这是有关如何使用 Windows Hello 作为打包 Windows 应用中传统用户名和密码身份验证系统的替代方法的完整演练的第二部分。 本文接续第 1 部分Windows Hello 登录应用的内容,并扩展功能,展示如何将 Windows Hello 集成到您现有的应用程序中。
为了构建此项目,你需要具备一定的C#和XAML经验。 还需要在 Windows 10 或 Windows 11 计算机上使用 Visual Studio 2026。 有关设置开发环境的完整说明,请参阅 “开始开发 Windows 应用 ”。
练习 1:服务器端逻辑
在本练习中,从第一个实验室中生成的Windows Hello应用程序开始,并创建本地模拟服务器和数据库。 此动手实验室旨在教如何将Windows Hello集成到现有系统中。 通过使用模拟服务器和模拟数据库,将消除许多不相关的设置。 在自己的应用程序中,需要将模拟对象替换为实际服务和数据库。
首先,从第一个Windows Hello 动手实验室中打开WindowsHelloLogin解决方案。
首先实现模拟服务器和模拟数据库。 创建名为“AuthService”的新文件夹。 在 Solution Explorer 中,右键单击 WindowsHelloLogin project,然后选择 Add>New Folder。
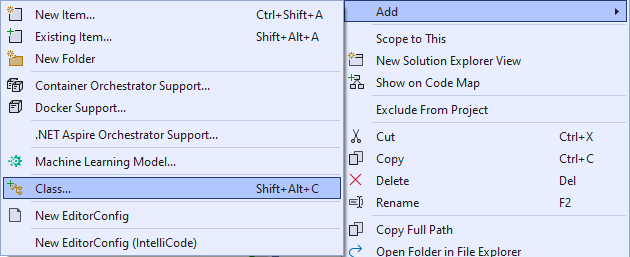
创建 UserAccount 和 WindowsHelloDevices 类,这些类将充当要保存在 mock 数据库中的数据的模型。 UserAccount 类似于在传统身份验证服务器上实现的用户模型。 右键单击 AuthService 文件夹并添加名为“UserAccount”的新类。
 的屏幕截图
的屏幕截图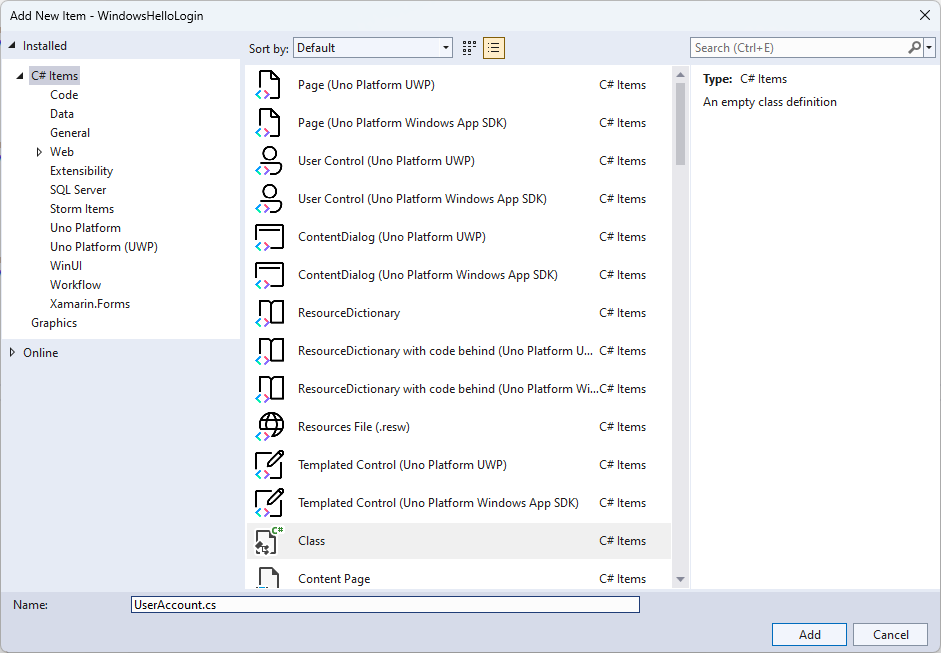
将类范围更改为公共,并为 UserAccount 类添加以下公共属性。 需要为
System.ComponentModel.DataAnnotations命名空间添加 using 语句。using System; using System.ComponentModel.DataAnnotations; namespace WindowsHelloLogin.AuthService { public class UserAccount { [Key, Required] public Guid UserId { get; set; } [Required] public string Username { get; set; } public string Password { get; set; } // public List<WindowsHelloDevice> WindowsHelloDevices = new(); } }你可能已注意到 WindowsHelloDevices 被注释掉的列表。 这是对当前实现中的现有用户模型所做的修改。 WindowsHelloDevices列表将包含 deviceID、Windows Hello 生成的公钥和 KeyCredentialAttestationResult。 在本练习中,您需要实现 keyAttestationResult,因为只有在具有 TPM(受信任的平台模块)芯片的设备上,Windows Hello 才能提供它们。 KeyCredentialAttestationResult 是多个属性的组合,需要拆分后才能通过数据库保存和加载这些属性。
在名为“WindowsHelloDevice.cs”的 AuthService 文件夹中创建新类。 这就是之前提到的 Windows Hello 设备的模型。 将类范围更改为公共,并添加以下属性。
using System;

namespace WindowsHelloLogin.AuthService
{
    public class WindowsHelloDevice
    {
        // These are the new variables that will need to be added to the existing UserAccount in the Database
        // The DeviceName is used to support multiple devices for the one user.
        // This way the correct public key is easier to find as a new public key is made for each device.
        // The KeyAttestationResult is only used if the User device has a TPM (Trusted Platform Module) chip,
        // in most cases it will not. So will be left out for this hands on lab.
        public Guid DeviceId { get; set; }
        public byte[] PublicKey { get; set; }
        // public KeyCredentialAttestationResult KeyAttestationResult { get; set; }
    }
}
返回 UserAccount.cs 文件,并取消注释 Windows Hello 设备列表。
using System.Collections.Generic;

namespace WindowsHelloLogin.AuthService
{
    public class UserAccount
    {
        [Key, Required]
        public Guid UserId { get; set; }
        [Required]
        public string Username { get; set; }
        public string Password { get; set; }
        public List<WindowsHelloDevice> WindowsHelloDevices = new();
    }
}
创建 UserAccount 和 WindowsHelloDevice 的模型后,需要在 AuthService 文件夹中创建另一个新类,该类将充当模拟数据库,因为这是从中保存和加载用户帐户列表的模拟数据库。 在现实世界中,这将是你的数据库实现。 在名为“MockStore.cs”的 AuthService 文件夹中创建新类。 将类范围更改为公共。
由于模拟存储将在本地保存和加载用户帐户列表,因此可以使用 XmlSerializer 实现用于保存和加载该列表的逻辑。 还需要记住文件名并保存位置。 在MockStore.cs实现以下内容:
using System.Collections.Generic;
using System;
using System.IO;
using System.Linq;
using System.Text;
using System.Threading.Tasks;
using System.Xml.Serialization;
using Windows.Storage;

namespace WindowsHelloLogin.AuthService
{
    public class MockStore
    {
        private const string USER_ACCOUNT_LIST_FILE_NAME = "userAccountsList.txt";
        // This cannot be a const because the LocalFolder is accessed at runtime
        private string _userAccountListPath = Path.Combine(
            ApplicationData.Current.LocalFolder.Path, USER_ACCOUNT_LIST_FILE_NAME);
        private List<UserAccount> _mockDatabaseUserAccountsList;

#region Save and Load Helpers
        /// <summary>
        /// Create and save a useraccount list file. (Replacing the old one)
        /// </summary>
        private async Task SaveAccountListAsync()
        {
            string accountsXml = SerializeAccountListToXml();

            if (File.Exists(_userAccountListPath))
            {
                StorageFile accountsFile = await StorageFile.GetFileFromPathAsync(_userAccountListPath);
                await FileIO.WriteTextAsync(accountsFile, accountsXml);
            }
            else
            {
                StorageFile accountsFile = await ApplicationData.Current.LocalFolder.CreateFileAsync(USER_ACCOUNT_LIST_FILE_NAME);
                await FileIO.WriteTextAsync(accountsFile, accountsXml);
            }
        }

        /// <summary>
        /// Gets the useraccount list file and deserializes it from XML to a list of useraccount objects.
        /// </summary>
        /// <returns>List of useraccount objects</returns>
        private async Task LoadAccountListAsync()
        {
            if (File.Exists(_userAccountListPath))
            {
                StorageFile accountsFile = await StorageFile.GetFileFromPathAsync(_userAccountListPath);

                string accountsXml = await FileIO.ReadTextAsync(accountsFile);
                DeserializeXmlToAccountList(accountsXml);
            }

            // If the UserAccountList does not contain the sampleUser Initialize the sample users
            // This is only needed as it in a Hand on Lab to demonstrate a user being migrated.
            // In the real world, user accounts would just be in a database.
            if (!_mockDatabaseUserAccountsList.Any(f => f.Username.Equals("sampleUsername")))
            {
                //If the list is empty, call InitializeSampleAccounts and return the list
                //await InitializeSampleUserAccountsAsync();
            }
        }

        /// <summary>
        /// Uses the local list of accounts and returns an XML formatted string representing the list
        /// </summary>
        /// <returns>XML formatted list of accounts</returns>
        private string SerializeAccountListToXml()
        {
            var xmlizer = new XmlSerializer(typeof(List<UserAccount>));
            var writer = new StringWriter();
            xmlizer.Serialize(writer, _mockDatabaseUserAccountsList);
            return writer.ToString();
        }

        /// <summary>
        /// Takes an XML formatted string representing a list of accounts and returns a list object of accounts
        /// </summary>
        /// <param name="listAsXml">XML formatted list of accounts</param>
        /// <returns>List object of accounts</returns>
        private List<UserAccount> DeserializeXmlToAccountList(string listAsXml)
        {
            var xmlizer = new XmlSerializer(typeof(List<UserAccount>));
            TextReader textreader = new StreamReader(new MemoryStream(Encoding.UTF8.GetBytes(listAsXml)));
            return _mockDatabaseUserAccountsList = (xmlizer.Deserialize(textreader)) as List<UserAccount>;
        }
#endregion
    }
}
在 LoadAccountListAsync 方法中,你可能已注意到已注释掉 InitializeSampleUserAccountsAsync 方法。需要在MockStore.cs中创建此方法。 此方法将填充用户帐户列表,以便进行登录。 在现实世界中,用户数据库已经被填满。 在此步骤中,还将创建一个构造函数来初始化用户列表并调用 LoadAccountListAsync。
namespace WindowsHelloLogin.AuthService
{
    public class MockStore
    {
        private const string USER_ACCOUNT_LIST_FILE_NAME = "userAccountsList.txt";
        // This cannot be a const because the LocalFolder is accessed at runtime
        private string _userAccountListPath = Path.Combine(
            ApplicationData.Current.LocalFolder.Path, USER_ACCOUNT_LIST_FILE_NAME);
        private List<UserAccount> _mockDatabaseUserAccountsList;

        public MockStore()
        {
            _mockDatabaseUserAccountsList = new List<UserAccount>();
            _ = LoadAccountListAsync();
        }

        private async Task InitializeSampleUserAccountsAsync()
        {
            // Create a sample Traditional User Account that only has a Username and Password
            // This will be used initially to demonstrate how to migrate to use Windows Hello

            var sampleUserAccount = new UserAccount()
            {
                UserId = Guid.NewGuid(),
                Username = "sampleUsername",
                Password = "samplePassword",
            };

            // Add the sampleUserAccount to the _mockDatabase
            _mockDatabaseUserAccountsList.Add(sampleUserAccount);
            await SaveAccountListAsync();
        }
    }
}
现在已经存在 InitializeSampleUserAccountsAsync 方法,请在 LoadAccountListAsync 方法中取消注释该方法调用。
private async Task LoadAccountListAsync()
{
    if (File.Exists(_userAccountListPath))
    {
        StorageFile accountsFile = await StorageFile.GetFileFromPathAsync(_userAccountListPath);

        string accountsXml = await FileIO.ReadTextAsync(accountsFile);
        DeserializeXmlToAccountList(accountsXml);
    }

    // If the UserAccountList does not contain the sampleUser Initialize the sample users
    // This is only needed as it in a Hand on Lab to demonstrate a user migrating
    // In the real world user accounts would just be in a database
    if (!_mockDatabaseUserAccountsList.Any(f = > f.Username.Equals("sampleUsername")))
            {
        //If the list is empty InitializeSampleUserAccountsAsync and return the list
        await InitializeSampleUserAccountsAsync();
    }
}
现在可以保存和加载模拟存储中的用户帐户列表。 应用程序的其他部分将需要对此列表access,因此需要一些方法来检索此数据。 在 InitializeSampleUserAccountsAsync 方法下,添加以下方法来获取数据。 他们允许你获取用户 ID、单个用户、特定Windows Hello设备的用户列表,以及获取特定设备上的用户的公钥。
public Guid GetUserId(string username)
{
    if (_mockDatabaseUserAccountsList.Any())
    {
        UserAccount account = _mockDatabaseUserAccountsList.FirstOrDefault(f => f.Username.Equals(username));
        if (account != null)
        {
            return account.UserId;
        }
    }
    return Guid.Empty;
}

public UserAccount GetUserAccount(Guid userId)
{
    return _mockDatabaseUserAccountsList.FirstOrDefault(f => f.UserId.Equals(userId));
}

public List<UserAccount> GetUserAccountsForDevice(Guid deviceId)
{
    var usersForDevice = new List<UserAccount>();

    foreach (UserAccount account in _mockDatabaseUserAccountsList)
    {
        if (account.WindowsHelloDevices.Any(f => f.DeviceId.Equals(deviceId)))
        {
            usersForDevice.Add(account);
        }
    }

    return usersForDevice;
}

public byte[] GetPublicKey(Guid userId, Guid deviceId)
{
    UserAccount account = _mockDatabaseUserAccountsList.FirstOrDefault(f => f.UserId.Equals(userId));
    if (account != null)
    {
        if (account.WindowsHelloDevices.Any())
        {
            return account.WindowsHelloDevices.FirstOrDefault(p => p.DeviceId.Equals(deviceId)).PublicKey;
        }
    }
    return null;
}
实现的下一个方法将处理简单的操作,以添加帐户、删除帐户以及删除设备。 需要删除设备,因为Windows Hello特定于设备。 对于登录的每个设备,Windows Hello将创建一个新的公钥和私钥对。 这就像对登录的每个设备使用不同的密码,不同之处在于你不需要记住所有这些密码;服务器会记住它们。 将以下方法添加到MockStore.cs。
public async Task<UserAccount> AddAccountAsync(string username)
{
    UserAccount newAccount = null;
    try
    {
        newAccount = new UserAccount()
        {
            UserId = Guid.NewGuid(),
            Username = username,
        };

        _mockDatabaseUserAccountsList.Add(newAccount);
        await SaveAccountListAsync();
    }
    catch (Exception)
    {
        throw;
    }
    return newAccount;
}

public async Task<bool> RemoveAccountAsync(Guid userId)
{
    UserAccount userAccount = GetUserAccount(userId);
    if (userAccount != null)
    {
        _mockDatabaseUserAccountsList.Remove(userAccount);
        await SaveAccountListAsync();
        return true;
    }
    return false;
}

public async Task<bool> RemoveDeviceAsync(Guid userId, Guid deviceId)
{
    UserAccount userAccount = GetUserAccount(userId);
    WindowsHelloDevice deviceToRemove = null;
    if (userAccount != null)
    {
        foreach (WindowsHelloDevice device in userAccount.WindowsHelloDevices)
        {
            if (device.DeviceId.Equals(deviceId))
            {
                deviceToRemove = device;
                break;
            }
        }
    }

    if (deviceToRemove != null)
    {
        //Remove the WindowsHelloDevice
        userAccount.WindowsHelloDevices.Remove(deviceToRemove);
        await SaveAccountListAsync();
    }

    return true;
}
在 MockStore 类中添加一个方法,该方法会将Windows Hello相关信息添加到现有 UserAccount。 此方法将称为“WindowsHelloUpdateDetailsAsync”,并将采用参数来标识用户,以及Windows Hello详细信息。 在创建 WindowsHelloDevice 的过程中,KeyAttestationResult 已被注释掉,但在实际应用程序中,这是必需的。
using System.Threading.Tasks;
using Windows.Security.Credentials;

public async Task WindowsHelloUpdateDetailsAsync(Guid userId, Guid deviceId, byte[] publicKey,
    KeyCredentialAttestationResult keyAttestationResult)
{
    UserAccount existingUserAccount = GetUserAccount(userId);
    if (existingUserAccount != null)
    {
        if (!existingUserAccount.WindowsHelloDevices.Any(f => f.DeviceId.Equals(deviceId)))
        {
            existingUserAccount.WindowsHelloDevices.Add(new WindowsHelloDevice()
            {
                DeviceId = deviceId,
                PublicKey = publicKey,
                // KeyAttestationResult = keyAttestationResult
            });
        }
    }
    await SaveAccountListAsync();
}
MockStore 类现已完成,因为这表示数据库应被视为专用数据库。 若要访问 MockStore,需要 AuthService 类来操作数据库数据。 在 AuthService 文件夹中,创建名为“AuthService.cs”的新类。 将类范围更改为公共,并添加单一实例模式,以确保只创建一个实例。
namespace WindowsHelloLogin.AuthService
{
    public class AuthService
    {
        // Singleton instance of the AuthService
        // The AuthService is a mock of what a real world server and service implementation would be
        private static AuthService _instance;
        public static AuthService Instance
        {
            get
            {
                if (null == _instance)
                {
                    _instance = new AuthService();
                }
                return _instance;
            }
        }

        private AuthService()
        { }
    }
}
AuthService 类需要创建 MockStore 类的实例,并为 MockStore 对象的属性提供access。
namespace WindowsHelloLogin.AuthService
{
    public class AuthService
    {
        //Singleton instance of the AuthService
        //The AuthService is a mock of what a real world server and database implementation would be
        private static AuthService _instance;
        public static AuthService Instance
        {
            get
            {
                if (null == _instance)
                {
                    _instance = new AuthService();
                }
                return _instance;
            }
        }

        private AuthService()
        { }

        private MockStore _mockStore = new();

        public Guid GetUserId(string username)
        {
            return _mockStore.GetUserId(username);
        }

        public UserAccount GetUserAccount(Guid userId)
        {
            return _mockStore.GetUserAccount(userId);
        }

        public List<UserAccount> GetUserAccountsForDevice(Guid deviceId)
        {
            return _mockStore.GetUserAccountsForDevice(deviceId);
        }
    }
}
需要使用 AuthService 类中的方法来访问 MockStore 对象中的添加、删除和更新 Windows Hello 详细信息的方法。 在 AuthService 类定义结束时,添加以下方法。
using System.Threading.Tasks;
using Windows.Security.Credentials;

public async Task RegisterAsync(string username)
{
    await _mockStore.AddAccountAsync(username);
}

public async Task<bool> WindowsHelloRemoveUserAsync(Guid userId)
{
    return await _mockStore.RemoveAccountAsync(userId);
}

public async Task<bool> WindowsHelloRemoveDeviceAsync(Guid userId, Guid deviceId)
{
    return await _mockStore.RemoveDeviceAsync(userId, deviceId);
}

public async Task WindowsHelloUpdateDetailsAsync(Guid userId, Guid deviceId, byte[] publicKey,
    KeyCredentialAttestationResult keyAttestationResult)
{
    await _mockStore.WindowsHelloUpdateDetailsAsync(userId, deviceId, publicKey, keyAttestationResult);
}
AuthService 类需要提供验证凭据的方法。 此方法将采用用户名和密码,并确保帐户存在且密码有效。 现有系统将具有等效的方法,用于检查用户是否获得授权。 将以下 ValidateCredentials 方法添加到AuthService.cs文件中。
public bool ValidateCredentials(string username, string password)
{
    if (!string.IsNullOrEmpty(username) && !string.IsNullOrEmpty(password))
    {
        // This would be used for existing accounts migrating to use Windows Hello
        Guid userId = GetUserId(username);
        if (userId != Guid.Empty)
        {
            UserAccount account = GetUserAccount(userId);
            if (account != null)
            {
                if (string.Equals(password, account.Password))
                {
                    return true;
                }
            }
        }
    }
    return false;
}
AuthService 类需要请求质询方法,该方法向客户端返回质询,以验证用户是否是他们声称的身份。 然后,AuthService 类中需要添加一个方法,以从客户端接收已签名的质询。 对于这个动手实验,确定签名挑战是否已完成的方法故意留得不完整。 Windows Hello到现有身份验证系统中的每个实现将略有不同。 服务器上存储的公钥需要与客户端返回到服务器的结果匹配。 将这两种方法添加到AuthService.cs。
using Windows.Security.Cryptography;
using Windows.Storage.Streams;

public IBuffer WindowsHelloRequestChallenge()
{
    return CryptographicBuffer.ConvertStringToBinary("ServerChallenge", BinaryStringEncoding.Utf8);
}

public bool SendServerSignedChallenge(Guid userId, Guid deviceId, byte[] signedChallenge)
{
    // Depending on your company polices and procedures this step will be different
    // It is at this point you will need to validate the signedChallenge that is sent back from the client.
    // Validation is used to ensure the correct user is trying to access this account.
    // The validation process will use the signedChallenge and the stored PublicKey
    // for the username and the specific device signin is called from.
    // Based on the validation result you will return a bool value to allow access to continue or to block the account.

    // For this sample validation will not happen as a best practice solution does not apply and will need to
       // be configured for each company.
    // Simply just return true.

    // You could get the User's Public Key with something similar to the following:
    byte[] userPublicKey = _mockStore.GetPublicKey(userId, deviceId);
    return true;
}
练习 2:客户端逻辑
在本练习中,你将更改第一个实验中的客户端视图和帮助类,以使用 AuthService 类。 在现实世界中, AuthService 将是身份验证服务器,你需要使用 Web API 从服务器发送和接收数据。 对于这次实践实验,客户端和服务器都是本地的,以利简化。 目标是了解如何使用Windows Hello API。
在MainPage.xaml.cs中,可以在加载的方法中删除 AccountHelper.LoadAccountListAsync 方法调用,因为 AuthService 类创建 MockStore 的实例来加载帐户列表。 该方法
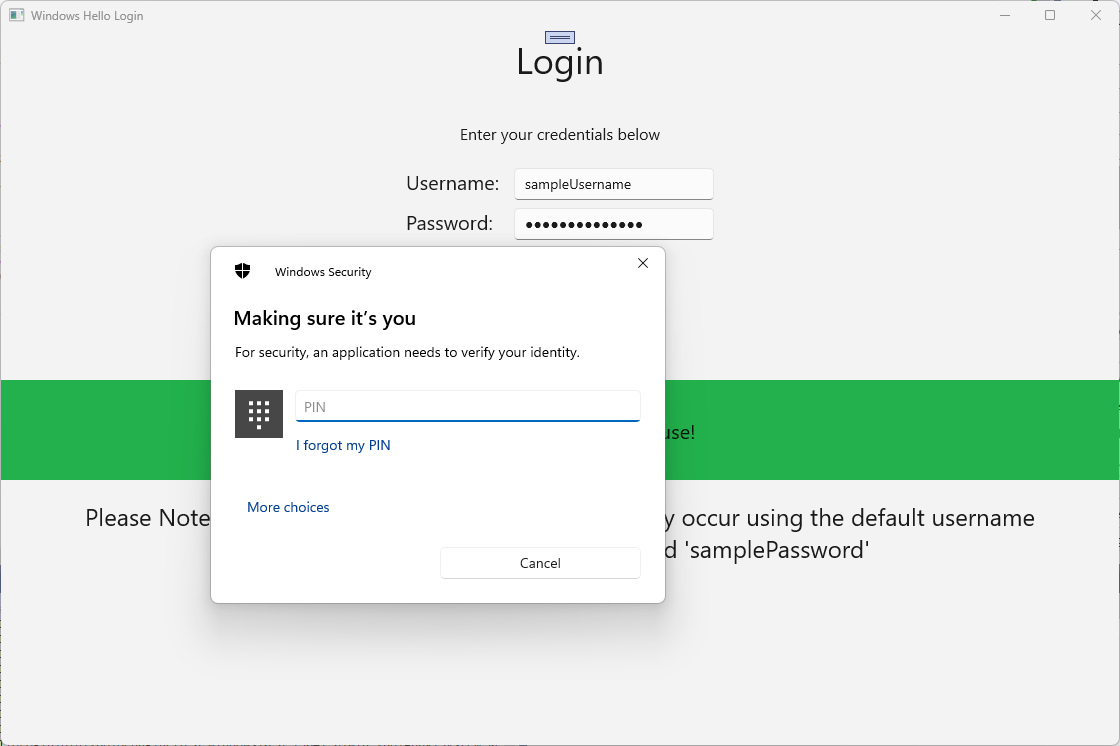
Loaded现在应类似于下面的代码片段。 请注意,由于没有内容被等待,异步方法定义已被移除。private void MainPage_Loaded(object sender, RoutedEventArgs e) { Frame.Navigate(typeof(UserSelection)); }更新 登录 页界面以要求输入密码。 此动手实验室演示了如何迁移现有系统以使用Windows Hello,现有帐户将具有用户名和密码。 此外,更新 XAML 底部的说明以包含默认密码。 在 Login.xaml 中更新以下 XAML。
<Grid>
  <StackPanel>
    <TextBlock Text="Login" FontSize="36" Margin="4" TextAlignment="Center"/>

    <TextBlock x:Name="ErrorMessage" Text="" FontSize="20" Margin="4" Foreground="Red" TextAlignment="Center"/>

    <TextBlock Text="Enter your credentials below" Margin="0,0,0,20"
               TextWrapping="Wrap" Width="300"
               TextAlignment="Center" VerticalAlignment="Center" FontSize="16"/>

    <StackPanel Orientation="Horizontal" HorizontalAlignment="Center">
      <!-- Username Input -->
      <TextBlock x:Name="UserNameTextBlock" Text="Username: "
                 FontSize="20" Margin="4" Width="100"/>
      <TextBox x:Name="UsernameTextBox" PlaceholderText="sampleUsername" Width="200" Margin="4"/>
    </StackPanel>

    <StackPanel Orientation="Horizontal" HorizontalAlignment="Center">
      <!-- Password Input -->
      <TextBlock x:Name="PasswordTextBlock" Text="Password: "
                 FontSize="20" Margin="4" Width="100"/>
      <PasswordBox x:Name="PasswordBox" PlaceholderText="samplePassword" Width="200" Margin="4"/>
    </StackPanel>

    <Button x:Name="LoginButton" Content="Login" Background="DodgerBlue" Foreground="White"
            Click="LoginButton_Click" Width="80" HorizontalAlignment="Center" Margin="0,20"/>

    <TextBlock Text="Don't have an account?"
               TextAlignment="Center" VerticalAlignment="Center" FontSize="16"/>
    <TextBlock x:Name="RegisterButtonTextBlock" Text="Register now"
               PointerPressed="RegisterButtonTextBlock_OnPointerPressed"
               Foreground="DodgerBlue"
               TextAlignment="Center" VerticalAlignment="Center" FontSize="16"/>

    <Border x:Name="WindowsHelloStatus" Background="#22B14C"
            Margin="0,20" Height="100">
      <TextBlock x:Name="WindowsHelloStatusText" Text="Windows Hello is ready to use!"
                 Margin="4" TextAlignment="Center" VerticalAlignment="Center" FontSize="20"/>
    </Border>

    <TextBlock x:Name="LoginExplanation" FontSize="24" TextAlignment="Center" TextWrapping="Wrap"
               Text="Please Note: To demonstrate a login, validation will only occur using the default username 'sampleUsername' and default password 'samplePassword'"/>
  </StackPanel>
</Grid>
在 Login 类的代码隐藏文件中,需要将类顶部的私有变量更改为
Account。 将OnNavigateTo事件中的类型强制转换为UserAccount。 还需要以下 using 语句。using WindowsHelloLogin.AuthService; namespace WindowsHelloLogin.Views { public sealed partial class Login : Page { private UserAccount _account; private bool _isExistingAccount; public Login() { this.InitializeComponent(); } protected override async void OnNavigatedTo(NavigationEventArgs e) { //Check Windows Hello is setup and available on this machine if (await WindowsHelloHelper.WindowsHelloAvailableCheckAsync()) { if (e.Parameter != null) { _isExistingAccount = true; //Set the account to the existing account being passed in _account = (UserAccount)e.Parameter; UsernameTextBox.Text = _account.Username; await SignInWindowsHelloAsync(); } } } private async void LoginButton_Click(object sender, RoutedEventArgs e) { ErrorMessage.Text = ""; await SignInWindowsHelloAsync(); } } }由于登录页使用
UserAccount对象而不是之前的Account对象,因此需要更新WindowsHelloHelper.cs以使用UserAccount作为某些方法的参数类型。 需要更改 CreateWindowsHelloKeyAsync、 RemoveWindowsHelloAccountAsync 和 GetWindowsHelloAuthenticationMessageAsync 方法的以下参数。 由于该UserAccount类具有GuidUserId,因此你将开始在更多地方使用 Id 以更加精确。public static async Task<bool> CreateWindowsHelloKeyAsync(Guid userId, string username) { KeyCredentialRetrievalResult keyCreationResult = await KeyCredentialManager.RequestCreateAsync(username, KeyCredentialCreationOption.ReplaceExisting); return true; } public static async Task RemoveWindowsHelloAccountAsync(UserAccount account) { } public static async Task<bool> GetWindowsHelloAuthenticationMessageAsync(UserAccount account) { KeyCredentialRetrievalResult openKeyResult = await KeyCredentialManager.OpenAsync(account.Username); //Calling OpenAsync will allow the user access to what is available in the app and will not require user credentials again. //If you wanted to force the user to sign in again you can use the following: //var consentResult = await Windows.Security.Credentials.UI.UserConsentVerifier.RequestVerificationAsync(account.Username); //This will ask for the either the password of the currently signed in Microsoft Account or the PIN used for Windows Hello. if (openKeyResult.Status == KeyCredentialStatus.Success) { //If OpenAsync has succeeded, the next thing to think about is whether the client application requires access to backend services. //If it does here you would Request a challenge from the Server. The client would sign this challenge and the server //would check the signed challenge. If it is correct it would allow the user access to the backend. //You would likely make a new method called RequestSignAsync to handle all this //for example, RequestSignAsync(openKeyResult); //Refer to the second Windows Hello sample for information on how to do this. //For this sample there is not concept of a server implemented so just return true. return true; } else if (openKeyResult.Status == KeyCredentialStatus.NotFound) { //If the _account is not found at this stage. It could be one of two errors. //1. Windows Hello has been disabled //2. Windows Hello has been disabled and re-enabled cause the Windows Hello Key to change. //Calling CreateWindowsHelloKeyAsync and passing through the account will attempt to replace the existing Windows Hello Key for that account. //If the error really is that Windows Hello is disabled then the CreateWindowsHelloKeyAsync method will output that error. if (await CreateWindowsHelloKeyAsync(account.UserId, account.Username)) { //If the Windows Hello Key was again successfully created, Windows Hello has just been reset. //Now that the Windows Hello Key has been reset for the account retry sign in. return await GetWindowsHelloAuthenticationMessageAsync(account); } } // Can't use Windows Hello right now, try again later return false; }需要更新 Login.xaml.cs 文件中的 SignInWindowsHelloAsync 方法才能使用 AuthService 而不是 AccountHelper。 验证凭据将通过 AuthService 进行。 对于此实践实验室,唯一配置的帐户是“sampleUsername”。 此帐户是在 MockStore.cs 的 InitializeSampleUserAccountsAsync 方法中创建的。 更新 Login.xaml.cs 中的 SignInWindowsHelloAsync 方法,以反映下面的代码片段。
private async Task SignInWindowsHelloAsync()
{
    if (_isExistingAccount)
    {
        if (await WindowsHelloHelper.GetWindowsHelloAuthenticationMessageAsync(_account))
        {
            Frame.Navigate(typeof(Welcome), _account);
        }
    }
    else if (AuthService.AuthService.Instance.ValidateCredentials(UsernameTextBox.Text, PasswordBox.Password))
    {
        Guid userId = AuthService.AuthService.Instance.GetUserId(UsernameTextBox.Text);

        if (userId != Guid.Empty)
        {
            //Now that the account exists on server try and create the necessary details and add them to the account
            if (await WindowsHelloHelper.CreateWindowsHelloKeyAsync(userId, UsernameTextBox.Text))
            {
                Debug.WriteLine("Successfully signed in with Windows Hello!");
                //Navigate to the Welcome Screen.
                _account = AuthService.AuthService.Instance.GetUserAccount(userId);
                Frame.Navigate(typeof(Welcome), _account);
            }
            else
            {
                //The Windows Hello account creation failed.
                //Remove the account from the server as the details were not configured
                await AuthService.AuthService.Instance.WindowsHelloRemoveUserAsync(userId);

                ErrorMessage.Text = "Account Creation Failed";
            }
        }
    }
    else
    {
        ErrorMessage.Text = "Invalid Credentials";
    }
}
由于Windows Hello将为每台设备上的每个帐户创建不同的公钥和私钥对,Welcome 页面将需要显示已登录帐户的已注册设备列表,并允许每个帐户被遗忘。 在 Welcome.xaml 中的
ForgetButton下方添加以下 XAML代码。 这将实现忘记设备按钮、错误文本区域和显示所有设备的列表。<Grid> <StackPanel> <TextBlock x:Name="Title" Text="Welcome" FontSize="40" TextAlignment="Center"/> <TextBlock x:Name="UserNameText" FontSize="28" TextAlignment="Center"/> <Button x:Name="BackToUserListButton" Content="Back to User List" Click="Button_Restart_Click" HorizontalAlignment="Center" Margin="0,20" Foreground="White" Background="DodgerBlue"/> <Button x:Name="ForgetButton" Content="Forget Me" Click="Button_Forget_User_Click" Foreground="White" Background="Gray" HorizontalAlignment="Center"/> <Button x:Name="ForgetDeviceButton" Content="Forget Device" Click="Button_Forget_Device_Click" Foreground="White" Background="Gray" Margin="0,40,0,20" HorizontalAlignment="Center"/> <TextBlock x:Name="ForgetDeviceErrorTextBlock" Text="Select a device first" TextWrapping="Wrap" Width="300" Foreground="Red" TextAlignment="Center" VerticalAlignment="Center" FontSize="16" Visibility="Collapsed"/> <ListView x:Name="UserListView" MaxHeight="500" MinWidth="350" Width="350" HorizontalAlignment="Center"> <ListView.ItemTemplate> <DataTemplate> <Grid Background="Gray" Height="50" Width="350" HorizontalAlignment="Center" VerticalAlignment="Stretch" > <TextBlock Text="{Binding DeviceId}" HorizontalAlignment="Center" TextAlignment="Center" VerticalAlignment="Center" Foreground="White"/> </Grid> </DataTemplate> </ListView.ItemTemplate> </ListView> </StackPanel> </Grid>在Welcome.xaml.cs文件中,需要将类顶部的私有
Account变量更改为私有UserAccount变量。 然后更新该方法OnNavigatedTo以使用 AuthService 并检索当前帐户的信息。 拥有帐户信息时,可以设置列表的ItemsSource以显示设备。 需要添加对 AuthService 命名空间的引用。using WindowsHelloLogin.AuthService; namespace WindowsHelloLogin.Views { public sealed partial class Welcome : Page { private UserAccount _activeAccount; public Welcome() { InitializeComponent(); } protected override void OnNavigatedTo(NavigationEventArgs e) { _activeAccount = (UserAccount)e.Parameter; if (_activeAccount != null) { UserAccount account = AuthService.AuthService.Instance.GetUserAccount(_activeAccount.UserId); if (account != null) { UserListView.ItemsSource = account.WindowsHelloDevices; UserNameText.Text = account.Username; } } } } }由于删除帐户时将使用 AuthService ,因此可以删除对方法中的 AccountHelper 的
Button_Forget_User_Click引用。 该方法现在应如下所示。private async void Button_Forget_User_Click(object sender, RoutedEventArgs e) { //Remove it from Windows Hello await WindowsHelloHelper.RemoveWindowsHelloAccountAsync(_activeAccount); Debug.WriteLine($"User {_activeAccount.Username} deleted."); //Navigate back to UserSelection page. Frame.Navigate(typeof(UserSelection)); }WindowsHelloHelper 方法不使用 AuthService 删除帐户。 需要调用 AuthService 并传递 userId。
public static async Task RemoveWindowsHelloAccountAsync(UserAccount account)
{
    //Open the account with Windows Hello
    KeyCredentialRetrievalResult keyOpenResult = await KeyCredentialManager.OpenAsync(account.Username);

    if (keyOpenResult.Status == KeyCredentialStatus.Success)
    {
        // In the real world you would send key information to server to unregister
        await AuthService.AuthService.Instance.WindowsHelloRemoveUserAsync(account.UserId);
    }

    //Then delete the account from the machines list of Windows Hello Accounts
    await KeyCredentialManager.DeleteAsync(account.Username);
}
在完成“ 欢迎” 页面实现之前,需要在WindowsHelloHelper.cs中创建一个允许删除设备的方法。 创建将在 AuthService 中调用 WindowsHelloRemoveDeviceAsync 的新方法。
public static async Task RemoveWindowsHelloDeviceAsync(UserAccount account, Guid deviceId)
{
    await AuthService.AuthService.Instance.WindowsHelloRemoveDeviceAsync(account.UserId, deviceId);
}
在Welcome.xaml.cs中,实现 Button_Forget_Device_Click 事件处理程序。 这将使用设备列表中的所选设备,并使用Windows Hello帮助程序调用删除设备。 请记住使事件处理程序异步。
private async void Button_Forget_Device_Click(object sender, RoutedEventArgs e)
{
    WindowsHelloDevice selectedDevice = UserListView.SelectedItem as WindowsHelloDevice;
    if (selectedDevice != null)
    {
        //Remove it from Windows Hello
        await WindowsHelloHelper.RemoveWindowsHelloDeviceAsync(_activeAccount, selectedDevice.DeviceId);

        Debug.WriteLine($"User {_activeAccount.Username} deleted.");

        if (!UserListView.Items.Any())
        {
            //Navigate back to UserSelection page.
            Frame.Navigate(typeof(UserSelection));
        }
    }
    else
    {
        ForgetDeviceErrorTextBlock.Visibility = Visibility.Visible;
    }
}
将更新的下一页是 UserSelection 页面。 UserSelection 页面需要使用 AuthService 检索当前设备的所有用户帐户。 目前,无法获取设备 ID 并传递给 AuthService,从而返回该设备的用户帐户。 在 Utils 文件夹中,创建名为“Helpers.cs”的新类。 将类范围更改为公共静态,然后添加以下方法,以便检索当前设备 ID。
using System;
using Windows.Security.ExchangeActiveSyncProvisioning;

namespace WindowsHelloLogin.Utils
{
    public static class Helpers
    {
        public static Guid GetDeviceId()
        {
            //Get the Device ID to pass to the server
            var deviceInformation = new EasClientDeviceInformation();
            return deviceInformation.Id;
        }
    }
}
在 UserSelection 页类中,只有后台代码需要更改,不需要更改用户界面。 在UserSelection.xaml.cs中,更新 UserSelection_Loaded 方法和 UserSelectionChanged 方法以使用
UserAccount类而不是Account类。 您还需要通过AuthService来获取该设备的所有用户。using System.Linq; using WindowsHelloLogin.AuthService; namespace WindowsHelloLogin.Views { public sealed partial class UserSelection : Page { public UserSelection() { InitializeComponent(); Loaded += UserSelection_Loaded; } private void UserSelection_Loaded(object sender, RoutedEventArgs e) { List<UserAccount> accounts = AuthService.AuthService.Instance.GetUserAccountsForDevice(Helpers.GetDeviceId()); if (accounts.Any()) { UserListView.ItemsSource = accounts; UserListView.SelectionChanged += UserSelectionChanged; } else { //If there are no accounts navigate to the Login page Frame.Navigate(typeof(Login)); } } /// <summary> /// Function called when an account is selected in the list of accounts /// Navigates to the Login page and passes the chosen account /// </summary> private void UserSelectionChanged(object sender, RoutedEventArgs e) { if (((ListView)sender).SelectedValue != null) { UserAccount account = (UserAccount)((ListView)sender).SelectedValue; if (account != null) { Debug.WriteLine($"Account {account.Username} selected!"); } Frame.Navigate(typeof(Login), account); } } } }WindowsHelloRegister 页面需要更新后台代码文件。 用户界面不需要进行任何更改。 在WindowsHelloRegister.xaml.cs中,删除类顶部的私有
Account变量,因为它不再需要。 更新 RegisterButton_Click_Async 事件处理程序以使用 AuthService。 此方法将创建新的 UserAccount ,然后尝试更新其帐户详细信息。 如果Windows Hello无法创建密钥,则会删除帐户,因为注册过程失败。private async void RegisterButton_Click_Async(object sender, RoutedEventArgs e) { ErrorMessage.Text = ""; //Validate entered credentials are acceptable if (!string.IsNullOrEmpty(UsernameTextBox.Text)) { //Register an Account on the AuthService so that we can get back a userId await AuthService.AuthService.Instance.RegisterAsync(UsernameTextBox.Text); Guid userId = AuthService.AuthService.Instance.GetUserId(UsernameTextBox.Text); if (userId != Guid.Empty) { //Now that the account exists on server try and create the necessary details and add them to the account if (await WindowsHelloHelper.CreateWindowsHelloKeyAsync(userId, UsernameTextBox.Text)) { //Navigate to the Welcome Screen. Frame.Navigate(typeof(Welcome), AuthService.AuthService.Instance.GetUserAccount(userId)); } else { //The Windows Hello account creation failed. //Remove the account from the server as the details were not configured await AuthService.AuthService.Instance.WindowsHelloRemoveUserAsync(userId); ErrorMessage.Text = "Account Creation Failed"; } } } else { ErrorMessage.Text = "Please enter a username"; } }生成并运行应用程序。 使用凭据“sampleUsername”和“samplePassword”登录到示例用户帐户。 在欢迎屏幕上,你可能会注意到“忘记设备”按钮已显示,但没有设备。 创建或迁移用户使用Windows Hello时,帐户信息未被推送到AuthService。
若要将Windows Hello帐户信息获取到 AuthService,需要更新WindowsHelloHelper.cs。 在 CreateWindowsHelloKeyAsync 方法中,无需仅在成功的情况下返回
true,而是需要调用一个新方法,该方法将尝试获取 KeyAttestation。 虽然这个实践实验没有在AuthService中记录这些信息,但你将了解如何在客户端获取这些信息。 按如下所示更新 CreateWindowsHelloKeyAsync 方法:public static async Task<bool> CreateWindowsHelloKeyAsync(Guid userId, string username) { KeyCredentialRetrievalResult keyCreationResult = await KeyCredentialManager.RequestCreateAsync(username, KeyCredentialCreationOption.ReplaceExisting); switch (keyCreationResult.Status) { case KeyCredentialStatus.Success: Debug.WriteLine("Successfully made key"); await GetKeyAttestationAsync(userId, keyCreationResult); return true; case KeyCredentialStatus.UserCanceled: Debug.WriteLine("User cancelled sign-in process."); break; case KeyCredentialStatus.NotFound: // User needs to setup Windows Hello Debug.WriteLine($"Windows Hello is not set up!{Environment.NewLine}Please go to Windows Settings and set up a PIN to use it."); break; default: break; } return false; }在 WindowsHelloHelper.cs 中创建 GetKeyAttestationAsync 方法。 此方法将展示如何获取特定设备上每个帐户由Windows Hello提供的所有必要信息。
using Windows.Storage.Streams;

private static async Task GetKeyAttestationAsync(Guid userId, KeyCredentialRetrievalResult keyCreationResult)
{
    KeyCredential userKey = keyCreationResult.Credential;
    IBuffer publicKey = userKey.RetrievePublicKey();
    KeyCredentialAttestationResult keyAttestationResult = await userKey.GetAttestationAsync();
    IBuffer keyAttestation = null;
    IBuffer certificateChain = null;
    bool keyAttestationIncluded = false;
    bool keyAttestationCanBeRetrievedLater = false;
    KeyCredentialAttestationStatus keyAttestationRetryType = 0;

    if (keyAttestationResult.Status == KeyCredentialAttestationStatus.Success)
    {
        keyAttestationIncluded = true;
        keyAttestation = keyAttestationResult.AttestationBuffer;
        certificateChain = keyAttestationResult.CertificateChainBuffer;
        Debug.WriteLine("Successfully made key and attestation");
    }
    else if (keyAttestationResult.Status == KeyCredentialAttestationStatus.TemporaryFailure)
    {
        keyAttestationRetryType = KeyCredentialAttestationStatus.TemporaryFailure;
        keyAttestationCanBeRetrievedLater = true;
        Debug.WriteLine("Successfully made key but not attestation");
    }
    else if (keyAttestationResult.Status == KeyCredentialAttestationStatus.NotSupported)
    {
        keyAttestationRetryType = KeyCredentialAttestationStatus.NotSupported;
        keyAttestationCanBeRetrievedLater = false;
        Debug.WriteLine("Key created, but key attestation not supported");
    }

    Guid deviceId = Helpers.GetDeviceId();

    //Update the Windows Hello details with the information we have just fetched above.
    //await UpdateWindowsHelloDetailsAsync(userId, deviceId, publicKey.ToArray(), keyAttestationResult);
}
你可能注意到在你刚才添加的 GetKeyAttestationAsync 方法中,最后一行被注释掉了。你创建的新方法将在这一行中,它将把所有 Windows Hello 信息发送到 AuthService。 在现实世界中,你需要通过 Web API 将数据发送到实际服务器。
using System.Runtime.InteropServices.WindowsRuntime;
using System.Threading.Tasks;

public static async Task<bool> UpdateWindowsHelloDetailsAsync(Guid userId, Guid deviceId, byte[] publicKey, KeyCredentialAttestationResult keyAttestationResult)
{
    //In the real world, you would use an API to add Windows Hello signing info to server for the signed in account.
    //For this tutorial, we do not implement a Web API for our server and simply mock the server locally.
    //The CreateWindowsHelloKey method handles adding the Windows Hello account locally to the device using the KeyCredential Manager

    //Using the userId the existing account should be found and updated.
    await AuthService.AuthService.Instance.WindowsHelloUpdateDetailsAsync(userId, deviceId, publicKey, keyAttestationResult);
    return true;
}
取消注释 GetKeyAttestationAsync 方法中的最后一行,以便将Windows Hello信息发送到 AuthService。
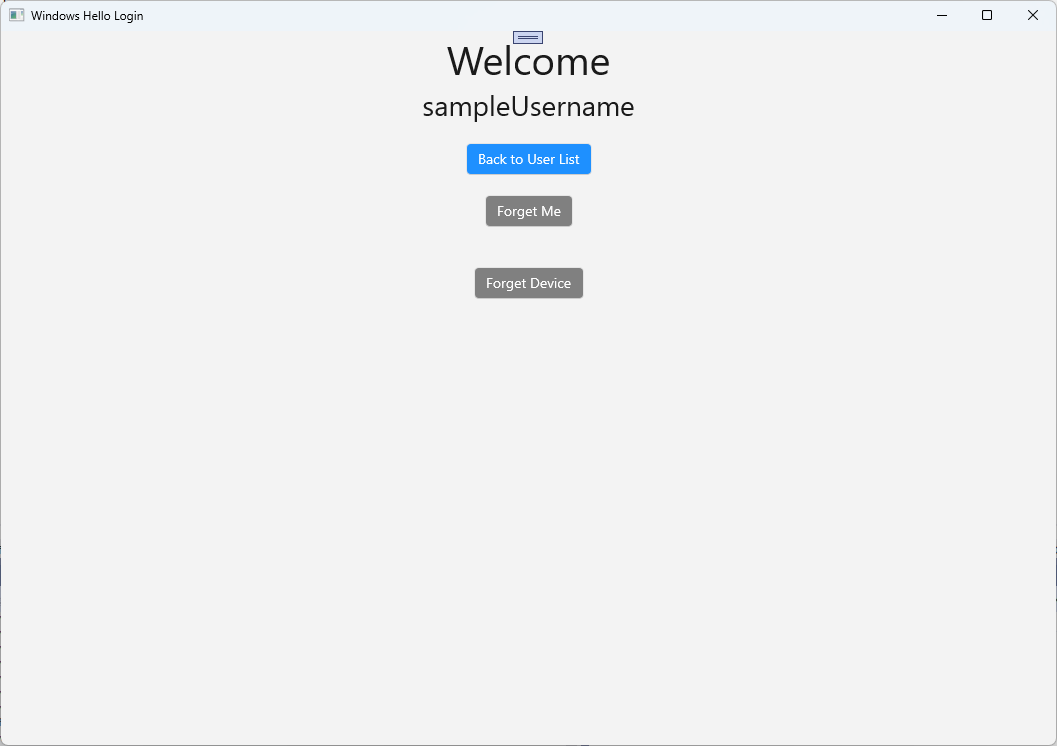
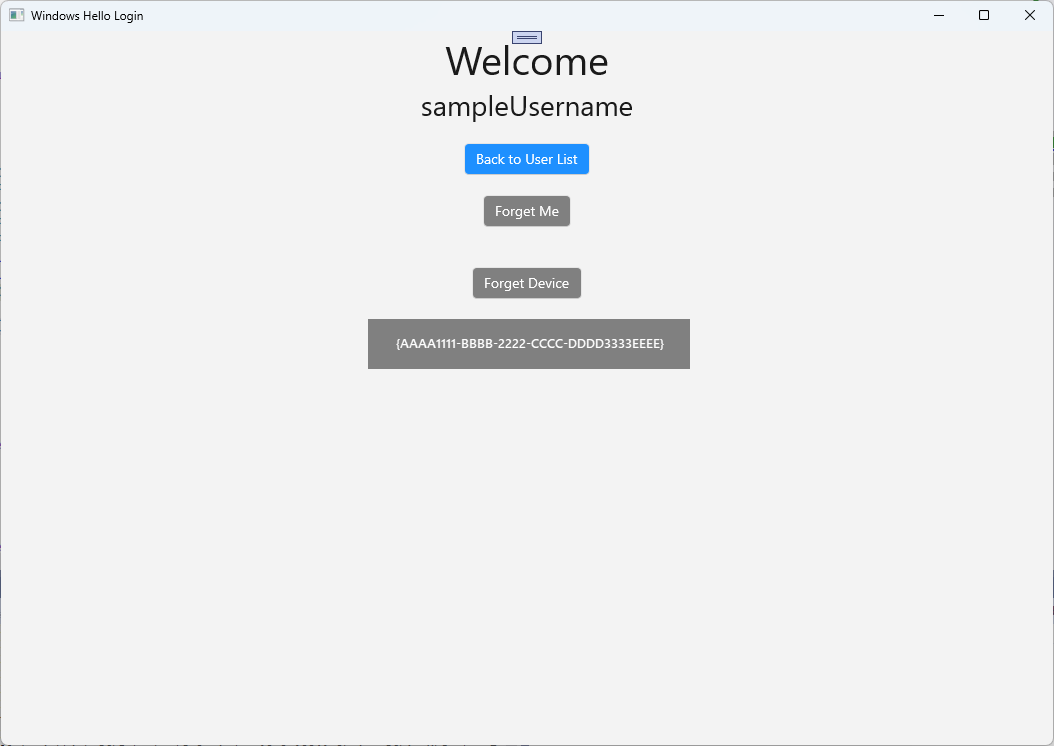
像以前一样生成并运行应用程序并使用默认凭据登录。 在 “欢迎 ”页上,你将看到设备 ID 已显示。 如果在另一台设备上登录,也会在此处显示(如果有云托管身份验证服务)。 对于此实践实验,将展示实际的设备 ID。 在实际实现中,你需要显示一个易记名称,一个人可以理解并使用它来标识每个设备。
要完成这个实操课,当用户在用户选择页面进行选择并重新登录时,需要向他们发出请求和挑战。 AuthService 有两种方法,你创建了两种方法来请求质询,一个使用签名质询。 在 WindowsHelloHelper.cs 中,创建名为 RequestSignAsync 的新方法。 这将从 AuthService 请求质询,使用 Windows Hello API 在本地对质询进行签名,并将签名质询发送到 AuthService。 在此实践实验中,AuthService 将收到签名的质询并返回
true。 在实际实现中,需要实现验证机制,以确定质询是否已由正确设备上的正确用户签名。 将以下方法添加到WindowsHelloHelper.csprivate static async Task<bool> RequestSignAsync(Guid userId, KeyCredentialRetrievalResult openKeyResult) { // Calling userKey.RequestSignAsync() prompts the uses to enter the PIN or use Biometrics (Windows Hello). // The app would use the private key from the user account to sign the sign-in request (challenge) // The client would then send it back to the server and await the servers response. IBuffer challengeMessage = AuthService.AuthService.Instance.WindowsHelloRequestChallenge(); KeyCredential userKey = openKeyResult.Credential; KeyCredentialOperationResult signResult = await userKey.RequestSignAsync(challengeMessage); if (signResult.Status == KeyCredentialStatus.Success) { // If the challenge from the server is signed successfully // send the signed challenge back to the server and await the servers response return AuthService.AuthService.Instance.SendServerSignedChallenge( userId, Helpers.GetDeviceId(), signResult.Result.ToArray()); } else if (signResult.Status == KeyCredentialStatus.UserCanceled) { // User cancelled the Windows Hello PIN entry. } else if (signResult.Status == KeyCredentialStatus.NotFound) { // Must recreate Windows Hello key } else if (signResult.Status == KeyCredentialStatus.SecurityDeviceLocked) { // Can't use Windows Hello right now, remember that hardware failed and suggest restart } else if (signResult.Status == KeyCredentialStatus.UnknownError) { // Can't use Windows Hello right now, try again later } return false; }在 WindowsHelloHelper 类中,从 GetWindowsHelloAuthenticationMessageAsync 方法调用 RequestSignAsync 方法。
public static async Task<bool> GetWindowsHelloAuthenticationMessageAsync(UserAccount account)
{
    KeyCredentialRetrievalResult openKeyResult = await KeyCredentialManager.OpenAsync(account.Username);
    // Calling OpenAsync will allow the user access to what is available in the app and will not require user credentials again.
    // If you wanted to force the user to sign in again you can use the following:
    // var consentResult = await Windows.Security.Credentials.UI.UserConsentVerifier.RequestVerificationAsync(account.Username);
    // This will ask for the either the password of the currently signed in Microsoft Account or the PIN used for Windows Hello.

    if (openKeyResult.Status == KeyCredentialStatus.Success)
    {
        //If OpenAsync has succeeded, the next thing to think about is whether the client application requires access to backend services.
        //If it does here you would Request a challenge from the Server. The client would sign this challenge and the server
        //would check the signed challenge. If it is correct it would allow the user access to the backend.
        //You would likely make a new method called RequestSignAsync to handle all this
        //for example, RequestSignAsync(openKeyResult);
        //Refer to the second Windows Hello sample for information on how to do this.

        return await RequestSignAsync(account.UserId, openKeyResult);
    }
    else if (openKeyResult.Status == KeyCredentialStatus.NotFound)
    {
        //If the _account is not found at this stage. It could be one of two errors.
        //1. Windows Hello has been disabled
        //2. Windows Hello has been disabled and re-enabled cause the Windows Hello Key to change.
        //Calling CreateWindowsHelloKeyAsync and passing through the account will attempt to replace the existing Windows Hello Key for that account.
        //If the error really is that Windows Hello is disabled then the CreateWindowsHelloKeyAsync method will output that error.
        if (await CreateWindowsHelloKeyAsync(account.UserId, account.Username))
        {
            //If the Windows Hello Key was again successfully created, Windows Hello has just been reset.
            //Now that the Windows Hello Key has been reset for the _account retry sign in.
            return await GetWindowsHelloAuthenticationMessageAsync(account);
        }
    }

    // Can't use Windows Hello right now, try again later
    return false;
}
在本练习中,你已更新客户端应用程序以使用 AuthService。 通过执行此作,可以消除 Account 类和 AccountHelper 类的需求。 删除 Utils 文件夹中的 Account 类、Models 文件夹和 AccountHelper 类。 在解决方案成功生成之前,需要删除应用程序中对
WindowsHelloLogin.Models命名空间的所有引用。生成并运行应用程序,并在模拟服务和数据库中使用Windows Hello。
在本动手实验中,你已了解如何使用 Windows Hello API 来替换从 Windows 计算机使用身份验证时对密码的需求。 当你考虑用户为了维护密码以及处理现有系统中丢失密码所消耗的精力时,应该能看到转向这种新的Windows Hello身份验证系统的优势。
我们把如何在服务和服务器端实现身份验证的详细信息留给你作为练习去进行。 预计大多数开发人员将拥有需要迁移的现有系统,以便开始使用Windows Hello。 每个系统的详细信息将有所不同。
