本主题逐步介绍如何使用平台调用服务(PInvoke)通过 WinUI 3 和 Win32 互作功能生成基本的 C# .NET 应用程序。
先决条件
基本托管 C#/.NET 应用
对于此示例,我们将指定应用窗口的位置和大小,转换并缩放应用窗口的相应 DPI,禁用窗口最小化和最大化按钮,最后查询当前进程以显示加载到当前进程的模块的列表。
我们将从初始模板应用程序生成示例应用(请参阅 先决条件)。 另请参阅 Visual Studio 中的WinUI 3 模板。
MainWindow.xaml 文件
使用 WinUI 3,可以在 XAML 标记中创建 Window 类的实例。
XAML Window 类已扩展以支持桌面环境窗口,将其转变为适用于 UWP 和桌面应用模型的每个低级别窗口实现的抽象层。 具体而言是适用于 UWP 的 CoreWindow 以及适用于 Win32 的窗口句柄(或 HWND)。
以下代码显示了初始模板应用中的 MainWindow.xaml 文件,该文件使用 Window 类作为应用的根元素。
<Window
    x:Class="WinUI_3_basic_win32_interop.MainWindow"
    xmlns="http://schemas.microsoft.com/winfx/2006/xaml/presentation"
    xmlns:x="http://schemas.microsoft.com/winfx/2006/xaml"
    xmlns:local="using:WinUI_3_basic_win32_interop"
    xmlns:d="http://schemas.microsoft.com/expression/blend/2008"
    xmlns:mc="http://schemas.openxmlformats.org/markup-compatibility/2006"
    mc:Ignorable="d">

    <StackPanel Orientation="Horizontal" HorizontalAlignment="Center" VerticalAlignment="Center">
        <Button x:Name="myButton" Click="myButton_Click">Click Me</Button>
    </StackPanel>
</Window>
配置
若要调用从
User32.dll导出的 Win32 API,可以在 Visual Studio 项目中使用 C#/Win32 P/Invoke 源生成器。 单击 工具>NuGet 包管理器>管理解决方案的 NuGet 包...,并在“浏览”选项卡上搜索 Microsoft.Windows.CsWin32。 有关更多详细信息,请参阅从托管代码调用本机函数。您可以通过确认在解决方案资源管理器中 依赖项> 节点下是否列出了 Microsoft.Windows.CsWin32 来选择性地确认安装是否成功。
还可以选择双击应用程序项目文件(或右键单击并选择 编辑项目文件)以在文本编辑器中打开该文件,并确认项目文件现在包含用于“Microsoft.Windows.CsWin32”的 NuGet
PackageReference。<Project Sdk="Microsoft.NET.Sdk"> <PropertyGroup> <OutputType>WinExe</OutputType> <TargetFramework>net8.0-windows10.0.19041.0</TargetFramework> <TargetPlatformMinVersion>10.0.17763.0</TargetPlatformMinVersion> <RootNamespace>WinUI_3_basic_win32_interop</RootNamespace> <ApplicationManifest>app.manifest</ApplicationManifest> <Platforms>x86;x64;ARM64</Platforms> <RuntimeIdentifiers>win-x86;win-x64;win-arm64</RuntimeIdentifiers> <PublishProfile>win-$(Platform).pubxml</PublishProfile> <UseWinUI>true</UseWinUI> <EnableMsixTooling>true</EnableMsixTooling> <Nullable>enable</Nullable> </PropertyGroup> <ItemGroup> <Content Include="Assets\SplashScreen.scale-200.png" /> <Content Include="Assets\LockScreenLogo.scale-200.png" /> <Content Include="Assets\Square150x150Logo.scale-200.png" /> <Content Include="Assets\Square44x44Logo.scale-200.png" /> <Content Include="Assets\Square44x44Logo.targetsize-24_altform-unplated.png" /> <Content Include="Assets\StoreLogo.png" /> <Content Include="Assets\Wide310x150Logo.scale-200.png" /> </ItemGroup> <ItemGroup> <Manifest Include="$(ApplicationManifest)" /> </ItemGroup> <!-- Defining the "Msix" ProjectCapability here allows the Single-project MSIX Packaging Tools extension to be activated for this project even if the Windows App SDK Nuget package has not yet been restored. --> <ItemGroup Condition="'$(DisableMsixProjectCapabilityAddedByProject)'!='true' and '$(EnableMsixTooling)'=='true'"> <ProjectCapability Include="Msix" /> </ItemGroup> <ItemGroup> <PackageReference Include="Microsoft.Windows.CsWin32" Version="0.3.183"> <PrivateAssets>all</PrivateAssets> <IncludeAssets>runtime; build; native; contentfiles; analyzers; buildtransitive</IncludeAssets> </PackageReference> <PackageReference Include="Microsoft.Windows.SDK.BuildTools" Version="10.0.26100.1742" /> <PackageReference Include="Microsoft.WindowsAppSDK" Version="1.6.250205002" /> </ItemGroup> <!-- Defining the "HasPackageAndPublishMenuAddedByProject" property here allows the Solution Explorer "Package and Publish" context menu entry to be enabled for this project even if the Windows App SDK Nuget package has not yet been restored. --> <PropertyGroup Condition="'$(DisableHasPackageAndPublishMenuAddedByProject)'!='true' and '$(EnableMsixTooling)'=='true'"> <HasPackageAndPublishMenu>true</HasPackageAndPublishMenu> </PropertyGroup> <!-- Publish Properties --> <PropertyGroup> <PublishReadyToRun Condition="'$(Configuration)' == 'Debug'">False</PublishReadyToRun> <PublishReadyToRun Condition="'$(Configuration)' != 'Debug'">True</PublishReadyToRun> <PublishTrimmed Condition="'$(Configuration)' == 'Debug'">False</PublishTrimmed> <PublishTrimmed Condition="'$(Configuration)' != 'Debug'">True</PublishTrimmed> </PropertyGroup> </Project>将文本文件添加到项目,并将其命名为
NativeMethods.txt。 此文件的内容用于告知 C#/Win32 P/Invoke 源生成器,您希望生成 P/Invoke 源代码的函数和类型。 换句话说,将在 C# 代码中调用和使用哪些函数和类型。GetDpiForWindow GetWindowLong SetWindowPos SetWindowLong HWND_TOP WINDOW_STYLE
代码
在
App.xaml.cs代码隐藏文件中,我们通过使用 WindowNative.GetWindowHandle WinRT COM 互操作方法获取窗口的句柄(请参阅 检索窗口句柄 (HWND))。该方法从应用的 OnLaunched 处理程序调用,如下所示:
/// <summary>
/// Invoked when the application is launched.
/// </summary>
/// <param name="args">Details about the launch request and process.</param>
protected override void OnLaunched(Microsoft.UI.Xaml.LaunchActivatedEventArgs args)
{
    m_window = new MainWindow();

    var hwnd = WinRT.Interop.WindowNative.GetWindowHandle(m_window);

    SetWindowDetails(hwnd, 800, 600);

    m_window.Activate();
}
然后,我们调用
SetWindowDetails方法,传递 Window 句柄和首选维度。在此方法中:
- 我们调用 GetDpiForWindow 获取窗口的每英寸(dpi)值的点数(Win32 使用物理像素,而 WinUI 3 使用有效像素)。 此 dpi 值用于计算刻度系数,并将其应用于为窗口指定的宽度和高度。
- 然后,调用 SetWindowPos 以指定窗口的所需位置。
- 最后,我们调用 SetWindowLong 禁用 最小化 和 最大化 按钮。
private static void SetWindowDetails(IntPtr hwnd, int width, int height)
{
    var dpi = Windows.Win32.PInvoke.GetDpiForWindow((Windows.Win32.Foundation.HWND)hwnd);
    float scalingFactor = (float)dpi / 96;
    width = (int)(width * scalingFactor);
    height = (int)(height * scalingFactor);

    _ = Windows.Win32.PInvoke.SetWindowPos((Windows.Win32.Foundation.HWND)hwnd,
                                Windows.Win32.Foundation.HWND.HWND_TOP,
                                0, 0, width, height,
                                Windows.Win32.UI.WindowsAndMessaging.SET_WINDOW_POS_FLAGS.SWP_NOMOVE);

    var nIndex = Windows.Win32.PInvoke.GetWindowLong((Windows.Win32.Foundation.HWND)hwnd,
              Windows.Win32.UI.WindowsAndMessaging.WINDOW_LONG_PTR_INDEX.GWL_STYLE) &
              ~(int)Windows.Win32.UI.WindowsAndMessaging.WINDOW_STYLE.WS_MINIMIZEBOX &
              ~(int)Windows.Win32.UI.WindowsAndMessaging.WINDOW_STYLE.WS_MAXIMIZEBOX;

    _ = Windows.Win32.PInvoke.SetWindowLong((Windows.Win32.Foundation.HWND)hwnd,
           Windows.Win32.UI.WindowsAndMessaging.WINDOW_LONG_PTR_INDEX.GWL_STYLE,
           nIndex);
}
在 MainWindow.xaml 文件中,我们使用具有 ScrollViewer 的 ContentDialog 来显示为当前进程加载的所有模块的列表。
<StackPanel Orientation="Horizontal" HorizontalAlignment="Center" VerticalAlignment="Center">
    <Button x:Name="myButton" Click="myButton_Click">Display loaded modules</Button>

    <ContentDialog x:Name="contentDialog" CloseButtonText="Close">
        <ScrollViewer>
            <TextBlock x:Name="cdTextBlock" TextWrapping="Wrap" />
        </ScrollViewer>
    </ContentDialog>

</StackPanel>
然后,我们将
MyButton_Click事件处理程序替换为以下代码。在这里,我们通过调用 GetCurrentProcess来获取对当前进程的引用。 我们随后循环访问模块的集合并将每个 ProcessModule 的文件名追加到显示字符串。
private async void myButton_Click(object sender, RoutedEventArgs e)
{
    myButton.Content = "Clicked";

    var description = new System.Text.StringBuilder();
    var process = System.Diagnostics.Process.GetCurrentProcess();
    foreach (System.Diagnostics.ProcessModule module in process.Modules)
    {
        description.AppendLine(module.FileName);
    }

    cdTextBlock.Text = description.ToString();
    await contentDialog.ShowAsync();
}
编译并运行应用。
窗口显示后,选择“显示加载的模块”按钮。
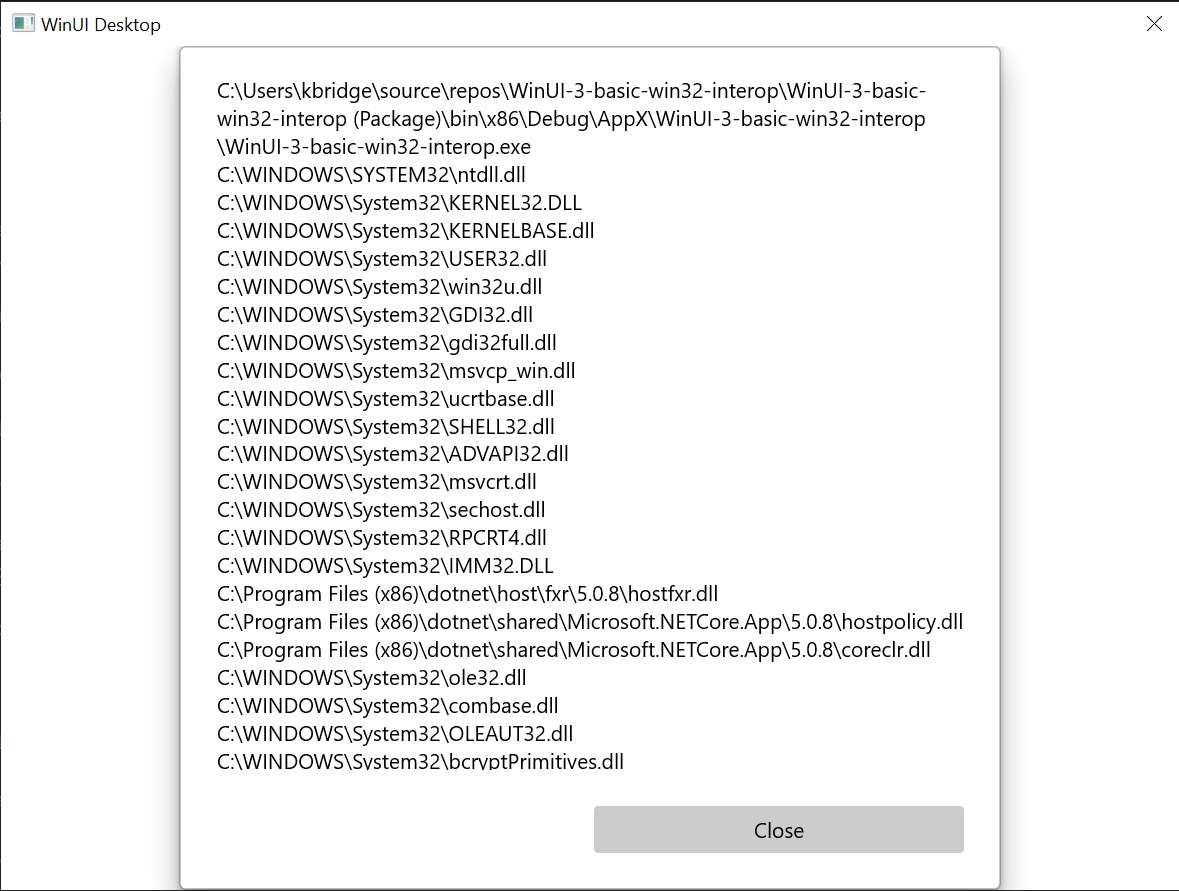
本主题中所述的基本 Win32 互作应用程序。
总结
在本主题中,我们介绍了如何访问基础窗口实现(在本例中为 Win32 和 HWND),以及使用 Win32 API 以及 WinRT API。 这演示如何在创建新的 WinUI 3 桌面应用时使用现有的桌面应用程序代码。
有关更广泛的示例,请参阅 Windows 应用 SDK 示例 GitHub 存储库中的 AppWindow 库示例。
自定义窗口标题栏的示例
在第二个示例中,我们演示如何自定义窗口的标题栏及其内容。 在进行之前,请查看以下主题:
创建新项目
- 在 Visual Studio 中,从 空白应用(打包,WinUI 3 桌面版) 项目模板创建新的 C# 或 C++/WinRT 项目。
配置
同样,像在第一个示例中一样引用 Microsoft.Windows.CsWin32 NuGet 包。
将
NativeMethods.txt文本文件添加到项目中。LoadImage SendMessage SetWindowText WM_SETICON
MainWindow.xaml
注释
如果需要用于本演练的图标文件,则可以从 computer.ico 示例应用下载 文件。 将该文件放在 Assets 文件夹中,并将该文件作为内容添加到项目中。 然后,可以使用 URL Assets/computer.ico访问文件。
否则,请随意使用已有的图标文件,并在下面的代码列表中更改对它的两个引用。
- 在下面的代码列表中,你将看到,我们在
MainWindow.xaml中添加了两个按钮,并为每个按钮指定了单击处理程序。 在第一个按钮 (basicButton_Click) 的单击处理程序中,我们设置标题栏图标和文本。 第二个示例(customButton_Click)中,我们通过将标题栏替换成名为 customTitleBarPanel的 StackPanel 的内容来展示更重要的自定义功能。
<?xml version="1.0" encoding="utf-8"?>
<Window
    x:Class="window_titlebar.MainWindow"
    xmlns="http://schemas.microsoft.com/winfx/2006/xaml/presentation"
    xmlns:x="http://schemas.microsoft.com/winfx/2006/xaml"
    xmlns:local="using:window_titlebar"
    xmlns:d="http://schemas.microsoft.com/expression/blend/2008"
    xmlns:mc="http://schemas.openxmlformats.org/markup-compatibility/2006"
    mc:Ignorable="d"
    Title="Basic WinUI 3 Window title bar sample">

    <Grid x:Name="rootElement" RowDefinitions="100, *, 100, *">

        <StackPanel x:Name="customTitleBarPanel" Grid.Row="0" Orientation="Horizontal" HorizontalAlignment="Stretch" VerticalAlignment="Top" Visibility="Collapsed">
            <Image Source="Images/windowIcon.gif" />
            <TextBlock VerticalAlignment="Center" Text="Full customization of title bar"/>
        </StackPanel>

        <StackPanel x:Name="buttonPanel"  Grid.Row="2" Orientation="Horizontal" HorizontalAlignment="Center">
            <Button x:Name="basicButton" Click="basicButton_Click" Margin="25">Set the Window title and icon</Button>
            <Button x:Name="customButton" Click="customButton_Click" Margin="25">Customize the window title bar</Button>
        </StackPanel>

    </Grid>
</Window>
MainWindow.xaml.cs/cpp
- 在下面的 basicButton_Click 处理程序的代码列表中,为了保持自定义标题栏隐藏,我们将 customTitleBarPanelStackPanel折叠,并将 ExtendsContentIntoTitleBar 属性设置为
false。 - 然后,调用 IWindowNative::get_WindowHandle(对于 C#,使用互操作帮助方法 GetWindowHandle)来检索主窗口的窗口句柄(HWND)。
- 接下来,通过调用 LoadImage 和 SendMessage 函数来设置应用程序图标(对于 C#,使用 PInvoke.User32 NuGet 包)。
- 最后,我们调用 SetWindowText 来更新标题栏字符串。
private void basicButton_Click(object sender, RoutedEventArgs e)
{
    // Ensure the custom title bar content is not displayed.
    customTitleBarPanel.Visibility = Visibility.Collapsed;

    // Disable custom title bar content.
    ExtendsContentIntoTitleBar = false;

    //Get the Window's HWND
    var hwnd = WinRT.Interop.WindowNative.GetWindowHandle(this);

    var hIcon = Windows.Win32.PInvoke.LoadImage(
        null,
        "Images/windowIcon.ico",
        Windows.Win32.UI.WindowsAndMessaging.GDI_IMAGE_TYPE.IMAGE_ICON,
        20, 20,
        Windows.Win32.UI.WindowsAndMessaging.IMAGE_FLAGS.LR_LOADFROMFILE);

    Windows.Win32.PInvoke.SendMessage(
        (Windows.Win32.Foundation.HWND)hwnd,
        Windows.Win32.PInvoke.WM_SETICON,
        (Windows.Win32.Foundation.WPARAM)0,
        (Windows.Win32.Foundation.LPARAM)hIcon.DangerousGetHandle());

    Windows.Win32.PInvoke.SetWindowText((Windows.Win32.Foundation.HWND)hwnd, "Basic customization of title bar");
}
// pch.h
...
#include <microsoft.ui.xaml.window.h>
...

// MainWindow.xaml.h
...
void basicButton_Click(Windows::Foundation::IInspectable const& sender, Microsoft::UI::Xaml::RoutedEventArgs const& args);
...

// MainWindow.xaml.cpp
void MainWindow::basicButton_Click(IInspectable const&, RoutedEventArgs const&)
{
    // Ensure the that custom title bar content is not displayed.
    customTitleBarPanel().Visibility(Visibility::Collapsed);

    // Disable custom title bar content.
    ExtendsContentIntoTitleBar(false);

    // Get the window's HWND
    auto windowNative{ this->m_inner.as<::IWindowNative>() };
    HWND hWnd{ 0 };
    windowNative->get_WindowHandle(&hWnd);

    HICON icon{ reinterpret_cast<HICON>(::LoadImage(nullptr, L"Assets/computer.ico", IMAGE_ICON, 0, 0, LR_DEFAULTSIZE | LR_LOADFROMFILE)) };
    ::SendMessage(hWnd, WM_SETICON, 0, (LPARAM)icon);

    this->Title(L"Basic customization of title bar");
}
- 在 customButton_Click 处理程序中,我们将 customTitleBarPanelStackPanel 的可见性设置为可见。
- 然后,我们将 ExtendsContentIntoTitleBar 属性设置为
true,并调用 SetTitleBar,以显示 customTitleBarPanelStackPanel 作为自定义标题栏。
private void customButton_Click(object sender, RoutedEventArgs e)
{
    customTitleBarPanel.Visibility = Visibility.Visible;

    // Enable custom title bar content.
    ExtendsContentIntoTitleBar = true;
    // Set the content of the custom title bar.
    SetTitleBar(customTitleBarPanel);
}
// MainWindow.xaml.h
...
void customButton_Click(Windows::Foundation::IInspectable const& sender, Microsoft::UI::Xaml::RoutedEventArgs const& args);
...

// MainWindow.xaml.cpp
void MainWindow::customButton_Click(IInspectable const&, RoutedEventArgs const&)
{
    customTitleBarPanel().Visibility(Visibility::Visible);

    // Enable custom title bar content.
    ExtendsContentIntoTitleBar(true);

    // Set the content of the custom title bar.
    SetTitleBar(customTitleBarPanel());
}
App.xaml
- 在
App.xaml文件中,紧接着<!-- Other app resources here -->注释之后,我们为标题栏添加了一些自定义颜色的画笔,如下所示。
<?xml version="1.0" encoding="utf-8"?>
<Application
    x:Class="window_titlebar.App"
    xmlns="http://schemas.microsoft.com/winfx/2006/xaml/presentation"
    xmlns:x="http://schemas.microsoft.com/winfx/2006/xaml"
    xmlns:local="using:window_titlebar">
    <Application.Resources>
        <ResourceDictionary>
            <ResourceDictionary.MergedDictionaries>
                <XamlControlsResources xmlns="using:Microsoft.UI.Xaml.Controls" />
                <!-- Other merged dictionaries here -->
            </ResourceDictionary.MergedDictionaries>
            <!-- Other app resources here -->
            <SolidColorBrush x:Key="WindowCaptionBackground">Green</SolidColorBrush>
            <SolidColorBrush x:Key="WindowCaptionBackgroundDisabled">LightGreen</SolidColorBrush>
            <SolidColorBrush x:Key="WindowCaptionForeground">Red</SolidColorBrush>
            <SolidColorBrush x:Key="WindowCaptionForegroundDisabled">Pink</SolidColorBrush>
        </ResourceDictionary>
    </Application.Resources>
</Application>
如果你一直在自己的应用中执行这些步骤,则可以立即生成项目并运行该应用。 你将看到类似于以下内容的应用程序窗口(使用自定义应用图标):
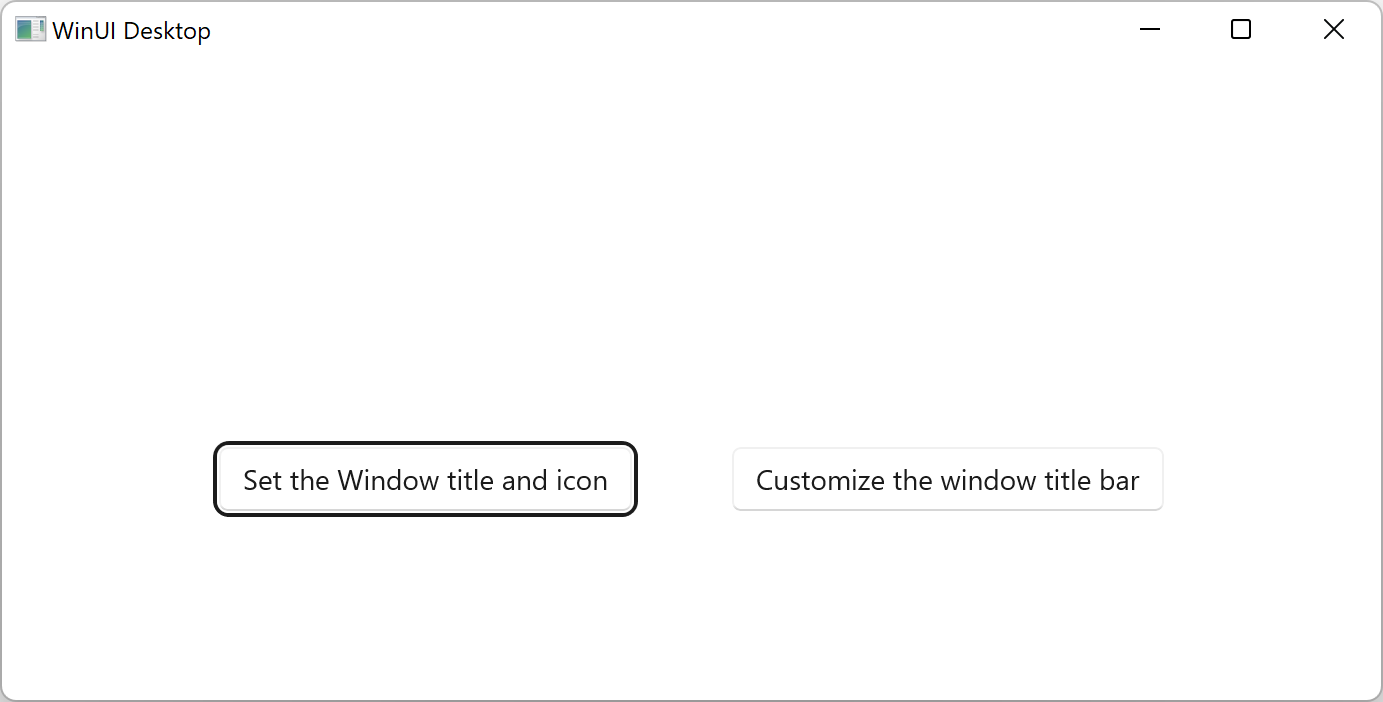
模板应用。
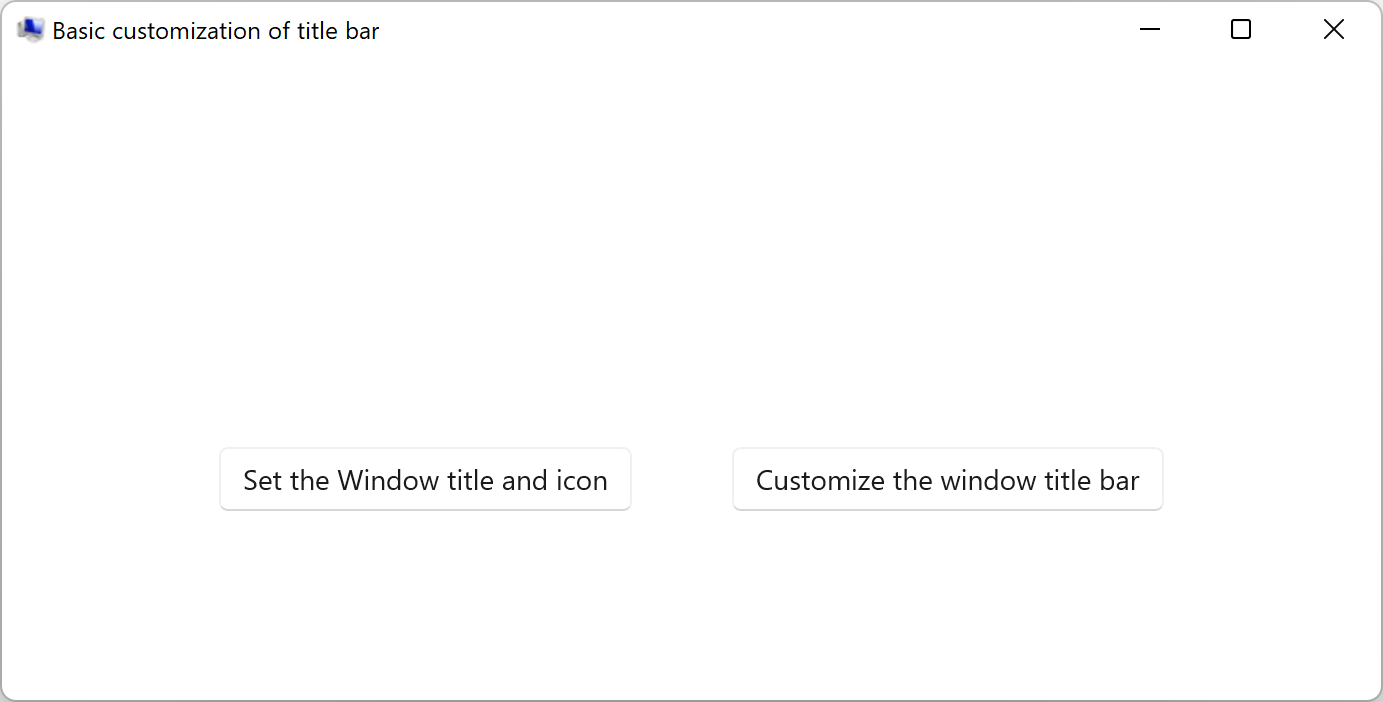
下面是基本的自定义标题栏:
模板应用程序与自定义应用程序图标。
带有自定义应用程序图标的模板应用。下面是完全自定义的标题栏:
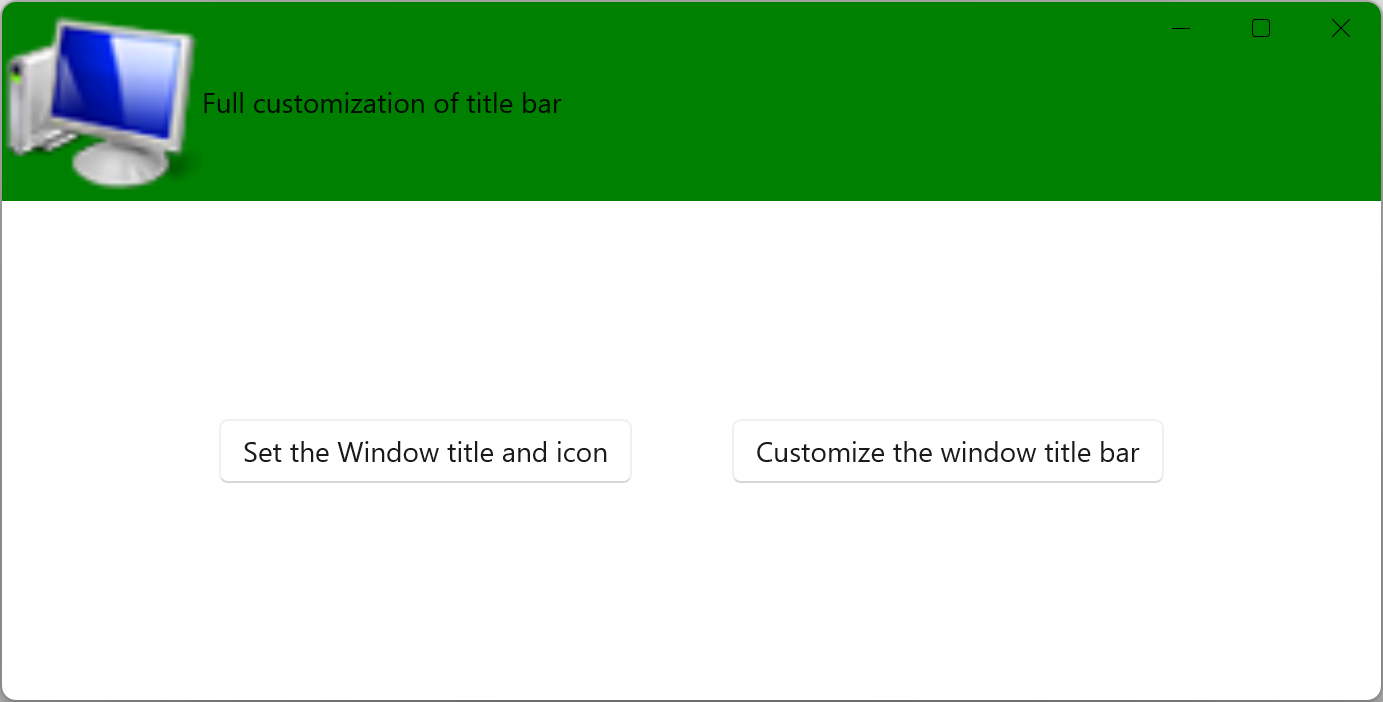
带有自定义标题栏的模板应用。
