注意
混合现实学院教程的设计考虑到了 HoloLens (第一代) 和混合现实沉浸式头戴显示设备。 因此,我们认为,对于寻求针对这些设备进行开发指导的开发人员来说,保留这些教程非常重要。 这些教程不会使用用于HoloLens 2的最新工具集或交互进行更新。 系统会维护这些设备以继续使用受支持的设备。 新的一系列教程演示了如何针对HoloLens 2进行开发。 发布这些教程时,会更新此通知,其中包含指向这些教程的链接。
本课程介绍如何将 Azure 媒体服务连接到Windows Mixed Reality VR 体验,以允许在沉浸式头戴显示设备上播放 360 度视频。
Azure 媒体服务 是一系列服务,可提供广播级视频流服务,以在当今最受欢迎的移动设备上覆盖更多受众。 有关详细信息,请访问 Azure 媒体服务页。
课程完成时,你应该有一个混合现实沉浸式头戴显示设备应用程序,能够:
通过 Azure 媒体服务从 Azure 存储检索 360 度视频。
在Unity场景中显示检索到的 360 度视频。
使用两个不同的视频在两个场景之间导航。
在应用程序中,如何将结果与设计集成由你决定。 本课程旨在介绍如何将 Azure 服务与Unity项目集成。 你的工作是利用从本课程中获得的知识来增强混合现实应用程序。
设备支持
| 课程 | HoloLens | 沉浸式头戴显示设备 |
|---|---|---|
| MR 和 Azure 306:流式处理视频 | ✔️ |
先决条件
注意
本教程面向具有 Unity 和 C# 基本经验的开发人员。 本文档中的先决条件和书面说明表示在撰写本文时测试和验证的内容 (2018 年 5 月) 。 你可以自由使用最新的软件,如 安装工具一文中所述。 它并不认为本课程中的信息与你在较新的软件中找到的信息完全匹配。
对于本课程,建议使用以下硬件和软件:
- 与Windows Mixed Reality兼容的开发电脑,用于沉浸式 (VR) 头戴显示设备开发
- 启用了开发人员模式的Windows 10 Fall Creators Update (或更高版本)
- 最新Windows 10 SDK
- Unity 2017.4
- Visual Studio 2017
- Windows Mixed Reality沉浸式 (VR) 头戴显示设备
- 用于 Azure 安装和数据检索的 Internet 访问
- 两个 mp4 格式的 360 度视频 (你可以在 此下载页 找到一些免版税视频)
准备工作
若要减少此项目的生成问题,请在根文件夹或近根文件夹中创建教程项目。 长文件夹路径可能会导致生成时出现问题。
设置并测试混合现实沉浸式头戴显示设备。
注意
本课程 不需要 运动控制器。 如果需要支持设置沉浸式头戴显示设备,请单击有关如何设置Windows Mixed Reality的链接。
第 1 章 - Azure 门户:创建 Azure 存储帐户
若要使用 Azure 存储服务,需要在Azure 门户中创建并配置存储帐户。
登录到 Azure 门户。
注意
如果还没有 Azure 帐户,则需要创建一个。 如果你在课堂或实验室环境中遵循本教程,请向讲师或监考人员请求有关设置新帐户的帮助。
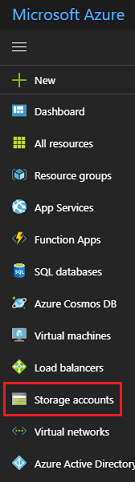
登录后,单击左侧菜单中的“ 存储帐户 ”。
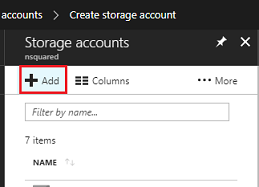
在“ 存储帐户 ”选项卡上,单击“ 添加”。
在 “创建存储帐户 ”选项卡中:
为帐户插入 “名称” ,请注意,此字段仅接受数字和小写字母。
对于 “部署模型”, 请选择“ 资源管理器”。
对于 “帐户类型”,请选择“ 存储 (常规用途 v1) 。
对于“性能”,请选择“Standard”。*
对于 “复制 ”,请选择“ 本地冗余存储 (LRS) ”。
将 “需要安全传输 ”保留为 “已禁用”。
选择 订阅。
选择资源组或创建新 资源组 。 资源组提供了一种监视、控制访问、预配和管理 Azure 资产集合计费的方法。
如果要创建新的资源组) , (确定资源组 的位置 。 理想情况下,位置应位于应用程序将运行的区域。 某些 Azure 资产仅在某些区域可用。
你需要确认你了解适用于此服务的条款和条件。
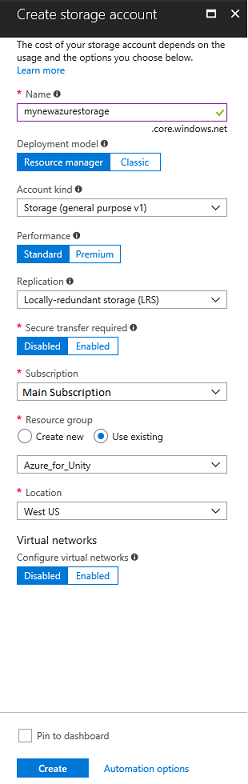
单击“ 创建 ”并等待创建服务,因为可能需要一分钟时间。
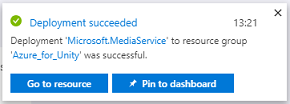
创建服务实例后,门户中会显示一条通知。
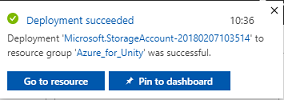
此时,无需关注资源,请转到下一章。
第 2 章 - Azure 门户:创建媒体服务
若要使用 Azure 媒体服务,需要配置服务实例,以提供给应用程序 (其中帐户持有者必须是管理员) 。
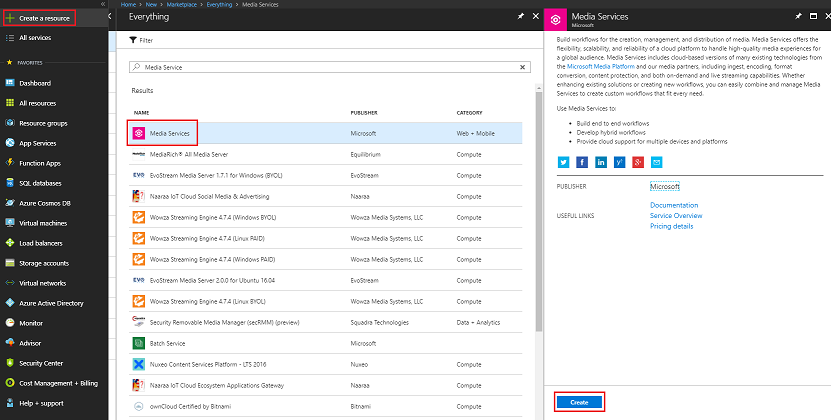
在 Azure 门户中,单击左上角的“ 创建资源 ”,然后搜索 “媒体服务”, 然后按 Enter。 单击要显示新页面的资源的粉红色图标。

新页面提供 媒体服务的说明。 在此提示符的左下角,单击“ 创建 ”按钮,以创建此服务的关联。
此时会显示一个面板,可在其中提供有关新媒体服务的一些详细信息:
为此服务实例插入所需的 帐户名称 。
选择 订阅。
选择资源组或创建新 资源组 。 资源组提供了一种监视、控制访问、预配和管理 Azure 资产集合计费的方法。 例如,建议将与单个项目关联的所有 Azure 服务保留 (,例如,这些实验室) 在通用资源组) 下。
若要详细了解 Azure 资源组,请单击 有关如何管理 Azure 资源组的链接。
如果要创建新的资源组) , (确定资源组 的位置 。 理想情况下,位置应位于应用程序将运行的区域。 某些 Azure 资产仅在某些区域可用。
对于“ 存储帐户 ”部分,请单击 “请选择...” 部分,然后单击在上一章中创建的 存储帐户 。
您还需要确认您了解适用于此服务的条款和条件。
单击“创建”。
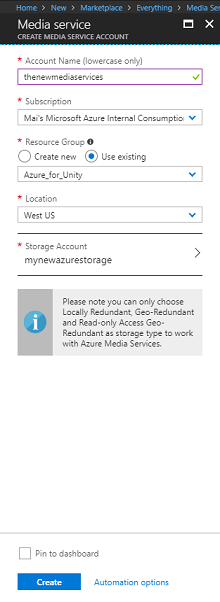
单击“ 创建”后,必须等待服务创建,这可能需要一分钟。
创建服务实例后,门户中会显示一条通知。

单击通知以浏览新的服务实例。
单击通知中的“ 转到资源 ”按钮,浏览新的服务实例。
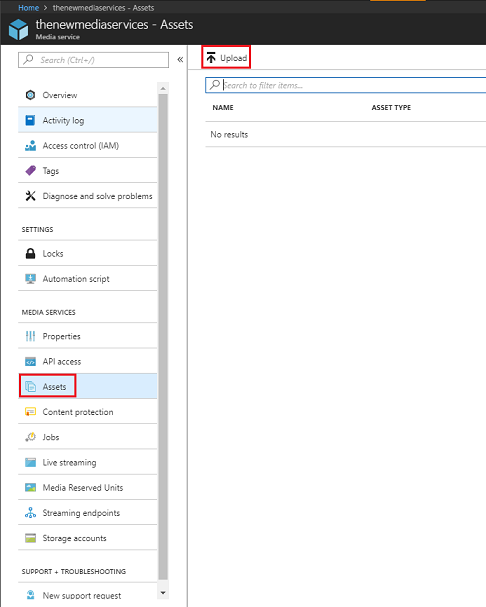
在“新建媒体服务”页的左侧面板中,单击“ 资产” 链接,该链接大约是一半。
在下一页上,单击页面左上角的“ 上传”。
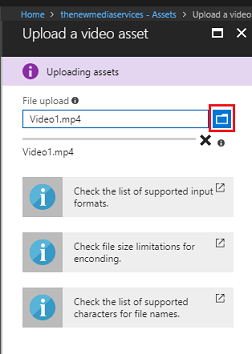
单击“ 文件夹” 图标浏览文件,然后选择要流式传输的第一个 360 视频。
可以点击此 链接下载示例视频。
警告
长文件名可能会导致编码器出现问题:因此为了确保视频没有问题,请考虑缩短视频文件名的长度。
视频上传完成后,进度栏变为绿色。
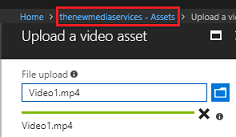
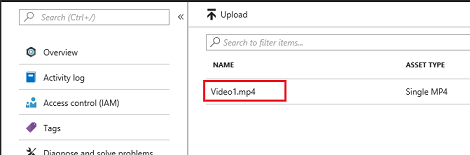
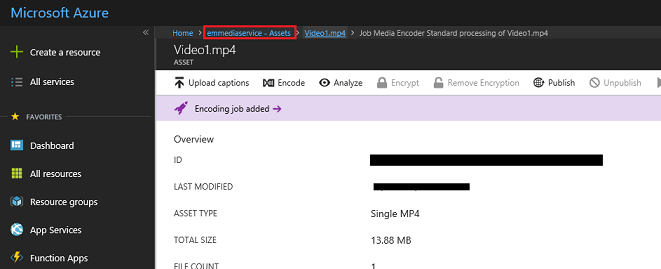
单击上述文本 (servicename - Assets) 返回到 “资产 ”页。
请注意,已上传的视频。 单击它。
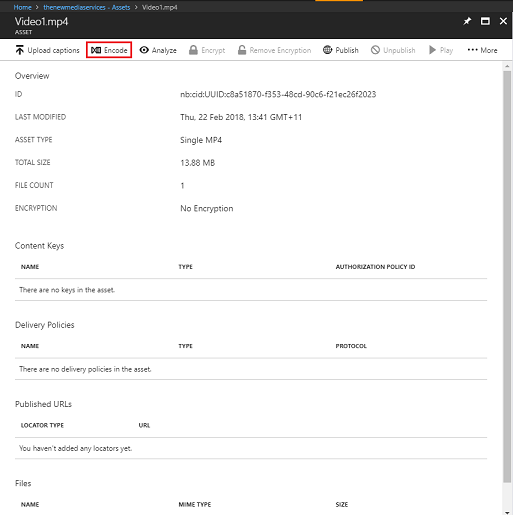
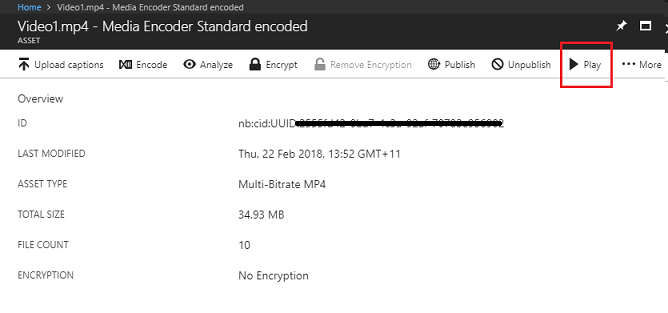
重定向到的页面会显示有关视频的详细信息。 若要能够使用视频,需要通过单击页面左上角的“编码”按钮对其进行 编码 。
此时会显示一个新面板,你可以在其中设置文件的编码选项。 设置以下属性, (某些属性已默认) 设置:
媒体编码器名称 Media Encoder Standard
编码预设 内容自适应多比特率 MP4
作业名称Media Encoder Standard处理 Video1.mp4
输出媒体资产名称 Video1.mp4 -- Media Encoder Standard编码
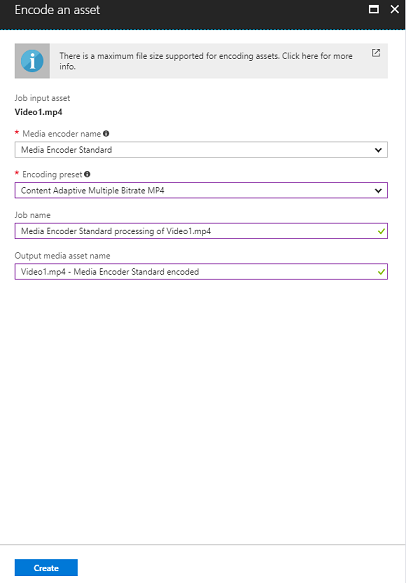
单击“创建”按钮。
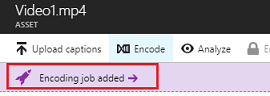
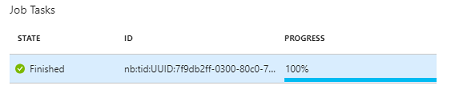
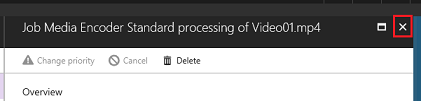
请注意 添加了编码作业的条形图,单击该栏,此时会显示一个面板,其中显示了编码进度。

等待作业完成。 作业完成后,可以随意关闭面板右上方带有“X”的面板。
重要
作业时间取决于视频的文件大小。 此过程可能需要相当长的时间。
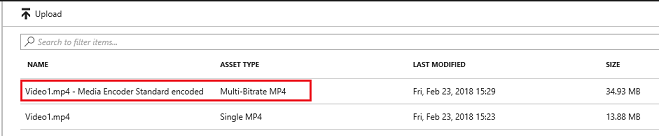
创建视频的编码版本后,可以将其发布,使其可访问。 为此,请单击蓝色链接 “资产” 以返回到“资产”页。
你会看到你的视频以及另一个视频,它是 资产类型 多比特率 MP4。

注意
你可能会注意到,新资产与初始视频一起为 “未知”,其 大小为“0”字节,只需刷新窗口即可更新。
单击此新资产。
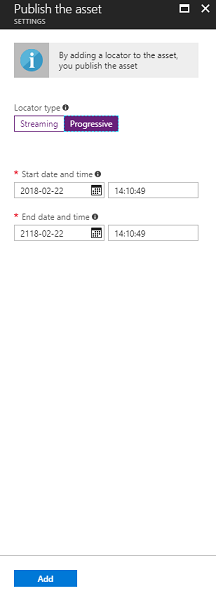
你将看到与之前使用的面板类似的面板,该面板是不同的资产。 单击位于页面顶部中心的 “发布 ”按钮。

系统会提示将 定位符(即入口点)设置为资产中的文件/秒。 对于方案,请设置以下属性:
定位符类型>渐进式。
在此示例中,会将日期和时间设置为从当前日期到未来 (100 年的时间) 。 按原样保留或将其更改为适合。
在该面板底部,单击“ 添加 ”按钮。
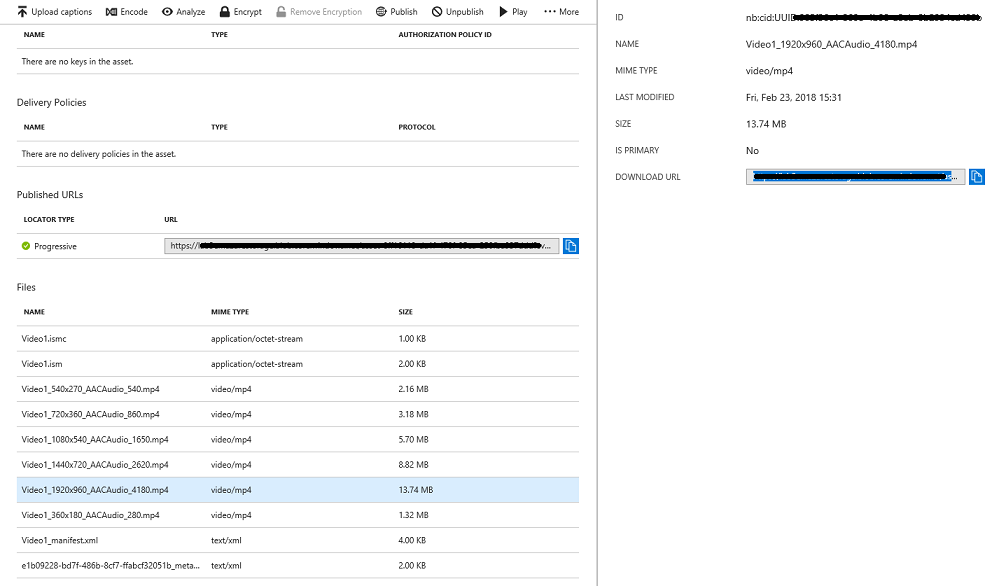
视频现已发布,可以使用其终结点进行流式传输。 页面下部是 “文件” 部分,其中驻留了视频的不同编码版本。 (图像为 1920x960 文件) ,然后选择可能的最高分辨率,然后显示一个面板。 可在此处找到 下载 URL。 复制此 终结点 ,稍后在代码中使用它。
注意
还可以按“ 播放 ”按钮播放视频并对其进行测试。
现在需要上传在本实验室中使用的第二个视频。 按照上述步骤作,对第二个视频重复相同的过程。 确保同时复制第二个 终结点 。 使用以下 链接下载第二个视频。
发布这两个视频后,即可转到下一章。
第 3 章 - 设置Unity项目
这是使用 混合现实 进行开发的典型设置,因此是其他项目的良好模板。
打开Unity并单击“新建”。
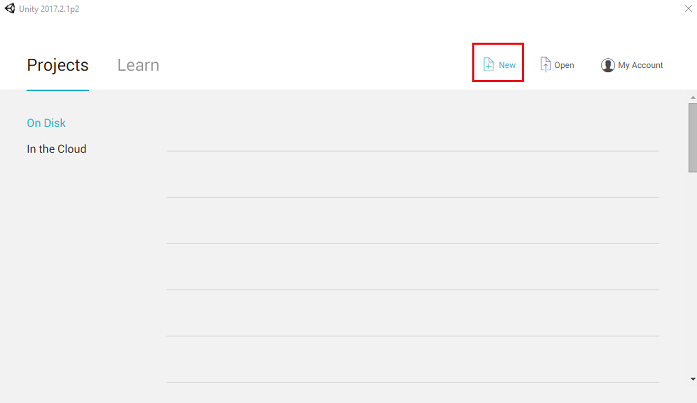
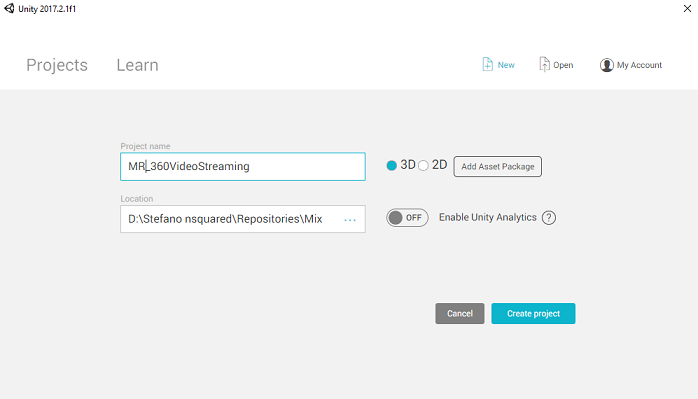
现在需要提供Unity项目名称,插入MR_360VideoStreaming。 确保项目类型设置为 3D。 将“位置”设置为适合你 (记住,离根目录更近更) 。 然后,单击“ 创建项目”。
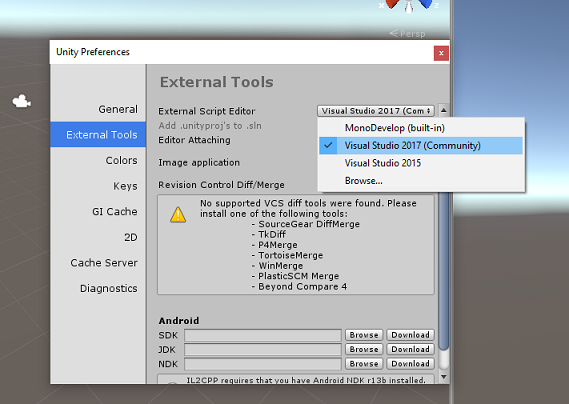
打开Unity后,有必要检查默认脚本编辑器设置为 Visual Studio。转到“编辑首选项”,然后从新窗口中导航到“外部工具”。 将外部脚本编辑器更改为 Visual Studio 2017。 关闭 “首选项” 窗口。
接下来,转到“文件生成设置”,并通过单击“切换平台”按钮将平台切换为通用 Windows 平台。
此外,请确保:
目标设备 设置为 “任何设备”。
生成类型 设置为 D3D。
SDK 设置为 “最新安装”。
Visual Studio 版本 设置为 “最新安装”。
“生成和运行” 设置为 “本地计算机”。
现在无需担心设置 场景 ,因为稍后会设置场景。
其余设置目前应保留为默认值。
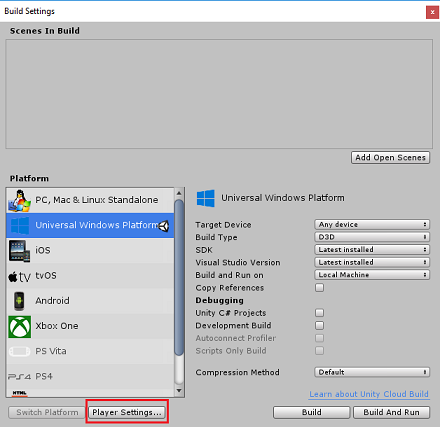
在 “生成设置” 窗口中,单击“ 播放器设置” 按钮,这将打开 检查器 所在空间中的相关面板。
在此面板中,需要验证一些设置:
在 “其他设置” 选项卡中:
脚本运行时版本 应 稳定 (.NET 3.5 等效) 。
脚本后端 应为 .NET。
API 兼容级别 应为 .NET 4.6。
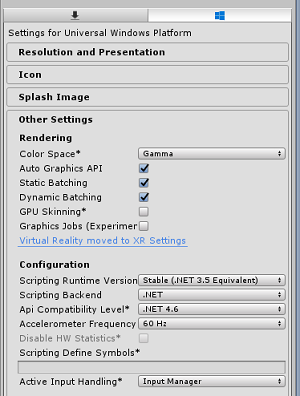
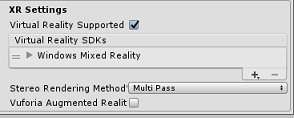
在面板下,在“发布设置) ”下的“XR 设置” (,勾选“支持虚拟现实”,确保已添加Windows Mixed Reality SDK。
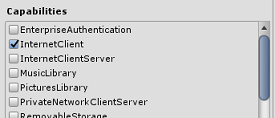
在“发布设置”选项卡的“功能”下,检查:
InternetClient
完成这些更改后,关闭 “生成设置” 窗口。
保存项目 文件保存项目。
第 4 章 - 导入 InsideOutSphere Unity 包
重要
如果想要跳过本课程Unity设置组件,并直接进入代码,请随时下载。 .unitypackage,将其作为 自定义包导入到项目中,然后从 第 5 章继续。 需要创建Unity项目。
对于本课程,需要下载名为 InsideOutSphere.unitypackage 的Unity资产包。
如何导入 unitypackage:
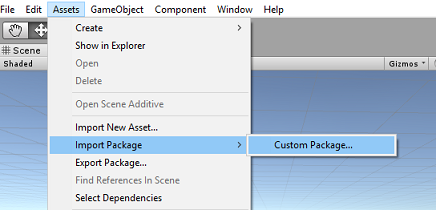
在前面Unity 仪表板时,单击屏幕顶部菜单中的“资产”,然后单击“导入包>自定义包”。
使用文件选取器选择 InsideOutSphere.unitypackage 包,然后单击“ 打开”。 此时会显示此资产的组件列表。 单击“导入”确认 导入。
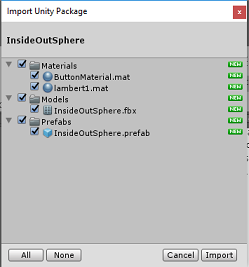
导入后,将三个新文件夹 (“材料”、“ 模型”和 “预制件”)添加到 “资产” 文件夹中。 这种文件夹结构是Unity项目的典型结构。
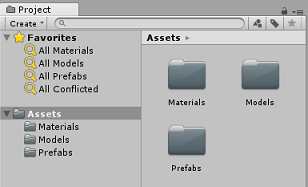
打开 Models 文件夹,查看导入的 InsideOutSphere 模型。
在 “材料” 文件夹中找到 InsideOutSpheres 材料 lambert1,以及由 GazeButton 使用的名为 ButtonMaterial 的材料。
Prefabs 文件夹包含 InsideOutSphere prefab,其中包含 InsideOutSphere模型和 GazeButton。
不包含任何代码,请遵循本课程编写代码。
在 “层次结构”中,选择“ 主相机 ”对象,并更新以下组件:
Transform
Position = X: 0,Y: 0,Z: 0。
旋转 = X: 0,Y: 0,Z:0。
比例 X: 1,Y: 1,Z:1。
照相机
清除标志:纯色。
剪裁平面:接近:0.1,远:6。

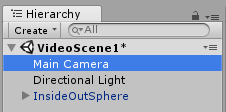
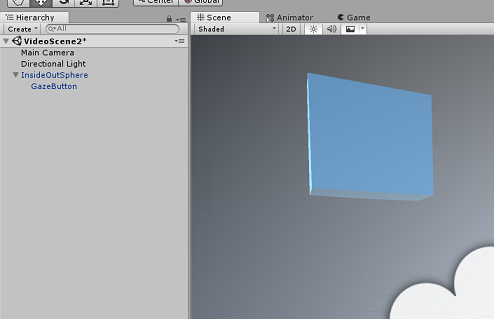
导航到 Prefab 文件夹,然后将 InsideOutSphere prefab 拖动到 层次结构 面板中。
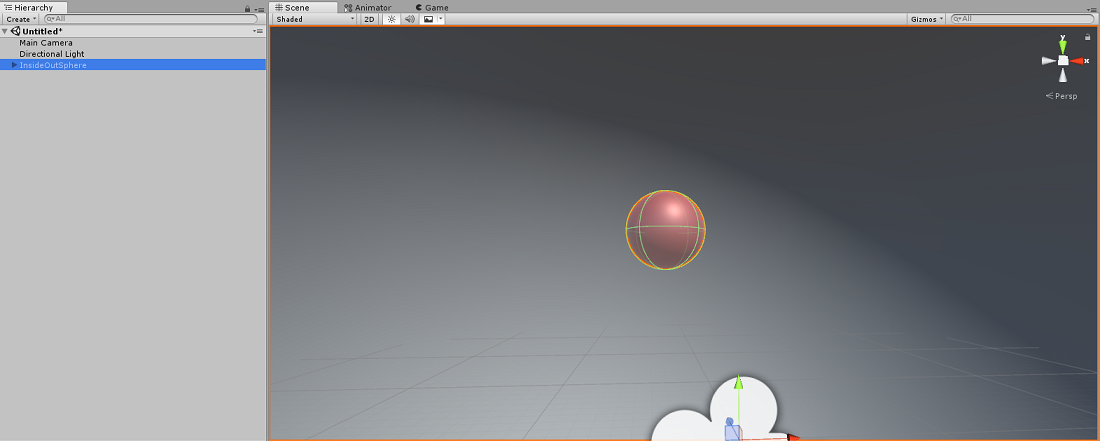
单击层次结构中的 InsideOutSphere 对象旁边的小箭头,展开该对象。 你将在它下面看到一个名为 GazeButton 的子对象,该对象用于更改场景和视频。
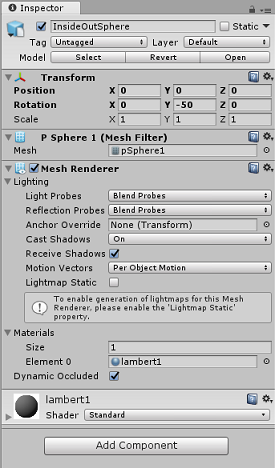
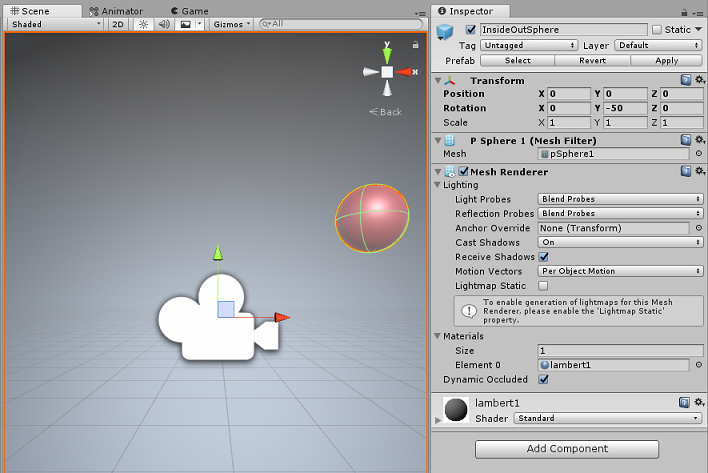
在检查器窗口中,单击 InsideOutSphere 的转换组件,确保设置了以下属性:
转换 - 位置
| X | Y | Z |
|---|---|---|
| 0 | 0 | 0 |
转换 - 旋转
| X | Y | Z |
|---|---|---|
| 0 | -50 | 0 |
转换 - 缩放
| X | Y | Z |
|---|---|---|
| 0 | 0 | 0 |
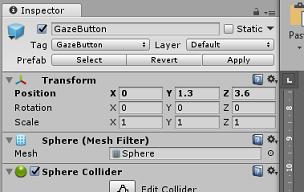
- 单击 “GazeButton ”子对象,并将其设置为 “转换 ”,如下所示:
转换 - 位置
| X | Y | Z |
|---|---|---|
| 3.6 | 1.3 | 0 |
转换 - 旋转
| X | Y | Z |
|---|---|---|
| 0 | 0 | 0 |
转换 - 缩放
| X | Y | Z |
|---|---|---|
| 1 | 1 | 1 |
第 5 章 - 创建 VideoController 类
VideoController 类托管两个用于流式传输 Azure 媒体服务内容的视频终结点。
若要创建此类,请:
右键单击位于项目面板中的“资产文件夹”,然后单击“创建>文件夹”。 将文件夹命名为 “脚本”。

双击“ 脚本” 文件夹将其打开。
右键单击文件夹内,然后单击“ 创建 > C# 脚本”。 将脚本命名为 VideoController。
双击新的 VideoController 脚本,使用 Visual Studio 2017 将其打开。
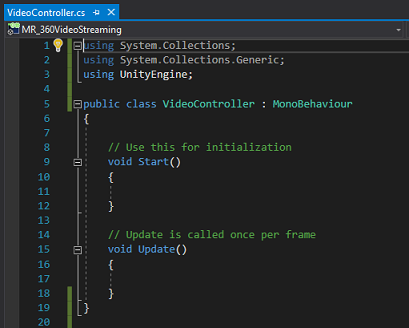
更新代码文件顶部的命名空间,如下所示:
using System.Collections;
using UnityEngine;
using UnityEngine.SceneManagement;
using UnityEngine.Video;
在 VideoController 类中输入以下变量以及 Awake () 方法:
    /// <summary>
    /// Provides Singleton-like behaviour to this class.
    /// </summary>
    public static VideoController instance;

    /// <summary>
    /// Reference to the Camera VideoPlayer Component.
    /// </summary>
    private VideoPlayer videoPlayer;

    /// <summary>
    /// Reference to the Camera AudioSource Component.
    /// </summary>
    private AudioSource audioSource;

    /// <summary>
    /// Reference to the texture used to project the video streaming
    /// </summary>
    private RenderTexture videoStreamRenderTexture;

    /// <summary>
    /// Insert here the first video endpoint
    /// </summary>
    private string video1endpoint = "-- Insert video 1 Endpoint here --";

    /// <summary>
    /// Insert here the second video endpoint
    /// </summary>
    private string video2endpoint = "-- Insert video 2 Endpoint here --";

    /// <summary>
    /// Reference to the Inside-Out Sphere.
    /// </summary>
    public GameObject sphere;

    void Awake()
    {
        instance = this;
    }
现在,可以从 Azure 媒体服务视频中输入终结点:
video1endpoint 变量中的第一个 。
video2endpoint 变量中的第二个。
警告
在 Unity 版本 2017.4.1f1 中使用 https 时存在已知问题。 如果视频在播放时出现错误,请尝试改用“http”。
接下来,需要编辑 Start () 方法。 每次用户切换场景 (通过查看“凝视”按钮来切换视频) 时,都会触发此方法。
    // Use this for initialization
    void Start()
    {
        Application.runInBackground = true;
        StartCoroutine(PlayVideo());
    }
在 Start () 方法之后,插入 PlayVideo () IEnumerator 方法,该方法用于 (无缝启动视频,因此) 不会出现口吃。
    private IEnumerator PlayVideo()
    {
        // create a new render texture to display the video
        videoStreamRenderTexture = new RenderTexture(2160, 1440, 32, RenderTextureFormat.ARGB32);

        videoStreamRenderTexture.Create();

        // assign the render texture to the object material
        Material sphereMaterial = sphere.GetComponent<Renderer>().sharedMaterial;

        //create a VideoPlayer component
        videoPlayer = gameObject.AddComponent<VideoPlayer>();

        // Set the video to loop.
        videoPlayer.isLooping = true;

        // Set the VideoPlayer component to play the video from the texture
        videoPlayer.renderMode = VideoRenderMode.RenderTexture;

        videoPlayer.targetTexture = videoStreamRenderTexture;

        // Add AudioSource
        audioSource = gameObject.AddComponent<AudioSource>();

        // Pause Audio play on Awake
        audioSource.playOnAwake = true;
        audioSource.Pause();

        // Set Audio Output to AudioSource
        videoPlayer.audioOutputMode = VideoAudioOutputMode.AudioSource;
        videoPlayer.source = VideoSource.Url;

        // Assign the Audio from Video to AudioSource to be played
        videoPlayer.EnableAudioTrack(0, true);
        videoPlayer.SetTargetAudioSource(0, audioSource);

        // Assign the video Url depending on the current scene
        switch (SceneManager.GetActiveScene().name)
        {
            case "VideoScene1":
                videoPlayer.url = video1endpoint;
                break;

            case "VideoScene2":
                videoPlayer.url = video2endpoint;
                break;

            default:
                break;
        }

        //Set video To Play then prepare Audio to prevent Buffering
        videoPlayer.Prepare();

        while (!videoPlayer.isPrepared)
        {
            yield return null;
        }

        sphereMaterial.mainTexture = videoStreamRenderTexture;

        //Play Video
        videoPlayer.Play();

        //Play Sound
        audioSource.Play();

        while (videoPlayer.isPlaying)
        {
            yield return null;
        }
    }
此类所需的最后一种方法是 ChangeScene () 方法,该方法用于在场景之间交换。
    public void ChangeScene()
    {
        SceneManager.LoadScene(SceneManager.GetActiveScene().name == "VideoScene1" ? "VideoScene2" : "VideoScene1");
    }
提示
ChangeScene () 方法使用称为条件运算符的便捷 C# 功能。 此功能允许在单个语句中检查条件,然后根据检查的结果返回值。 通过此 链接详细了解条件运算符。
在返回到Unity之前,请在 Visual Studio 中保存更改。
返回到Unity 编辑器,单击 VideoController 类 [from]{.underline} 脚本文件夹并将其拖动到层次结构面板中的主相机对象。
单击“ 主相机 ”并查看 “检查器面板”。 请注意,在新添加的脚本组件中,有一个字段具有空值。 此引用字段面向代码中的公共变量。
将 InsideOutSphere 对象从 层次结构面板 拖动到 Sphere 槽,如图中所示。

第 6 章 - 创建 Gaze 类
此类负责创建从主相机向前投影的 Raycast,以检测用户正在查看的对象。 在这种情况下, Raycast 需要确定用户是否正在查看场景中的 GazeButton 对象并触发行为。
若要创建此类,请:
转到之前创建的 Scripts 文件夹。
右键单击 “项目 ”面板中的“ 创建C# 脚本”。 将脚本命名为 Gaze。
双击新的 Gaze 脚本以使用 Visual Studio 2017 将其打开。
确保以下命名空间位于脚本的顶部,并删除任何其他命名空间:
using UnityEngine;然后在 Gaze 类中添加以下变量:
    /// <summary>
    /// Provides Singleton-like behaviour to this class.
    /// </summary>
    public static Gaze instance;

    /// <summary>
    /// Provides a reference to the object the user is currently looking at.
    /// </summary>
    public GameObject FocusedGameObject { get; private set; }

    /// <summary>
    /// Provides a reference to compare whether the user is still looking at
    /// the same object (and has not looked away).
    /// </summary>
    private GameObject oldFocusedObject = null;

    /// <summary>
    /// Max Ray Distance
    /// </summary>
    float gazeMaxDistance = 300;

    /// <summary>
    /// Provides whether an object has been successfully hit by the raycast.
    /// </summary>
    public bool Hit { get; private set; }
现在需要添加 Awake () 和 Start () 方法的代码。
    private void Awake()
    {
        // Set this class to behave similar to singleton
        instance = this;
    }

    void Start()
    {
        FocusedGameObject = null;
    }
在 Update () 方法中添加以下代码,以投影 Raycast 并检测目标命中情况:
    void Update()
    {
        // Set the old focused gameobject.
        oldFocusedObject = FocusedGameObject;
        RaycastHit hitInfo;

        // Initialise Raycasting.
        Hit = Physics.Raycast(Camera.main.transform.position, Camera.main.transform.forward, out hitInfo, gazeMaxDistance);

        // Check whether raycast has hit.
        if (Hit == true)
        {
            // Check whether the hit has a collider.
            if (hitInfo.collider != null)
            {
                // Set the focused object with what the user just looked at.
                FocusedGameObject = hitInfo.collider.gameObject;
            }
            else
            {
                // Object looked on is not valid, set focused gameobject to null.
                FocusedGameObject = null;
            }
        }
        else
        {
            // No object looked upon, set focused gameobject to null.
            FocusedGameObject = null;
        }

        // Check whether the previous focused object is this same
        // object (so to stop spamming of function).
        if (FocusedGameObject != oldFocusedObject)
        {
            // Compare whether the new Focused Object has the desired tag we set previously.
            if (FocusedGameObject.CompareTag("GazeButton"))
            {
                FocusedGameObject.SetActive(false);
                VideoController.instance.ChangeScene();
            }
        }
    }
在返回到Unity之前,请在 Visual Studio 中保存更改。
单击 “凝视” 类并将其从“脚本”文件夹拖动到 “层次结构 ”面板中的“主相机”对象。
第 7 章 - 设置两个Unity场景
本章的目的是设置两个场景,每个场景托管要流式传输的视频。 复制创建的场景以减少设置时间。 然后,编辑新场景,使 GazeButton 对象位于不同的位置,并且具有不同的外观,以显示如何在场景之间更改。
转到“将场景另存为...”>。此时会显示一个保存窗口。 单击“ 新建文件夹” 按钮。
将文件夹命名 为“场景”。
“ 保存场景 ”窗口已打开。 打开新创建的 Scenes 文件夹。
在 “文件名: 文本”字段中,键入 “VideoScene1”,然后按 “保存”。
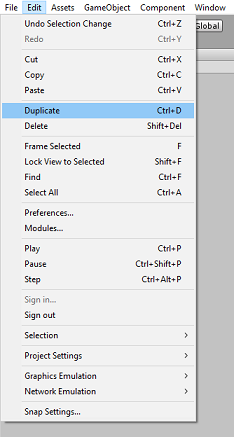
返回到Unity,打开 Scenes 文件夹,然后左键单击 VideoScene1 文件。 使用键盘,然后按 Ctrl + D 复制该场景
提示
还可以通过导航到“编辑重复项”>来执行“复制”命令。
Unity自动递增场景名称编号,但无论如何检查它,以确保它与以前插入的代码匹配。
应具有 VideoScene1 和 VideoScene2。
使用两个场景,转到“文件>生成设置”。 打开 “生成设置” 窗口后,将场景拖动到 “生成中的场景 ”部分。
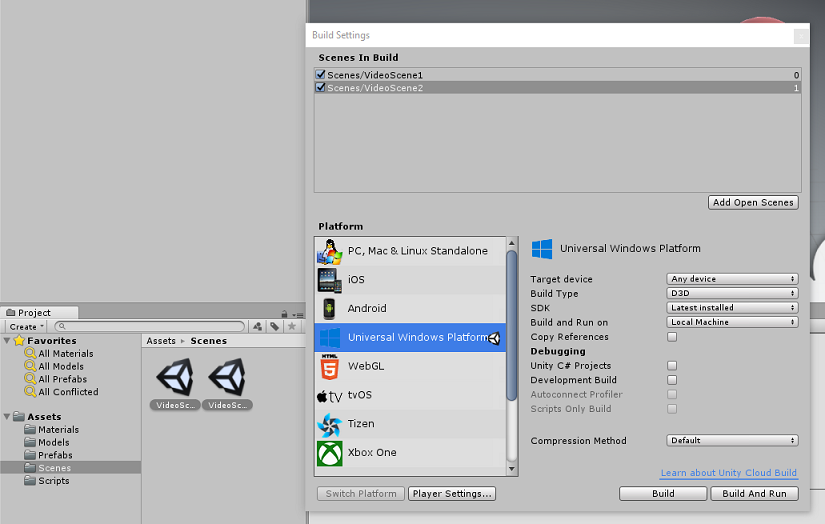
提示
通过按住 Ctrl 按钮,然后左键单击每个场景,最后拖动两个场景,可以从“场景”文件夹中选择这两个场景。
关闭 “生成设置” 窗口,然后双击“ VideoScene2”。
打开第二个场景后,单击 InsideOutSphere 的 GazeButton 子对象,并将其设置为“转换”,如下所示:
转换 - 位置
| X | Y | Z |
|---|---|---|
| 0 | 1.3 | 3.6 |
转换 - 旋转
| X | Y | Z |
|---|---|---|
| 0 | 0 | 0 |
转换 - 缩放
| X | Y | Z |
|---|---|---|
| 1 | 1 | 1 |
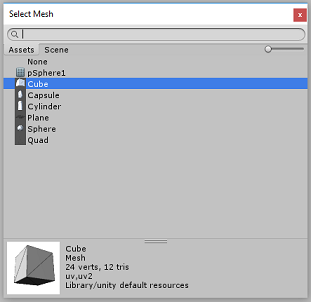
选中 “GazeButton” 子级后,查看 “检查器 ”和“ 网格筛选器”。 单击 “网格 引用”字段旁边的小目标:
此时将显示 “选择网格” 弹出窗口。 双击“资产”列表中的“多维数据集”网格。
网格筛选器会更新,现在为多维数据集。 现在,单击“Sphere 碰撞体”旁边的“齿轮”图标,然后单击“删除组件”,从此对象中删除碰撞体。
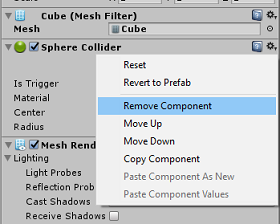
选中“GazeButton”后,单击检查器底部的“添加组件”按钮。 在搜索字段中,键入 框和 Box Collider 是一个选项,单击该选项可将 Box 碰撞体 添加到 GazeButton 对象。
GazeButton 现在已部分更新,外观不同,但是,现在会创建一个新的 Material,使其看起来与第一个场景中的对象不同,并且更易于识别为不同的对象。
导航到项目面板中的“材料”文件夹。 复制 ButtonMaterial Material (按键盘上的 Ctrl + D ,或左键单击 “材料”,然后从 “编辑 文件”菜单选项中选择“ 复制) ”。
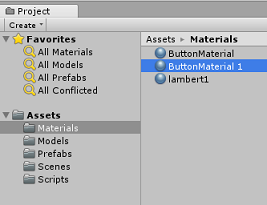
在此处选择名为 ButtonMaterial 1 的新 ButtonMaterial Material () ,然后在“检查器”中单击“反照”颜色窗口。 此时会显示一个弹出窗口,你可以在其中选择其他颜色 (选择你喜欢) ,然后关闭弹出窗口。 Material 是其自身的实例,与原始实例不同。
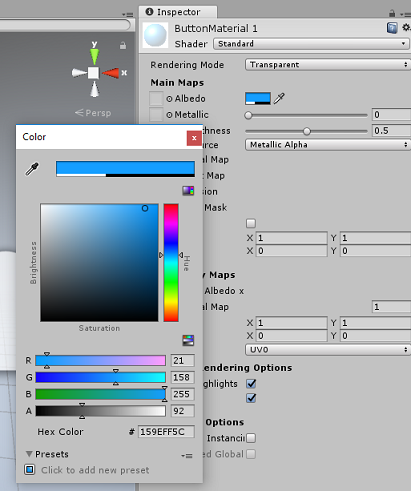
将新 材料 拖到 GazeButton 子级上,现在可更新其外观,以便与第一个场景按钮轻松区分。
此时,可以在生成 UWP 项目之前在编辑器中测试项目。
按编辑器中的“播放”按钮,然后戴上头戴显示设备。
查看两个 GazeButton 对象,在第一个和第二个视频之间切换。
第 8 章 - 生成 UWP 解决方案
确保编辑器没有错误后,即可开始生成。
若要生成::
单击“文件>保存”保存当前场景。
选中名为“Unity C# 项目”的框, (此选项允许在生成完成后编辑类) 。
转到 “文件 > 生成设置” ,然后单击“ 生成”。
系统会提示选择要在其中生成解决方案的文件夹。
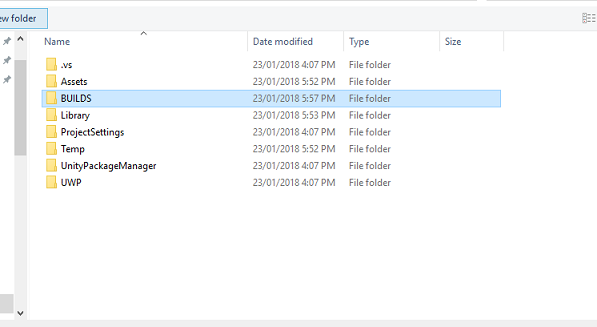
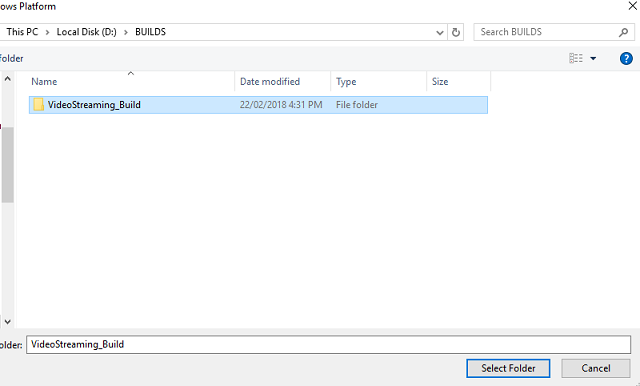
创建 BUILDS 文件夹,并在该文件夹中创建具有所选适当名称的另一个文件夹。
单击新文件夹,然后单击“ 选择文件夹”,以便选择该文件夹,以在该位置开始生成。
Unity生成 (可能需要一些时间) ,它将在生成位置打开一个文件资源管理器窗口。
第 9 章 - 在本地计算机上部署
生成完成后,生成位置会显示一个文件资源管理器窗口。 若要使用 Visual Studio 2017 打开解决方案,请打开命名并生成到的文件夹,然后双击该文件夹中的解决方案 (.sln) 文件。
剩下的唯一作是将应用部署到计算机 (或 本地计算机) 。
若要部署到本地计算机,请执行以下作:
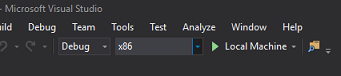
在 Visual Studio 2017 中,打开解决方案文件。
在 “解决方案平台”中,选择“ x86、本地计算机”。
在 “解决方案配置” 中,选择“ 调试”。
现在需要将任何包还原到解决方案。 右键单击 解决方案,然后单击 “还原解决方案的 NuGet 包...”
注意
Unity生成的包需要面向本地计算机引用。
转到 “生成”菜单 ,然后单击“ 部署解决方案 ”,将应用程序旁加载到计算机。 Visual Studio 首先生成,然后部署应用程序。
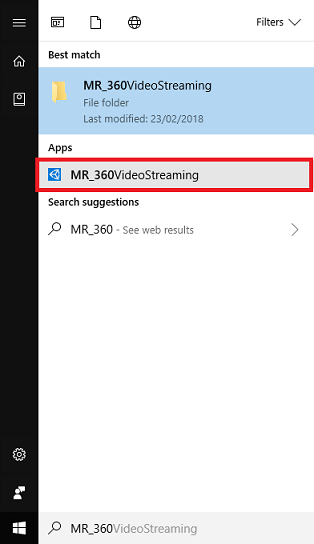
你的应用现在应显示在已安装的应用列表中,这些应用已准备好启动。
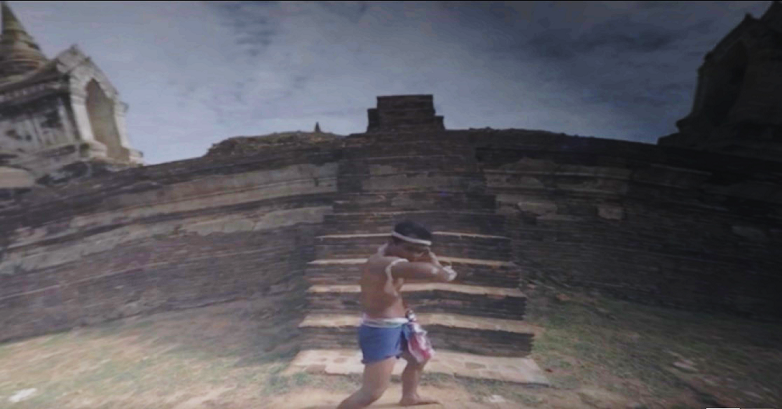
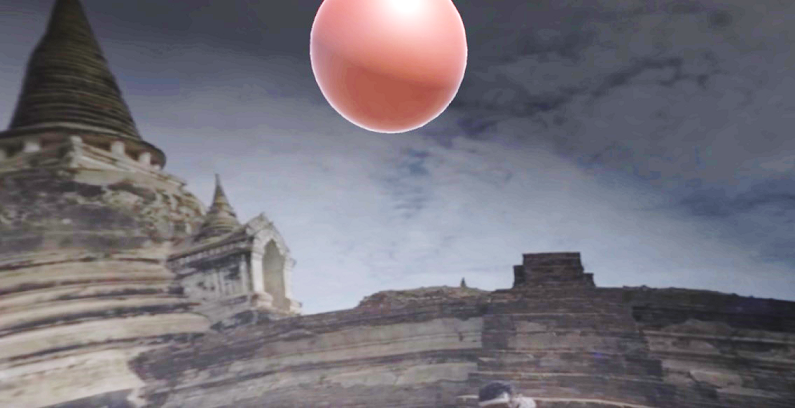
运行 混合现实 应用程序时,你将位于应用中使用的 InsideOutSphere 模型中。 此球体是视频流式传输到的位置,并提供针对这种视角拍摄的传入视频的 360 度视图。 视频可能需要几秒钟才能加载,因为应用受可用 Internet 速度限制,而视频将被提取、下载,然后流式传输到应用中。 准备就绪后,通过凝视红色球体来更改场景并打开第二个视频! 然后随意返回,使用第二个场景中的蓝色立方体!
已完成的 Azure 媒体服务应用程序
恭喜,你构建了一个混合现实应用,应用 Azure 媒体服务来流式传输 360 个视频。
奖励练习
练习 1
在本教程中,完全可以使用单个场景来更改视频。 使用应用程序进行试验,并将其转换为单个场景! 甚至向混合添加另一个视频。
练习 2
尝试使用 Azure 和 Unity,并尝试实现应用根据 Internet 连接强度自动选择不同文件大小的视频的功能。