DirectX 和 XAML 互操作
注意
本主题适用于通用 Windows 平台(UWP)游戏和应用,以及 Windows.UI.Xaml.Xxx 命名空间中的类型(而不是 Microsoft.UI.Xaml.Xxx)。
可以在通用 Windows 平台 (UWP) 游戏或应用中将可扩展应用程序标记语言 (XAML) 与 Microsoft DirectX 一起使用。 XAML 和 DirectX 的结合可让你生成与 DirectX 呈现的内容互操作的灵活用户界面框架;这对于图形密集型应用非常有用。 本主题介绍了使用 DirectX 的 UWP 应用的结构,并确定了在构建 UWP 应用以使用 DirectX 时要使用的重要类型。
如果你的应用主要侧重于 2D 呈现,可能需要使用 Win2D Windows 运行时库。 此库由 Microsoft 维护,并且基于核心 Direct2D 技术生成。 Win2D 大大简化了实现 2D 图形的使用模式,并包括对本文档中所述的某些技术的有用抽象。 有关更多详细信息,请参阅项目页。 本文档介绍有关选择 不使用 Win2D 的应用开发人员的指南。
注意
DirectX API 未定义为 Windows 运行时类型,但你可以使用 C++/WinRT 开发与 DirectX 互操作的 XAML UWP 应用。 如果将调用 DirectX 的代码分解到其自己的 C++/WinRT Windows 运行时组件 (WRC) 中,则可以在 UWP应用(甚至是 C# 组件)中使用该 WRC,然后结合 XAML 和 DirectX。
XAML 和 DirectX
DirectX 分别为 2D 和 3D 图形提供了两个强大的库:Direct2D 和 Direct3D。 尽管 XAML 提供了对基本 2D 基元和效果的支持,但许多建模和游戏应用需要更复杂的图形支持。 对于这些情况,你可以使用 Direct2D 和 Direct3D 呈现更复杂的图形,并使用 XAML 实现更传统的用户界面 (UI) 元素。
如果要实现自定义 XAML 和 DirectX 互操作,需要知道以下两个概念。
- 共享图面是由 XAML(可以使用 DirectX 间接绘入)使用 Windows::UI::Xaml::Media::ImageSource 类型定义的调整大小的显示区域。 对于共享图面,不对新内容显示在屏幕上的情形控制精确计时。 而将对共享图面的更新同步到 XAML 框架的更新。
- 交换链表示用于以最小延迟显示图形的缓冲区集合。 通常,交换链独立于 UI 线程以每秒 60 帧的速度进行更新。 但是,交换链会使用更多的内存和 CPU 资源来支持快速更新,并且相对来说难以使用,因为你必须管理多个线程。
考虑 DirectX 的用途。 您是否将其用来合成适合显示窗口维度的单一控件或对其进行动画处理? 它是否包含需要实时呈现和控制的输出,就像在游戏中一样? 如果是,你可能需要实现一个交换链。 否则,可以使用共享图面。
在确定希望使用 DirectX 的方式之后,即可使用这些 Windows 运行时类型之一将 DirectX 呈现合并到 UWP 应用中。
- 如果希望创作静态图像,或以事件驱动的间隔绘制复杂图像,可使用 Windows::UI::Xaml::Media::Imaging::SurfaceImageSource 绘制到共享图面。 此类型处理特定大小的 DirectX 绘图图面。 通常,在将图像或纹理撰写为位图时使用此类型,以便在文档或 UI 元素中显示。 它不适用于实时交互,例如高性能游戏。 这是因为 SurfaceImageSource 对象的更新会同步到 XAML 用户界面更新,而且这可能导致你提供给用户的视觉反馈出现延迟,例如起伏不定的帧速率或实时输入时能感觉到的迟缓响应。 不过,更新对动态控制或数据模拟而言已经足够快了。
- 如果图像比所提供的屏幕空间要大,并且可由用户平移或缩放,则使用 Windows::UI::Xaml::Media::Imaging::VirtualSurfaceImageSource。 此类型处理一个比屏幕更大的特定大小 DirectX 绘图图面。 与 SurfaceImageSource 一样,在动态撰写复杂图像或控件时,可以使用此功能。 而且,与 SurfaceImageSource 一样,它不适用于高性能游戏。 可以使用 VirtualSurfaceImageSource 的 XAML 元素的一些示例包括地图控件或大型图像密集的文档查看器。
- 如果你使用 DirectX 提供实时更新的图形,或者在必须以低延迟的定期间隔更新的情况下,可以使用 SwapChainPanel 类,这样你无需同步到 XAML 框架刷新计时器即可刷新图形。 使用 SwapChainPanel,你可以直接访问图形设备的交换链 (IDXGISwapChain1),并将 XAML 放在渲染目标之上。 SwapChainPanel 很适合需要基于 XAML 的用户界面的游戏和全屏 DirectX 应用。 若要使用此方法,你必须熟悉 DirectX,包括 Microsoft DirectX 图形基础结构 (DXGI)、Direct2D 和 Direct3D 技术。 有关详细信息,请参阅 Direct3D 11 编程指南。
SurfaceImageSource
SurfaceImageSource 为你提供要绘入的 DirectX 共享图面,然后将位编写到应用内容中。
提示
行间距 (DirectWrite) 和可下载字体 (DirectWrite) 示例应用程序演示了 SurfaceImageSource。
从很高的层次来说,这里是创建和更新 SurfaceImageSource 的过程。
- 创建 Direct 3D 设备、Direct 2D 设备和 Direct 2D 设备上下文。
- 创建一个 SurfaceImageSource ,并在其上设置 Direct 2D(或 Direct 3D)设备。
- 开始在 SurfaceImageSource 上绘图以获得 DXGI 表面。
- 使用 Direct2D(或 Direct3D)绘制到 DXGI 表面。
- 完成后在 SurfaceImageSource 上结束绘图。
- 在 XAML 图像或 ImageBrush 上设置 SurfaceImageSource,以便在 XAML UI 中显示它。
下面通过源代码示例更深入地介绍这些步骤。
你可以通过在 Microsoft Visual Studio 中创建一个新项目来遵循下面显示和描述的代码。 创建一个空白应用 (C++/WinRT) 项目。 面向 Windows SDK 的最新正式发布(非预览)版本。
打开
pch.h,并在已经存在的内容下方添加以下内容。// pch.h ... #include <d3d11_4.h> #include <d2d1_1.h> #include <windows.ui.xaml.media.dxinterop.h> #include <winrt/Windows.UI.Xaml.Media.Imaging.h>将下面显示的
using指令添加到MainPage.cpp的顶部,在已经存在的指令下方。 同样在MainPage.cpp中,将 MainPage::ClickHandler 的现有实现替换为如下所示的清单。 此代码将创建 Direct 3D 设备、Direct 2D 设备和 Direct 2D 设备上下文。 为此,它将调用 D3D11CreateDevice、D2D1CreateDevice 和 ID2D1Device::CreateDeviceContext。// MainPage.cpp | paste this below the existing using directives using namespace Windows::UI::Xaml::Media::Imaging;// MainPage.cpp | paste this to replace the existing MainPage::ClickHandler void MainPage::ClickHandler(IInspectable const&, RoutedEventArgs const&) { myButton().Content(box_value(L"Clicked")); uint32_t creationFlags = D3D11_CREATE_DEVICE_BGRA_SUPPORT; D3D_FEATURE_LEVEL featureLevels[] = { D3D_FEATURE_LEVEL_11_1, D3D_FEATURE_LEVEL_11_0, D3D_FEATURE_LEVEL_10_1, D3D_FEATURE_LEVEL_10_0, D3D_FEATURE_LEVEL_9_3, D3D_FEATURE_LEVEL_9_2, D3D_FEATURE_LEVEL_9_1 }; // Create the Direct3D device. winrt::com_ptr<::ID3D11Device> d3dDevice; D3D_FEATURE_LEVEL supportedFeatureLevel; winrt::check_hresult(::D3D11CreateDevice( nullptr, D3D_DRIVER_TYPE_HARDWARE, 0, creationFlags, featureLevels, ARRAYSIZE(featureLevels), D3D11_SDK_VERSION, d3dDevice.put(), &supportedFeatureLevel, nullptr) ); // Get the DXGI device. winrt::com_ptr<::IDXGIDevice> dxgiDevice{ d3dDevice.as<::IDXGIDevice>() }; // Create the Direct2D device and a corresponding context. winrt::com_ptr<::ID2D1Device> d2dDevice; ::D2D1CreateDevice(dxgiDevice.get(), nullptr, d2dDevice.put()); winrt::com_ptr<::ID2D1DeviceContext> d2dDeviceContext; winrt::check_hresult( d2dDevice->CreateDeviceContext( D2D1_DEVICE_CONTEXT_OPTIONS_NONE, d2dDeviceContext.put() ) ); }接下来,添加代码以创建 SurfaceImageSource,并通过调用 ISurfaceImageSourceNativeWithD2D::SetDevice 在其上设置 Direct 2D(或 Direct 3D)设备。
注意
如果将从后台线程绘制到 SurfaceImageSource,则你也需要确保 DXGI 设备已启用多线程访问(如以下代码中所示)。 出于性能原因,只有在从后台线程绘制时才应该这样做。
通过将高度和宽度 传递给 SurfaceImageSource 构造函数来定义共享图面的大小。 还可以指示图面是否需要 alpha (不透明度) 支持。
要设置设备并运行绘图操作,我们需要一个指向 ISurfaceImageSourceNativeWithD2D 的指针。 要获得一个这样的指针,请查询 SurfaceImageSource 对象以获取其底层 ISurfaceImageSourceNativeWithD2D 接口。
// MainPage.cpp | paste this at the end of MainPage::ClickHandler
SurfaceImageSource surfaceImageSource(500, 500);

winrt::com_ptr<::ISurfaceImageSourceNativeWithD2D> sisNativeWithD2D{
    surfaceImageSource.as<::ISurfaceImageSourceNativeWithD2D>() };

// Associate the Direct2D device with the SurfaceImageSource.
sisNativeWithD2D->SetDevice(d2dDevice.get());

// To enable multi-threaded access (optional)
winrt::com_ptr<::ID3D11Multithread> d3dMultiThread{
    d3dDevice.as<::ID3D11Multithread>() };
d3dMultiThread->SetMultithreadProtected(true);
调用 ISurfaceImageSourceNativeWithD2D::BeginDraw 以检索 DXGI 表面(IDXGISurface 接口)。 如果你启用了多线程访问,则可以从后台线程调用 ISurfaceImageSourceNativeWithD2D::BeginDraw(以及后面的绘图命令)。 在此步骤中,你还将从 DXGI 表面创建位图,并将其设置到 Direct 2D 设备上下文中。
在 offset 参数中,ISurfaceImageSourceNativeWithD2D::BeginDraw 返回更新后的目标矩形的点偏移量(一个 x,y 值)。 可以使用此偏移来确定使用 ID2D1DeviceContext 绘制更新内容的位置。
// MainPage.cpp | paste this at the end of MainPage::ClickHandler
winrt::com_ptr<::IDXGISurface> dxgiSurface;

RECT updateRect{ 0, 0, 500, 500 };
POINT offset{ 0, 0 };
HRESULT beginDrawHR = sisNativeWithD2D->BeginDraw(
    updateRect,
    __uuidof(::IDXGISurface),
    dxgiSurface.put_void(),
    &offset);

// Create render target.
winrt::com_ptr<::ID2D1Bitmap1> bitmap;
winrt::check_hresult(
    d2dDeviceContext->CreateBitmapFromDxgiSurface(
        dxgiSurface.get(),
        nullptr,
        bitmap.put()
    )
);

// Set context's render target.
d2dDeviceContext->SetTarget(bitmap.get());
使用 Direct 2D 设备上下文来绘制 SurfaceImageSource 的内容。 仅绘制 updateRect 参数中上一步中指定的更新区域。
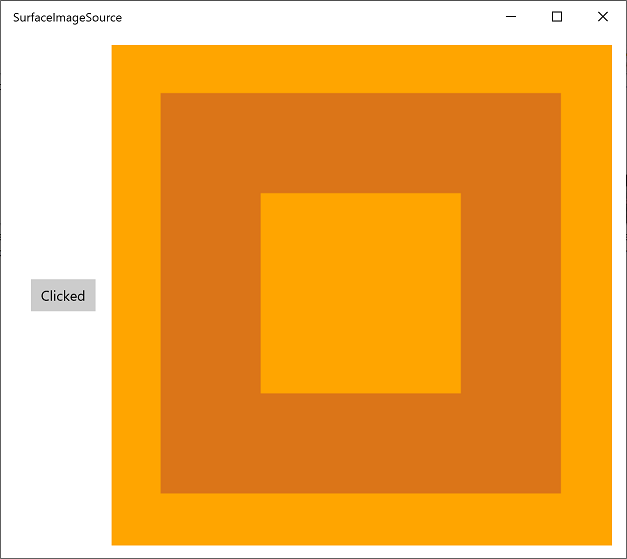
// MainPage.cpp | paste this at the end of MainPage::ClickHandler
if (beginDrawHR == DXGI_ERROR_DEVICE_REMOVED ||
    beginDrawHR == DXGI_ERROR_DEVICE_RESET ||
    beginDrawHR == D2DERR_RECREATE_TARGET)
{
    // The Direct3D and Direct2D devices were lost and need to be re-created.
    // Recovery steps are:
    // 1) Re-create the Direct3D and Direct2D devices
    // 2) Call ISurfaceImageSourceNativeWithD2D::SetDevice with the new Direct2D
    //    device
    // 3) Redraw the contents of the SurfaceImageSource
}
else if (beginDrawHR == E_SURFACE_CONTENTS_LOST)
{
    // The devices were not lost but the entire contents of the surface
    // were. Recovery steps are:
    // 1) Call ISurfaceImageSourceNativeWithD2D::SetDevice with the Direct2D
    //    device again
    // 2) Redraw the entire contents of the SurfaceImageSource
}
else
{
    // Draw using Direct2D context.
    d2dDeviceContext->BeginDraw();

    d2dDeviceContext->Clear(D2D1::ColorF(D2D1::ColorF::Orange));

    winrt::com_ptr<::ID2D1SolidColorBrush> brush;
    winrt::check_hresult(d2dDeviceContext->CreateSolidColorBrush(
        D2D1::ColorF(D2D1::ColorF::Chocolate),
        D2D1::BrushProperties(0.8f),
        brush.put()));

    D2D1_SIZE_F const size{ 500, 500 };
    D2D1_RECT_F const rect{ 100.0f, 100.0f, size.width - 100.0f, size.height - 100.0f };
    d2dDeviceContext->DrawRectangle(rect, brush.get(), 100.0f);

    d2dDeviceContext->EndDraw();
}
调用 ISurfaceImageSourceNativeWithD2D::EndDraw 以完成位图(你必须仅从 UI 线程调用 ISurfaceImageSourceNativeWithD2D::EndDraw)。 然后在 XAML 图像(或 ImageBrush)上设置 SurfaceImageSource,以便在 XAML UI 中显示它。
// MainPage.cpp | paste this at the end of MainPage::ClickHandler
sisNativeWithD2D->EndDraw();

// The SurfaceImageSource object's underlying
// ISurfaceImageSourceNativeWithD2D object will contain the completed bitmap.

theImage().Source(surfaceImageSource);
注意
当前调用 SurfaceImageSource::SetSource(从 IBitmapSource::SetSource 继承)将引发异常。 不要从 SurfaceImageSource 对象调用。
注意
当 Window 隐藏或处于不活动状态时,请必须避免绘制到 SurfaceImageSource,否则,ISurfaceImageSourceNativeWithD2D API 将会失败。 处理围绕窗口可见性和应用程序暂停的事件以实现这一目标。
最后,在
MainPage.xaml中现有的 XAML 标记中添加以下 Image 元素。<!-- MainPage.xaml --> ... <Image x:Name="theImage" Width="500" Height="500" /> ...现在可以生成并运行应用了。 单击按钮可以查看 Image 中显示的 SurfaceImageSource 的内容。
VirtualSurfaceImageSource
VirtualSurfaceImageSource 扩展了 SurfaceImageSource,它适用于内容可能太大而无法一次全部显示在屏幕上(和/或太大而无法作为单个纹理放入视频内存)的场景,因此必须对内容进行虚拟化以便以最佳方式渲染。 例如,地图应用程序或大型文档画布。
提示
复杂墨迹示例应用程序演示了 VirtualSurfaceImageSource。
VirtualSurfaceImageSource 不同于 SurfaceImageSource,因为它使用了一个回调 IVirtualSurfaceImageSourceCallbacksNative::UpdatesNeeded,你可以实现该回调,当图面区域在屏幕上可见时更新该区域。 你不需要清除隐藏的区域,因为 XAML 框架会负责此事。
在处理 VirtualSurfaceImageSource 之前,最好是先熟悉 SurfaceImageSource(参见上面的 SurfaceImageSource 部分)。 但从很高的层次来说,这里是创建和更新 VirtualSurfaceImageSource 的过程。
- 实现 IVirtualSurfaceImageSourceCallbackNative 接口。
- 创建 Direct 3D 设备、Direct 2D 设备和 Direct 2D 设备上下文。
- 创建一个 VirtualSurfaceImageSource,并在其上设置 Direct 2D(或 Direct 3D)设备。
- 在 VirtualSurfaceImageSource 上调用 RegisterForUpdatesNeeded。
- 在你的 UpdatesNeeded 回调中,调用 GetUpdateRectCount 和 GetUpdateRects。
- 渲染更新矩形(使用 BeginDraw/EndDraw 就像 SurfaceImageSource 一样)。
- 在 XAML 图像或 ImageBrush 上设置 SurfaceImageSource,以便在 XAML UI 中显示它。
下面通过源代码示例更深入地介绍这些步骤。
你可以通过在 Microsoft Visual Studio 中创建一个新项目来遵循下面显示和描述的代码。 创建一个空白应用 (C++/WinRT) 项目,并将其命名为 VSISDemo(如果要在下面给出的代码清单中复制粘贴,请务必给项目起这个名称)。 面向 Windows SDK 的最新正式发布(非预览)版本。
打开
pch.h,并在已经存在的内容下方添加以下内容。// pch.h ... #include <d3d11_4.h> #include <d2d1_1.h> #include <windows.ui.xaml.media.dxinterop.h> #include <winrt/Windows.UI.Xaml.Media.Imaging.h>在此步骤中,你将提供 IVirtualSurfaceUpdatesCallbackNative 接口的实现。 向项目中添加一个新的头文件 (.h) 项,并将其命名为 CallbackImplementation.h。 将该文件的内容替换为下面的列表。 列表后面解释了代码。
#include "pch.h"

namespace winrt::VSISDemo::implementation
{
    struct CallbackImplementation : winrt::implements<CallbackImplementation, ::IVirtualSurfaceUpdatesCallbackNative>
    {
        CallbackImplementation(
            winrt::com_ptr<::ISurfaceImageSourceNativeWithD2D> sisNativeWithD2D,
            winrt::com_ptr<::IVirtualSurfaceImageSourceNative> const& vsisNative,
            winrt::com_ptr<::ID2D1DeviceContext> const& d2dDeviceContext) :
            m_sisNativeWithD2D(sisNativeWithD2D),
            m_vsisNative(vsisNative),
            m_d2dDeviceContext(d2dDeviceContext)
        {}

        IFACEMETHOD(UpdatesNeeded)()
        {
            HRESULT hr = S_OK;

            ULONG drawingBoundsCount = 0;
            m_vsisNative->GetUpdateRectCount(&drawingBoundsCount);

            std::unique_ptr<RECT[]> drawingBounds(
                new RECT[drawingBoundsCount]);

            m_vsisNative->GetUpdateRects(
                drawingBounds.get(),
                drawingBoundsCount);

            for (ULONG i = 0; i < drawingBoundsCount; ++i)
            {
                winrt::com_ptr<::IDXGISurface> dxgiSurface;

                POINT offset{ 0, 0 };
                HRESULT beginDrawHR = m_sisNativeWithD2D->BeginDraw(
                    drawingBounds[i],
                    __uuidof(::IDXGISurface),
                    dxgiSurface.put_void(),
                    &offset);

                // Create render target.
                winrt::com_ptr<::ID2D1Bitmap1> bitmap;
                winrt::check_hresult(
                    m_d2dDeviceContext->CreateBitmapFromDxgiSurface(
                        dxgiSurface.get(),
                        nullptr,
                        bitmap.put()
                    )
                );

                // Set context's render target.
                m_d2dDeviceContext->SetTarget(bitmap.get());

                if (beginDrawHR == DXGI_ERROR_DEVICE_REMOVED ||
                    beginDrawHR == DXGI_ERROR_DEVICE_RESET ||
                    beginDrawHR == D2DERR_RECREATE_TARGET)
                {
                    // The Direct3D and Direct2D devices were lost and need to be re-created.
                    // Recovery steps are:
                    // 1) Re-create the Direct3D and Direct2D devices
                    // 2) Call ISurfaceImageSourceNativeWithD2D::SetDevice with the new Direct2D
                    //    device
                    // 3) Redraw the contents of the SurfaceImageSource
                }
                else if (beginDrawHR == E_SURFACE_CONTENTS_LOST)
                {
                    // The devices were not lost but the entire contents of the surface
                    // were. Recovery steps are:
                    // 1) Call ISurfaceImageSourceNativeWithD2D::SetDevice with the Direct2D
                    //    device again
                    // 2) Redraw the entire contents of the SurfaceImageSource
                }
                else
                {
                    // Draw using Direct2D context.
                    m_d2dDeviceContext->BeginDraw();

                    m_d2dDeviceContext->Clear(D2D1::ColorF(D2D1::ColorF::Orange));

                    winrt::com_ptr<::ID2D1SolidColorBrush> brush;
                    winrt::check_hresult(m_d2dDeviceContext->CreateSolidColorBrush(
                        D2D1::ColorF(D2D1::ColorF::Chocolate),
                        D2D1::BrushProperties(0.8f),
                        brush.put()));

                    D2D1_SIZE_F const size{ drawingBounds[i].right - drawingBounds[i].left, drawingBounds[i].bottom - drawingBounds[i].top };
                    D2D1_RECT_F const rect{ 100.0f, 100.0f, size.width - 100.0f, size.height - 100.0f };
                    m_d2dDeviceContext->DrawRectangle(rect, brush.get(), 100.0f);

                    m_d2dDeviceContext->EndDraw();
                }

                m_sisNativeWithD2D->EndDraw();
            }

            return hr;
        }

    private:
        winrt::com_ptr<::ISurfaceImageSourceNativeWithD2D> m_sisNativeWithD2D{ nullptr };
        winrt::com_ptr<::IVirtualSurfaceImageSourceNative> m_vsisNative{ nullptr };
        winrt::com_ptr<::ID2D1DeviceContext> m_d2dDeviceContext{ nullptr };
    };
}
每当需要更新 VirtualSurfaceImageSource 的某个区域时,框架都会调用你的 IVirtualSurfaceUpdatesCallbackNative::UpdatesNeeded 实现(如上所示)。
在两个时刻可发生此情况:当框架确定该区域需要绘制时(例如,当用户平移或缩放图面的视图时),或者在应用在该区域上调用 IVirtualSurfaceImageSourceNative::Invalidate 时。
在 IVirtualSurfaceImageSourceNative::UpdatesNeeded 的实现中,使用 IVirtualSurfaceImageSourceNative::GetUpdateRectCount 和 IVirtualSurfaceImageSourceNative::GetUpdateRects 方法确定必须绘制图面的哪些区域。
对于必须更新的每个区域,将特定内容绘制到该区域,但是将你的图形限制在有限的区域以提高性能。 调用 ISurfaceImageSourceNativeWithD2D 方法的细节与 SurfaceImageSource 相同(请参阅上面的 SurfaceImageSource 部分)。
注意
当 Window 隐藏或处于不活动状态时,请必须避免绘制到 VirtualSurfaceImageSource,否则,ISurfaceImageSourceNativeWithD2D API 将会失败。 处理围绕窗口可见性和应用程序暂停的事件以实现这一目标。
在 MainPage 类中,我们将添加一个 CallbackImplementation 类型的成员。 我们还会创建 Direct 3D 设备、Direct 2D 设备和 Direct 2D 设备上下文。 为此,我们将调用 D3D11CreateDevice、D2D1CreateDevice 和 ID2D1Device::CreateDeviceContext。
将
MainPage.idl、MainPage.h和MainPage.cpp的内容替换为以下列表的内容。// MainPage.idl namespace VSISDemo { [default_interface] runtimeclass MainPage : Windows.UI.Xaml.Controls.Page { MainPage(); } }// MainPage.h #pragma once #include "MainPage.g.h" #include "CallbackImplementation.h" namespace winrt::VSISDemo::implementation { struct MainPage : MainPageT<MainPage> { MainPage(); void ClickHandler(Windows::Foundation::IInspectable const& sender, Windows::UI::Xaml::RoutedEventArgs const& args); private: winrt::com_ptr<::IVirtualSurfaceUpdatesCallbackNative> m_cbi{ nullptr }; }; } namespace winrt::VSISDemo::factory_implementation { struct MainPage : MainPageT<MainPage, implementation::MainPage> { }; }// MainPage.cpp #include "pch.h" #include "MainPage.h" #include "MainPage.g.cpp" using namespace winrt; using namespace Windows::UI::Xaml; using namespace Windows::UI::Xaml::Media::Imaging; namespace winrt::VSISDemo::implementation { MainPage::MainPage() { InitializeComponent(); } void MainPage::ClickHandler(IInspectable const&, RoutedEventArgs const&) { myButton().Content(box_value(L"Clicked")); uint32_t creationFlags = D3D11_CREATE_DEVICE_BGRA_SUPPORT; D3D_FEATURE_LEVEL featureLevels[] = { D3D_FEATURE_LEVEL_11_1, D3D_FEATURE_LEVEL_11_0, D3D_FEATURE_LEVEL_10_1, D3D_FEATURE_LEVEL_10_0, D3D_FEATURE_LEVEL_9_3, D3D_FEATURE_LEVEL_9_2, D3D_FEATURE_LEVEL_9_1 }; // Create the Direct3D device. winrt::com_ptr<::ID3D11Device> d3dDevice; D3D_FEATURE_LEVEL supportedFeatureLevel; winrt::check_hresult(::D3D11CreateDevice( nullptr, D3D_DRIVER_TYPE_HARDWARE, 0, creationFlags, featureLevels, ARRAYSIZE(featureLevels), D3D11_SDK_VERSION, d3dDevice.put(), &supportedFeatureLevel, nullptr) ); // Get the Direct3D device. winrt::com_ptr<::IDXGIDevice> dxgiDevice{ d3dDevice.as<::IDXGIDevice>() }; // Create the Direct2D device and a corresponding context. winrt::com_ptr<::ID2D1Device> d2dDevice; ::D2D1CreateDevice(dxgiDevice.get(), nullptr, d2dDevice.put()); winrt::com_ptr<::ID2D1DeviceContext> d2dDeviceContext; winrt::check_hresult( d2dDevice->CreateDeviceContext( D2D1_DEVICE_CONTEXT_OPTIONS_NONE, d2dDeviceContext.put() ) ); } }接下来,添加代码以创建所需的 VirtualSurfaceImageSource,并通过调用 ISurfaceImageSourceNativeWithD2D::SetDevice 在其上设置 Direct 2D(或 Direct 3D)设备。
注意
如果将从后台线程绘制到 VirtualSurfaceImageSource,则你也需要确保 DXGI 设备已启用多线程访问(如以下代码中所示)。 出于性能原因,只有在从后台线程绘制时才应该这样做。
要设置设备并运行绘图操作,我们需要一个指向 ISurfaceImageSourceNativeWithD2D 的指针。 要获得一个这样的指针,请查询 VirtualSurfaceImageSource 对象以获取其底层 ISurfaceImageSourceNativeWithD2D 接口。
还要查询 IVirtualSurfaceImageSourceNative,并调用 IVirtualSurfaceImageSourceNative::RegisterForUpdatesNeeded ,提供你的 IVirtualSurfaceUpdatesCallbackNative 实现。
然后在 XAML 图像(或 ImageBrush)上设置 SurfaceImageSource,以便在 XAML UI 中显示它。
// MainPage.cpp | paste this at the end of MainPage::ClickHandler
VirtualSurfaceImageSource virtualSurfaceImageSource(2000, 2000);

winrt::com_ptr<::ISurfaceImageSourceNativeWithD2D> sisNativeWithD2D{
    virtualSurfaceImageSource.as<::ISurfaceImageSourceNativeWithD2D>() };

// Associate the Direct2D device with the SurfaceImageSource.
sisNativeWithD2D->SetDevice(d2dDevice.get());

// To enable multi-threaded access (optional)
winrt::com_ptr<::ID3D11Multithread> d3dMultiThread{
    d3dDevice.as<::ID3D11Multithread>() };
d3dMultiThread->SetMultithreadProtected(true);

winrt::com_ptr<::IVirtualSurfaceImageSourceNative> vsisNative{
    virtualSurfaceImageSource.as<::IVirtualSurfaceImageSourceNative>() };

m_cbi = winrt::make<CallbackImplementation>(sisNativeWithD2D, vsisNative, d2dDeviceContext);
vsisNative->RegisterForUpdatesNeeded(m_cbi.as<::IVirtualSurfaceUpdatesCallbackNative>().get());

// The SurfaceImageSource object's underlying
// ISurfaceImageSourceNativeWithD2D object will contain the completed bitmap.

theImage().Source(virtualSurfaceImageSource);
最后,在
MainPage.xaml中现有的 XAML 标记中添加以下 Image 元素。<!-- MainPage.xaml --> ... <Image x:Name="theImage" Width="500" Height="500" /> ...现在可以生成并运行应用了。 单击按钮可以查看 Image 中显示的 VirtualSurfaceImageSource 的内容。
SwapChainPanel 和游戏
SwapChainPanel 是用于支持高性能图形和游戏的 Windows 运行时类型,你可以在其中直接管理交换链。 在这种情况下,你将创建自己的 DirectX 交换链并管理呈现的内容。 SwapChainPanel 的另一个功能是你可以在其前面覆盖其他 XAML 元素。
提示
以下示例应用程序演示了 SurfaceImageSource:Direct2D 高级彩色图像渲染、Direct2D 照片调整、Direct2D SVG 图像渲染、低延迟输入、DirectX 和 XAML 游戏以及 XAML SwapChainPanel DirectX 互操作 (Windows 8.1)。
若要确保良好的性能,SwapChainPanel 类型有一些限制。
- 每个应用的 SwapChainPanel 实例不超过 4 个。
- 你应该将 DirectX 交换链的高度和宽度(在 DXGI_SWAP_CHAIN_DESC1 中)设置为交换链元素的当前尺寸。 如果不这么做,将缩放显示内容以适合它(使用 DXGI_SCALING_STRETCH)。
- 必须将 DirectX 交换链的缩放模式(在 DXGI_SWAP_CHAIN_DESC1 中)设置为 DXGI_SCALING_STRETCH。
- 必须通过调用 IDXGIFactory2::CreateSwapChainForComposition 来创建 DirectX 交换链。
你基于应用的需求来更新 SwapChainPanel,而不是与 XAML 框架的更新同步。 如果需要将 SwapChainPanel 的更新与 XAML 框架的更新同步,可以注册 Windows::UI::Xaml::Media::CompositionTarget::Rendering 事件。 否则,如果尝试从更新 SwapChainPanel 的不同线程更新 XAML 元素,则必须考虑任何跨线程问题。
如果你需要接收 SwapChainPanel 的低延迟指针输入,请使用 SwapChainPanel::CreateCoreIndependentInputSource。 此方法将返回 CoreIndependentInputSource 对象,该对象可用于在后台线程上以最小延迟接收输入事件。 请注意,在调用此方法后,将不会对 SwapChainPanel 引发正常 XAML 指针输入事件,因为所有输入都将重定向到后台线程。
下面是创建和更新 SwapChainPanel 对象的过程。
你可以通过在 Microsoft Visual Studio 中创建一个新项目来遵循下面显示和描述的代码。 创建一个空白应用 (C++/WinRT) 项目,并将其命名为 SCPDemo(如果要在下面给出的代码清单中复制粘贴,请务必给项目起这个名称)。 面向 Windows SDK 的最新正式发布(非预览)版本。
打开
pch.h,并在已经存在的内容下方添加以下内容。// pch.h ... #include <d3d11_4.h> #include <d2d1_1.h> #include <windows.ui.xaml.media.dxinterop.h>在 MainPage 类中,我们将首先创建一个 Direct 3D 设备、一个 Direct 2D 设备和一个 Direct 2D 设备上下文。 为此,我们将调用 D3D11CreateDevice、D2D1CreateDevice 和 ID2D1Device::CreateDeviceContext。
将
MainPage.idl、MainPage.h和MainPage.cpp的内容替换为以下列表的内容。// MainPage.idl namespace SCPDemo { [default_interface] runtimeclass MainPage : Windows.UI.Xaml.Controls.Page { MainPage(); } }// MainPage.h #pragma once #include "MainPage.g.h" namespace winrt::SCPDemo::implementation { struct MainPage : MainPageT<MainPage> { MainPage(); void ClickHandler(Windows::Foundation::IInspectable const& sender, Windows::UI::Xaml::RoutedEventArgs const& args); }; } namespace winrt::SCPDemo::factory_implementation { struct MainPage : MainPageT<MainPage, implementation::MainPage> { }; }// MainPage.cpp #include "pch.h" #include "MainPage.h" #include "MainPage.g.cpp" using namespace winrt; using namespace Windows::UI::Xaml; namespace winrt::SCPDemo::implementation { MainPage::MainPage() { InitializeComponent(); } void MainPage::ClickHandler(IInspectable const&, RoutedEventArgs const&) { myButton().Content(box_value(L"Clicked")); uint32_t creationFlags = D3D11_CREATE_DEVICE_BGRA_SUPPORT; D3D_FEATURE_LEVEL featureLevels[] = { D3D_FEATURE_LEVEL_11_1, D3D_FEATURE_LEVEL_11_0, D3D_FEATURE_LEVEL_10_1, D3D_FEATURE_LEVEL_10_0, D3D_FEATURE_LEVEL_9_3, D3D_FEATURE_LEVEL_9_2, D3D_FEATURE_LEVEL_9_1 }; // Create the Direct3D device. winrt::com_ptr<::ID3D11Device> d3dDevice; D3D_FEATURE_LEVEL supportedFeatureLevel; winrt::check_hresult(::D3D11CreateDevice( nullptr, D3D_DRIVER_TYPE_HARDWARE, 0, creationFlags, featureLevels, ARRAYSIZE(featureLevels), D3D11_SDK_VERSION, d3dDevice.put(), &supportedFeatureLevel, nullptr) ); // Get the Direct3D device. winrt::com_ptr<::IDXGIDevice> dxgiDevice{ d3dDevice.as<::IDXGIDevice>() }; // Create the Direct2D device and a corresponding context. winrt::com_ptr<::ID2D1Device> d2dDevice; ::D2D1CreateDevice(dxgiDevice.get(), nullptr, d2dDevice.put()); winrt::com_ptr<::ID2D1DeviceContext> d2dDeviceContext; winrt::check_hresult( d2dDevice->CreateDeviceContext( D2D1_DEVICE_CONTEXT_OPTIONS_NONE, d2dDeviceContext.put() ) ); } }将 XAML 标记包装在 SwapChainPanel 元素中,并带有
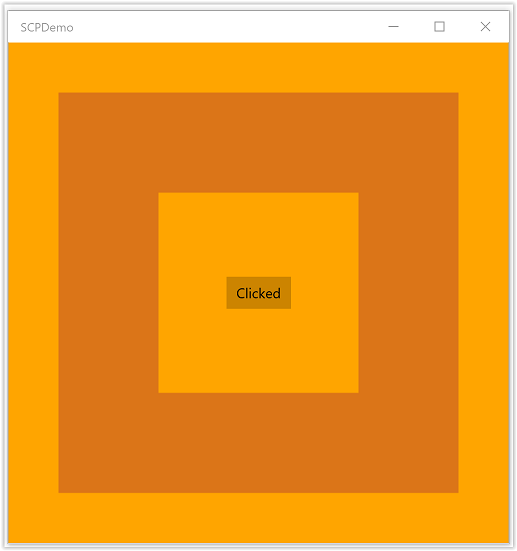
x:Name。 包装的 XAML 元素将呈现在 SwapChainPanel 的前面。<!-- MainPage.xaml --> <SwapChainPanel x:Name="swapChainPanel"> <StackPanel Orientation="Horizontal" HorizontalAlignment="Center" VerticalAlignment="Center"> <Button x:Name="myButton" Click="ClickHandler">Click Me</Button> </StackPanel> </SwapChainPanel>然后,你可以通过具有相同名称的访问器函数访问该 SwapChainPanel 对象,正如我们将看到的。
接下来,调用 IDXGIFactory2::CreateSwapChainForComposition 来创建交换链。
// MainPage.cpp | paste this at the end of MainPage::ClickHandler
// Get the DXGI adapter.
winrt::com_ptr< ::IDXGIAdapter > dxgiAdapter;
dxgiDevice->GetAdapter(dxgiAdapter.put());

// Get the DXGI factory.
winrt::com_ptr< ::IDXGIFactory2 > dxgiFactory;
dxgiFactory.capture(dxgiAdapter, &IDXGIAdapter::GetParent);

DXGI_SWAP_CHAIN_DESC1 swapChainDesc { 0 };
swapChainDesc.Width = 500;
swapChainDesc.Height = 500;
swapChainDesc.Format = DXGI_FORMAT_B8G8R8A8_UNORM; // This is the most common swapchain format.
swapChainDesc.Stereo = false;
swapChainDesc.SampleDesc.Count = 1; // Don't use multi-sampling.
swapChainDesc.SampleDesc.Quality = 0;
swapChainDesc.BufferUsage = DXGI_USAGE_RENDER_TARGET_OUTPUT;
swapChainDesc.BufferCount = 2;
swapChainDesc.Scaling = DXGI_SCALING_STRETCH;
swapChainDesc.SwapEffect = DXGI_SWAP_EFFECT_FLIP_SEQUENTIAL; // We recommend using this swap effect for all applications.
swapChainDesc.Flags = 0;

// Create a swap chain by calling IDXGIFactory2::CreateSwapChainForComposition.
winrt::com_ptr< ::IDXGISwapChain1 > swapChain;
dxgiFactory->CreateSwapChainForComposition(
    d3dDevice.get(),
    &swapChainDesc,
    nullptr,
    swapChain.put());
从你命名为 swapChainPanel 的 SwapChainPanel 中获取 ISwapChainPanelNative。 调用 ISwapChainPanelNative::SetSwapChain 在 SwapChainPanel 上设置交换链。
// MainPage.cpp | paste this at the end of MainPage::ClickHandler
// Get native interface for SwapChainPanel
auto panelNative{ swapChainPanel().as<ISwapChainPanelNative>() };

winrt::check_hresult(
    panelNative->SetSwapChain(swapChain.get())
);
最后,绘制到 DirectX 交换链,然后提供它来显示内容。
// Create a Direct2D target bitmap associated with the
// swap chain back buffer, and set it as the current target.
D2D1_BITMAP_PROPERTIES1 bitmapProperties =
    D2D1::BitmapProperties1(
        D2D1_BITMAP_OPTIONS_TARGET | D2D1_BITMAP_OPTIONS_CANNOT_DRAW,
        D2D1::PixelFormat(DXGI_FORMAT_B8G8R8A8_UNORM, D2D1_ALPHA_MODE_PREMULTIPLIED),
        96.f,
        96.f
    );

winrt::com_ptr<::IDXGISurface> dxgiBackBuffer;
swapChain->GetBuffer(0, __uuidof(dxgiBackBuffer), dxgiBackBuffer.put_void());

winrt::com_ptr< ::ID2D1Bitmap1 > targetBitmap;
winrt::check_hresult(
    d2dDeviceContext->CreateBitmapFromDxgiSurface(
        dxgiBackBuffer.get(),
        &bitmapProperties,
        targetBitmap.put()
    )
);

d2dDeviceContext->SetTarget(targetBitmap.get());

// Draw using Direct2D context.
d2dDeviceContext->BeginDraw();

d2dDeviceContext->Clear(D2D1::ColorF(D2D1::ColorF::Orange));

winrt::com_ptr<::ID2D1SolidColorBrush> brush;
winrt::check_hresult(d2dDeviceContext->CreateSolidColorBrush(
    D2D1::ColorF(D2D1::ColorF::Chocolate),
    D2D1::BrushProperties(0.8f),
    brush.put()));

D2D1_SIZE_F const size{ 500, 500 };
D2D1_RECT_F const rect{ 100.0f, 100.0f, size.width - 100.0f, size.height - 100.0f };
d2dDeviceContext->DrawRectangle(rect, brush.get(), 100.0f);

d2dDeviceContext->EndDraw();

swapChain->Present(1, 0);
当Windows 运行时布局/呈现逻辑发出更新信号时,将刷新 XAML 元素。
现在可以生成并运行应用了。 单击该按钮可查看显示在其他 XAML 元素后面的 SwapChainPanel 的内容。
注意
通常,你的 DirectX 应用应当在横向创建交换链,并等于显示窗口大小(这在大多数 Microsoft Store 游戏中通常为本机屏幕分辨率)。 这可确保你的应用在没有任何可见 XAML 覆盖时使用最佳交换链实现。 如果应用旋转到纵向模式,你的应用应在现有交换链上调用 IDXGISwapChain1::SetRotation,根据需要应用内容转换,然后在同一交换链上再次调用 SetSwapChain。 同样,每当通过调用 IDXGISwapChain::ResizeBuffers 调整交换链的大小时,你的应用都应在同一交换链上再次调用 SetSwapChain。
相关主题
反馈
即将发布:在整个 2024 年,我们将逐步淘汰作为内容反馈机制的“GitHub 问题”,并将其取代为新的反馈系统。 有关详细信息,请参阅:https://aka.ms/ContentUserFeedback。
提交和查看相关反馈