创建 Xamarin.Forms 应用程序快速入门
 下载示例
下载示例在本快速入门中,你将了解如何:
- 创建 Xamarin.Forms Shell 应用程序。
- 使用可扩展应用程序标记语言 (XAML) 定义页面的用户界面,并与代码中的 XAML 元素进行交互。
- 通过为
Shell类提供子类,说明 Shell 应用程序的可视层次结构。
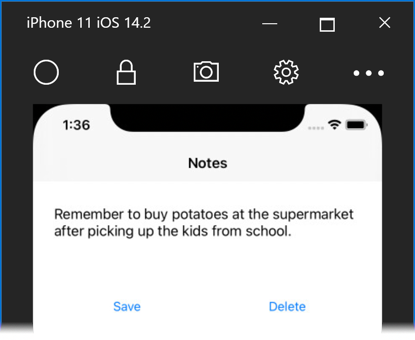
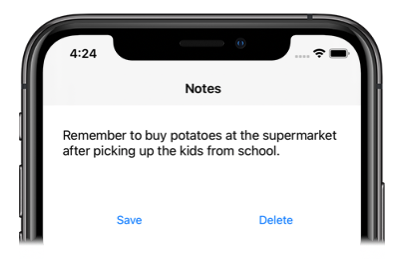
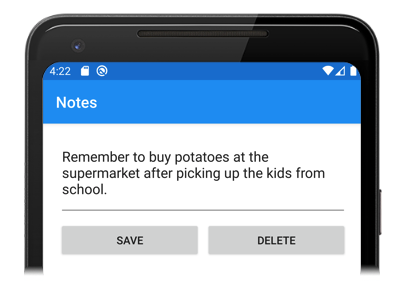
本快速入门演练如何创建跨平台 Xamarin.Forms Shell 应用程序,使你可输入便笺内容并将其保存到设备存储。 最终的应用程序如下所示:


先决条件
- Visual Studio 2019(最新版本),且安装了“使用 .NET 的移动开发”工作负载。
- C# 的知识。
- (可选)用于在 iOS 上构建应用程序的配对 Mac。
有关这些先决条件的详细信息,请参阅安装 Xamarin。 有关将 Visual Studio 2019 连接到 Mac 生成主机的信息,请参阅通过“与 Mac 配对”进行 Xamarin.iOS 开发。
Visual Studio 2019 入门
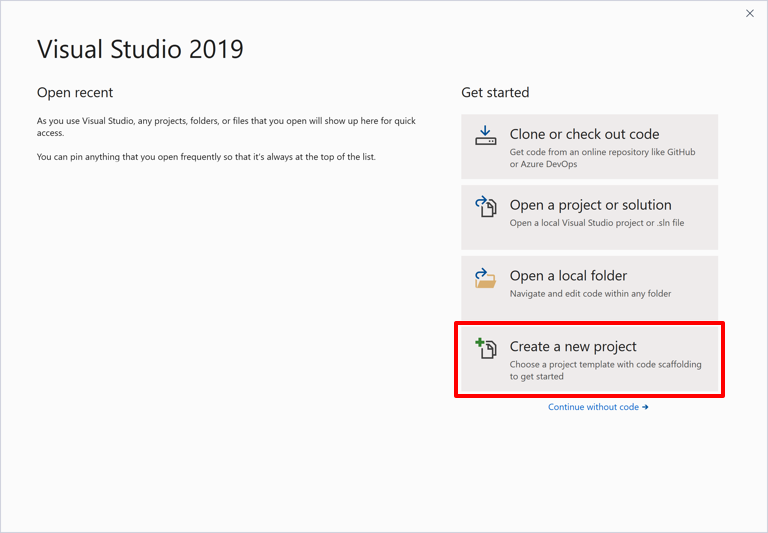
启动 Visual Studio 2019,然后在开始窗口中单击“创建建项目”以创建新项目:
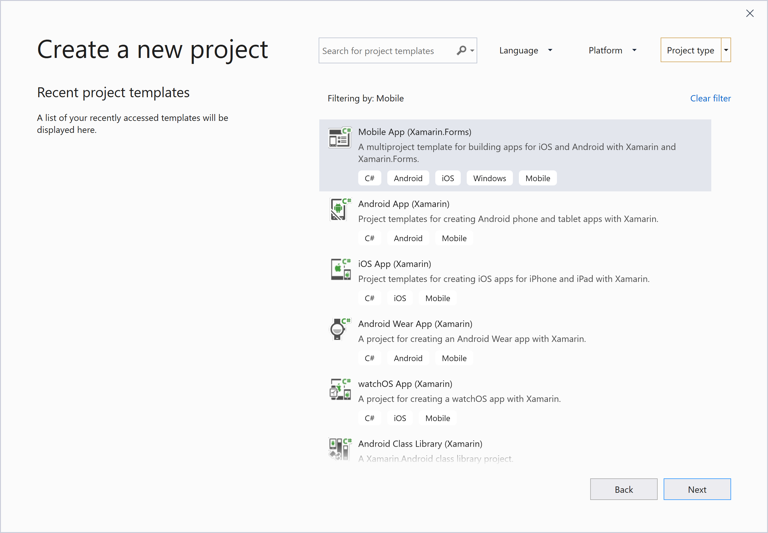
在“创建新项目”窗口中,在“项目类型”下拉菜单中选择“移动”,选择“移动应用(Xamarin.Forms)”模板,然后单击“下一步”按钮:
在“配置新项目”对话框中,将“项目名称”设置为“Notes”,为项目选择合适的位置,然后单击“创建”按钮:
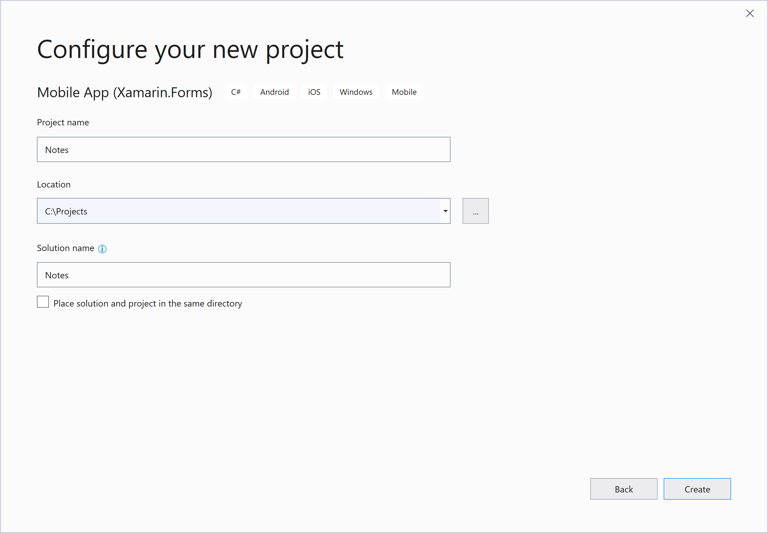
重要
本快速入门中的 C# 和 XAML 片段要求将解决方案和项目都命名为“便笺”。 使用不同的名称会导致:将本快速入门中的代码复制到项目中时出现生成错误。
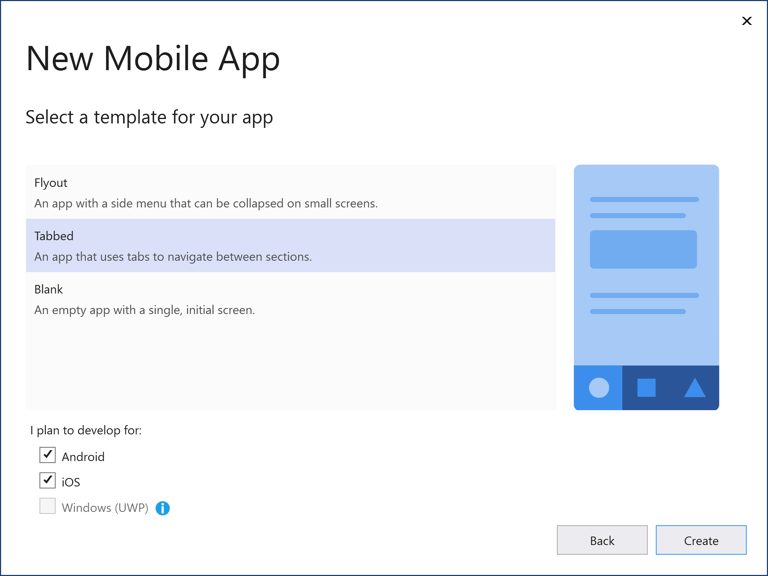
在“新建移动应用”对话框中,选择“选项卡式”模板,然后单击“创建”按钮:
创建项目后,关闭 GettingStarted.txt 文件。
有关创建的 .NET Standard 库的详细信息,请参阅 Xamarin.Forms Shell 快速入门的深入探讨中的 Xamarin.Forms Shell 应用程序剖析。
在解决方案资源管理器的“Notes”项目中,删除以下文件夹(及其内容):
- 模型
- 服务
- ViewModels
- 视图
在解决方案资源管理器的“Notes”项目中,删除 GettingStarted.txt。
在解决方案资源管理器的“Notes”项目中,添加一个名为“Views”的新文件夹。
在“解决方案资源管理器”的“Notes”项目中,选择“Views”文件夹,右键单击,然后选择“添加”>“新建项...”。在“添加新项”对话框中,选择“Visual C# 项”>“Xamarin.Forms”>“内容页”,将新文件命名为“NotesPage”,然后单击“添加”按钮:
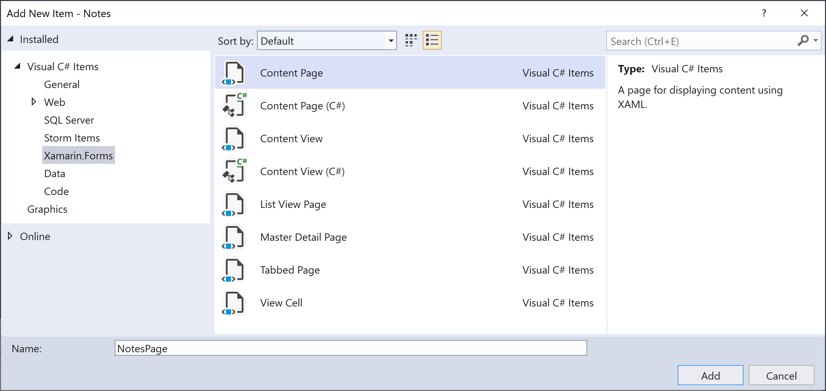
这会将名为“NotesPage”的新页面添加到“Views”文件夹中。 此页会是应用程序中的主页面。
在“解决方案资源管理器”的“Notes”项目中,双击“NotesPage.xaml”将其打开 :
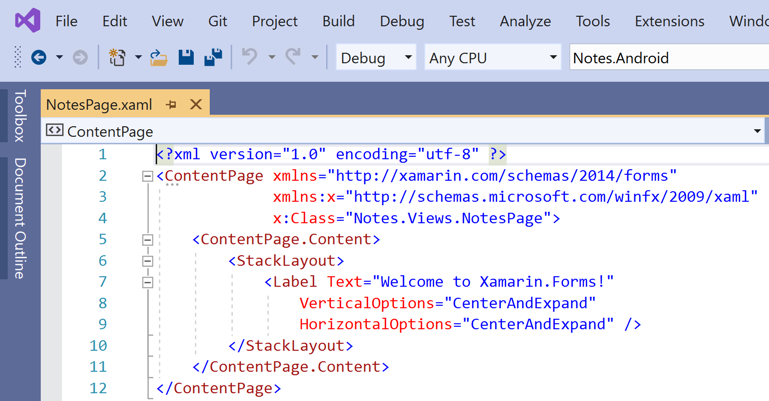
在 NotesPage.xaml 中,删除所有模板代码并将其替换为以下代码:
<?xml version="1.0" encoding="UTF-8"?>
<ContentPage xmlns="http://xamarin.com/schemas/2014/forms"
             xmlns:x="http://schemas.microsoft.com/winfx/2009/xaml"
             x:Class="Notes.Views.NotesPage"
             Title="Notes">
    <!-- Layout children vertically -->
    <StackLayout Margin="20">
        <Editor x:Name="editor"
                Placeholder="Enter your note"
                HeightRequest="100" />
        <!-- Layout children in two columns -->
        <Grid ColumnDefinitions="*,*">
            <Button Text="Save"
                    Clicked="OnSaveButtonClicked" />
            <Button Grid.Column="1"
                    Text="Delete"
                    Clicked="OnDeleteButtonClicked"/>
        </Grid>
    </StackLayout>
</ContentPage>
该代码以声明的方式定义页面的用户界面,它包含一个用于文本输入的
Editor,以及两个指示应用程序保存或删除文件的Button对象。 这两个Button对象水平放置在Grid中,而Editor和Grid垂直放置在StackLayout中。 有关创建用户界面的详细信息,请参阅 Xamarin.Forms Shell 快速入门深入探讨中的用户界面。通过按 Ctrl+S,保存对 NotesPage.xaml 所做的更改。
在“解决方案资源管理器”的“Notes”项目中,双击“NotesPage.xaml.cs”将其打开 :
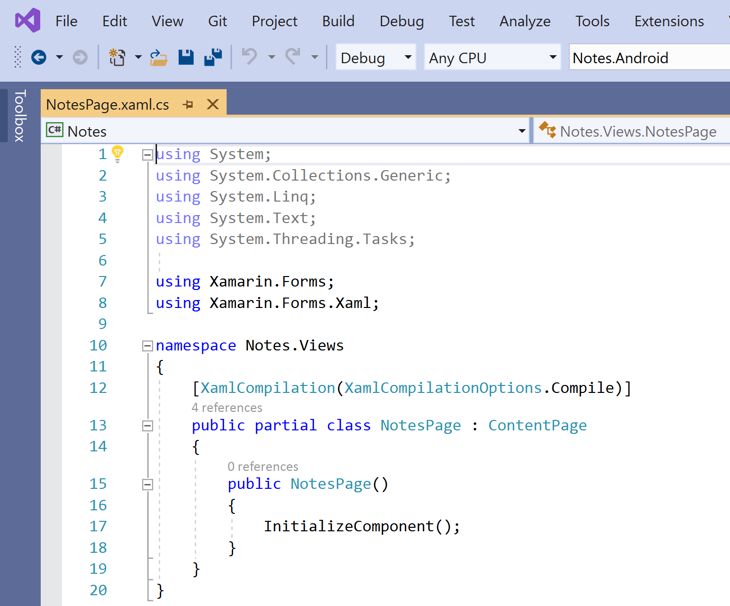
在 NotesPage.xaml.cs 中,删除所有模板代码并将其替换为以下代码:
using System;
using System.IO;
using Xamarin.Forms;

namespace Notes.Views
{
    public partial class NotesPage : ContentPage
    {
        string _fileName = Path.Combine(Environment.GetFolderPath(Environment.SpecialFolder.LocalApplicationData), "notes.txt");

        public NotesPage()
        {
            InitializeComponent();

            // Read the file.
            if (File.Exists(_fileName))
            {
                editor.Text = File.ReadAllText(_fileName);
            }
        }

        void OnSaveButtonClicked(object sender, EventArgs e)
        {
            // Save the file.
            File.WriteAllText(_fileName, editor.Text);
        }

        void OnDeleteButtonClicked(object sender, EventArgs e)
        {
            // Delete the file.
            if (File.Exists(_fileName))
            {
                File.Delete(_fileName);
            }
            editor.Text = string.Empty;
        }
    }
}
此代码定义一个
_fileName字段,该字段引用名为notes.txt的文件,而该文件将便笺数据存储在应用程序的本地应用程序数据文件夹中。 如果有文件,则在执行页构造函数时读取文件并将其显示在Editor中。 按“保存”Button时,会执行OnSaveButtonClicked事件处理程序,它将Editor的内容保存到文件中。 按“删除”Button时执行OnDeleteButtonClicked事件处理程序,删除该文件(前提是它存在)并删除Editor中的任何文本。 有关用户交互的详细信息,请参阅 Xamarin.Forms Shell 快速入门深入探讨中的响应用户交互。通过按 Ctrl+S,保存对 NotesPage.xaml.cs 所做的更改。
在“解决方案资源管理器”的“Notes”项目中,选择“Views”文件夹,右键单击,然后选择“添加”>“新建项...”。在“添加新项”对话框中,选择“Visual C# 项”>“Xamarin.Forms”>“内容页”,将新文件命名为“AboutPage”,然后单击“添加”按钮:
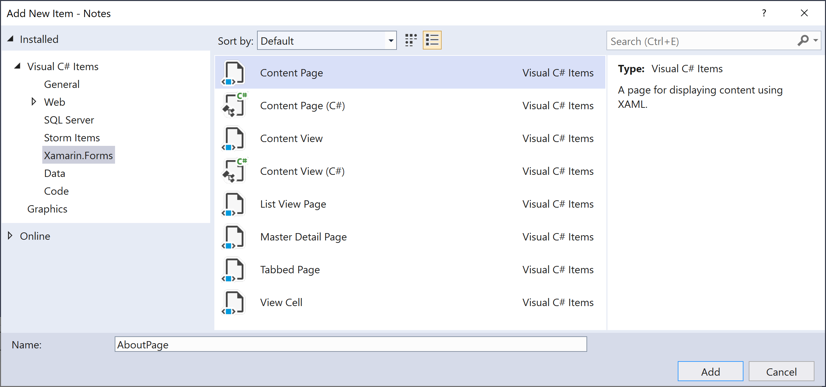
这会将名为“AboutPage”的新页面添加到“Views”文件夹中。
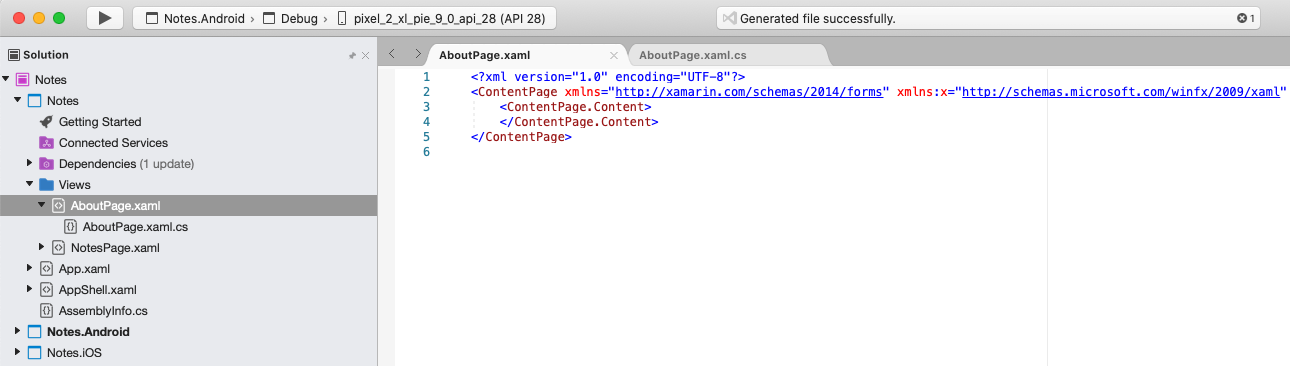
在“解决方案资源管理器”的“Notes”项目中,双击“AboutPage.xaml”将其打开 :
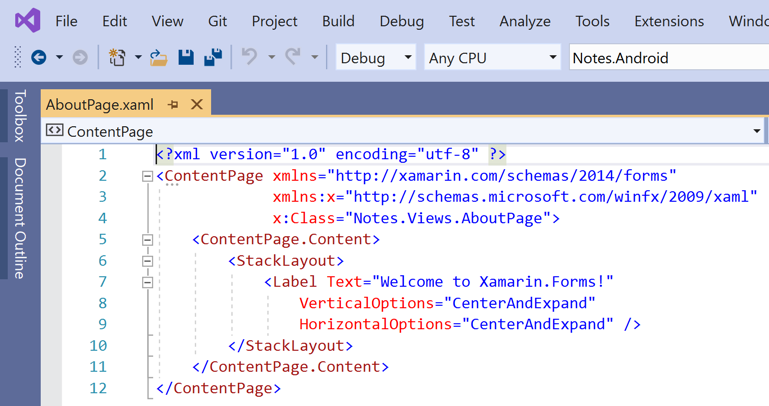
在 AboutPage.xaml 中,删除所有模板代码并将其替换为以下代码:
<?xml version="1.0" encoding="UTF-8"?>
<ContentPage xmlns="http://xamarin.com/schemas/2014/forms"
             xmlns:x="http://schemas.microsoft.com/winfx/2009/xaml"
             x:Class="Notes.Views.AboutPage"
             Title="About">
    <!-- Layout children in two rows -->
    <Grid RowDefinitions="Auto,*">
        <Image Source="xamarin_logo.png"
               BackgroundColor="{OnPlatform iOS=LightSlateGray, Android=#2196F3}"
               VerticalOptions="Center"
               HeightRequest="64" />
        <!-- Layout children vertically -->
        <StackLayout Grid.Row="1"
                     Margin="20"
                     Spacing="20">
            <Label FontSize="22">
                <Label.FormattedText>
                    <FormattedString>
                        <FormattedString.Spans>
                            <Span Text="Notes"
                                  FontAttributes="Bold"
                                  FontSize="22" />
                            <Span Text=" v1.0" />
                        </FormattedString.Spans>
                    </FormattedString>
                </Label.FormattedText>
            </Label>
            <Label Text="This app is written in XAML and C# with the Xamarin Platform." />
            <Button Text="Learn more"
                    Clicked="OnButtonClicked" />
        </StackLayout>
    </Grid>
</ContentPage>
此代码以声明方式定义页面的用户界面,该界面由一个
Image、显示文本的两个Label对象,以及一个Button组成。 这两个Label对象和Button垂直放置在StackLayout中,而Image和StackLayout垂直放置在Grid中。 有关创建用户界面的详细信息,请参阅 Xamarin.Forms Shell 快速入门深入探讨中的用户界面。通过按 Ctrl+S,保存对 AboutPage.xaml 所做的更改。
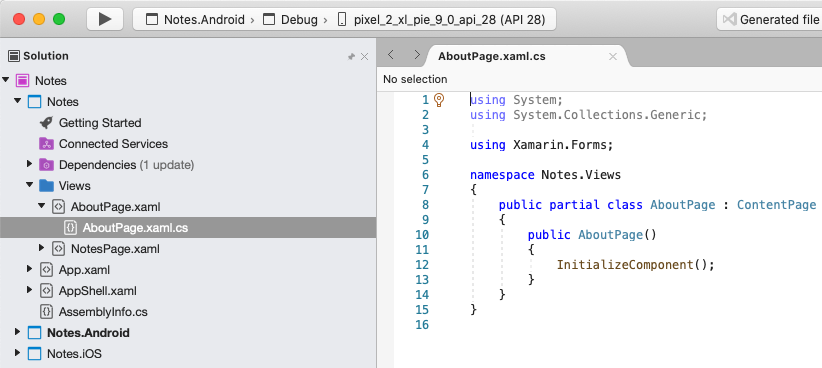
在“解决方案资源管理器”的“Notes”项目中,双击“AboutPage.xaml.cs”将其打开 :
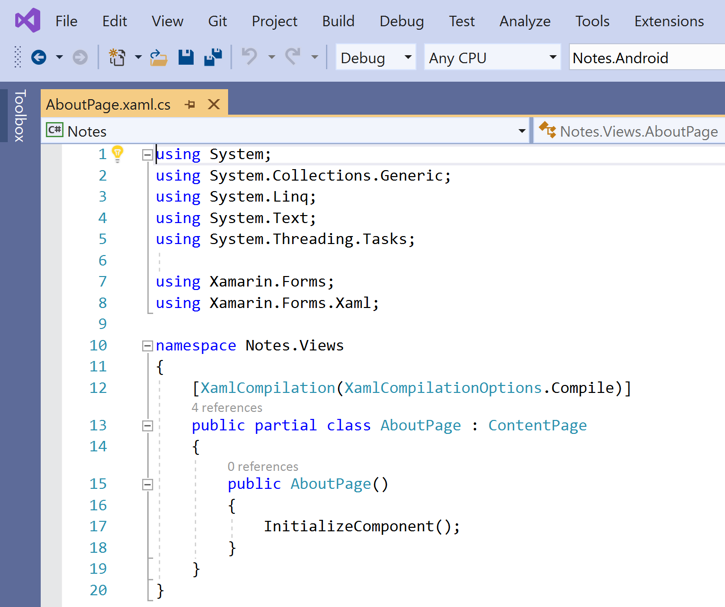
在 AboutPage.xaml.cs 中,删除所有模板代码并将其替换为以下代码:
using System;
using Xamarin.Essentials;
using Xamarin.Forms;

namespace Notes.Views
{
    public partial class AboutPage : ContentPage
    {
        public AboutPage()
        {
            InitializeComponent();
        }

        async void OnButtonClicked(object sender, EventArgs e)
        {
            // Launch the specified URL in the system browser.
            await Launcher.OpenAsync("https://aka.ms/xamarin-quickstart");
        }
    }
}
此代码定义
OnButtonClicked事件处理程序,该事件处理程序在按下“了解更多”Button时执行。 按下该按钮时,将启动 Web 浏览器,并显示由OpenAsync方法的 URI 参数所代表的页面。 有关用户交互的详细信息,请参阅 Xamarin.Forms Shell 快速入门深入探讨中的响应用户交互。通过按 Ctrl+S,保存对 AboutPage.xaml.cs 所做的更改。
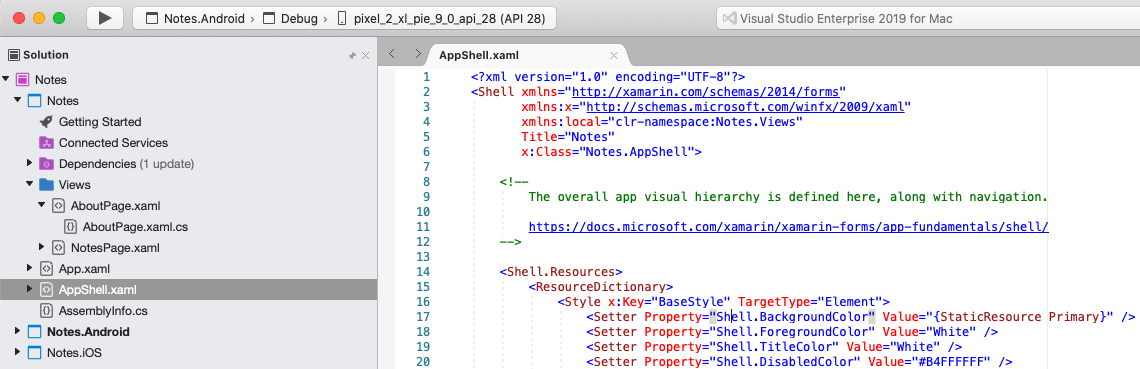
在“解决方案资源管理器”的“Notes”项目中,双击“AppShell.xaml”将其打开 :
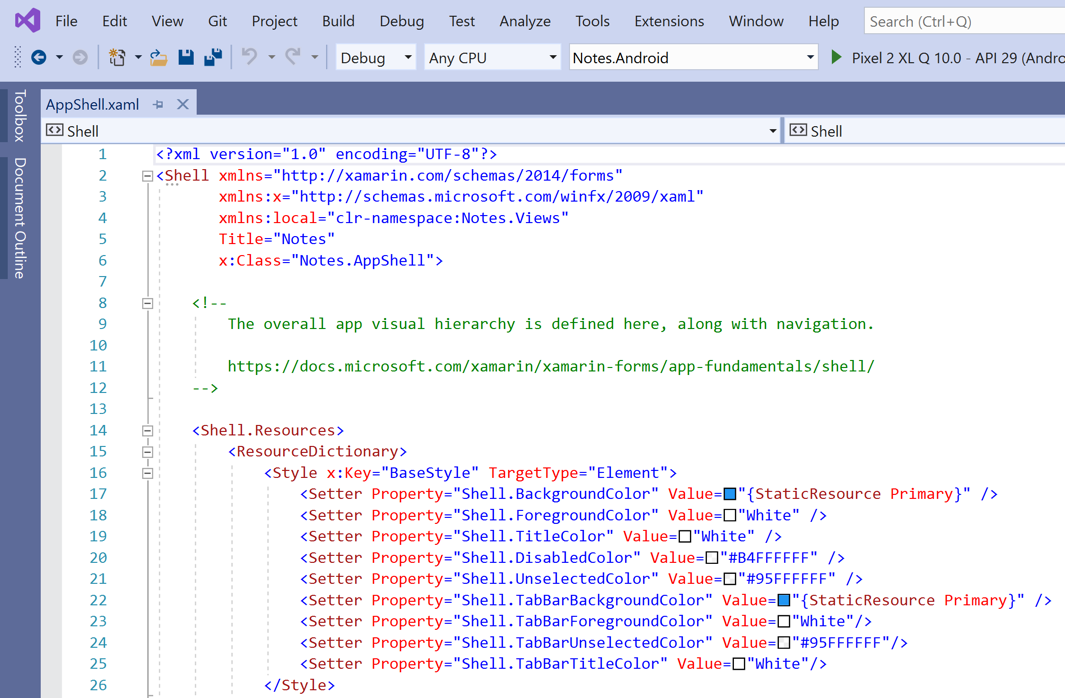
在“AppShell.xaml”中,删除所有模板代码,替换为以下代码:
<?xml version="1.0" encoding="UTF-8"?>
<Shell xmlns="http://xamarin.com/schemas/2014/forms"
       xmlns:x="http://schemas.microsoft.com/winfx/2009/xaml"
       xmlns:views="clr-namespace:Notes.Views"
       x:Class="Notes.AppShell">
    <!-- Display a bottom tab bar containing two tabs -->
    <TabBar>
        <ShellContent Title="Notes"
                      Icon="icon_feed.png"
                      ContentTemplate="{DataTemplate views:NotesPage}" />
        <ShellContent Title="About"
                      Icon="icon_about.png"
                      ContentTemplate="{DataTemplate views:AboutPage}" />
    </TabBar>
</Shell>
此代码以声明方式定义了应用程序的可视层次结构,它所含的
TabBar中包含两个ShellContent对象。 上述对象不表示任何用户界面元素,而表示应用程序可视层次结构的组织。 Shell 使用这些对象,生成内容的用户界面。 有关创建用户界面的详细信息,请参阅 Xamarin.Forms Shell 快速入门深入探讨中的用户界面。通过按 Ctrl+S,保存对 AppShell.xaml 所做的更改。
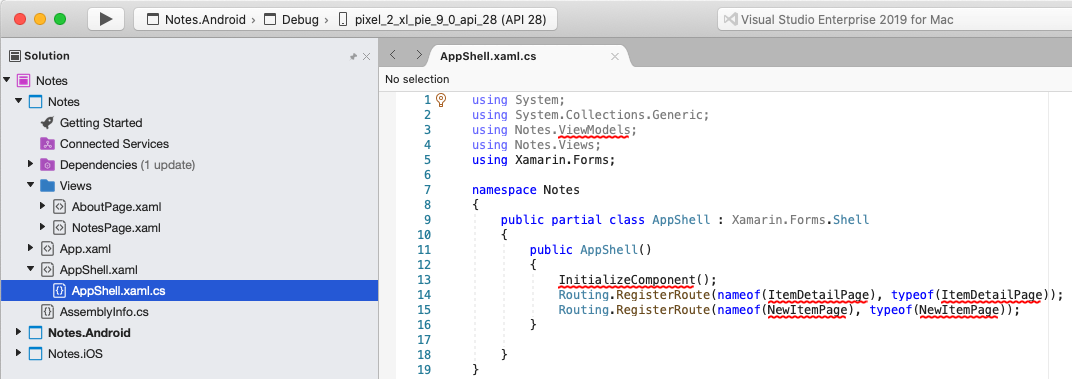
在“解决方案资源管理器”的“Notes”项目中,展开“AppShell.xaml”,然后双击“AppShell.xaml.cs”将其打开 :
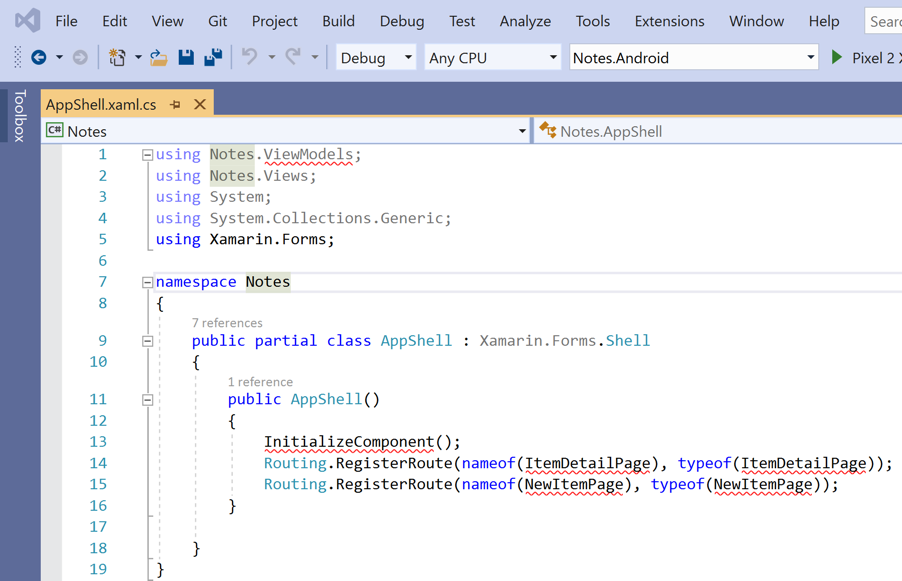
在“AppShell.xaml.cs”中,删除所有模板代码,替换为以下代码:
using Xamarin.Forms;

namespace Notes
{
    public partial class AppShell : Shell
    {
        public AppShell()
        {
            InitializeComponent();
        }
    }
}
通过按 Ctrl+S,保存对 AppShell.xaml.cs 所做的更改。
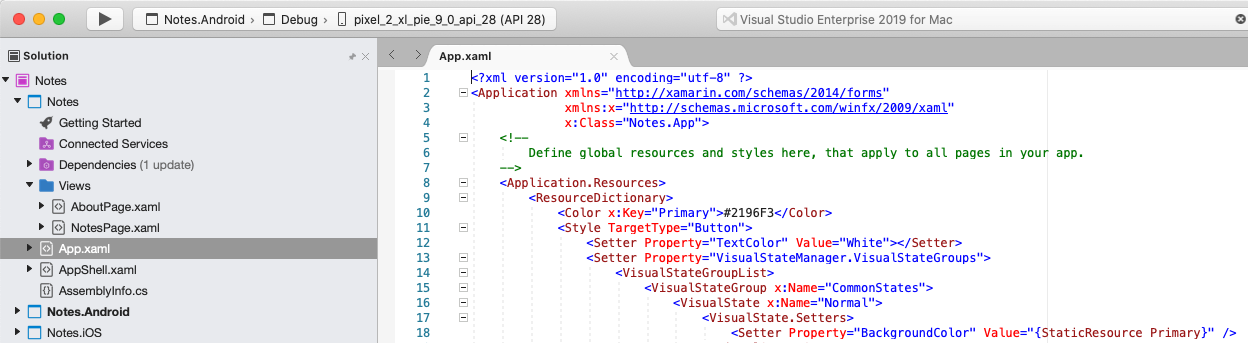
在“解决方案资源管理器”的“Notes”项目中,双击“App.xaml”将其打开 :
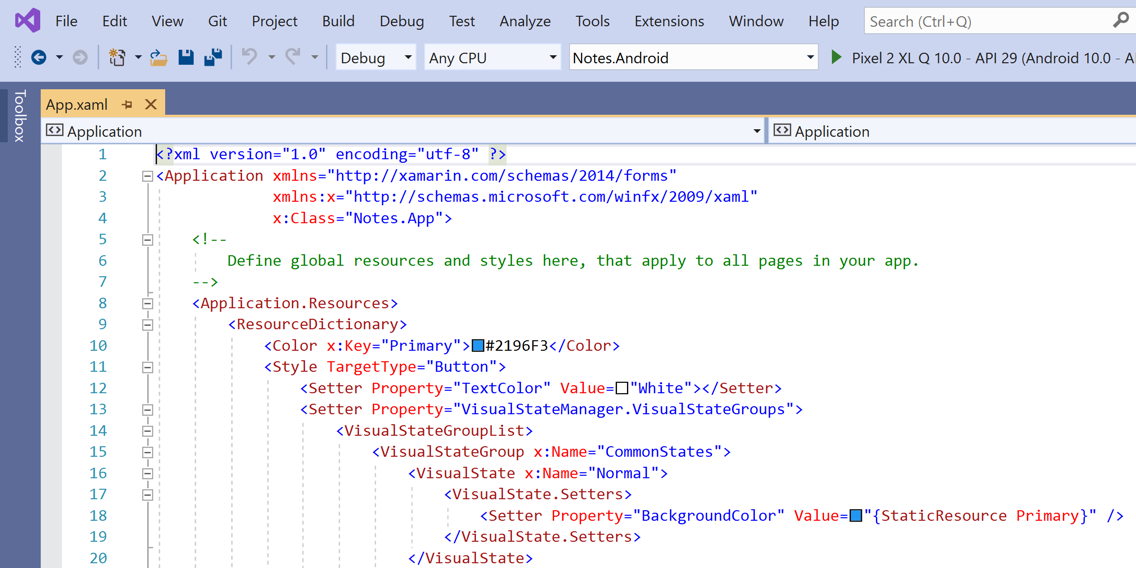
在“App.xaml”中,删除所有模板代码并将其替换为以下代码:
<?xml version="1.0" encoding="utf-8" ?>
<Application xmlns="http://xamarin.com/schemas/2014/forms"
             xmlns:x="http://schemas.microsoft.com/winfx/2009/xaml"
             x:Class="Notes.App">

</Application>
此代码以声明方式定义了一个
App类,该类负责实例化应用程序。通过按 Ctrl+S,保存对 App.xaml 所做的更改。
在“解决方案资源管理器”的“Notes”项目中,展开“App.xaml”,然后双击“App.xaml.cs”将其打开 :
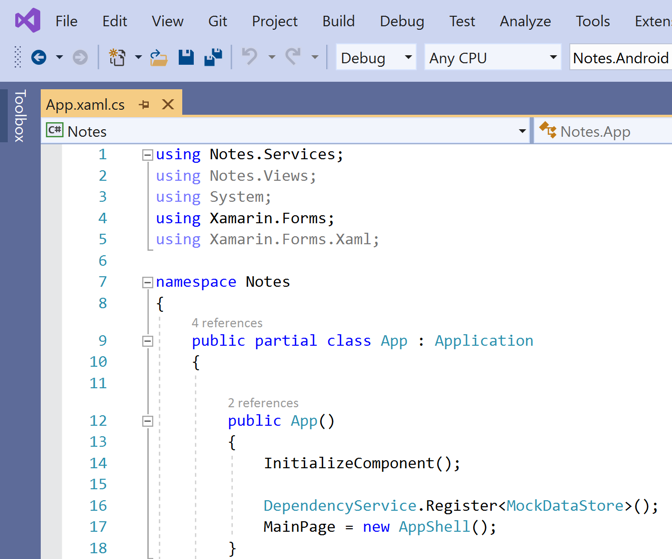
在“App.xaml.cs”中,删除所有模板代码并将其替换为以下代码:
using Xamarin.Forms;

namespace Notes
{
    public partial class App : Application
    {

        public App()
        {
            InitializeComponent();
            MainPage = new AppShell();
        }

        protected override void OnStart()
        {
        }

        protected override void OnSleep()
        {
        }

        protected override void OnResume()
        {
        }
    }
}
此代码定义了
App类的代码隐藏,该类负责实例化应用程序。 它将MainPage属性初始化为子类Shell对象。通过按 Ctrl+S,保存对 App.xaml.cs 所做的更改。
生成快速入门
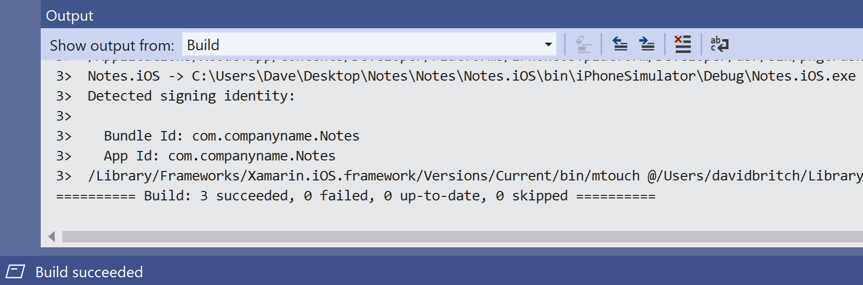
在 Visual Studio 中,选择“生成”>“生成解决方案”菜单项(或按 F6)。 将生成解决方案,Visual Studio 状态栏中将显示一条成功消息:
如果发生错误,请重复前面的步骤并更正任何错误,直到成功生成项目。
在 Visual Studio 工具栏中,按“开始”按钮(类似“播放”按钮的三角形按钮),启动所选 Android Emulator 内的应用程序:


输入便笺内容,然后按“保存”按钮。 然后,关闭应用程序并重新启动它,以确保重新加载输入的注释。
按“关于”选项卡图标导航到
AboutPage:
按“了解更多”按钮,启动快速入门网页。
有关如何在每个平台上启动应用程序的详细信息,请参阅在 Xamarin.Forms 快速入门深入探讨中的在每个平台上启动应用程序。
注意
以下步骤仅供在拥有符合 Xamarin.Forms 开发系统要求的配对 Mac 时执行。
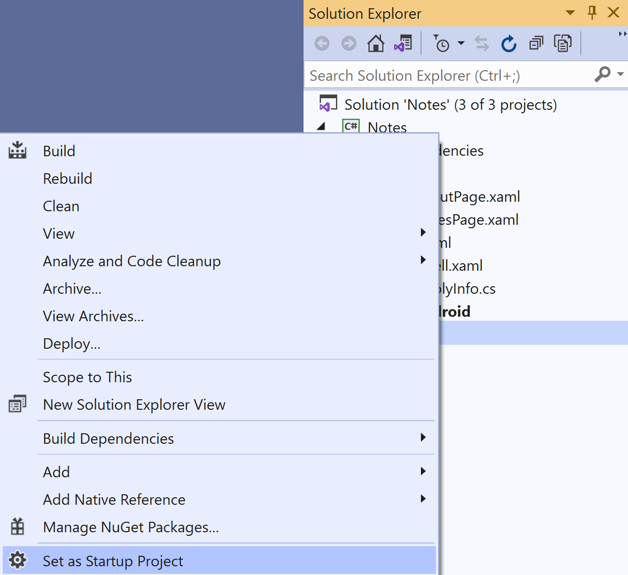
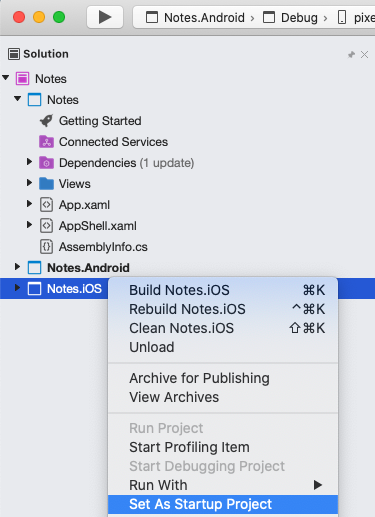
在 Visual Studio 工具栏中,右键单击“Notes.iOS”项目,然后选择“设为启动项目” 。
在 Visual Studio 工具栏中,按“开始”按钮(类似“播放”按钮的三角形按钮),启动所选 iOS 远程模拟器内的应用程序:

输入便笺内容,然后按“保存”按钮。 然后,关闭应用程序并重新启动它,以确保重新加载输入的注释。
按“关于”选项卡图标导航到
AboutPage: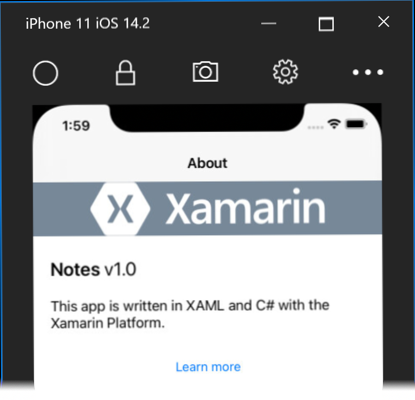
按“了解更多”按钮,启动快速入门网页。
有关如何在每个平台上启动应用程序的详细信息,请参阅在 Xamarin.Forms 快速入门深入探讨中的在每个平台上启动应用程序。


先决条件
- Visual Studio for Mac(最新版),且安装了 iOS 和 Android 平台支持。
- Xcode(最新版本)。
- C# 的知识。
有关这些先决条件的详细信息,请参阅安装 Xamarin。
Visual Studio for Mac 入门
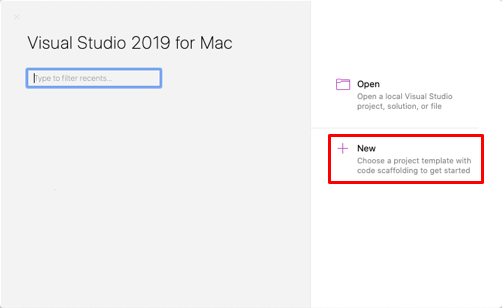
启动 Visual Studio for Mac,然后在开始窗口中单击“新建”以创建新项目:
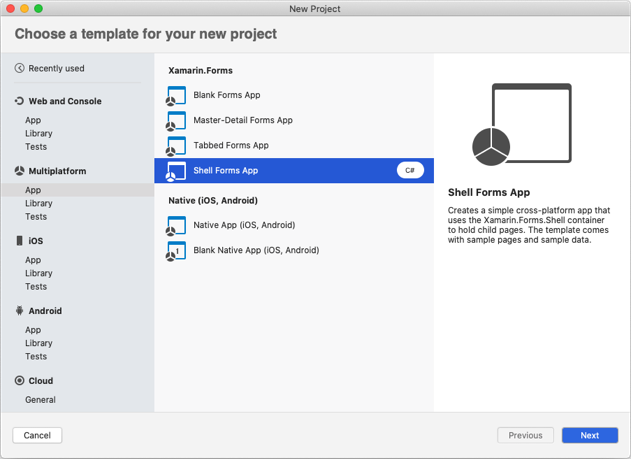
在“为新项目选择一个模板”对话框中,单击“多平台”>“应用”,选择“Shell 窗体应用”模板,然后单击“下一步”按钮:
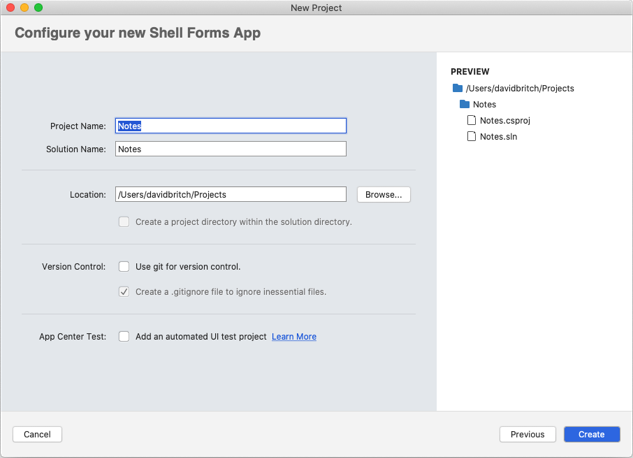
在“配置 Shell 窗体应用”对话框中,将新应用命名为“Notes”,然后单击“下一步”按钮 :

在“配置新 Shell 窗体应用”对话框中,将“解决方案”和“项目”名称保留设置为“Notes”,为项目选择合适的位置,然后单击“创建”按钮创建项目 :
重要
本快速入门中的 C# 和 XAML 片段要求将解决方案和项目都命名为“便笺”。 使用不同的名称会导致:将本快速入门中的代码复制到项目中时出现生成错误。
有关创建的 .NET Standard 库的详细信息,请参阅 Xamarin.Forms Shell 快速入门的深入探讨中的 Xamarin.Forms Shell 应用程序剖析。
在“Solution Pad”的“Notes”项目中,删除以下文件夹(及其内容):
- 模型
- 服务
- ViewModels
- 视图
在“Solution Pad”的“Notes”项目中,删除 GettingStarted.txt。
在“Solution Pad”的“Notes”项目中,添加一个名为“Views”的新文件夹。
在“Solution Pad”的“Notes”项目,选择“Views”文件夹,右键单击并选择“添加”>“新建文件...”。在“新建文件”对话框中,选择“窗体”>“窗体 ContentPage XAML”,将新文件命名为“NotesPage”,然后单击“新建”按钮:
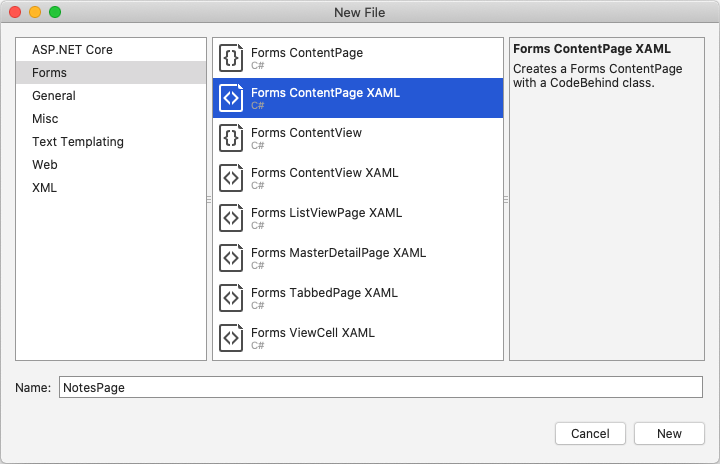
这会将名为“NotesPage”的新页面添加到“Views”文件夹中。 此页会是应用程序中的主页面。
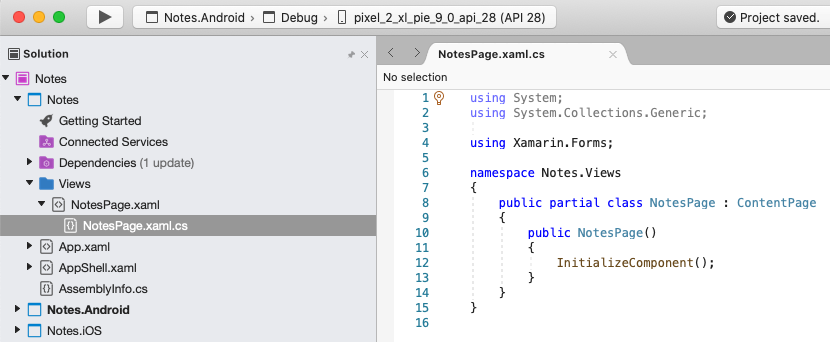
在“Solution Pad”的“Notes”项目中,双击“NotesPage.xaml”将其打开 :

在 NotesPage.xaml 中,删除所有模板代码并将其替换为以下代码:
<?xml version="1.0" encoding="UTF-8"?>
<ContentPage xmlns="http://xamarin.com/schemas/2014/forms"
             xmlns:x="http://schemas.microsoft.com/winfx/2009/xaml"
             x:Class="Notes.Views.NotesPage"
             Title="Notes">
    <!-- Layout children vertically -->
    <StackLayout Margin="20">
        <Editor x:Name="editor"
                Placeholder="Enter your note"
                HeightRequest="100" />
        <!-- Layout children in two columns -->
        <Grid ColumnDefinitions="*,*">
            <Button Text="Save"
                    Clicked="OnSaveButtonClicked" />
            <Button Grid.Column="1"
                    Text="Delete"
                    Clicked="OnDeleteButtonClicked"/>
        </Grid>
    </StackLayout>
</ContentPage>
该代码以声明的方式定义页面的用户界面,它包含一个用于文本输入的
Editor,以及两个指示应用程序保存或删除文件的Button对象。 这两个Button对象水平放置在Grid中,而Editor和Grid垂直放置在StackLayout中。 有关创建用户界面的详细信息,请参阅 Xamarin.Forms Shell 快速入门深入探讨中的用户界面。通过选择“文件”>“保存”(或按 ⌘ + S),保存对 NotesPage.xaml 所做的更改。
在“Solution Pad”的“Notes”项目中,双击“NotesPage.xaml.cs”将其打开 :
在 NotesPage.xaml.cs 中,删除所有模板代码并将其替换为以下代码:
using System;
using System.IO;
using Xamarin.Forms;

namespace Notes.Views
{
    public partial class NotesPage : ContentPage
    {
        string _fileName = Path.Combine(Environment.GetFolderPath(Environment.SpecialFolder.LocalApplicationData), "notes.txt");

        public NotesPage()
        {
            InitializeComponent();

            // Read the file.
            if (File.Exists(_fileName))
            {
                editor.Text = File.ReadAllText(_fileName);
            }
        }

        void OnSaveButtonClicked(object sender, EventArgs e)
        {
            // Save the file.
            File.WriteAllText(_fileName, editor.Text);
        }

        void OnDeleteButtonClicked(object sender, EventArgs e)
        {
            // Delete the file.
            if (File.Exists(_fileName))
            {
                File.Delete(_fileName);
            }
            editor.Text = string.Empty;
        }
    }
}
此代码定义一个
_fileName字段,该字段引用名为notes.txt的文件,而该文件将便笺数据存储在应用程序的本地应用程序数据文件夹中。 如果有文件,则在执行页构造函数时读取文件并将其显示在Editor中。 按“保存”Button时,会执行OnSaveButtonClicked事件处理程序,它将Editor的内容保存到文件中。 按“删除”Button时执行OnDeleteButtonClicked事件处理程序,删除该文件(前提是它存在)并删除Editor中的任何文本。 有关用户交互的详细信息,请参阅 Xamarin.Forms Shell 快速入门深入探讨中的响应用户交互。通过选择“文件”>“保存”(或按 ⌘ + S),保存对 NotesPage.xaml.cs 所做的更改。
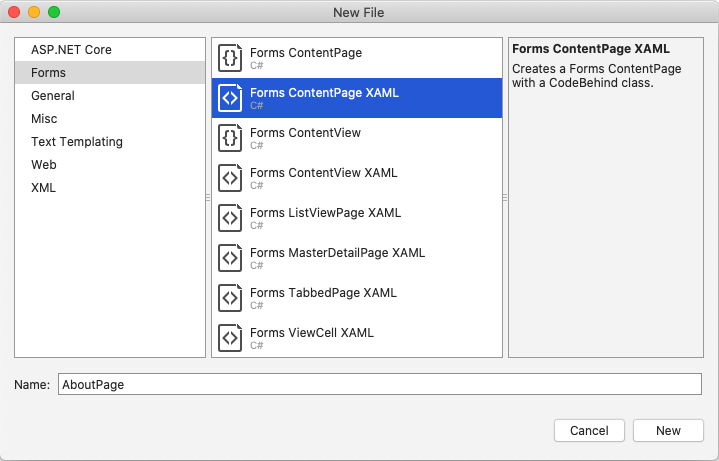
在“Solution Pad”的“Notes”项目,选择“Views”文件夹,右键单击并选择“添加”>“新建文件...”。在“新建文件”对话框中,选择“窗体”>“窗体 ContentPage XAML”,将新文件命名为“AboutPage”,然后单击“新建”按钮:
在“Solution Pad”的“Notes”项目中,双击“AboutPage.xaml”将其打开 :
这会将名为“AboutPage”的新页面添加到“Views”文件夹中。
在 AboutPage.xaml 中,删除所有模板代码并将其替换为以下代码:
<?xml version="1.0" encoding="UTF-8"?>
<ContentPage xmlns="http://xamarin.com/schemas/2014/forms"
             xmlns:x="http://schemas.microsoft.com/winfx/2009/xaml"
             x:Class="Notes.Views.AboutPage"
             Title="About">
    <!-- Layout children in two rows -->
    <Grid RowDefinitions="Auto,*">
        <Image Source="xamarin_logo.png"
               BackgroundColor="{OnPlatform iOS=LightSlateGray, Android=#2196F3}"
               VerticalOptions="Center"
               HeightRequest="64" />
        <!-- Layout children vertically -->
        <StackLayout Grid.Row="1"
                     Margin="20"
                     Spacing="20">
            <Label FontSize="22">
                <Label.FormattedText>
                    <FormattedString>
                        <FormattedString.Spans>
                            <Span Text="Notes"
                                  FontAttributes="Bold"
                                  FontSize="22" />
                            <Span Text=" v1.0" />
                        </FormattedString.Spans>
                    </FormattedString>
                </Label.FormattedText>
            </Label>
            <Label Text="This app is written in XAML and C# with the Xamarin Platform." />
            <Button Text="Learn more"
                    Clicked="OnButtonClicked" />
        </StackLayout>
    </Grid>
</ContentPage>
此代码以声明方式定义页面的用户界面,该界面由一个
Image、显示文本的两个Label对象,以及一个Button组成。 这两个Label对象和Button垂直放置在StackLayout中,而Image和StackLayout垂直放置在Grid中。 有关创建用户界面的详细信息,请参阅 Xamarin.Forms Shell 快速入门深入探讨中的用户界面。通过选择“文件”>“保存”(或按 ⌘ + S),保存对 AboutPage.xaml 所做的更改。
在“Solution Pad”的“Notes”项目中,双击“AboutPage.xaml.cs”将其打开 :
在 AboutPage.xaml.cs 中,删除所有模板代码并将其替换为以下代码:
using System;
using Xamarin.Essentials;
using Xamarin.Forms;

namespace Notes.Views
{
    public partial class AboutPage : ContentPage
    {
        public AboutPage()
        {
            InitializeComponent();
        }

        async void OnButtonClicked(object sender, EventArgs e)
        {
            // Launch the specified URL in the system browser.
            await Launcher.OpenAsync("https://aka.ms/xamarin-quickstart");
        }
    }
}
此代码定义
OnButtonClicked事件处理程序,该事件处理程序在按下“了解更多”Button时执行。 按下该按钮时,将启动 Web 浏览器,并显示由OpenAsync方法的 URI 参数所代表的页面。 有关用户交互的详细信息,请参阅 Xamarin.Forms Shell 快速入门深入探讨中的响应用户交互。通过选择“文件”>“保存”(或按 ⌘ + S),保存对 AboutPage.xaml.cs 所做的更改。
在“Solution Pad”的“Notes”项目中,双击“AppShell.xaml”将其打开 :
在“AppShell.xaml”中,删除所有模板代码,替换为以下代码:
<?xml version="1.0" encoding="UTF-8"?>
<Shell xmlns="http://xamarin.com/schemas/2014/forms"
       xmlns:x="http://schemas.microsoft.com/winfx/2009/xaml"
       xmlns:views="clr-namespace:Notes.Views"
       x:Class="Notes.AppShell">
    <!-- Display a bottom tab bar containing two tabs -->
    <TabBar>
        <ShellContent Title="Notes"
                      Icon="icon_feed.png"
                      ContentTemplate="{DataTemplate views:NotesPage}" />
        <ShellContent Title="About"
                      Icon="icon_about.png"
                      ContentTemplate="{DataTemplate views:AboutPage}" />
    </TabBar>
</Shell>
此代码以声明方式定义了应用程序的可视层次结构,它所含的
TabBar中包含两个ShellContent对象。 上述对象不表示任何用户界面元素,而表示应用程序可视层次结构的组织。 Shell 使用这些对象,生成内容的用户界面。 有关创建用户界面的详细信息,请参阅 Xamarin.Forms Shell 快速入门深入探讨中的用户界面。通过选择“文件”>“保存”(或按 ⌘ + S),保存对 AppShell.xaml 所做的更改。
在“Solution Pad”的“Notes”项目中,展开“AppShell.xaml”,然后双击“AppShell.xaml.cs”将其打开 :
在“AppShell.xaml.cs”中,删除所有模板代码,替换为以下代码:
using Xamarin.Forms;

namespace Notes
{
    public partial class AppShell : Shell
    {
        public AppShell()
        {
            InitializeComponent();
        }
    }
}
通过选择“文件”>“保存”(或按 ⌘ + S),保存对 AppShell.xaml.cs 所做的更改。
在“Solution Pad”的“Notes”项目中,双击“App.xaml”将其打开 :
在“App.xaml”中,删除所有模板代码并将其替换为以下代码:
<?xml version="1.0" encoding="utf-8" ?>
<Application xmlns="http://xamarin.com/schemas/2014/forms"
             xmlns:x="http://schemas.microsoft.com/winfx/2009/xaml"
             x:Class="Notes.App">

</Application>
此代码以声明方式定义了一个
App类,该类负责实例化应用程序。通过选择“文件”>“保存”(或按 ⌘ + S),保存对 App.xaml 所做的更改。
在“Solution Pad”的“Notes”项目中,展开“App.xaml”,然后双击“App.xaml.cs”将其打开 :

在“App.xaml.cs”中,删除所有模板代码并将其替换为以下代码:
using Xamarin.Forms;

namespace Notes
{
    public partial class App : Application
    {

        public App()
        {
            InitializeComponent();
            MainPage = new AppShell();
        }

        protected override void OnStart()
        {
        }

        protected override void OnSleep()
        {
        }

        protected override void OnResume()
        {
        }
    }
}
此代码定义了
App类的代码隐藏,该类负责实例化应用程序。 它将MainPage属性初始化为子类Shell对象。通过选择“文件”>“保存”(或按 ⌘ + S),保存对 App.xaml.cs 所做的更改。
生成快速入门
在 Visual Studio for Mac 中,选择“生成”>“生成所有”菜单项(或按 ⌘ + B)。 项目将生成,并在 Visual Studio for Mac 工具栏中显示一条成功消息:

如果发生错误,请重复前面的步骤并更正任何错误,直到成功生成项目。
在“Solution Pad”中选择“Notes.iOS”项目,右键单击并选择“设为启动项目” :
在 Visual Studio for Mac 工具栏中,按“开始”按钮(类似“播放”按钮的三角形按钮),启动所选 iOS 模拟器内的应用程序:

输入便笺内容,然后按“保存”按钮。 然后,关闭应用程序并重新启动它,以确保重新加载输入的注释。
按“关于”选项卡图标导航到
AboutPage:
按“了解更多”按钮,启动快速入门网页。
有关如何在每个平台上启动应用程序的详细信息,请参阅在 Xamarin.Forms 快速入门深入探讨中的在每个平台上启动应用程序。
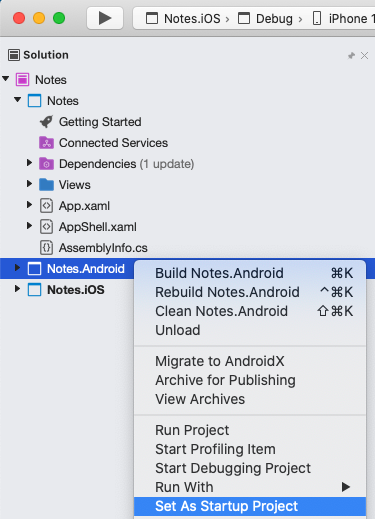
在“Solution Pad”中选择“Notes.Droid”项目,右键单击并选择“设为启动项目” :
在 Visual Studio for Mac 工具栏中,按“开始”按钮(类似“播放”按钮的三角形按钮),启动所选 Android Emulator 内的应用程序:
输入便笺内容,然后按“保存”按钮。 然后,关闭应用程序并重新启动它,以确保重新加载输入的注释。
按“关于”选项卡图标导航到
AboutPage: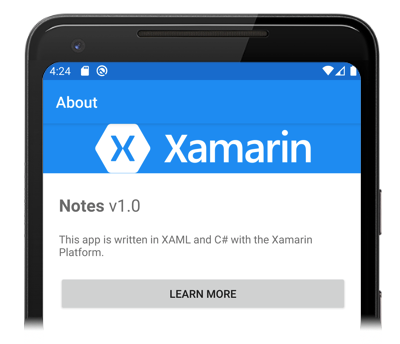
按“了解更多”按钮,启动快速入门网页。
有关如何在每个平台上启动应用程序的详细信息,请参阅在 Xamarin.Forms 快速入门深入探讨中的在每个平台上启动应用程序。
后续步骤
在此快速入门中,读者学习了如何:
- 创建 Xamarin.Forms Shell 应用程序。
- 使用可扩展应用程序标记语言 (XAML) 定义页面的用户界面,并与代码中的 XAML 元素进行交互。
- 通过为
Shell类提供子类,说明 Shell 应用程序的可视层次结构。
继续学习下一个快速入门教程,将其他页面添加到此 Xamarin.Forms Shell 应用程序中。