單元測試 ASP.NET Web API 2
本指南和應用程式示範如何為您的 Web API 2 應用程式建立簡單的單元測試。 本教學課程說明如何在解決方案中包含單元測試專案,以及撰寫測試方法,以檢查控制器方法傳回的值。
本教學課程假設您已熟悉 ASP.NET Web API的基本概念。 如需簡介教學課程,請參閱使用 ASP.NET Web API 2 消費者入門。
本主題中的單元測試刻意僅限於簡單的資料案例。 如需更進階的資料案例單元測試,請參閱在單元測試 ASP.NET Web API 2 時模擬 Entity Framework。
教學課程中使用的軟體版本
- Visual Studio 2017
- Web API 2
本主題內容
本主題包含下列幾節:
必要條件
Visual Studio 2017 Community、Professional 或 Enterprise 版本
下載程式碼
下載 已完成的專案。 可下載的專案包含本主題的單元測試程式碼,以及在單元測試 ASP.NET Web API主題時模擬 Entity Framework。
使用單元測試專案建立應用程式
您可以在建立應用程式時建立單元測試專案,或將單元測試專案新增至現有的應用程式。 本教學課程示範建立單元測試專案的這兩種方法。 若要遵循本教學課程,您可以使用任一種方法。
建立應用程式時新增單元測試專案
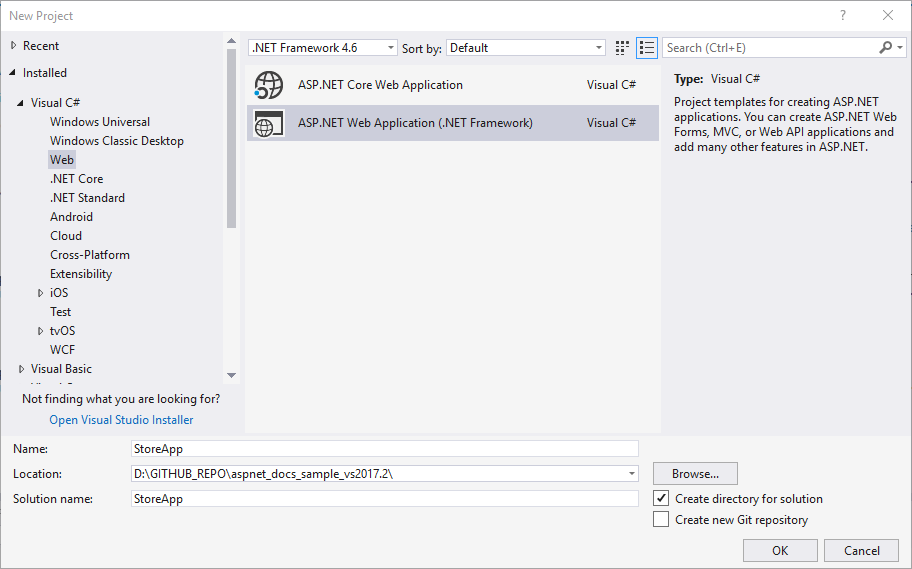
建立名為 StoreApp的新 ASP.NET Web 應用程式。
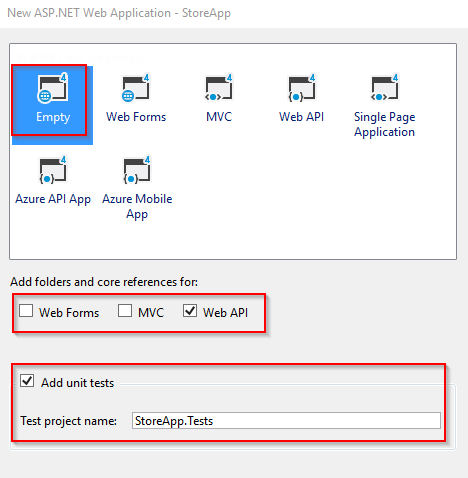
在 [新增 ASP.NET 專案] 視窗中,選取 [空白 ] 範本,並新增 Web API 的資料夾和核心參考。 選取 [ 新增單元測試] 選項。 單元測試專案會自動命名為 StoreApp.Tests。 您可以保留此名稱。
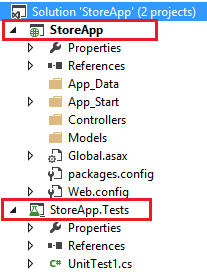
建立應用程式之後,您會看到它包含兩個專案。
將單元測試專案新增至現有的應用程式
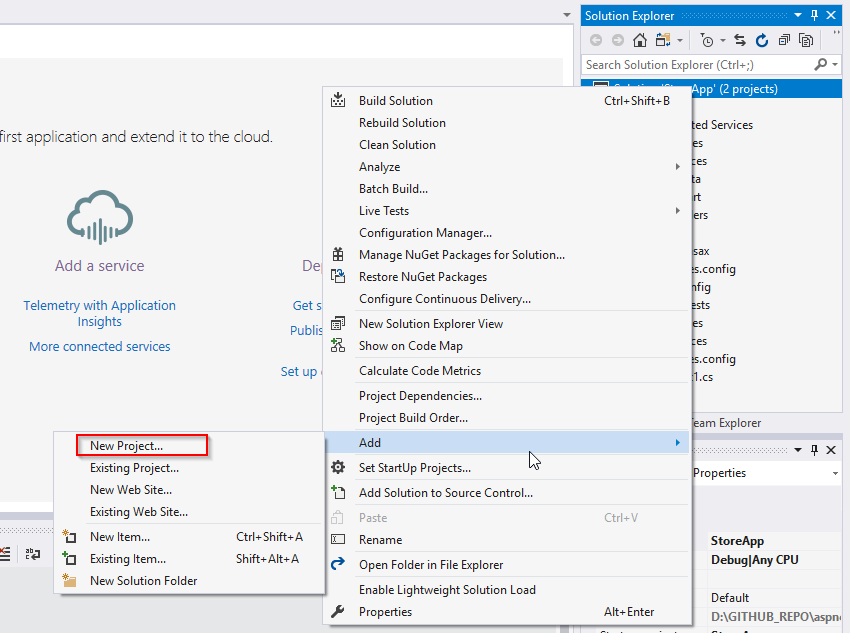
如果您在建立應用程式時未建立單元測試專案,您可以隨時新增一個。 例如,假設您已經有名為 StoreApp 的應用程式,而且您想要新增單元測試。 若要新增單元測試專案,請以滑鼠右鍵按一下您的方案,然後選取 [ 新增 ] 和 [ 新增專案]。
選取左窗格中的 [測試 ],然後針對專案類型選取 [單元測試專案 ]。 將專案命名為 StoreApp.Tests。
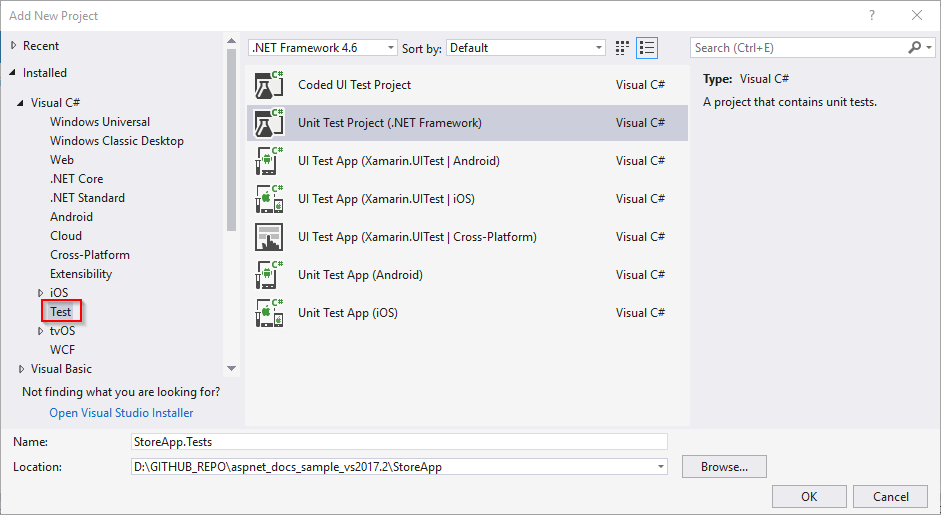
您將會在方案中看到單元測試專案。
在單元測試專案中,將專案參考新增至原始專案。
設定 Web API 2 應用程式
在您的 StoreApp 專案中,將類別檔案新增至名為Product.cs的Models資料夾。 以下列程式碼取代檔案的內容。
using System;

namespace StoreApp.Models
{
    public class Product
    {
        public int Id { get; set; }
        public string Name { get; set; }
        public decimal Price { get; set; }
    }
}
建置方案。
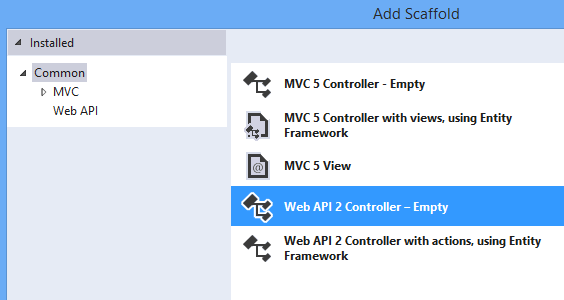
以滑鼠右鍵按一下 Controllers 資料夾,然後選取 [ 新增 ] 和 [ 新增 Scaffolded 專案]。 選取 [Web API 2 控制器 - 空白]。
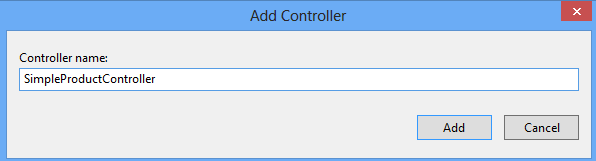
將控制器名稱設定為 SimpleProductController,然後按一下 [ 新增]。
將現有的程式碼取代為下列程式碼。 為了簡化此範例,資料會儲存在清單中,而不是資料庫。 此類別中定義的清單代表生產資料。 請注意,控制器包含採用 Product 物件清單參數的建構函式。 此建構函式可讓您在單元測試時通過測試資料。 控制器也包含兩 個非同步 方法,以說明單元測試非同步方法。 這些非同步方法是藉由呼叫 Task.FromResult 來實作,以將多餘的程式碼降到最低,但通常方法會包含大量資源的作業。
using System;
using System.Collections.Generic;
using System.Linq;
using System.Threading.Tasks;
using System.Web.Http;
using StoreApp.Models;

namespace StoreApp.Controllers
{
    public class SimpleProductController : ApiController
    {
        List<Product> products = new List<Product>();

        public SimpleProductController() { }

        public SimpleProductController(List<Product> products)
        {
            this.products = products;
        }

        public IEnumerable<Product> GetAllProducts()
        {
            return products;
        }

        public async Task<IEnumerable<Product>> GetAllProductsAsync()
        {
            return await Task.FromResult(GetAllProducts());
        }

        public IHttpActionResult GetProduct(int id)
        {
            var product = products.FirstOrDefault((p) => p.Id == id);
            if (product == null)
            {
                return NotFound();
            }
            return Ok(product);
        }

        public async Task<IHttpActionResult> GetProductAsync(int id)
        {
            return await Task.FromResult(GetProduct(id));
        }
    }
}
GetProduct 方法會傳回 IHttpActionResult 介面的實例。 IHttpActionResult 是 Web API 2 中的其中一項新功能,可簡化單元測試開發。 實作 IHttpActionResult 介面的類別可在 System.Web.Http.Results 命名空間中找到。 這些類別代表來自動作要求的可能回應,並對應至 HTTP 狀態碼。
建置方案。
您現在已準備好設定測試專案。
在測試專案中安裝 NuGet 套件
當您使用空白範本來建立應用程式時,單元測試專案 (StoreApp.Tests) 不包含任何已安裝的 NuGet 套件。 其他範本,例如 Web API 範本,會在單元測試專案中包含一些 NuGet 套件。 在本教學課程中,您必須將 Microsoft ASP.NET Web API 2 核心套件包含在測試專案中。
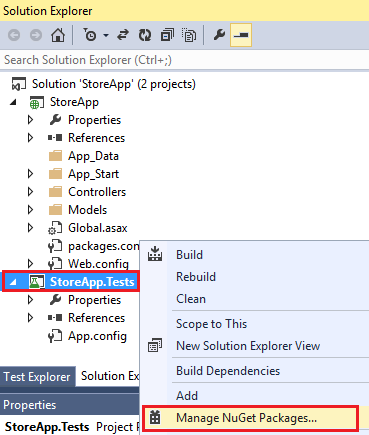
以滑鼠右鍵按一下 StoreApp.Tests 專案,然後選取 [管理 NuGet 套件]。 您必須選取 StoreApp.Tests 專案,才能將套件新增至該專案。
尋找並安裝 Microsoft ASP.NET Web API 2 核心套件。
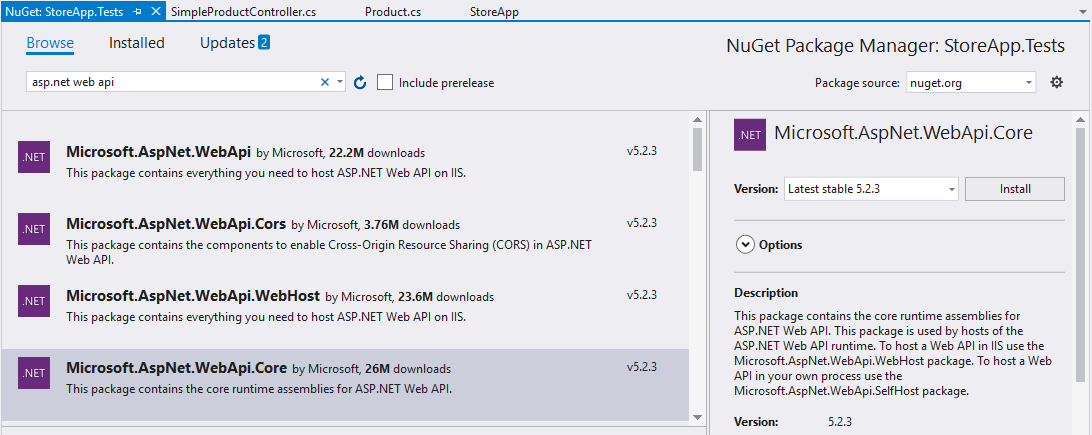
關閉 [管理 NuGet 套件] 視窗。
建立測試
根據預設,您的測試專案包含名為 UnitTest1.cs 的空白測試檔案。 此檔案會顯示您用來建立測試方法的屬性。 針對單元測試,您可以使用此檔案或建立您自己的檔案。
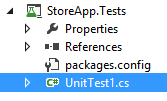
在本教學課程中,您將建立自己的測試類別。 您可以刪除 UnitTest1.cs 檔案。 新增名為 TestSimpleProductController.cs 的類別,並以下列程式碼取代程式碼。
using System;
using System.Collections.Generic;
using System.Threading.Tasks;
using System.Web.Http.Results;
using Microsoft.VisualStudio.TestTools.UnitTesting;
using StoreApp.Controllers;
using StoreApp.Models;

namespace StoreApp.Tests
{
    [TestClass]
    public class TestSimpleProductController
    {
        [TestMethod]
        public void GetAllProducts_ShouldReturnAllProducts()
        {
            var testProducts = GetTestProducts();
            var controller = new SimpleProductController(testProducts);

            var result = controller.GetAllProducts() as List<Product>;
            Assert.AreEqual(testProducts.Count, result.Count);
        }

        [TestMethod]
        public async Task GetAllProductsAsync_ShouldReturnAllProducts()
        {
            var testProducts = GetTestProducts();
            var controller = new SimpleProductController(testProducts);

            var result = await controller.GetAllProductsAsync() as List<Product>;
            Assert.AreEqual(testProducts.Count, result.Count);
        }

        [TestMethod]
        public void GetProduct_ShouldReturnCorrectProduct()
        {
            var testProducts = GetTestProducts();
            var controller = new SimpleProductController(testProducts);

            var result = controller.GetProduct(4) as OkNegotiatedContentResult<Product>;
            Assert.IsNotNull(result);
            Assert.AreEqual(testProducts[3].Name, result.Content.Name);
        }

        [TestMethod]
        public async Task GetProductAsync_ShouldReturnCorrectProduct()
        {
            var testProducts = GetTestProducts();
            var controller = new SimpleProductController(testProducts);

            var result = await controller.GetProductAsync(4) as OkNegotiatedContentResult<Product>;
            Assert.IsNotNull(result);
            Assert.AreEqual(testProducts[3].Name, result.Content.Name);
        }

        [TestMethod]
        public void GetProduct_ShouldNotFindProduct()
        {
            var controller = new SimpleProductController(GetTestProducts());

            var result = controller.GetProduct(999);
            Assert.IsInstanceOfType(result, typeof(NotFoundResult));
        }

        private List<Product> GetTestProducts()
        {
            var testProducts = new List<Product>();
            testProducts.Add(new Product { Id = 1, Name = "Demo1", Price = 1 });
            testProducts.Add(new Product { Id = 2, Name = "Demo2", Price = 3.75M });
            testProducts.Add(new Product { Id = 3, Name = "Demo3", Price = 16.99M });
            testProducts.Add(new Product { Id = 4, Name = "Demo4", Price = 11.00M });

            return testProducts;
        }
    }
}
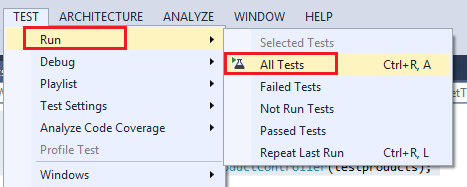
執行測試
您現在已準備好執行測試。 所有以 TestMethod 屬性標記的方法都會經過測試。 從 [ 測試] 功能表項目,執行測試。
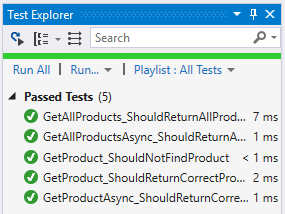
開啟 [ 測試總 管] 視窗,並注意測試結果。
總結
您已經完成此教學課程。 本教學課程中的資料已刻意簡化,以專注于單元測試條件。 如需更進階的資料案例單元測試,請參閱在單元測試 ASP.NET Web API 2 時模擬 Entity Framework。
意見反應
即將登場:在 2024 年,我們將逐步淘汰 GitHub 問題作為內容的意見反應機制,並將它取代為新的意見反應系統。 如需詳細資訊,請參閱:https://aka.ms/ContentUserFeedback。
提交並檢視相關的意見反應