建立 Azure Stack HCI 的邏輯網路
適用於:Azure Stack HCI 版本 23H2
本文說明如何為您的 Azure Stack HCI 叢集建立或新增邏輯網路。
必要條件
開始之前,請務必完成下列必要條件:
請務必檢閱並 完成必要條件。
您可以存取已部署的 Azure Stack HCI 系統、具有 Arc 資源網橋和自定義位置。
請確定您有外部 VM 交換器,可供 Azure Stack HCI 叢集中的所有伺服器存取。 根據預設,外部交換器會在部署 Azure Stack HCI 叢集期間建立,您可以用來與您將建立的邏輯網路產生關聯。
執行下列命令,以取得叢集上的外部 VM 交換器名稱。
Get-VmSwitch -SwitchType External記下參數的名稱。 當您建立邏輯網路時,會使用此資訊。 以下是範例輸出:
PS C:\Users\hcideployuser> Get-VmSwitch -SwitchType External
Name                               SwitchType       NetAdapterInterfaceDescription
----                               ----------       ----------------------------
ConvergedSwitch(management_compute_storage) External        Teamed-Interface
PS C:\Users\hcideployuser>
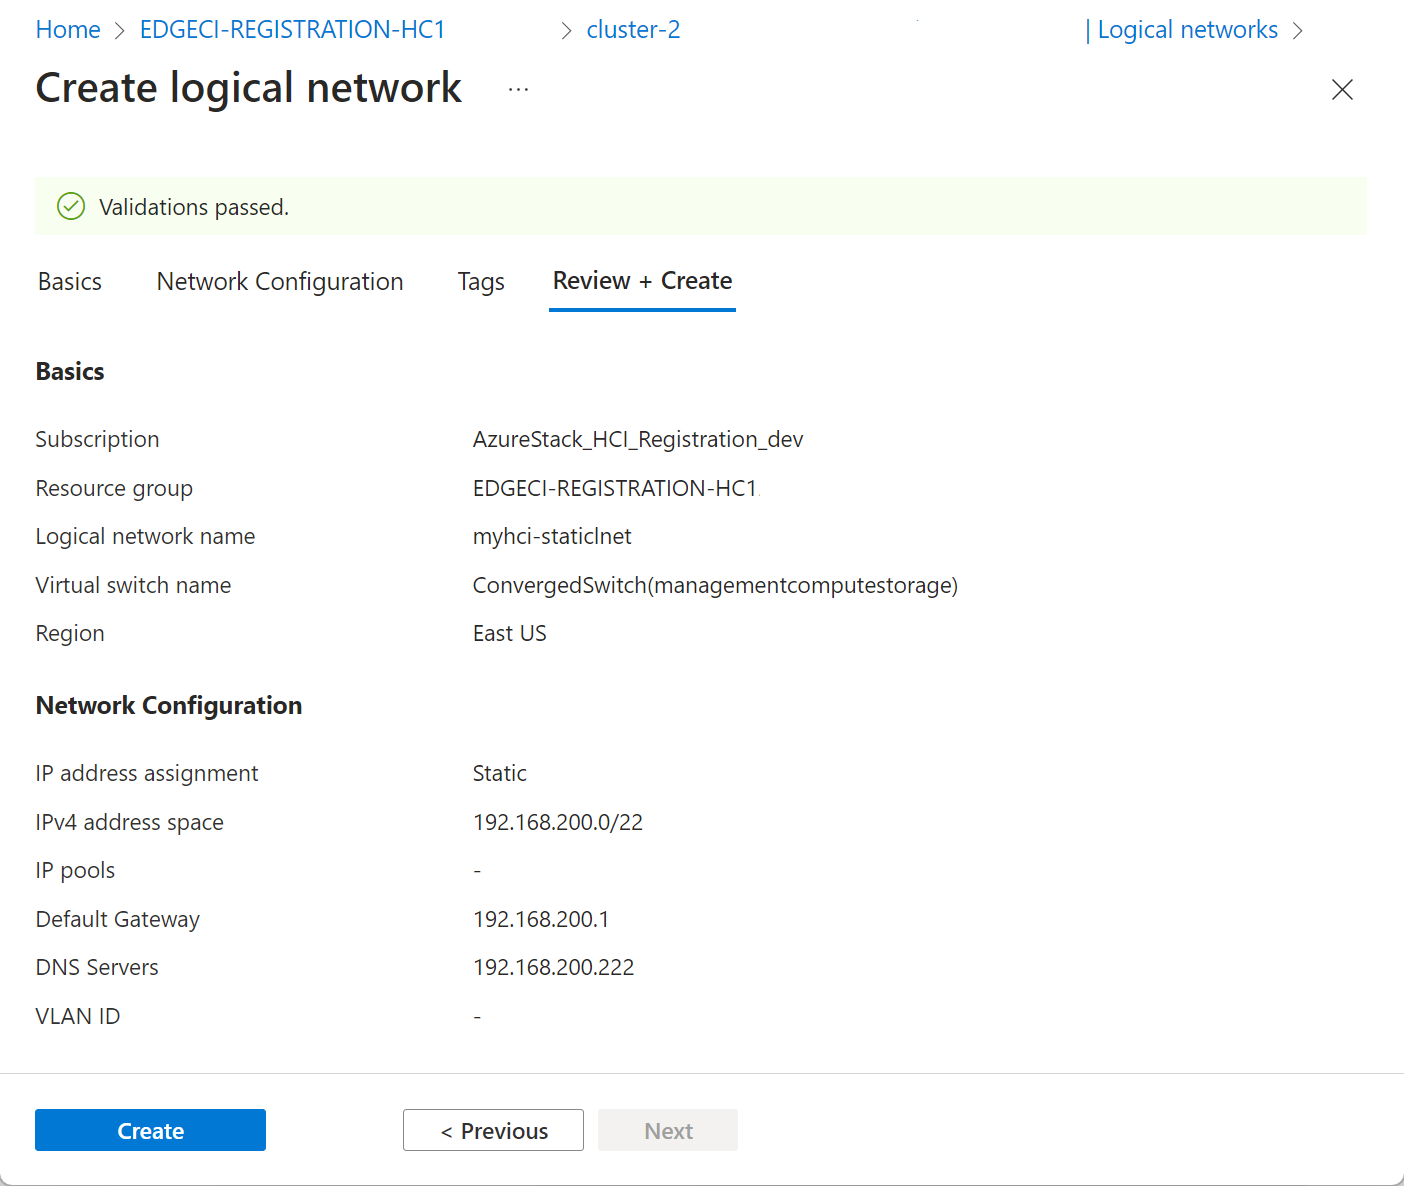
若要在位址空間中建立具有靜態 IP 位址的 VM,請新增具有靜態 IP 配置的邏輯網路。 請與您的網路管理員保留IP範圍,並確定取得此IP範圍的位址前綴。
建立邏輯網路
您可以使用 Azure Command-Line 介面 (CLI) 或使用 Azure 入口網站 來建立邏輯網路。
完成下列步驟,以使用 Azure CLI 建立邏輯網路。
登入並設定訂用帳戶
線上到 Azure Stack HCI 系統上的伺服器。
登入。 輸入:
az login --use-device-code設定您的訂用帳戶。
az account set --subscription <Subscription ID>
透過 CLI 建立邏輯網路
您可以使用 az stack-hci-vm network lnet create Cmdlet 在 VM 交換器上建立 DHCP 或靜態 IP 組態的邏輯網路。 用來建立 DHCP 和靜態邏輯網路的參數不同。
透過 CLI 建立靜態邏輯網路
在此版本中,您只能透過 Azure CLI 使用靜態 IP 來建立虛擬機。
當您想要在這些邏輯網路上建立具有網路介面的虛擬機時,請建立靜態邏輯網路。 請遵循 Azure CLI 中的下列步驟來設定靜態邏輯網路:
設定參數。 以下為範例:
$lnetName = "myhci-lnet-static"
$vmSwitchName = '"ConvergedSwitch(management_compute_storage)"'
$subscription = "<Subscription ID>"
$resource_group = "myhci-rg"
$customLocationName = "myhci-cl"
$customLocationID ="/subscriptions/$subscription/resourceGroups/$resource_group/providers/Microsoft.ExtendedLocation/customLocations/$customLocationName"
$location = "eastus"
$addressPrefixes = "100.68.180.0/28"
$gateway = "192.168.200.1"
$dnsServers = "192.168.200.222"
注意
針對在部署建立的預設 VM 參數,傳遞以雙引弧括住的名稱字串,後面接著單引號。 例如,預設 VM 交換器 ConvergedSwitch (management_compute_storage) 會傳遞為 『ConvergedSwitch (management_compute_storage) 」。。
針對靜態 IP, 必要的 參數會以下列方式表化:
參數 描述 name 您為 Azure Stack HCI 叢集建立的邏輯網路名稱。 請務必提供遵循 Azure 資源規則的名稱。 建立邏輯網路之後,即無法重新命名。 vm-switch-name 部署邏輯網路之 Azure Stack HCI 叢集上的外部虛擬交換器名稱。 resource-group 您要在其中建立邏輯網路之資源組名。 為了方便管理,我們建議您使用與 Azure Stack HCI 叢集相同的資源群組。 訂用帳戶 部署 Azure Stack HCI 之訂用帳戶的名稱或標識碼。 這可能是您在 Azure Stack HCI 叢集上用於邏輯網路的另一個訂用帳戶。 custom-location 使用此選項來提供與您建立此邏輯網路之 Azure Stack HCI 叢集相關聯的自定義位置。 位置 如 所 az locations指定的 Azure 區域。Vlan Arc VM 的 VLAN 識別碼。 請連絡您的網路管理員以取得此值。 值為 0 表示沒有 VLAN 識別碼。 ip-allocation-method IP 位址設定方法,可以是 Dynamic或Static。 如果未指定此參數,預設會使用動態組態來建立邏輯網路。address-prefixes CIDR 表示法中的子網位址。 例如:"192.168.0.0/16"。 dns-servers DNS 伺服器的 IPv4 位址清單。 以空格分隔格式指定多個 DNS 伺服器。 例如:“10.0.0.5” “10.0.0.10” 閘道 默認閘道的 Ipv4 位址。 注意
如果您要建立靜態邏輯網路,則必須指定 DNS 伺服器和閘道。
建立靜態邏輯網路。 執行下列 Cmdlet:
az stack-hci-vm network lnet create --subscription $subscription --resource-group $resource_group --custom-location $customLocationID --location $location --name $lnetName --vm-switch-name $vmSwitchName --ip-allocation-method "Static" --address-prefixes $addressPrefixes --gateway $gateway --dns-servers $dnsServers以下是範例輸出:
{
  "extendedLocation": {
    "name": "/subscriptions/<Subscription ID>resourceGroups/myhci-rg/providers/Microsoft.ExtendedLocation/customLocations/myhci-cl",
    "type": "CustomLocation"
  },
  "id": "/subscriptions/<Subscription ID>resourceGroups/myhci-rg/providers/Microsoft.AzureStackHCI/logicalnetworks/myhci-lnet-static",
  "location": "eastus",
  "name": "myhci-lnet-static",
  "properties": {
    "dhcpOptions": {
      "dnsServers": [
        "192.168.200.222"
      ]
    },
    "provisioningState": "Succeeded",
    "status": {},
    "subnets": [
      {
        "name": "myhci-lnet-static",
        "properties": {
          "addressPrefix": "192.168.201.0/24",
          "addressPrefixes": null,
          "ipAllocationMethod": "Static",
          "ipConfigurationReferences": null,
          "ipPools": null,
          "routeTable": {
            "etag": null,
            "name": null,
            "properties": {
              "routes": [
                {
                  "name": "myhci-lnet-static-default-route",
                  "properties": {
                    "addressPrefix": "0.0.0.0/0",
                    "nextHopIpAddress": "192.168.200.1"
                  }
                }
              ]
            },
            "type": null
          },
          "vlan": null
        }
      }
    ],
    "vmSwitchName": "ConvergedSwitch(management_compute_storage)"
  },
  "resourceGroup": "myhci-rg",
  "systemData": {
    "createdAt": "2023-11-02T16:38:18.460150+00:00",
    "createdBy": "guspinto@contoso.com",
    "createdByType": "User",
    "lastModifiedAt": "2023-11-02T16:40:22.996281+00:00",
    "lastModifiedBy": "319f651f-7ddb-4fc6-9857-7aef9250bd05",
    "lastModifiedByType": "Application"
  },
  "tags": null,
  "type": "microsoft.azurestackhci/logicalnetworks"
}
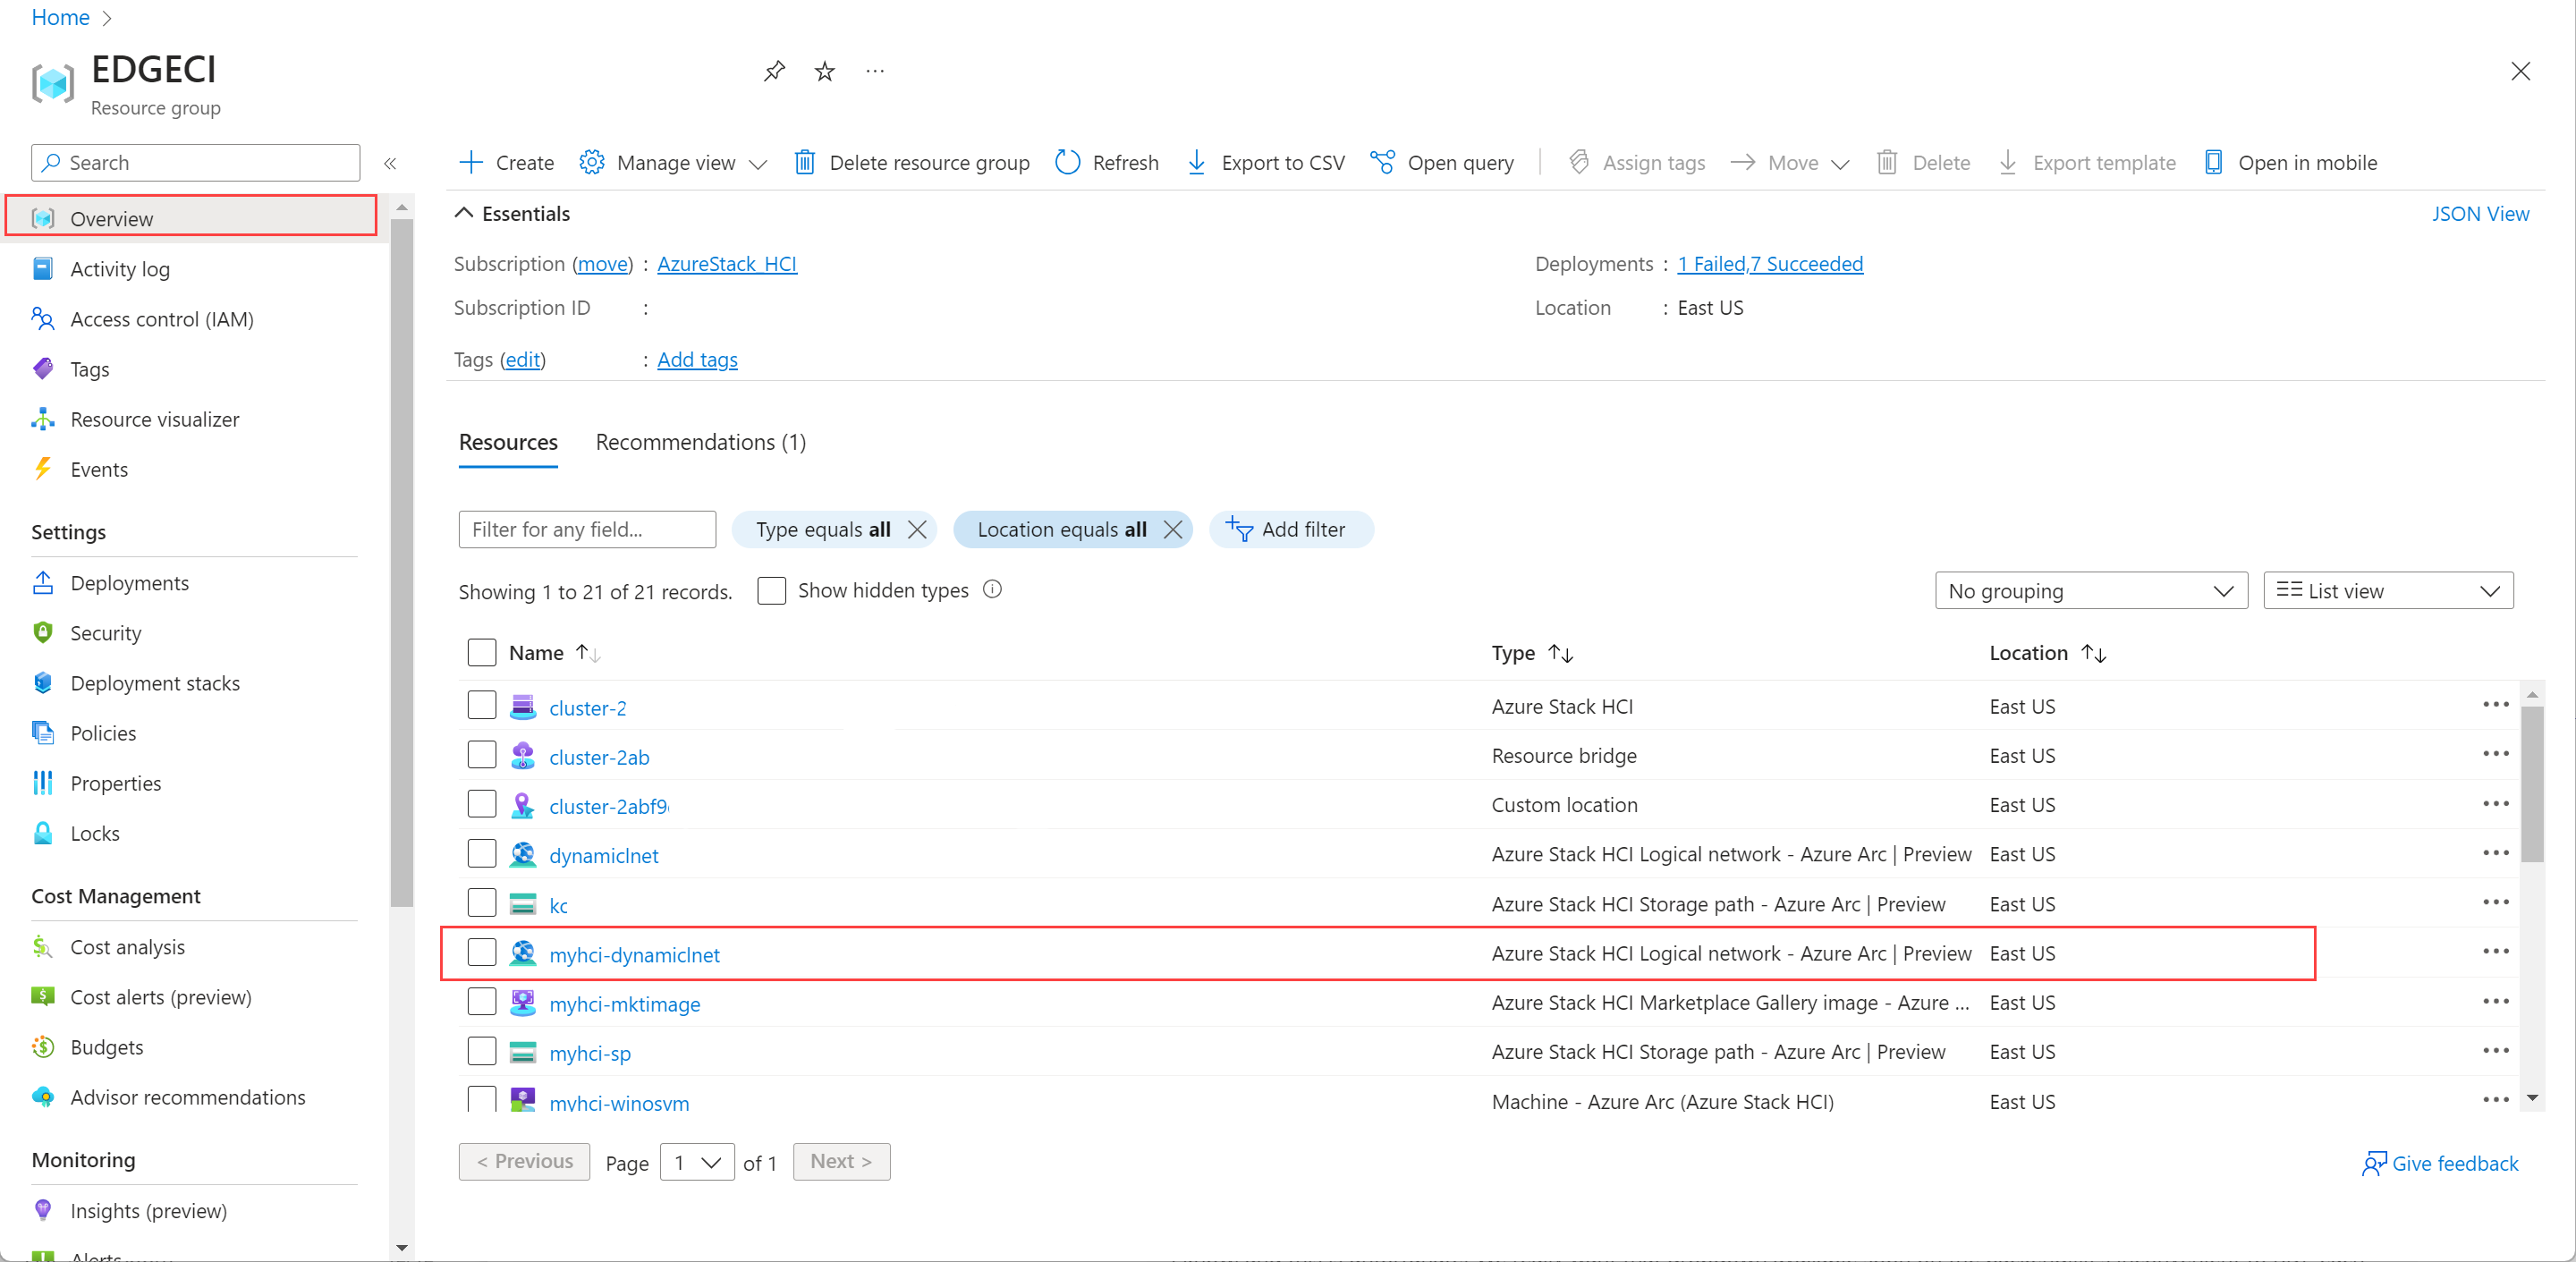
邏輯網路建立完成後,您就可以使用這些邏輯網路上的網路介面建立虛擬機。
透過 CLI 建立 DHCP 邏輯網路
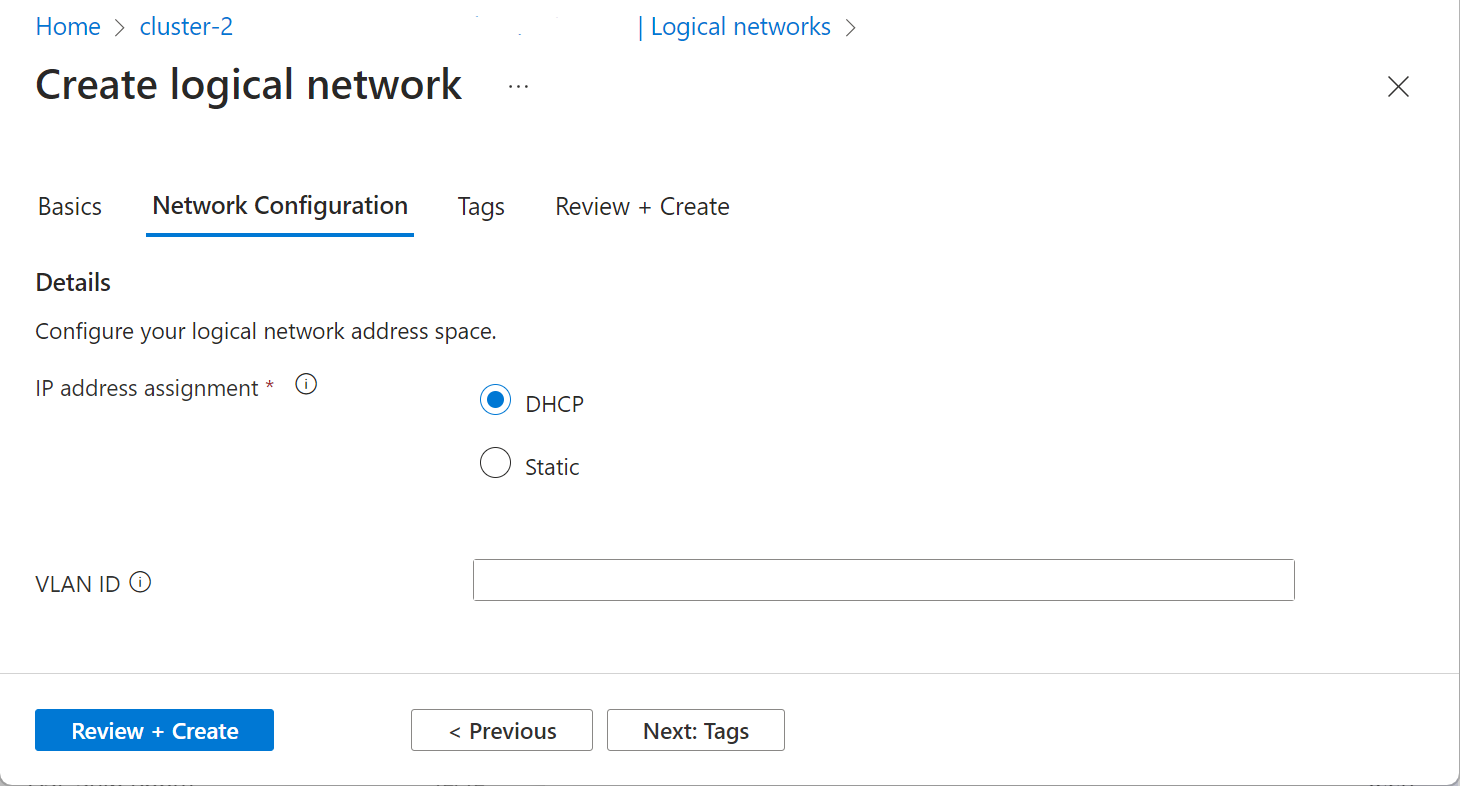
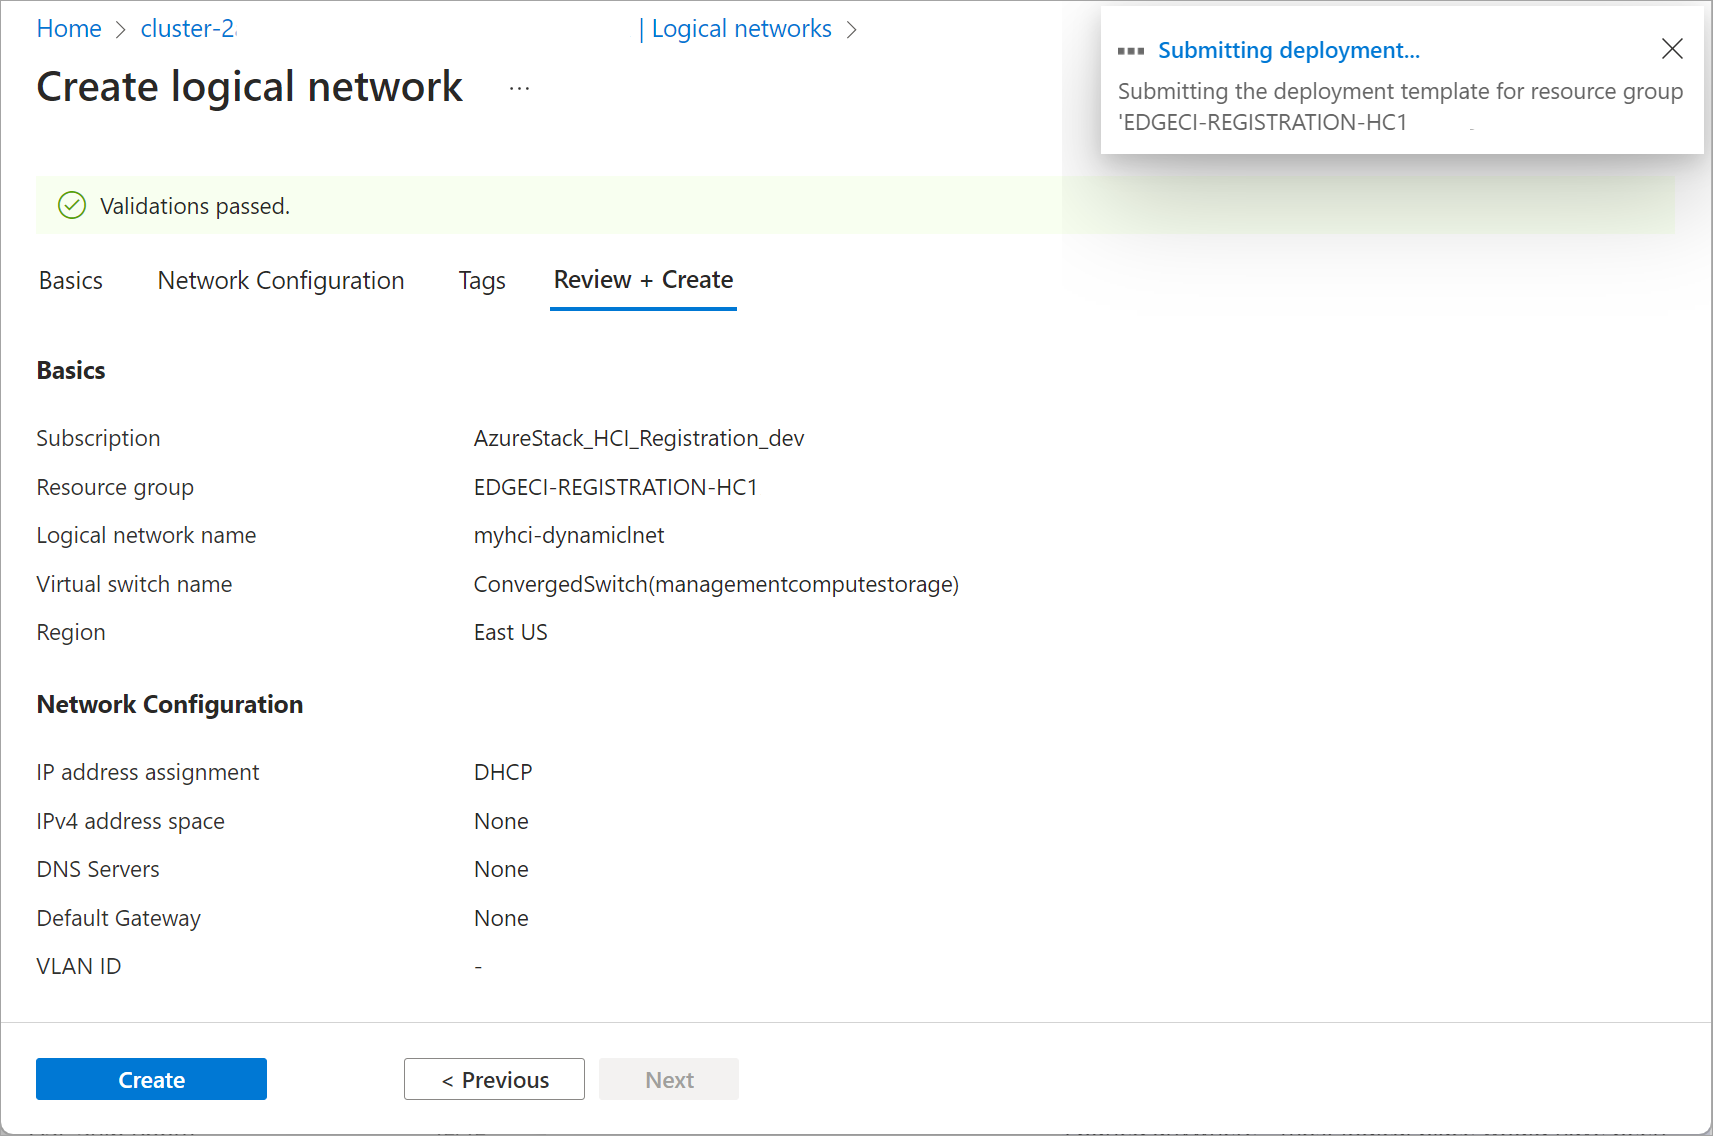
當您想要連接虛擬機的基礎網路具有 DHCP 時,建立 DHCP 邏輯網路。
請遵循下列步驟來設定 DHCP 邏輯網路:
設定參數。 以下是使用預設外部參數的範例:
$lnetName = "myhci-lnet-dhcp"
$vSwitchName = "ConvergedSwitch(management_compute_storage)"
$subscription = "<subscription-id>"
$resourceGroup = "myhci-rg"
$customLocationName = "myhci-cl"
$customLocationID = "/subscriptions/$subscription/resourceGroups/$resourceGroup/providers/Microsoft.ExtendedLocation/customLocations/$customLocationName"
$location = "eastus"
注意
針對在部署建立的預設 VM 參數,傳遞以雙引弧括住的名稱字串,後面接著單引號。 例如,預設 VM 交換器 ConvergedSwitch (management_compute_storage) 會傳遞為 『ConvergedSwitch (management_compute_storage) 」。。
以下是建立 DHCP 邏輯網路 所需的 參數:
參數 描述 name 您為 Azure Stack HCI 叢集建立的邏輯網路名稱。 請務必提供遵循 Azure 資源規則的名稱。 建立邏輯網路之後,即無法重新命名。 vm-switch-name 部署邏輯網路之 Azure Stack HCI 叢集上的外部虛擬交換器名稱。 resource-group 您要在其中建立邏輯網路之資源組名。 為了方便管理,我們建議您使用與 Azure Stack HCI 叢集相同的資源群組。 訂用帳戶 部署 Azure Stack HCI 之訂用帳戶的名稱或標識碼。 這可能是您在 Azure Stack HCI 叢集上用於邏輯網路的另一個訂用帳戶。 custom-location 使用此選項來提供與您建立此邏輯網路之 Azure Stack HCI 叢集相關聯的自定義位置。 位置 如 所 az locations指定的 Azure 區域。Vlan Arc VM 的 VLAN 識別碼。 請連絡您的網路管理員以取得此值。 值為 0 表示沒有 VLAN 識別碼。 執行下列 Cmdlet 來建立 DHCP 邏輯網路:
az stack-hci-vm network lnet create --subscription $subscription --resource-group $resourceGroup --custom-location $customLocationID --location $location --name $lnetName --vm-switch-name $vSwitchName --ip-allocation-method "Dynamic"以下是範例輸出:
{
  "extendedLocation": {
    "name": "/subscriptions/<Subscription ID>/resourceGroups/myhci-rg/providers/Microsoft.ExtendedLocation/customLocations/myhci-cl",
    "type": "CustomLocation"
  },
  "id": "/subscriptions/<Subscription ID>/resourceGroups/myhci-rg/providers/Microsoft.AzureStackHCI/logicalnetworks/myhci-lnet-dhcp",
  "location": "eastus",
  "name": "myhci-lnet-dhcp",
  "properties": {
    "dhcpOptions": null,
    "provisioningState": "Succeeded",
    "status": {},
    "subnets": [
      {
        "name": "myhci-lnet-dhcp",
        "properties": {
          "addressPrefix": null,
          "addressPrefixes": null,
          "ipAllocationMethod": "Dynamic",
          "ipConfigurationReferences": null,
          "ipPools": null,
          "routeTable": null,
          "vlan": 0
        }
      }
    ],
    "vmSwitchName": "ConvergedSwitch(management_compute_storage)"
  },
  "resourceGroup": "myhci-rg",
  "systemData": {
    "createdAt": "2023-11-02T16:32:51.531198+00:00",
    "createdBy": "guspinto@contoso.com",
    "createdByType": "User",
    "lastModifiedAt": "2023-11-02T23:08:08.462686+00:00",
    "lastModifiedBy": "319f651f-7ddb-4fc6-9857-7aef9250bd05",
    "lastModifiedByType": "Application"
  },
  "tags": null,
  "type": "microsoft.azurestackhci/logicalnetworks"
}
下一步
意見反應
即將登場:在 2024 年,我們將逐步淘汰 GitHub 問題作為內容的意見反應機制,並將它取代為新的意見反應系統。 如需詳細資訊,請參閱:https://aka.ms/ContentUserFeedback。
提交並檢視相關的意見反應
![Azure Stack HCI 叢集資源中 [概觀] 頁面的螢幕快照,其中顯示已連線的 Azure Arc。](../../includes/media/hci-vm-image-prerequisites-marketplace/azure-arc-connected.png)
![顯示 Azure 入口網站 中 [資源] 窗格的螢幕快照。](media/create-logical-networks/select-logical-network.png)

![顯示 [基本] 索引標籤的螢幕快照。](media/create-logical-networks/enter-network-name.png)
![顯示 [網络設定] 索引標籤的螢幕快照。](media/create-logical-networks/enter-ip-addresses.png)


![DHCP 邏輯網路的 [檢閱 + 建立] 螢幕快照。](media/create-logical-networks/review-and-create.png)


