重要事項
- Azure Cognitive Services Form Recognizer 現在已在 Foundry Tools 中稱為 Azure Document Intelligence。
- 某些平台仍在等候重新命名更新。
- 我們文件中的 Azure 表格辨識器或文件智慧服務全都是指相同的 Azure 服務。
Azure 文件智慧/表單識別器是一項基於雲端的 Foundry 工具服務,利用機器學習從文件中提取鍵值對、文字、表格及關鍵資料。
您可以使用程式設計語言 SDK 或呼叫 REST API,輕鬆地將檔案處理模型整合到工作流程和應用程式中。
針對此快速入門,建議您在學習本快速入門的技術時使用免費服務。 請記住,免費的頁數限制為每個月 500 頁。
若要深入了解 API 的功能和開發選項,請瀏覽我們的概觀 (部分機器翻譯) 頁面。
用戶端連結庫 | REST API 參考 | 套件| 範例|支援的 REST API 版本
用戶端連結庫 |API 參考 | 套件 (NuGet) | 樣品 | 支援的 REST API 版本
用戶端連結庫 |REST API 參考 | 套件 | 範例 |支援的 REST API 版本
在本快速入門中,請使用下列功能,從表單和文件中分析及擷取資料和值:
先決條件
Azure 訂用帳戶 - 建立免費帳戶。
目前的 Visual Studio 整合式開發環境 (IDE) 版本。
一個 Foundry 工具或文件智慧資源。 一旦你有了 Azure 訂閱,就在 Azure 入口網站建立 一個單一服務 或 Azure 多服務 資源,來取得你的金鑰和端點。
您可以使用免費定價層 (
F0) 來試用服務,之後可升級至付費層以用於實際執行環境。
秘訣
如果你打算在同一端點/金鑰下存取多個 Foundry 工具,請建立 Microsoft Foundry 資源。 針對僅限文件智慧服務存取,請建立文件智慧服務資源。 如果您想要使用 Microsoft Entra 驗證,則需要使用單一服務資源。
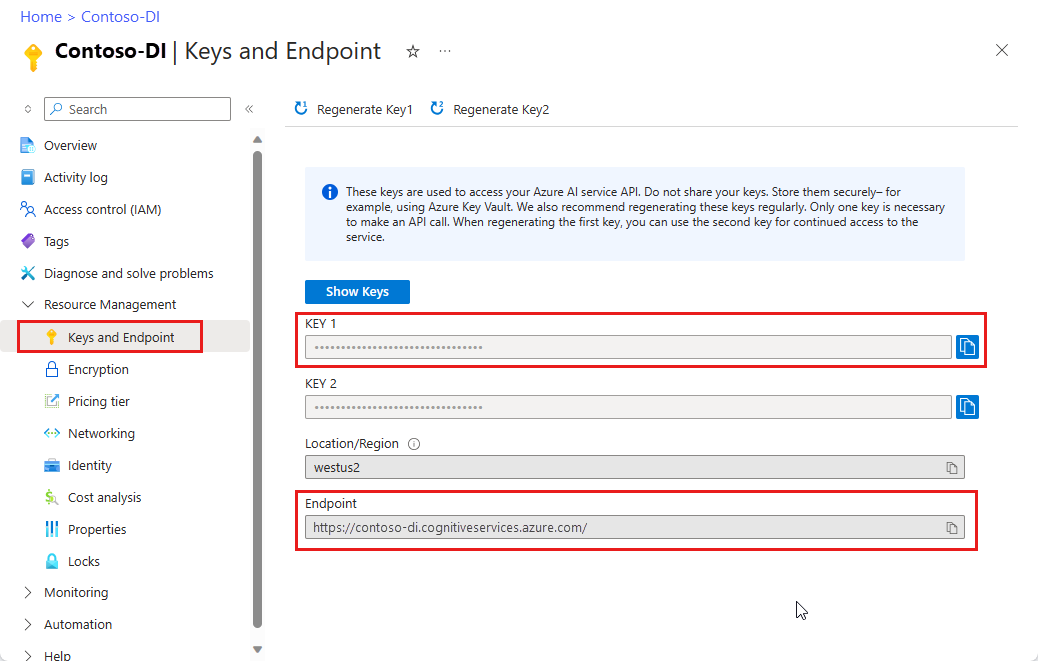
部署資源之後,請選取 [移至資源]。 您需要使用已建立資源的金鑰和端點,將應用程式連線至文件智慧服務 API。 您稍後會在快速入門中將金鑰和端點貼上至程式碼中:
一個 Foundry 工具或文件智慧資源。 一旦你有了 Azure 訂閱,就在 Azure 入口網站建立 一個單一服務 或 Azure 多服務 資源,來取得你的金鑰和端點。
您可以使用免費定價層 (
F0) 來試用服務,之後可升級至付費層以用於實際執行環境。
秘訣
如果你打算在同一端點/金鑰下存取多個 Foundry 工具,請建立 Microsoft Foundry 資源。 僅針對 Azure 表格辨識器的存取,請建立 Azure 表格辨識器資源。 如果您想要使用 Microsoft Entra 驗證,則需要使用單一服務資源。
部署資源之後,請選取 [移至資源]。 您需要您所建立資源的金鑰和端點,以將應用程式連線至 Azure 表格辨識器 API。 您稍後會在快速入門中將金鑰和端點貼上至程式碼中:
設定
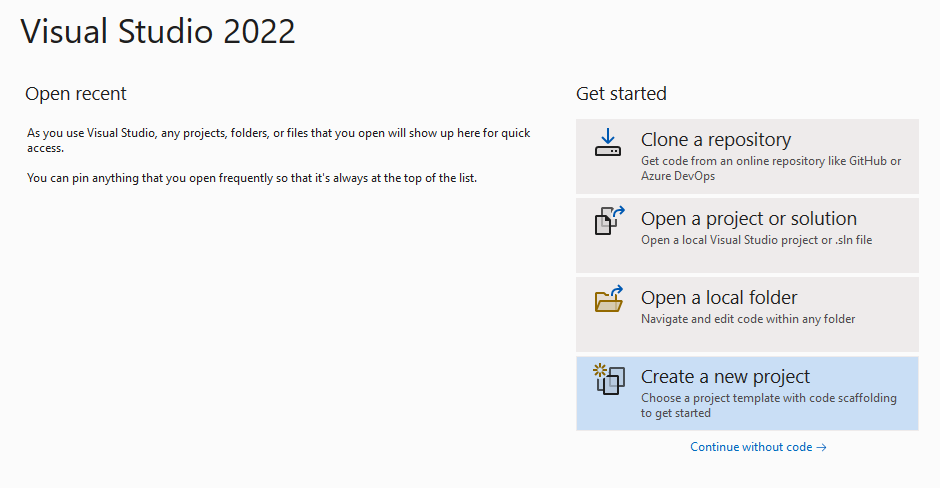
啟動 Visual Studio。
在開始頁面中,選擇 [建立新專案]。
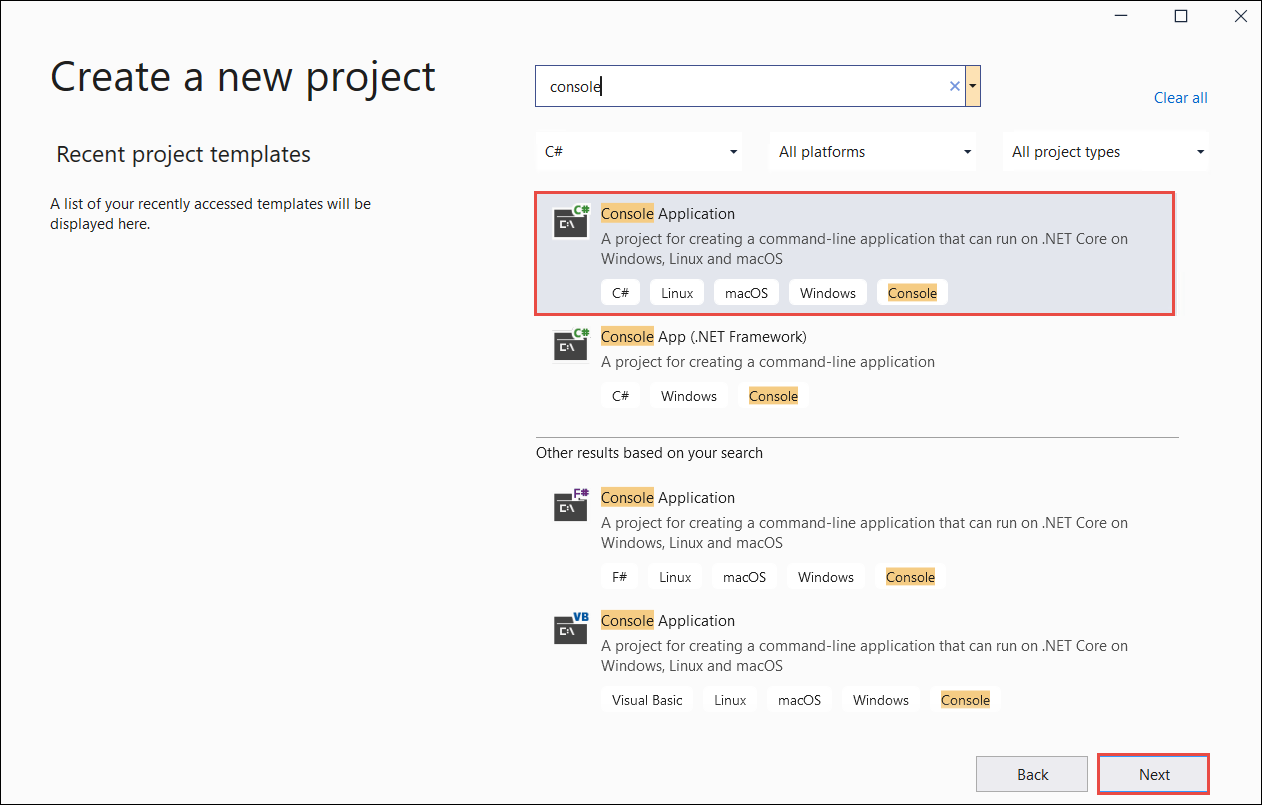
在 [建立新專案] 頁面上,在搜尋欄中輸入主控台。 選擇 [主控台應用程式] 範本,然後選擇 [下一步]。
- 在 [設定新專案] 對話方塊視窗中,於 [專案名稱] 方塊中輸入
doc_intel_quickstart。 然後選擇 [下一步]。
- 在 [設定新專案] 對話方塊視窗中,於 [專案名稱] 方塊中輸入
form_recognizer_quickstart。 然後選擇 [下一步]。
在 [其他資訊] 對話方塊視窗中,選取 [.NET 8.0 (長期支援)],然後選取 [建立]。

使用 NuGet 安裝用戶端程式庫
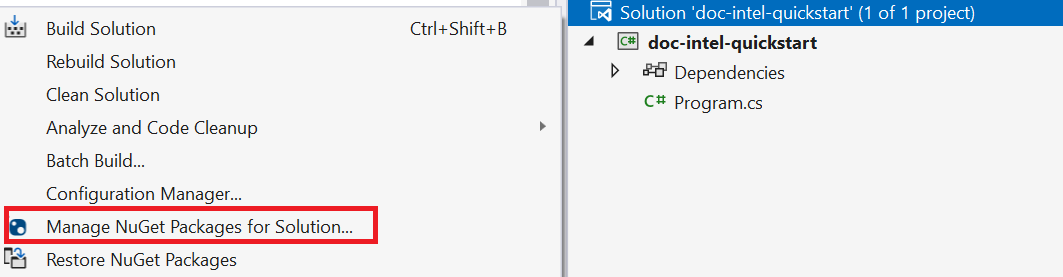
以滑鼠右鍵按一下您的 doc_intel_quickstart 專案,然後選取 [管理 NuGet 套件...]。
選取 [瀏覽] 索引標籤,然後輸入 Azure.AI.DocumentIntelligence。
選取
Include prerelease核取方塊。
從下拉式功能表中選擇版本,並在專案中安裝套件。
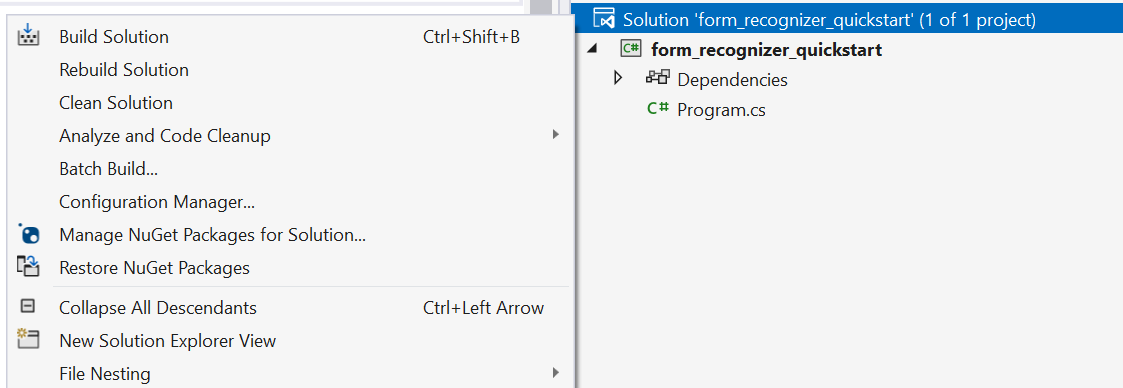
以滑鼠右鍵按一下您的 form_recognizer_quickstart 專案,然後選取 [管理 NuGet 套件...]。
選取 [瀏覽] 索引標籤,然後輸入 [Azure.AI.FormRecognizer]。 從下拉式功能表中選取 [4.1.0] 版
以滑鼠右鍵按一下您的 form_recognizer_quickstart 專案,然後選取 [管理 NuGet 套件...]。
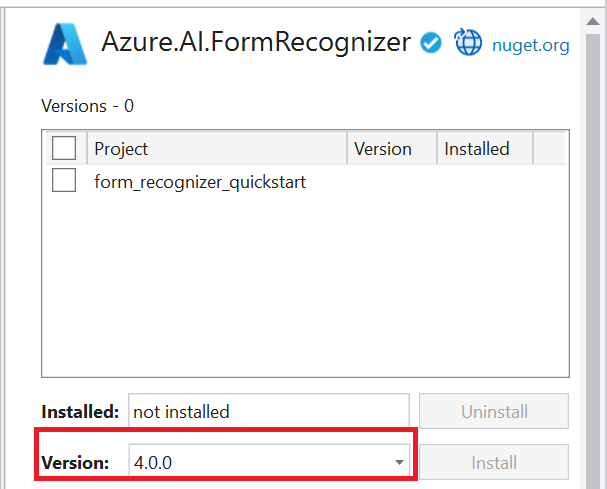
選取 [瀏覽] 索引標籤,然後輸入 [Azure.AI.FormRecognizer]。 從下拉式功能表中選取 [4.0.0] 版
建置應用程式
若要與此文件智慧服務互動,您必須建立 DocumentIntelligenceClient 類別的執行個體。 若要這樣做,請使用 AzureKeyCredential 從 Azure 入口網站建立 key,並使用 DocumentIntelligenceClient 和文件智慧服務 AzureKeyCredential 來建立 endpoint 執行個體。
若要與 Azure 表格辨識器服務互動,您需要建立 DocumentAnalysisClient 類別的執行個體。 若要這樣做,您要使用 AzureKeyCredential 從 Azure 入口網站建立 key,並使用 DocumentAnalysisClient 和 Azure 表格辨識器 AzureKeyCredential 來建立 endpoint 執行個體。
附註
- 從 .NET 6 開始,使用
console範本的新專案會產生與舊版不同的新程式樣式。 - 新輸出會使用最新的 C# 功能,以簡化您需要撰寫的程式碼。
- 當您使用較新版本時,只需要撰寫
Main方法的本文。 您不需要包含最上層陳述式、全域 Using 指示詞或隱含 Using 指示詞。 - 如需詳細資訊,請參閱新的 C# 範本產生最上層語句。
開啟 Program.cs 檔案。
刪除現有的程式碼,包括行
Console.Writeline("Hello World!"),然後選取下列其中一個程式碼範例,以複製並貼到應用程式的 Program.cs 檔案中:
重要事項
我們建議使用適用於 Azure 資源的受控識別搭配 Microsoft Entra ID 驗證,以避免使用在雲端執行的應用程式儲存認證。
請謹慎使用 API 金鑰。 請勿在程式碼中直接包含 API 金鑰,且切勿公開張貼金鑰。 如果使用 API 金鑰,請安全地將它們儲存在 Azure 金鑰保存庫、定期輪替金鑰,並使用角色型存取控制和網路存取限制來限制對 Azure 金鑰保存庫 的存取。 如需在應用程式中安全地使用 API 金鑰的詳細資訊,請參閱 使用 Azure Key Vault 的 API 金鑰。
如需 AI 服務安全性的詳細資訊,請參閱驗證對 Azure AI 服務的要求。
版面配置模型
從文件中擷取文字、選取標記、文字樣式、資料表結構和周框區域座標。
- 在此範例中,您需要來自 URI 的文件檔案。 您可以針對本快速入門使用我們的範例文件 (英文)。
- 我們已將檔案 URI 值新增至指令碼頂端的
Uri fileUri變數。 - 若要從 URI 上的指定檔案擷取配置,請使用
StartAnalyzeDocumentFromUri方法並傳遞prebuilt-layout作為模型識別碼。 傳回值是AnalyzeResult物件,包含來自提交文件的資料。
將下列程式碼範例新增到 Program.cs 檔案中。 請務必使用來自 Azure 入口網站文件智慧服務執行個體的值來更新金鑰與端點變數:
using Azure;
using Azure.AI.DocumentIntelligence;

//set `<your-endpoint>` and `<your-key>` variables with the values from the Azure portal to create your `AzureKeyCredential` and `DocumentIntelligenceClient` instance
string endpoint = "<your-endpoint>";
string key = "<your-key>";
AzureKeyCredential credential = new AzureKeyCredential(key);
DocumentIntelligenceClient client = new DocumentIntelligenceClient(new Uri(endpoint), credential);

//sample document
Uri fileUri = new Uri ("https://raw.githubusercontent.com/Azure-Samples/cognitive-services-REST-api-samples/master/curl/form-recognizer/sample-layout.pdf");

AnalyzeDocumentContent content = new AnalyzeDocumentContent()
{
    UrlSource= fileUri
};

Operation<AnalyzeResult> operation = await client.AnalyzeDocumentAsync(WaitUntil.Completed, "prebuilt-layout", content);

AnalyzeResult result = operation.Value;

foreach (DocumentPage page in result.Pages)
{
    Console.WriteLine($"Document Page {page.PageNumber} has {page.Lines.Count} line(s), {page.Words.Count} word(s)," +
        $" and {page.SelectionMarks.Count} selection mark(s).");

    for (int i = 0; i < page.Lines.Count; i++)
    {
        DocumentLine line = page.Lines[i];

        Console.WriteLine($"  Line {i}:");
        Console.WriteLine($"    Content: '{line.Content}'");

        Console.Write("    Bounding polygon, with points ordered clockwise:");
        for (int j = 0; j < line.Polygon.Count; j += 2)
        {
            Console.Write($" ({line.Polygon[j]}, {line.Polygon[j + 1]})");
        }

        Console.WriteLine();
    }

    for (int i = 0; i < page.SelectionMarks.Count; i++)
    {
        DocumentSelectionMark selectionMark = page.SelectionMarks[i];

        Console.WriteLine($"  Selection Mark {i} is {selectionMark.State}.");
        Console.WriteLine($"    State: {selectionMark.State}");

        Console.Write("    Bounding polygon, with points ordered clockwise:");
        for (int j = 0; j < selectionMark.Polygon.Count; j++)
        {
            Console.Write($" ({selectionMark.Polygon[j]}, {selectionMark.Polygon[j + 1]})");
        }

        Console.WriteLine();
    }
}

for (int i = 0; i < result.Paragraphs.Count; i++)
{
    DocumentParagraph paragraph = result.Paragraphs[i];

    Console.WriteLine($"Paragraph {i}:");
    Console.WriteLine($"  Content: {paragraph.Content}");

    if (paragraph.Role != null)
    {
        Console.WriteLine($"  Role: {paragraph.Role}");
    }
}

foreach (DocumentStyle style in result.Styles)
{
    // Check the style and style confidence to see if text is handwritten.
    // Note that value '0.8' is used as an example.

    bool isHandwritten = style.IsHandwritten.HasValue && style.IsHandwritten == true;

    if (isHandwritten && style.Confidence > 0.8)
    {
        Console.WriteLine($"Handwritten content found:");

        foreach (DocumentSpan span in style.Spans)
        {
            var handwrittenContent = result.Content.Substring(span.Offset, span.Length);
            Console.WriteLine($"  {handwrittenContent}");
        }
    }
}

for (int i = 0; i < result.Tables.Count; i++)
{
    DocumentTable table = result.Tables[i];

    Console.WriteLine($"Table {i} has {table.RowCount} rows and {table.ColumnCount} columns.");

    foreach (DocumentTableCell cell in table.Cells)
    {
        Console.WriteLine($"  Cell ({cell.RowIndex}, {cell.ColumnIndex}) is a '{cell.Kind}' with content: {cell.Content}");
    }
}
執行應用程式
將程式碼範例新增至應用程式之後,請選擇 formRecognizer_quickstart 旁的綠色 [開始] 按鈕來建置和執行程式,或按 F5。

將下列程式碼範例新增到 Program.cs 檔案中。 請務必使用來自 Azure 入口網站 Azure 表格辨識器執行個體的值來更新金鑰和端點變數:
using Azure;
using Azure.AI.FormRecognizer.DocumentAnalysis;

//set `<your-endpoint>` and `<your-key>` variables with the values from the Azure portal to create your `AzureKeyCredential` and `DocumentAnalysisClient` instance
string endpoint = "<your-endpoint>";
string key = "<your-key>";
AzureKeyCredential credential = new AzureKeyCredential(key);
DocumentAnalysisClient client = new DocumentAnalysisClient(new Uri(endpoint), credential);

//sample document
Uri fileUri = new Uri ("https://raw.githubusercontent.com/Azure-Samples/cognitive-services-REST-api-samples/master/curl/form-recognizer/sample-layout.pdf");

AnalyzeDocumentOperation operation = await client.AnalyzeDocumentFromUriAsync(WaitUntil.Completed, "prebuilt-layout", fileUri);

AnalyzeResult result = operation.Value;

foreach (DocumentPage page in result.Pages)
{
    Console.WriteLine($"Document Page {page.PageNumber} has {page.Lines.Count} line(s), {page.Words.Count} word(s),");
    Console.WriteLine($"and {page.SelectionMarks.Count} selection mark(s).");

    for (int i = 0; i < page.Lines.Count; i++)
    {
        DocumentLine line = page.Lines[i];
        Console.WriteLine($"  Line {i} has content: '{line.Content}'.");

        Console.WriteLine($"    Its bounding box is:");
        Console.WriteLine($"      Upper left => X: {line.Polygon[0].X}, Y= {line.Polygon[0].Y}");
        Console.WriteLine($"      Upper right => X: {line.Polygon[1].X}, Y= {line.Polygon[1].Y}");
        Console.WriteLine($"      Lower right => X: {line.Polygon[2].X}, Y= {line.Polygon[2].Y}");
        Console.WriteLine($"      Lower left => X: {line.Polygon[3].X}, Y= {line.Polygon[3].Y}");
    }

    for (int i = 0; i < page.SelectionMarks.Count; i++)
    {
        DocumentSelectionMark selectionMark = page.SelectionMarks[i];

        Console.WriteLine($"  Selection Mark {i} is {selectionMark.State}.");
        Console.WriteLine($"    Its bounding box is:");
        Console.WriteLine($"      Upper left => X: {selectionMark.Polygon[0].X}, Y= {selectionMark.Polygon[0].Y}");
        Console.WriteLine($"      Upper right => X: {selectionMark.Polygon[1].X}, Y= {selectionMark.Polygon[1].Y}");
        Console.WriteLine($"      Lower right => X: {selectionMark.Polygon[2].X}, Y= {selectionMark.Polygon[2].Y}");
        Console.WriteLine($"      Lower left => X: {selectionMark.Polygon[3].X}, Y= {selectionMark.Polygon[3].Y}");
    }
}

foreach (DocumentStyle style in result.Styles)
{
    // Check the style and style confidence to see if text is handwritten.
    // Note that value '0.8' is used as an example.

    bool isHandwritten = style.IsHandwritten.HasValue && style.IsHandwritten == true;

    if (isHandwritten && style.Confidence > 0.8)
    {
        Console.WriteLine($"Handwritten content found:");

        foreach (DocumentSpan span in style.Spans)
        {
            Console.WriteLine($"  Content: {result.Content.Substring(span.Index, span.Length)}");
        }
    }
}

Console.WriteLine("The following tables were extracted:");

for (int i = 0; i < result.Tables.Count; i++)
{
    DocumentTable table = result.Tables[i];
    Console.WriteLine($"  Table {i} has {table.RowCount} rows and {table.ColumnCount} columns.");

    foreach (DocumentTableCell cell in table.Cells)
    {
        Console.WriteLine($"    Cell ({cell.RowIndex}, {cell.ColumnIndex}) has kind '{cell.Kind}' and content: '{cell.Content}'.");
    }
}
執行應用程式
將程式碼範例新增至應用程式之後,請選擇 formRecognizer_quickstart 旁的綠色 [開始] 按鈕來建置和執行程式,或按 F5。

版面配置模型輸出
以下是預期的輸出程式碼片段:
  Document Page 1 has 69 line(s), 425 word(s), and 15 selection mark(s).
  Line 0 has content: 'UNITED STATES'.
    Its bounding box is:
      Upper left => X: 3.4915, Y= 0.6828
      Upper right => X: 5.0116, Y= 0.6828
      Lower right => X: 5.0116, Y= 0.8265
      Lower left => X: 3.4915, Y= 0.8265
  Line 1 has content: 'SECURITIES AND EXCHANGE COMMISSION'.
    Its bounding box is:
      Upper left => X: 2.1937, Y= 0.9061
      Upper right => X: 6.297, Y= 0.9061
      Lower right => X: 6.297, Y= 1.0498
      Lower left => X: 2.1937, Y= 1.0498
若要檢視整個輸出,請造訪 GitHub 上的 Azure 範例存放庫,以檢視配置模型輸出。
將下列程式碼範例新增到 Program.cs 檔案中。 請務必使用來自 Azure 入口網站 Azure 表格辨識器執行個體的值來更新金鑰和端點變數:
using Azure;
using Azure.AI.FormRecognizer.DocumentAnalysis;

//set `<your-endpoint>` and `<your-key>` variables with the values from the Azure portal to create your `AzureKeyCredential` and `DocumentAnalysisClient` instance
string endpoint = "<your-endpoint>";
string key = "<your-key>";
AzureKeyCredential credential = new AzureKeyCredential(key);
DocumentAnalysisClient client = new DocumentAnalysisClient(new Uri(endpoint), credential);

//sample document
Uri fileUri = new Uri ("https://raw.githubusercontent.com/Azure-Samples/cognitive-services-REST-api-samples/master/curl/form-recognizer/sample-layout.pdf");

AnalyzeDocumentOperation operation = await client.AnalyzeDocumentFromUriAsync(WaitUntil.Completed, "prebuilt-layout", fileUri);

AnalyzeResult result = operation.Value;

foreach (DocumentPage page in result.Pages)
{
    Console.WriteLine($"Document Page {page.PageNumber} has {page.Lines.Count} line(s), {page.Words.Count} word(s),");
    Console.WriteLine($"and {page.SelectionMarks.Count} selection mark(s).");

    for (int i = 0; i < page.Lines.Count; i++)
    {
        DocumentLine line = page.Lines[i];
        Console.WriteLine($"  Line {i} has content: '{line.Content}'.");

        Console.WriteLine($"    Its bounding polygon (points ordered clockwise):");

        for (int j = 0; j < line.Polygon.Count; j++)
        {
            Console.WriteLine($"      Point {j} => X: {line.Polygon[j].X}, Y: {line.Polygon[j].Y}");
        }
    }

    for (int i = 0; i < page.SelectionMarks.Count; i++)
    {
        DocumentSelectionMark selectionMark = page.SelectionMarks[i];

        Console.WriteLine($"  Selection Mark {i} is {selectionMark.State}.");
        Console.WriteLine($"    Its bounding polygon (points ordered clockwise):");

        for (int j = 0; j < selectionMark.Polygon.Count; j++)
        {
            Console.WriteLine($"      Point {j} => X: {selectionMark.Polygon[j].X}, Y: {selectionMark.Polygon[j].Y}");
        }
    }
}

Console.WriteLine("Paragraphs:");

foreach (DocumentParagraph paragraph in result.Paragraphs)
{
    Console.WriteLine($"  Paragraph content: {paragraph.Content}");

    if (paragraph.Role != null)
    {
        Console.WriteLine($"    Role: {paragraph.Role}");
    }
}

foreach (DocumentStyle style in result.Styles)
{
    // Check the style and style confidence to see if text is handwritten.
    // Note that value '0.8' is used as an example.

    bool isHandwritten = style.IsHandwritten.HasValue && style.IsHandwritten == true;

    if (isHandwritten && style.Confidence > 0.8)
    {
        Console.WriteLine($"Handwritten content found:");

        foreach (DocumentSpan span in style.Spans)
        {
            Console.WriteLine($"  Content: {result.Content.Substring(span.Index, span.Length)}");
        }
    }
}

Console.WriteLine("The following tables were extracted:");

for (int i = 0; i < result.Tables.Count; i++)
{
    DocumentTable table = result.Tables[i];
    Console.WriteLine($"  Table {i} has {table.RowCount} rows and {table.ColumnCount} columns.");

    foreach (DocumentTableCell cell in table.Cells)
    {
        Console.WriteLine($"    Cell ({cell.RowIndex}, {cell.ColumnIndex}) has kind '{cell.Kind}' and content: '{cell.Content}'.");
    }
}
Extract the layout of a document from a file stream
To extract the layout from a given file at a file stream, use the AnalyzeDocument method and pass prebuilt-layout as the model ID. The returned value is an AnalyzeResult object containing data about the submitted document.

string filePath = "<filePath>";
using var stream = new FileStream(filePath, FileMode.Open);

AnalyzeDocumentOperation operation = await client.AnalyzeDocumentAsync(WaitUntil.Completed, "prebuilt-layout", stream);
AnalyzeResult result = operation.Value;

foreach (DocumentPage page in result.Pages)
{
    Console.WriteLine($"Document Page {page.PageNumber} has {page.Lines.Count} line(s), {page.Words.Count} word(s),");
    Console.WriteLine($"and {page.SelectionMarks.Count} selection mark(s).");

    for (int i = 0; i < page.Lines.Count; i++)
    {
        DocumentLine line = page.Lines[i];
        Console.WriteLine($"  Line {i} has content: '{line.Content}'.");

        Console.WriteLine($"    Its bounding polygon (points ordered clockwise):");

        for (int j = 0; j < line.Polygon.Count; j++)
        {
            Console.WriteLine($"      Point {j} => X: {line.Polygon[j].X}, Y: {line.Polygon[j].Y}");
        }
    }

    for (int i = 0; i < page.SelectionMarks.Count; i++)
    {
        DocumentSelectionMark selectionMark = page.SelectionMarks[i];

        Console.WriteLine($"  Selection Mark {i} is {selectionMark.State}.");
        Console.WriteLine($"    Its bounding polygon (points ordered clockwise):");

        for (int j = 0; j < selectionMark.Polygon.Count; j++)
        {
            Console.WriteLine($"      Point {j} => X: {selectionMark.Polygon[j].X}, Y: {selectionMark.Polygon[j].Y}");
        }
    }
}

Console.WriteLine("Paragraphs:");

foreach (DocumentParagraph paragraph in result.Paragraphs)
{
    Console.WriteLine($"  Paragraph content: {paragraph.Content}");

    if (paragraph.Role != null)
    {
        Console.WriteLine($"    Role: {paragraph.Role}");
    }
}

foreach (DocumentStyle style in result.Styles)
{
    // Check the style and style confidence to see if text is handwritten.
    // Note that value '0.8' is used as an example.

    bool isHandwritten = style.IsHandwritten.HasValue && style.IsHandwritten == true;

    if (isHandwritten && style.Confidence > 0.8)
    {
        Console.WriteLine($"Handwritten content found:");

        foreach (DocumentSpan span in style.Spans)
        {
            Console.WriteLine($"  Content: {result.Content.Substring(span.Index, span.Length)}");
        }
    }
}

Console.WriteLine("The following tables were extracted:");

for (int i = 0; i < result.Tables.Count; i++)
{
    DocumentTable table = result.Tables[i];
    Console.WriteLine($"  Table {i} has {table.RowCount} rows and {table.ColumnCount} columns.");

    foreach (DocumentTableCell cell in table.Cells)
    {
        Console.WriteLine($"    Cell ({cell.RowIndex}, {cell.ColumnIndex}) has kind '{cell.Kind}' and content: '{cell.Content}'.");
    }
}
執行應用程式
將程式碼範例新增至應用程式之後,請選擇 formRecognizer_quickstart 旁的綠色 [開始] 按鈕來建置和執行程式,或按 F5。
預先建置模型
使用預建模型來分析及擷取特定檔案類型中的常見欄位。 在此範例中,我們會使用預建發票模型來分析發票。
秘訣
這不限於發票,有多種預建模型可供選擇,每個模型都有一組自身支援的欄位。
analyze 作業所用的模型取決於要分析的文件類型。 請參閱模型資料擷取。
將下列程式碼範例新增到您的 Program.cs 檔案中。 請務必使用來自 Azure 入口網站文件智慧服務執行個體的值來更新金鑰與端點變數:
using Azure;
using Azure.AI.DocumentIntelligence;

//set `<your-endpoint>` and `<your-key>` variables with the values from the Azure portal to create your `AzureKeyCredential` and `DocumentIntelligenceClient` instance
string endpoint = "<your-endpoint>";
string key = "<your-key>";
AzureKeyCredential credential = new AzureKeyCredential(key);
DocumentIntelligenceClient client = new DocumentIntelligenceClient(new Uri(endpoint), credential);

//sample invoice document
Uri uriSource = new Uri("https://raw.githubusercontent.com/Azure-Samples/cognitive-services-REST-api-samples/master/curl/form-recognizer/sample-invoice.pdf");

Operation<AnalyzeResult> operation = await client.AnalyzeDocumentAsync(WaitUntil.Completed, "prebuilt-invoice", uriSource);

AnalyzeResult result = operation.Value;

for (int i = 0; i < result.Documents.Count; i++)
{
    Console.WriteLine($"Document {i}:");

    AnalyzedDocument document = result.Documents[i];

    if (document.Fields.TryGetValue("VendorName", out DocumentField vendorNameField)
        && vendorNameField.FieldType == DocumentFieldType.String)
    {
        string vendorName = vendorNameField.ValueString;
        Console.WriteLine($"Vendor Name: '{vendorName}', with confidence {vendorNameField.Confidence}");
    }

    if (document.Fields.TryGetValue("CustomerName", out DocumentField customerNameField)
        && customerNameField.FieldType == DocumentFieldType.String)
    {
        string customerName = customerNameField.ValueString;
        Console.WriteLine($"Customer Name: '{customerName}', with confidence {customerNameField.Confidence}");
    }

    if (document.Fields.TryGetValue("Items", out DocumentField itemsField)
        && itemsField.FieldType == DocumentFieldType.List)
    {
        foreach (DocumentField itemField in itemsField.ValueList)
        {
            Console.WriteLine("Item:");

            if (itemField.FieldType == DocumentFieldType.Dictionary)
            {
                IReadOnlyDictionary<string, DocumentField> itemFields = itemField.ValueDictionary;

                if (itemFields.TryGetValue("Description", out DocumentField itemDescriptionField)
                    && itemDescriptionField.FieldType == DocumentFieldType.String)
                {
                    string itemDescription = itemDescriptionField.ValueString;
                    Console.WriteLine($"  Description: '{itemDescription}', with confidence {itemDescriptionField.Confidence}");
                }

                if (itemFields.TryGetValue("Amount", out DocumentField itemAmountField)
                    && itemAmountField.FieldType == DocumentFieldType.Currency)
                {
                    CurrencyValue itemAmount = itemAmountField.ValueCurrency;
                    Console.WriteLine($"  Amount: '{itemAmount.CurrencySymbol}{itemAmount.Amount}', with confidence {itemAmountField.Confidence}");
                }
            }
        }
    }

    if (document.Fields.TryGetValue("SubTotal", out DocumentField subTotalField)
        && subTotalField.FieldType == DocumentFieldType.Currency)
    {
        CurrencyValue subTotal = subTotalField.ValueCurrency;
        Console.WriteLine($"Sub Total: '{subTotal.CurrencySymbol}{subTotal.Amount}', with confidence {subTotalField.Confidence}");
    }

    if (document.Fields.TryGetValue("TotalTax", out DocumentField totalTaxField)
        && totalTaxField.FieldType == DocumentFieldType.Currency)
    {
        CurrencyValue totalTax = totalTaxField.ValueCurrency;
        Console.WriteLine($"Total Tax: '{totalTax.CurrencySymbol}{totalTax.Amount}', with confidence {totalTaxField.Confidence}");
    }

    if (document.Fields.TryGetValue("InvoiceTotal", out DocumentField invoiceTotalField)
        && invoiceTotalField.FieldType == DocumentFieldType.Currency)
    {
        CurrencyValue invoiceTotal = invoiceTotalField.ValueCurrency;
        Console.WriteLine($"Invoice Total: '{invoiceTotal.CurrencySymbol}{invoiceTotal.Amount}', with confidence {invoiceTotalField.Confidence}");
    }
}
執行應用程式
將程式碼範例新增至應用程式之後,請選擇 formRecognizer_quickstart 旁的綠色 [開始] 按鈕來建置和執行程式,或按 F5。
將下列程式碼範例新增到您的 Program.cs 檔案中。 請務必使用來自 Azure 入口網站 Azure 表格辨識器執行個體的值來更新金鑰和端點變數:
using Azure;
using Azure.AI.FormRecognizer.DocumentAnalysis;

//set `<your-endpoint>` and `<your-key>` variables with the values from the Azure portal to create your `AzureKeyCredential` and `FormRecognizerClient` instance
string endpoint = "<your-endpoint>";
string key = "<your-key>";
AzureKeyCredential credential = new AzureKeyCredential(key);
DocumentAnalysisClient client = new DocumentAnalysisClient(new Uri(endpoint), credential);

//sample invoice document

Uri invoiceUri = new Uri ("https://raw.githubusercontent.com/Azure-Samples/cognitive-services-REST-api-samples/master/curl/form-recognizer/sample-invoice.pdf");

Operation operation = await client.AnalyzeDocumentAsync(WaitUntil.Completed, "prebuilt-invoice", invoiceUri);

AnalyzeResult result = operation.Value;

for (int i = 0; i < result.Documents.Count; i++)
{
    Console.WriteLine($"Document {i}:");

    AnalyzedDocument document = result.Documents[i];

    if (document.Fields.TryGetValue("VendorName", out DocumentField vendorNameField))
    {
        if (vendorNameField.FieldType == DocumentFieldType.String)
        {
            string vendorName = vendorNameField.Value.AsString();
            Console.WriteLine($"Vendor Name: '{vendorName}', with confidence {vendorNameField.Confidence}");
        }
    }

    if (document.Fields.TryGetValue("CustomerName", out DocumentField customerNameField))
    {
        if (customerNameField.FieldType == DocumentFieldType.String)
        {
            string customerName = customerNameField.Value.AsString();
            Console.WriteLine($"Customer Name: '{customerName}', with confidence {customerNameField.Confidence}");
        }
    }

    if (document.Fields.TryGetValue("Items", out DocumentField itemsField))
    {
        if (itemsField.FieldType == DocumentFieldType.List)
        {
            foreach (DocumentField itemField in itemsField.Value.AsList())
            {
                Console.WriteLine("Item:");

                if (itemField.FieldType == DocumentFieldType.Dictionary)
                {
                    IReadOnlyDictionary<string, DocumentField> itemFields = itemField.Value.AsDictionary();

                    if (itemFields.TryGetValue("Description", out DocumentField itemDescriptionField))
                    {
                        if (itemDescriptionField.FieldType == DocumentFieldType.String)
                        {
                            string itemDescription = itemDescriptionField.Value.AsString();

                            Console.WriteLine($"  Description: '{itemDescription}', with confidence {itemDescriptionField.Confidence}");
                        }
                    }

                    if (itemFields.TryGetValue("Amount", out DocumentField itemAmountField))
                    {
                        if (itemAmountField.FieldType == DocumentFieldType.Currency)
                        {
                            CurrencyValue itemAmount = itemAmountField.Value.AsCurrency();

                            Console.WriteLine($"  Amount: '{itemAmount.Symbol}{itemAmount.Amount}', with confidence {itemAmountField.Confidence}");
                        }
                    }
                }
            }
        }
    }

    if (document.Fields.TryGetValue("SubTotal", out DocumentField subTotalField))
    {
        if (subTotalField.FieldType == DocumentFieldType.Currency)
        {
            CurrencyValue subTotal = subTotalField.Value.AsCurrency();
            Console.WriteLine($"Sub Total: '{subTotal.Symbol}{subTotal.Amount}', with confidence {subTotalField.Confidence}");
        }
    }

    if (document.Fields.TryGetValue("TotalTax", out DocumentField totalTaxField))
    {
        if (totalTaxField.FieldType == DocumentFieldType.Currency)
        {
            CurrencyValue totalTax = totalTaxField.Value.AsCurrency();
            Console.WriteLine($"Total Tax: '{totalTax.Symbol}{totalTax.Amount}', with confidence {totalTaxField.Confidence}");
        }
    }

    if (document.Fields.TryGetValue("InvoiceTotal", out DocumentField invoiceTotalField))
    {
        if (invoiceTotalField.FieldType == DocumentFieldType.Currency)
        {
            CurrencyValue invoiceTotal = invoiceTotalField.Value.AsCurrency();
            Console.WriteLine($"Invoice Total: '{invoiceTotal.Symbol}{invoiceTotal.Amount}', with confidence {invoiceTotalField.Confidence}");
        }
    }
}
執行應用程式
將程式碼範例新增至應用程式之後,請選擇 formRecognizer_quickstart 旁的綠色 [開始] 按鈕來建置和執行程式,或按 F5。
預建模型輸出
以下是預期的輸出程式碼片段:
  Document 0:
  Vendor Name: 'CONTOSO LTD.', with confidence 0.962
  Customer Name: 'MICROSOFT CORPORATION', with confidence 0.951
  Item:
    Description: 'Test for 23 fields', with confidence 0.899
    Amount: '100', with confidence 0.902
  Sub Total: '100', with confidence 0.979
若要檢視整個輸出,請造訪 GitHub 上的 Azure 範例存放庫,以檢視預先建置發票模型輸出。
將下列程式碼範例新增到您的 Program.cs 檔案中。 請務必使用來自 Azure 入口網站 Azure 表格辨識器執行個體的值來更新金鑰和端點變數:
using Azure;
using Azure.AI.FormRecognizer.DocumentAnalysis;

//set `<your-endpoint>` and `<your-key>` variables with the values from the Azure portal to create your `AzureKeyCredential` and `FormRecognizerClient` instance
string endpoint = "<your-endpoint>";
string key = "<your-key>";
AzureKeyCredential credential = new AzureKeyCredential(key);
DocumentAnalysisClient client = new DocumentAnalysisClient(new Uri(endpoint), credential);

//sample invoice document

Uri invoiceUri = new Uri ("https://raw.githubusercontent.com/Azure-Samples/cognitive-services-REST-api-samples/master/curl/form-recognizer/sample-invoice.pdf");

AnalyzeDocumentOperation operation = await client.AnalyzeDocumentFromUriAsync(WaitUntil.Completed, "prebuilt-invoice", invoiceUri);

AnalyzeResult result = operation.Value;

for (int i = 0; i < result.Documents.Count; i++)
{
    Console.WriteLine($"Document {i}:");

    AnalyzedDocument document = result.Documents[i];

    if (document.Fields.TryGetValue("VendorName", out DocumentField vendorNameField))
    {
        if (vendorNameField.FieldType == DocumentFieldType.String)
        {
            string vendorName = vendorNameField.Value.AsString();
            Console.WriteLine($"Vendor Name: '{vendorName}', with confidence {vendorNameField.Confidence}");
        }
    }

    if (document.Fields.TryGetValue("CustomerName", out DocumentField customerNameField))
    {
        if (customerNameField.FieldType == DocumentFieldType.String)
        {
            string customerName = customerNameField.Value.AsString();
            Console.WriteLine($"Customer Name: '{customerName}', with confidence {customerNameField.Confidence}");
        }
    }

    if (document.Fields.TryGetValue("Items", out DocumentField itemsField))
    {
        if (itemsField.FieldType == DocumentFieldType.List)
        {
            foreach (DocumentField itemField in itemsField.Value.AsList())
            {
                Console.WriteLine("Item:");

                if (itemField.FieldType == DocumentFieldType.Dictionary)
                {
                    IReadOnlyDictionary<string, DocumentField> itemFields = itemField.Value.AsDictionary();

                    if (itemFields.TryGetValue("Description", out DocumentField itemDescriptionField))
                    {
                        if (itemDescriptionField.FieldType == DocumentFieldType.String)
                        {
                            string itemDescription = itemDescriptionField.Value.AsString();

                            Console.WriteLine($"  Description: '{itemDescription}', with confidence {itemDescriptionField.Confidence}");
                        }
                    }

                    if (itemFields.TryGetValue("Amount", out DocumentField itemAmountField))
                    {
                        if (itemAmountField.FieldType == DocumentFieldType.Currency)
                        {
                            CurrencyValue itemAmount = itemAmountField.Value.AsCurrency();

                            Console.WriteLine($"  Amount: '{itemAmount.Symbol}{itemAmount.Amount}', with confidence {itemAmountField.Confidence}");
                        }
                    }
                }
            }
        }
    }

    if (document.Fields.TryGetValue("SubTotal", out DocumentField subTotalField))
    {
        if (subTotalField.FieldType == DocumentFieldType.Currency)
        {
            CurrencyValue subTotal = subTotalField.Value.AsCurrency();
            Console.WriteLine($"Sub Total: '{subTotal.Symbol}{subTotal.Amount}', with confidence {subTotalField.Confidence}");
        }
    }

    if (document.Fields.TryGetValue("TotalTax", out DocumentField totalTaxField))
    {
        if (totalTaxField.FieldType == DocumentFieldType.Currency)
        {
            CurrencyValue totalTax = totalTaxField.Value.AsCurrency();
            Console.WriteLine($"Total Tax: '{totalTax.Symbol}{totalTax.Amount}', with confidence {totalTaxField.Confidence}");
        }
    }

    if (document.Fields.TryGetValue("InvoiceTotal", out DocumentField invoiceTotalField))
    {
        if (invoiceTotalField.FieldType == DocumentFieldType.Currency)
        {
            CurrencyValue invoiceTotal = invoiceTotalField.Value.AsCurrency();
            Console.WriteLine($"Invoice Total: '{invoiceTotal.Symbol}{invoiceTotal.Amount}', with confidence {invoiceTotalField.Confidence}");
        }
    }
}
執行應用程式
將程式碼範例新增至應用程式之後,請選擇 formRecognizer_quickstart 旁的綠色 [開始] 按鈕來建置和執行程式,或按 F5。
用戶端連結庫 | REST API 參考 | 套件 (Maven) | 範例 |支援的 REST API 版本
用戶端連結庫 || REST API 參考 | 套件 (Maven) | 範例|支援的 REST API 版本
在本快速入門中,請使用下列功能,從表單和文件中分析及擷取資料和值:
先決條件
Azure 訂用帳戶 - 建立免費帳戶。
最新的 Visual Studio Code 版本或您慣用的 IDE。 請參閱 Visual Studio Code 中的 JAVA。
秘訣
- Visual Studio Code 為 Windows 和 macOS 提供 Java 編碼套件。編碼套件是 VS Code、JAVA 開發套件 (JDK) 以及 Microsoft 建議延伸模組的集合。 編碼套件也可以用於修正現有的開發環境。
- 如果您使用適用於 JAVA 的 VS Code 和 JAVA 開發套件,請安裝適用於 JAVA 的 Gradle 延伸模組。
如果您未使用 Visual Studio Code,請確保在開發環境中安裝下列項目:
Java 開發套件 (JDK) (英文) 第 8 版或更新版本。 如需詳細資訊,請參閱 Microsoft Build of OpenJDK。
Gradle,6.8 版或後續版本。
一個 Foundry 工具或文件智慧資源。 擁有 Azure 訂用帳戶後,請在 Azure 入口網站中建立單一服務或多重服務文件智慧服務資源,以取得您的金鑰與端點。 您可以使用免費定價層 (
F0) 來試用服務,之後可升級至付費層以用於實際執行環境。秘訣
如果你打算在同一端點/金鑰下存取多個 Foundry 工具,請建立 Microsoft Foundry 資源。 針對僅限文件智慧服務存取,請建立文件智慧服務資源。 如果您想要使用 Microsoft Entra 驗證,則需要使用單一服務資源。
部署資源之後,請選取 [移至資源]。 您需要使用已建立資源的金鑰和端點,將應用程式連線至文件智慧服務 API。 稍後需在程式碼中貼上金鑰和端點:
設定
建立新的 Gradle 專案
在主控台視窗 (例如 cmd、PowerShell 或 Bash) 中,為您的應用程式建立一個名為 doc-intel-app 的新目錄,並瀏覽至該目錄。
mkdir doc-intel-app && doc-intel-appmkdir doc-intel-app; cd doc-intel-app從您的工作目錄執行
gradle init命令。 此命令會建立 Gradle 的基本組建檔案,包括 build.gradle.kts,將在執行階段使用 build.gradle.kts,來建立及設定應用程式。gradle init --type basic出現選擇 DSL 的提示時,請選取 [Kotlin]。
選取 Return 或 Enter 以接受預設專案名稱 (doc-intel-app)。
在主控台視窗 (例如 cmd、PowerShell 或 Bash) 中,為您的應用程式建立一個名為 form-recognize-app 的新目錄,並瀏覽至該目錄。
mkdir form-recognize-app && form-recognize-appmkdir form-recognize-app; cd form-recognize-app從您的工作目錄執行
gradle init命令。 此命令會建立 Gradle 的基本組建檔案,包括 build.gradle.kts,將在執行階段使用 build.gradle.kts,來建立及設定應用程式。gradle init --type basic出現選擇 DSL 的提示時,請選取 [Kotlin]。
選取 Return 或 Enter 以接受預設專案名稱 (form-recognize-app)。
安裝用戶端程式庫
本快速入門會使用 Gradle 相依性管理員。 您可以在 Maven 中央存放庫中找到用戶端程式庫和其他相依性管理員的資訊。
在 IDE 中開啟專案的 build.gradle.kts 檔案。 複製並貼上下列程式碼以將用戶端程式庫作為 implementation 陳述式包含在內,一併加入必要的外掛程式和設定。
   plugins {
       java
       application
   }
   application {
       mainClass.set("DocIntelligence")
   }
   repositories {
       mavenCentral()
   }
   dependencies {
       implementation group: 'com.azure', name: 'azure-ai-documentintelligence', version: '1.0.0'

   }
本快速入門會使用 Gradle 相依性管理員。 您可以在 Maven 中央存放庫中找到用戶端程式庫和其他相依性管理員的資訊。
在 IDE 中開啟專案的 build.gradle.kts 檔案。 複製並貼上下列程式碼以將用戶端程式庫作為 implementation 陳述式包含在內,一併加入必要的外掛程式和設定。
   plugins {
       java
       application
   }
   application {
       mainClass.set("FormRecognizer")
   }
   repositories {
       mavenCentral()
   }
   dependencies {
       implementation group: 'com.azure', name: 'azure-ai-formrecognizer', version: '4.1.0'

   }
本快速入門會使用 Gradle 相依性管理員。 您可以在 Maven 中央存放庫中找到用戶端程式庫和其他相依性管理員的資訊。
在 IDE 中開啟專案的 build.gradle.kts 檔案。 複製並貼上下列程式碼以將用戶端程式庫作為 implementation 陳述式包含在內,一併加入必要的外掛程式和設定。
   plugins {
       java
       application
   }
   application {
       mainClass.set("FormRecognizer")
   }
   repositories {
       mavenCentral()
   }
   dependencies {
       implementation group: 'com.azure', name: 'azure-ai-formrecognizer', version: '4.0.0'


   }
建立 Java 應用程式
若要與此文件智慧服務互動,您必須建立 DocumentIntelligenceClient 類別的執行個體。 若要這樣做,請使用 AzureKeyCredential 從 Azure 入口網站建立 key,並使用 DocumentIntelligenceClient 和文件智慧服務 AzureKeyCredential 來建立 endpoint 執行個體。
若要與此文件智慧服務互動,您必須建立 DocumentAnalysisClient 類別的執行個體。 若要這樣做,請使用 AzureKeyCredential 從 Azure 入口網站建立 key,並使用 DocumentAnalysisClient 和文件智慧服務 AzureKeyCredential 來建立 endpoint 執行個體。
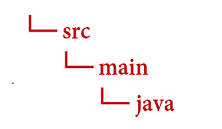
從 doc-intel-app 目錄執行下列命令:
mkdir -p src/main/java您會建立下列目錄結構:
重要事項
我們建議使用適用於 Azure 資源的受控識別搭配 Microsoft Entra ID 驗證,以避免使用在雲端執行的應用程式儲存認證。
請謹慎使用 API 金鑰。 請勿在程式碼中直接包含 API 金鑰,且切勿公開張貼金鑰。 如果使用 API 金鑰,請安全地將它們儲存在 Azure 金鑰保存庫、定期輪替金鑰,並使用角色型存取控制和網路存取限制來限制對 Azure 金鑰保存庫 的存取。 如需在應用程式中安全地使用 API 金鑰的詳細資訊,請參閱 使用 Azure Key Vault 的 API 金鑰。
如需 AI 服務安全性的詳細資訊,請參閱驗證對 Azure AI 服務的要求。
版面配置模型
從文件中擷取文字、選取標記、文字樣式、資料表結構和周框區域座標。
- 在此範例中,您需要位於某個 URI 的文件檔案。 您可以針對本快速入門使用我們的範例文件 (英文)。
- 若要分析 URI 中的指定檔案,請使用
beginAnalyzeDocumentFromUrl方法並將prebuilt-layout作為模型識別碼傳遞。傳回值為AnalyzeResult物件,其中包含所提交文件的相關資料。 - 我們已將檔案 URI 值新增至主要方法中的
documentUrl變數。
將下列範例程式碼新增至檔案 DocIntelligence.java。 請務必使用來自 Azure 入口網站文件智慧服務執行個體的值來更新金鑰與端點變數:
import com.azure.ai.documentintelligence.DocumentIntelligenceClient;
import com.azure.ai.documentintelligence.DocumentIntelligenceClientBuilder;
import com.azure.ai.documentintelligence.models.AnalyzeDocumentOptions;
import com.azure.ai.documentintelligence.models.AnalyzeOperationDetails;
import com.azure.ai.documentintelligence.models.AnalyzeResult;
import com.azure.ai.documentintelligence.models.DocumentTable;
import com.azure.core.credential.AzureKeyCredential;
import com.azure.core.util.polling.SyncPoller;

import java.util.List;

public class DocIntelligence {

  // set `<your-endpoint>` and `<your-key>` variables with the values from the Azure portal
  private static final String endpoint = "<your-endpoint>";
  private static final String key = "<your-key>";

  public static void main(String[] args) {

    // create your `DocumentIntelligenceClient` instance and `AzureKeyCredential` variable
    DocumentIntelligenceClient client = new DocumentIntelligenceClientBuilder()
      .credential(new AzureKeyCredential(key))
      .endpoint(endpoint)
      .buildClient();

    // sample document
    String modelId = "prebuilt-layout";
    String documentUrl = "https://raw.githubusercontent.com/Azure-Samples/cognitive-services-REST-api-samples/master/curl/form-recognizer/sample-layout.pdf";

    AnalyzeDocumentOptions options = new AnalyzeDocumentOptions(documentUrl);

    SyncPoller<AnalyzeOperationDetails, AnalyzeResult> analyzeLayoutPoller = client.beginAnalyzeDocument(modelId, options);

    AnalyzeResult analyzeLayoutResult = analyzeLayoutPoller.getFinalResult();

    // pages
    analyzeLayoutResult.getPages().forEach(documentPage -> {
      System.out.printf("Page has width: %.2f and height: %.2f, measured with unit: %s%n",
        documentPage.getWidth(),
        documentPage.getHeight(),
        documentPage.getUnit());

      // lines
      documentPage.getLines().forEach(documentLine ->
        System.out.printf("Line '%s' is within a bounding polygon %s.%n",
          documentLine.getContent(),
          documentLine.getPolygon()));

      // words
      documentPage.getWords().forEach(documentWord ->
        System.out.printf("Word '%s' has a confidence score of %.2f.%n",
          documentWord.getContent(),
          documentWord.getConfidence()));

      // selection marks
      documentPage.getSelectionMarks().forEach(documentSelectionMark ->
        System.out.printf("Selection mark is '%s' and is within a bounding polygon %s with confidence %.2f.%n",
          documentSelectionMark.getState().toString(),
          documentSelectionMark.getPolygon(),
          documentSelectionMark.getConfidence()));
    });

    // tables
    List < DocumentTable > tables = analyzeLayoutResult.getTables();
    for (int i = 0; i < tables.size(); i++) {
      DocumentTable documentTable = tables.get(i);
      System.out.printf("Table %d has %d rows and %d columns.%n", i, documentTable.getRowCount(),
        documentTable.getColumnCount());
      documentTable.getCells().forEach(documentTableCell ->
        System.out.printf("Cell '%s', has row index %d and column index %d.%n", documentTableCell.getContent(),
          documentTableCell.getRowIndex(), documentTableCell.getColumnIndex()));
      System.out.println();
    }

    // styles
    analyzeLayoutResult.getStyles().forEach(documentStyle -> System.out.printf("Document is handwritten %s.%n", documentStyle.isHandwritten()));
  }
}
建置並執行應用程式
將程式碼範例新增至應用程式後,請往回瀏覽至您的主要專案目錄:doc-intel-app。
使用
build命令組建您的應用程式:gradle build使用
run命令執行您的應用程式:gradle run
將下列範例程式碼新增至檔案 FormRecognizer.java。 請務必使用來自 Azure 入口網站文件智慧服務執行個體的值來更新金鑰與端點變數:
import com.azure.ai.formrecognizer.documentanalysis.models.*;
import com.azure.ai.formrecognizer.documentanalysis.DocumentAnalysisClient;
import com.azure.ai.formrecognizer.documentanalysis.DocumentAnalysisClientBuilder;

import com.azure.core.credential.AzureKeyCredential;
import com.azure.core.util.polling.SyncPoller;

import java.io.IOException;
import java.util.List;
import java.util.Arrays;
import java.time.LocalDate;
import java.util.Map;
import java.util.stream.Collectors;

public class FormRecognizer {

  // set `<your-endpoint>` and `<your-key>` variables with the values from the Azure portal
  private static final String endpoint = "<your-endpoint>";
  private static final String key = "<your-key>";

  public static void main(String[] args) {

    // create your `DocumentAnalysisClient` instance and `AzureKeyCredential` variable
    DocumentAnalysisClient client = new DocumentAnalysisClientBuilder()
      .credential(new AzureKeyCredential(key))
      .endpoint(endpoint)
      .buildClient();

    // sample document
    String documentUrl = "https://raw.githubusercontent.com/Azure-Samples/cognitive-services-REST-api-samples/master/curl/form-recognizer/sample-layout.pdf";
    String modelId = "prebuilt-layout";

    SyncPoller < OperationResult, AnalyzeResult > analyzeLayoutResultPoller =
      client.beginAnalyzeDocumentFromUrl(modelId, documentUrl);

    AnalyzeResult analyzeLayoutResult = analyzeLayoutResultPoller.getFinalResult();

    // pages
    analyzeLayoutResult.getPages().forEach(documentPage -> {
      System.out.printf("Page has width: %.2f and height: %.2f, measured with unit: %s%n",
        documentPage.getWidth(),
        documentPage.getHeight(),
        documentPage.getUnit());

      // lines
      documentPage.getLines().forEach(documentLine ->
        System.out.printf("Line %s is within a bounding polygon %s.%n",
          documentLine.getContent(),
          documentLine.getPolygon().toString()));

      // words
      documentPage.getWords().forEach(documentWord ->
        System.out.printf("Word '%s' has a confidence score of %.2f%n",
          documentWord.getContent(),
          documentWord.getConfidence()));

      // selection marks
      documentPage.getSelectionMarks().forEach(documentSelectionMark ->
        System.out.printf("Selection mark is %s and is within a bounding polygon %s with confidence %.2f.%n",
          documentSelectionMark.getState().toString(),
          documentSelectionMark.getPolygon().toString(),
          documentSelectionMark.getConfidence()));
    });

    // tables
    List < DocumentTable > tables = analyzeLayoutResult.getTables();
    for (int i = 0; i < tables.size(); i++) {
      DocumentTable documentTable = tables.get(i);
      System.out.printf("Table %d has %d rows and %d columns.%n", i, documentTable.getRowCount(),
        documentTable.getColumnCount());
      documentTable.getCells().forEach(documentTableCell -> {
        System.out.printf("Cell '%s', has row index %d and column index %d.%n", documentTableCell.getContent(),
          documentTableCell.getRowIndex(), documentTableCell.getColumnIndex());
      });
      System.out.println();
    }
  }
  // Utility function to get the bounding polygon coordinates
  private static String getBoundingCoordinates(List < Point > Polygon) {
    return Polygon.stream().map(point -> String.format("[%.2f, %.2f]", point.getX(),
      point.getY())).collect(Collectors.joining(", "));
  }
}
建置並執行應用程式
將程式碼範例新增至應用程式後,請往回瀏覽至您的主要專案目錄:form-recognize-app。
使用
build命令組建您的應用程式:gradle build使用
run命令執行您的應用程式:gradle run
版面配置模型輸出
以下是預期的輸出程式碼片段:
  Table 0 has 5 rows and 3 columns.
  Cell 'Title of each class', has row index 0 and column index 0.
  Cell 'Trading Symbol', has row index 0 and column index 1.
  Cell 'Name of exchange on which registered', has row index 0 and column index 2.
  Cell 'Common stock, $0.00000625 par value per share', has row index 1 and column index 0.
  Cell 'MSFT', has row index 1 and column index 1.
  Cell 'NASDAQ', has row index 1 and column index 2.
  Cell '2.125% Notes due 2021', has row index 2 and column index 0.
  Cell 'MSFT', has row index 2 and column index 1.
  Cell 'NASDAQ', has row index 2 and column index 2.
  Cell '3.125% Notes due 2028', has row index 3 and column index 0.
  Cell 'MSFT', has row index 3 and column index 1.
  Cell 'NASDAQ', has row index 3 and column index 2.
  Cell '2.625% Notes due 2033', has row index 4 and column index 0.
  Cell 'MSFT', has row index 4 and column index 1.
  Cell 'NASDAQ', has row index 4 and column index 2.
若要檢視整個輸出,請造訪 GitHub 上的 Azure 範例存放庫,以檢視配置模型輸出。
將下列範例程式碼新增至檔案 FormRecognizer.java。 請務必使用來自 Azure 入口網站文件智慧服務執行個體的值來更新金鑰與端點變數:
import com.azure.ai.formrecognizer.documentanalysis.DocumentAnalysisClient;
import com.azure.ai.formrecognizer.documentanalysis.DocumentAnalysisClientBuilder;
import com.azure.ai.formrecognizer.documentanalysis.models.AnalyzeResult;
import com.azure.ai.formrecognizer.documentanalysis.models.OperationResult;
import com.azure.ai.formrecognizer.documentanalysis.models.DocumentTable;
import com.azure.ai.formrecognizer.documentanalysis.models.Point;
import com.azure.core.credential.AzureKeyCredential;
import com.azure.core.util.polling.SyncPoller;

import java.util.List;
import java.util.stream.Collectors;

public class FormRecognizer {

  // set `<your-endpoint>` and `<your-key>` variables with the values from the Azure portal
  private static final String endpoint = "<your-endpoint>";
  private static final String key = "<your-key>";

  public static void main(String[] args) {

    // create your `DocumentAnalysisClient` instance and `AzureKeyCredential` variable
    DocumentAnalysisClient client = new DocumentAnalysisClientBuilder()
      .credential(new AzureKeyCredential(key))
      .endpoint(endpoint)
      .buildClient();

    // sample document
    String documentUrl = "https://raw.githubusercontent.com/Azure-Samples/cognitive-services-REST-api-samples/master/curl/form-recognizer/sample-layout.pdf";
    String modelId = "prebuilt-layout";

    SyncPoller < OperationResult, AnalyzeResult > analyzeLayoutPoller =
      client.beginAnalyzeDocumentFromUrl(modelId, documentUrl);

    AnalyzeResult analyzeLayoutResult = analyzeLayoutPoller.getFinalResult();

    // pages
    analyzeLayoutResult.getPages().forEach(documentPage -> {
      System.out.printf("Page has width: %.2f and height: %.2f, measured with unit: %s%n",
        documentPage.getWidth(),
        documentPage.getHeight(),
        documentPage.getUnit());

      // lines
      documentPage.getLines().forEach(documentLine ->
        System.out.printf("Line '%s' is within a bounding polygon %s.%n",
          documentLine.getContent(),
          getBoundingCoordinates(documentLine.getPolygon())));

      // words
      documentPage.getWords().forEach(documentWord ->
        System.out.printf("Word '%s' has a confidence score of %.2f.%n",
          documentWord.getContent(),
          documentWord.getConfidence()));

      // selection marks
      documentPage.getSelectionMarks().forEach(documentSelectionMark ->
        System.out.printf("Selection mark is '%s' and is within a bounding polygon %s with confidence %.2f.%n",
          documentSelectionMark.getSelectionMarkState().toString(),
          getBoundingCoordinates(documentSelectionMark.getPolygon()),
          documentSelectionMark.getConfidence()));
    });

    // tables
    List < DocumentTable > tables = analyzeLayoutResult.getTables();
    for (int i = 0; i < tables.size(); i++) {
      DocumentTable documentTable = tables.get(i);
      System.out.printf("Table %d has %d rows and %d columns.%n", i, documentTable.getRowCount(),
        documentTable.getColumnCount());
      documentTable.getCells().forEach(documentTableCell -> {
        System.out.printf("Cell '%s', has row index %d and column index %d.%n", documentTableCell.getContent(),
          documentTableCell.getRowIndex(), documentTableCell.getColumnIndex());
      });
      System.out.println();
    }

    // styles
    analyzeLayoutResult.getStyles().forEach(documentStyle -
      > System.out.printf("Document is handwritten %s.%n", documentStyle.isHandwritten()));
  }

  /**
   * Utility function to get the bounding polygon coordinates.
   */
  private static String getBoundingCoordinates(List < Point > Polygon) {
    return Polygon.stream().map(point -> String.format("[%.2f, %.2f]", point.getX(),
      point.getY())).collect(Collectors.joining(", "));
  }
}
建置並執行應用程式
將程式碼範例新增至應用程式後,請往回瀏覽至您的主要專案目錄:form-recognize-app。
使用
build命令組建您的應用程式:gradle build使用
run命令執行您的應用程式:gradle run
預先建置模型
使用預建模型來分析及擷取特定檔案類型中的常見欄位。 在此範例中,我們會使用預建發票模型來分析發票。
秘訣
這不限於發票,有多種預建模型可供選擇,每個模型都有一組自身支援的欄位。
analyze 作業所用的模型取決於要分析的文件類型。 請參閱模型資料擷取。
將下列範例程式碼新增至檔案 DocIntelligence.java。 請務必使用來自 Azure 入口網站文件智慧服務執行個體的值來更新金鑰與端點變數:
import com.azure.ai.documentintelligence.models.AnalyzeDocumentRequest;
import com.azure.ai.documentintelligence.models.AnalyzeResult;
import com.azure.ai.documentintelligence.models.AnalyzeResultOperation;
import com.azure.ai.documentintelligence.models.Document;
import com.azure.ai.documentintelligence.models.DocumentField;
import com.azure.ai.documentintelligence.models.DocumentFieldType;
import com.azure.core.credential.AzureKeyCredential;
import com.azure.core.util.polling.SyncPoller;

import java.io.IOException;
import java.time.LocalDate;
import java.util.List;
import java.util.Map;

public class DocIntelligence {

  // set `<your-endpoint>` and `<your-key>` variables with the values from the Azure portal
  private static final String endpoint = "<your-endpoint>";
  private static final String key = "<your-key>";

  public static void main(String[] args) {

    // sample document
    String modelId = "prebuilt-invoice";
    String invoiceUrl = "https://raw.githubusercontent.com/Azure-Samples/cognitive-services-REST-api-samples/master/curl/form-recognizer/sample-invoice.pdf";

    public static void main(final String[] args) throws IOException {

      // Instantiate a client that will be used to call the service.
      DocumentIntelligenceClient client = new DocumentIntelligenceClientBuilder()
        .credential(new AzureKeyCredential(key))
        .endpoint(endpoint)
        .buildClient();

      SyncPoller<AnalyzeResultOperation, AnalyzeResultOperation > analyzeInvoicesPoller =
        client.beginAnalyzeDocument(modelId,
            null,
            null,
            null,
            null,
            null,
            null,
            new AnalyzeDocumentRequest().setUrlSource(invoiceUrl));

      AnalyzeResult analyzeInvoiceResult = analyzeInvoicesPoller.getFinalResult().getAnalyzeResult();

      for (int i = 0; i < analyzeInvoiceResult.getDocuments().size(); i++) {
        Document analyzedInvoice = analyzeInvoiceResult.getDocuments().get(i);
        Map < String, DocumentField > invoiceFields = analyzedInvoice.getFields();
        System.out.printf("----------- Analyzing invoice  %d -----------%n", i);
        DocumentField vendorNameField = invoiceFields.get("VendorName");
        if (vendorNameField != null) {
          if (DocumentFieldType.STRING == vendorNameField.getType()) {
            String merchantName = vendorNameField.getValueString();
            System.out.printf("Vendor Name: %s, confidence: %.2f%n",
              merchantName, vendorNameField.getConfidence());
          }
        }

        DocumentField vendorAddressField = invoiceFields.get("VendorAddress");
        if (vendorAddressField != null) {
          if (DocumentFieldType.STRING == vendorAddressField.getType()) {
            String merchantAddress = vendorAddressField.getValueString();
            System.out.printf("Vendor address: %s, confidence: %.2f%n",
              merchantAddress, vendorAddressField.getConfidence());
          }
        }

        DocumentField customerNameField = invoiceFields.get("CustomerName");
        if (customerNameField != null) {
          if (DocumentFieldType.STRING == customerNameField.getType()) {
            String merchantAddress = customerNameField.getValueString();
            System.out.printf("Customer Name: %s, confidence: %.2f%n",
              merchantAddress, customerNameField.getConfidence());
          }
        }

        DocumentField customerAddressRecipientField = invoiceFields.get("CustomerAddressRecipient");
        if (customerAddressRecipientField != null) {
          if (DocumentFieldType.STRING == customerAddressRecipientField.getType()) {
            String customerAddr = customerAddressRecipientField.getValueString();
            System.out.printf("Customer Address Recipient: %s, confidence: %.2f%n",
              customerAddr, customerAddressRecipientField.getConfidence());
          }
        }

        DocumentField invoiceIdField = invoiceFields.get("InvoiceId");
        if (invoiceIdField != null) {
          if (DocumentFieldType.STRING == invoiceIdField.getType()) {
            String invoiceId = invoiceIdField.getValueString();
            System.out.printf("Invoice ID: %s, confidence: %.2f%n",
              invoiceId, invoiceIdField.getConfidence());
          }
        }

        DocumentField invoiceDateField = invoiceFields.get("InvoiceDate");
        if (customerNameField != null) {
          if (DocumentFieldType.DATE == invoiceDateField.getType()) {
            LocalDate invoiceDate = invoiceDateField.getValueDate();
            System.out.printf("Invoice Date: %s, confidence: %.2f%n",
              invoiceDate, invoiceDateField.getConfidence());
          }
        }

        DocumentField invoiceTotalField = invoiceFields.get("InvoiceTotal");
        if (customerAddressRecipientField != null) {
          if (DocumentFieldType.NUMBER == invoiceTotalField.getType()) {
            Double invoiceTotal = invoiceTotalField.getValueNumber();
            System.out.printf("Invoice Total: %.2f, confidence: %.2f%n",
              invoiceTotal, invoiceTotalField.getConfidence());
          }
        }

        DocumentField invoiceItemsField = invoiceFields.get("Items");
        if (invoiceItemsField != null) {
          System.out.printf("Invoice Items: %n");
          if (DocumentFieldType.ARRAY == invoiceItemsField.getType()) {
            List < DocumentField > invoiceItems = invoiceItemsField.getValueArray();
            invoiceItems.stream()
              .filter(invoiceItem -> DocumentFieldType.OBJECT == invoiceItem.getType())
              .map(documentField -> documentField.getValueObject())
              .forEach(documentFieldMap -> documentFieldMap.forEach((key, documentField) -> {

                // See a full list of fields found on an invoice here:
                // https://aka.ms/documentintelligence/invoicefields

                if ("Description".equals(key)) {
                  if (DocumentFieldType.STRING == documentField.getType()) {
                    String name = documentField.getValueString();
                    System.out.printf("Description: %s, confidence: %.2fs%n",
                      name, documentField.getConfidence());
                  }
                }
                if ("Quantity".equals(key)) {
                  if (DocumentFieldType.NUMBER == documentField.getType()) {
                    Double quantity = documentField.getValueNumber();
                    System.out.printf("Quantity: %f, confidence: %.2f%n",
                      quantity, documentField.getConfidence());
                  }
                }
                if ("UnitPrice".equals(key)) {
                  if (DocumentFieldType.NUMBER == documentField.getType()) {
                    Double unitPrice = documentField.getValueNumber();
                    System.out.printf("Unit Price: %f, confidence: %.2f%n",
                      unitPrice, documentField.getConfidence());
                  }
                }
                if ("ProductCode".equals(key)) {
                  if (DocumentFieldType.NUMBER == documentField.getType()) {
                    Double productCode = documentField.getValueNumber();
                    System.out.printf("Product Code: %f, confidence: %.2f%n",
                      productCode, documentField.getConfidence());
                  }
                }
              }));
          }
        }
      }
    }
  }
}
建置並執行應用程式
將程式碼範例新增至應用程式後,請往回瀏覽至您的主要專案目錄:doc-intel-app。
使用
build命令組建您的應用程式:gradle build使用
run命令執行您的應用程式:gradle run
將下列範例程式碼新增至檔案 FormRecognizer.java。 請務必使用來自 Azure 入口網站文件智慧服務執行個體的值來更新金鑰與端點變數:
import com.azure.ai.formrecognizer.documentanalysis.models.*;
import com.azure.ai.formrecognizer.documentanalysis.DocumentAnalysisClient;
import com.azure.ai.formrecognizer.documentanalysis.DocumentAnalysisClientBuilder;

import com.azure.core.credential.AzureKeyCredential;
import com.azure.core.util.polling.SyncPoller;

import java.io.IOException;
import java.util.List;
import java.util.Arrays;
import java.time.LocalDate;
import java.util.Map;
import java.util.stream.Collectors;

public class FormRecognizer {

  // set `<your-endpoint>` and `<your-key>` variables with the values from the Azure portal
  private static final String endpoint = "<your-endpoint>";
  private static final String key = "<your-key>";

  public static void main(final String[] args) throws IOException {

    // create your `DocumentAnalysisClient` instance and `AzureKeyCredential` variable
    DocumentAnalysisClient client = new DocumentAnalysisClientBuilder()
      .credential(new AzureKeyCredential(key))
      .endpoint(endpoint)
      .buildClient();

    // sample document
    String modelId = "prebuilt-invoice";
    String invoiceUrl = "https://raw.githubusercontent.com/Azure-Samples/cognitive-services-REST-api-samples/master/curl/form-recognizer/sample-invoice.pdf";

    SyncPoller < OperationResult, AnalyzeResult > analyzeInvoicePoller = client.beginAnalyzeDocumentFromUrl(modelId, invoiceUrl);

    AnalyzeResult analyzeInvoiceResult = analyzeInvoicePoller.getFinalResult();

    for (int i = 0; i < analyzeInvoiceResult.getDocuments().size(); i++) {
      AnalyzedDocument analyzedInvoice = analyzeInvoiceResult.getDocuments().get(i);
      Map < String, DocumentField > invoiceFields = analyzedInvoice.getFields();
      System.out.printf("----------- Analyzing invoice  %d -----------%n", i);
      DocumentField vendorNameField = invoiceFields.get("VendorName");
      if (vendorNameField != null) {
        if (DocumentFieldType.STRING == vendorNameField.getType()) {
          String merchantName = vendorNameField.getValueAsString();
          System.out.printf("Vendor Name: %s, confidence: %.2f%n",
            merchantName, vendorNameField.getConfidence());
        }
      }

      DocumentField vendorAddressField = invoiceFields.get("VendorAddress");
      if (vendorAddressField != null) {
        if (DocumentFieldType.STRING == vendorAddressField.getType()) {
          String merchantAddress = vendorAddressField.getValueAsString();
          System.out.printf("Vendor address: %s, confidence: %.2f%n",
            merchantAddress, vendorAddressField.getConfidence());
        }
      }

      DocumentField customerNameField = invoiceFields.get("CustomerName");
      if (customerNameField != null) {
        if (DocumentFieldType.STRING == customerNameField.getType()) {
          String merchantAddress = customerNameField.getValueAsString();
          System.out.printf("Customer Name: %s, confidence: %.2f%n",
            merchantAddress, customerNameField.getConfidence());
        }
      }

      DocumentField customerAddressRecipientField = invoiceFields.get("CustomerAddressRecipient");
      if (customerAddressRecipientField != null) {
        if (DocumentFieldType.STRING == customerAddressRecipientField.getType()) {
          String customerAddr = customerAddressRecipientField.getValueAsString();
          System.out.printf("Customer Address Recipient: %s, confidence: %.2f%n",
            customerAddr, customerAddressRecipientField.getConfidence());
        }
      }

      DocumentField invoiceIdField = invoiceFields.get("InvoiceId");
      if (invoiceIdField != null) {
        if (DocumentFieldType.STRING == invoiceIdField.getType()) {
          String invoiceId = invoiceIdField.getValueAsString();
          System.out.printf("Invoice ID: %s, confidence: %.2f%n",
            invoiceId, invoiceIdField.getConfidence());
        }
      }

      DocumentField invoiceDateField = invoiceFields.get("InvoiceDate");
      if (customerNameField != null) {
        if (DocumentFieldType.DATE == invoiceDateField.getType()) {
          LocalDate invoiceDate = invoiceDateField.getValueAsDate();
          System.out.printf("Invoice Date: %s, confidence: %.2f%n",
            invoiceDate, invoiceDateField.getConfidence());
        }
      }

      DocumentField invoiceTotalField = invoiceFields.get("InvoiceTotal");
      if (customerAddressRecipientField != null) {
        if (DocumentFieldType.DOUBLE == invoiceTotalField.getType()) {
          Double invoiceTotal = invoiceTotalField.getValueAsDouble();
          System.out.printf("Invoice Total: %.2f, confidence: %.2f%n",
            invoiceTotal, invoiceTotalField.getConfidence());
        }
      }

      DocumentField invoiceItemsField = invoiceFields.get("Items");
      if (invoiceItemsField != null) {
        System.out.printf("Invoice Items: %n");
        if (DocumentFieldType.LIST == invoiceItemsField.getType()) {
          List < DocumentField > invoiceItems = invoiceItemsField.getValueAsList();
          invoiceItems.stream()
            .filter(invoiceItem -> DocumentFieldType.MAP == invoiceItem.getType())
            .map(documentField -> documentField.getValueAsMap())
            .forEach(documentFieldMap -> documentFieldMap.forEach((key, documentField) -> {

              // See a full list of fields found on an invoice here:
              // https://aka.ms/formrecognizer/invoicefields

              if ("Description".equals(key)) {
                if (DocumentFieldType.STRING == documentField.getType()) {
                  String name = documentField.getValueAsString();
                  System.out.printf("Description: %s, confidence: %.2fs%n",
                    name, documentField.getConfidence());
                }
              }
              if ("Quantity".equals(key)) {
                if (DocumentFieldType.DOUBLE == documentField.getType()) {
                  Double quantity = documentField.getValueAsDouble();
                  System.out.printf("Quantity: %f, confidence: %.2f%n",
                    quantity, documentField.getConfidence());
                }
              }
              if ("UnitPrice".equals(key)) {
                if (DocumentFieldType.DOUBLE == documentField.getType()) {
                  Double unitPrice = documentField.getValueAsDouble();
                  System.out.printf("Unit Price: %f, confidence: %.2f%n",
                    unitPrice, documentField.getConfidence());
                }
              }
              if ("ProductCode".equals(key)) {
                if (DocumentFieldType.DOUBLE == documentField.getType()) {
                  Double productCode = documentField.getValueAsDouble();
                  System.out.printf("Product Code: %f, confidence: %.2f%n",
                    productCode, documentField.getConfidence());
                }
              }
            }));
        }
      }
    }
  }
}
建置並執行應用程式
將程式碼範例新增至應用程式後,請往回瀏覽至您的主要專案目錄:doc-intel-app。
使用
build命令組建您的應用程式:gradle build使用
run命令執行您的應用程式:gradle run
預建模型輸出
以下是預期的輸出程式碼片段:
  ----------- Analyzing invoice  0 -----------
  Analyzed document has doc type invoice with confidence : 1.00
  Vendor Name: CONTOSO LTD., confidence: 0.92
  Vendor address: 123 456th St New York, NY, 10001, confidence: 0.91
  Customer Name: MICROSOFT CORPORATION, confidence: 0.84
  Customer Address Recipient: Microsoft Corp, confidence: 0.92
  Invoice ID: INV-100, confidence: 0.97
  Invoice Date: 2019-11-15, confidence: 0.97
若要檢視整個輸出,請造訪 GitHub 上的 Azure 範例存放庫,以檢視預先建置發票模型輸出。
將下列範例程式碼新增至檔案 FormRecognizer.java。 請務必使用來自 Azure 入口網站文件智慧服務執行個體的值來更新金鑰與端點變數:
import com.azure.ai.formrecognizer.documentanalysis.DocumentAnalysisClient;
import com.azure.ai.formrecognizer.documentanalysis.DocumentAnalysisClientBuilder;
import com.azure.ai.formrecognizer.documentanalysis.models.AnalyzeResult;
import com.azure.ai.formrecognizer.documentanalysis.models.AnalyzedDocument;
import com.azure.ai.formrecognizer.documentanalysis.models.DocumentField;
import com.azure.ai.formrecognizer.documentanalysis.models.DocumentFieldType;
import com.azure.ai.formrecognizer.documentanalysis.models.OperationResult;
import com.azure.core.credential.AzureKeyCredential;
import com.azure.core.util.polling.SyncPoller;

import java.io.IOException;
import java.time.LocalDate;
import java.util.List;
import java.util.Map;

public class FormRecognizer {

  // set `<your-endpoint>` and `<your-key>` variables with the values from the Azure portal
  private static final String endpoint = "<your-endpoint>";
  private static final String key = "<your-key>";

  public static void main(String[] args) {

    // create your `DocumentAnalysisClient` instance and `AzureKeyCredential` variable
    DocumentAnalysisClient client = new DocumentAnalysisClientBuilder()
      .credential(new AzureKeyCredential(key))
      .endpoint(endpoint)
      .buildClient();

    // sample document
    String modelId = "prebuilt-invoice";
    String invoiceUrl = "https://raw.githubusercontent.com/Azure-Samples/cognitive-services-REST-api-samples/master/curl/form-recognizer/sample-invoice.pdf";

    SyncPoller < OperationResult, AnalyzeResult > analyzeInvoicePoller = client.beginAnalyzeDocumentFromUrl(modelId, invoiceUrl);

    AnalyzeResult analyzeInvoiceResult = analyzeInvoicePoller.getFinalResult();

    for (int i = 0; i < analyzeInvoiceResult.getDocuments().size(); i++) {
      AnalyzedDocument analyzedInvoice = analyzeInvoiceResult.getDocuments().get(i);
      Map < String, DocumentField > invoiceFields = analyzedInvoice.getFields();
      System.out.printf("----------- Analyzing invoice  %d -----------%n", i);
      DocumentField vendorNameField = invoiceFields.get("VendorName");
      if (vendorNameField != null) {
        if (DocumentFieldType.STRING == vendorNameField.getType()) {
          String merchantName = vendorNameField.getValueAsString();
          System.out.printf("Vendor Name: %s, confidence: %.2f%n",
            merchantName, vendorNameField.getConfidence());
        }
      }

      DocumentField vendorAddressField = invoiceFields.get("VendorAddress");
      if (vendorAddressField != null) {
        if (DocumentFieldType.STRING == vendorAddressField.getType()) {
          String merchantAddress = vendorAddressField.getValueAsString();
          System.out.printf("Vendor address: %s, confidence: %.2f%n",
            merchantAddress, vendorAddressField.getConfidence());
        }
      }

      DocumentField customerNameField = invoiceFields.get("CustomerName");
      if (customerNameField != null) {
        if (DocumentFieldType.STRING == customerNameField.getType()) {
          String merchantAddress = customerNameField.getValueAsString();
          System.out.printf("Customer Name: %s, confidence: %.2f%n",
            merchantAddress, customerNameField.getConfidence());
        }
      }

      DocumentField customerAddressRecipientField = invoiceFields.get("CustomerAddressRecipient");
      if (customerAddressRecipientField != null) {
        if (DocumentFieldType.STRING == customerAddressRecipientField.getType()) {
          String customerAddr = customerAddressRecipientField.getValueAsString();
          System.out.printf("Customer Address Recipient: %s, confidence: %.2f%n",
            customerAddr, customerAddressRecipientField.getConfidence());
        }
      }

      DocumentField invoiceIdField = invoiceFields.get("InvoiceId");
      if (invoiceIdField != null) {
        if (DocumentFieldType.STRING == invoiceIdField.getType()) {
          String invoiceId = invoiceIdField.getValueAsString();
          System.out.printf("Invoice ID: %s, confidence: %.2f%n",
            invoiceId, invoiceIdField.getConfidence());
        }
      }

      DocumentField invoiceDateField = invoiceFields.get("InvoiceDate");
      if (customerNameField != null) {
        if (DocumentFieldType.DATE == invoiceDateField.getType()) {
          LocalDate invoiceDate = invoiceDateField.getValueAsDate();
          System.out.printf("Invoice Date: %s, confidence: %.2f%n",
            invoiceDate, invoiceDateField.getConfidence());
        }
      }

      DocumentField invoiceTotalField = invoiceFields.get("InvoiceTotal");
      if (customerAddressRecipientField != null) {
        if (DocumentFieldType.DOUBLE == invoiceTotalField.getType()) {
          Double invoiceTotal = invoiceTotalField.getValueAsDouble();
          System.out.printf("Invoice Total: %.2f, confidence: %.2f%n",
            invoiceTotal, invoiceTotalField.getConfidence());
        }
      }

      DocumentField invoiceItemsField = invoiceFields.get("Items");
      if (invoiceItemsField != null) {
        System.out.printf("Invoice Items: %n");
        if (DocumentFieldType.LIST == invoiceItemsField.getType()) {
          List < DocumentField > invoiceItems = invoiceItemsField.getValueAsList();
          invoiceItems.stream()
            .filter(invoiceItem -> DocumentFieldType.MAP == invoiceItem.getType())
            .map(documentField -> documentField.getValueAsMap())
            .forEach(documentFieldMap -> documentFieldMap.forEach((key, documentField) -> {

              // See a full list of fields found on an invoice here:
              // https://aka.ms/formrecognizer/invoicefields

              if ("Description".equals(key)) {
                if (DocumentFieldType.STRING == documentField.getType()) {
                  String name = documentField.getValueAsString();
                  System.out.printf("Description: %s, confidence: %.2fs%n",
                    name, documentField.getConfidence());
                }
              }
              if ("Quantity".equals(key)) {
                if (DocumentFieldType.DOUBLE == documentField.getType()) {
                  Double quantity = documentField.getValueAsDouble();
                  System.out.printf("Quantity: %f, confidence: %.2f%n",
                    quantity, documentField.getConfidence());
                }
              }
              if ("UnitPrice".equals(key)) {
                if (DocumentFieldType.DOUBLE == documentField.getType()) {
                  Double unitPrice = documentField.getValueAsDouble();
                  System.out.printf("Unit Price: %f, confidence: %.2f%n",
                    unitPrice, documentField.getConfidence());
                }
              }
              if ("ProductCode".equals(key)) {
                if (DocumentFieldType.DOUBLE == documentField.getType()) {
                  Double productCode = documentField.getValueAsDouble();
                  System.out.printf("Product Code: %f, confidence: %.2f%n",
                    productCode, documentField.getConfidence());
                }
              }
            }));
        }
      }
    }
  }
}
建置並執行應用程式
將程式碼範例新增至應用程式後,請往回瀏覽至您的主要專案目錄:doc-intel-app。
使用
build命令組建您的應用程式:gradle build使用
run命令執行您的應用程式:gradle run
用戶端程式庫 (英文) | REST API 參考 (部分機器翻譯) | 套件 (npm) (英文) | 範例 (英文) |支援的 REST API 版本 (部分機器翻譯)
用戶端程式庫 (英文) |REST API 參考 (部分機器翻譯) | 套件 (npm) (英文) | 範例 (英文) |支援的 REST API 版本 (部分機器翻譯)
用戶端程式庫 (英文) |REST API 參考 (部分機器翻譯) | 套件 (npm) (英文) | 範例 (英文) |支援的 REST API 版本 (部分機器翻譯)
在本快速入門中,請使用下列功能,從表單和文件中分析及擷取資料和值:
先決條件
Azure 訂用帳戶 - 建立免費帳戶。
最新的 Visual Studio Code 版本或您慣用的 IDE。 如需詳細資訊,請參閱Visual Studio Code 中的 Node.js (英文)。
一個 Foundry 工具或文件智慧資源。 擁有 Azure 訂用帳戶後,請在 Azure 入口網站中建立單一服務或多重服務文件智慧服務資源,以取得您的金鑰與端點。 您可以使用免費定價層 (
F0) 來試用服務,之後可升級至付費層以用於實際執行環境。秘訣
如果你打算在同一端點/金鑰下存取多個 Foundry 工具,請建立 Microsoft Foundry 資源。 針對僅限文件智慧服務存取,請建立文件智慧服務資源。 如果您想要使用 Microsoft Entra 驗證,則需要使用單一服務資源。
部署資源之後,請選取 [移至資源]。 您需要使用已建立資源的金鑰和端點,將應用程式連線至文件智慧服務 API。 您稍後會在快速入門中將金鑰和端點貼上至程式碼中:
設定
建立新 Node.js 快速應用程式:在主控台視窗 (例如 cmd、PowerShell 或 Bash) 中,為您的應用程式建立名為
doc-intel-app的新目錄,並瀏覽至該目錄。mkdir doc-intel-app && cd doc-intel-app執行
npm init命令來初始化應用程式,並建構您的專案。npm init使用終端機中顯示的提示來指定專案的屬性。
- 名稱、版本號碼和進入點是最重要的屬性。
- 建議為進入點名稱保留
index.js。 描述、測試命令、GitHub 存放庫、關鍵字、作者和授權資訊皆為選擇性屬性,在此專案中可以跳過。 - 選取 [退回] 或 [輸入],接受括弧中的建議。
- 完成提示後,將會在 doc-intel-app 目錄中建立
package.json檔案。
安裝
ai-document-intelligence用戶端程式庫和azure/identitynpm 套件:npm i @azure-rest/ai-document-intelligence@1.0.0 @azure/core-auth您應用程式的
package.json檔案會隨著相依性而更新。
安裝
ai-form-recognizer用戶端程式庫和azure/identitynpm 套件:npm i @azure/ai-form-recognizer@5.0.0 @azure/identity- 您應用程式的
package.json檔案會隨著相依性而更新。
- 您應用程式的
安裝
ai-form-recognizer用戶端程式庫和azure/identitynpm 套件:npm i @azure/ai-form-recognizer@4.0.0 @azure/identity
在應用程式目錄中建立名為
index.js的檔案。秘訣
- 您可以使用 PowerShell 建立新檔案。
- 按住 Shift 鍵並在資料夾上以滑鼠右鍵按一下,以開啟專案目錄中的 PowerShell 視窗。
- 輸入下列命令 New-Item index.js。
建置應用程式
若要與此文件智慧服務互動,您必須建立 DocumentIntelligenceClient 類別的執行個體。 若要這樣做,請使用 AzureKeyCredential 從 Azure 入口網站建立 key,並使用 DocumentIntelligenceClient 和文件智慧服務 AzureKeyCredential 來建立 endpoint 執行個體。
若要與此文件智慧服務互動,您必須建立 DocumentAnalysisClient 類別的執行個體。 若要這樣做,您要使用 AzureKeyCredential 從 Azure 入口網站建立 key,並使用 DocumentAnalysisClient 和 Azure 表格辨識器 AzureKeyCredential 來建立 endpoint 執行個體。
重要事項
我們建議使用適用於 Azure 資源的受控識別搭配 Microsoft Entra ID 驗證,以避免使用在雲端執行的應用程式儲存認證。
請謹慎使用 API 金鑰。 請勿在程式碼中直接包含 API 金鑰,且切勿公開張貼金鑰。 如果使用 API 金鑰,請安全地將它們儲存在 Azure 金鑰保存庫、定期輪替金鑰,並使用角色型存取控制和網路存取限制來限制對 Azure 金鑰保存庫 的存取。 如需在應用程式中安全地使用 API 金鑰的詳細資訊,請參閱 使用 Azure Key Vault 的 API 金鑰。
如需 AI 服務安全性的詳細資訊,請參閱驗證對 Azure AI 服務的要求。
版面配置模型
從文件中擷取文字、選取標記、文字樣式、資料表結構和周框區域座標。
- 在此範例中,您需要來自 URL 的文件檔案。 您可以針對本快速入門使用我們的範例文件 (英文)。
- 我們已將檔案 URL 值新增至檔案頂端附近的
formUrl變數。- 若要分析來自 URL 的指定檔案,需使用
beginAnalyzeDocuments方法並傳遞prebuilt-layout作為模型識別碼。
    const DocumentIntelligence = require("@azure-rest/ai-document-intelligence").default,
  { getLongRunningPoller, isUnexpected } = require("@azure-rest/ai-document-intelligence");

  const { AzureKeyCredential } = require("@azure/core-auth");

    // set `<your-key>` and `<your-endpoint>` variables with the values from the Azure portal.
    const key = "<your-key>";
    const endpoint = "<your-endpoint>";

    // sample document
    const formUrl = "https://raw.githubusercontent.com/Azure-Samples/cognitive-services-REST-api-samples/master/curl/form-recognizer/sample-layout.pdf"

   async function main() {
    const client = DocumentIntelligence(endpoint, new AzureKeyCredential(key));


    const initialResponse = await client
      .path("/documentModels/{modelId}:analyze", "prebuilt-layout")
      .post({
        contentType: "application/json",
        body: {
          urlSource: formUrl
        },
       });

       if (isUnexpected(initialResponse)) {
       throw initialResponse.body.error;
     }

    const poller = await getLongRunningPoller(client, initialResponse);
    const analyzeResult = (await poller.pollUntilDone()).body.analyzeResult;

    const documents = analyzeResult?.documents;

    const document = documents && documents[0];
    if (!document) {
    throw new Error("Expected at least one document in the result.");
    }

    console.log(
    "Extracted document:",
    document.docType,
    `(confidence: ${document.confidence || "<undefined>"})`,
    );
    console.log("Fields:", document.fields);
}

main().catch((error) => {
    console.error("An error occurred:", error);
    process.exit(1);
});
執行應用程式
將程式碼範例新增至應用程式後,請執行您的程式:
瀏覽至文件智慧服務應用程式所在的資料夾 (doc-intel-app)。
在您的終端機中輸入下列命令:
node index.js
將下列範例程式碼新增至檔案 index.js。 請務必使用來自 Azure 入口網站文件智慧服務執行個體的值來更新金鑰與端點變數:
 const { AzureKeyCredential, DocumentAnalysisClient } = require("@azure/ai-form-recognizer");

    // set `<your-key>` and `<your-endpoint>` variables with the values from the Azure portal.
    const key = "<your-key>";
    const endpoint = "<your-endpoint>";

    // sample document
  const formUrl = "https://raw.githubusercontent.com/Azure-Samples/cognitive-services-REST-api-samples/master/curl/form-recognizer/sample-layout.pdf"

  async function main() {
    const client = new DocumentAnalysisClient(endpoint, new AzureKeyCredential(key));

    const poller = await client.beginAnalyzeDocumentFromUrl("prebuilt-layout", formUrl);

    const {
        pages,
        tables
    } = await poller.pollUntilDone();

    if (pages.length <= 0) {
        console.log("No pages were extracted from the document.");
    } else {
        console.log("Pages:");
        for (const page of pages) {
            console.log("- Page", page.pageNumber, `(unit: ${page.unit})`);
            console.log(`  ${page.width}x${page.height}, angle: ${page.angle}`);
            console.log(`  ${page.lines.length} lines, ${page.words.length} words`);
        }
    }

    if (tables.length <= 0) {
        console.log("No tables were extracted from the document.");
    } else {
        console.log("Tables:");
        for (const table of tables) {
            console.log(
                `- Extracted table: ${table.columnCount} columns, ${table.rowCount} rows (${table.cells.length} cells)`
            );
        }
    }
}

main().catch((error) => {
    console.error("An error occurred:", error);
    process.exit(1);
});
執行應用程式
將程式碼範例新增至應用程式後,請執行您的程式:
瀏覽至文件智慧服務應用程式所在的資料夾 (doc-intel-app)。
在您的終端機中輸入下列命令:
node index.js
版面配置模型輸出
以下是預期的輸出程式碼片段:
Pages:
- Page 1 (unit: inch)
  8.5x11, angle: 0
  69 lines, 425 words
Tables:
- Extracted table: 3 columns, 5 rows (15 cells)
若要檢視整個輸出,請造訪 GitHub 上的 Azure 範例存放庫,以檢視配置模型輸出。
預先建置模型
在此範例中,我們會使用預建發票模型來分析發票。
秘訣
這不限於發票,有多種預建模型可供選擇,每個模型都有一組自身支援的欄位。
analyze 作業所用的模型取決於要分析的文件類型。 請參閱模型資料擷取。
const DocumentIntelligence = require("@azure-rest/ai-document-intelligence").default,
  { getLongRunningPoller, isUnexpected } = require("@azure-rest/ai-document-intelligence");

const { AzureKeyCredential } = require("@azure/core-auth");

    // set `<your-key>` and `<your-endpoint>` variables with the values from the Azure portal.
    const key = "<your-key>";
    const endpoint = "<your-endpoint>";

    // sample document
    const invoiceUrl = "https://raw.githubusercontent.com/Azure-Samples/cognitive-services-REST-api-samples/master/curl/form-recognizer/sample-invoice.pdf"

async function main() {

    const client = DocumentIntelligence(endpoint, new AzureKeyCredential(key));

    const initialResponse = await client
    .path("/documentModels/{modelId}:analyze", "prebuilt-invoice")
    .post({
      contentType: "application/json",
      body: {
        // The Document Intelligence service will access the URL to the invoice image and extract data from it
        urlSource: invoiceUrl,
      },
    });

    if (isUnexpected(initialResponse)) {
       throw initialResponse.body.error;
     }

    const poller = await getLongRunningPoller(client, initialResponse);

    poller.onProgress((state) => console.log("Operation:", state.result, state.status));
    const analyzeResult = (await poller.pollUntilDone()).body.analyzeResult;

    const documents = analyzeResult?.documents;

    const result = documents && documents[0];
    if (result) {
      console.log(result.fields);
    } else {
      throw new Error("Expected at least one invoice in the result.");
    }

console.log(
    "Extracted invoice:",
    document.docType,
    `(confidence: ${document.confidence || "<undefined>"})`,
  );
  console.log("Fields:", document.fields);
}


main().catch((error) => {
    console.error("An error occurred:", error);
    process.exit(1);
});
執行應用程式
將程式碼範例新增至應用程式後,請執行您的程式:
瀏覽至文件智慧服務應用程式所在的資料夾 (doc-intel-app)。
在您的終端機中輸入下列命令:
node index.js
 const {
    AzureKeyCredential,
    DocumentAnalysisClient
} = require("@azure/ai-form-recognizer");

// set `<your-key>` and `<your-endpoint>` variables with the values from the Azure portal.
const key = "<your-key>";
const endpoint = "<your-endpoint>";
// sample document
invoiceUrl = "https://raw.githubusercontent.com/Azure-Samples/cognitive-services-REST-api-samples/master/curl/form-recognizer/sample-invoice.pdf"

async function main() {
    const client = new DocumentAnalysisClient(endpoint, new AzureKeyCredential(key));

    const poller = await client.beginAnalyzeDocumentFromUrl("prebuilt-invoice", invoiceUrl);

    const {
        pages,
        tables
    } = await poller.pollUntilDone();

    if (pages.length <= 0) {
        console.log("No pages were extracted from the document.");
    } else {
        console.log("Pages:");
        for (const page of pages) {
            console.log("- Page", page.pageNumber, `(unit: ${page.unit})`);
            console.log(`  ${page.width}x${page.height}, angle: ${page.angle}`);
            console.log(`  ${page.lines.length} lines, ${page.words.length} words`);

            if (page.lines && page.lines.length > 0) {
                console.log("  Lines:");

                for (const line of page.lines) {
                    console.log(`  - "${line.content}"`);

                    // The words of the line can also be iterated independently. The words are computed based on their
                    // corresponding spans.
                    for (const word of line.words()) {
                        console.log(`    - "${word.content}"`);
                    }
                }
            }
        }
    }

    if (tables.length <= 0) {
        console.log("No tables were extracted from the document.");
    } else {
        console.log("Tables:");
        for (const table of tables) {
            console.log(
                `- Extracted table: ${table.columnCount} columns, ${table.rowCount} rows (${table.cells.length} cells)`
            );
        }
    }
}

main().catch((error) => {
    console.error("An error occurred:", error);
    process.exit(1);
});
執行應用程式
將程式碼範例新增至應用程式後,請執行您的程式:
瀏覽至文件智慧服務應用程式所在的資料夾 (doc-intel-app)。
在您的終端機中輸入下列命令:
node index.js
預建模型輸出
以下是預期的輸出程式碼片段:
  Vendor Name: CONTOSO LTD.
  Customer Name: MICROSOFT CORPORATION
  Invoice Date: 2019-11-15T00:00:00.000Z
  Due Date: 2019-12-15T00:00:00.000Z
  Items:
  - <no product code>
    Description: Test for 23 fields
    Quantity: 1
    Date: undefined
    Unit: undefined
    Unit Price: 1
    Tax: undefined
    Amount: 100
若要檢視整個輸出,請造訪 GitHub 上的 Azure 範例存放庫,以檢視預先建置發票模型輸出。
const { AzureKeyCredential, DocumentAnalysisClient } = require("@azure/ai-form-recognizer");

  // set `<your-key>` and `<your-endpoint>` variables with the values from the Azure portal.
      const key = "<your-key>";
      const endpoint = "<your-endpoint>";
// sample document
    invoiceUrl = "https://raw.githubusercontent.com/Azure-Samples/cognitive-services-REST-api-samples/master/curl/form-recognizer/sample-invoice.pdf"

async function main() {
    const client = new DocumentAnalysisClient(endpoint, new AzureKeyCredential(key));

    const poller = await client.beginAnalyzeDocument("prebuilt-invoice", invoiceUrl);

    const {
    documents: [document],
  } = await poller.pollUntilDone();


  if (document) {
    const {
      vendorName,
      customerName,
      invoiceDate,
      dueDate,
      items,
      subTotal,
      previousUnpaidBalance,
      totalTax,
      amountDue,
    } = document.fields;

    // The invoice model has many fields. For details, *see* [Invoice model field extraction](../../prebuilt/invoice.md#field-extraction)
    console.log("Vendor Name:", vendorName && vendorName.value);
    console.log("Customer Name:", customerName && customerName.value);
    console.log("Invoice Date:", invoiceDate && invoiceDate.value);
    console.log("Due Date:", dueDate && dueDate.value);

    console.log("Items:");
    for (const item of (items && items.values) || []) {
      const { productCode, description, quantity, date, unit, unitPrice, tax, amount } =
        item.properties;

      console.log("-", (productCode && productCode.value) || "<no product code>");
      console.log("  Description:", description && description.value);
      console.log("  Quantity:", quantity && quantity.value);
      console.log("  Date:", date && date.value);
      console.log("  Unit:", unit && unit.value);
      console.log("  Unit Price:", unitPrice && unitPrice.value);
      console.log("  Tax:", tax && tax.value);
      console.log("  Amount:", amount && amount.value);
    }

    console.log("Subtotal:", subTotal && subTotal.value);
    console.log("Previous Unpaid Balance:", previousUnpaidBalance && previousUnpaidBalance.value);
    console.log("Tax:", totalTax && totalTax.value);
    console.log("Amount Due:", amountDue && amountDue.value);
  } else {
    throw new Error("Expected at least one receipt in the result.");
  }
}


main().catch((error) => {
    console.error("An error occurred:", error);
    process.exit(1);
});
執行應用程式
將程式碼範例新增至應用程式後,請執行您的程式:
瀏覽至文件智慧服務應用程式所在的資料夾 (doc-intel-app)。
在您的終端機中輸入下列命令:
node index.js
用戶端連結庫 |REST API 參考 | 套件 (PyPi) | 範例 | 支援的 REST API 版本
用戶端連結庫 |REST API 參考 | 套件 (PyPi) | 範例 | 支援的 REST API 版本
用戶端連結庫 |REST API 參考 | 套件 (PyPi) | 範例 | 支援的 REST API 版本
在本快速入門中,請使用下列功能,從表單和文件中分析及擷取資料:
先決條件
Azure 訂用帳戶 - 建立免費帳戶。
Python 3.7 或更新版本 (英文)。
- 您安裝的 Python 應包含 pip。 您可以在命令列上執行
pip --version來檢查是否已安裝 pip。 安裝最新版本的 Python 以取得 pip。
- 您安裝的 Python 應包含 pip。 您可以在命令列上執行
最新的 Visual Studio Code 版本或您慣用的 IDE。 如需詳細資訊,請參閱 Visual Studio Code 中的 Python 使用者入門 (英文)。
一個 Foundry 工具或文件智慧資源。 擁有 Azure 訂用帳戶後,請在 Azure 入口網站中建立單一服務或多重服務文件智慧服務資源,以取得您的金鑰與端點。 您可以使用免費定價層 (
F0) 來試用服務,之後可升級至付費層以用於實際執行環境。
秘訣
如果你打算在同一端點/金鑰下存取多個 Foundry 工具,請建立 Microsoft Foundry 資源。 針對僅限文件智慧服務存取,請建立文件智慧服務資源。 如果您想要使用 Microsoft Entra 驗證,則需要使用單一服務資源。
部署資源之後,請選取 [移至資源]。 您需要使用已建立資源的金鑰和端點,將應用程式連線至文件智慧服務 API。 您稍後會在快速入門中將金鑰和端點貼上至程式碼中:
設定
在本地環境中開啟終端機視窗,安裝 Python(帶有 pip 的 Azure Document Intelligence in Foundry Tools)客戶端函式庫:
pip install azure-ai-documentintelligence==1.0.0b4
pip install azure-ai-formrecognizer==3.3.0
pip install azure-ai-formrecognizer==3.2.0b6
建立 Python 應用程式
若要與此文件智慧服務互動,您必須建立 DocumentIntelligenceClient 類別的執行個體。 若要這樣做,請使用 AzureKeyCredential 從 Azure 入口網站建立 key,並使用 DocumentIntelligenceClient 和文件智慧服務 AzureKeyCredential 來建立 endpoint 執行個體。
若要與此文件智慧服務互動,您必須建立 DocumentAnalysisClient 類別的執行個體。 若要這樣做,請使用 AzureKeyCredential 從 Azure 入口網站建立 key,並使用 DocumentAnalysisClient 和文件智慧服務 AzureKeyCredential 來建立 endpoint 執行個體。
重要事項
我們建議使用適用於 Azure 資源的受控識別搭配 Microsoft Entra ID 驗證,以避免使用在雲端執行的應用程式儲存認證。
請謹慎使用 API 金鑰。 請勿在程式碼中直接包含 API 金鑰,且切勿公開張貼金鑰。 如果使用 API 金鑰,請安全地將它們儲存在 Azure 金鑰保存庫、定期輪替金鑰,並使用角色型存取控制和網路存取限制來限制對 Azure 金鑰保存庫 的存取。 如需在應用程式中安全地使用 API 金鑰的詳細資訊,請參閱 使用 Azure Key Vault 的 API 金鑰。
如需 AI 服務安全性的詳細資訊,請參閱驗證對 Azure AI 服務的要求。
版面配置模型
從文件中擷取文字、選取標記、文字樣式、資料表結構和周框區域座標。
- 在此範例中,您需要來自 URL 的文件檔案。 您可以針對本快速入門使用我們的範例文件 (英文)。
- 我們已將檔案 URI 值新增至
formUrl函式中的analyze_layout變數。
將下列程式碼範例新增至您的 doc_intel_quickstart.py 應用程式。 請務必使用來自 Azure 入口網站文件智慧服務執行個體的值來更新金鑰與端點變數:
# import libraries
import os
from azure.core.credentials import AzureKeyCredential
from azure.ai.documentintelligence import DocumentIntelligenceClient
from azure.ai.documentintelligence.models import AnalyzeResult
from azure.ai.documentintelligence.models import AnalyzeDocumentRequest

# set `<your-endpoint>` and `<your-key>` variables with the values from the Azure portal
endpoint = "<your-endpoint>"
key = "<your-key>"

# helper functions

def get_words(page, line):
    result = []
    for word in page.words:
        if _in_span(word, line.spans):
            result.append(word)
    return result


def _in_span(word, spans):
    for span in spans:
        if word.span.offset >= span.offset and (
            word.span.offset + word.span.length
        ) <= (span.offset + span.length):
            return True
    return False


def analyze_layout():
    # sample document
    formUrl = "https://raw.githubusercontent.com/Azure-Samples/cognitive-services-REST-api-samples/master/curl/form-recognizer/sample-layout.pdf"

    document_intelligence_client = DocumentIntelligenceClient(
        endpoint=endpoint, credential=AzureKeyCredential(key)
    )

    poller = document_intelligence_client.begin_analyze_document(
        "prebuilt-layout", AnalyzeDocumentRequest(url_source=formUrl
    ))

    result: AnalyzeResult = poller.result()

    if result.styles and any([style.is_handwritten for style in result.styles]):
        print("Document contains handwritten content")
    else:
        print("Document does not contain handwritten content")

    for page in result.pages:
        print(f"----Analyzing layout from page #{page.page_number}----")
        print(
            f"Page has width: {page.width} and height: {page.height}, measured with unit: {page.unit}"
        )

        if page.lines:
            for line_idx, line in enumerate(page.lines):
                words = get_words(page, line)
                print(
                    f"...Line # {line_idx} has word count {len(words)} and text '{line.content}' "
                    f"within bounding polygon '{line.polygon}'"
                )

                for word in words:
                    print(
                        f"......Word '{word.content}' has a confidence of {word.confidence}"
                    )

        if page.selection_marks:
            for selection_mark in page.selection_marks:
                print(
                    f"Selection mark is '{selection_mark.state}' within bounding polygon "
                    f"'{selection_mark.polygon}' and has a confidence of {selection_mark.confidence}"
                )

    if result.tables:
        for table_idx, table in enumerate(result.tables):
            print(
                f"Table # {table_idx} has {table.row_count} rows and "
                f"{table.column_count} columns"
            )
            if table.bounding_regions:
                for region in table.bounding_regions:
                    print(
                        f"Table # {table_idx} location on page: {region.page_number} is {region.polygon}"
                    )
            for cell in table.cells:
                print(
                    f"...Cell[{cell.row_index}][{cell.column_index}] has text '{cell.content}'"
                )
                if cell.bounding_regions:
                    for region in cell.bounding_regions:
                        print(
                            f"...content on page {region.page_number} is within bounding polygon '{region.polygon}'"
                        )

    print("----------------------------------------")


if __name__ == "__main__":
    analyze_layout()
執行應用程式
將程式碼範例新增至應用程式後,請建置並執行您的程式:
瀏覽至 doc_intel_quickstart.py 檔案所在的資料夾。
在您的終端機中輸入下列命令:
python doc_intel_quickstart.py
若要分析位於 URL 的指定檔案,請使用 begin_analyze_document_from_url 方法並傳遞 prebuilt-layout 作為模型識別碼。 傳回值是一個 result 物件,其中包含提交文件的相關資料。
將下列程式碼範例新增至您的 form_recognizer_quickstart.py 應用程式。 請務必使用來自 Azure 入口網站 Azure 表格辨識器執行個體的值來更新金鑰和端點變數:
# import libraries
import os
from azure.ai.formrecognizer import DocumentAnalysisClient
from azure.core.credentials import AzureKeyCredential

# set `<your-endpoint>` and `<your-key>` variables with the values from the Azure portal
endpoint = "<your-endpoint>"
key = "<your-key>"

def format_polygon(polygon):
    if not polygon:
        return "N/A"
    return ", ".join(["[{}, {}]".format(p.x, p.y) for p in polygon])

def analyze_layout():
    # sample document
    formUrl = "https://raw.githubusercontent.com/Azure-Samples/cognitive-services-REST-api-samples/master/curl/form-recognizer/sample-layout.pdf"

    document_analysis_client = DocumentAnalysisClient(
        endpoint=endpoint, credential=AzureKeyCredential(key)
    )

    poller = document_analysis_client.begin_analyze_document_from_url(
            "prebuilt-layout", formUrl)
    result = poller.result()

    for idx, style in enumerate(result.styles):
        print(
            "Document contains {} content".format(
                "handwritten" if style.is_handwritten else "no handwritten"
            )
        )

    for page in result.pages:
        print("----Analyzing layout from page #{}----".format(page.page_number))
        print(
            "Page has width: {} and height: {}, measured with unit: {}".format(
                page.width, page.height, page.unit
            )
        )

        for line_idx, line in enumerate(page.lines):
            words = line.get_words()
            print(
                "...Line # {} has word count {} and text '{}' within bounding box '{}'".format(
                    line_idx,
                    len(words),
                    line.content,
                    format_polygon(line.polygon),
                )
            )

            for word in words:
                print(
                    "......Word '{}' has a confidence of {}".format(
                        word.content, word.confidence
                    )
                )

        for selection_mark in page.selection_marks:
            print(
                "...Selection mark is '{}' within bounding box '{}' and has a confidence of {}".format(
                    selection_mark.state,
                    format_polygon(selection_mark.polygon),
                    selection_mark.confidence,
                )
            )

    for table_idx, table in enumerate(result.tables):
        print(
            "Table # {} has {} rows and {} columns".format(
                table_idx, table.row_count, table.column_count
            )
        )
        for region in table.bounding_regions:
            print(
                "Table # {} location on page: {} is {}".format(
                    table_idx,
                    region.page_number,
                    format_polygon(region.polygon),
                )
            )
        for cell in table.cells:
            print(
                "...Cell[{}][{}] has content '{}'".format(
                    cell.row_index,
                    cell.column_index,
                    cell.content,
                )
            )
            for region in cell.bounding_regions:
                print(
                    "...content on page {} is within bounding box '{}'".format(
                        region.page_number,
                        format_polygon(region.polygon),
                    )
                )

    print("----------------------------------------")


if __name__ == "__main__":
    analyze_layout()
執行應用程式
將程式碼範例新增至應用程式後,請建置並執行您的程式:
瀏覽至 form_recognizer_quickstart.py 檔案所在的資料夾。
在您的終端機中輸入下列命令:
python form_recognizer_quickstart.py
版面配置模型輸出
以下是預期的輸出程式碼片段:
  ----Analyzing layout from page #1----
  Page has width: 8.5 and height: 11.0, measured with unit: inch
  ...Line # 0 has word count 2 and text 'UNITED STATES' within bounding box '[3.4915, 0.6828], [5.0116, 0.6828], [5.0116, 0.8265], [3.4915, 0.8265]'
  ......Word 'UNITED' has a confidence of 1.0
  ......Word 'STATES' has a confidence of 1.0
  ...Line # 1 has word count 4 and text 'SECURITIES AND EXCHANGE COMMISSION' within bounding box '[2.1937, 0.9061], [6.297, 0.9061], [6.297, 1.0498], [2.1937, 1.0498]'
  ......Word 'SECURITIES' has a confidence of 1.0
  ......Word 'AND' has a confidence of 1.0
  ......Word 'EXCHANGE' has a confidence of 1.0
  ......Word 'COMMISSION' has a confidence of 1.0
  ...Line # 2 has word count 3 and text 'Washington, D.C. 20549' within bounding box '[3.4629, 1.1179], [5.031, 1.1179], [5.031, 1.2483], [3.4629, 1.2483]'
  ......Word 'Washington,' has a confidence of 1.0
  ......Word 'D.C.' has a confidence of 1.0
若要檢視整個輸出,請造訪 GitHub 上的 Azure 範例存放庫,以檢視配置模型輸出。
將下列程式碼範例新增至您的 form_recognizer_quickstart.py 應用程式。 請務必使用來自 Azure 入口網站 Azure 表格辨識器執行個體的值來更新金鑰和端點變數:
# import libraries
import os
from azure.ai.formrecognizer import DocumentAnalysisClient
from azure.core.credentials import AzureKeyCredential

# set `<your-endpoint>` and `<your-key>` variables with the values from the Azure portal
endpoint = "<your-endpoint>"
key = "<your-key>"


def analyze_layout():
    # sample document
    formUrl = "https://raw.githubusercontent.com/Azure-Samples/cognitive-services-REST-api-samples/master/curl/form-recognizer/sample-layout.pdf"

    document_analysis_client = DocumentAnalysisClient(
        endpoint=endpoint, credential=AzureKeyCredential(key)
    )

    poller = document_analysis_client.begin_analyze_document_from_url(
        "prebuilt-layout", formUrl
    )
    result = poller.result()

    for idx, style in enumerate(result.styles):
        print(
            "Document contains {} content".format(
                "handwritten" if style.is_handwritten else "no handwritten"
            )
        )

    for page in result.pages:
        print("----Analyzing layout from page #{}----".format(page.page_number))
        print(
            "Page has width: {} and height: {}, measured with unit: {}".format(
                page.width, page.height, page.unit
            )
        )

        for line_idx, line in enumerate(page.lines):
            words = line.get_words()
            print(
                "...Line # {} has word count {} and text '{}' within bounding polygon '{}'".format(
                    line_idx,
                    len(words),
                    line.content,
                    format_polygon(line.polygon),
                )
            )

            for word in words:
                print(
                    "......Word '{}' has a confidence of {}".format(
                        word.content, word.confidence
                    )
                )

        for selection_mark in page.selection_marks:
            print(
                "...Selection mark is '{}' within bounding polygon '{}' and has a confidence of {}".format(
                    selection_mark.state,
                    format_polygon(selection_mark.polygon),
                    selection_mark.confidence,
                )
            )

    for table_idx, table in enumerate(result.tables):
        print(
            "Table # {} has {} rows and {} columns".format(
                table_idx, table.row_count, table.column_count
            )
        )
        for region in table.bounding_regions:
            print(
                "Table # {} location on page: {} is {}".format(
                    table_idx,
                    region.page_number,
                    format_polygon(region.polygon),
                )
            )
        for cell in table.cells:
            print(
                "...Cell[{}][{}] has content '{}'".format(
                    cell.row_index,
                    cell.column_index,
                    cell.content,
                )
            )
            for region in cell.bounding_regions:
                print(
                    "...content on page {} is within bounding polygon '{}'".format(
                        region.page_number,
                        format_polygon(region.polygon),
                    )
                )

    print("----------------------------------------")


if __name__ == "__main__":
    analyze_layout()
執行應用程式
將程式碼範例新增至應用程式後,請建置並執行您的程式:
瀏覽至 form_recognizer_quickstart.py 檔案所在的資料夾。
在您的終端機中輸入下列命令:
python form_recognizer_quickstart.py
預先建置模型
使用預建模型來分析及擷取特定檔案類型中的常見欄位。 在此範例中,我們會使用預建發票模型來分析發票。
秘訣
這不限於發票,有多種預建模型可供選擇,每個模型都有一組自身支援的欄位。
analyze 作業所用的模型取決於要分析的文件類型。 請參閱模型資料擷取。
將下列程式碼範例新增至您的 doc_intel_quickstart.py 應用程式。 請務必使用來自 Azure 入口網站文件智慧服務執行個體的值來更新金鑰與端點變數:
# import libraries
import os
from azure.core.credentials import AzureKeyCredential
from azure.ai.documentintelligence import DocumentIntelligenceClient
from azure.ai.documentintelligence.models import AnalyzeResult
from azure.ai.documentintelligence.models import AnalyzeDocumentRequest


# set `<your-endpoint>` and `<your-key>` variables with the values from the Azure portal
endpoint = "<your-endpoint>"
key = "<your-key>"

def analyze_invoice():
    # sample document

    invoiceUrl = "https://raw.githubusercontent.com/Azure-Samples/cognitive-services-REST-api-samples/master/curl/form-recognizer/sample-invoice.pdf"

    document_intelligence_client = DocumentIntelligenceClient(
        endpoint=endpoint, credential=AzureKeyCredential(key)
    )

    poller = document_intelligence_client.begin_analyze_document(
        "prebuilt-invoice", AnalyzeDocumentRequest(url_source=invoiceUrl)
    )
    invoices = poller.result()

    if invoices.documents:
        for idx, invoice in enumerate(invoices.documents):
            print(f"--------Analyzing invoice #{idx + 1}--------")
            vendor_name = invoice.fields.get("VendorName")
            if vendor_name:
                print(
                    f"Vendor Name: {vendor_name.get('content')} has confidence: {vendor_name.get('confidence')}"
                )
            vendor_address = invoice.fields.get("VendorAddress")
            if vendor_address:
                print(
                    f"Vendor Address: {vendor_address.get('content')} has confidence: {vendor_address.get('confidence')}"
                )
            vendor_address_recipient = invoice.fields.get("VendorAddressRecipient")
            if vendor_address_recipient:
                print(
                    f"Vendor Address Recipient: {vendor_address_recipient.get('content')} has confidence: {vendor_address_recipient.get('confidence')}"
                )
            customer_name = invoice.fields.get("CustomerName")
            if customer_name:
                print(
                    f"Customer Name: {customer_name.get('content')} has confidence: {customer_name.get('confidence')}"
                )
            customer_id = invoice.fields.get("CustomerId")
            if customer_id:
                print(
                    f"Customer Id: {customer_id.get('content')} has confidence: {customer_id.get('confidence')}"
                )
            customer_address = invoice.fields.get("CustomerAddress")
            if customer_address:
                print(
                    f"Customer Address: {customer_address.get('content')} has confidence: {customer_address.get('confidence')}"
                )
            customer_address_recipient = invoice.fields.get("CustomerAddressRecipient")
            if customer_address_recipient:
                print(
                    f"Customer Address Recipient: {customer_address_recipient.get('content')} has confidence: {customer_address_recipient.get('confidence')}"
                )
            invoice_id = invoice.fields.get("InvoiceId")
            if invoice_id:
                print(
                    f"Invoice Id: {invoice_id.get('content')} has confidence: {invoice_id.get('confidence')}"
                )
            invoice_date = invoice.fields.get("InvoiceDate")
            if invoice_date:
                print(
                    f"Invoice Date: {invoice_date.get('content')} has confidence: {invoice_date.get('confidence')}"
                )
            invoice_total = invoice.fields.get("InvoiceTotal")
            if invoice_total:
                print(
                    f"Invoice Total: {invoice_total.get('content')} has confidence: {invoice_total.get('confidence')}"
                )
            due_date = invoice.fields.get("DueDate")
            if due_date:
                print(
                    f"Due Date: {due_date.get('content')} has confidence: {due_date.get('confidence')}"
                )
            purchase_order = invoice.fields.get("PurchaseOrder")
            if purchase_order:
                print(
                    f"Purchase Order: {purchase_order.get('content')} has confidence: {purchase_order.get('confidence')}"
                )
            billing_address = invoice.fields.get("BillingAddress")
            if billing_address:
                print(
                    f"Billing Address: {billing_address.get('content')} has confidence: {billing_address.get('confidence')}"
                )
            billing_address_recipient = invoice.fields.get("BillingAddressRecipient")
            if billing_address_recipient:
                print(
                    f"Billing Address Recipient: {billing_address_recipient.get('content')} has confidence: {billing_address_recipient.get('confidence')}"
                )
            shipping_address = invoice.fields.get("ShippingAddress")
            if shipping_address:
                print(
                    f"Shipping Address: {shipping_address.get('content')} has confidence: {shipping_address.get('confidence')}"
                )
            shipping_address_recipient = invoice.fields.get("ShippingAddressRecipient")
            if shipping_address_recipient:
                print(
                    f"Shipping Address Recipient: {shipping_address_recipient.get('content')} has confidence: {shipping_address_recipient.get('confidence')}"
                )
            print("Invoice items:")
            for idx, item in enumerate(invoice.fields.get("Items").get("valueArray")):
                print(f"...Item #{idx + 1}")
                item_description = item.get("valueObject").get("Description")
                if item_description:
                    print(
                        f"......Description: {item_description.get('content')} has confidence: {item_description.get('confidence')}"
                    )
                item_quantity = item.get("valueObject").get("Quantity")
                if item_quantity:
                    print(
                        f"......Quantity: {item_quantity.get('content')} has confidence: {item_quantity.get('confidence')}"
                    )
                unit = item.get("valueObject").get("Unit")
                if unit:
                    print(
                        f"......Unit: {unit.get('content')} has confidence: {unit.get('confidence')}"
                    )
                unit_price = item.get("valueObject").get("UnitPrice")
                if unit_price:
                    unit_price_code = (
                        unit_price.get("valueCurrency").get("currencyCode")
                        if unit_price.get("valueCurrency").get("currencyCode")
                        else ""
                    )
                    print(
                        f"......Unit Price: {unit_price.get('content')}{unit_price_code} has confidence: {unit_price.get('confidence')}"
                    )
                product_code = item.get("valueObject").get("ProductCode")
                if product_code:
                    print(
                        f"......Product Code: {product_code.get('content')} has confidence: {product_code.get('confidence')}"
                    )
                item_date = item.get("valueObject").get("Date")
                if item_date:
                    print(
                        f"......Date: {item_date.get('content')} has confidence: {item_date.get('confidence')}"
                    )
                tax = item.get("valueObject").get("Tax")
                if tax:
                    print(
                        f"......Tax: {tax.get('content')} has confidence: {tax.get('confidence')}"
                    )
                amount = item.get("valueObject").get("Amount")
                if amount:
                    print(
                        f"......Amount: {amount.get('content')} has confidence: {amount.get('confidence')}"
                    )
            subtotal = invoice.fields.get("SubTotal")
            if subtotal:
                print(
                    f"Subtotal: {subtotal.get('content')} has confidence: {subtotal.get('confidence')}"
                )
            total_tax = invoice.fields.get("TotalTax")
            if total_tax:
                print(
                    f"Total Tax: {total_tax.get('content')} has confidence: {total_tax.get('confidence')}"
                )
            previous_unpaid_balance = invoice.fields.get("PreviousUnpaidBalance")
            if previous_unpaid_balance:
                print(
                    f"Previous Unpaid Balance: {previous_unpaid_balance.get('content')} has confidence: {previous_unpaid_balance.get('confidence')}"
                )
            amount_due = invoice.fields.get("AmountDue")
            if amount_due:
                print(
                    f"Amount Due: {amount_due.get('content')} has confidence: {amount_due.get('confidence')}"
                )
            service_start_date = invoice.fields.get("ServiceStartDate")
            if service_start_date:
                print(
                    f"Service Start Date: {service_start_date.get('content')} has confidence: {service_start_date.get('confidence')}"
                )
            service_end_date = invoice.fields.get("ServiceEndDate")
            if service_end_date:
                print(
                    f"Service End Date: {service_end_date.get('content')} has confidence: {service_end_date.get('confidence')}"
                )
            service_address = invoice.fields.get("ServiceAddress")
            if service_address:
                print(
                    f"Service Address: {service_address.get('content')} has confidence: {service_address.get('confidence')}"
                )
            service_address_recipient = invoice.fields.get("ServiceAddressRecipient")
            if service_address_recipient:
                print(
                    f"Service Address Recipient: {service_address_recipient.get('content')} has confidence: {service_address_recipient.get('confidence')}"
                )
            remittance_address = invoice.fields.get("RemittanceAddress")
            if remittance_address:
                print(
                    f"Remittance Address: {remittance_address.get('content')} has confidence: {remittance_address.get('confidence')}"
                )
            remittance_address_recipient = invoice.fields.get(
                "RemittanceAddressRecipient"
            )
            if remittance_address_recipient:
                print(
                    f"Remittance Address Recipient: {remittance_address_recipient.get('content')} has confidence: {remittance_address_recipient.get('confidence')}"
                )


          print("----------------------------------------")


if __name__ == "__main__":
    analyze_invoice()
執行應用程式
將程式碼範例新增至應用程式後,請建置並執行您的程式:
瀏覽至 doc_intel_quickstart.py 檔案所在的資料夾。
在您的終端機中輸入下列命令:
python doc_intel_quickstart.py
若要在 URI 上分析指定檔案,請使用 begin_analyze_document_from_url 方法並傳遞 prebuilt-invoice 作為模型識別碼。 傳回值是一個 result 物件,其中包含提交文件的相關資料。
將下列程式碼範例新增至您的 form_recognizer_quickstart.py 應用程式。 請務必使用來自 Azure 入口網站 Azure 表格辨識器執行個體的值來更新金鑰和端點變數:
# import libraries
import os
from azure.ai.formrecognizer import DocumentAnalysisClient
from azure.core.credentials import AzureKeyCredential

# set `<your-endpoint>` and `<your-key>` variables with the values from the Azure portal
endpoint = "<your-endpoint>"
key = "<your-key>"


def format_bounding_region(bounding_regions):
    if not bounding_regions:
        return "N/A"
    return ", ".join(
        "Page #{}: {}".format(region.page_number, format_polygon(region.polygon))
        for region in bounding_regions
    )


def format_polygon(polygon):
    if not polygon:
        return "N/A"
    return ", ".join(["[{}, {}]".format(p.x, p.y) for p in polygon])


def analyze_invoice():

    invoiceUrl = "https://raw.githubusercontent.com/Azure-Samples/cognitive-services-REST-api-samples/master/curl/form-recognizer/sample-invoice.pdf"

    document_analysis_client = DocumentAnalysisClient(
        endpoint=endpoint, credential=AzureKeyCredential(key)
    )

    poller = document_analysis_client.begin_analyze_document_from_url(
        "prebuilt-invoice", invoiceUrl
    )
    invoices = poller.result()

    for idx, invoice in enumerate(invoices.documents):
        print("--------Recognizing invoice #{}--------".format(idx + 1))
        vendor_name = invoice.fields.get("VendorName")
        if vendor_name:
            print(
                "Vendor Name: {} has confidence: {}".format(
                    vendor_name.value, vendor_name.confidence
                )
            )
        vendor_address = invoice.fields.get("VendorAddress")
        if vendor_address:
            print(
                "Vendor Address: {} has confidence: {}".format(
                    vendor_address.value, vendor_address.confidence
                )
            )
        vendor_address_recipient = invoice.fields.get("VendorAddressRecipient")
        if vendor_address_recipient:
            print(
                "Vendor Address Recipient: {} has confidence: {}".format(
                    vendor_address_recipient.value, vendor_address_recipient.confidence
                )
            )
        customer_name = invoice.fields.get("CustomerName")
        if customer_name:
            print(
                "Customer Name: {} has confidence: {}".format(
                    customer_name.value, customer_name.confidence
                )
            )
        customer_id = invoice.fields.get("CustomerId")
        if customer_id:
            print(
                "Customer Id: {} has confidence: {}".format(
                    customer_id.value, customer_id.confidence
                )
            )
        customer_address = invoice.fields.get("CustomerAddress")
        if customer_address:
            print(
                "Customer Address: {} has confidence: {}".format(
                    customer_address.value, customer_address.confidence
                )
            )
        customer_address_recipient = invoice.fields.get("CustomerAddressRecipient")
        if customer_address_recipient:
            print(
                "Customer Address Recipient: {} has confidence: {}".format(
                    customer_address_recipient.value,
                    customer_address_recipient.confidence,
                )
            )
        invoice_id = invoice.fields.get("InvoiceId")
        if invoice_id:
            print(
                "Invoice Id: {} has confidence: {}".format(
                    invoice_id.value, invoice_id.confidence
                )
            )
        invoice_date = invoice.fields.get("InvoiceDate")
        if invoice_date:
            print(
                "Invoice Date: {} has confidence: {}".format(
                    invoice_date.value, invoice_date.confidence
                )
            )
        invoice_total = invoice.fields.get("InvoiceTotal")
        if invoice_total:
            print(
                "Invoice Total: {} has confidence: {}".format(
                    invoice_total.value, invoice_total.confidence
                )
            )
        due_date = invoice.fields.get("DueDate")
        if due_date:
            print(
                "Due Date: {} has confidence: {}".format(
                    due_date.value, due_date.confidence
                )
            )
        purchase_order = invoice.fields.get("PurchaseOrder")
        if purchase_order:
            print(
                "Purchase Order: {} has confidence: {}".format(
                    purchase_order.value, purchase_order.confidence
                )
            )
        billing_address = invoice.fields.get("BillingAddress")
        if billing_address:
            print(
                "Billing Address: {} has confidence: {}".format(
                    billing_address.value, billing_address.confidence
                )
            )
        billing_address_recipient = invoice.fields.get("BillingAddressRecipient")
        if billing_address_recipient:
            print(
                "Billing Address Recipient: {} has confidence: {}".format(
                    billing_address_recipient.value,
                    billing_address_recipient.confidence,
                )
            )
        shipping_address = invoice.fields.get("ShippingAddress")
        if shipping_address:
            print(
                "Shipping Address: {} has confidence: {}".format(
                    shipping_address.value, shipping_address.confidence
                )
            )
        shipping_address_recipient = invoice.fields.get("ShippingAddressRecipient")
        if shipping_address_recipient:
            print(
                "Shipping Address Recipient: {} has confidence: {}".format(
                    shipping_address_recipient.value,
                    shipping_address_recipient.confidence,
                )
            )
        print("Invoice items:")
        for idx, item in enumerate(invoice.fields.get("Items").value):
            print("...Item #{}".format(idx + 1))
            item_description = item.value.get("Description")
            if item_description:
                print(
                    "......Description: {} has confidence: {}".format(
                        item_description.value, item_description.confidence
                    )
                )
            item_quantity = item.value.get("Quantity")
            if item_quantity:
                print(
                    "......Quantity: {} has confidence: {}".format(
                        item_quantity.value, item_quantity.confidence
                    )
                )
            unit = item.value.get("Unit")
            if unit:
                print(
                    "......Unit: {} has confidence: {}".format(
                        unit.value, unit.confidence
                    )
                )
            unit_price = item.value.get("UnitPrice")
            if unit_price:
                print(
                    "......Unit Price: {} has confidence: {}".format(
                        unit_price.value, unit_price.confidence
                    )
                )
            product_code = item.value.get("ProductCode")
            if product_code:
                print(
                    "......Product Code: {} has confidence: {}".format(
                        product_code.value, product_code.confidence
                    )
                )
            item_date = item.value.get("Date")
            if item_date:
                print(
                    "......Date: {} has confidence: {}".format(
                        item_date.value, item_date.confidence
                    )
                )
            tax = item.value.get("Tax")
            if tax:
                print(
                    "......Tax: {} has confidence: {}".format(tax.value, tax.confidence)
                )
            amount = item.value.get("Amount")
            if amount:
                print(
                    "......Amount: {} has confidence: {}".format(
                        amount.value, amount.confidence
                    )
                )
        subtotal = invoice.fields.get("SubTotal")
        if subtotal:
            print(
                "Subtotal: {} has confidence: {}".format(
                    subtotal.value, subtotal.confidence
                )
            )
        total_tax = invoice.fields.get("TotalTax")
        if total_tax:
            print(
                "Total Tax: {} has confidence: {}".format(
                    total_tax.value, total_tax.confidence
                )
            )
        previous_unpaid_balance = invoice.fields.get("PreviousUnpaidBalance")
        if previous_unpaid_balance:
            print(
                "Previous Unpaid Balance: {} has confidence: {}".format(
                    previous_unpaid_balance.value, previous_unpaid_balance.confidence
                )
            )
        amount_due = invoice.fields.get("AmountDue")
        if amount_due:
            print(
                "Amount Due: {} has confidence: {}".format(
                    amount_due.value, amount_due.confidence
                )
            )
        service_start_date = invoice.fields.get("ServiceStartDate")
        if service_start_date:
            print(
                "Service Start Date: {} has confidence: {}".format(
                    service_start_date.value, service_start_date.confidence
                )
            )
        service_end_date = invoice.fields.get("ServiceEndDate")
        if service_end_date:
            print(
                "Service End Date: {} has confidence: {}".format(
                    service_end_date.value, service_end_date.confidence
                )
            )
        service_address = invoice.fields.get("ServiceAddress")
        if service_address:
            print(
                "Service Address: {} has confidence: {}".format(
                    service_address.value, service_address.confidence
                )
            )
        service_address_recipient = invoice.fields.get("ServiceAddressRecipient")
        if service_address_recipient:
            print(
                "Service Address Recipient: {} has confidence: {}".format(
                    service_address_recipient.value,
                    service_address_recipient.confidence,
                )
            )
        remittance_address = invoice.fields.get("RemittanceAddress")
        if remittance_address:
            print(
                "Remittance Address: {} has confidence: {}".format(
                    remittance_address.value, remittance_address.confidence
                )
            )
        remittance_address_recipient = invoice.fields.get("RemittanceAddressRecipient")
        if remittance_address_recipient:
            print(
                "Remittance Address Recipient: {} has confidence: {}".format(
                    remittance_address_recipient.value,
                    remittance_address_recipient.confidence,
                )
            )

        print("----------------------------------------")

if __name__ == "__main__":
    analyze_invoice()
執行應用程式
將程式碼範例新增至應用程式後,請建置並執行您的程式:
瀏覽至 form_recognizer_quickstart.py 檔案所在的資料夾。
在您的終端機中輸入下列命令:
python form_recognizer_quickstart.py
預建模型輸出
以下是預期的輸出程式碼片段:
  --------Recognizing invoice #1--------
  Vendor Name: CONTOSO LTD. has confidence: 0.919
  Vendor Address: 123 456th St New York, NY, 10001 has confidence: 0.907
  Vendor Address Recipient: Contoso Headquarters has confidence: 0.919
  Customer Name: MICROSOFT CORPORATION has confidence: 0.84
  Customer Id: CID-12345 has confidence: 0.956
  Customer Address: 123 Other St, Redmond WA, 98052 has confidence: 0.909
  Customer Address Recipient: Microsoft Corp has confidence: 0.917
  Invoice Id: INV-100 has confidence: 0.972
  Invoice Date: 2019-11-15 has confidence: 0.971
  Invoice Total: CurrencyValue(amount=110.0, symbol=$) has confidence: 0.97
  Due Date: 2019-12-15 has confidence: 0.973
若要檢視整個輸出,請造訪 GitHub 上的 Azure 範例存放庫,以檢視預先建置發票模型輸出。
將下列程式碼範例新增至您的 form_recognizer_quickstart.py 應用程式。 請務必使用來自 Azure 入口網站 Azure 表格辨識器執行個體的值來更新金鑰和端點變數:
# import libraries
import os
from azure.ai.formrecognizer import DocumentAnalysisClient
from azure.core.credentials import AzureKeyCredential

# set `<your-endpoint>` and `<your-key>` variables with the values from the Azure portal
endpoint = "<your-endpoint>"
key = "<your-key>"


def format_polygon(polygon):
    if not polygon:
        return "N/A"
    return ", ".join(["[{}, {}]".format(p.x, p.y) for p in polygon])


def analyze_layout():
    # sample document
    formUrl = "https://raw.githubusercontent.com/Azure-Samples/cognitive-services-REST-api-samples/master/curl/form-recognizer/sample-layout.pdf"

    document_analysis_client = DocumentAnalysisClient(
        endpoint=endpoint, credential=AzureKeyCredential(key)
    )

    poller = document_analysis_client.begin_analyze_document_from_url(
        "prebuilt-layout", formUrl
    )
    result = poller.result()

    for idx, style in enumerate(result.styles):
        print(
            "Document contains {} content".format(
                "handwritten" if style.is_handwritten else "no handwritten"
            )
        )


for page in result.pages:
    print("----Analyzing layout from page #{}----".format(page.page_number))
    print(
        "Page has width: {} and height: {}, measured with unit: {}".format(
            page.width, page.height, page.unit
        )
    )

    for line_idx, line in enumerate(page.lines):
        words = line.get_words()
        print(
            "...Line # {} has word count {} and text '{}' within bounding polygon '{}'".format(
                line_idx,
                len(words),
                line.content,
                format_polygon(line.polygon),
            )
        )

        for word in words:
            print(
                "......Word '{}' has a confidence of {}".format(
                    word.content, word.confidence
                )
            )

    for selection_mark in page.selection_marks:
        print(
            "...Selection mark is '{}' within bounding polygon '{}' and has a confidence of {}".format(
                selection_mark.state,
                format_polygon(selection_mark.polygon),
                selection_mark.confidence,
            )
        )

for table_idx, table in enumerate(result.tables):
    print(
        "Table # {} has {} rows and {} columns".format(
            table_idx, table.row_count, table.column_count
        )
    )
    for region in table.bounding_regions:
        print(
            "Table # {} location on page: {} is {}".format(
                table_idx,
                region.page_number,
                format_polygon(region.polygon),
            )
        )
    for cell in table.cells:
        print(
            "...Cell[{}][{}] has content '{}'".format(
                cell.row_index,
                cell.column_index,
                cell.content,
            )
        )
        for region in cell.bounding_regions:
            print(
                "...content on page {} is within bounding polygon '{}'".format(
                    region.page_number,
                    format_polygon(region.polygon),
                )
            )

print("----------------------------------------")


if __name__ == "__main__":
    analyze_layout()
執行應用程式
將程式碼範例新增至應用程式後,請建置並執行您的程式:
瀏覽至 form_recognizer_quickstart.py 檔案所在的資料夾。
在您的終端機中輸入下列命令:
python form_recognizer_quickstart.py
在本快速入門中,了解如何使用文件智慧服務 REST API,從文件中分析及擷取資料和值:
先決條件
Azure 訂用帳戶 - 建立免費帳戶
已安裝命令
cURL列工具。PowerShell 7.* 版以上 (或類似的命令列應用程式)。
若要檢查您的 PowerShell 版本,請輸入下列相對於您作業系統的命令:
- Windows:
Get-Host | Select-Object Version - macOS 或 Linux:
$PSVersionTable
- Windows:
文件智慧(單一服務)或 Foundry Tools(多服務)資源。 擁有 Azure 訂用帳戶後,請在 Azure 入口網站中建立單一服務或多重服務文件智慧服務資源,以取得您的金鑰與端點。 您可以使用免費定價層 (
F0) 來試用服務,之後可升級至付費層以用於實際執行環境。
秘訣
如果你打算在同一端點/金鑰下存取多個 Foundry 工具,請建立 Microsoft Foundry 資源。 針對僅限文件智慧服務存取,請建立文件智慧服務資源。 如果您想要使用 Microsoft Entra 驗證,則需要使用單一服務資源。
部署資源之後,請選取 [移至資源]。 您需要使用已建立資源的金鑰和端點,將應用程式連線至文件智慧服務 API。 您稍後會在快速入門中將金鑰和端點貼上至程式碼中:
分析文件並取得結果
POST 要求可用來以預建或自訂模型分析文件。 GET 要求可用來擷取文件分析呼叫的結果。
modelId 用於 POST 作業,resultId 則用於 GET 作業。
分析文件 (POST 要求)
在執行下列 cURL 命令前,請對 POST 要求進行下列變更:
將
{endpoint}取代為 Azure 入口網站文件智慧服務執行個體中的端點值。將
{key}取代為 Azure 入口網站文件智慧服務執行個體中的金鑰值。使用下表作為參考,以所需值取代
{modelID}和{your-document-url}。您需要文件檔案的 URL。 在本快速入門中,您可以使用下表中針對每個功能所提供的範例表單:
範例文件
| 功能 | {modelID} | {your-document-url} |
|---|---|---|
| 讀取 | prebuilt-read |
https://raw.githubusercontent.com/Azure-Samples/cognitive-services-REST-api-samples/master/curl/form-recognizer/rest-api/read.png |
| 版面配置 | prebuilt-layout |
https://raw.githubusercontent.com/Azure-Samples/cognitive-services-REST-api-samples/master/curl/form-recognizer/rest-api/layout.png |
| 健康保險卡 | prebuilt-healthInsuranceCard.us |
https://raw.githubusercontent.com/Azure-Samples/cognitive-services-REST-api-samples/master/curl/form-recognizer/rest-api/insurance-card.png |
| W-2 | prebuilt-tax.us.w2 |
https://raw.githubusercontent.com/Azure-Samples/cognitive-services-REST-api-samples/master/curl/form-recognizer/rest-api/w2.png |
| 發票 | prebuilt-invoice |
https://github.com/Azure-Samples/cognitive-services-REST-api-samples/raw/master/curl/form-recognizer/rest-api/invoice.pdf |
| 收據 | prebuilt-receipt |
https://raw.githubusercontent.com/Azure-Samples/cognitive-services-REST-api-samples/master/curl/form-recognizer/rest-api/receipt.png |
| 身分證明文件 | prebuilt-idDocument |
https://raw.githubusercontent.com/Azure-Samples/cognitive-services-REST-api-samples/master/curl/form-recognizer/rest-api/identity_documents.png |
範例文件
| 功能 | {modelID} | {your-document-url} |
|---|---|---|
| 一般文件 | prebuilt-document |
https://raw.githubusercontent.com/Azure-Samples/cognitive-services-REST-api-samples/master/curl/form-recognizer/sample-layout.pdf |
| 讀取 | prebuilt-read |
https://raw.githubusercontent.com/Azure-Samples/cognitive-services-REST-api-samples/master/curl/form-recognizer/rest-api/read.png |
| 版面配置 | prebuilt-layout |
https://raw.githubusercontent.com/Azure-Samples/cognitive-services-REST-api-samples/master/curl/form-recognizer/rest-api/layout.png |
| 健康保險卡 | prebuilt-healthInsuranceCard.us |
https://raw.githubusercontent.com/Azure-Samples/cognitive-services-REST-api-samples/master/curl/form-recognizer/rest-api/insurance-card.png |
| W-2 | prebuilt-tax.us.w2 |
https://raw.githubusercontent.com/Azure-Samples/cognitive-services-REST-api-samples/master/curl/form-recognizer/rest-api/w2.png |
| 發票 | prebuilt-invoice |
https://github.com/Azure-Samples/cognitive-services-REST-api-samples/raw/master/curl/form-recognizer/rest-api/invoice.pdf |
| 收據 | prebuilt-receipt |
https://raw.githubusercontent.com/Azure-Samples/cognitive-services-REST-api-samples/master/curl/form-recognizer/rest-api/receipt.png |
| 身分證明文件 | prebuilt-idDocument |
https://raw.githubusercontent.com/Azure-Samples/cognitive-services-REST-api-samples/master/curl/form-recognizer/rest-api/identity_documents.png |
| 名片 | prebuilt-businessCard |
https://raw.githubusercontent.com/Azure-Samples/cognitive-services-REST-api-samples/de5e0d8982ab754823c54de47a47e8e499351523/curl/form-recognizer/rest-api/business_card.jpg |
重要事項
完成時,請記得從程式碼中移除金鑰,且不要公開張貼金鑰。 在生產環境中,請使用安全的方式來儲存和存取您的認證,例如 Azure Key Vault。 欲了解更多資訊, 請參閱 Foundry Tools 安全性。
POST 要求
curl -v -i POST "{endpoint}/documentintelligence/documentModels/{modelId}:analyze?api-version=2024-11-30" -H "Content-Type: application/json" -H "Ocp-Apim-Subscription-Key: {key}" --data-ascii "{'urlSource': '{your-document-url}'}"
curl -v -i POST "{endpoint}/formrecognizer/documentModels/{modelID}:analyze?api-version=2023-07-31" -H "Content-Type: application/json" -H "Ocp-Apim-Subscription-Key: {key}" --data-ascii "{'urlSource': '{your-document-url}'}"
curl -v -i POST "{endpoint}/formrecognizer/documentModels/{modelId}:analyze?api-version=2022-08-31" -H "Content-Type: application/json" -H "Ocp-Apim-Subscription-Key: {key}" --data-ascii "{'urlSource': '{your-document-url}'}"
POST 回應 (resultID)
您收到 202 (Success) 回應,其中包含唯讀 Operation-Location 標頭。 此標頭的值包含 resultID,可透過查詢以取得非同步作業的狀態,並且可使用 GET 要求搭配您的相同資源訂用帳戶金鑰來擷取結果:

取得分析結果 (GET 要求)
呼叫 Analyze document API 之後,請呼叫 Get analyze result&preserve-view=true&tabs=HTTP) API,以取得作業的狀態和擷取的數據。 執行命令之前,請進行下列變更:
呼叫 Analyze document (部分機器翻譯) API 後,請呼叫取得分析結果 (部分機器翻譯) API 以取得作業狀態和擷取的資料。 執行命令之前,請進行下列變更:
呼叫 Analyze document (部分機器翻譯) API 後,請呼叫取得分析結果 (部分機器翻譯) API 以取得作業狀態和擷取的資料。 執行命令之前,請進行下列變更:
GET 要求
curl -v -X GET "{endpoint}/documentintelligence/documentModels/{modelId}/analyzeResults/{resultId}?api-version=2024-11-30" -H "Ocp-Apim-Subscription-Key: {key}"
curl -v -X GET "{endpoint}/formrecognizer/documentModels/{modelId}/analyzeResults/{resultId}?api-version=2023-07-31" -H "Ocp-Apim-Subscription-Key: {key}"
curl -v -X GET "{endpoint}/formrecognizer/documentModels/{modelId}/analyzeResults/{resultId}?api-version=2022-08-31" -H "Ocp-Apim-Subscription-Key: {key}"
檢查回應
您收到具有 JSON 輸出的 200 (Success) 回應。 第一個 "status" 欄位會指出作業的狀態。 如果作業未完成,而 "status" 的值是 "running" 或 "notStarted",此時您應該以手動方式或透過指令碼再次呼叫 API。 我們建議您在每個呼叫之前間隔一秒以上的時間。
預建發票的回應範例
{
    "status": "succeeded",
    "createdDateTime": "2024-03-25T19:31:37Z",
    "lastUpdatedDateTime": "2024-03-25T19:31:43Z",
    "analyzeResult": {
        "apiVersion": "2024-11-30",
        "modelId": "prebuilt-invoice",
        "stringIndexType": "textElements"...
    ..."pages": [
            {
                "pageNumber": 1,
                "angle": 0,
                "width": 8.5,
                "height": 11,
                "unit": "inch",
                "words": [
                    {
                        "content": "CONTOSO",
                        "boundingBox": [
                            0.5911,
                            0.6857,
                            1.7451,
                            0.6857,
                            1.7451,
                            0.8664,
                            0.5911,
                            0.8664
                        ],
                        "confidence": 1,
                        "span": {
                            "offset": 0,
                            "length": 7
                                }
                      }],
              }]
      }
}
{
    "status": "succeeded",
    "createdDateTime": "2023-08-25T19:31:37Z",
    "lastUpdatedDateTime": "2023-08-25T19:31:43Z",
    "analyzeResult": {
        "apiVersion": "2023-07-31",
        "modelId": "prebuilt-invoice",
        "stringIndexType": "textElements"...
    ..."pages": [
            {
                "pageNumber": 1,
                "angle": 0,
                "width": 8.5,
                "height": 11,
                "unit": "inch",
                "words": [
                    {
                        "content": "CONTOSO",
                        "boundingBox": [
                            0.5911,
                            0.6857,
                            1.7451,
                            0.6857,
                            1.7451,
                            0.8664,
                            0.5911,
                            0.8664
                        ],
                        "confidence": 1,
                        "span": {
                            "offset": 0,
                            "length": 7
                                }
                      }],
              }]
      }
}
{
    "status": "succeeded",
    "createdDateTime": "2022-09-25T19:31:37Z",
    "lastUpdatedDateTime": "2022-09-25T19:31:43Z",
    "analyzeResult": {
        "apiVersion": "2022-08-31",
        "modelId": "prebuilt-invoice",
        "stringIndexType": "textElements"...
    ..."pages": [
            {
                "pageNumber": 1,
                "angle": 0,
                "width": 8.5,
                "height": 11,
                "unit": "inch",
                "words": [
                    {
                        "content": "CONTOSO",
                        "boundingBox": [
                            0.5911,
                            0.6857,
                            1.7451,
                            0.6857,
                            1.7451,
                            0.8664,
                            0.5911,
                            0.8664
                        ],
                        "confidence": 1,
                        "span": {
                            "offset": 0,
                            "length": 7
                                }
                      }],
              }]
      }
}
支援的文件欄位
預建模型會擷取預先定義的文件欄位集。 如需擷取欄位名稱、類型、描述和範例,請參閱模型資料擷取。
沒錯,恭喜!
在本快速入門中,您使用文件智慧服務模型分析了多種表單和文件。 接下來,請探索文件智慧服務工作室和參考文件以深入了解文件智慧服務 API。
後續步驟
此內容適用於:![]() v2.1 | 最新版本:
v2.1 | 最新版本:![]() v4.0 (GA)
v4.0 (GA)
開始使用 Azure 文件智慧,使用您選擇的程式語言或 REST API。 文件智慧是一項基於雲端的 Foundry 工具服務,利用機器學習從您的文件中提取鍵值對、文字和表格。 當您學習技術時,我們建議您使用免費的服務。 請記住,免費的頁數限制為每個月 500 頁。
若要深入了解文件智慧服務的功能和開發選項,請瀏覽我們的概觀 (部分機器翻譯) 頁面。
參考文件 | 程式庫來源程式碼 | 套件 (NuGet) | 範例
在本快速入門中,您會使用下列 API 從表單和文件中擷取結構化資料:
先決條件
Azure 訂用帳戶 - 建立免費帳戶。
目前的 Visual Studio 整合式開發環境 (IDE) 版本。
一個 Foundry 工具或文件智慧資源。 擁有 Azure 訂用帳戶後,請在 Azure 入口網站中建立單一服務或多重服務文件智慧服務資源,以取得您的金鑰與端點。 您可以使用免費定價層 (
F0) 來試用服務,之後可升級至付費層以用於實際執行環境。秘訣
如果你打算在單一端點/金鑰下存取多個 Foundry 工具,請建立一個 Foundry 資源。 針對僅限文件智慧服務存取,請建立文件智慧服務資源。 請注意,如果您想要使用 Microsoft Entra 驗證 (部分機器翻譯),需要使用單一服務資源。
部署資源之後,請選取 [移至資源]。 您需要使用已建立資源的金鑰和端點,將應用程式連線至文件智慧服務 API。 您稍後會在快速入門中將金鑰和端點貼上至程式碼中:
設定
啟動 Visual Studio 2019。
在開始頁面中,選擇 [建立新專案]。
在 [建立新專案] 頁面上,在搜尋欄中輸入主控台。 選擇 [主控台應用程式] 範本,然後選擇 [下一步]。
在 [設定新專案] 對話方塊視窗中,於 [專案名稱] 方塊中輸入
formRecognizer_quickstart。 然後選擇 [下一步]。![Visual Studio [設定新專案] 對話視窗的螢幕擷取畫面。](../media/quickstarts/configure-new-project.png?view=doc-intel-4.0.0)
在 [其他資訊] 對話方塊視窗中,選取 [.NET 5.0 (目前)],然後選取 [建立]。
使用 NuGet 安裝用戶端程式庫
於您的 formRecognizer_quickstart 專案上按一下滑鼠右鍵,然後選取 [管理 NuGet 套件]。
選取 [瀏覽] 索引標籤,然後輸入 [Azure.AI.FormRecognizer]。
從下拉式功能表中選取 3.1.1 版,然後選取 [安裝]。
建置應用程式
若要與此文件智慧服務互動,您必須建立 FormRecognizerClient 類別的執行個體。 若要這樣做,您可以使用金鑰建立 AzureKeyCredential,並使用 FormRecognizerClient 和您的文件智慧服務 AzureKeyCredential 建立 endpoint 執行個體。
附註
- 從 .NET 6 開始,使用
console範本的新專案會產生與舊版不同的新程式樣式。 - 新輸出會使用最新的 C# 功能,以簡化您需要撰寫的程式碼。
- 當您使用較新版本時,只需要撰寫
Main方法的本文。 您不需要包含最上層陳述式、全域 Using 指示詞或隱含 Using 指示詞。 - 如需詳細資訊,請參閱新的 C# 範本產生最上層語句。
開啟 Program.cs 檔案。
包含下列 Using 指示詞:
using Azure;
using Azure.AI.FormRecognizer;
using Azure.AI.FormRecognizer.Models;
using System.Threading.Tasks;
- 設定您的
endpoint和key環境變數,並建立您的AzureKeyCredential和FormRecognizerClient執行個體:
private static readonly string endpoint = "your-form-recognizer-endpoint";
private static readonly string key = "your-api-key";
private static readonly AzureKeyCredential credential = new AzureKeyCredential(key);
刪除行
Console.Writeline("Hello World!");,並將其中一個試試看程式碼範例新增至 Program.cs 檔案:
請選取程式碼範例以複製並貼上到應用程式的 Main 方法中:
重要事項
完成時,請記得從程式碼中移除金鑰,且不要公開張貼金鑰。 在生產環境中,請使用安全的方式來儲存和存取您的認證,例如 Azure Key Vault。 欲了解更多資訊,請參閱 Foundry Tools 安全 文章。
試試看:版面配置模型
從文件中擷取文字、選取標記、文字樣式、資料表結構及其週框區域座標。
- 在此範例中,您需要位於某個 URI 的文件檔案。 您可以針對本快速入門使用我們的範例文件 (英文)。
- 我們已將檔案 URI 值新增至
formUri變數。 - 若要從 URI 上的指定檔案擷取配置,請使用
StartRecognizeContentFromUriAsync方法。
將下列程式碼新增至版面配置應用程式 Program.cs 檔案:
FormRecognizerClient recognizerClient = AuthenticateClient();

Task recognizeContent = RecognizeContent(recognizerClient);
Task.WaitAll(recognizeContent);

private static FormRecognizerClient AuthenticateClient()
            {
                var credential = new AzureKeyCredential(key);
                var client = new FormRecognizerClient(new Uri(endpoint), credential);
                return client;
            }

            private static async Task RecognizeContent(FormRecognizerClient recognizerClient)
        {
            string formUrl = "https://raw.githubusercontent.com/Azure-Samples/cognitive-services-REST-api-samples/master/curl/form-recognizer/sample-layout.pdf";
            FormPageCollection formPages = await recognizerClient
        .StartRecognizeContentFromUri(new Uri(formUrl))
        .WaitForCompletionAsync();

            foreach (FormPage page in formPages)
            {
                Console.WriteLine($"Form Page {page.PageNumber} has {page.Lines.Count} lines.");

                for (int i = 0; i < page.Lines.Count; i++)
                {
                    FormLine line = page.Lines[i];
                    Console.WriteLine($"    Line {i} has {line.Words.Count} word{(line.Words.Count > 1 ? "s" : "")}, and text: '{line.Text}'.");
                }

                for (int i = 0; i < page.Tables.Count; i++)
                {
                    FormTable table = page.Tables[i];
                    Console.WriteLine($"Table {i} has {table.RowCount} rows and {table.ColumnCount} columns.");
                    foreach (FormTableCell cell in table.Cells)
                    {
                        Console.WriteLine($"    Cell ({cell.RowIndex}, {cell.ColumnIndex}) contains text: '{cell.Text}'.");
                    }
                }
            }
        }
    }
}
試試看:預建模型
此範例以發票為例,示範如何使用預先定型的模型來分析某些常見文件類型中的資料。
選擇預建模型
這不限於發票,有多種預建模型可供選擇,每個模型都有一組自身支援的欄位。 分析作業所用的模型取決於要分析的文件類型。 以下是文件智慧服務目前支援的預建模型:
將下列程式碼新增至預建發票應用程式 Program.cs 檔案方法
FormRecognizerClient recognizerClient = AuthenticateClient();

  Task analyzeinvoice = AnalyzeInvoice(recognizerClient, invoiceUrl);
  Task.WaitAll(analyzeinvoice);

   private static FormRecognizerClient AuthenticateClient() {
     var credential = new AzureKeyCredential(key);
     var client = new FormRecognizerClient(new Uri(endpoint), credential);
     return client;
   }

   static string invoiceUrl = "https://raw.githubusercontent.com/Azure-Samples/cognitive-services-REST-api-samples/master/curl/form-recognizer/sample-invoice.pdf";

   private static async Task AnalyzeInvoice(FormRecognizerClient recognizerClient, string invoiceUrl) {
     var options = new RecognizeInvoicesOptions() {
       Locale = "en-US"
     };
     RecognizedFormCollection invoices = await recognizerClient.StartRecognizeInvoicesFromUriAsync(new Uri(invoiceUrl), options).WaitForCompletionAsync();

     RecognizedForm invoice = invoices[0];

     FormField invoiceIdField;
     if (invoice.Fields.TryGetValue("InvoiceId", out invoiceIdField)) {
       if (invoiceIdField.Value.ValueType == FieldValueType.String) {
         string invoiceId = invoiceIdField.Value.AsString();
         Console.WriteLine($"    Invoice Id: '{invoiceId}', with confidence {invoiceIdField.Confidence}");
       }
     }

     FormField invoiceDateField;
     if (invoice.Fields.TryGetValue("InvoiceDate", out invoiceDateField)) {
       if (invoiceDateField.Value.ValueType == FieldValueType.Date) {
         DateTime invoiceDate = invoiceDateField.Value.AsDate();
         Console.WriteLine($"    Invoice Date: '{invoiceDate}', with confidence {invoiceDateField.Confidence}");
       }
     }

     FormField dueDateField;
     if (invoice.Fields.TryGetValue("DueDate", out dueDateField)) {
       if (dueDateField.Value.ValueType == FieldValueType.Date) {
         DateTime dueDate = dueDateField.Value.AsDate();
         Console.WriteLine($"    Due Date: '{dueDate}', with confidence {dueDateField.Confidence}");
       }
     }

     FormField vendorNameField;
     if (invoice.Fields.TryGetValue("VendorName", out vendorNameField)) {
       if (vendorNameField.Value.ValueType == FieldValueType.String) {
         string vendorName = vendorNameField.Value.AsString();
         Console.WriteLine($"    Vendor Name: '{vendorName}', with confidence {vendorNameField.Confidence}");
       }
     }

     FormField vendorAddressField;
     if (invoice.Fields.TryGetValue("VendorAddress", out vendorAddressField)) {
       if (vendorAddressField.Value.ValueType == FieldValueType.String) {
         string vendorAddress = vendorAddressField.Value.AsString();
         Console.WriteLine($"    Vendor Address: '{vendorAddress}', with confidence {vendorAddressField.Confidence}");
       }
     }

     FormField customerNameField;
     if (invoice.Fields.TryGetValue("CustomerName", out customerNameField)) {
       if (customerNameField.Value.ValueType == FieldValueType.String) {
         string customerName = customerNameField.Value.AsString();
         Console.WriteLine($"    Customer Name: '{customerName}', with confidence {customerNameField.Confidence}");
       }
     }

     FormField customerAddressField;
     if (invoice.Fields.TryGetValue("CustomerAddress", out customerAddressField)) {
       if (customerAddressField.Value.ValueType == FieldValueType.String) {
         string customerAddress = customerAddressField.Value.AsString();
         Console.WriteLine($"    Customer Address: '{customerAddress}', with confidence {customerAddressField.Confidence}");
       }
     }

     FormField customerAddressRecipientField;
     if (invoice.Fields.TryGetValue("CustomerAddressRecipient", out customerAddressRecipientField)) {
       if (customerAddressRecipientField.Value.ValueType == FieldValueType.String) {
         string customerAddressRecipient = customerAddressRecipientField.Value.AsString();
         Console.WriteLine($"    Customer address recipient: '{customerAddressRecipient}', with confidence {customerAddressRecipientField.Confidence}");
       }
     }

     FormField invoiceTotalField;
     if (invoice.Fields.TryGetValue("InvoiceTotal", out invoiceTotalField)) {
       if (invoiceTotalField.Value.ValueType == FieldValueType.Float) {
         float invoiceTotal = invoiceTotalField.Value.AsFloat();
         Console.WriteLine($"    Invoice Total: '{invoiceTotal}', with confidence {invoiceTotalField.Confidence}");
       }
     }
   }
 }
}
執行您的應用程式
選擇 formRecognizer_quickstart 旁的綠色 [開始] 按鈕,建立並執行程式,或是按一下 F5。
參考文件 | 程式庫來源程式碼 | 套件 (Maven) | 範例
在本快速入門中,您會使用下列 API 從表單和文件中擷取結構化資料:
先決條件
Azure 訂用帳戶 - 建立免費帳戶。
Java 開發套件 (JDK) (英文) 第 8 版或更新版本。 如需詳細資訊,請參閱支援的 Java 版本和更新排程。
一個 Foundry 工具或文件智慧資源。 擁有 Azure 訂用帳戶後,請在 Azure 入口網站中建立單一服務或多重服務文件智慧服務資源,以取得您的金鑰與端點。 您可以使用免費定價層 (
F0) 來試用服務,之後可升級至付費層以用於實際執行環境。部署資源之後,請選取 [移至資源]。 您需要使用已建立資源的金鑰和端點,將應用程式連線至文件智慧服務 API。 您稍後會在快速入門中將金鑰和端點貼上至程式碼中:
設定
建立新的 Gradle 專案
在主控台視窗 (例如 cmd、PowerShell 或 Bash) 中,為您的應用程式建立名為 form-recognizer-app 的新目錄,並瀏覽至該目錄。
mkdir form-recognizer-app && form-recognizer-app
從您的工作目錄執行
gradle init命令。 此命令會建立 Gradle 的基本組建檔案,包括 build.gradle.kts,將在執行階段使用 build.gradle.kts,來建立及設定應用程式。gradle init --type basic出現選擇 DSL 的提示時,請選取 [Kotlin]。
接受預設專案名稱 (form-recognizer-app)
安裝用戶端程式庫
本快速入門會使用 Gradle 相依性管理員。 您可以在 Maven 中央存放庫中找到用戶端程式庫和其他相依性管理員的資訊。
在專案的 build.gradle.kts 檔案中,將用戶端程式庫納入為 implementation 陳述式,以及必要的外掛程式和設定。
plugins {
    java
    application
}
application {
    mainClass.set("FormRecognizer")
}
repositories {
    mavenCentral()
}
dependencies {
    implementation(group = "com.azure", name = "azure-ai-formrecognizer", version = "3.1.1")
}
建立 Java 檔案
從工作目錄執行下列命令:
mkdir -p src/main/java
您會建立下列目錄結構:

瀏覽至 Java 目錄,並建立名為 FormRecognizer.java 的檔案。 在您慣用的編輯器或 IDE 中開啟該檔案,並新增下列套件宣告和 import 陳述式:
import com.azure.ai.formrecognizer.*;
import com.azure.ai.formrecognizer.models.*;

import java.util.concurrent.atomic.AtomicReference;
import java.util.List;
import java.util.Map;
import java.time.LocalDate;

import com.azure.core.credential.AzureKeyCredential;
import com.azure.core.http.rest.PagedIterable;
import com.azure.core.util.Context;
import com.azure.core.util.polling.SyncPoller;
請選取程式碼範例以複製並貼上到應用程式的 Main 方法中:
重要事項
完成時,請記得從程式碼中移除金鑰,且不要公開張貼金鑰。 在生產環境中,請使用安全的方式來儲存和存取您的認證,例如 Azure Key Vault。 欲了解更多資訊, 請參閱 Foundry Tools 安全性。
試試看:版面配置模型
從文件中擷取文字、選取標記、文字樣式、資料表結構及其週框區域座標。
- 在此範例中,您需要位於某個 URI 的文件檔案。 您可以針對本快速入門使用我們的範例文件 (英文)。
- 若要在 URI 上分析指定檔案,需使用
beginRecognizeContentFromUrl方法。 - 我們已將檔案 URI 值新增至主要方法中的
formUrl變數。
使用下列程式碼更新應用程式的 FormRecognizer 類別 (請務必使用來自 Azure 入口網站文件智慧服務執行個體的值,來更新金鑰與端點變數):
static final String key = "PASTE_YOUR_FORM_RECOGNIZER_KEY_HERE";
static final String endpoint = "PASTE_YOUR_FORM_RECOGNIZER_ENDPOINT_HERE";

public static void main(String[] args) {FormRecognizerClient recognizerClient = new FormRecognizerClientBuilder()
                .credential(new AzureKeyCredential(key)).endpoint(endpoint).buildClient();

    String formUrl = "https://raw.githubusercontent.com/Azure-Samples/cognitive-services-REST-api-samples/master/curl/form-recognizer/sample-layout.pdf";

    System.out.println("Get form content...");
        GetContent(recognizerClient, formUrl);
  }
    private static void GetContent(FormRecognizerClient recognizerClient, String invoiceUri) {
        String analyzeFilePath = invoiceUri;
        SyncPoller<FormRecognizerOperationResult, List<FormPage>> recognizeContentPoller = recognizerClient
                .beginRecognizeContentFromUrl(analyzeFilePath);

        List<FormPage> contentResult = recognizeContentPoller.getFinalResult();
        // </snippet_getcontent_call>
        // <snippet_getcontent_print>
        contentResult.forEach(formPage -> {
            // Table information
            System.out.println("----Recognizing content ----");
            System.out.printf("Has width: %f and height: %f, measured with unit: %s.%n", formPage.getWidth(),
                    formPage.getHeight(), formPage.getUnit());
            formPage.getTables().forEach(formTable -> {
                System.out.printf("Table has %d rows and %d columns.%n", formTable.getRowCount(),
                        formTable.getColumnCount());
                formTable.getCells().forEach(formTableCell -> {
                    System.out.printf("Cell has text %s.%n", formTableCell.getText());
                });
                System.out.println();
            });
        });
    }
試試看:預建模型
此範例以發票為例,示範如何使用預先定型的模型來分析某些常見文件類型中的資料。
選擇預建模型
這不限於發票,有多種預建模型可供選擇,每個模型都有一組自身支援的欄位。
analyze 作業所用的模型取決於要分析的文件類型。 以下是文件智慧服務目前支援的預建模型:
使用下列程式碼更新應用程式的 FormRecognizer 類別 (請務必使用來自 Azure 入口網站文件智慧服務執行個體的值,來更新金鑰與端點變數):
static final String key = "PASTE_YOUR_FORM_RECOGNIZER_KEY_HERE";
static final String endpoint = "PASTE_YOUR_FORM_RECOGNIZER_ENDPOINT_HERE";

public static void main(String[] args) {
    FormRecognizerClient recognizerClient = new FormRecognizerClientBuilder().credential(new AzureKeyCredential(key)).endpoint(endpoint).buildClient();

    String invoiceUrl = "https://raw.githubusercontent.com/Azure-Samples/cognitive-services-REST-api-samples/master/curl/form-recognizer/sample-invoice.pdf";

    System.out.println("Analyze invoice...");
        AnalyzeInvoice(recognizerClient, invoiceUrl);
  }
    private static void AnalyzeInvoice(FormRecognizerClient recognizerClient, String invoiceUrl) {
      SyncPoller < FormRecognizerOperationResult,
        List < RecognizedForm >> recognizeInvoicesPoller = recognizerClient.beginRecognizeInvoicesFromUrl(invoiceUrl);
      List < RecognizedForm > recognizedInvoices = recognizeInvoicesPoller.getFinalResult();

      for (int i = 0; i < recognizedInvoices.size(); i++) {
        RecognizedForm recognizedInvoice = recognizedInvoices.get(i);
        Map < String,
        FormField > recognizedFields = recognizedInvoice.getFields();
        System.out.printf("----------- Recognized invoice info for page %d -----------%n", i);
        FormField vendorNameField = recognizedFields.get("VendorName");
        if (vendorNameField != null) {
            if (FieldValueType.STRING == vendorNameField.getValue().getValueType()) {
                String merchantName = vendorNameField.getValue().asString();
                System.out.printf("Vendor Name: %s, confidence: %.2f%n", merchantName, vendorNameField.getConfidence());
            }
        }

        FormField vendorAddressField = recognizedFields.get("VendorAddress");
        if (vendorAddressField != null) {
            if (FieldValueType.STRING == vendorAddressField.getValue().getValueType()) {
                String merchantAddress = vendorAddressField.getValue().asString();
                System.out.printf("Vendor address: %s, confidence: %.2f%n", merchantAddress, vendorAddressField.getConfidence());
            }
        }

        FormField customerNameField = recognizedFields.get("CustomerName");
        if (customerNameField != null) {
            if (FieldValueType.STRING == customerNameField.getValue().getValueType()) {
                String merchantAddress = customerNameField.getValue().asString();
                System.out.printf("Customer Name: %s, confidence: %.2f%n", merchantAddress, customerNameField.getConfidence());
            }
        }

        FormField customerAddressRecipientField = recognizedFields.get("CustomerAddressRecipient");
        if (customerAddressRecipientField != null) {
            if (FieldValueType.STRING == customerAddressRecipientField.getValue().getValueType()) {
                String customerAddr = customerAddressRecipientField.getValue().asString();
                System.out.printf("Customer Address Recipient: %s, confidence: %.2f%n", customerAddr, customerAddressRecipientField.getConfidence());
            }
        }

        FormField invoiceIdField = recognizedFields.get("InvoiceId");
        if (invoiceIdField != null) {
            if (FieldValueType.STRING == invoiceIdField.getValue().getValueType()) {
                String invoiceId = invoiceIdField.getValue().asString();
                System.out.printf("Invoice Id: %s, confidence: %.2f%n", invoiceId, invoiceIdField.getConfidence());
            }
        }

        FormField invoiceDateField = recognizedFields.get("InvoiceDate");
        if (customerNameField != null) {
            if (FieldValueType.DATE == invoiceDateField.getValue().getValueType()) {
                LocalDate invoiceDate = invoiceDateField.getValue().asDate();
                System.out.printf("Invoice Date: %s, confidence: %.2f%n", invoiceDate, invoiceDateField.getConfidence());
            }
        }

        FormField invoiceTotalField = recognizedFields.get("InvoiceTotal");
        if (customerAddressRecipientField != null) {
            if (FieldValueType.FLOAT == invoiceTotalField.getValue().getValueType()) {
                Float invoiceTotal = invoiceTotalField.getValue().asFloat();
                System.out.printf("Invoice Total: %.2f, confidence: %.2f%n", invoiceTotal, invoiceTotalField.getConfidence());
            }
        }
    }
}
建置並執行應用程式
再度瀏覽至您的主要專案目錄:form-recognizer-app。
- 使用
build命令組建您的應用程式:
gradle build
- 使用
run命令執行您的應用程式:
gradle run
參考文件 | 程式庫來源程式碼 | 套件 (npm) | 範例
在本快速入門中,您會使用下列 API 從表單和文件中擷取結構化資料:
先決條件
Azure 訂用帳戶 - 建立免費帳戶。
最新的 Visual Studio Code 版本或您慣用的 IDE。
最新
LTS版的 Node.js一個 Foundry 工具或文件智慧資源。 擁有 Azure 訂用帳戶後,請在 Azure 入口網站中建立單一服務或多重服務文件智慧服務資源,以取得您的金鑰與端點。 您可以使用免費定價層 (
F0) 來試用服務,之後可升級至付費層以用於實際執行環境。秘訣
如果你打算在單一端點/金鑰下存取多個 Foundry 工具,請建立一個 Foundry 資源。 針對僅限文件智慧服務存取,請建立文件智慧服務資源。 請注意,如果您想要使用 Microsoft Entra 驗證 (部分機器翻譯),需要使用單一服務資源。
部署資源之後,請選取 [移至資源]。 您需要使用已建立資源的金鑰和端點,將應用程式連線至文件智慧服務 API。 您稍後會在快速入門中將金鑰和端點貼上至程式碼中:
設定
建立新的 Node.js 應用程式。 在主控台視窗 (例如 cmd、PowerShell 或 Bash) 中,為您的應用程式建立新的目錄,並瀏覽至該目錄。
mkdir form-recognizer-app && cd form-recognizer-app執行命令
npm init,以使用package.json檔案建立節點應用程式。npm init安裝
ai-form-recognizer用戶端程式庫 npm 套件:npm install @azure/ai-form-recognizer您應用程式的
package.json檔案會隨著相依性而更新。建立名為
index.js的檔案,將其開啟並匯入下列程式庫:const { FormRecognizerClient, AzureKeyCredential } = require("@azure/ai-form-recognizer");為資源的 Azure 端點和金鑰建立變數:
const key = "PASTE_YOUR_FORM_RECOGNIZER_KEY_HERE";
const endpoint = "PASTE_YOUR_FORM_RECOGNIZER_ENDPOINT_HERE";
此時,您的 JavaScript 應用程式應包含以下幾行程式碼:
const { FormRecognizerClient, AzureKeyCredential } = require("@azure/ai-form-recognizer");

const endpoint = "PASTE_YOUR_FORM_RECOGNIZER_ENDPOINT_HERE";
const key = "PASTE_YOUR_FORM_RECOGNIZER_KEY_HERE";
請選取程式碼範例,以複製並貼到您的應用程式中:
重要事項
完成時,請記得從程式碼中移除金鑰,且不要公開張貼金鑰。 在生產環境中,請使用安全的方式來儲存和存取您的認證,例如 Azure Key Vault。 欲了解更多資訊, 請參閱 Foundry Tools 安全性。
試試看:版面配置模型
- 在此範例中,您需要位於某個 URI 的文件檔案。 您可以針對本快速入門使用我們的範例文件 (英文)。
- 我們已將檔案 URI 值新增至檔案頂端附近的
formUrl變數。 - 若要在 URI 上分析指定檔案,需使用
beginRecognizeContent方法。
將下列程式碼新增至變數 key 下方這一行的版面配置應用程式
const formUrl = "https://raw.githubusercontent.com/Azure-Samples/cognitive-services-REST-api-samples/master/curl/form-recognizer/sample-invoice.pdf";

const formUrl = "https://raw.githubusercontent.com/Azure-Samples/cognitive-services-REST-api-samples/master/curl/form-recognizer/sample-invoice.pdf";

async function recognizeContent() {
    const client = new FormRecognizerClient(endpoint, new AzureKeyCredential(key));
    const poller = await client.beginRecognizeContentFromUrl(formUrl);
    const pages = await poller.pollUntilDone();

    if (!pages || pages.length === 0) {
        throw new Error("Expecting non-empty list of pages!");
    }

    for (const page of pages) {
        console.log(
            `Page ${page.pageNumber}: width ${page.width} and height ${page.height} with unit ${page.unit}`
        );
        for (const table of page.tables) {
            for (const cell of table.cells) {
                console.log(`cell [${cell.rowIndex},${cell.columnIndex}] has text ${cell.text}`);
            }
        }
    }
}

recognizeContent().catch((err) => {
    console.error("The sample encountered an error:", err);
});
試試看:預建模型
此範例以發票為例,示範如何使用預先定型的模型來分析某些常見文件類型中的資料。 如需發票欄位的完整清單,請參閱我們的預建概念頁面
選擇預建模型
這不限於發票,有多種預建模型可供選擇,每個模型都有一組自身支援的欄位。
analyze 作業所用的模型取決於要分析的文件類型。 以下是文件智慧服務目前支援的預建模型:
將下列程式碼新增至變數 key 下方的預建發票應用程式
const invoiceUrl = "https://raw.githubusercontent.com/Azure-Samples/cognitive-services-REST-api-samples/master/curl/form-recognizer/sample-invoice.pdf";

async function recognizeInvoices() {

    const client = new FormRecognizerClient(endpoint, new AzureKeyCredential(key));

    const poller = await client.beginRecognizeInvoicesFromUrl(invoiceUrl);
    const [invoice] = await poller.pollUntilDone();

    if (invoice === undefined) {
        throw new Error("Failed to extract data from at least one invoice.");
    }

    /**
     * This is a helper function for printing a simple field with an elemental type.
     */
    function fieldToString(field) {
        const {
            name,
            valueType,
            value,
            confidence
        } = field;
        return `${name} (${valueType}): '${value}' with confidence ${confidence}'`;
    }

    console.log("Invoice fields:");

    /**
     * Invoices contain a lot of optional fields, but they are all of elemental types
     * such as strings, numbers, and dates, so we will just enumerate them all.
     */
    for (const [name, field] of Object.entries(invoice.fields)) {
        if (field.valueType !== "array" && field.valueType !== "object") {
            console.log(`- ${name} ${fieldToString(field)}`);
        }
    }

    // Invoices also support nested line items, so we can iterate over them.
    let idx = 0;

    console.log("- Items:");

    const items = invoice.fields["Items"]?.value;
    for (const item of items ?? []) {
        const value = item.value;

        // Each item has several subfields that are nested within the item. We'll
        // map over this list of the subfields and filter out any fields that
        // weren't found. Not all fields will be returned every time, only those
        // that the service identified for the particular document in question.

        const subFields = [
                "Description",
                "Quantity",
                "Unit",
                "UnitPrice",
                "ProductCode",
                "Date",
                "Tax",
                "Amount"
            ]
            .map((fieldName) => value[fieldName])
            .filter((field) => field !== undefined);

        console.log(
            [
                `  - Item #${idx}`,
                // Now we will convert those fields into strings to display
                ...subFields.map((field) => `    - ${fieldToString(field)}`)
            ].join("\n")
        );
    }
}

recognizeInvoices().catch((err) => {
    console.error("The sample encountered an error:", err);
});
參考文件 | 程式庫來源程式碼 | 套件 (PyPi) | 範例
在本快速入門中,您會使用下列 API 從表單和文件中擷取結構化資料:
先決條件
Azure 訂用帳戶 - 建立免費帳戶
-
- 您安裝的 Python 應包含 pip。 您可以在命令列上執行
pip --version來檢查是否已安裝 pip。 安裝最新版本的 Python 以取得 pip。
- 您安裝的 Python 應包含 pip。 您可以在命令列上執行
一個 Foundry 工具或文件智慧資源。 擁有 Azure 訂用帳戶後,請在 Azure 入口網站中建立單一服務或多重服務文件智慧服務資源,以取得您的金鑰與端點。 您可以使用免費定價層 (
F0) 來試用服務,之後可升級至付費層以用於實際執行環境。秘訣
如果你打算在單一端點/金鑰下存取多個 Foundry 工具,請建立一個 Foundry 資源。 針對僅限文件智慧服務存取,請建立文件智慧服務資源。 請注意,如果您想要使用 Microsoft Entra 驗證 (部分機器翻譯),需要使用單一服務資源。
部署資源之後,請選取 [移至資源]。 您需要使用已建立資源的金鑰和端點,將應用程式連線至文件智慧服務 API。 您稍後會在快速入門中將金鑰和端點貼上至程式碼中:
設定
在本地環境中開啟終端機視窗,安裝 Python(帶有 pip 的 Azure Document Intelligence in Foundry Tools)客戶端函式庫:
pip install azure-ai-formrecognizer
建立新的 Python 應用程式
在您偏好的編輯器或 IDE 中建立名為 form_recognizer_quickstart.py 的新 Python 應用程式。 然後,匯入下列程式庫:
import os
from azure.ai.formrecognizer import FormRecognizerClient
from azure.core.credentials import AzureKeyCredential
為 Azure 資源端點和金鑰建立變數
endpoint = "YOUR_FORM_RECOGNIZER_ENDPOINT"
key = "YOUR_FORM_RECOGNIZER_KEY"
此時,您的 Python 應用程式應包含以下幾行程式碼:
import os
from azure.core.exceptions import ResourceNotFoundError
from azure.ai.formrecognizer import DocumentAnalysisClient
from azure.core.credentials import AzureKeyCredential

endpoint = "YOUR_FORM_RECOGNIZER_ENDPOINT"
key = "YOUR_FORM_RECOGNIZER_KEY"
請選取程式碼範例,以複製並貼到您的應用程式中:
重要事項
完成時,請記得從程式碼中移除金鑰,且不要公開張貼金鑰。 在生產環境中,請使用安全的方式來儲存和存取您的認證,例如 Azure Key Vault。 欲了解更多資訊, 請參閱 Foundry Tools 安全性。
試試看:版面配置模型
- 在此範例中,您需要位於某個 URI 的文件檔案。 您可以針對本快速入門使用我們的範例文件 (英文)。
- 我們已將檔案 URI 值新增至檔案頂端附近的
formUrl變數。 - 若要在 URI 上分析指定檔案,需使用
begin_recognize_content_from_url方法。
將下列程式碼新增至變數 key 下方這一行的版面配置應用程式
  def format_bounding_box(bounding_box):
    if not bounding_box:
        return "N/A"
    return ", ".join(["[{}, {}]".format(p.x, p.y) for p in bounding_box])

 def recognize_content():
    # sample document
    formUrl = "https://raw.githubusercontent.com/Azure-Samples/cognitive-services-REST-api-samples/master/curl/form-recognizer/sample-layout.pdf"

    form_recognizer_client = FormRecognizerClient(
        endpoint=endpoint, credential=AzureKeyCredential(key)
    )

    poller = form_recognizer_client.begin_recognize_content_from_url(formUrl)
    form_pages = poller.result()

    for idx, content in enumerate(form_pages):
        print(
            "Page has width: {} and height: {}, measured with unit: {}".format(
                content.width, content.height, content.unit
            )
        )
        for table_idx, table in enumerate(content.tables):
            print(
                "Table # {} has {} rows and {} columns".format(
                    table_idx, table.row_count, table.column_count
                )
            )
            print(
                "Table # {} location on page: {}".format(
                    table_idx, format_bounding_box(table.bounding_box)
                )
            )
            for cell in table.cells:
                print(
                    "...Cell[{}][{}] has text '{}' within bounding box '{}'".format(
                        cell.row_index,
                        cell.column_index,
                        cell.text,
                        format_bounding_box(cell.bounding_box),
                    )
                )

        for line_idx, line in enumerate(content.lines):
            print(
                "Line # {} has word count '{}' and text '{}' within bounding box '{}'".format(
                    line_idx,
                    len(line.words),
                    line.text,
                    format_bounding_box(line.bounding_box),
                )
            )
            if line.appearance:
                if (
                    line.appearance.style_name == "handwriting"
                    and line.appearance.style_confidence > 0.8
                ):
                    print(
                        "Text line '{}' is handwritten and might be a signature.".format(
                            line.text
                        )
                    )
            for word in line.words:
                print(
                    "...Word '{}' has a confidence of {}".format(
                        word.text, word.confidence
                    )
                )

        for selection_mark in content.selection_marks:
            print(
                "Selection mark is '{}' within bounding box '{}' and has a confidence of {}".format(
                    selection_mark.state,
                    format_bounding_box(selection_mark.bounding_box),
                    selection_mark.confidence,
                )
            )
        print("----------------------------------------")


if __name__ == "__main__":
    recognize_content()
試試看:預建模型
此範例以發票為例,示範如何使用預先定型的模型來分析某些常見文件類型中的資料。 如需發票欄位的完整清單,請參閱我們的預建概念頁面
選擇預建模型
這不限於發票,有多種預建模型可供選擇,每個模型都有一組自身支援的欄位。
analyze 作業所用的模型取決於要分析的文件類型。 以下是文件智慧服務目前支援的預建模型:
將下列程式碼新增至變數 key 下方的預建發票應用程式
def recognize_invoice():

    invoiceUrl = "https://raw.githubusercontent.com/Azure-Samples/cognitive-services-REST-api-samples/master/curl/form-recognizer/sample-invoice.pdf"

    form_recognizer_client = FormRecognizerClient(
        endpoint=endpoint, credential=AzureKeyCredential(key)
    )

    poller = form_recognizer_client.begin_recognize_invoices_from_url(
        invoiceUrl, locale="en-US"
    )
    invoices = poller.result()

    for idx, invoice in enumerate(invoices):
        vendor_name = invoice.fields.get("VendorName")
        if vendor_name:
            print(
                "Vendor Name: {} has confidence: {}".format(
                    vendor_name.value, vendor_name.confidence
                )
            )
        vendor_address = invoice.fields.get("VendorAddress")
        if vendor_address:
            print(
                "Vendor Address: {} has confidence: {}".format(
                    vendor_address.value, vendor_address.confidence
                )
            )
        vendor_address_recipient = invoice.fields.get("VendorAddressRecipient")
        if vendor_address_recipient:
            print(
                "Vendor Address Recipient: {} has confidence: {}".format(
                    vendor_address_recipient.value, vendor_address_recipient.confidence
                )
            )
        customer_name = invoice.fields.get("CustomerName")
        if customer_name:
            print(
                "Customer Name: {} has confidence: {}".format(
                    customer_name.value, customer_name.confidence
                )
            )
        customer_id = invoice.fields.get("CustomerId")
        if customer_id:
            print(
                "Customer Id: {} has confidence: {}".format(
                    customer_id.value, customer_id.confidence
                )
            )
        customer_address = invoice.fields.get("CustomerAddress")
        if customer_address:
            print(
                "Customer Address: {} has confidence: {}".format(
                    customer_address.value, customer_address.confidence
                )
            )
        customer_address_recipient = invoice.fields.get("CustomerAddressRecipient")
        if customer_address_recipient:
            print(
                "Customer Address Recipient: {} has confidence: {}".format(
                    customer_address_recipient.value,
                    customer_address_recipient.confidence,
                )
            )
        invoice_id = invoice.fields.get("InvoiceId")
        if invoice_id:
            print(
                "Invoice Id: {} has confidence: {}".format(
                    invoice_id.value, invoice_id.confidence
                )
            )
        invoice_date = invoice.fields.get("InvoiceDate")
        if invoice_date:
            print(
                "Invoice Date: {} has confidence: {}".format(
                    invoice_date.value, invoice_date.confidence
                )
            )
        invoice_total = invoice.fields.get("InvoiceTotal")
        if invoice_total:
            print(
                "Invoice Total: {} has confidence: {}".format(
                    invoice_total.value, invoice_total.confidence
                )
            )
        due_date = invoice.fields.get("DueDate")
        if due_date:
            print(
                "Due Date: {} has confidence: {}".format(
                    due_date.value, due_date.confidence
                )
            )
        purchase_order = invoice.fields.get("PurchaseOrder")
        if purchase_order:
            print(
                "Purchase Order: {} has confidence: {}".format(
                    purchase_order.value, purchase_order.confidence
                )
            )
        billing_address = invoice.fields.get("BillingAddress")
        if billing_address:
            print(
                "Billing Address: {} has confidence: {}".format(
                    billing_address.value, billing_address.confidence
                )
            )
        billing_address_recipient = invoice.fields.get("BillingAddressRecipient")
        if billing_address_recipient:
            print(
                "Billing Address Recipient: {} has confidence: {}".format(
                    billing_address_recipient.value,
                    billing_address_recipient.confidence,
                )
            )
        shipping_address = invoice.fields.get("ShippingAddress")
        if shipping_address:
            print(
                "Shipping Address: {} has confidence: {}".format(
                    shipping_address.value, shipping_address.confidence
                )
            )
        shipping_address_recipient = invoice.fields.get("ShippingAddressRecipient")
        if shipping_address_recipient:
            print(
                "Shipping Address Recipient: {} has confidence: {}".format(
                    shipping_address_recipient.value,
                    shipping_address_recipient.confidence,
                )
            )
        print("Invoice items:")
        for idx, item in enumerate(invoice.fields.get("Items").value):
            item_description = item.value.get("Description")
            if item_description:
                print(
                    "......Description: {} has confidence: {}".format(
                        item_description.value, item_description.confidence
                    )
                )
            item_quantity = item.value.get("Quantity")
            if item_quantity:
                print(
                    "......Quantity: {} has confidence: {}".format(
                        item_quantity.value, item_quantity.confidence
                    )
                )
            unit = item.value.get("Unit")
            if unit:
                print(
                    "......Unit: {} has confidence: {}".format(
                        unit.value, unit.confidence
                    )
                )
            unit_price = item.value.get("UnitPrice")
            if unit_price:
                print(
                    "......Unit Price: {} has confidence: {}".format(
                        unit_price.value, unit_price.confidence
                    )
                )
            product_code = item.value.get("ProductCode")
            if product_code:
                print(
                    "......Product Code: {} has confidence: {}".format(
                        product_code.value, product_code.confidence
                    )
                )
            item_date = item.value.get("Date")
            if item_date:
                print(
                    "......Date: {} has confidence: {}".format(
                        item_date.value, item_date.confidence
                    )
                )
            tax = item.value.get("Tax")
            if tax:
                print(
                    "......Tax: {} has confidence: {}".format(tax.value, tax.confidence)
                )
            amount = item.value.get("Amount")
            if amount:
                print(
                    "......Amount: {} has confidence: {}".format(
                        amount.value, amount.confidence
                    )
                )
        subtotal = invoice.fields.get("SubTotal")
        if subtotal:
            print(
                "Subtotal: {} has confidence: {}".format(
                    subtotal.value, subtotal.confidence
                )
            )
        total_tax = invoice.fields.get("TotalTax")
        if total_tax:
            print(
                "Total Tax: {} has confidence: {}".format(
                    total_tax.value, total_tax.confidence
                )
            )
        previous_unpaid_balance = invoice.fields.get("PreviousUnpaidBalance")
        if previous_unpaid_balance:
            print(
                "Previous Unpaid Balance: {} has confidence: {}".format(
                    previous_unpaid_balance.value, previous_unpaid_balance.confidence
                )
            )
        amount_due = invoice.fields.get("AmountDue")
        if amount_due:
            print(
                "Amount Due: {} has confidence: {}".format(
                    amount_due.value, amount_due.confidence
                )
            )
        service_start_date = invoice.fields.get("ServiceStartDate")
        if service_start_date:
            print(
                "Service Start Date: {} has confidence: {}".format(
                    service_start_date.value, service_start_date.confidence
                )
            )
        service_end_date = invoice.fields.get("ServiceEndDate")
        if service_end_date:
            print(
                "Service End Date: {} has confidence: {}".format(
                    service_end_date.value, service_end_date.confidence
                )
            )
        service_address = invoice.fields.get("ServiceAddress")
        if service_address:
            print(
                "Service Address: {} has confidence: {}".format(
                    service_address.value, service_address.confidence
                )
            )
        service_address_recipient = invoice.fields.get("ServiceAddressRecipient")
        if service_address_recipient:
            print(
                "Service Address Recipient: {} has confidence: {}".format(
                    service_address_recipient.value,
                    service_address_recipient.confidence,
                )
            )
        remittance_address = invoice.fields.get("RemittanceAddress")
        if remittance_address:
            print(
                "Remittance Address: {} has confidence: {}".format(
                    remittance_address.value, remittance_address.confidence
                )
            )
        remittance_address_recipient = invoice.fields.get("RemittanceAddressRecipient")
        if remittance_address_recipient:
            print(
                "Remittance Address Recipient: {} has confidence: {}".format(
                    remittance_address_recipient.value,
                    remittance_address_recipient.confidence,
                )
            )


if __name__ == "__main__":
    recognize_invoice()
執行您的應用程式
瀏覽至 form_recognizer_quickstart.py 檔案所在的資料夾。
在您的終端機中輸入下列命令:
python form_recognizer_quickstart.py
| 文件智慧服務 REST API | Azure REST API 參考 |
在本快速入門中,您會使用下列 API 從表單和文件中擷取結構化資料:
先決條件
Azure 訂用帳戶 - 建立免費帳戶
已安裝 cURL。
PowerShell 6.0 版以上,或類似的命令列應用程式。
一個 Foundry 工具或文件智慧資源。 擁有 Azure 訂用帳戶後,請在 Azure 入口網站中建立單一服務或多重服務文件智慧服務資源,以取得您的金鑰與端點。 您可以使用免費定價層 (
F0) 來試用服務,之後可升級至付費層以用於實際執行環境。秘訣
如果你打算在單一端點/金鑰下存取多個 Foundry 工具,請建立一個 Foundry 資源。 針對僅限文件智慧服務存取,請建立文件智慧服務資源。 請注意,如果您想要使用 Microsoft Entra 驗證 (部分機器翻譯),需要使用單一服務資源。
部署資源之後,請選取 [移至資源]。 您需要使用已建立資源的金鑰和端點,將應用程式連線至文件智慧服務 API。 您稍後會在快速入門中將金鑰和端點貼上至程式碼中:
請選取程式碼範例,以複製並貼到您的應用程式中:
重要事項
完成時,請記得從程式碼中移除金鑰,且不要公開張貼金鑰。 在生產環境中,請使用安全的方式來儲存和存取您的認證,例如 Azure Key Vault。 欲了解更多資訊, 請參閱 Foundry Tools 安全性。
試試看:版面配置模型
- 在此範例中,您需要位於某個 URI 的文件檔案。 您可以針對本快速入門使用我們的範例文件 (英文)。
- 將
{endpoint}取代為您使用文件智慧服務訂用帳戶取得的端點。 - 將
{key}取代為您在先前的步驟中複製的金鑰。 - 將
\"{your-document-url}取代為範例文件 URL:
https://raw.githubusercontent.com/Azure-Samples/cognitive-services-REST-api-samples/master/curl/form-recognizer/sample-layout.pdf
要求
curl -v -i POST "https://{endpoint}/formrecognizer/v2.1/layout/analyze" -H "Content-Type: application/json" -H "Ocp-Apim-Subscription-Key: {key}" --data-ascii "{'urlSource': '{your-document-url}'}"
運作地點
您收到 202 (Success) 回應,其中包含 Operation-Location 標頭。 此標頭的值會包含一個結果識別碼,可用來查詢非同步作業狀態並取得結果:
https://cognitiveservice/formrecognizer/v2.1/layout/analyzeResults/{resultId}。
在下列範例中,URL 中在 analyzeResults/ 之後的字串就是結果識別碼。
https://cognitiveservice/formrecognizer/v2/layout/analyzeResults/54f0b076-4e38-43e5-81bd-b85b8835fdfb
取得配置結果
呼叫 Analyze Layout API 後,請呼叫取得分析結果 API 以取得作業狀態和擷取的資料。 執行命令之前,請進行下列變更:
- 將
{endpoint}取代為您使用文件智慧服務訂用帳戶取得的端點。 - 將
{key}取代為您在先前的步驟中複製的金鑰。 - 將
{resultId}取代為先前步驟中的結果識別碼。
要求
curl -v -X GET "https://{endpoint}/formrecognizer/v2.1/layout/analyzeResults/{resultId}" -H "Ocp-Apim-Subscription-Key: {key}"
檢查結果
您收到 200 (success) 回應及 JSON 內容。
請參閱下列發票影像和其對應的 JSON 輸出。
-
"readResults"節點包含每一行文字,以及各自的周框方塊在頁面上的位置。 -
selectionMarks節點顯示每個選取標記 (核取方塊、選項標記),以及其狀態是selected或unselected。 -
"pageResults"區段包含擷取的資料表。 針對每個資料表,會擷取文字、資料列和資料行索引、資料列和資料行擴展、周框方塊等。
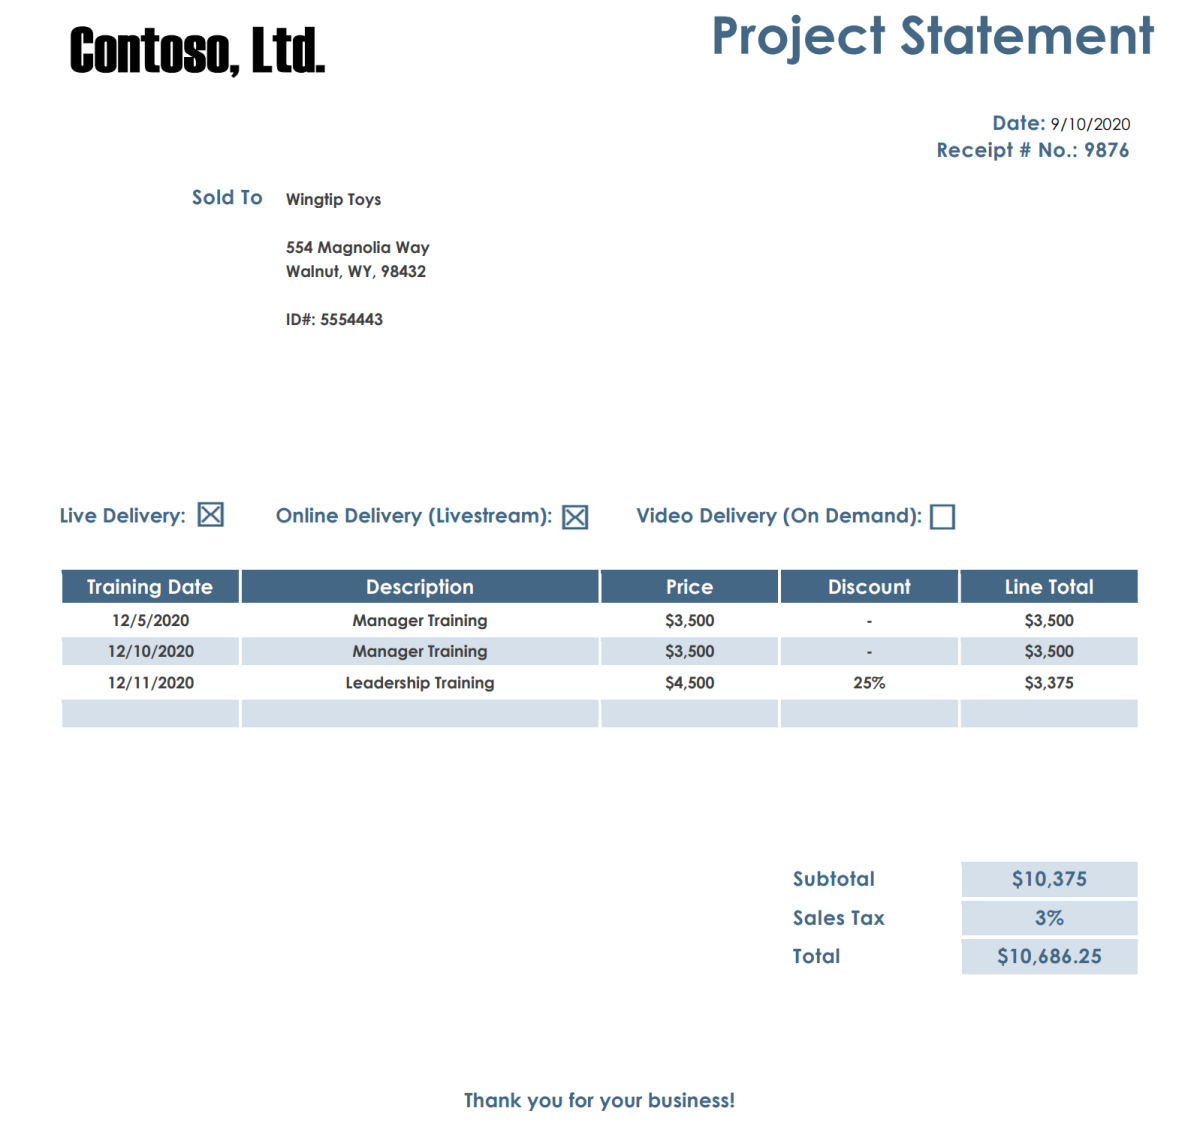
回應內文
您可檢視 GitHub 上的完整範例輸出。
試試看:預建模型
- 在此範例中,我們會使用預建模型來分析發票文件。 您可以使用本快速入門的發票範例文件。
選擇預建模型
這不限於發票,有多種預建模型可供選擇,每個模型都有一組自身支援的欄位。
analyze 作業所用的模型取決於要分析的文件類型。 以下是文件智慧服務目前支援的預建模型:
執行命令之前,請進行下列變更:
將
{endpoint}取代為您使用文件智慧服務訂用帳戶取得的端點。將
{key}取代為您在先前的步驟中複製的金鑰。將
\"{your-document-url}取代為範例發票 URL:https://raw.githubusercontent.com/Azure-Samples/cognitive-services-REST-api-samples/master/curl/form-recognizer/sample-invoice.pdf
要求
curl -v -i POST https://{endpoint}/formrecognizer/v2.1/prebuilt/invoice/analyze" -H "Content-Type: application/json" -H "Ocp-Apim-Subscription-Key: {key}" --data-ascii "{'urlSource': '{your invoice URL}'}"
運作地點
您收到 202 (Success) 回應,其中包含 Operation-Location 標頭。 此標頭的值會包含一個結果識別碼,可用來查詢非同步作業狀態並取得結果:
https:// cognitiveservice/formrecognizer/v2.1/prebuilt/receipt/analyzeResults/{resultId}
在下列範例中,URL 之中位於 analyzeResults/ 後面的字串部分,就是結果識別碼:
https://cognitiveservice/formrecognizer/v2.1/prebuilt/invoice/analyzeResults/54f0b076-4e38-43e5-81bd-b85b8835fdfb
取得發票結果
呼叫 Analyze Invoice API 後,請呼叫取得分析發票結果 API 以取得作業狀態和擷取的資料。 執行命令之前,請進行下列變更:
- 將
{endpoint}取代為您使用文件智慧服務訂用帳戶取得的金鑰。 您可以在文件智慧服務的資源 [概觀] 索引標籤上找到此項目。 - 將
{resultId}取代為先前步驟中的結果識別碼。 - 以您的金鑰取代
{key}。
要求
curl -v -X GET "https://{endpoint}/formrecognizer/v2.1/prebuilt/invoice/analyzeResults/{resultId}" -H "Ocp-Apim-Subscription-Key: {key}"
檢查回應
您收到具有 JSON 輸出的 200 (Success) 回應。
- 欄位
"readResults"包含從發票中擷取的每一行文字。 -
"pageResults"包含從發票中擷取的資料表和選取標記。 -
"documentResults"欄位包含發票最重要部分的索引鍵/值資訊。
請參閱範例發票文件。
回應內文
請參閱 GitHub 上的完整範例輸出。
完成了,做得好!
後續步驟
如需增強體驗和進階模型品質,請嘗試文件智慧服務工作室 (英文)。
工作室支援使用 v2.1 標記資料定型的任何模型。
變更記錄提供從 v3.1 移轉至 v4.0 的詳細資訊。