使用 Windows 虛擬機器擴展集的 Azure Resource Manager 範本將客體作業系統計量傳送至 Azure 監視器計量存放區
注意
Azure 監視器代理程式 (AMA) 會從 Azure 和混合式虛擬機器和虛擬機器擴展集的客體作業系統收集監視資料,然後傳遞給 Azure 監視器以用於各個功能、見解和其他服務,例如 Microsoft Sentinel 和適用於雲端的 Microsoft Defender。
我們建議使用 Azure 監視器代理程式,從虛擬機器擴展集收集記錄和計量。 如需詳細資訊,請參閱 Azure 監視器代理程式概觀。
您可以使用 Azure 監視器的 適用於 Windows (WAD) 的 Azure 診斷擴充功能,從當作虛擬機器、雲端服務或 Azure Service Fabric 叢集一部分執行的客體作業系統 (客體 OS) 收集計量與記錄。 擴充功能可以將遙測資料傳送到先前連結的文章中所列的許多不同位置。
此文章說明將 Windows 虛擬機器擴展集的客體作業系統效能計量傳送至 Azure 監視器資料存放區的程序。 從 Microsoft Azure 診斷 1.11 版開始,您可以直接將計量寫入到已收集標準平台計量的 Azure 監視器計量存放區。 藉由將計量儲存在此位置,您就可以存取平台計量適用的相同動作。 動作包括近乎即時的警示、圖表、路由、從 REST API 存取以及更多功能。 在過去,Microsoft Azure 診斷擴充功能會寫入到 Azure 儲存體,而不是 Azure 監視器資料存放區。
如果您剛開始使用 Resource Manager 範本,請了解範本部署與其結構和語法。
注意
建議您使用 Azure Az PowerShell 模組來與 Azure 互動。 若要開始使用,請參閱安裝 Azure PowerShell (部分機器翻譯)。 若要了解如何移轉至 Az PowerShell 模組,請參閱將 Azure PowerShell 從 AzureRM 移轉至 Az。
必要條件
您必須先向 Microsoft.Insights 註冊您的訂用帳戶。
您需要安裝 Azure PowerShell,或可以使用 Azure Cloud Shell。
設定 Azure 監視器作為資料接收器
Azure 診斷擴充功能會使用稱為資料接收器的功能,將計量與記錄路由傳送至不同的位置。 下列步驟示範如何使用新的「Azure 監視器 」資料接收器,使用 Resource Manager 範本與 PowerShell 來部署 VM。
撰寫 Resource Manager 範本
針對此範例,您可以使用公開提供的範例範本:
Azuredeploy.json 是預先設定的 Resource Manager 範本,可用於部署虛擬機器擴展集。
Azuredeploy.parameters.json 是參數檔案,儲存您要為 VM 設定的使用者名稱與密碼等資訊。 在部署期間,Resource Manager 範本會使用此檔案中設定的參數。
下載這兩個檔案並儲存在本機。
修改 azuredeploy.parameters.json
開啟 azuredeploy.parameters.json 檔案:
- 提供您想要部署的 vmSKU。 建議使用 Standard_D2_v3。
- 指定您要用於虛擬機器擴展集的 windowsOSVersion。 建議使用 2016-Datacenter。
- 使用 vmssName 屬性為要部署的虛擬機器擴展集資源命名。 例如,VMSS-WAD-TEST。
- 使用 instanceCount 屬性,指定您要在虛擬機器擴展集上執行的 VM 數目。
- 輸入虛擬機器擴展集的 adminUsername 與 adminPassword 值。 這些參數可用來從遠端存取擴展集中的 VM。 為避免 VM 被駭,請勿使用此範本中的資訊。 Bot 會掃描網際網路,取得公用 GitHub 存放庫中的使用者名稱與密碼。 使用這些預設值的 VM 可能是測試 VM。
修改 azuredeploy.json
開啟 azuredeploy.json 檔案。
新增變數來儲存 Resource Manager 範本中的儲存體帳戶資訊。 診斷設定檔中指定的任何記錄或效能計數器,都會寫入 Azure 監視器計量存放區和此處指定的儲存體帳戶:
"variables": {
  //add this line
  "storageAccountName": "[concat('storage', uniqueString(resourceGroup().id))]",
  ...
}
在 resources 區段中找到虛擬機器擴展集定義,然後將 identity 區段新增至設定。 此新增作業可確保 Azure 對其指派系統身分識別。 這個步驟也可確保擴展集中的 VM 可對 Azure 監視器發出與本身相關的客體計量:
{
  "type": "Microsoft.Compute/virtualMachineScaleSets",
  "name": "[variables('namingInfix')]",
  "location": "[resourceGroup().location]",
  "apiVersion": "2017-03-30",
  //add these lines below
  "identity": {
       "type": "systemAssigned"
   },
   //end of lines to add
   ...
}
在虛擬機器擴展集資源中,找到 virtualMachineProfile 區段。 新增名為 extensionsProfile 的新設定檔來管理擴充功能。
在 extensionProfile 中,將新擴充功能新增至範本,如 VMSS-WAD-extension 區段中所示。 此節是 Azure 資源受控識別的擴充功能,可確保 Azure 監視器會接受所發出的計量。 name 欄位可以包含任何名稱。
MSI 擴充功能中的下列程式碼也可以將診斷擴充功能與設定作為擴充功能資源,新增至虛擬機器擴展集資源。 請視需要新增或移除效能計數器:
  "extensionProfile": {
    "extensions": [
      // BEGINNING of added code
      // Managed identities for Azure resources
      {
        "name": "VMSS-WAD-extension",
        "properties": {
          "publisher": "Microsoft.ManagedIdentity",
          "type": "ManagedIdentityExtensionForWindows",
          "typeHandlerVersion": "1.0",
          "autoUpgradeMinorVersion": true,
          "settings": {
            "port": 50342
          },
          "protectedSettings": {}
        }
      },
      // add diagnostic extension. (Remove this comment after pasting.)
      {
        "name": "[concat('VMDiagnosticsVmExt','_vmNodeType0Name')]",
        "properties": {
          "type": "IaaSDiagnostics",
          "autoUpgradeMinorVersion": true,
          "protectedSettings": {
            "storageAccountName": "[variables('storageAccountName')]",
            "storageAccountKey": "[listKeys(resourceId('Microsoft.Storage/storageAccounts', variables('storageAccountName')),'2015-05-01-preview').key1]",
            "storageAccountEndPoint": "https://core.windows.net/"
          },
          "publisher": "Microsoft.Azure.Diagnostics",
          "settings": {
            "WadCfg": {
              "DiagnosticMonitorConfiguration": {
                "overallQuotaInMB": "50000",
                "PerformanceCounters": {
                  "scheduledTransferPeriod": "PT1M",
                  "sinks": "AzMonSink",
                  "PerformanceCounterConfiguration": [
                    {
                      "counterSpecifier": "\\Memory\\% Committed Bytes In Use",
                      "sampleRate": "PT15S"
                    },
                    {
                      "counterSpecifier": "\\Memory\\Available Bytes",
                      "sampleRate": "PT15S"
                    },
                    {
                      "counterSpecifier": "\\Memory\\Committed Bytes",
                      "sampleRate": "PT15S"
                    }
                  ]
                },
                "EtwProviders": {
                  "EtwEventSourceProviderConfiguration": [
                    {
                      "provider": "Microsoft-ServiceFabric-Actors",
                      "scheduledTransferKeywordFilter": "1",
                      "scheduledTransferPeriod": "PT5M",
                      "DefaultEvents": {
                        "eventDestination": "ServiceFabricReliableActorEventTable"
                      }
                    },
                    {
                      "provider": "Microsoft-ServiceFabric-Services",
                      "scheduledTransferPeriod": "PT5M",
                      "DefaultEvents": {
                        "eventDestination": "ServiceFabricReliableServiceEventTable"
                      }
                    }
                  ],
                  "EtwManifestProviderConfiguration": [
                    {
                       "provider": "cbd93bc2-71e5-4566-b3a7-595d8eeca6e8",
                       "scheduledTransferLogLevelFilter": "Information",
                       "scheduledTransferKeywordFilter": "4611686018427387904",
                       "scheduledTransferPeriod": "PT5M",
                       "DefaultEvents": {
                         "eventDestination": "ServiceFabricSystemEventTable"
                       }
                    }
                  ]
                }
              },
              "SinksConfig": {
                 "Sink": [
                    {
                    "name": "AzMonSink",
                    "AzureMonitor": {}
                    }
                 ]
              }
            },
            "StorageAccount": "[variables('storageAccountName')]"
          },
          "typeHandlerVersion": "1.11"
        }
      }
    ]
  },
  // end of added code. Be sure that the number and type of brackets match properly when done.
  {
  "type": "Microsoft.Insights/autoscaleSettings",
  ...
  }
為儲存體帳戶新增 dependsOn,確保它會以正確的順序建立:
"dependsOn": [
  "[concat('Microsoft.Network/loadBalancers/', variables('loadBalancerName'))]",
  "[concat('Microsoft.Network/virtualNetworks/', variables('virtualNetworkName'))]",
  //add this line below
  "[concat('Microsoft.Storage/storageAccounts/', variables('storageAccountName'))]"
]
如果尚未在範本中建立儲存體帳戶,請予以建立:
"resources": [
  // add this code
  {
    "type": "Microsoft.Storage/storageAccounts",
    "name": "[variables('storageAccountName')]",
    "apiVersion": "2015-05-01-preview",
    "location": "[resourceGroup().location]",
    "properties": {
      "accountType": "Standard_LRS"
    }
  },
  // end added code
  {
    "type": "Microsoft.Network/virtualNetworks",
    "name": "[variables('virtualNetworkName')]",
    ...
  }
]
儲存並關閉這兩個檔案。
部署 Resource Manager 範本
注意
您必須執行 Azure 診斷擴充功能 1.5 版或更新版本,並且將 Resource Manager 範本中的 autoUpgradeMinorVersion: 屬性集合設定為 true。 接著,Azure 會在啟動 VM 時載入適當的擴充功能。 如果您的範本中沒有這些設定,請進行變更,並重新部署該範本。
請使用 Azure PowerShell 來部署 Resource Manager 範本:
啟動 PowerShell。
使用
Login-AzAccount登入 Azure。使用
Get-AzSubscription取得訂用帳戶清單。設定您要建立的訂用帳戶,或更新虛擬機器:
Select-AzSubscription -SubscriptionName "<Name of the subscription>"為要部署的 VM 建立新的資源群組。 執行以下命令:
New-AzResourceGroup -Name "VMSSWADtestGrp" -Location "<Azure Region>"執行下列命令來部署 VM:
注意
如果您想要更新現有擴展集,請將 -Mode Incremental 新增至命令的結尾。
New-AzResourceGroupDeployment -Name "VMSSWADTest" -ResourceGroupName "VMSSWADtestGrp" -TemplateFile "<File path of your azuredeploy.JSON file>" -TemplateParameterFile "<File path of your azuredeploy.parameters.JSON file>"部署成功之後,您應該會在 Azure 入口網站中發現虛擬機器擴展集。 它應該會對 Azure 監視器發出計量。
注意
您可能會遇到和所選 vmSkuSize 相關的錯誤。 在該狀況下,請回到 azuredeploy.json 檔案,然後更新 vmSkuSize 參數的預設值。 我們建議您嘗試使用 Standard_DS1_v2。
繪製計量圖表
登入 Azure 入口網站。
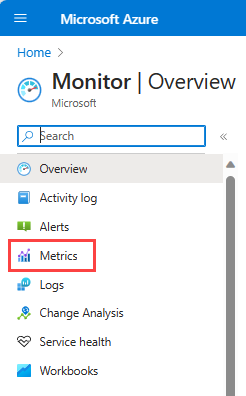
在左側功能表中,選取 [監視]。
在 [監視] 頁面上,選取 [計量]。
將彙總期間變更為 [過去 30 分鐘]。
在 [資源] 下拉式功能表中,選取您建立的虛擬機器擴展集。
在 [命名空間] 下拉式功能表中,選取虛擬機器客體。
在 [計量] 下拉式功能表中,選取 [記憶體\認可的位元組 (使用中)]。


接著,您也可以選擇使用這個計量上的維度,為特定 VM 繪製圖表,或對擴展集中的每個 VM 繪製圖表。
下一步
- 深入了解自訂計量。