快速入門:建立和發佈 Azure 受控應用程式定義
本快速入門將簡介如何使用 Azure 受控應用程式。 您可以建立和發佈儲存在服務類別目錄中的受控應用程式定義,以供貴組織成員使用。
若要將受控應用程式發佈至您的服務類別目錄,請執行下列工作:
- 建立 Azure Resource Manager 範本 (ARM 範本),該範本會定義與受控應用程式一起部署的資源。
- 部署受控應用程式時,定義入口網站的使用者介面元素。
- 建立包含必要 JSON 檔案的 .zip 套件。 .zip 套件檔案對於服務類別目錄的受控應用程式定義具有 120 MB 限制。
- 發佈受控應用程式定義,使其可在您的服務類別目錄中使用。
如果您的受控應用程式定義超過 120 MB,或基於組織的合規性原因而想使用自己的儲存體帳戶,請移至快速入門:自備儲存體來建立及發佈 Azure 受控應用程式定義。
您可以使用 Bicep 開發受控應用程式定義,但必須先將其轉換成 ARM 範本 JSON,才能在 Azure 中發佈定義。 如需詳細資訊,請移至 快速入門:使用 Bicep 建立和發佈 Azure 受控應用程式定義。
您也可以使用 Bicep 從服務類別目錄部署受控應用程式定義。 如需詳細資訊,請移至 快速入門:使用 Bicep 部署 Azure 受控應用程式定義。
必要條件
若要完成此快速入門,您需要下列項目:
- 具有作用中訂閱,以及對 Microsoft Entra 資源 (例如使用者、群組或服務主體) 具有許可權的 Azure 帳戶。 如果您沒有帳戶,請在開始之前建立免費帳戶。
- Visual Studio Code 搭配最新的 Azure Resource Manager 工具延伸模組。 針對 Bicep 檔案,請安裝適用於 Visual Studio Code 的 Bicep 延伸模組。
- 安裝最新版的 Azure PowerShell 或 Azure CLI。
建立 ARM 範本
每個受控應用程式定義都包含名為 mainTemplate.json 的檔案。 此範本會定義要部署的 Azure 資源,而且與一般 ARM 範本不同。
開啟 Visual Studio Code,建立具有區分大小寫名稱 mainTemplate.json 的檔案,並加以儲存。
新增下列 JSON 並儲存檔案。 其會定義用來部署 App Service 和 App Service 方案的資源。 此範本會使用具有隨用隨付成本的 App Service 基本方案 (B1)。 如需詳細資訊,請參閱 Linux 上的 Azure App Service 價格。
{
  "$schema": "https://schema.management.azure.com/schemas/2019-04-01/deploymentTemplate.json#",
  "contentVersion": "1.0.0.0",
  "parameters": {
    "location": {
      "type": "string",
      "defaultValue": "[resourceGroup().location]"
    },
    "appServicePlanName": {
      "type": "string",
      "maxLength": 40,
      "metadata": {
        "description": "App Service plan name."
      }
    },
    "appServiceNamePrefix": {
      "type": "string",
      "maxLength": 47,
      "metadata": {
        "description": "App Service name prefix."
      }
    }
  },
  "variables": {
    "appServicePlanSku": "B1",
    "appServicePlanCapacity": 1,
    "appServiceName": "[format('{0}{1}', parameters('appServiceNamePrefix'), uniqueString(resourceGroup().id))]",
    "linuxFxVersion": "DOTNETCORE|8.0"
  },
  "resources": [
    {
      "type": "Microsoft.Web/serverfarms",
      "apiVersion": "2023-01-01",
      "name": "[parameters('appServicePlanName')]",
      "location": "[parameters('location')]",
      "sku": {
        "name": "[variables('appServicePlanSku')]",
        "capacity": "[variables('appServicePlanCapacity')]"
      },
      "kind": "linux",
      "properties": {
        "zoneRedundant": false,
        "reserved": true
      }
    },
    {
      "type": "Microsoft.Web/sites",
      "apiVersion": "2023-01-01",
      "name": "[variables('appServiceName')]",
      "location": "[parameters('location')]",
      "properties": {
        "serverFarmId": "[resourceId('Microsoft.Web/serverfarms', parameters('appServicePlanName'))]",
        "httpsOnly": true,
        "redundancyMode": "None",
        "siteConfig": {
          "linuxFxVersion": "[variables('linuxFxVersion')]",
          "minTlsVersion": "1.2",
          "ftpsState": "Disabled"
        }
      },
      "dependsOn": [
        "[resourceId('Microsoft.Web/serverfarms', parameters('appServicePlanName'))]"
      ]
    }
  ],
  "outputs": {
    "appServicePlan": {
      "type": "string",
      "value": "[parameters('appServicePlanName')]"
    },
    "appServiceApp": {
      "type": "string",
      "value": "[reference(resourceId('Microsoft.Web/sites', variables('appServiceName')), '2023-01-01').defaultHostName]"
    }
  }
}
定義入口網站體驗
身為發行者,您可以定義用來建立受控應用程式的入口網站體驗。 createUiDefinition.json 檔案會產生入口網站使用者介面。 您可以使用下拉式清單和文字輸入框等控制項元素,定義使用者為每個參數提供輸入的方式。
在此範例中,使用者介面會提示您輸入 App Service 名稱前置詞和 App Service 方案的名稱。 在 mainTemplate.json 部署期間,appServiceName 變數會使用 uniqueString 函式,將 13 個字元的字串附加至名稱前置詞,讓名稱在 Azure 中是全域唯一的。
開啟 Visual Studio Code,建立具有區分大小寫名稱 createUiDefinition.json 的檔案,並加以儲存。
將下列 JSON 程式碼新增至檔案,並加以儲存。
{
  "$schema": "https://schema.management.azure.com/schemas/0.1.2-preview/CreateUIDefinition.MultiVm.json#",
  "handler": "Microsoft.Azure.CreateUIDef",
  "version": "0.1.2-preview",
  "parameters": {
    "basics": [
      {}
    ],
    "steps": [
      {
        "name": "webAppSettings",
        "label": "Web App settings",
        "subLabel": {
          "preValidation": "Configure the web app settings",
          "postValidation": "Completed"
        },
        "elements": [
          {
            "name": "appServicePlanName",
            "type": "Microsoft.Common.TextBox",
            "label": "App Service plan name",
            "placeholder": "App Service plan name",
            "defaultValue": "",
            "toolTip": "Use alphanumeric characters or hyphens with a maximum of 40 characters.",
            "constraints": {
              "required": true,
              "regex": "^[a-z0-9A-Z-]{1,40}$",
              "validationMessage": "Only alphanumeric characters or hyphens are allowed, with a maximum of 40 characters."
            },
            "visible": true
          },
          {
            "name": "appServiceName",
            "type": "Microsoft.Common.TextBox",
            "label": "App Service name prefix",
            "placeholder": "App Service name prefix",
            "defaultValue": "",
            "toolTip": "Use alphanumeric characters or hyphens with minimum of 2 characters and maximum of 47 characters.",
            "constraints": {
              "required": true,
              "regex": "^[a-z0-9A-Z-]{2,47}$",
              "validationMessage": "Only alphanumeric characters or hyphens are allowed, with a minimum of 2 characters and maximum of 47 characters."
            },
            "visible": true
          }
        ]
      }
    ],
    "outputs": {
      "location": "[location()]",
      "appServicePlanName": "[steps('webAppSettings').appServicePlanName]",
      "appServiceNamePrefix": "[steps('webAppSettings').appServiceName]"
    }
  }
}
如需詳細資訊,請參閱開始使用 CreateUiDefinition。
封裝檔案
將兩個檔案新增至名為 app.zip 的封裝檔案。 這兩個檔案必須位於 .zip 檔案的根層級。 如果這些檔案在資料夾中,當建立受控應用程式定義時,您會收到錯誤,指出必要的檔案不存在。
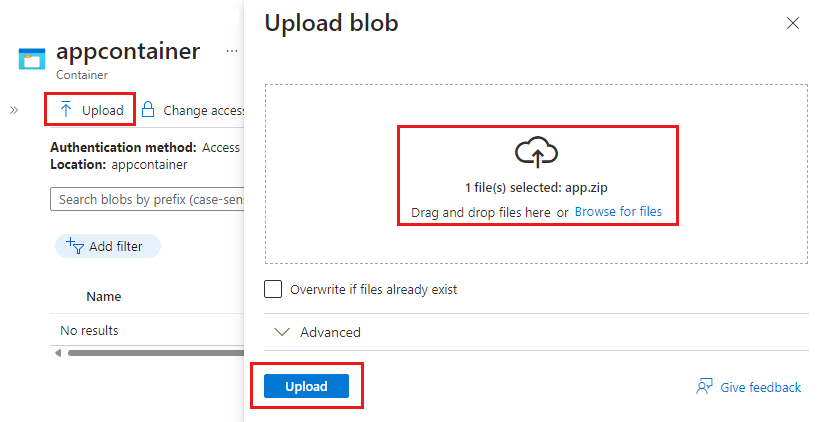
將 app.zip 上傳至 Azure 儲存體帳戶,以便在部署受控應用程式定義時使用。 儲存體帳戶名稱在整個 Azure 中必須是全域唯一的,長度必須是 3-24 個字元,且只有小寫字母和數字。 在命令中,以您唯一的儲存體帳戶名稱取代預留位置 <pkgstorageaccountname>,包括角括弧 (<>)。
在 Visual Studio Code 開啟新的 PowerShell 終端,並登入您的 Azure 訂用帳戶。
Connect-AzAccount
此命令會開啟您的預設瀏覽器,並提示您登入 Azure。 如需詳細資訊,請移至使用 Azure PowerShell 登入。
New-AzResourceGroup -Name packageStorageGroup -Location westus

$pkgstorageparms = @{
  ResourceGroupName = "packageStorageGroup"
  Name = "<pkgstorageaccountname>"
  Location = "westus"
  SkuName = "Standard_LRS"
  Kind = "StorageV2"
  MinimumTlsVersion = "TLS1_2"
  AllowBlobPublicAccess = $true
  AllowSharedKeyAccess = $false
}

$pkgstorageaccount = New-AzStorageAccount @pkgstorageparms
$pkgstorageparms 變數會使用 PowerShell splatting (部分機器翻譯) 來改善命令中所用參數值的可讀性,以建立新的儲存體帳戶。 其他使用多個參數值的 PowerShell 命令會使用 Splatting。
建立儲存體帳戶之後,請將角色指派儲存體 Blob 資料參與者新增至儲存體帳戶範圍。 指派對 Microsoft Entra 使用者帳戶的存取權限。 根據您在 Azure 中的存取層級而定,您可能需要管理員指派的其他權限。 如需詳細資訊,請參閱指派 Azure 角色以存取 Blob 資料 (部分機器翻譯) 和使用 Azure 入口網站指派 Azure 角色。
將該角色新增至儲存體帳戶之後,需要幾分鐘的時間才會在 Azure 中變成作用中。 然後,您便可以建立要建立容器和上傳檔案所需的內容。
$pkgstoragecontext = New-AzStorageContext -StorageAccountName $pkgstorageaccount.StorageAccountName -UseConnectedAccount

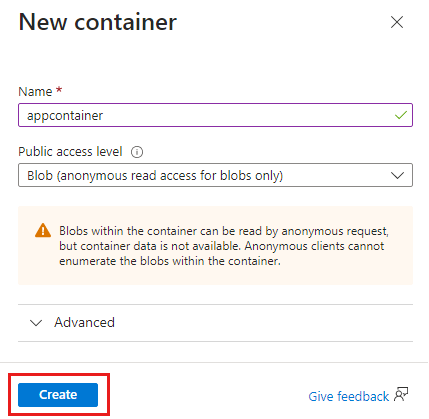
New-AzStorageContainer -Name appcontainer -Context $pkgstoragecontext -Permission blob

$blobparms = @{
  File = "app.zip"
  Container = "appcontainer"
  Blob = "app.zip"
  Context = $pkgstoragecontext
}

Set-AzStorageBlobContent @blobparms
建立受控應用程式定義
在本節中,您會從 Microsoft Entra ID 取得身分識別資訊、建立資源群組,以及部署受控應用程式定義。
取得群組識別碼和角色定義識別碼
下一個步驟是選取要代表客戶管理資源的使用者、安全性群組或應用程式。 此身分識別會根據指派的角色,取得受控資源群組的權限。 角色可以是任何內建的 Azure 角色,例如擁有者或參與者。
此範例使用安全性群組,而您的 Microsoft Entra 帳戶應該是群組的成員。 若要取得群組的物件識別碼,請使用群組名稱取代包括角括號 (<>) 的預留位置 <managedAppDemo>。 您部署受控應用程式定義時,將會使用此變數的值。
若要建立新的 Microsoft Entra 群組,請移至管理 Microsoft Entra 群組和群組成員資格。
$principalid=(Get-AzADGroup -DisplayName <managedAppDemo>).Id
接下來,取得您要為使用者、群組或應用程式授與存取權限的 Azure 內建角色之角色定義識別碼。 您部署受控應用程式定義時,將會使用此變數的值。
$roleid=(Get-AzRoleDefinition -Name Owner).Id
發佈受控應用程式定義
為您的受控應用程式定義建立資源群組。
New-AzResourceGroup -Name appDefinitionGroup -Location westus
blob 命令會建立變數來儲存封裝 .zip 檔案的 URL。 該變數會用於建立受控應用程式定義的命令中。
$blob = Get-AzStorageBlob -Container appcontainer -Blob app.zip -Context $pkgstoragecontext

$publishparms = @{
  Name = "sampleManagedApplication"
  Location = "westus"
  ResourceGroupName = "appDefinitionGroup"
  LockLevel = "ReadOnly"
  DisplayName = "Sample managed application"
  Description = "Sample managed application that deploys web resources"
  Authorization = "${principalid}:$roleid"
  PackageFileUri = $blob.ICloudBlob.StorageUri.PrimaryUri.AbsoluteUri
}

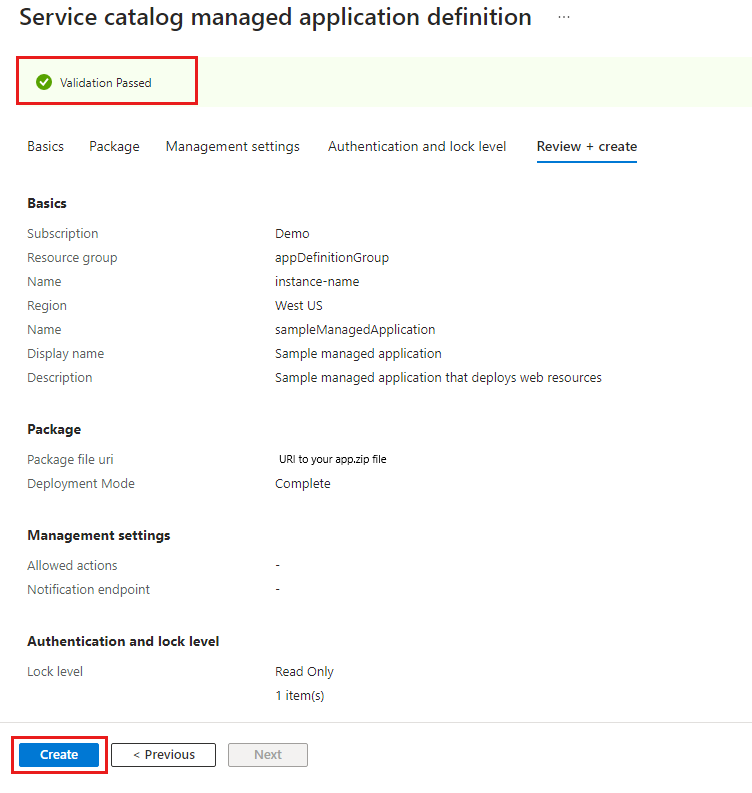
New-AzManagedApplicationDefinition @publishparms
命令完成時,您的資源群組中會有受控應用程式定義。
上述範例中使用的部分參數:
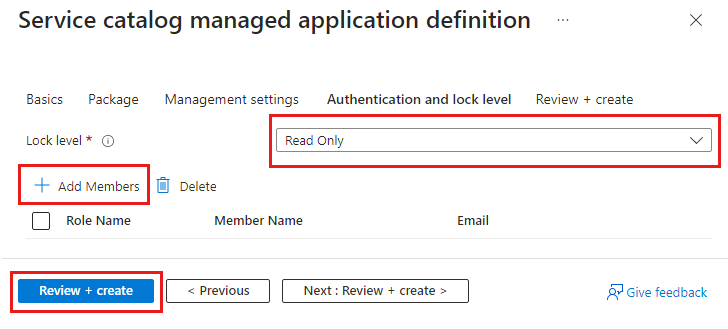
ResourceGroupName:資源群組的名稱,其中會建立受控應用程式定義。LockLevel:受控資源群組上的lockLevel可避免客戶在此資源群組執行不當作業。 目前唯一支援的鎖定等級是ReadOnly。ReadOnly規定客戶只能讀取受控資源群組中存在的資源。 發行者身分識別若獲得授與受控資源群組的存取權限,則不受鎖定等級的限制。Authorization:描述用來授與權限給受控資源群組的主體識別碼及角色定義識別碼。"${principalid}:$roleid"或者您可以針對每個變數"${principalid}:${roleid}"使用大括號。- 使用逗號分隔多個值:
"${principalid1}:$roleid1", "${principalid2}:$roleid2"。
PackageFileUri:包含必要檔案的 .zip 封裝檔案位置。
確定使用者可以看到您的定義
您可以存取受控應用程式定義,但您想確保您組織中的其他使用者可以存取它。 至少在定義上將讀者角色授與給他們。 他們可能已從訂用帳戶或資源群組繼承此存取層級。 若要查看可存取定義和新增使用者或群組的人員,請參閱使用 Azure 入口網站指派 Azure 角色。
清除資源
如果您要部署定義,請繼續閱讀與文章相關的後續步驟一節,以瞭解如何部署定義。
如果您已完成受控應用程式定義,就可刪除您所建立名為 packageStorageGroup 和 appDefinitionGroup 的資源群組。
命令會提示您確認是否移除資源群組。
Remove-AzResourceGroup -Name packageStorageGroup

Remove-AzResourceGroup -Name appDefinitionGroup
下一步
您已發佈受控應用程式定義。 下一個步驟是了解如何部署該定義的執行個體。
![Azure 入口網站首頁的螢幕擷取畫面,其中已醒目提示 [建立資源]。](media/publish-service-catalog-app/create-resource.png)
![[儲存體帳戶] 頁面的螢幕擷取畫面,其中已醒目提示 [建立] 按鈕。](media/publish-service-catalog-app/create-storage-account.png)
![用來建立儲存體帳戶的 Azure 表單上 [基本資料] 索引標籤的螢幕擷取畫面。](media/publish-service-catalog-app/create-storage-account-basics.png)


![ZIP 檔案 URL 的螢幕擷取畫面,其中已醒目提示 [複製] 按鈕。](media/publish-service-catalog-app/copy-file-url.png)
![[服務類別目錄受控應用程式定義] 頁面的螢幕擷取畫面,其中已醒目提示 [建立] 按鈕。](media/publish-service-catalog-app/create-service-catalog-definition.png)
![用來建立服務類別目錄定義之表單上 [基本資料] 索引標籤的螢幕擷取畫面。](media/publish-service-catalog-app/create-service-catalog-definition-basics.png)

