使用異動資料擷取資源,將已變更的資料從 Azure Data Lake Storage Gen2 擷取至 Azure SQL Database
適用於: Azure Data Factory
  Azure Synapse Analytics
提示
試用 Microsoft Fabric 中的 Data Factory,這是適用於企業的全方位分析解決方案。 Microsoft Fabric 涵蓋從資料移動到資料科學、即時分析、商業智慧和報告的所有項目。 了解如何免費開始新的試用!
在本文中,您會使用 Azure Data Factory 使用者介面來建立異動資料擷取 (CDC) 資源。 資源會從 Azure Data Lake Storage Gen2 來源獲取已變更的資料,並將其即時新增至 Azure SQL Database。
在本文中,您將學會如何:
- 建立 CDC 資源。
- 監視 CDC 活動。
您可以修改並展開本文中的設定模式。
必要條件
開始本文中的程序前,請確定您具備這些資源:
- Azure 訂用帳戶。 如果您沒有 Azure 訂用帳戶,請建立免費的 Azure 帳戶。
- SQL 資料庫。 您會使用 Azure SQL Database 作爲來源資料存放區。 如果您沒有 SQL 資料庫,請在 Azure 入口網站中建立一個。
- 「儲存體帳戶」。 您可以使用儲存在 Azure Data Lake Storage Gen2 中的 Delta Lake 作為目標資料存放區。 如果您沒有儲存體帳戶,請參閱 建立儲存體帳戶,以按照步驟來建立帳戶。
建立 CDC 成品
移至資料處理站中的 [建立者] 窗格。 在 [Pipelines] 下方,隨即出現名為 [異動資料擷取 (預覽)] 的新最上層成品。
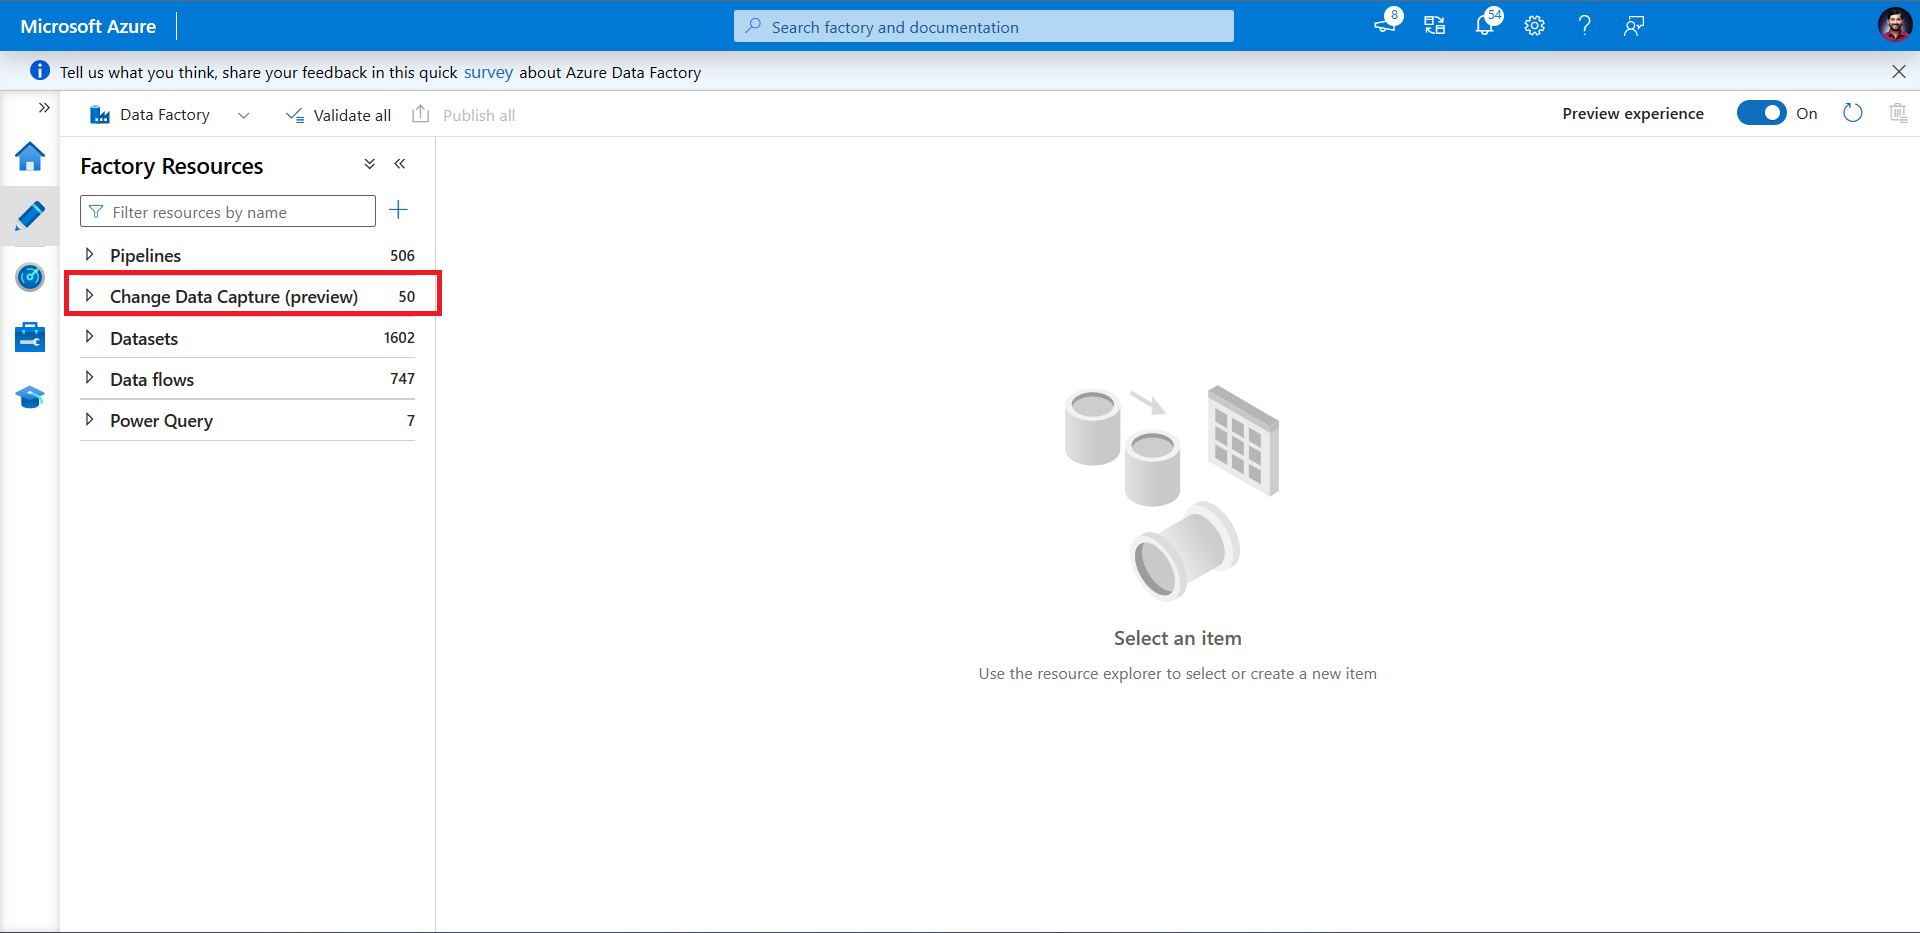
將滑鼠停留在 [異動資料擷取 (預覽)] 上方,直到出現三個點為止。 然後選取 [異動資料擷取 (預覽) 動作]。

選取 [新 CDC (預覽)]。 此步驟會開啟飛出視窗以開始引導式流程。

系統會提示您為 CDC 資源命名。 根據預設,名稱為「adfcdc」,其數字會以 1 遞增。 您可以使用您選擇的名稱取代此預設名稱。
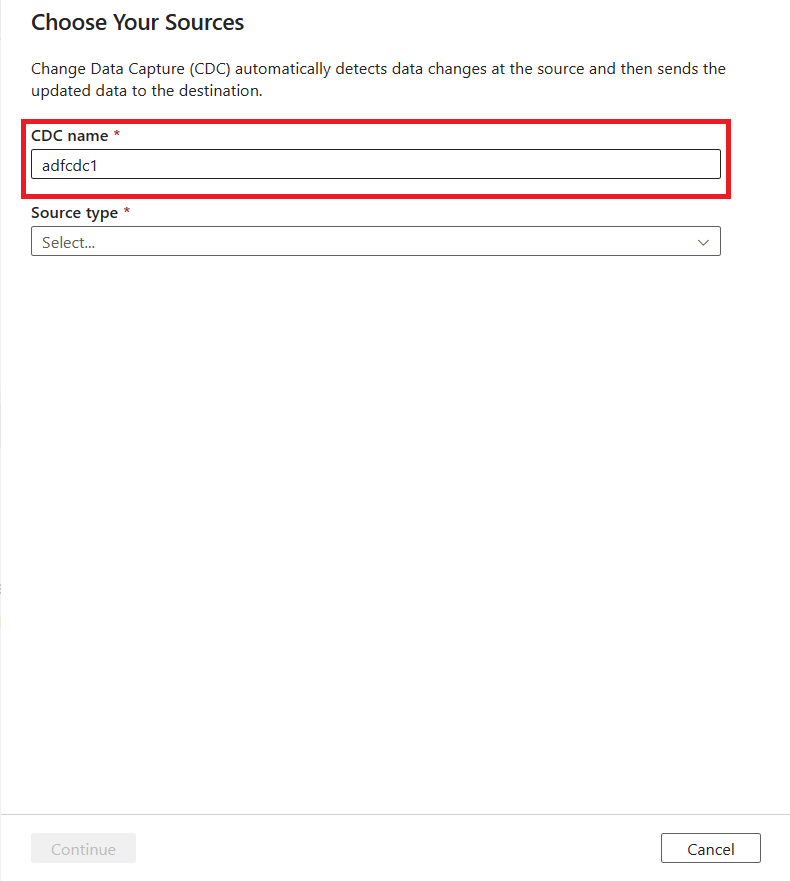
使用下拉式清單來選擇您的資料來源。 針對本文,請選取 [DelimitedText]。
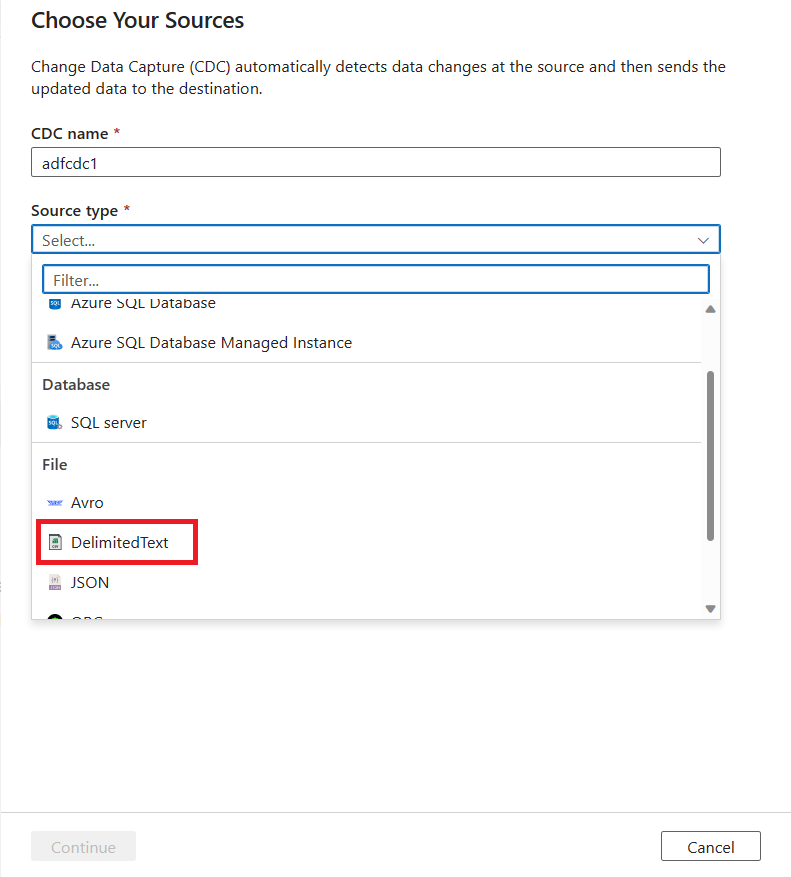
系統會提示您選取連結的服務。 建立新的連結服務或選取現有服務。
使用 [來源設定] 區域,選擇性地設定進階來源組態,包括資料行和資料列分隔符號。
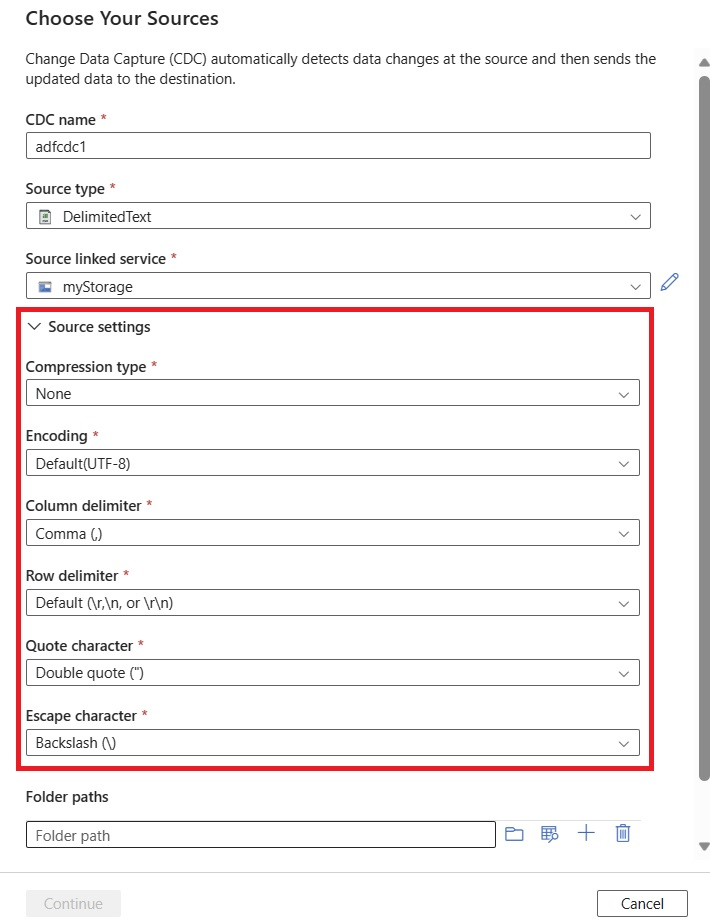
如果您未手動編輯這些來源設定,則會將其設定為預設值。
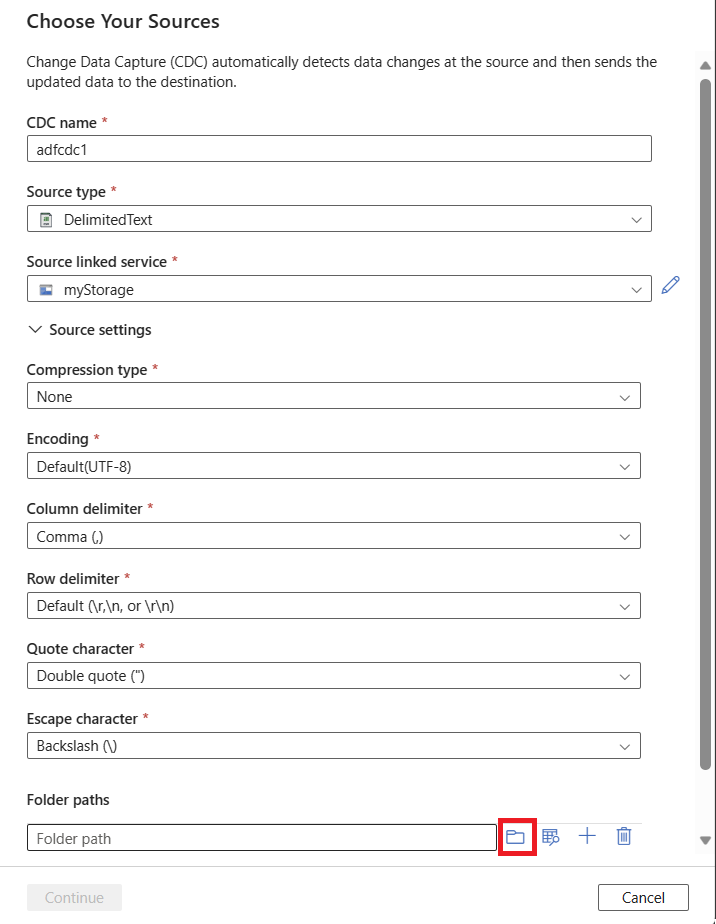
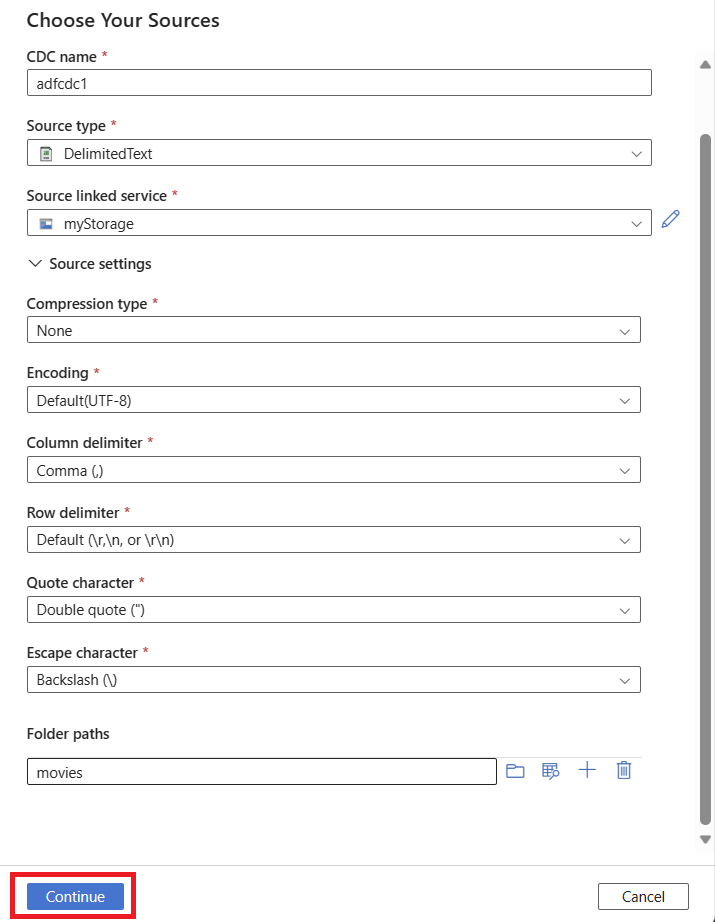
使用 [瀏覽] 按鈕來選取來源資料資料夾。
選取資料夾路徑之後,請選取 [繼續] 來設定您的資料目標。
您可選擇使用加號 (+) 按鈕來新增多個來源資料夾。 其他來源也必須使用您已選取的相同連結服務。
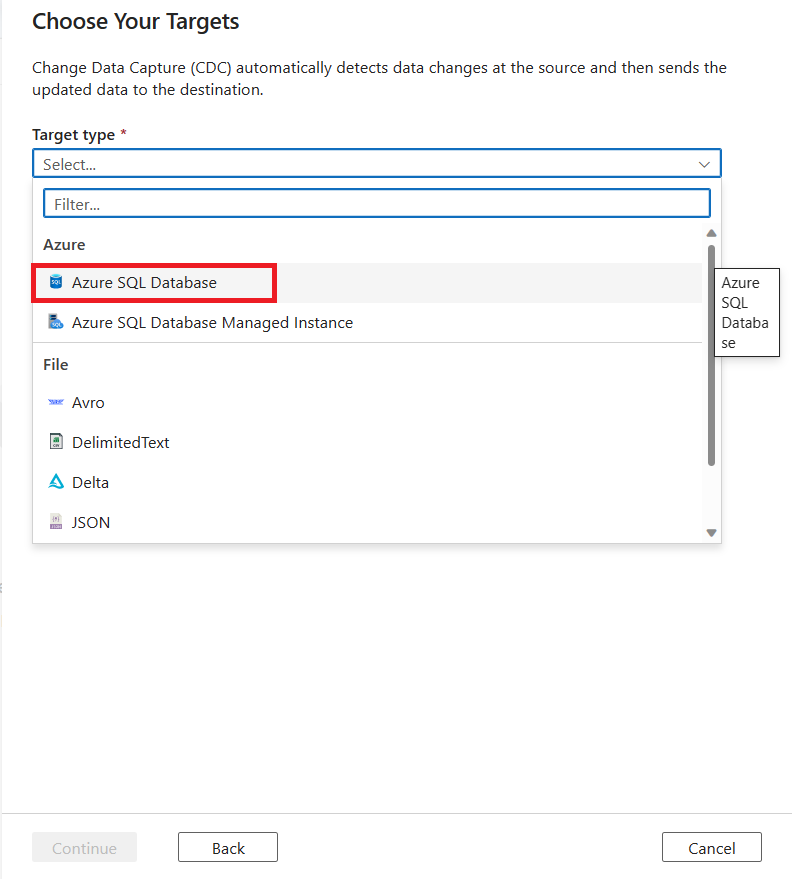
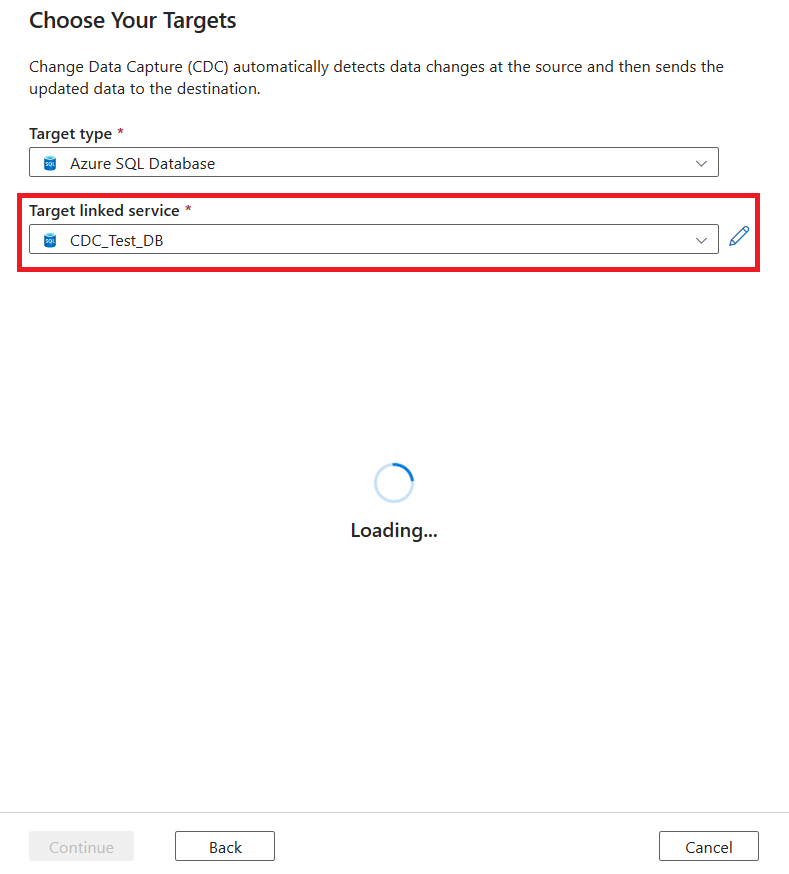
使用下拉式清單選取 [目標類型] 值。 針對本文,請選取 [Azure SQL Database]。
系統會提示您選取連結的服務。 建立新的連結服務或選取現有服務。
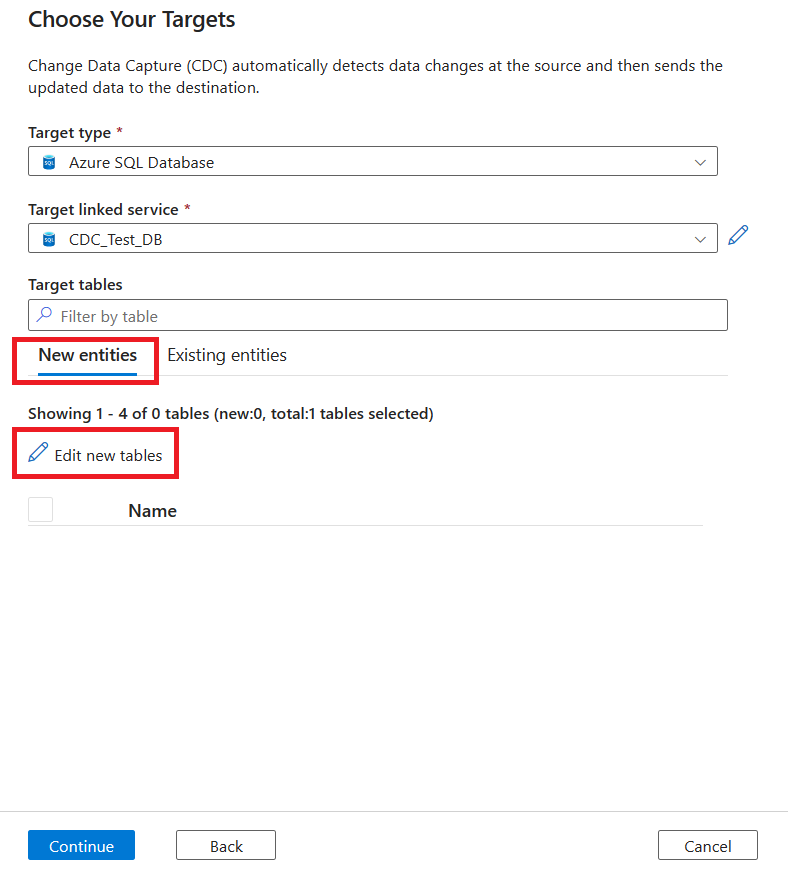
針對 [目標資料表],您可以建立新的目標資料表或選取現有的資料表:
若要建立目標資料表,請選取 [新增實體] 索引標籤,然後選取 [編輯新資料表]。
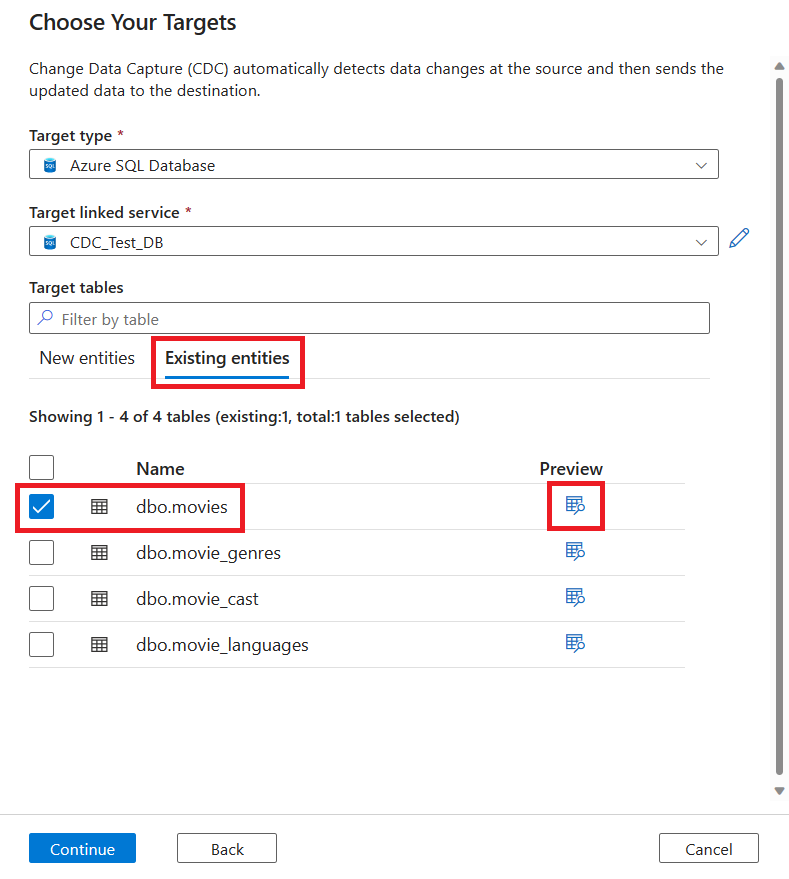
若要選取現有的資料表,請選取 [現有實體] 索引標籤,然後使用核取方塊來選擇資料表。 使用 [預覽] 按鈕來檢視資料表資料。
如果目標上的現有資料表具有相符名稱,則預設會在 [現有實體] 下選取。 如果沒有,則會在 [新增實體] 底下建立具有相符名稱的新資料表。 此外,您可以使用 [編輯新資料表] 按鈕來編輯新的資料表。
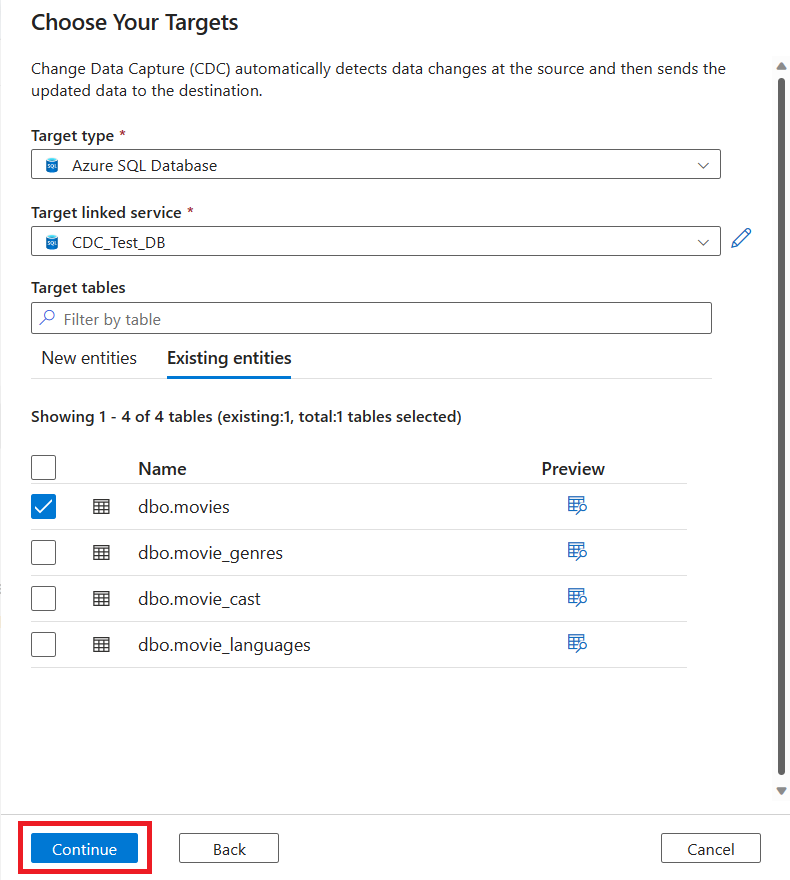
您可使用核取方塊,從 SQL 資料庫選擇多個目標資料表。 選擇目標資料表之後,請選取 [繼續]。
擷取異動資料的新索引標籤隨即出現。 此索引標籤是 CDC Studio,您可以在其中設定新的資源。
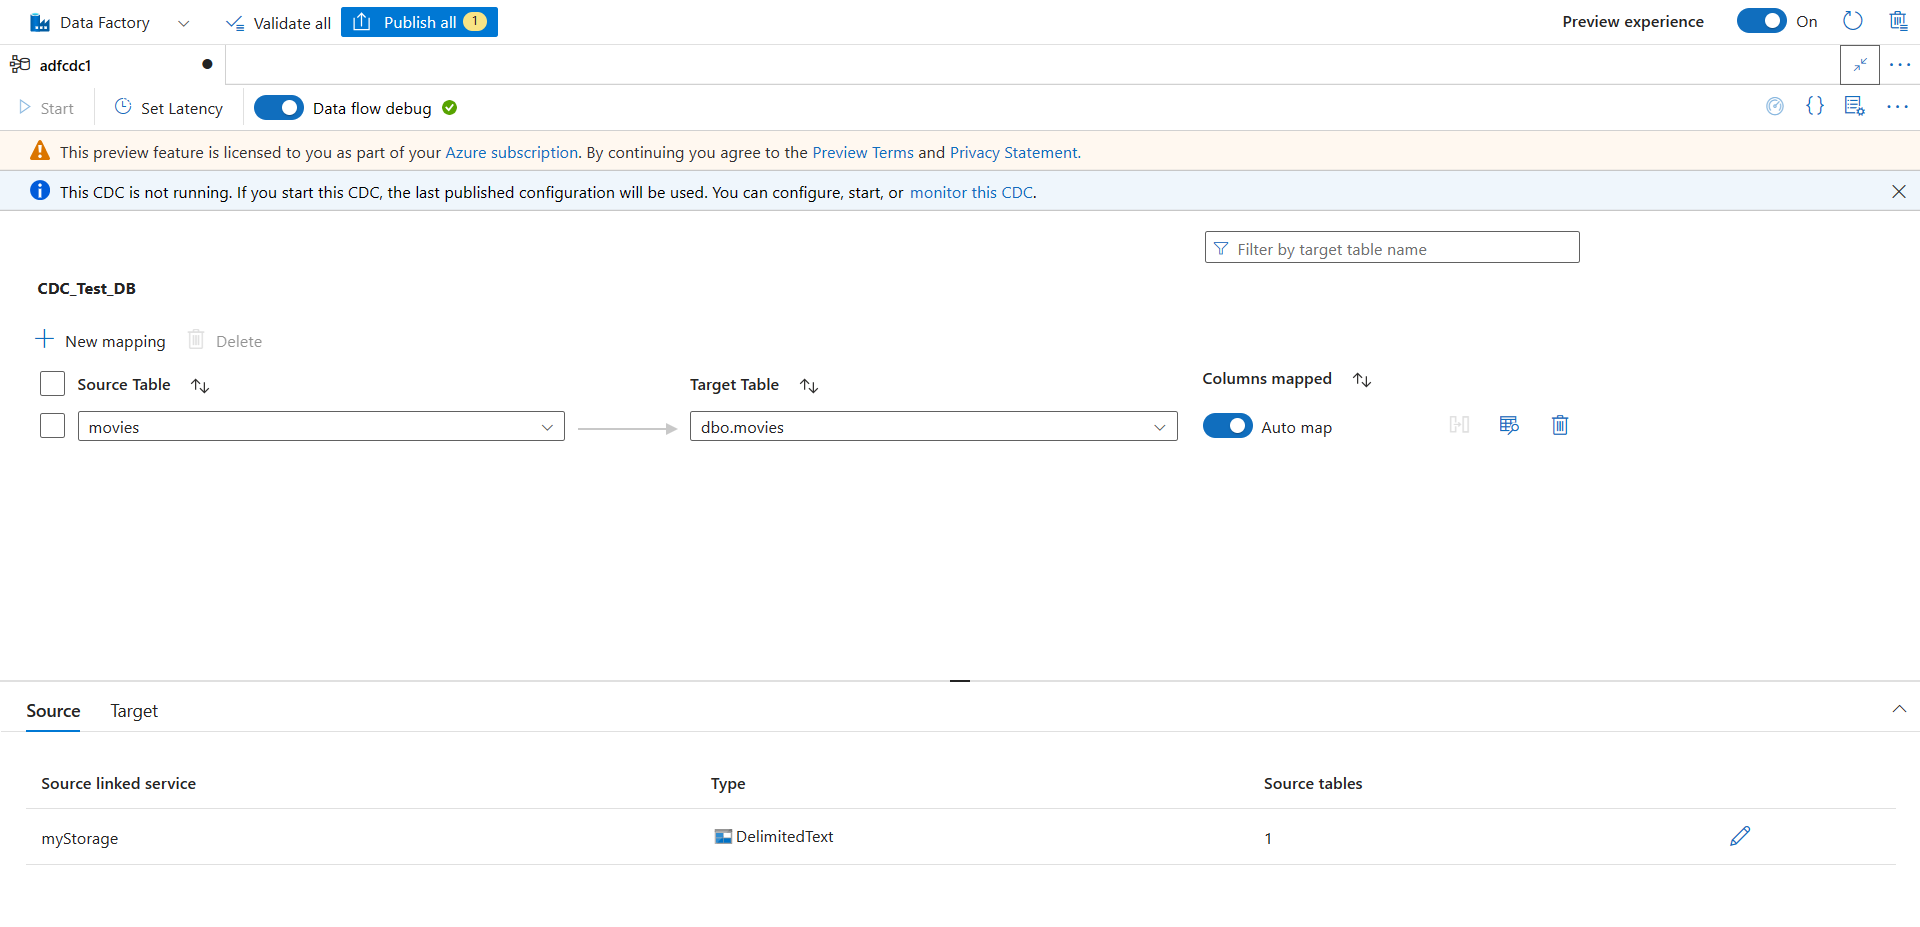
系統會自動為您建立新對應。 您可使用下拉式清單,更新您的對應的 [來源資料表] 和 [目標資料表] 選取項目。

選取資料表之後,預設會開啟 [自動對應] 切換按鈕來對應其資料行。 [自動對應] 在接收器中會依名稱自動對應資料行、在來源結構描述演進時挑選新的資料行變更,並使此資訊流向支援的接收類型。
如果您想要使用 [自動對應],而不變更任何資料行對應,請直接移至步驟 18。

如果您想要啟用資料行對應,請選取對應,然後關閉 [自動對應] 切換按鈕。 然後,選取 [資料行對應] 按鈕來檢視對應。
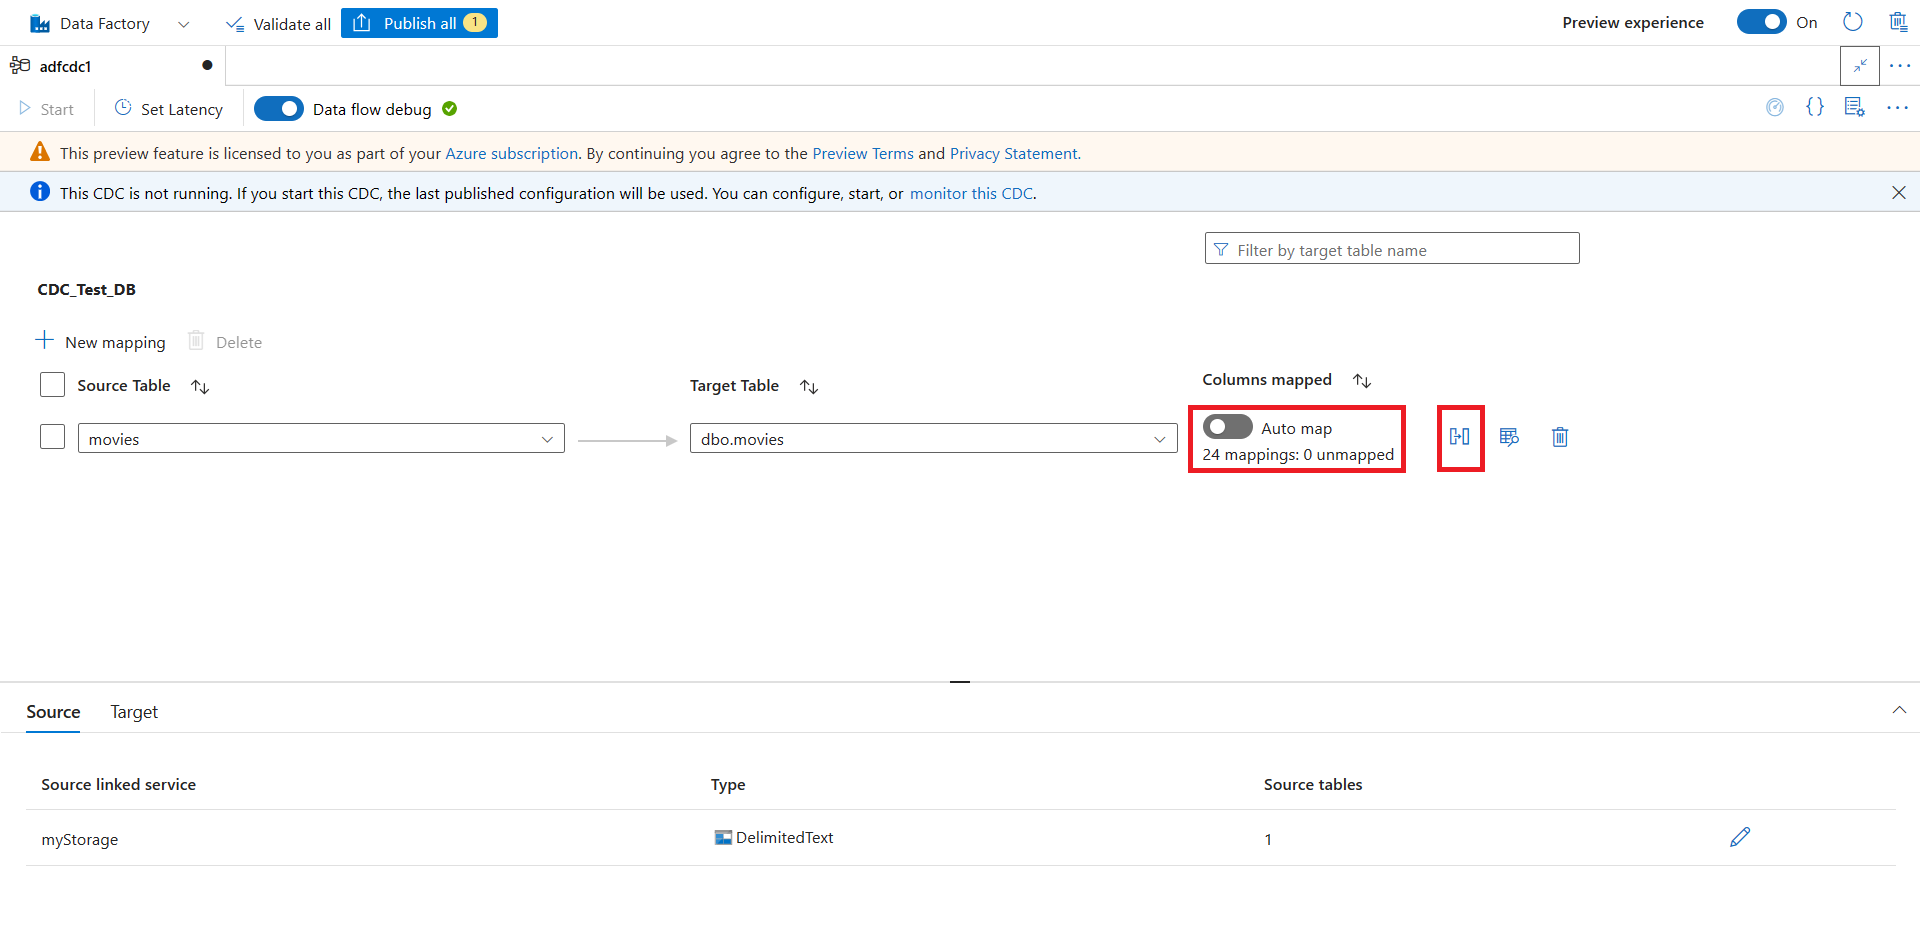
您可以開啟 [自動對應] 切換按鈕,隨時切換回自動對應。
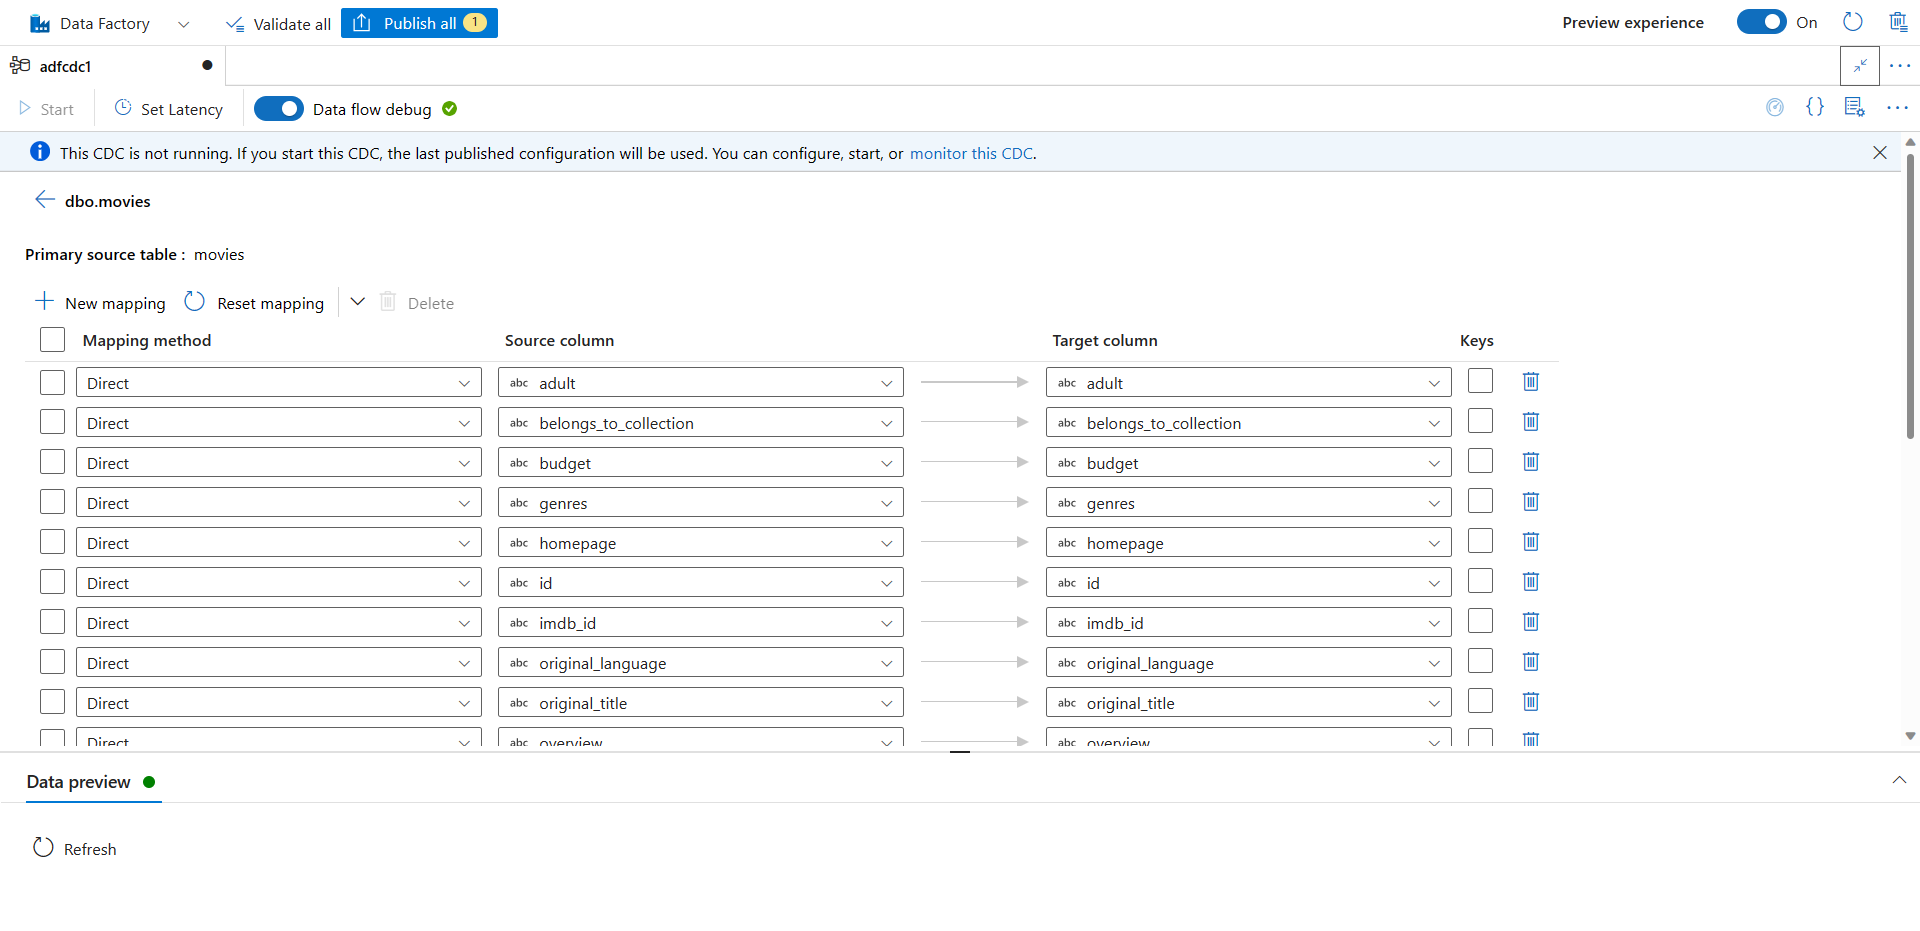
檢視資料行對應。 使用下拉式清單來編輯 [對應方法]、[來源資料行] 及 [目標資料行] 的資料行對應。
您可以從這個頁面執行下列動作:
- 使用 [新增對應] 按鈕,新增更多資料行對應。 使用下拉式清單來針對 [對應方法]、[來源資料行] 及 [目標資料行] 進行選取。
- 如果您想要追蹤支援的接收類型的刪除作業,請選取 [索引鍵] 資料行。
- 選取 [資料預覽] 底下的 [重新整理] 按鈕,以將資料位於目標的外觀視覺化。

當您的對應完成時,請選取箭號按鈕以返回主要 CDC 畫布。

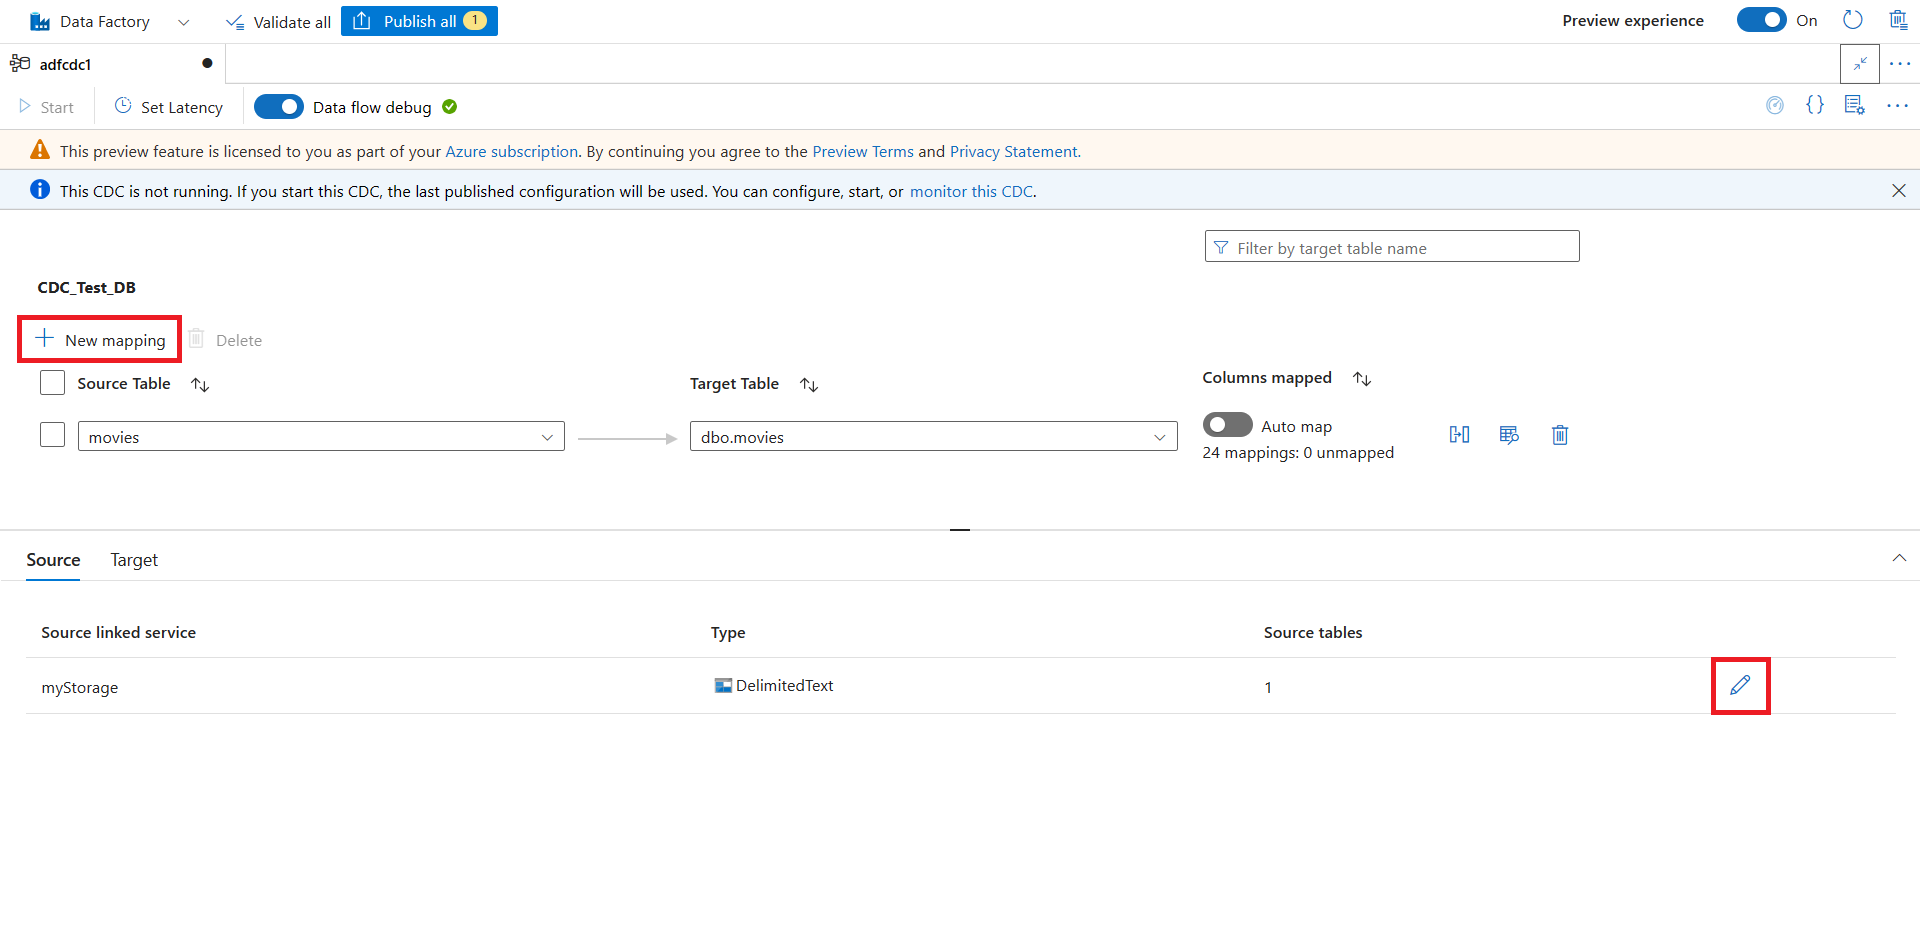
您可以在一個 CDC 成品中新增更多來源對目標的對應。 使用 [編輯] 按鈕來新增更多資料來源和目標。 然後,選取 [新增對應],並使用下拉式清單來設定新的來源和目標。 您可以個別開啟或關閉每項對應的 [自動對應]。
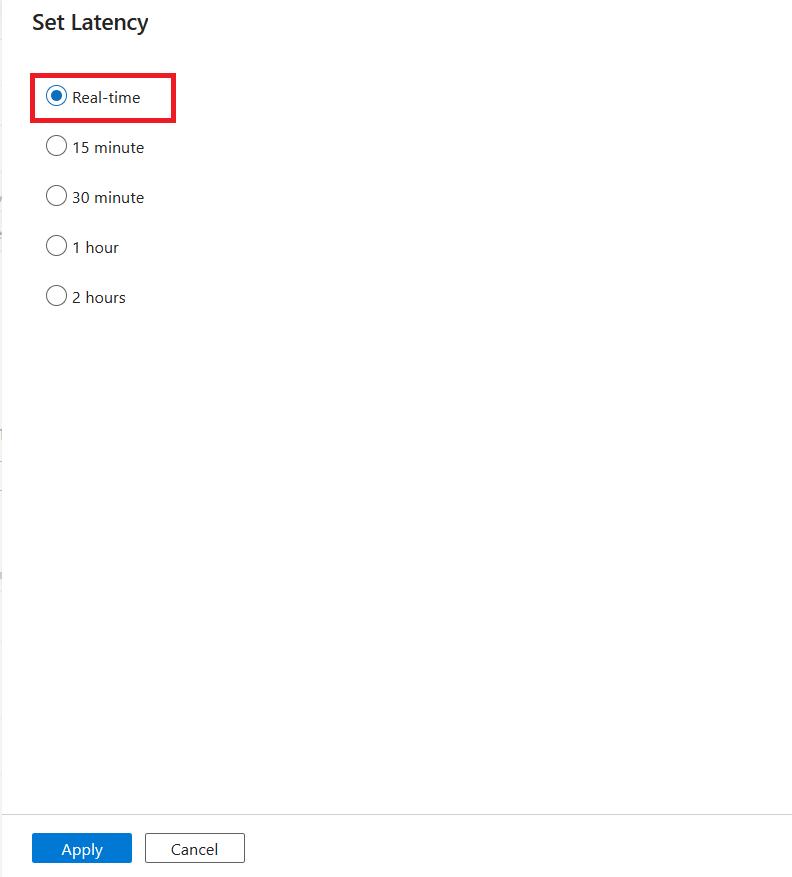
對應完成之後,請使用 [設定延遲] 按鈕來設定 CDC 延遲。

選取 CDC 的延遲,然後選取 [套用] 以進行變更。
根據預設,延遲設定為 15 分鐘。 本文中的範例會使用 [即時] 選項來取得延遲。 即時延遲會以少於 1 分鐘的間隔,不斷取得來源資料的變更。
針對其他延遲 (例如,如果您選取 15 分鐘),您的異動資料擷取會處理來源資料,並獲取自上次處理時間以來的任何變更的資料。
注意
如果支援延伸至串流資料整合 (Azure 事件中樞和 Kafka 資料來源),則延遲預設會設定為 [即時]。
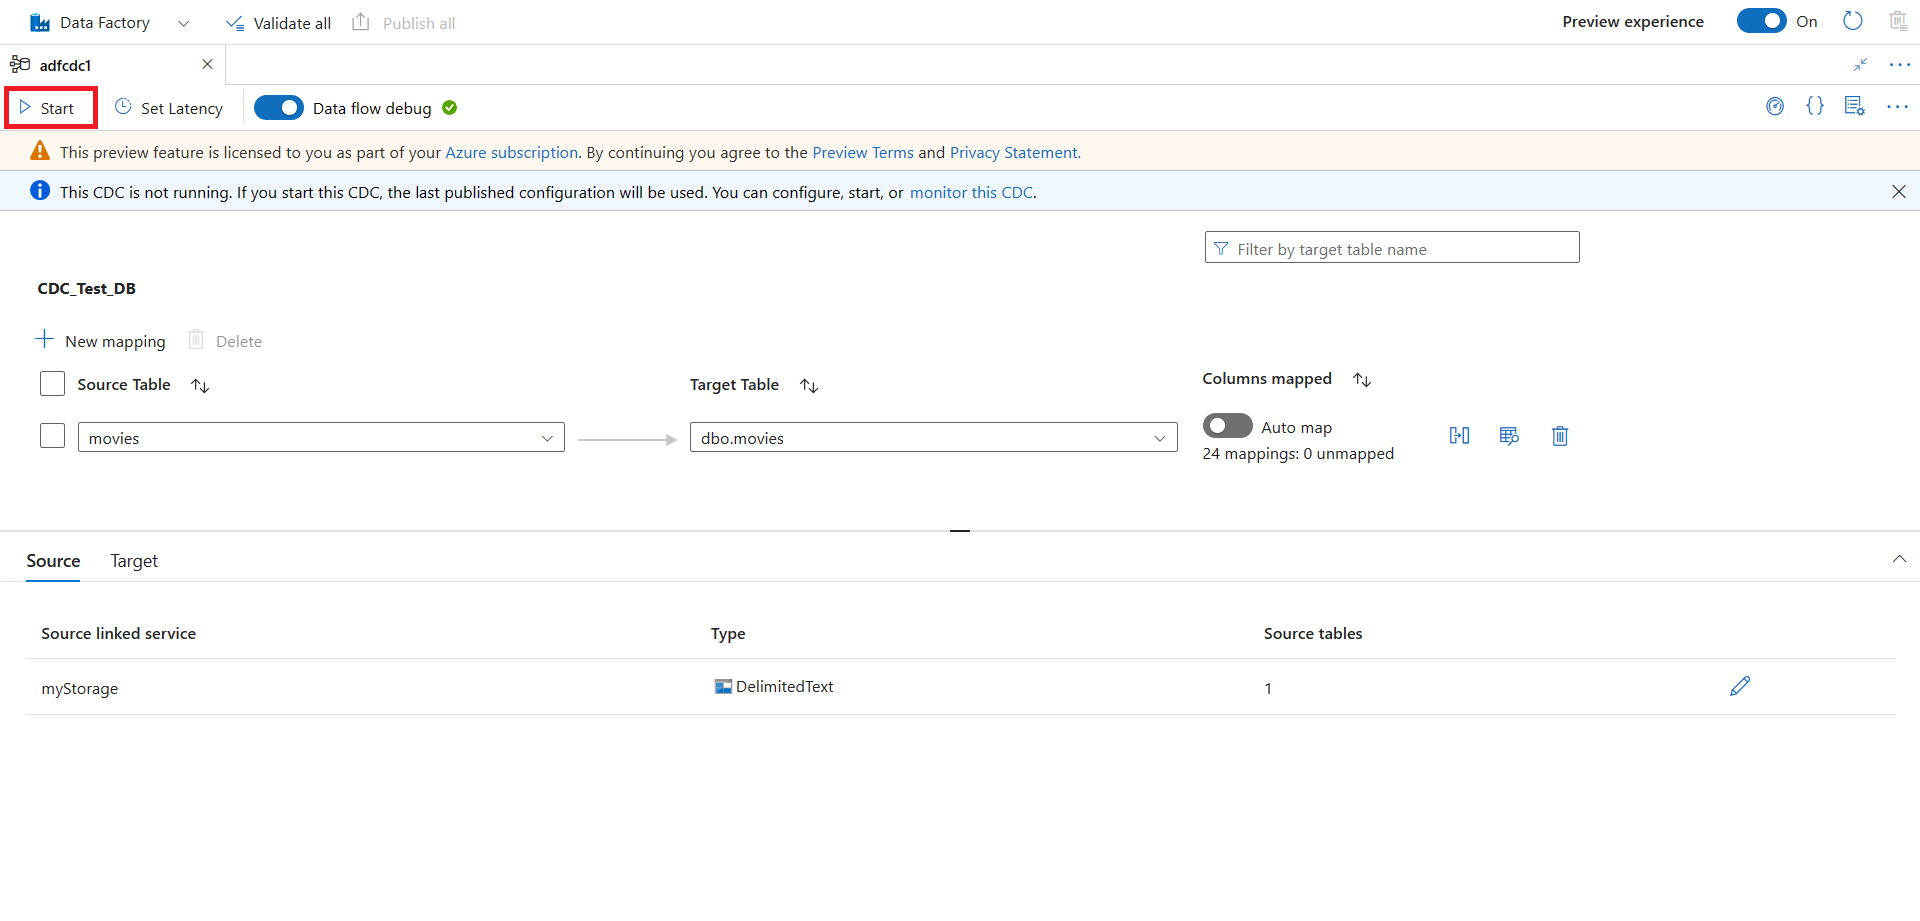
設定 CDC 之後,請選取 [全部發佈] 以發佈變更。

注意
如果您不發佈變更,您將無法啟動 CDC 資源。 下一個步驟中將無法使用 [開始] 按鈕。
選取 [開始] 以開始執行異動資料擷取。


監視異動資料擷取
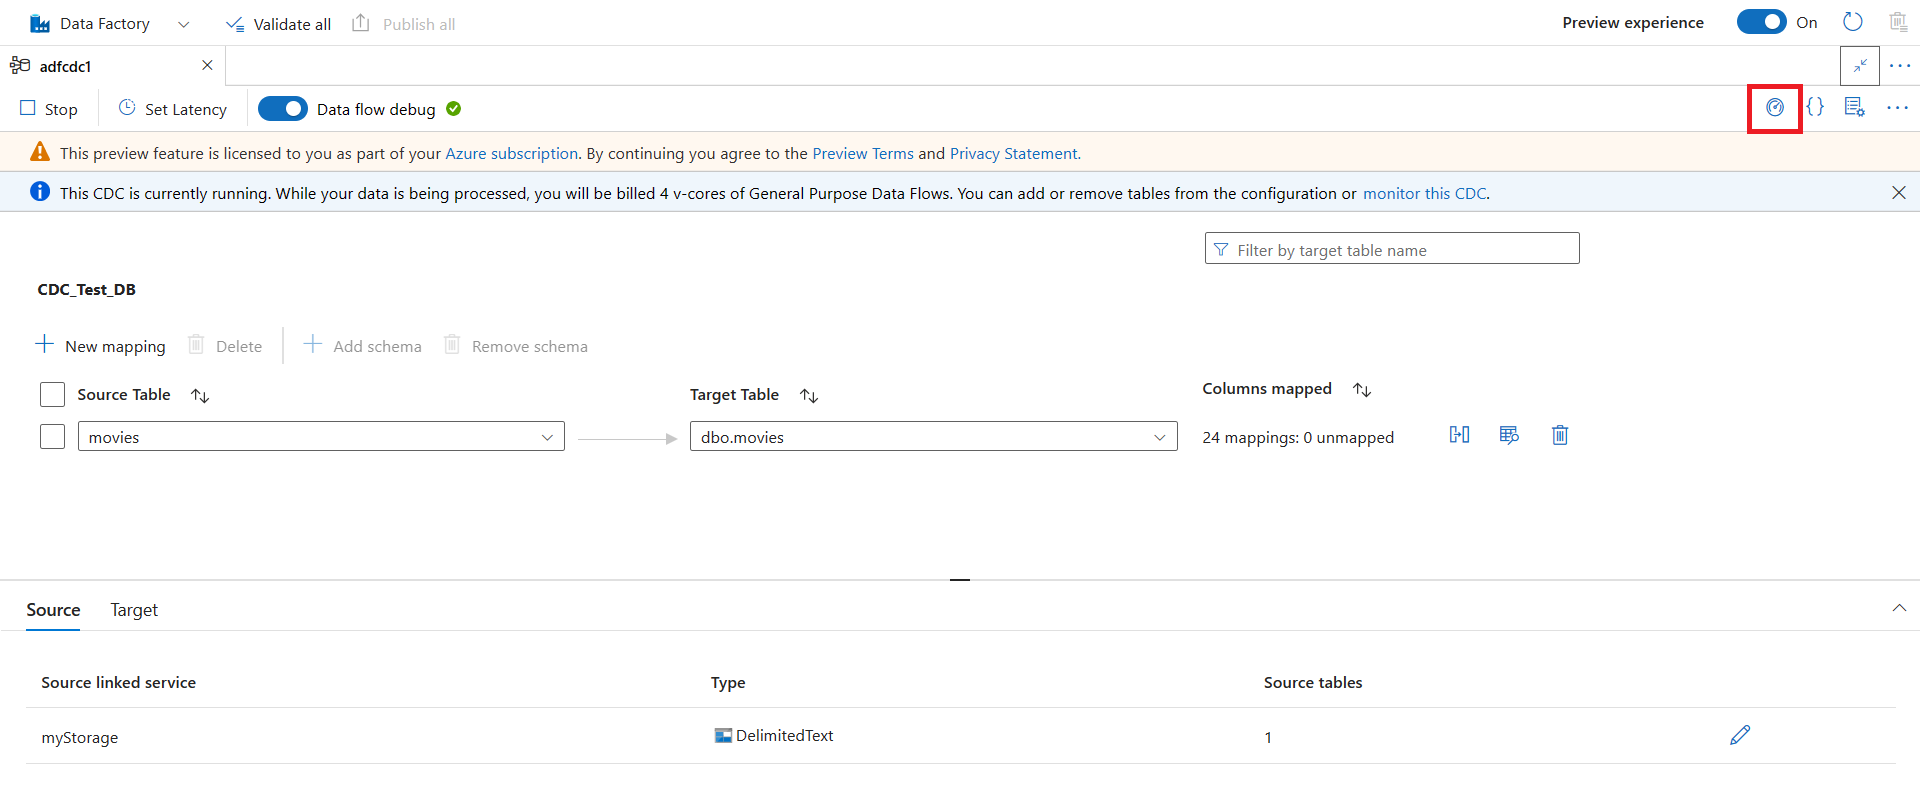
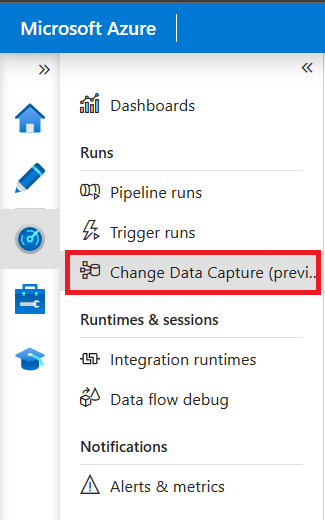
使用下列其中一種方法來開啟 [監視] 窗格:
在 Azure 入口網站中選取 [監視]。

從 CDC 設計工具選取監視圖示。
選取 [異動資料擷取 (預覽)] 以檢視 CDC 資源。
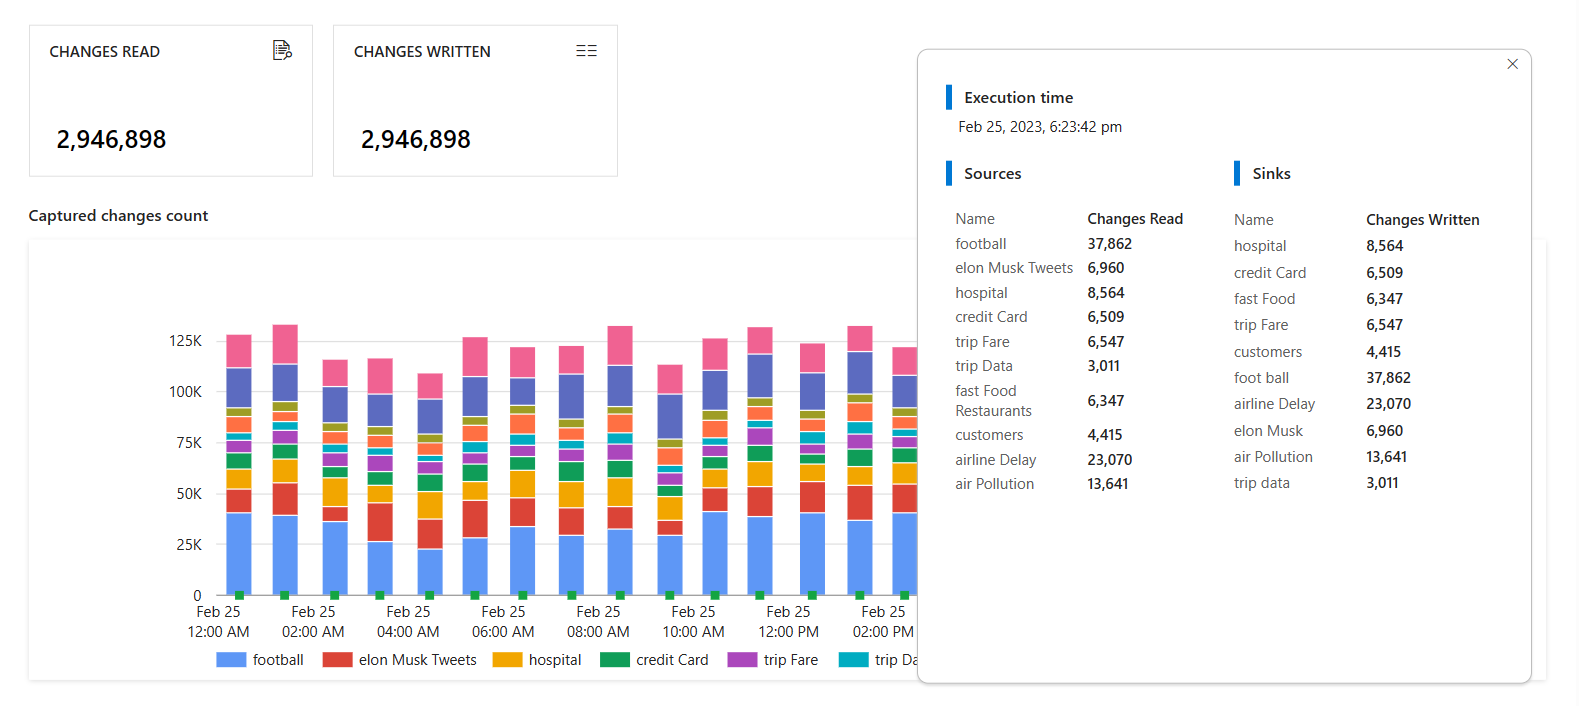
[異動資料擷取] 窗格會顯示異動資料擷取的 [來源]、[目標]、[狀態] 及 [上次處理] 資訊。

選取 CDC 的名稱,以查看更多詳細資料。 您可查看讀取和寫入的變更次數(插入、更新或刪除),以及其他診斷資訊。
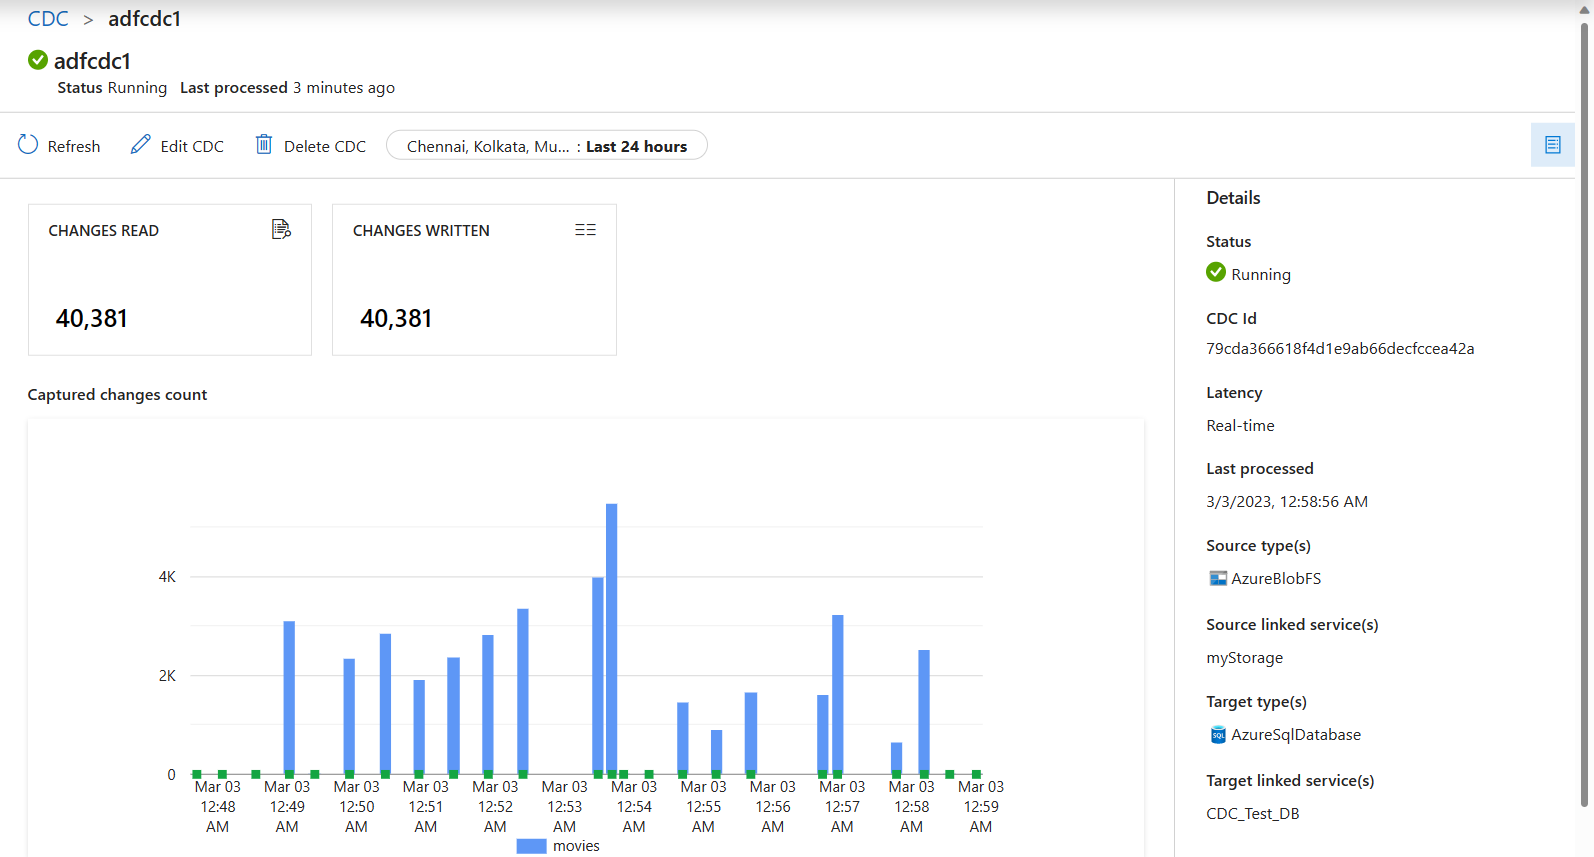
如果您在異動資料擷取中設定多個對應,則每個對應都會顯示為不同的色彩。 選取長條以查看每個對應的特定詳細資料,或使用窗格底部的診斷資訊。


相關內容
意見反應
即將登場:在 2024 年,我們將逐步淘汰 GitHub 問題作為內容的意見反應機制,並將它取代為新的意見反應系統。 如需詳細資訊,請參閱:https://aka.ms/ContentUserFeedback。
提交並檢視相關的意見反應