適用於: Azure Data Factory
  Azure Synapse Analytics
秘訣
Data Factory in Microsoft Fabric 是下一代的 Azure Data Factory,擁有更簡單的架構、內建 AI 及新功能。 如果你是資料整合新手,建議先從 Fabric Data Factory 開始。 現有的 ADF 工作負載可升級至 Fabric,以存取資料科學、即時分析與報告等新能力。
這個快速入門說明如何使用 .NET SDK 建立 Azure Data Factory。 你在這個資料工廠建立的管線會將資料從 Azure Blob 儲存體中的一個資料夾複製到另一個資料夾。 關於如何使用 Azure Data Factory transform 資料的教學,請參見 Tutorial: Transform data with Spark。
必要條件
Azure 訂閱
如果你沒有Azure訂閱,請在開始前建立一個free帳號。
Azure 角色
要建立資料工廠實例,你用來登入Azure的使用者帳號必須是contributor或 owner 角色的成員,或是Azure訂閱的 administrator。 要查看訂閱中擁有的權限,請前往 Azure 入口網站,在右上角選擇你的使用者名稱,選擇「...」圖示以獲得更多選項,然後選擇我的權限。 如果您有多個訂用帳戶的存取權,請選取適當的訂用帳戶。
若要建立及管理 Data factory 的子資源 (包括資料集、連結服務、管線、觸發程序和整合執行階段),必須要符合下列需求:
- 要在 Azure 入口網站中建立和管理子資源,您必須至少在資源群組層級屬於 Data Factory 貢獻者 角色或更高。
- 若要使用 PowerShell 或 SDK 來建立及管理子資源,具備資源層級或更高層級的參與者角色即已足夠。
如需將使用者新增至角色的範例指示,請參閱新增角色一文。
如需詳細資訊,請參閱下列文章:
Azure 儲存帳戶
在這個快速入門中,你會使用一個通用的 Azure 儲存帳戶(尤其是 Blob 存儲空間)作為 source 和 destination 的資料儲存庫。 如果你沒有通用Azure Storage帳號,請參考 建立儲存帳號來建立一個。
取得儲存體帳戶名稱
你需要你的 Azure Storage 帳號名稱來進行這個快速入門。 下列程序說明用以取得儲存體帳戶名稱的步驟:
- 在網頁瀏覽器中,請前往 Azure 入口網站,並以您的Azure用戶名和密碼登入。
- 從Azure入口網站選單中,選擇 所有服務,然後選擇 Storage>Storage accounts。 您也可以從任何頁面搜尋並選取儲存體帳戶。
- 在 [儲存體帳戶] 頁面中,篩選您的儲存體帳戶 (如有需要),然後選取您的儲存體帳戶。
您也可以從任何頁面搜尋並選取儲存體帳戶。
建立 Blob 容器
在這個章節中,你會在 Azure Blob 儲存中建立一個名為 adftutorial 的 blob 容器。
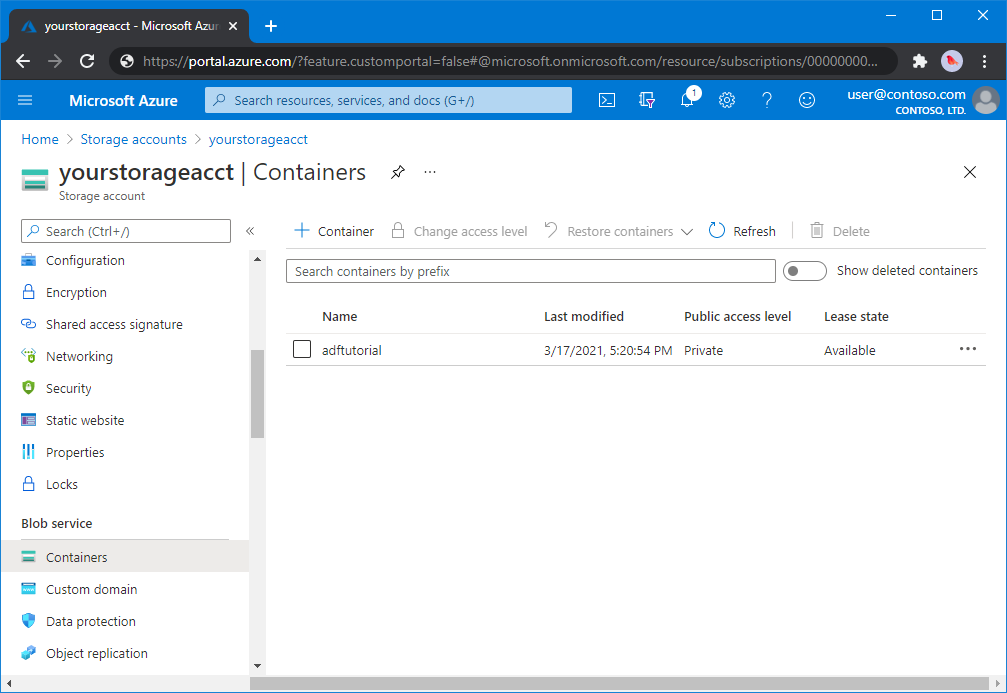
從 [儲存體帳戶] 頁面中,選取 [概觀]>[容器]。
在[帳戶名稱] <> - [容器] 頁面的工具列上,選取 [容器]。
在 [新增容器] 對話方塊中,輸入 adftutorial 作為名稱,然後選取 [確定]。 [帳戶名稱] <> [容器] - 頁面已更新,以在容器清單中納入 adftutorial。
新增 Blob 容器的輸入資料夾與檔案
在此節中,您會在您建立的容器中建立名為 input 的資料夾,然後將範例檔案上傳到 input 資料夾。 在您開始之前,請開啟文字編輯器 (例如 [記事本]) 並使用下列內容建立名為 emp.txt 的檔案:
John, Doe
Jane, Doe
將該檔案儲存在 C:\ADFv2QuickStartPSH 資料夾中。 (如果該資料夾還不存在,請自行建立。)然後回到 Azure 入口網站,並依照以下步驟操作:
在剛才離開的<帳戶名稱> - 容器頁面中,從更新後的容器清單裡選取 adftutorial。
- 如果你關閉視窗或進入其他頁面,請再次登入 Azure 入口。
- 從Azure入口網站選單中,選擇 所有服務,然後選擇 Storage>Storage accounts。 您也可以從任何頁面搜尋並選取儲存體帳戶。
- 選取您的儲存體帳戶,然後選取 容器>adftutorial。
在 [adftutorial] 容器頁面的工具列上,選取 [上傳]。
在 [上傳 Blob] 頁面上,選取 [檔案] 方塊,然後瀏覽並選取 emp.txt 檔。
展開 進階 標題。 現在畫面會顯示該頁面,如下所示:
![選取 [進階] 連結](includes/media/data-factory-quickstart-prerequisites/upload-blob-advanced.png)
在 [上傳至資料夾] 方塊中,輸入 input。
選取上傳按鈕。 您應該會在清單中看到 emp.txt 檔案以及上傳的狀態。
選取「關閉」 圖示(X)以關閉「上傳 Blob」 頁面。
保持 [adftutorial] 容器頁面開啟。 您可以在快速入門結尾使用它來驗證輸出。
Visual Studio
本文的攻略使用 Visual Studio 2019。 Visual Studio 2013、2015 或 2017 的操作程序略有不同。
在 Microsoft Entra ID 中建立應用程式
請參閱如何:使用入口網站建立可存取資源的 Microsoft Entra 應用程式和服務主體中的章節,依照指示來完成以下任務:
- 在 Create a Microsoft Entra application,建立一個代表你本教學中.NET應用程式的應用程式。 針對登入 URL,您可以提供虛擬 URL,如文章中所示 (
https://contoso.org/exampleapp)。 - 在取得值以便登入中,取得應用程式識別碼和租用戶識別碼,並記下這些值以稍後在本教學課程中使用。
- 在憑證和祕密中,取得驗證金鑰,並記下此值以稍後在本教學課程中使用。
- 在指派角色給應用程式中,將應用程式指派給訂用帳戶層級的參與者角色,讓應用程式可以在訂用帳戶中建立資料處理站。
建立一個 Visual Studio 專案
接著,在 Visual Studio 建立一個 C# .NET 控制台應用程式:
- 啟動 Visual Studio。
- 在開始視窗中,選擇 建立新專案>Console App (.NET Framework)。 必須是 .NET 版本 4.5.2 或以上。
- 在 Project name 中輸入 ADFv2QuickStart。
- 選取 [建立] 以建立專案。
安裝 NuGet 套件
選擇 Tools>NuGet Package Manager>Package Manager Console。
在 Package Manager Console 面板中,執行以下指令來安裝套件。 欲了解更多資訊,請參閱Azure。ResourceManager.DataFactory NuGet package.
Install-Package Azure.ResourceManager.DataFactory -IncludePrerelease
Install-Package Azure.Identity
建立資料處理站
開啟 Program.cs 並包含下列陳述式,以新增命名空間的參照。
using Azure;
using Azure.Core;
using Azure.Core.Expressions.DataFactory;
using Azure.Identity;
using Azure.ResourceManager;
using Azure.ResourceManager.DataFactory;
using Azure.ResourceManager.DataFactory.Models;
using Azure.ResourceManager.Resources;
using System;
using System.Collections.Generic;
將下列程式碼新增至 Main 方法,以設定變數。 使用您自己的值取代預留位置。 如需查詢目前 Data Factory 可用的Azure區域清單,請在下一頁選擇您感興趣的區域,然後展開 Analytics 以找到 Data Factory:Products by region。 Data Factory 使用的資料儲存(Azure Storage、Azure SQL Database 等)和運算(HDInsight 等)可能存在於其他區域。
// Set variables
string tenantID = "<your tenant ID>";
string applicationId = "<your application ID>";
string authenticationKey = "<your authentication key for the application>";
string subscriptionId = "<your subscription ID where the data factory resides>";
string resourceGroup = "<your resource group where the data factory resides>";
string region = "<the location of your resource group>";
string dataFactoryName =
    "<specify the name of data factory to create. It must be globally unique.>";
string storageAccountName = "<your storage account name to copy data>";
string storageKey = "<your storage account key>";
// specify the container and input folder from which all files
// need to be copied to the output folder.
string inputBlobContainer = "<blob container to copy data from, e.g. containername>";
string inputBlobPath = "<path to existing blob(s) to copy data from, e.g. inputdir/file>";
//specify the contains and output folder where the files are copied
string outputBlobContainer = "<blob container to copy data from, e.g. containername>";
string outputBlobPath = "<the blob path to copy data to, e.g. outputdir/file>";

// name of the Azure Storage linked service, blob dataset, and the pipeline
string storageLinkedServiceName = "AzureStorageLinkedService";
string blobDatasetName = "BlobDataset";
string pipelineName = "Adfv2QuickStartPipeline";
將下列程式碼新增至 Main 方法,以建立資料處理站。
ArmClient armClient = new ArmClient(
    new ClientSecretCredential(tenantID, applicationId, authenticationKey, new TokenCredentialOptions
    {
        AuthorityHost = AzureAuthorityHosts.AzurePublicCloud
    }),
    subscriptionId,
    new ArmClientOptions { Environment = ArmEnvironment.AzurePublicCloud }
);

ResourceIdentifier resourceIdentifier = SubscriptionResource.CreateResourceIdentifier(subscriptionId);
SubscriptionResource subscriptionResource = armClient.GetSubscriptionResource(resourceIdentifier);

Console.WriteLine("Get an existing resource group " + resourceGroupName + "...");
var resourceGroupOperation = subscriptionResource.GetResourceGroups().Get(resourceGroupName);
ResourceGroupResource resourceGroupResource = resourceGroupOperation.Value;

Console.WriteLine("Create a data factory " + dataFactoryName + "...");
DataFactoryData dataFactoryData = new DataFactoryData(AzureLocation.EastUS2);
var dataFactoryOperation = resourceGroupResource.GetDataFactories().CreateOrUpdate(WaitUntil.Completed, dataFactoryName, dataFactoryData);
Console.WriteLine(dataFactoryOperation.WaitForCompletionResponse().Content);

// Get the data factory resource
DataFactoryResource dataFactoryResource = dataFactoryOperation.Value;
建立連結的服務
在 Main 方法中加入以下程式碼,建立一個 Azure Storage 連結服務。
您在資料處理站中建立的連結服務會將您的資料存放區和計算服務連結到資料處理站。 在這個快速入門中,你只需要為複製來源和匯入儲存庫建立一個 Azure Blob Storage 連結服務;範例中它名為「AzureBlobStorageLinkedService」。
// Create an Azure Storage linked service
Console.WriteLine("Create a linked service " + storageLinkedServiceName + "...");
AzureBlobStorageLinkedService azureBlobStorage = new AzureBlobStorageLinkedService()
{
    ConnectionString = azureBlobStorageConnectionString
};

DataFactoryLinkedServiceData linkedServiceData = new DataFactoryLinkedServiceData(azureBlobStorage);

var linkedServiceOperation = dataFactoryResource.GetDataFactoryLinkedServices().CreateOrUpdate(WaitUntil.Completed, storageLinkedServiceName, linkedServiceData);
Console.WriteLine(linkedServiceOperation.WaitForCompletionResponse().Content);
建立資料集
將下列程式碼新增至 Main 方法,以建立分隔符號文字資料集。
您會定義一個資料集,用來表示要從來源複製到接收器的資料。 在此範例中,這個 Delimited Text 資料集會參考您在前一步建立的 Azure Blob 儲存體連結服務。 資料集會使用兩個參數,其值在取用資料集的活動中設定。 該參數是用來建構 "container" 和 "folderPath",以指向資料位於/儲存所在的位置。
// Create an Azure Blob dataset
DataFactoryLinkedServiceReference linkedServiceReference = new DataFactoryLinkedServiceReference(DataFactoryLinkedServiceReferenceType.LinkedServiceReference, storageLinkedServiceName);
DelimitedTextDataset delimitedTextDataset = new DelimitedTextDataset(linkedServiceReference)
{
    DataLocation = new AzureBlobStorageLocation
    {
        Container = DataFactoryElement<string>.FromExpression("@dataset().container"),
        FileName = DataFactoryElement<string>.FromExpression("@dataset().path")
    },
    Parameters =
    {
        new KeyValuePair<string, EntityParameterSpecification>("container",new EntityParameterSpecification(EntityParameterType.String)),
        new KeyValuePair<string, EntityParameterSpecification>("path",new EntityParameterSpecification(EntityParameterType.String))
    },
    FirstRowAsHeader = false,
    QuoteChar = "\"",
    EscapeChar = "\\",
    ColumnDelimiter = ","
};

DataFactoryDatasetData datasetData = new DataFactoryDatasetData(delimitedTextDataset);

var datasetOperation = dataFactoryResource.GetDataFactoryDatasets().CreateOrUpdate(WaitUntil.Completed, blobDatasetName, datasetData);
Console.WriteLine(datasetOperation.WaitForCompletionResponse().Content);
建立新管線
將下列程式碼新增至 Main 方法,以建立具有複製活動的管線。
在此範例中,此管線包含一個活動,並使用四個參數:輸入 Blob 容器和路徑和輸出 Blob 容器和路徑。 這些參數的值是在觸發/執行管線時設定。 複製活動指的是在前一個步驟中建立作為輸入和輸出的同一 Blob 資料集。 當將該資料集用作輸入資料集時,即會指定輸入容器和路徑。 並且,當將該資料集用作輸出資料集時,即會指定輸出容器和路徑。
// Create a pipeline with a copy activity
Console.WriteLine("Creating pipeline " + pipelineName + "...");
DataFactoryPipelineData pipelineData = new DataFactoryPipelineData()
{
    Parameters =
    {
        new KeyValuePair<string, EntityParameterSpecification>("inputContainer",new EntityParameterSpecification(EntityParameterType.String)),
        new KeyValuePair<string, EntityParameterSpecification>("inputPath",new EntityParameterSpecification(EntityParameterType.String)),
        new KeyValuePair<string, EntityParameterSpecification>("outputContainer",new EntityParameterSpecification(EntityParameterType.String)),
        new KeyValuePair<string, EntityParameterSpecification>("outputPath",new EntityParameterSpecification(EntityParameterType.String))
    },
    Activities =
    {
        new CopyActivity("CopyFromBlobToBlob",new DataFactoryBlobSource(),new DataFactoryBlobSink())
        {
            Inputs =
            {
                new DatasetReference(DatasetReferenceType.DatasetReference,blobDatasetName)
                {
                    Parameters =
                    {
                        new KeyValuePair<string, BinaryData>("container", BinaryData.FromString("\"@pipeline().parameters.inputContainer\"")),
                        new KeyValuePair<string, BinaryData>("path", BinaryData.FromString("\"@pipeline().parameters.inputPath\""))
                    }
                }
            },
            Outputs =
            {
                new DatasetReference(DatasetReferenceType.DatasetReference,blobDatasetName)
                {
                    Parameters =
                    {
                        new KeyValuePair<string, BinaryData>("container", BinaryData.FromString("\"@pipeline().parameters.outputContainer\"")),
                        new KeyValuePair<string, BinaryData>("path", BinaryData.FromString("\"@pipeline().parameters.outputPath\""))
                    }
                }
            }
        }
    }
};

var pipelineOperation = dataFactoryResource.GetDataFactoryPipelines().CreateOrUpdate(WaitUntil.Completed, pipelineName, pipelineData);
Console.WriteLine(pipelineOperation.WaitForCompletionResponse().Content);
建立管線執行
將下列程式碼新增至 Main 方法,以觸發管線執行。
此程式碼也會將管線中指定的 inputContainer、inputPath、outputContainer 和 outputPath 參數值,設為來源與接收器 Blob 路徑的實際值。
// Create a pipeline run
Console.WriteLine("Creating pipeline run...");
Dictionary<string, BinaryData> parameters = new Dictionary<string, BinaryData>()
{
    { "inputContainer",BinaryData.FromObjectAsJson(inputBlobContainer) },
    { "inputPath",BinaryData.FromObjectAsJson(inputBlobPath) },
    { "outputContainer",BinaryData.FromObjectAsJson(outputBlobContainer) },
    { "outputPath",BinaryData.FromObjectAsJson(outputBlobPath) }
};

var pipelineResource = dataFactoryResource.GetDataFactoryPipeline(pipelineName);
var runResponse = pipelineResource.Value.CreateRun(parameters);
Console.WriteLine("Pipeline run ID: " + runResponse.Value.RunId);
監視管線執行
將下列程式碼新增至 Main 方法,以持續檢查狀態,直到完成複製資料為止。
// Monitor the pipeline run
Console.WriteLine("Checking pipeline run status...");
DataFactoryPipelineRunInfo pipelineRun;
while (true)
{
    pipelineRun = dataFactoryResource.GetPipelineRun(runResponse.Value.RunId.ToString());
    Console.WriteLine("Status: " + pipelineRun.Status);
    if (pipelineRun.Status == "InProgress" || pipelineRun.Status == "Queued")
        System.Threading.Thread.Sleep(15000);
    else
        break;
}
將下列程式碼新增至 Main 方法,以取出複製活動執行的詳細資料,例如被讀取或寫入的資料大小。
// Check the copy activity run details
Console.WriteLine("Checking copy activity run details...");

var queryResponse = dataFactoryResource.GetActivityRun(pipelineRun.RunId.ToString(),
    new RunFilterContent(DateTime.UtcNow.AddMinutes(-10), DateTime.UtcNow.AddMinutes(10)));

var enumerator = queryResponse.GetEnumerator();
enumerator.MoveNext();

if (pipelineRun.Status == "Succeeded")
    Console.WriteLine(enumerator.Current.Output);
else
    Console.WriteLine(enumerator.Current.Error);
Console.WriteLine("\nPress any key to exit...");
Console.ReadKey();
執行程式碼
建置並啟動應用程式,然後確認管線執行。
主控台會印出建立資料處理站、連結服務、資料集、管線和管線執行的進度。 然後檢查管線的運行狀態。 請等到您看到複製活動執行詳細資料,其中顯示讀取/寫入資料的大小。 接著,使用 Azure 儲存體總管等工具,檢查 Blob 是否依您在變數中指定的方式,從「inputBlobPath」複製到「outputBlobPath」。
範例輸出
Create a data factory quickstart-adf...
{
  "name": "quickstart-adf",
  "type": "Microsoft.DataFactory/factories",
  "properties": {
    "provisioningState": "Succeeded",
    "version": "2018-06-01"
  },
  "location": "eastus2"
}
Create a linked service AzureBlobStorage...
{
  "name": "AzureBlobStorage",
  "type": "Microsoft.DataFactory/factories/linkedservices",
  "properties": {
    "type": "AzureBlobStorage",
    "typeProperties": {
      "connectionString": "DefaultEndpointsProtocol=https;AccountName=<storageAccountName>;",
      "encryptedCredential": "<encryptedCredential>"
    }
  }
}
Creating dataset BlobDelimitedDataset...
{
  "name": "BlobDelimitedDataset",
  "type": "Microsoft.DataFactory/factories/datasets",
  "properties": {
    "type": "DelimitedText",
    "linkedServiceName": {
      "type": "LinkedServiceReference",
      "referenceName": "AzureBlobStorage"
    },
    "parameters": {
      "container": {
        "type": "String"
      },
      "path": {
        "type": "String"
      }
    },
    "typeProperties": {
      "location": {
        "container": {
          "type": "Expression",
          "value": "@dataset().container"
        },
        "type": "AzureBlobStorageLocation",
        "fileName": {
          "type": "Expression",
          "value": "@dataset().path"
        }
      },
      "columnDelimiter": ",",
      "quoteChar": "\"",
      "escapeChar": "\\",
      "firstRowAsHeader": false
    }
  }
}
Creating pipeline Adfv2QuickStartPipeline...
{
  "properties": {
    "activities": [
      {
        "inputs": [
          {
            "type": "DatasetReference",
            "referenceName": "BlobDelimitedDataset",
            "parameters": {
              "container": "@pipeline().parameters.inputContainer",
              "path": "@pipeline().parameters.inputPath"
            }
          }
        ],
        "outputs": [
          {
            "type": "DatasetReference",
            "referenceName": "BlobDelimitedDataset",
            "parameters": {
              "container": "@pipeline().parameters.outputContainer",
              "path": "@pipeline().parameters.outputPath"
            }
          }
        ],
        "name": "CopyFromBlobToBlob",
        "type": "Copy",
        "typeProperties": {
          "source": {
            "type": "BlobSource"
          },
          "sink": {
            "type": "BlobSink"
          }
        }
      }
    ],
    "parameters": {
      "inputContainer": {
        "type": "String"
      },
      "inputPath": {
        "type": "String"
      },
      "outputContainer": {
        "type": "String"
      },
      "outputPath": {
        "type": "String"
      }
    }
  }
}
Creating pipeline run...
Pipeline run ID: 3aa26ffc-5bee-4db9-8bac-ccbc2d7b51c1
Checking pipeline run status...
Status: InProgress
Status: Succeeded
Checking copy activity run details...
{
  "dataRead": 1048,
  "dataWritten": 1048,
  "filesRead": 1,
  "filesWritten": 1,
  "sourcePeakConnections": 1,
  "sinkPeakConnections": 1,
  "copyDuration": 8,
  "throughput": 1.048,
  "errors": [],
  "effectiveIntegrationRuntime": "AutoResolveIntegrationRuntime (East US 2)",
  "usedDataIntegrationUnits": 4,
  "billingReference": {
    "activityType": "DataMovement",
    "billableDuration": [
      {
        "meterType": "AzureIR",
        "duration": 0.06666666666666667,
        "unit": "DIUHours"
      }
    ],
    "totalBillableDuration": [
      {
        "meterType": "AzureIR",
        "duration": 0.06666666666666667,
        "unit": "DIUHours"
      }
    ]
  },
  "usedParallelCopies": 1,
  "executionDetails": [
    {
      "source": {
        "type": "AzureBlobStorage"
      },
      "sink": {
        "type": "AzureBlobStorage"
      },
      "status": "Succeeded",
      "start": "2023-12-15T10:25:33.9991558Z",
      "duration": 8,
      "usedDataIntegrationUnits": 4,
      "usedParallelCopies": 1,
      "profile": {
        "queue": {
          "status": "Completed",
          "duration": 5
        },
        "transfer": {
          "status": "Completed",
          "duration": 1,
          "details": {
            "listingSource": {
              "type": "AzureBlobStorage",
              "workingDuration": 0
            },
            "readingFromSource": {
              "type": "AzureBlobStorage",
              "workingDuration": 0
            },
            "writingToSink": {
              "type": "AzureBlobStorage",
              "workingDuration": 0
            }
          }
        }
      },
      "detailedDurations": {
        "queuingDuration": 5,
        "transferDuration": 1
      }
    }
  ],
  "dataConsistencyVerification": {
    "VerificationResult": "NotVerified"
  }
}

Press any key to exit...
驗證輸出
管道會自動在 adftutorial Blob 容器中建立輸出資料夾。 然後,它會將 emp.txt 檔案從輸入資料夾複製到輸出資料夾。
- 在 Azure 入口網站中,於您先前在上方為 Blob 容器新增輸入資料夾與檔案一節停留的 adftutorial 容器頁面上,選取重新整理以查看輸出資料夾。
- 在資料夾清單中,選取 [輸出]。
- 確認 emp.txt 已複製到輸出資料夾。
清除資源
若要以程式設計方式刪除資料處理站,請將下列程式碼新增至程式:
Console.WriteLine("Deleting the data factory");
dataFactoryResource.Delete(WaitUntil.Completed);
下一步
本範例中的管線會將資料從一個位置複製到 Azure Blob 儲存體中的另一個位置。 瀏覽教學課程以了解使用 Data Factory 的更多案例。