Azure DevOps Services |Azure DevOps Server 2022 - Azure DevOps Server 2019
使用 Azure DevOps 多階段管線,將您的 CI/CD 程式分成代表開發週期不同部分的階段。 多階段管線可讓您更瞭解您的部署程式,並讓您更輕鬆地整合 核准和檢查。
在本文中,您將建立兩個 App Service 實例,並建置具有三個階段的 YAML 管線:
在真實情境下,根據您的 DevOps 流程,您可能會有另一個部署至生產環境的階段。
這個練習中的範例程式代碼是針對一個 .NET Web 應用程式,該應用程式用於一個虛構的太空遊戲,其中包含排行榜以顯示高分。 您將部署至適用於 Linux 的 Azure Web 應用程式的開發和測試實例。
必要條件
| 產品 | 要求 |
|---|---|
| Azure DevOps | - Azure DevOps 組織和專案。
免費建立一個。 - 權限: - 若要授與專案中所有管線的存取權:您必須是 Project Administrators 群組的成員。 - 若要建立服務連線:您必須具有服務連線的系統管理員或建立者角色。 - 能夠在由 Microsoft 託管的代理上運行管線。 您可以購買平行作業,也可以申請免費方案。 |
| GitHub的 | - GitHub 帳戶。 |
分支專案
在 GitHub 上分叉下列範例存放庫。
https://github.com/MicrosoftDocs/mslearn-tailspin-spacegame-web-deploy
建立 App Service 執行個體
您必須先建立要部署的 App Service 實例,才能部署管線。 您將使用 Azure CLI 來建立實例。
登入 Azure 入口網站。
從功能表中,選取 [Cloud Shell] 和 [Bash] 體驗。
生成一個隨機數,以使您的 Web 應用程式網域名稱獨一無二。 具有唯一值的優點是,您的 App Service 實例不會與其他完成本教學課程的學習者發生名稱衝突。
webappsuffix=$RANDOM開啟命令提示字元,並使用
az group create命令來建立名為 tailspin-space-game-rg 的資源群組,其中包含您所有的 App Service 實例。 將location值更新為使用您所在的最近區域。az group create --location eastus --name tailspin-space-game-rg使用命令提示字元建立 App Service 方案。
az appservice plan create \
  --name tailspin-space-game-asp \
  --resource-group tailspin-space-game-rg \
  --sku B1 \
  --is-linux
在命令提示字元中,使用
az webapp create命令為兩個環境(Dev 和 Staging)各建立一個 App Service 實例。az webapp create \ --name tailspin-space-game-web-dev-$webappsuffix \ --resource-group tailspin-space-game-rg \ --plan tailspin-space-game-asp \ --runtime "DOTNET|8.0" az webapp create \ --name tailspin-space-game-web-staging-$webappsuffix \ --resource-group tailspin-space-game-rg \ --plan tailspin-space-game-asp \ --runtime "DOTNET|8.0"使用命令提示字元列出這兩個 App Service 實例,然後使用
az webapp list命令確認它們是否正在執行。az webapp list \ --resource-group tailspin-space-game-rg \ --query "[].{hostName: defaultHostName, state: state}" \ --output table複製 App Service 實例的名稱,以在下一節中當做變數使用。
建立您的 Azure DevOps 專案和變數
設定您的 Azure DevOps 專案和組建管線。 您也會為開發和預備實例新增變數。
您的建置流程:
- 包含在分支的程式碼變更時會啟動的觸發器
- 定義兩個變數,
buildConfiguration和releaseBranchName - 包含名為 Build 的階段,以建置 Web 應用程式
- 發佈您將在稍後階段使用的成品
新增建置階段
登入您的 Azure DevOps 組織並前往您的專案。
移至 [管線],然後在建立第一個管線時選取 [ 新增管線 ] 或 [建立管線 ]。
執行精靈的步驟,首先選取 [GitHub] 作為您的原始程式碼位置。
系統可能會將您重新導向至 GitHub 以進行登入。 若是如此,請輸入 GitHub 認證。
當您看到存放庫清單時,請選取您的存放庫。
系統可能會將您重新導向至 GitHub,以安裝 Azure Pipelines 應用程式。 如果發生此情況,請選取 [核准並安裝]。
當「設定」索引標籤出現時,請選取「入門管線」。
將此程式代碼取代azure-pipelines.yml的內容。
trigger:
- '*'

variables:
  buildConfiguration: 'Release'
  releaseBranchName: 'release'

stages:
- stage: 'Build'
  displayName: 'Build the web application'
  jobs:
  - job: 'Build'
    displayName: 'Build job'
    pool:
      vmImage: 'ubuntu-22.04'
      demands:
      - npm

    variables:
      wwwrootDir: 'Tailspin.SpaceGame.Web/wwwroot'
      dotnetSdkVersion: '8.x'

    steps:
    - task: UseDotNet@2
      displayName: 'Use .NET SDK $(dotnetSdkVersion)'
      inputs:
        version: '$(dotnetSdkVersion)'

    - task: Npm@1
      displayName: 'Run npm install'
      inputs:
        verbose: false

    - script: './node_modules/.bin/node-sass $(wwwrootDir) --output $(wwwrootDir)'
      displayName: 'Compile Sass assets'

    - task: gulp@1
      displayName: 'Run gulp tasks'

    - script: 'echo "$(Build.DefinitionName), $(Build.BuildId), $(Build.BuildNumber)" > buildinfo.txt'
      displayName: 'Write build info'
      workingDirectory: $(wwwrootDir)

    - task: DotNetCoreCLI@2
      displayName: 'Restore project dependencies'
      inputs:
        command: 'restore'
        projects: '**/*.csproj'

    - task: DotNetCoreCLI@2
      displayName: 'Build the project - $(buildConfiguration)'
      inputs:
        command: 'build'
        arguments: '--no-restore --configuration $(buildConfiguration)'
        projects: '**/*.csproj'

    - task: DotNetCoreCLI@2
      displayName: 'Publish the project - $(buildConfiguration)'
      inputs:
        command: 'publish'
        projects: '**/*.csproj'
        publishWebProjects: false
        arguments: '--no-build --configuration $(buildConfiguration) --output $(Build.ArtifactStagingDirectory)/$(buildConfiguration)'
        zipAfterPublish: true

    - publish: '$(Build.ArtifactStagingDirectory)'
      artifact: drop
當您準備好時,請選取 [儲存並執行]。
新增實例變數
在 Azure DevOps 中,前往管道>庫。
選取 + 變數群組。
在 屬性 下,為變數組名稱新增 發行。
建立兩個變數來指向您的開發和預備主機名。 以實例的正確值取代值
1234。變數名稱 範例值 WebAppNameDev tailspin-space-game-web-dev-1234 WebAppName準備階段 tailspin-space-game-web-staging-1234 選取 [ 儲存] 以儲存變數。
新增開發階段
接下來,您將更新管線,將組建推進至 開發 階段。
在 Azure Pipelines 中,移至 管線>管線。
選取 內容選單中的 [編輯 ],以編輯您的管線。
![選取 [編輯] 功能表項的螢幕快照。](media/mutistage-pipeline/multistage-pipeline-edit-contextual-menu.png?view=azure-devops)
更新 azure-pipelines.yml 以包含開發階段。 在開發階段,您的管線將會:
trigger:
- '*'

variables:
  buildConfiguration: 'Release'
  releaseBranchName: 'release'

stages:
- stage: 'Build'
  displayName: 'Build the web application'
  jobs:
  - job: 'Build'
    displayName: 'Build job'
    pool:
      vmImage: 'ubuntu-22.04'
      demands:
      - npm

    variables:
      wwwrootDir: 'Tailspin.SpaceGame.Web/wwwroot'
      dotnetSdkVersion: '8.x'

    steps:
    - task: UseDotNet@2
      displayName: 'Use .NET SDK $(dotnetSdkVersion)'
      inputs:
        version: '$(dotnetSdkVersion)'

    - task: Npm@1
      displayName: 'Run npm install'
      inputs:
        verbose: false

    - script: './node_modules/.bin/node-sass $(wwwrootDir) --output $(wwwrootDir)'
      displayName: 'Compile Sass assets'

    - task: gulp@1
      displayName: 'Run gulp tasks'

    - script: 'echo "$(Build.DefinitionName), $(Build.BuildId), $(Build.BuildNumber)" > buildinfo.txt'
      displayName: 'Write build info'
      workingDirectory: $(wwwrootDir)

    - task: DotNetCoreCLI@2
      displayName: 'Restore project dependencies'
      inputs:
        command: 'restore'
        projects: '**/*.csproj'

    - task: DotNetCoreCLI@2
      displayName: 'Build the project - $(buildConfiguration)'
      inputs:
        command: 'build'
        arguments: '--no-restore --configuration $(buildConfiguration)'
        projects: '**/*.csproj'

    - task: DotNetCoreCLI@2
      displayName: 'Publish the project - $(buildConfiguration)'
      inputs:
        command: 'publish'
        projects: '**/*.csproj'
        publishWebProjects: false
        arguments: '--no-build --configuration $(buildConfiguration) --output $(Build.ArtifactStagingDirectory)/$(buildConfiguration)'
        zipAfterPublish: true

    - publish: '$(Build.ArtifactStagingDirectory)'
      artifact: drop

- stage: 'Dev'
  displayName: 'Deploy to the dev environment'
  dependsOn: Build
  condition:  succeeded()
  jobs:
  - deployment: Deploy
    pool:
      vmImage: 'ubuntu-22.04'
    environment: dev
    variables:
    - group: Release
    strategy:
      runOnce:
        deploy:
          steps:
          - download: current
            artifact: drop
          - task: AzureWebApp@1
            displayName: 'Azure App Service Deploy: dev website'
            inputs:
              azureSubscription: 'your-subscription'
              appType: 'webAppLinux'
              appName: '$(WebAppNameDev)'
              package: '$(Pipeline.Workspace)/drop/$(buildConfiguration)/*.zip'
更改
AzureWebApp@1任務以使用您的訂閱。選取設定以完成此任務。

your-subscription更新 Azure 訂用帳戶的值以使用您自己的訂用帳戶。 您可能需要在此過程中授權存取權。 如果您在 YAML 編輯器中遇到授權資源的問題,替代方法是 建立服務連線。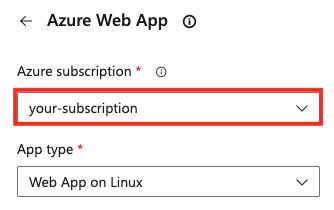
將 應用程式類型 設定為Linux上的Web應用程式。
選取 [ 新增 ] 以更新工作。
儲存並執行您的流程。
新增預備階段
最後,您將將開發階段升階為預備階段。 不同於開發環境,您希望能在預備環境中擁有更大的控制權,因此會新增手動核准。
建立預備環境
從 Azure Pipelines 中,選取 [環境]。
選取 新增環境。
建立名為預備環境的新環境,並將 [資源] 設定為 [無]。
在預備環境頁面上,選取 [ 核准並檢查]。

選取 [核准]。
在 [核准者] 中,選取 [ 新增使用者和群組],然後選取您的帳戶。
在 給核准者的指示中,撰寫 準備好上線時核准此變更。
選取儲存。
將新階段新增至管線
您會將新的階段Staging新增至需要手動核准的管線。
編輯管線檔案並新增
Staging區段。trigger: - '*' variables: buildConfiguration: 'Release' releaseBranchName: 'release' stages: - stage: 'Build' displayName: 'Build the web application' jobs: - job: 'Build' displayName: 'Build job' pool: vmImage: 'ubuntu-22.04' demands: - npm variables: wwwrootDir: 'Tailspin.SpaceGame.Web/wwwroot' dotnetSdkVersion: '8.x' steps: - task: UseDotNet@2 displayName: 'Use .NET SDK $(dotnetSdkVersion)' inputs: version: '$(dotnetSdkVersion)' - task: Npm@1 displayName: 'Run npm install' inputs: verbose: false - script: './node_modules/.bin/node-sass $(wwwrootDir) --output $(wwwrootDir)' displayName: 'Compile Sass assets' - task: gulp@1 displayName: 'Run gulp tasks' - script: 'echo "$(Build.DefinitionName), $(Build.BuildId), $(Build.BuildNumber)" > buildinfo.txt' displayName: 'Write build info' workingDirectory: $(wwwrootDir) - task: DotNetCoreCLI@2 displayName: 'Restore project dependencies' inputs: command: 'restore' projects: '**/*.csproj' - task: DotNetCoreCLI@2 displayName: 'Build the project - $(buildConfiguration)' inputs: command: 'build' arguments: '--no-restore --configuration $(buildConfiguration)' projects: '**/*.csproj' - task: DotNetCoreCLI@2 displayName: 'Publish the project - $(buildConfiguration)' inputs: command: 'publish' projects: '**/*.csproj' publishWebProjects: false arguments: '--no-build --configuration $(buildConfiguration) --output $(Build.ArtifactStagingDirectory)/$(buildConfiguration)' zipAfterPublish: true - publish: '$(Build.ArtifactStagingDirectory)' artifact: drop - stage: 'Dev' displayName: 'Deploy to the dev environment' dependsOn: Build condition: succeeded() jobs: - deployment: Deploy pool: vmImage: 'ubuntu-22.04' environment: dev variables: - group: Release strategy: runOnce: deploy: steps: - download: current artifact: drop - task: AzureWebApp@1 displayName: 'Azure App Service Deploy: dev website' inputs: azureSubscription: 'your-subscription' appType: 'webAppLinux' appName: '$(WebAppNameDev)' package: '$(Pipeline.Workspace)/drop/$(buildConfiguration)/*.zip' - stage: 'Staging' displayName: 'Deploy to the staging environment' dependsOn: Dev jobs: - deployment: Deploy pool: vmImage: 'ubuntu-22.04' environment: staging variables: - group: 'Release' strategy: runOnce: deploy: steps: - download: current artifact: drop - task: AzureWebApp@1 displayName: 'Azure App Service Deploy: staging website' inputs: azureSubscription: 'your-subscription' appType: 'webAppLinux' appName: '$(WebAppNameStaging)' package: '$(Pipeline.Workspace)/drop/$(buildConfiguration)/*.zip'在預備階段中變更
AzureWebApp@1工作以使用您的訂閱帳戶。選取設定以完成此任務。
your-subscription更新 Azure 訂用帳戶的值以使用您自己的訂用帳戶。 您可能需要在此過程中授權存取權。
將 應用程式類型 設定為Linux上的Web應用程式。
選取 [ 新增 ] 以更新工作。
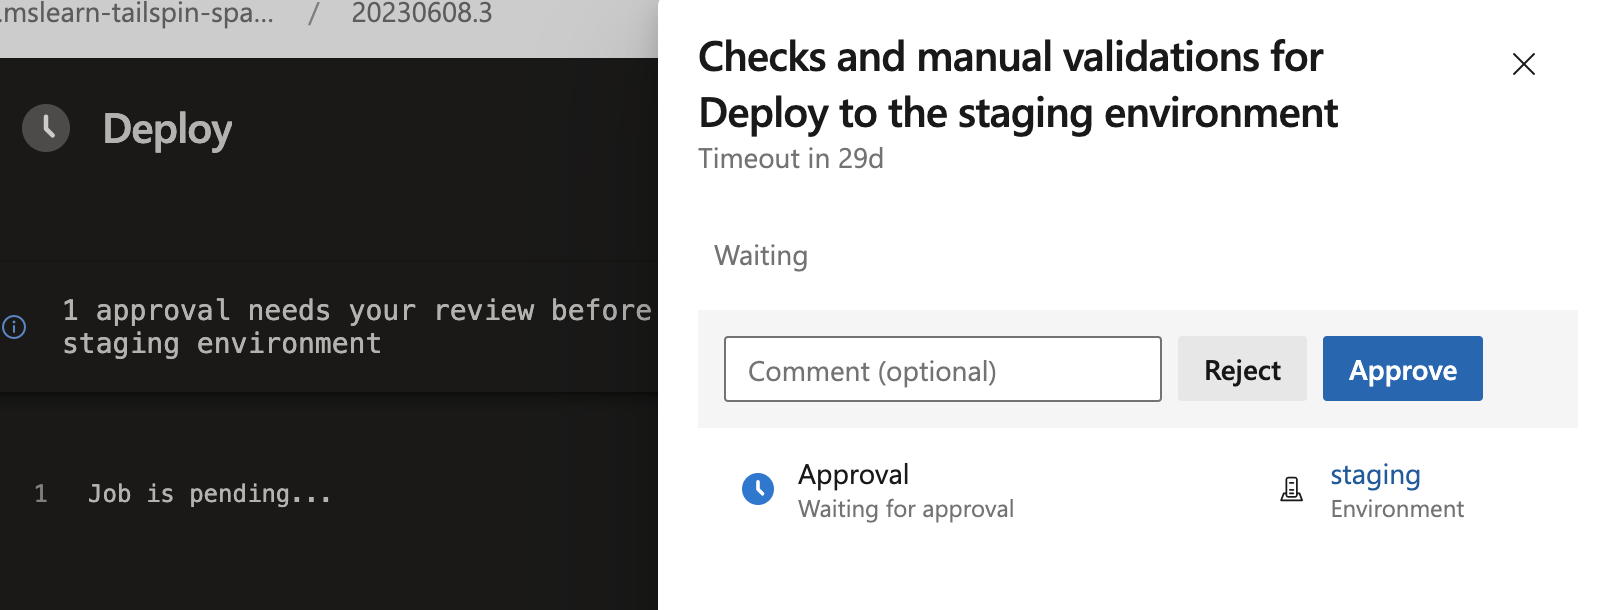
移至管線執行。 請在建置運行時加以監看。 到達
Staging時,管線會等待手動發布批准。 您也會收到一封通知您有管線正在等待核准的電子郵件。
審核批准並允許流水線運行。
清除資源
如果您不打算繼續使用此應用程式,請刪除 Azure 入口網站 中的資源群組,並使用下列步驟刪除 Azure DevOps 中的專案:
若要清理您的資源群組,請執行以下步驟:
請前往 Azure 入口網站並登入。
從功能表列中,選取 [Cloud Shell]。 當出現提示時,請選取 Bash 體驗。

執行下列 az group delete 命令,以刪除您使用的資源群組
tailspin-space-game-rg。az group delete --name tailspin-space-game-rg
若要刪除 Azure DevOps 專案,包括建置管線,請參閱 刪除專案。