開始使用裝置管理 (Java)
後端應用程式可使用 Azure IoT 中樞基元 (例如裝置對應項和直接方法),從遠端啟動並監視裝置上的裝置管理動作。 本文會示範後端應用程式和裝置應用程式如何共同運作,以使用 IoT 中樞初始化和監視遠端裝置重新啟動。
注意
本文中所述的功能僅適用於 IoT 中樞的標準層。 如需基本和標準/免費 IoT 中樞層的詳細資訊,請參閱選擇適合您解決方案的 IoT 中樞層。
使用直接方法從雲端中的後端應用程式起始裝置管理動作 (例如重新啟動、恢復出廠預設值,以及韌體更新)。 該裝置將負責:
處理從 IoT 中樞傳送的方法要求。
在裝置上起始對應的裝置專有動作。
透過針對 IoT 中樞的報告屬性提供狀態更新。
您可以在雲端中使用後端 App 來執行裝置對應項查詢,以報告裝置管理動作的進度。
本文說明如何建立:
simulated-device:為模擬裝置應用程式,使用直接方法重新啟動裝置,並報告上次重新啟動時間。 直接方法是從雲端叫用。
trigger-reboot:為 Java 應用程式,可透過您的 IoT 中樞在模擬裝置應用程式中呼叫直接方法。 會顯示回應和更新的回報屬性。
注意
如需可用來建置應用程式,以在裝置與您的解決方案後端執行之 SDK 的資訊,請參閱 Azure IoT SDK。
必要條件
Azure 訂用帳戶中的 IoT 中樞。 如果您還沒有中樞,可遵循建立 IoT 中樞中的步驟。
在 IoT 中樞內註冊的裝置。 如果 IoT 中樞中沒有裝置,請遵循註冊裝置中的步驟。
Java SE 開發套件 8。 請務必選取 [長期支援] 下的 [Java 8],以取得 JDK 8 的下載。
請確定您的防火牆已開啟連接埠 8883。 本文中的裝置範例會使用 MQTT 通訊協定,其會透過連接埠 8883 進行通訊。 某些公司和教育網路環境可能會封鎖此連接埠。 如需此問題的詳細資訊和解決方法,請參閱連線至 IoT 中樞 (MQTT)。
使用直接方法建立裝置應用程式
在本節中,您將建立模擬裝置的 Java 主控台應用程式。 此應用程式會從您的 IoT 中樞接聽 reboot 直接方法呼叫,並立即回應該呼叫。 然後會休眠一段時間,以模擬重新開機程序,再使用回報屬性來通知 trigger-reboot 後端應用程式重新開機已完成。
在 dm-get-started 資料夾的命令提示字元中,使用下列命令建立稱為 simulated-device 的 Maven 專案:
mvn archetype:generate -DgroupId=com.mycompany.app -DartifactId=simulated-device -DarchetypeArtifactId=maven-archetype-quickstart -DinteractiveMode=false在命令提示字元中,巡覽至 simulated-device 資料夾。
使用文字編輯器,開啟 simulated-device 資料夾中的 pom.xml 檔案,並將下列相依性新增至 [相依性] 節點。 這個相依性可讓您在應用程式中使用 iot-service-client 套件與 IoT 中樞通訊:
<dependency>
  <groupId>com.microsoft.azure.sdk.iot</groupId>
  <artifactId>iot-device-client</artifactId>
  <version>1.17.5</version>
</dependency>
注意
您可以使用 Maven 搜尋來檢查最新版的 iot-device-client。
將下列相依性新增至 [相依性] 節點。 此相依性會設定 Apache SLF4J 記錄外觀的 NOP,以供裝置用戶端 SDK 用來實作記錄。 這是選擇性設定,但如果予以省略,則可能會在執行應用程式時於主控台中看到一則警告。 如需裝置用戶端 SDK 中記錄的詳細資訊,請參閱<適用於 Java 的 Azure IoT 裝置 SDK 範例>讀我檔案中的記錄 (英文)。
<dependency>
  <groupId>org.slf4j</groupId>
  <artifactId>slf4j-nop</artifactId>
  <version>1.7.28</version>
</dependency>
將下列 [建置] 節點新增至 [相依性] 節點之後。 此設定會指示 Maven 使用 Java 1.8 來建置應用程式:
<build>
  <plugins>
    <plugin>
      <groupId>org.apache.maven.plugins</groupId>
      <artifactId>maven-compiler-plugin</artifactId>
      <version>3.3</version>
      <configuration>
        <source>1.8</source>
        <target>1.8</target>
      </configuration>
    </plugin>
  </plugins>
</build>
儲存並關閉 pom.xml 檔案。
使用文字編輯器,開啟 simulated-device\src\main\java\com\mycompany\app\App.java 來源檔案。
在此檔案中新增下列 import 陳述式:
import com.microsoft.azure.sdk.iot.device.*;
import com.microsoft.azure.sdk.iot.device.DeviceTwin.*;

import java.io.IOException;
import java.net.URISyntaxException;
import java.time.LocalDateTime;
import java.util.Scanner;
import java.util.Set;
import java.util.HashSet;
將下列類別層級變數新增到 App 類別中。 將
{yourdeviceconnectionstring}取代為您在 IoT 中樞註冊新裝置時看到的裝置連接字串:private static final int METHOD_SUCCESS = 200; private static final int METHOD_NOT_DEFINED = 404; private static IotHubClientProtocol protocol = IotHubClientProtocol.MQTT; private static String connString = "{yourdeviceconnectionstring}"; private static DeviceClient client;若要實作直接方法狀態事件的回呼處理常式,請將下列巢狀類別新增至 App 類別:
protected static class DirectMethodStatusCallback implements IotHubEventCallback
{
  public void execute(IotHubStatusCode status, Object context)
  {
    System.out.println("IoT Hub responded to device method operation with status " + status.name());
  }
}
若要實作裝置對應項狀態事件的回呼處理常式,請將下列巢狀類別新增至 App 類別:
protected static class DeviceTwinStatusCallback implements IotHubEventCallback
{
    public void execute(IotHubStatusCode status, Object context)
    {
        System.out.println("IoT Hub responded to device twin operation with status " + status.name());
    }
}
若要實作屬性事件的回呼處理常式,請將下列巢狀類別新增至 App 類別:
protected static class PropertyCallback implements PropertyCallBack<String, String>
{
  public void PropertyCall(String propertyKey, String propertyValue, Object context)
  {
    System.out.println("PropertyKey:     " + propertyKey);
    System.out.println("PropertyKvalue:  " + propertyKey);
  }
}
若要實作執行緒以模擬裝置重新開機,請將下列巢狀類別新增至 App 類別。 此執行緒會休眠五秒,再設定 lastReboot 回報屬性:
protected static class RebootDeviceThread implements Runnable {
  public void run() {
    try {
      System.out.println("Rebooting...");
      Thread.sleep(5000);
      Property property = new Property("lastReboot", LocalDateTime.now());
      Set<Property> properties = new HashSet<Property>();
      properties.add(property);
      client.sendReportedProperties(properties);
      System.out.println("Rebooted");
    }
    catch (Exception ex) {
      System.out.println("Exception in reboot thread: " + ex.getMessage());
    }
  }
}
若要在裝置上實作直接方法,請將下列巢狀類別新增至 App 類別。 當模擬的應用程式收到 reboot 直接方法的呼叫時,其會傳回通知給呼叫者,然後啟動執行緒以處理重新開機:
protected static class DirectMethodCallback implements com.microsoft.azure.sdk.iot.device.DeviceTwin.DeviceMethodCallback
{
  @Override
  public DeviceMethodData call(String methodName, Object methodData, Object context)
  {
    DeviceMethodData deviceMethodData;
    switch (methodName)
    {
      case "reboot" :
      {
        int status = METHOD_SUCCESS;
        System.out.println("Received reboot request");
        deviceMethodData = new DeviceMethodData(status, "Started reboot");
        RebootDeviceThread rebootThread = new RebootDeviceThread();
        Thread t = new Thread(rebootThread);
        t.start();
        break;
      }
      default:
      {
        int status = METHOD_NOT_DEFINED;
        deviceMethodData = new DeviceMethodData(status, "Not defined direct method " + methodName);
      }
    }
    return deviceMethodData;
  }
}
修改 main 方法的簽章以擲回下列例外狀況:
public static void main(String[] args) throws IOException, URISyntaxException若要具現化 DeviceClient,請將 main 方法中的程式碼取代為下列程式碼:
System.out.println("Starting device client sample...");
client = new DeviceClient(connString, protocol);
若要開始接聽直接方法呼叫,請將下列程式碼新增至 main 方法:
try
{
  client.open();
  client.subscribeToDeviceMethod(new DirectMethodCallback(), null, new DirectMethodStatusCallback(), null);
  client.startDeviceTwin(new DeviceTwinStatusCallback(), null, new PropertyCallback(), null);
  System.out.println("Subscribed to direct methods and polling for reported properties. Waiting...");
}
catch (Exception e)
{
  System.out.println("On exception, shutting down \n" + " Cause: " + e.getCause() + " \n" +  e.getMessage());
  client.close();
  System.out.println("Shutting down...");
}
若要關閉裝置模擬器,請將下列程式碼新增至 main 方法:
System.out.println("Press any key to exit...");
Scanner scanner = new Scanner(System.in);
scanner.nextLine();
scanner.close();
client.close();
System.out.println("Shutting down...");
儲存並關閉 simulated-device\src\main\java\com\mycompany\app\App.java 檔案。
建置 simulated-device 應用程式,並更正所有錯誤。 在命令提示字元中,巡覽至 simulated-device 資料夾,並執行下列命令:
mvn clean package -DskipTests
取得 IoT 中樞連接字串
在本文中,您會建立後端服務,在裝置上叫用直接方法。 若要透過 IoT 中樞在裝置上叫用直接方法,則服務需要有服務連線權限。 根據預設,每個 IoT 中樞都是透過授與此權限且名為服務的共用存取原則所建立。
若要取得服務原則的 IoT 中樞連接字串,請遵循下列步驟:
在 Azure 入口網站中,選取 [資源群組]。 選取中樞所在的資源群組,然後從資源清單選取中樞。
在 IoT 中樞的左側窗格中,選取 [共用存取原則]。
從原則清單中,選取服務原則。
複製 [主要連接字串] 並儲存該值。

如需 IoT 中樞共用存取原則和權限的詳細資訊,請參閱存取控制及權限。
建立服務應用程式以觸發重新開機
在本節中,您將建立 Java 主控台應用程式以:
在模擬的裝置應用程式中叫用 reboot 直接方法。
顯示回應。
輪詢從裝置傳送的回報屬性,來判斷何時完成重新開機。
此主控台應用程式會連線到您的 IoT 中樞來叫用直接方法,並讀取回報屬性。
建立稱為 dm-get-started 的空資料夾。
在 dm-get-started 資料夾的命令提示字元中,使用下列命令建立稱為 trigger-reboot 的 Maven 專案:
mvn archetype:generate -DgroupId=com.mycompany.app -DartifactId=trigger-reboot -DarchetypeArtifactId=maven-archetype-quickstart -DinteractiveMode=false在命令提示字元中,巡覽至 trigger-reboot 資料夾。
使用文字編輯器,開啟 trigger-reboot 資料夾中的 pom.xml 檔案,並將下列相依性新增至 [相依性] 節點。 這個相依性可讓您在應用程式中使用 iot-service-client 套件與 IoT 中樞通訊:
<dependency>
  <groupId>com.microsoft.azure.sdk.iot</groupId>
  <artifactId>iot-service-client</artifactId>
  <version>1.17.1</version>
  <type>jar</type>
</dependency>
注意
您可以使用 Maven 搜尋來檢查最新版的 iot-service-client。
將下列 [建置] 節點新增至 [相依性] 節點之後。 此設定會指示 Maven 使用 Java 1.8 來建置應用程式:
<build>
  <plugins>
    <plugin>
      <groupId>org.apache.maven.plugins</groupId>
      <artifactId>maven-compiler-plugin</artifactId>
      <version>3.3</version>
      <configuration>
        <source>1.8</source>
        <target>1.8</target>
      </configuration>
    </plugin>
  </plugins>
</build>
儲存並關閉 pom.xml 檔案。
使用文字編輯器,開啟 trigger-reboot\src\main\java\com\mycompany\app\App.java 來源檔案。
在此檔案中新增下列 import 陳述式:
import com.microsoft.azure.sdk.iot.service.devicetwin.DeviceMethod;
import com.microsoft.azure.sdk.iot.service.devicetwin.MethodResult;
import com.microsoft.azure.sdk.iot.service.exceptions.IotHubException;
import com.microsoft.azure.sdk.iot.service.devicetwin.DeviceTwin;
import com.microsoft.azure.sdk.iot.service.devicetwin.DeviceTwinDevice;

import java.io.IOException;
import java.util.concurrent.TimeUnit;
import java.util.concurrent.Executors;
import java.util.concurrent.ExecutorService;
將下列類別層級變數新增到 App 類別中。 將
{youriothubconnectionstring}取代為先前在取得 IoT 中樞連接字串內複製的 IoT 中樞連接字串:public static final String iotHubConnectionString = "{youriothubconnectionstring}"; public static final String deviceId = "myDeviceId"; private static final String methodName = "reboot"; private static final Long responseTimeout = TimeUnit.SECONDS.toSeconds(30); private static final Long connectTimeout = TimeUnit.SECONDS.toSeconds(5);若要實作執行緒以每隔 10 秒從裝置對應項讀取回報屬性,請將下列巢狀類別新增至 App 類別:
private static class ShowReportedProperties implements Runnable {
  public void run() {
    try {
      DeviceTwin deviceTwins = DeviceTwin.createFromConnectionString(iotHubConnectionString);
      DeviceTwinDevice twinDevice = new DeviceTwinDevice(deviceId);
      while (true) {
        System.out.println("Get reported properties from device twin");
        deviceTwins.getTwin(twinDevice);
        System.out.println(twinDevice.reportedPropertiesToString());
        Thread.sleep(10000);
      }
    } catch (Exception ex) {
      System.out.println("Exception reading reported properties: " + ex.getMessage());
    }
  }
}
修改 main 方法的簽章以擲回下列例外狀況:
public static void main(String[] args) throws IOException若要在模擬裝置上叫用 reboot 直接方法,請將 main 方法中的程式碼取代為下列程式碼:
System.out.println("Starting sample...");
DeviceMethod methodClient = DeviceMethod.createFromConnectionString(iotHubConnectionString);

try
{
  System.out.println("Invoke reboot direct method");
  MethodResult result = methodClient.invoke(deviceId, methodName, responseTimeout, connectTimeout, null);

  if(result == null)
  {
    throw new IOException("Invoke direct method reboot returns null");
  }
  System.out.println("Invoked reboot on device");
  System.out.println("Status for device:   " + result.getStatus());
  System.out.println("Message from device: " + result.getPayload());
}
catch (IotHubException e)
{
    System.out.println(e.getMessage());
}
若要啟動執行緒以從模擬的裝置輪詢回報屬性,請將下列程式碼新增至 main 方法:
ShowReportedProperties showReportedProperties = new ShowReportedProperties();
ExecutorService executor = Executors.newFixedThreadPool(1);
executor.execute(showReportedProperties);
若要讓您停止應用程式,請將下列程式碼新增至 main 方法:
System.out.println("Press ENTER to exit.");
System.in.read();
executor.shutdownNow();
System.out.println("Shutting down sample...");
儲存並關閉 trigger-reboot\src\main\java\com\mycompany\app\App.java 檔案。
建置 trigger-reboot 後端應用程式,並更正任何錯誤。 在命令提示字元中,巡覽至 trigger-reboot 資料夾,並執行下列命令:
mvn clean package -DskipTests
執行應用程式
您現在可開始執行應用程式。
在 simulated-device 資料夾的命令提示字元中,執行下列命令以開始接聽來自 IoT 中樞的 reboot 方法呼叫:
mvn exec:java -Dexec.mainClass="com.mycompany.app.App"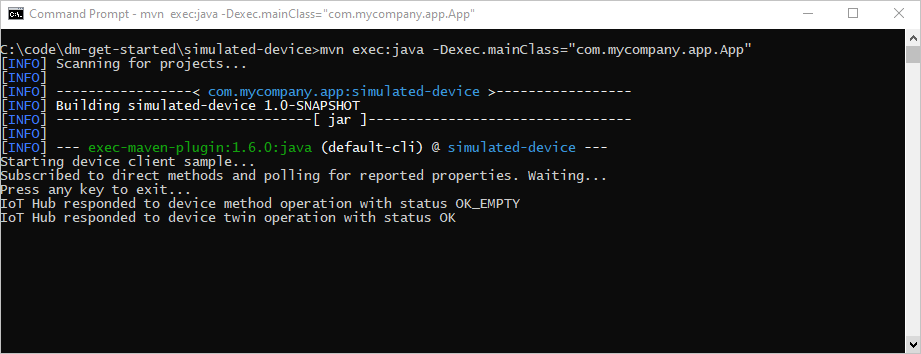
在 trigger-reboot 資料夾的命令提示字元中,執行下列命令以呼叫模擬裝置上來自 IoT 中樞的 reboot 方法:
mvn exec:java -Dexec.mainClass="com.mycompany.app.App"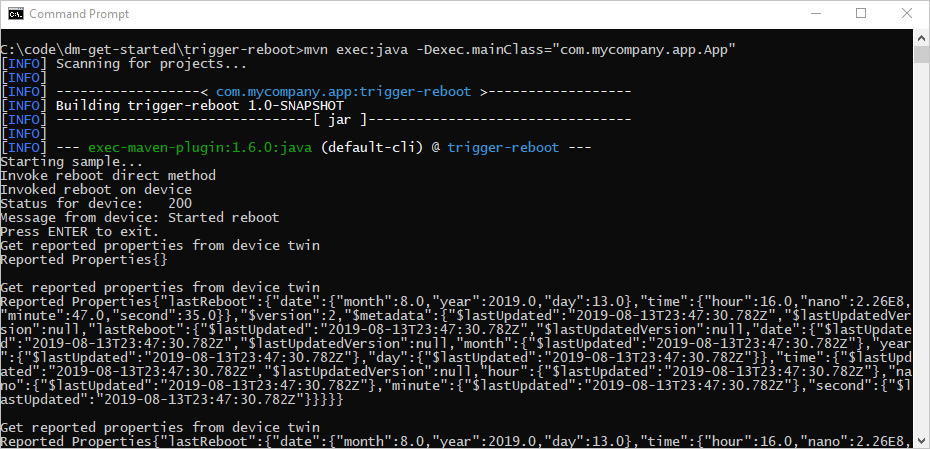
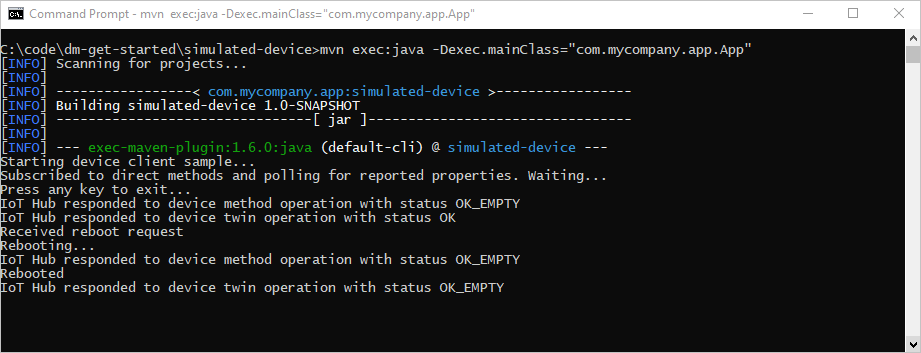
會回應 reboot 直接方法呼叫的模擬裝置:
自訂及延伸裝置管理動作
您的 IoT 解決方案可以透過使用裝置對應項和雲端到裝置方法基元,擴充一組已定義的裝置管理模式或啟用自訂模式。 其他裝置管理動作範例還包括恢復出廠預設值、韌體更新、軟體更新、電源管理、網路和連線管理,以及資料加密。
裝置維護期間
一般而言,您會設定讓裝置在產生最短中斷和停機時間的時機執行動作。 裝置維護期間是用來定義裝置組態更新時機的常用模式。 您的後端解決方案可以使用所需的裝置對應項 (twin) 屬性,在您的裝置上定義可啟用維護期間的原則並啟用該原則。 當裝置收到維護期間原則時,它可以使用回報的裝置對應項 (twin) 屬性來回報原則的狀態。 接著,後端 App 便可使用裝置對應項 (twin) 查詢來證明是否符合裝置及每個原則的規定。
下一步
在本文中,您使用了直接方法在裝置上觸發遠端重新啟動。 您已使用報告屬性來從裝置回報上次重新開機時間,以及查詢裝置對應項來從雲端探索裝置的上次重新開機時間。
若要繼續開始使用 IoT 中樞和裝置管理模式,例如端對端映像型更新,請參閱 Azure IoT 中樞裝置更新文章,使用 Raspberry Pi 3 B+ 參考映像。
若要了解如何擴充 IoT 解決方案,以及在多部裝置上排程方法呼叫,請參閱排程及廣播作業。
意見反應
即將登場:在 2024 年,我們將逐步淘汰 GitHub 問題作為內容的意見反應機制,並將它取代為新的意見反應系統。 如需詳細資訊,請參閱:https://aka.ms/ContentUserFeedback。
提交並檢視相關的意見反應