本逐步解說說明如何在 Visual Studio 中建立 Windows 桌面應用程式。 您建立的應用程式會使用 Windows API 在視窗中顯示 Hello,Windows 桌面! 。 您可以使用在這個逐步解說中開發的程式碼作為模式,來建立 Windows 傳統型應用程式。
Windows API (也稱為 Win32 API、Windows 傳統型 API 和 Windows Classic API) 是以 C 語言為基礎的架構,用於建立 Windows 應用程式。 數十年來它用來建立 Windows 應用程式。 在 Windows API 之上建置了更進階且更容易的程式架構,例如 MFC、ATL 和 .NET 架構。 即使是以 C++/WinRT 撰寫之 UWP 和市集應用程式的最新式 Windows 執行階段程式碼,也會使用下方的 Windows API。 如需 Windows API 的詳細資訊,請參閱 Windows API 索引。
重要
本文結尾的 建置程式代碼 區段會顯示完整的程序代碼。 本逐步解說涵蓋進入 Windows 應用程式的各種程式代碼片段,但代碼段中會省略一些詳細數據,以專注於最重要的部分。 您可以複製完整的程式碼,並在最後將其貼到專案中。
必要條件
Microsoft Windows 7 或更新版本。 建議使用 Windows 11 或更新版本以獲得最佳開發體驗。
Visual Studio。 如需如何下載並安裝 Visual Studio 的詳細資訊,請參閱安裝 Visual Studio。 當您執行安裝程式時,請確認已選取使用 C++ 的桌面開發工作負載。 如果您在安裝 Visual Studio 時未安裝此工作負載,也不用擔心。 您可以再次執行安裝程式並立即安裝。
如何使用 Visual Studio IDE 的基本瞭解。 如果您先前使用過 Windows 傳統型應用程式,您應能輕鬆跟上。 如需簡介,請參閱 Visual Studio IDE 功能導覽。
具備一些C++語言的熟悉程度。 別擔心,我們不會進行太複雜的操作。
建立 Windows 桌面專案
請遵循下列步驟來建立您的第一個 Windows 桌面專案。 如本文開頭所述,完成的程式代碼可在逐步解說結尾的建置程式 代碼 一節中取得。 請繼續進行並遵循建立專案的步驟,但在呈現完整的應用程式程式碼時,在結束之前請先不要貼上下列程式碼的區段。 程式碼片段中會省略一些詳細資料,以專注於最重要的部分。 您可以複製完整的程式碼,並在最後將其貼到專案中。
若要查看您慣用 Visual Studio 版本的步驟,請使用位於此頁面目錄頂端 的版本選取器 。
在 Visual Studio 中建立 Windows 桌面專案
從主功能表,選擇 [檔案]> [新增]> [專案],以開啟 [建立新專案] 對話方塊。
在對話方塊頂端,將 [語言] 設定為 [C++],將 [平台] 設定為 [Windows],並將 [專案類型] 設定為 [桌面]。
從專案類型的篩選清單中,選擇 [Windows 桌面精靈],然後選擇 [下一步]。 在下一個頁面中,輸入專案的名稱,例如 DesktopApp。
選擇 [建立] 按鈕以建立專案。
[Windows 桌面專案] 對話方塊現在會出現。 在 [應用程式類型] 下拉式清單中,確定您選取了 [傳統型應用程式 (.exe)]。 由於我們正在建立 Windows 應用程式,因此選擇 [主控台應用程式] 會產生將不會建置我們將要使用程式碼的專案。 在 [其他選項] 下,選取 [空專案]。 選擇 [確定] 建立專案。
在 [方案總管] 中,以滑鼠右鍵按一下 DesktopApp 專案,選擇 [新增],然後選擇 [新增項目]。
動畫會顯示在 [方案總管] 中以滑鼠右鍵按一下專案名稱、選擇出現的功能表中的 [新增],然後選擇 [新增項目]。
在 [加入新項目] 對話方塊中,選取 [C++ 檔 (.cpp)] 。 在 [ 名稱] 方塊中,輸入檔案的名稱,例如
HelloWindowsDesktop.cpp。 選擇新增。![Visual Studio 2019 中 [新增專案] 對話框的螢幕快照。已選取 [C 加號加號檔案][.cpp] 選項。名稱欄位會設定為 Hello Windows Desktop.cpp。](../build/media/desktop-app-add-cpp-file-153.png?view=msvc-170)
現在會建立您的專案,並在編輯器中開啟您的來源檔案。
若要在 Visual Studio 2017 中建立 Windows 桌面專案
在 [檔案] 功能表上,選擇 [新增] 然後選擇 [專案]。
在 [新增專案] 對話方塊的左窗格中,展開 [已安裝]>[Visual C++],然後選取 [Windows 桌面]。 在中央窗格中,選取 [Windows 桌面精靈]。
在 [名稱] 方塊中,輸入專案的名稱,例如 DesktopApp。 選擇確定。
![Visual Studio 2017 中 [新增專案] 對話框的螢幕快照。已選取 [Windows 桌面精靈] 專案。名稱文字框顯示 DesktopApp。](../build/media/desktop-app-new-project-name-153.png?view=msvc-170)
在 [Windows 桌面專案] 對話方塊的 [應用程式類型] 底下,選取 [Windows 應用程式 (.exe)]。 在 [其他選項] 下,選取 [空專案] 。 請確定未選取 [先行編譯標頭檔]。 選擇 [確定] 建立專案。
在 [方案總管] 中,以滑鼠右鍵按一下 DesktopApp 專案,選擇 [新增],然後選擇 [新增項目]。
動畫會顯示在 [方案總管] 中以滑鼠右鍵按一下專案名稱、選擇出現的功能表中的 [新增],然後選擇 [新增項目]。
在 [加入新項目] 對話方塊中,選取 [C++ 檔 (.cpp)] 。 在 [ 名稱] 方塊中,輸入檔案的名稱,例如
HelloWindowsDesktop.cpp。 選擇新增。
現在會建立您的專案,並在編輯器中開啟您的來源檔案。
若要在 Visual Studio 2015 中建立 Windows 桌面專案
在 [檔案] 功能表上,選擇 [新增] 然後選擇 [專案]。
在 [新增專案] 對話方塊的左窗格中,展開 [已安裝]>[範本]>[Visual C++],然後選取 [Win32]。 在中間窗格選取 [Win32 專案] 。
在 [名稱] 方塊中,輸入專案的名稱,例如 DesktopApp。 選擇確定。
![Visual Studio 2015 中 [新增專案] 對話框的螢幕快照,其中醒目提示 [Win32 專案] 選項,並在 [名稱] 文本框中輸入 DesktopApp。](../build/media/desktop-app-new-project-name-150.png?view=msvc-170)
在 [Win32 應用程式精靈] 對話方塊的 [概觀] 頁面上選擇 [下一步]。
![Visual Studio 2015 中顯示 [Win32 應用程式精靈概觀] 頁面的對話框螢幕快照。](../build/media/desktop-app-win32-wizard-overview-150.png?view=msvc-170)
在 [應用程式設定] 頁面的 [應用程式類型] 下,選取 [Windows 應用程式]。 在 [其他選項] 底下,取消核取 [先行編譯標頭檔],然後選取 [空白專案]。 選擇 [完成] 以建立專案。
在 [方案總管] 中,以滑鼠右鍵按一下 DesktopApp 專案、選擇 [新增],然後選擇 [新增項目]。
動畫會顯示在 [方案總管] 中以滑鼠右鍵按一下專案名稱、選擇出現的功能表中的 [新增],然後選擇 [新增項目]。
在 [加入新項目] 對話方塊中,選取 [C++ 檔 (.cpp)] 。 在 [ 名稱] 方塊中,輸入檔案的名稱,例如
HelloWindowsDesktop.cpp。 選擇新增。![Visual Studio 2015 中 [新增項目] 對話框的螢幕快照,其中已選取 Visual C++,並醒目提示 [C++ 檔案] 選項。](../build/media/desktop-app-add-cpp-file-150.png?view=msvc-170)
現在會建立您的專案,並在編輯器中開啟您的來源檔案。
程式碼
接下來,了解如何在 Visual Studio 中建立 Windows 傳統型應用程式的程式碼。
程式碼在 Windows 傳統型應用程式中開始執行的位置
就像每個 C 應用程式和 C++ 應用程式都必須有
main函式作為起點,每個 Windows 傳統型應用程式也都必須有WinMain函式。WinMain具有下列語法。int WINAPI WinMain( _In_ HINSTANCE hInstance, _In_opt_ HINSTANCE hPrevInstance, _In_ LPSTR lpCmdLine, _In_ int nCmdShow );如需這個函式之參數和傳回值的相關資訊,請參閱 WinMain 進入點。
注意
所有這些額外的單字,例如
WINAPI或CALLBACK或HINSTANCE或_In_是什麼? 傳統的 Windows API 會使用 typedefs 和前置處理器巨集,廣泛抽象化一些型別和平台特定程式碼的詳細資料,例如呼叫慣例、__declspec宣告和編譯器 pragmas。 在 Visual Studio 中,您可以使用 IntelliSense 快速諮詢功能來查看這些 typedefs 和巨集的定義。 將滑鼠停留在感興趣的單字上,或選取單字,然後按 Ctrl+K、Ctrl+I 以顯示包含定義的小型快顯視窗。 如需詳細資訊,請參閱使用 IntelliSense。 參數和傳回型別通常會使用 SAL 註釋來協助您捕捉程式設計錯誤。 如需詳細資訊,請參閱使用 SAL 註釋減少 C/C++ 程式碼的缺失。Windows 桌面程式需要
<windows.h>。 您也會頻繁看到#include <tchar.h>。 這可讓您更輕鬆地撰寫可使用char或wchar_t的應用程式。 其運作方式是,您改用程式碼中的TCHAR巨集,其最終會在專案中定義wchar_t符號時解析為UNICODE,否則它會解析為char。 如果您一律啟用 UNICODE 來建置,則不需要TCHAR,且可以直接使用wchar_t。 如需詳細資訊,請參閱使用泛型文字對應。 下列程式代碼顯示檔案頂端的這兩#include個語句。#include <windows.h> #include <tchar.h>除了
WinMain函式之外,每個 Windows 傳統型應用程式還必須有視窗程序函式。 此函式稱為WndProc,但您可以在程式碼中提供您想要的任何名稱。WndProc具有下列語法。LRESULT CALLBACK WndProc( _In_ HWND hWnd, _In_ UINT message, _In_ WPARAM wParam, _In_ LPARAM lParam );在此函式中,您會撰寫程式碼來處理應用程式在事件發生時從 Windows 接收的訊息。 例如,如果使用者在應用程式中選擇 [確定] 按鈕,Windows 就會傳送訊息給您。 您可以在
WndProc函式內撰寫程式碼,以執行任何適當的工作。 它稱為處理事件。 您只會處理與應用程式相關的事件。如需詳細資訊,請參閱 Window 程序。
將功能新增至 WinMain 函式
在
WinMain函式中,您需要擷取主要視窗的一些基本資訊。 您可以填入型別WNDCLASSEX的結構來執行此動作。 結構包含視窗的相關信息,例如應用程式圖示、視窗的背景色彩、要顯示在標題列中的名稱等等。 重要的是,它包含視窗程序的函式指標,可處理 Windows 傳送至應用程式的訊息。 下列範例會顯示一個典型的WNDCLASSEX結構:WNDCLASSEX wcex; wcex.cbSize = sizeof(WNDCLASSEX); wcex.style = CS_HREDRAW | CS_VREDRAW; wcex.lpfnWndProc = WndProc; wcex.cbClsExtra = 0; wcex.cbWndExtra = 0; wcex.hInstance = hInstance; wcex.hIcon = LoadIcon(wcex.hInstance, IDI_APPLICATION); wcex.hCursor = LoadCursor(NULL, IDC_ARROW); wcex.hbrBackground = (HBRUSH)(COLOR_WINDOW+1); wcex.lpszMenuName = NULL; wcex.lpszClassName = szWindowClass; wcex.hIconSm = LoadIcon(wcex.hInstance, IDI_APPLICATION);如需這個結構欄位的相關資訊,請參閱
WNDCLASSEX。填妥
WNDCLASSEX結構之後,您會向 Windows 註冊它,讓它知道您的視窗,以及如何傳送訊息給它。 請使用RegisterClassEx函式,並將視窗類別結構當做引數傳遞。_T巨集被使用,是因為我們根據先前關於 Unicode 的討論會使用TCHAR類型。 下列程式碼示範如何註冊視窗類別。if (!RegisterClassEx(&wcex)) { MessageBox(NULL, _T("Call to RegisterClassEx failed!"), _T("Windows Desktop Guided Tour"), NULL); return 1; }使用函式
CreateWindowEx建立視窗。static TCHAR szWindowClass[] = _T("DesktopApp"); static TCHAR szTitle[] = _T("Windows Desktop Guided Tour Application"); // The parameters to CreateWindowEx explained: // WS_EX_OVERLAPPEDWINDOW : An optional extended window style. // szWindowClass: the name of the application // szTitle: the text that appears in the title bar // WS_OVERLAPPEDWINDOW: the type of window to create // CW_USEDEFAULT, CW_USEDEFAULT: initial position (x, y) // 500, 100: initial size (width, height) // NULL: the parent of this window // NULL: this application does not have a menu bar // hInstance: the first parameter from WinMain // NULL: not used in this application HWND hWnd = CreateWindowEx( WS_EX_OVERLAPPEDWINDOW, szWindowClass, szTitle, WS_OVERLAPPEDWINDOW, CW_USEDEFAULT, CW_USEDEFAULT, 500, 100, NULL, NULL, hInstance, NULL ); if (!hWnd) { MessageBox(NULL, _T("Call to CreateWindowEx failed!"), _T("Windows Desktop Guided Tour"), NULL); return 1; }這個函式會傳回
HWND,也就是視窗的控制代碼。 控制代碼有點像指標。 Windows 會使用它來追蹤您所建立的視窗。 如需詳細資訊,請參閱 Windows 資料類型。此時,視窗已建立,但我們仍然需要告訴 Windows 使其可見。 這就是此程式碼的用途:
// The parameters to ShowWindow explained:
// hWnd: the value returned from CreateWindowEx
// nCmdShow: the fourth parameter from WinMain
ShowWindow(hWnd,
   nCmdShow);
UpdateWindow(hWnd);
顯示的視窗只是空白矩形,因為您尚未實作
WndProc函式。 應用程式尚未處理 Windows 現在傳送給它的訊息。為了處理訊息,我們會先新增所謂的訊息迴圈,以接聽 Windows 所傳送的訊息。 當應用程式收到訊息時,這個迴圈會將其分派給您的
WndProc函式以進行處理。 此訊息迴圈會類似下列程式碼:MSG msg; while (GetMessage(&msg, NULL, 0, 0)) { TranslateMessage(&msg); DispatchMessage(&msg); } return (int) msg.wParam;如需訊息迴圈中結構和函式的詳細資訊,請參閱
MSG、GetMessage、TranslateMessage 和DispatchMessage。建立應用程式主要視窗並接聽 Windows 傳送給應用程式訊息的基本
WinMain函式,類似於下列程式碼:int WINAPI WinMain(HINSTANCE hInstance, HINSTANCE hPrevInstance, LPSTR lpCmdLine, int nCmdShow) { WNDCLASSEX wcex; wcex.cbSize = sizeof(WNDCLASSEX); wcex.style = CS_HREDRAW | CS_VREDRAW; wcex.lpfnWndProc = WndProc; wcex.cbClsExtra = 0; wcex.cbWndExtra = 0; wcex.hInstance = hInstance; wcex.hIcon = LoadIcon(wcex.hInstance, IDI_APPLICATION); wcex.hCursor = LoadCursor(NULL, IDC_ARROW); wcex.hbrBackground = (HBRUSH)(COLOR_WINDOW+1); wcex.lpszMenuName = NULL; wcex.lpszClassName = szWindowClass; wcex.hIconSm = LoadIcon(wcex.hInstance, IDI_APPLICATION); if (!RegisterClassEx(&wcex)) { MessageBox(NULL, _T("Call to RegisterClassEx failed!"), _T("Windows Desktop Guided Tour"), NULL); return 1; } // Store instance handle in our global variable hInst = hInstance; // The parameters to CreateWindowEx explained: // WS_EX_OVERLAPPEDWINDOW : An optional extended window style. // szWindowClass: the name of the application // szTitle: the text that appears in the title bar // WS_OVERLAPPEDWINDOW: the type of window to create // CW_USEDEFAULT, CW_USEDEFAULT: initial position (x, y) // 500, 100: initial size (width, height) // NULL: the parent of this window // NULL: this application does not have a menu bar // hInstance: the first parameter from WinMain // NULL: not used in this application HWND hWnd = CreateWindowEx( WS_EX_OVERLAPPEDWINDOW, szWindowClass, szTitle, WS_OVERLAPPEDWINDOW, CW_USEDEFAULT, CW_USEDEFAULT, 500, 100, NULL, NULL, hInstance, NULL ); if (!hWnd) { MessageBox(NULL, _T("Call to CreateWindowEx failed!"), _T("Windows Desktop Guided Tour"), NULL); return 1; } // The parameters to ShowWindow explained: // hWnd: the value returned from CreateWindowEx // nCmdShow: the fourth parameter from WinMain ShowWindow(hWnd, nCmdShow); UpdateWindow(hWnd); // Main message loop: MSG msg; while (GetMessage(&msg, NULL, 0, 0)) { TranslateMessage(&msg); DispatchMessage(&msg); } return (int) msg.wParam; }
處理 WndProc 函式中的訊息
若要處理應用程式所接收的訊息,您可以在
switch函式中實作WndProc陳述式。要處理的重要訊息是
WM_PAINT。 當應用程式所顯示的視窗有某部分必須更新時,應用程式就會收到WM_PAINT訊息。 當使用者將視窗移至視窗前方並再次移動時,就會發生此事件。 它會在第一次顯示視窗時收到此訊息,讓您有機會顯示應用程式 UI。 您的應用程式會在 Windows 傳送事件時找出這些事件。 第一次顯示視窗時,整個視窗都必須更新。若要處理
WM_PAINT訊息,請先呼叫BeginPaint,然後處理所有邏輯,以配置視窗中的文字、按鈕和其他控制項。 然後呼叫EndPaint。 針對此應用程式,BeginPaint()和EndPaint()之間的程式碼會將Hello, Windows desktop!顯示在您於WinMain()中建立的視窗。 在下列程式碼中,TextOut函式會在視窗中的指定位置顯示文字。PAINTSTRUCT ps; HDC hdc; TCHAR greeting[] = _T("Hello, Windows desktop!"); switch (message) { case WM_PAINT: hdc = BeginPaint(hWnd, &ps); // Here your application is laid out. // For this introduction, we just print out "Hello, Windows desktop!" // in the top left corner. TextOut(hdc, 5, 5, greeting, _tcslen(greeting)); // End application-specific layout section. EndPaint(hWnd, &ps); break; }在上述程式碼中,
HDC是與視窗工作區相關聯的裝置內容控制代碼。 在視窗中繪製時,您可以使用它來參考其工作區。 使用BeginPaint和EndPaint函式來準備並完成工作區中的繪圖。BeginPaint會傳回用於在工作區中繪製之顯示裝置內容的控制代碼;EndPaint會結束繪製要求並釋放裝置內容。應用程式通常會處理許多其他訊息。 例如,
WM_CREATE會在第一次建立視窗時傳送,而WM_DESTROY會在關閉視窗時傳送。 下列程式碼會顯示基本但完整的WndProc函式:LRESULT CALLBACK WndProc(HWND hWnd, UINT message, WPARAM wParam, LPARAM lParam) { PAINTSTRUCT ps; HDC hdc; TCHAR greeting[] = _T("Hello, Windows desktop!"); switch (message) { case WM_PAINT: hdc = BeginPaint(hWnd, &ps); // Here your application is laid out. // For this introduction, we just print out "Hello, Windows desktop!" // in the top left corner. TextOut(hdc, 5, 5, greeting, _tcslen(greeting)); // End application specific layout section. EndPaint(hWnd, &ps); break; case WM_DESTROY: PostQuitMessage(0); break; default: return DefWindowProc(hWnd, message, wParam, lParam); break; } return 0; }
建置程式碼
如前所述,工作應用程式的完整程式碼如下。
建立這個範例
刪除編輯器中的所有
HelloWindowsDesktop.cpp程序代碼。 複製此範例程式代碼,並將它貼到HelloWindowsDesktop.cpp:// HelloWindowsDesktop.cpp // compile with: /D_UNICODE /DUNICODE /DWIN32 /D_WINDOWS /c #include <windows.h> #include <stdlib.h> #include <string.h> #include <tchar.h> // Global variables // The main window class name. static TCHAR szWindowClass[] = _T("DesktopApp"); // The string that appears in the application's title bar. static TCHAR szTitle[] = _T("Windows Desktop Guided Tour Application"); // Stored instance handle for use in Win32 API calls such as FindResource HINSTANCE hInst; // Forward declarations of functions included in this code module: LRESULT CALLBACK WndProc(HWND, UINT, WPARAM, LPARAM); int WINAPI WinMain( _In_ HINSTANCE hInstance, _In_opt_ HINSTANCE hPrevInstance, _In_ LPSTR lpCmdLine, _In_ int nCmdShow ) { WNDCLASSEX wcex; wcex.cbSize = sizeof(WNDCLASSEX); wcex.style = CS_HREDRAW | CS_VREDRAW; wcex.lpfnWndProc = WndProc; wcex.cbClsExtra = 0; wcex.cbWndExtra = 0; wcex.hInstance = hInstance; wcex.hIcon = LoadIcon(wcex.hInstance, IDI_APPLICATION); wcex.hCursor = LoadCursor(NULL, IDC_ARROW); wcex.hbrBackground = (HBRUSH)(COLOR_WINDOW+1); wcex.lpszMenuName = NULL; wcex.lpszClassName = szWindowClass; wcex.hIconSm = LoadIcon(wcex.hInstance, IDI_APPLICATION); if (!RegisterClassEx(&wcex)) { MessageBox(NULL, _T("Call to RegisterClassEx failed!"), _T("Windows Desktop Guided Tour"), NULL); return 1; } // Store instance handle in our global variable hInst = hInstance; // The parameters to CreateWindowEx explained: // WS_EX_OVERLAPPEDWINDOW : An optional extended window style. // szWindowClass: the name of the application // szTitle: the text that appears in the title bar // WS_OVERLAPPEDWINDOW: the type of window to create // CW_USEDEFAULT, CW_USEDEFAULT: initial position (x, y) // 500, 100: initial size (width, height) // NULL: the parent of this window // NULL: this application does not have a menu bar // hInstance: the first parameter from WinMain // NULL: not used in this application HWND hWnd = CreateWindowEx( WS_EX_OVERLAPPEDWINDOW, szWindowClass, szTitle, WS_OVERLAPPEDWINDOW, CW_USEDEFAULT, CW_USEDEFAULT, 500, 100, NULL, NULL, hInstance, NULL ); if (!hWnd) { MessageBox(NULL, _T("Call to CreateWindowEx failed!"), _T("Windows Desktop Guided Tour"), NULL); return 1; } // The parameters to ShowWindow explained: // hWnd: the value returned from CreateWindowEx // nCmdShow: the fourth parameter from WinMain ShowWindow(hWnd, nCmdShow); UpdateWindow(hWnd); // Main message loop: MSG msg; while (GetMessage(&msg, NULL, 0, 0)) { TranslateMessage(&msg); DispatchMessage(&msg); } return (int) msg.wParam; } // FUNCTION: WndProc(HWND, UINT, WPARAM, LPARAM) // // PURPOSE: Processes messages for the main window. // // WM_PAINT - Paint the main window // WM_DESTROY - post a quit message and return LRESULT CALLBACK WndProc(HWND hWnd, UINT message, WPARAM wParam, LPARAM lParam) { PAINTSTRUCT ps; HDC hdc; TCHAR greeting[] = _T("Hello, Windows desktop!"); switch (message) { case WM_PAINT: hdc = BeginPaint(hWnd, &ps); // Here your application is laid out. // For this introduction, we just print out "Hello, Windows desktop!" // in the top left corner. TextOut(hdc, 5, 5, greeting, _tcslen(greeting)); // End application-specific layout section. EndPaint(hWnd, &ps); break; case WM_DESTROY: PostQuitMessage(0); break; default: return DefWindowProc(hWnd, message, wParam, lParam); break; } return 0; }在 [ 建置 ] 功能表上,選擇 [ 建置方案]。 編譯的結果會出現在 Visual Studio 的 [輸出] 視窗中。
動畫會顯示點擊 [全部儲存] 按鈕,然後從主功能表選擇 [建置 > 建置方案]。
若要執行應用程式,請按 F5。 應該會出現具有文字
Hello, Windows desktop!的視窗。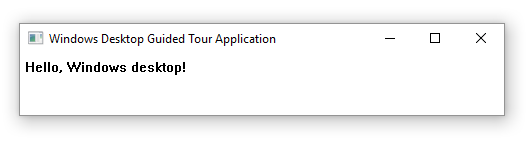
恭喜! 您已建置傳統的 Windows 傳統型應用程式。