當您建立視覺效果時,您可以新增自定義其屬性的選項。 一些可自訂格式化的專案包括:
- 標題
- 背景
- 邊境
- 影子
- 顏色
在本教學課程中,您將瞭解如何:
- 將格式化屬性新增至視覺效果。
- 包裝視覺內容
- 將自定義視覺效果匯入 Power BI Desktop 或服務報表
先決條件
本教學課程說明如何將通用格式屬性新增至視覺效果。 我們將使用 Circle 卡片 視覺效果作為範例。 我們將新增變更圓形色彩和粗細的功能。 如果您沒有「圓形卡片」的項目資料夾,即您在教學中建立的,請在繼續之前重做此教學。
新增格式設定選項
在 PowerShell中,流覽至您的圓形卡片專案資料夾,然後啟動圓形卡片視覺效果。 您的視覺化應用程式目前正在您的電腦上執行。
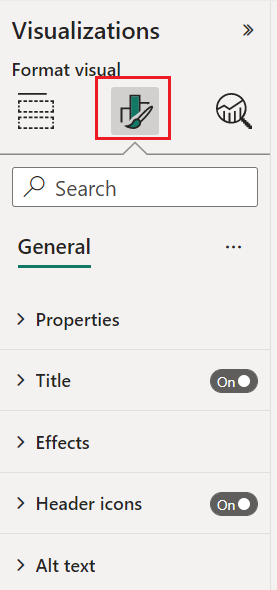
pbiviz start在 Power BI中,選取 [格式] 面板。
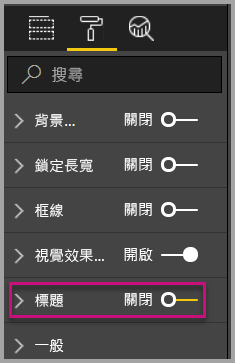
您應該會看到一般格式設定選項,但不應該看到任何視覺格式設定選項。
在 Visual Studio Code中,開啟
capabilities.json檔案。在 dataViewMappings 陣列之前,新增 物件。
"objects": {},
儲存
capabilities.json檔案。在 Power BI中,再次檢閱格式化選項。
注意
如果您沒有看到格式設定選項變更,請選擇 重載自定義視覺效果。

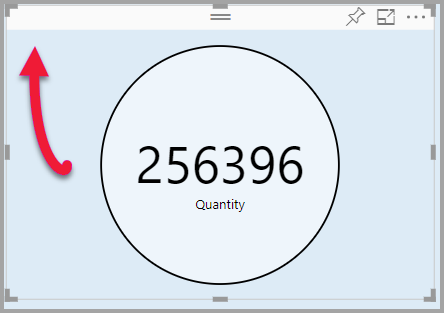
將 [標題] 選項設定為 [關閉]。 請注意,視覺效果不再顯示左上角的量值名稱。
新增自訂格式設定選項
現在,讓我們新增一個新的群組,使用標籤 來設定圓形顏色,並使用標籤 來設定圓形外框的粗細。
在 PowerShell中,輸入 ctrl Ctrl+C 以停止自定義視覺效果。
在 Visual Studio Code的
capabilities.json檔案中,將下列 JSON 片段插入標示為 物件的物件中。"circle": { "properties": { "circleColor": { "type": { "fill": { "solid": { "color": true } } } }, "circleThickness": { "type": { "numeric": true } } } }此 JSON 片段描述名為 circle的群組,其中包含兩個變數 -circleColor 和 circleThickness。
儲存
capabilities.json檔案。在 [總管] 窗格中,移至 [src] 資料夾,然後選取 [settings.ts]。 此檔案代表入門視覺效果的設定。
在
settings.ts檔案中,將匯入語句和兩個類別取代為下列程式碼。import { formattingSettings } from "powerbi-visuals-utils-formattingmodel"; import FormattingSettingsCard = formattingSettings.SimpleCard; import FormattingSettingsSlice = formattingSettings.Slice; import FormattingSettingsModel = formattingSettings.Model; export class CircleSettings extends FormattingSettingsCard{ public circleColor = new formattingSettings.ColorPicker({ name: "circleColor", displayName: "Color", value: { value: "#ffffff" }, visible: true }); public circleThickness = new formattingSettings.NumUpDown({ name: "circleThickness", displayName: "Thickness", value: 2, visible: true }); public name: string = "circle"; public displayName: string = "Circle"; public visible: boolean = true; public slices: FormattingSettingsSlice[] = [this.circleColor, this.circleThickness] } export class VisualSettings extends FormattingSettingsModel { public circle: CircleSettings = new CircleSettings(); public cards: FormattingSettingsCard[] = [this.circle]; }此課程模組會定義兩個類別。 CircleSettings 類別會定義兩個屬性,其名稱符合 capabilities.json 檔案中定義的物件(circleColor 和 circleThickness),並設定預設值。 VisualSettings 類別會根據
capabilities.json檔案中所述的屬性來定義 circle 物件。儲存
settings.ts檔案。開啟
visual.ts檔案。在
visual.ts檔案中,匯入 :import { VisualSettings } from "./settings"; import { FormattingSettingsService } from "powerbi-visuals-utils-formattingmodel";在 Visual 類別中新增下列屬性:
private visualSettings: VisualSettings;
private formattingSettingsService: FormattingSettingsService;
這個屬性會儲存 VisualSettings 對象的參考,描述視覺效果設定。
在 Visual 類別中,將以下內容插入為 建構函式的第一行:
this.formattingSettingsService = new FormattingSettingsService();在 Visual 類別中,於 update 方法之後新增下列方法。
public getFormattingModel(): powerbi.visuals.FormattingModel {
    return this.formattingSettingsService.buildFormattingModel(this.visualSettings);
}
此函式會在每次格式化窗格渲染時呼叫。 它可讓您選取要在屬性窗格中對使用者公開的物件和屬性。
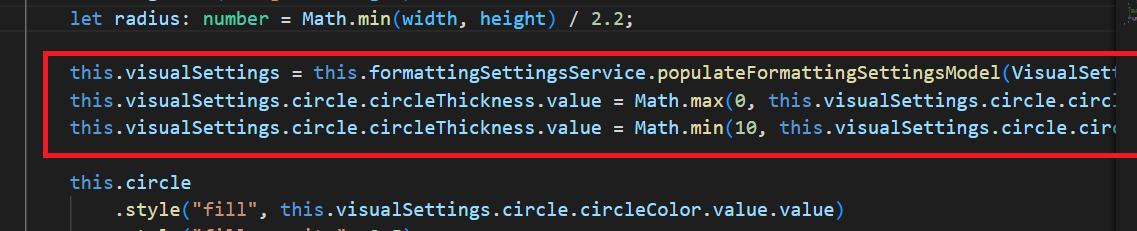
在 update 方法中,在宣告 radius 變數之後,新增下列程序代碼。
this.visualSettings = this.formattingSettingsService.populateFormattingSettingsModel(VisualSettings, options.dataViews[0]);
this.visualSettings.circle.circleThickness.value = Math.max(0, this.visualSettings.circle.circleThickness.value);
this.visualSettings.circle.circleThickness.value = Math.min(10, this.visualSettings.circle.circleThickness.value);
此程式代碼會擷取格式選項。 它會調整任何傳入 circleThickness 屬性的值,並將它轉換成介於零到 10 之間的數位。
在 圓形元素中,修改傳遞至 填滿樣式的值 和 筆劃寬度樣式的值,如下所示:
.style("fill", this.visualSettings.circle.circleColor.value.value).style("stroke-width", this.visualSettings.circle.circleThickness.value)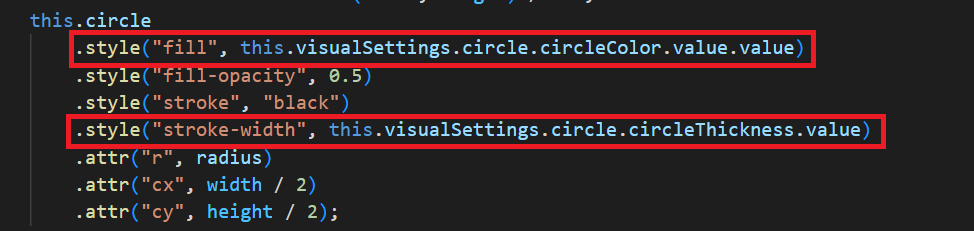
儲存
visual.ts檔案。在 PowerShell中,啟動視覺效果。
pbiviz start在 Power BI中,在視覺效果上方的工具列中,選取 [切換自動重載] 。
![[切換自動重載] 圖示的螢幕快照。](media/custom-visual-develop-tutorial-format-options/toggle-auto-reload.png)
在 視覺化格式 選項中,展開 Circle。
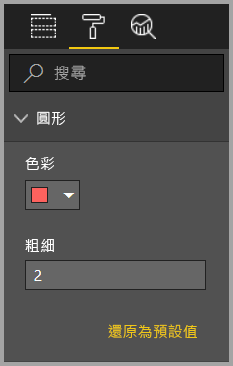
修改 顏色 和 厚度 的選項。
將 粗細 選項修改為小於零的值,以及大於 10 的值。 然後請注意,視覺效果會將值更新為可容忍的最小值或最大值。
除錯
如需調試自訂視覺物件的秘訣,請參閱 偵錯指南。
封裝自定義視覺效果
現在視覺效果已完成且可供使用,現在可以封裝它。 封裝的視覺效果可以匯入Power BI報表或服務,供其他人使用及享受。
當您的視覺化準備就緒時,請遵循 封裝 Power BI 視覺化 中的指示,然後視需要與其他人分享,以便他們可以 匯入 並欣賞。