集合檢視允許使用任意版面配置來顯示一組內容。 使用內建支援時,它們可讓您輕鬆建立類似網格線或線性版面配置,同時支援自定義版面配置。

集合檢視會使用委派和數據源來維護專案的集合,以提供用戶互動和集合的內容。 由於集合檢視是以與檢視本身無關的版面配置子系統為基礎,因此提供不同的版面配置可以輕鬆地變更集合檢視數據的呈現方式。
關於集合檢視
如上所述,集合檢視 (UICollectionView) 會管理已排序的專案集合,並呈現具有可自定義版面配置的專案。 集合檢視的運作方式與數據表檢視類似UITableView,不同之處在於它們可以使用版面配置來呈現不只是單一數據行中的專案。
在tvOS中使用集合檢視時,您的應用程式會負責使用資料來源 (UICollectionViewDataSource) 提供與集合相關聯的數據。 集合檢視數據可以選擇性地組織並呈現成不同的群組(區段)。
集合檢視會使用 Cell (UICollectionViewCell) 在螢幕上呈現個別專案,該儲存格會提供集合中指定資訊片段的呈現方式(例如影像及其標題)。
您可以選擇性地將補充檢視新增至集合檢視的簡報,以做為區段和儲存格的頁首和頁尾。 集合檢視的配置負責定義這些檢視的位置以及個別儲存格。
集合檢視可以使用委派來回應用戶互動(UICollectionViewDelegate)。 如果已醒目提示儲存格,或已選取儲存格,則此委派也會負責判斷指定的儲存格是否可以取得焦點。 在某些情況下,委派會決定個別儲存格的大小。
集合檢視版面配置
集合檢視的主要功能是其呈現的數據與其版面配置之間的分隔。 集合檢視版面配置 (UICollectionViewLayout) 負責在集合檢視的螢幕簡報中,提供組織和儲存格的位置(以及任何補充檢視)。
個別儲存格是由集合檢視從其附加數據源建立,然後由指定的集合檢視版面配置排列和顯示。
建立集合檢視時,通常會提供集合檢視版面配置。 不過,您可以隨時變更集合檢視版面配置,而且集合檢視數據的螢幕上呈現將會使用提供的新版面配置自動更新。
集合檢視版面配置提供數種方法,可用來建立兩個不同版面配置之間的轉換動畫效果(預設不會完成動畫)。 此外,集合檢視版面配置可以使用手勢辨識器,進一步建立使用者互動的動畫效果,進而變更版面配置。
建立儲存格和增補檢視
集合檢視的數據源不僅負責提供支援集合項目的數據,也負責顯示內容的儲存格。
由於集合檢視是設計來處理大型專案集合,因此可以清除佇列並重複使用個別儲存格,以避免記憶體超過限制。 清除佇列檢視的方法有兩種不同的方法:
DequeueReusableCell- 建立或傳回指定類型的儲存格(如應用程式分鏡腳稿中所指定)。DequeueReusableSupplementaryView- 建立或傳回指定類型的補充檢視(如應用程式分鏡腳本中所指定)。
呼叫上述任一方法之前,您必須先註冊類別、Storyboard 或 .xib 檔案,以使用集合檢視建立單元格的檢視。 例如:
public CityCollectionView (IntPtr handle) : base (handle)
{
    // Initialize
    RegisterClassForCell (typeof(CityCollectionViewCell), CityViewDatasource.CardCellId);
    ...
}
其中 typeof(CityCollectionViewCell) 提供支持檢視的類別,並提供 CityViewDatasource.CardCellId 清除佇列單元格時所使用的標識碼。
清除數據格之後,您可以使用它所代表之專案的數據進行設定,並返回要顯示的集合檢視。
關於集合檢視控制器
集合檢視控制器 (UICollectionViewController) 是提供下列行為的特製化檢視控制器 (UIViewController) :
- 它負責從分鏡腳本或
.xib檔案載入集合檢視,並具現化檢視。 如果在程式代碼中建立,它會自動建立新的未設定集合檢視。 - 載入集合檢視之後,控制器會嘗試從分鏡腳本或檔案載入其數據源和
.xib委派。 如果沒有可用,它會將本身設定為兩者的來源。 - 確保數據會在第一次顯示時填入集合檢視之前載入,然後重載並清除每個後續顯示上的選取專案。
此外,集合檢視控制器提供可覆寫的方法,可用來管理集合檢視的生命週期,例如 AwakeFromNib 和 ViewWillDisplay。
集合檢視和分鏡腳本
在 Xamarin.tvOS 應用程式中使用集合檢視的最簡單方式,就是將集合檢視新增至分鏡腳本。 作為快速範例,我們將建立範例應用程式來呈現影像、標題和選取按鈕。 如果使用者按兩下 [選取] 按鈕,就會顯示 [集合檢視],讓用戶選擇新的影像。 選擇影像時,會關閉集合檢視,並顯示新的影像和標題。
讓我們執行下列動作:
在 Visual Studio for Mac 中啟動新的 單一檢視 tvOS 應用程式 。
在 方案總管 中,按兩下
Main.storyboard檔案,然後在iOS設計工具中開啟它。將影像檢視、標籤和按鈕新增至現有的檢視,並將其設定為如下所示:

將 [名稱] 指派給 [屬性總管] 的 [Widget] 索引標籤中的 [影像檢視] 和 [卷標]。 例如:

接下來,將集合檢視控制器拖曳到分鏡腳本:

從 [按鈕] 拖曳至 [集合檢視控制器],然後從彈出視窗中選取 [ 推送 ]:
![從快顯選取 [推送]](collection-views-images/collection05.png)
執行應用程式時,每當使用者按兩下 [按鈕] 時,就會顯示 [集合檢視]。
選取 [集合檢視],然後在 [屬性總管] 的 [版面配置] 索引標籤中輸入下列值:

這會控制個別儲存格的大小,以及儲存格與集合檢視外部邊緣之間的框線。
選取集合檢視控制器,並在 [小工具] 索引標籤中將其類別設定為
CityCollectionViewController:
選取集合檢視,並在 [小工具] 索引標籤中將其類別設定為
CityCollectionView: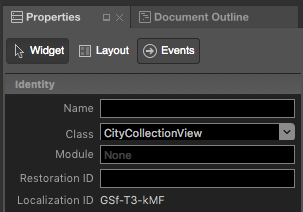
選取 [集合檢視儲存格],並在 [小工具] 索引標籤中將其類別設定為
CityCollectionViewCell:
在 [ 小工具] 索引標籤 中,確定 [版面配置 ] 為
Flow,而 [捲動方向 ] 適用於Vertical集合檢視:
選取集合檢視儲存格,並將其 [小工具] 索引標籤中的 [身分識別] 設定為
CityCell:
儲存您的變更。


![從快顯選取 [推送]](collection-views-images/collection05.png#lightbox)


![從快顯選取 [推送]](collection-views-images/collection05vs.png#lightbox)


如果我們選擇 Custom 集合檢視的 版面配置,我們可以指定自定義版面配置。 Apple 提供內 UICollectionViewFlowLayout 建, UICollectionViewDelegateFlowLayout 而且可以輕鬆地在網格線型配置中呈現數據(這些是由 flow 版面配置樣式使用)。
如需使用分鏡腳本的詳細資訊,請參閱我們的 Hello, tvOS 快速入門指南。
提供集合檢視的數據
既然我們已將集合檢視(和集合檢視控制器)新增至分鏡腳本,我們需要提供集合的數據。
數據模型
首先,我們將為數據建立模型,以保存要顯示之影像的檔名、標題和旗標,以允許選取城市。
建立 CityInfo 類別,使其看起來如下:
using System;

namespace tvCollection
{
    public class CityInfo
    {
        #region Computed Properties
        public string ImageFilename { get; set; }
        public string Title { get; set; }
        public bool CanSelect{ get; set; }
        #endregion

        #region Constructors
        public CityInfo (string filename, string title, bool canSelect)
        {
            // Initialize
            this.ImageFilename = filename;
            this.Title = title;
            this.CanSelect = canSelect;
        }
        #endregion
    }
}
集合檢視儲存格
現在,我們需要定義每個數據格的數據呈現方式。 編輯檔案 CityCollectionViewCell.cs (自動從分鏡腳本檔案建立),使其看起來如下所示:
using System;
using Foundation;
using UIKit;
using CoreGraphics;

namespace tvCollection
{
    public partial class CityCollectionViewCell : UICollectionViewCell
    {
        #region Private Variables
        private CityInfo _city;
        #endregion

        #region Computed Properties
        public UIImageView CityView { get ; set; }
        public UILabel CityTitle { get; set; }

        public CityInfo City {
            get { return _city; }
            set {
                _city = value;
                CityView.Image = UIImage.FromFile (City.ImageFilename);
                CityView.Alpha = (City.CanSelect) ? 1.0f : 0.5f;
                CityTitle.Text = City.Title;
            }
        }
        #endregion

        #region Constructors
        public CityCollectionViewCell (IntPtr handle) : base (handle)
        {
            // Initialize
            CityView = new UIImageView(new CGRect(22, 19, 320, 171));
            CityView.AdjustsImageWhenAncestorFocused = true;
            AddSubview (CityView);

            CityTitle = new UILabel (new CGRect (22, 209, 320, 21)) {
                TextAlignment = UITextAlignment.Center,
                TextColor = UIColor.White,
                Alpha = 0.0f
            };
            AddSubview (CityTitle);
        }
        #endregion


    }
}
針對我們的 tvOS 應用程式,我們將顯示影像和選擇性標題。 如果無法選取指定的城市,我們會使用下列程式代碼將影像檢視變暗:
CityView.Alpha = (City.CanSelect) ? 1.0f : 0.5f;
當使用者將包含影像的儲存格帶入焦點時,我們想要在上面使用內建的視差效果,以設定下列屬性:
CityView.AdjustsImageWhenAncestorFocused = true;
如需瀏覽和焦點的詳細資訊,請參閱我們的使用導覽和焦點和 Siri 遠端和 藍牙 控制器檔。
集合檢視數據提供者
建立數據模型並定義數據格配置后,讓我們建立集合檢視的數據源。 數據源不僅會負責提供支持數據,還會清除數據佇列以在畫面上顯示個別儲存格。
建立 CityViewDatasource 類別,使其看起來如下:
using System;
using System.Collections.Generic;
using UIKit;
using Foundation;
using CoreGraphics;
using ObjCRuntime;

namespace tvCollection
{
    public class CityViewDatasource : UICollectionViewDataSource
    {
        #region Application Access
        public static AppDelegate App {
            get { return (AppDelegate)UIApplication.SharedApplication.Delegate; }
        }
        #endregion

        #region Static Constants
        public static NSString CardCellId = new NSString ("CityCell");
        #endregion

        #region Computed Properties
        public List<CityInfo> Cities { get; set; } = new List<CityInfo>();
        public CityCollectionView ViewController { get; set; }
        #endregion

        #region Constructors
        public CityViewDatasource (CityCollectionView controller)
        {
            // Initialize
            this.ViewController = controller;
            PopulateCities ();
        }
        #endregion

        #region Public Methods
        public void PopulateCities() {

            // Clear existing cities
            Cities.Clear();

            // Add new cities
            Cities.Add(new CityInfo("City01.jpg", "Houses by Water", false));
            Cities.Add(new CityInfo("City02.jpg", "Turning Circle", true));
            Cities.Add(new CityInfo("City03.jpg", "Skyline at Night", true));
            Cities.Add(new CityInfo("City04.jpg", "Golden Gate Bridge", true));
            Cities.Add(new CityInfo("City05.jpg", "Roads by Night", true));
            Cities.Add(new CityInfo("City06.jpg", "Church Domes", true));
            Cities.Add(new CityInfo("City07.jpg", "Mountain Lights", true));
            Cities.Add(new CityInfo("City08.jpg", "City Scene", false));
            Cities.Add(new CityInfo("City09.jpg", "House in Winter", true));
            Cities.Add(new CityInfo("City10.jpg", "By the Lake", true));
            Cities.Add(new CityInfo("City11.jpg", "At the Dome", true));
            Cities.Add(new CityInfo("City12.jpg", "Cityscape", true));
            Cities.Add(new CityInfo("City13.jpg", "Model City", true));
            Cities.Add(new CityInfo("City14.jpg", "Taxi, Taxi!", true));
            Cities.Add(new CityInfo("City15.jpg", "On the Sidewalk", true));
            Cities.Add(new CityInfo("City16.jpg", "Midnight Walk", true));
            Cities.Add(new CityInfo("City17.jpg", "Lunchtime Cafe", true));
            Cities.Add(new CityInfo("City18.jpg", "Coffee Shop", true));
            Cities.Add(new CityInfo("City19.jpg", "Rustic Tavern", true));
        }
        #endregion

        #region Override Methods
        public override nint NumberOfSections (UICollectionView collectionView)
        {
            return 1;
        }

        public override nint GetItemsCount (UICollectionView collectionView, nint section)
        {
            return Cities.Count;
        }

        public override UICollectionViewCell GetCell (UICollectionView collectionView, NSIndexPath indexPath)
        {
            var cityCell = (CityCollectionViewCell)collectionView.DequeueReusableCell (CardCellId, indexPath);
            var city = Cities [indexPath.Row];

            // Initialize city
            cityCell.City = city;

            return cityCell;
        }
        #endregion
    }
}
讓我們詳細查看這個類別。 首先,我們會繼承自 UICollectionViewDataSource ,並提供單元格標識碼的快捷方式(我們在 iOS 設計工具中指派):
public static NSString CardCellId = new NSString ("CityCell");
接下來,我們會提供集合數據的記憶體,並提供類別來填入數據:
public List<CityInfo> Cities { get; set; } = new List<CityInfo>();
...

public void PopulateCities() {

    // Clear existing cities
    Cities.Clear();

    // Add new cities
    Cities.Add(new CityInfo("City01.jpg", "Houses by Water", false));
    Cities.Add(new CityInfo("City02.jpg", "Turning Circle", true));
    ...
}
然後,我們會覆寫 方法, NumberOfSections 並傳回集合檢視擁有的區段數(專案群組)。 在此情況下,只有一個:
public override nint NumberOfSections (UICollectionView collectionView)
{
    return 1;
}
接下來,我們會使用下列程式代碼傳回集合中的項目數目:
public override nint GetItemsCount (UICollectionView collectionView, nint section)
{
    return Cities.Count;
}
最後,當集合檢視要求使用下列程式代碼時,我們會清除可重複使用的儲存格:
public override UICollectionViewCell GetCell (UICollectionView collectionView, NSIndexPath indexPath)
{
    var cityCell = (CityCollectionViewCell)collectionView.DequeueReusableCell (CardCellId, indexPath);
    var city = Cities [indexPath.Row];

    // Initialize city
    cityCell.City = city;

    return cityCell;
}
取得類型 CityCollectionViewCell 集合檢視單元格之後,我們會將它填入指定的專案。
回應使用者事件
由於我們希望用戶能夠從集合中選取專案,因此我們需要提供集合檢視委派來處理此互動。 我們需要提供一種方式,讓我們的通話檢視知道使用者已選取的專案。
應用程式委派
我們需要一種方法,將目前選取的專案從集合檢視關聯回呼叫端檢視。 我們會在上使用 AppDelegate自定義屬性。 編輯檔案並 AppDelegate.cs 新增下列程式代碼:
public CityInfo SelectedCity { get; set;} = new CityInfo("City02.jpg", "Turning Circle", true);
這會定義 屬性,並設定一開始會顯示的預設城市。 稍後,我們將使用此屬性來顯示用戶的選取範圍,並允許變更選取專案。
集合檢視委派
接下來,將新的 CityViewDelegate 類別新增至專案,使其看起來如下:
using System;
using System.Collections.Generic;
using UIKit;
using Foundation;
using CoreGraphics;

namespace tvCollection
{
    public class CityViewDelegate : UICollectionViewDelegateFlowLayout
    {
        #region Application Access
        public static AppDelegate App {
            get { return (AppDelegate)UIApplication.SharedApplication.Delegate; }
        }
        #endregion

        #region Constructors
        public CityViewDelegate ()
        {
        }
        #endregion

        #region Override Methods
        public override CGSize GetSizeForItem (UICollectionView collectionView, UICollectionViewLayout layout, NSIndexPath indexPath)
        {
            return new CGSize (361, 256);
        }

        public override bool CanFocusItem (UICollectionView collectionView, NSIndexPath indexPath)
        {
            if (indexPath == null) {
                return false;
            } else {
                var controller = collectionView as CityCollectionView;
                return controller.Source.Cities[indexPath.Row].CanSelect;
            }
        }

        public override void ItemSelected (UICollectionView collectionView, NSIndexPath indexPath)
        {
            var controller = collectionView as CityCollectionView;
            App.SelectedCity = controller.Source.Cities [indexPath.Row];

            // Close Collection
            controller.ParentController.DismissViewController(true,null);
        }
        #endregion
    }
}
讓我們進一步瞭解這個類別。 首先,我們會繼承自 UICollectionViewDelegateFlowLayout。 我們繼承自這個類別,而不是 UICollectionViewDelegate 的原因是我們使用內 UICollectionViewFlowLayout 建來呈現專案,而不是自定義版面配置類型。
接下來,我們會使用此程式碼傳回個別專案的大小:
public override CGSize GetSizeForItem (UICollectionView collectionView, UICollectionViewLayout layout, NSIndexPath indexPath)
{
    return new CGSize (361, 256);
}
然後,我們決定指定的儲存格是否可以使用下列程式代碼取得焦點:
public override bool CanFocusItem (UICollectionView collectionView, NSIndexPath indexPath)
{
    if (indexPath == null) {
        return false;
    } else {
        var controller = collectionView as CityCollectionView;
        return controller.Source.Cities[indexPath.Row].CanSelect;
    }
}
我們會檢查指定的備份數據片段是否將其 CanSelect 旗標設定為 true ,並傳回該值。 如需瀏覽和焦點的詳細資訊,請參閱我們的使用導覽和焦點和 Siri 遠端和 藍牙 控制器檔。
最後,我們會以下列程式代碼回應用戶選取專案:
public override void ItemSelected (UICollectionView collectionView, NSIndexPath indexPath)
{
    var controller = collectionView as CityCollectionView;
    App.SelectedCity = controller.Source.Cities [indexPath.Row];

    // Close Collection
    controller.ParentController.DismissViewController(true,null);
}
在這裡, SelectedCity 我們將 的 AppDelegate 屬性設定為用戶選取的專案,並關閉集合檢視控制器,並返回呼叫我們的檢視。 我們尚未定義 ParentController 集合檢視的 屬性,接下來會執行此動作。
設定集合檢視
現在我們需要編輯集合檢視,並指派我們的數據源和委派。 編輯檔案 CityCollectionView.cs (自動從分鏡腳本建立),使其看起來如下:
using System;
using Foundation;
using UIKit;

namespace tvCollection
{
    public partial class CityCollectionView : UICollectionView
    {
        #region Application Access
        public static AppDelegate App {
            get { return (AppDelegate)UIApplication.SharedApplication.Delegate; }
        }
        #endregion

        #region Computed Properties
        public CityViewDatasource Source {
            get { return DataSource as CityViewDatasource;}
        }

        public CityCollectionViewController ParentController { get; set;}
        #endregion

        #region Constructors
        public CityCollectionView (IntPtr handle) : base (handle)
        {
            // Initialize
            RegisterClassForCell (typeof(CityCollectionViewCell), CityViewDatasource.CardCellId);
            DataSource = new CityViewDatasource (this);
            Delegate = new CityViewDelegate ();
        }
        #endregion

        #region Override Methods
        public override nint NumberOfSections ()
        {
            return 1;
        }

        public override void DidUpdateFocus (UIFocusUpdateContext context, UIFocusAnimationCoordinator coordinator)
        {
            var previousItem = context.PreviouslyFocusedView as CityCollectionViewCell;
            if (previousItem != null) {
                Animate (0.2, () => {
                    previousItem.CityTitle.Alpha = 0.0f;
                });
            }

            var nextItem = context.NextFocusedView as CityCollectionViewCell;
            if (nextItem != null) {
                Animate (0.2, () => {
                    nextItem.CityTitle.Alpha = 1.0f;
                });
            }
        }
        #endregion
    }
}
首先,我們提供一個快捷方式來存取我們的 AppDelegate:
public static AppDelegate App {
    get { return (AppDelegate)UIApplication.SharedApplication.Delegate; }
}
接下來,我們會提供集合檢視數據源的快捷方式,以及存取集合檢視控制器的屬性(由上述委派用來在用戶選取時關閉集合):
public CityViewDatasource Source {
    get { return DataSource as CityViewDatasource;}
}

public CityCollectionViewController ParentController { get; set;}
然後,我們會使用下列程式代碼來初始化集合檢視,並指派我們的數據格類別、數據源和委派:
public CityCollectionView (IntPtr handle) : base (handle)
{
    // Initialize
    RegisterClassForCell (typeof(CityCollectionViewCell), CityViewDatasource.CardCellId);
    DataSource = new CityViewDatasource (this);
    Delegate = new CityViewDelegate ();
}
最後,我們希望影像底下的標題只有在使用者醒目提示時才會顯示(焦點中)。 我們會使用下列程式代碼來執行此動作:
public override void DidUpdateFocus (UIFocusUpdateContext context, UIFocusAnimationCoordinator coordinator)
{
    var previousItem = context.PreviouslyFocusedView as CityCollectionViewCell;
    if (previousItem != null) {
        Animate (0.2, () => {
            previousItem.CityTitle.Alpha = 0.0f;
        });
    }

    var nextItem = context.NextFocusedView as CityCollectionViewCell;
    if (nextItem != null) {
        Animate (0.2, () => {
            nextItem.CityTitle.Alpha = 1.0f;
        });
    }
}
我們將上一個專案的透明度設定為零(0),並將下一個專案的透明度設為100%。 這些轉換也會以動畫顯示。
設定集合檢視控制器
現在,我們需要在集合檢視上執行最終設定,並允許控制器設定我們定義的屬性,以便在用戶選取之後關閉集合檢視。
編輯檔案 CityCollectionViewController.cs (從分鏡腳本自動建立),使其看起來如下:
// This file has been autogenerated from a class added in the UI designer.

using System;

using Foundation;
using UIKit;

namespace tvCollection
{
    public partial class CityCollectionViewController : UICollectionViewController
    {
        #region Computed Properties
        public CityCollectionView Collection {
            get { return CollectionView as CityCollectionView; }
        }
        #endregion

        #region Constructors
        public CityCollectionViewController (IntPtr handle) : base (handle)
        {
        }
        #endregion

        #region Override Methods
        public override void AwakeFromNib ()
        {
            base.AwakeFromNib ();

            // Save link to controller
            Collection.ParentController = this;
        }
        #endregion
    }
}
將所有專案放在一起
既然我們已經將所有元件放在一起來填入和控制集合檢視,我們需要對主要檢視進行最終的編輯,以將所有項目結合在一起。
編輯檔案 ViewController.cs (從分鏡腳本自動建立),使其看起來如下:
using System;
using Foundation;
using UIKit;
using tvCollection;

namespace MySingleView
{
    public partial class ViewController : UIViewController
    {
        #region Application Access
        public static AppDelegate App {
            get { return (AppDelegate)UIApplication.SharedApplication.Delegate; }
        }
        #endregion

        #region Constructors
        public ViewController (IntPtr handle) : base (handle)
        {
        }
        #endregion

        #region Override Methods
        public override void ViewDidLoad ()
        {
            base.ViewDidLoad ();
            // Perform any additional setup after loading the view, typically from a nib.
        }

        public override void ViewWillAppear (bool animated)
        {
            base.ViewWillAppear (animated);

            // Update image with the currently selected one
            CityView.Image = UIImage.FromFile(App.SelectedCity.ImageFilename);
            BackgroundView.Image = CityView.Image;
            CityTitle.Text = App.SelectedCity.Title;
        }

        public override void DidReceiveMemoryWarning ()
        {
            base.DidReceiveMemoryWarning ();
            // Release any cached data, images, etc that aren't in use.
        }
        #endregion
    }
}
下列程式代碼一開始會從 SelectedCity 的 AppDelegate 屬性顯示選取的專案,並在使用者從集合檢視中選取專案時重新顯示它:
public override void ViewWillAppear (bool animated)
{
    base.ViewWillAppear (animated);

    // Update image with the currently selected one
    CityView.Image = UIImage.FromFile(App.SelectedCity.ImageFilename);
    BackgroundView.Image = CityView.Image;
    CityTitle.Text = App.SelectedCity.Title;
}
測試應用程式
當您建置並執行應用程式時,主要檢視會以預設城市顯示:

如果使用者按下 [ 選取檢視 ] 按鈕,則會顯示 [集合檢視]:

任何其 CanSelect 屬性設定為 false 的城市都會呈現暗灰色,且使用者將無法將焦點設定為該城市。 當使用者醒目提示專案(使其成為焦點)時,標題會顯示,而且他們可以使用視差效果來微妙地傾斜 3D 中的影像。
當使用者按下選取影像時,集合檢視會關閉,且主要檢視會以新的影像重新顯示:

建立自定義版面配置和重新排序專案
使用集合檢視的主要功能之一,就是能夠建立自定義版面配置。 由於tvOS繼承自iOS,因此建立自訂版面配置的程式相同。 如需詳細資訊,請參閱集合 檢視 簡介檔。
最近新增至 iOS 9 的集合檢視,可讓您輕鬆地重新排序集合中的專案。 同樣地,由於 tvOS 9 是 iOS 9 的子集,因此這樣做的方式相同。 如需詳細資訊,請參閱我們的 集合檢視變更 檔。
摘要
本文涵蓋在 Xamarin.tvOS 應用程式內設計和使用集合檢視。 首先,它會討論組成集合檢視的所有元素。 接下來,它示範如何使用分鏡腳本來設計和實作集合檢視。 最後,會提供建立自定義版面配置和重新排序專案的相關信息連結。