本文涵蓋在 Xamarin.tvOS 應用程式內設計和使用資料表檢視和數據表檢視控制器。
在tvOS中,數據表檢視會顯示為卷動數據列的單一數據行,可選擇性地組織成群組或區段。 當您需要有效率地向用戶顯示大量數據時,應該使用數據表檢視,以清楚瞭解的方式。
數據表檢視通常會顯示在分割檢視的一側做為導覽,其中選取專案的詳細數據會顯示在相反側:
關於數據表檢視
會顯示 UITableView 可捲動資料列的單一數據行,作為可選擇性地組織成群組或區段的信息階層式清單:
Apple 有下列使用數據表的建議:
- 注意寬度 - 請嘗試在表格寬度中達到正確的平衡。 如果數據表太寬,可能很難從遠處掃描,而且可以從可用的內容區域取走。 如果數據表太窄,可能會導致資訊被截斷或換行,這可能會讓用戶難以從房間讀取。
- 快速 顯示資料表內容 - 針對大型數據清單,延遲載入內容,並在向使用者顯示數據表時立即開始顯示資訊。 如果數據表需要很長的時間才能載入,使用者可能會失去對應用程式的興趣,或認為它已鎖定。
- 通知使用者長內容載入 - 如果無法避免長時間的數據表載入時間,請呈現 進度列或活動指標 ,讓他們知道應用程式尚未鎖定。
數據表檢視儲存格類型
UITableViewCell用來代表數據表檢視中的個別數據列。 Apple 已定義數個預設的資料表單元格型態:
- 預設值 - 此類型會顯示 [儲存格] 左側的 [影像] 選項,並在右側顯示靠左對齊的 [標題]。
- 副標題 - 此類型在第一行呈現靠左對齊的標題,在下一行顯示較小的靠左對齊子標題。
- 值 1 - 此類型在同一行上呈現左對齊標題,其色彩較淺、靠右對齊的子標題。
- 值 2 - 此類型在同一行上呈現右對齊的標題,其色彩較淺、靠左對齊的子標題。
所有預設的數據表檢視儲存格類型也都支援圖形元素,例如洩漏指標或複選標記。
此外,您可以定義 自訂 資料表檢視儲存格類型,並呈現 您在介面設計工具中或透過程式代碼建立的原型儲存格。
Apple 有下列使用表格檢視儲存格的建議:
- 避免文字裁剪 - 保留個別的文字短行,使其最終不會截斷。 截斷的單字或片語很難讓使用者從房間間剖析。
- 請考慮焦點數據列狀態 - 因為數據列變大,在焦點中具有更多圓角,因此您必須測試儲存格在所有狀態中的外觀。 影像或文字在焦點狀態可能會裁剪或看起來不正確。
- 謹慎 使用可編輯的數據表 - 移動或刪除資料表數據列比 iOS 更耗時。 您必須仔細決定這項功能是否會新增或分散您的 tvOS 應用程式。
- 在適當的情況下 建立自定義儲存格型態 - 雖然內建的數據表檢視儲存格型別適用於許多情況,但請考慮為非標準資訊建立自定義儲存格類型,以提供更大的控件,並更妥善地向使用者呈現資訊。
使用數據表檢視
在 Xamarin.tvOS 應用程式中使用資料表檢視的最簡單方式,就是在介面設計工具中建立和修改其外觀。
若要開始,請執行下列動作:
在 Visual Studio for Mac 中,啟動新的 tvOS 應用程式專案,然後選取 tvOS> 應用程式>單一檢視應用程式,然後按兩下 [下一步] 按鈕:
輸入應用程式的 [名稱],然後按 [下一步]:
調整 [項目名稱 ] 和 [方案名稱 ] 或接受預設值,然後按下 [ 建立 ] 按鈕以建立新的方案:
在 Solution Pad 中,按兩下
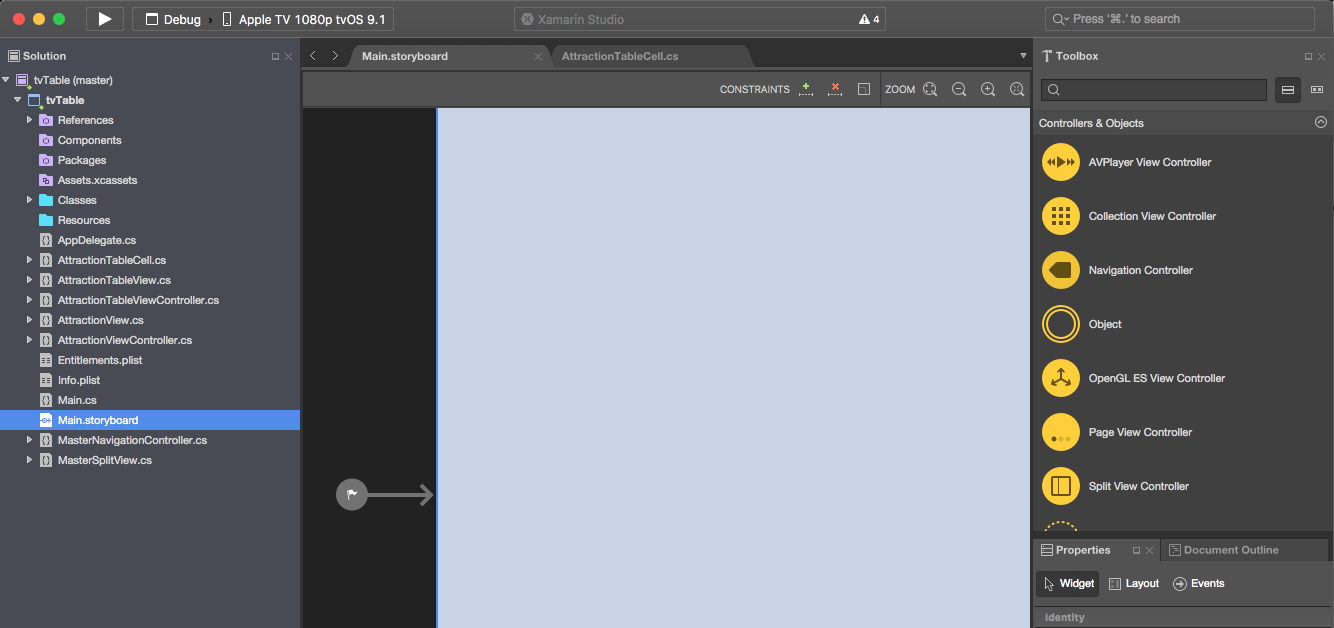
Main.storyboard檔案,以在 iOS 設計工具中開啟它:選取並刪除預設檢視 控制器:
從 [工具箱] 中選取分割檢視控制器,並將其拖曳到 [設計介面]。
根據預設,您會取得具有瀏覽檢視控制器的分割檢視,以及左側的數據表檢視控制器,以及右側的檢視控制器。 這是 Apple 建議在 tvOS 中使用資料表檢視:
您必須選取 [數據表檢視] 的每個部分,並在 [屬性總管] 的 [小工具] 索引標籤中為其指派自定義類別名稱,以便稍後在 C# 程式代碼中存取它。 例如,數據表檢視 控制器:
請確定您為 數據表檢視控制器、 數據表檢視 和任何 原型儲存格建立自定義類別。 Visual Studio for Mac 會在建立自定義類別時,將自定義類別新增至專案樹狀結構:
接下來,選取 [設計介面] 中的 [數據表檢視],並視需要調整其屬性。 例如原型儲存格和樣式的數目(純文字或分組):
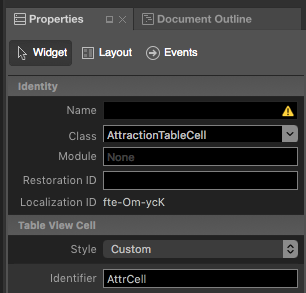
針對每個原型單元格,選取它,並在 [屬性總管] 的 [小工具] 索引卷標中指派唯一的標識符。 此步驟非常重要,因為稍後當您填入數據表時需要此標識符。 例如:
AttrCell您也可以透過 [樣式] 下拉式清單選取 ,將單元格呈現為其中一個默認數據表檢視單元格類型,或將其設定為 [自定義],並使用 [設計介面] 從 [工具箱] 拖曳其他 UI 小工具來配置單元格:
在 [屬性總管] 的 [小工具] 索引標籤中,將唯一名稱指派給 [原型數據格] 設計中的每個 UI 元素,以便稍後在 C# 程式代碼中存取它們:
針對數據表檢視中的所有原型單元格重複上述步驟。
接下來,將自定義類別指派給UI設計的其餘部分、配置 [詳細數據] 檢視,並將唯一 的 [名稱 ] 指派給 [詳細數據] 檢視中的每個 UI 元素,以便您也可以在 C# 中存取它們。 例如:
將變更儲存至分鏡腳本。
設計數據模型
若要讓使用數據表檢視所顯示的資訊更為簡單,並方便呈現詳細資訊(當使用者選取或醒目提示數據表檢視中的數據列時),請建立自定義類別或類別,以做為所呈現信息的數據模型。
以包含城市清單的旅遊預約應用程式範例為例,每個應用程式都包含使用者可以選取的唯一景點清單。 用戶將能夠將景點標示為 [我的最愛]、選取 [ 取得景點方向 ] 和 [預訂飛往指定城市的航班 ]。
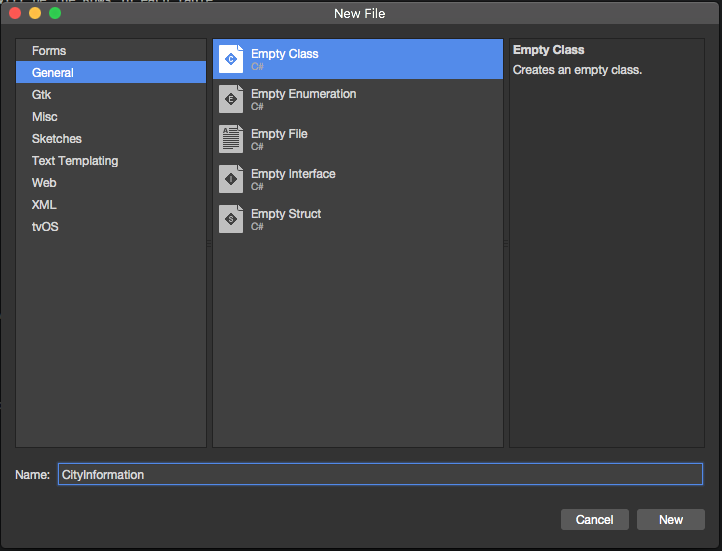
若要建立景點的數據模型,請以滑鼠右鍵按兩下SolutionPad中的專案名稱,然後選取[新增>檔案...]。針對 [名稱] 輸入 AttractionInformation ,然後按兩下 [新增] 按鈕:
AttractionInformation.cs編輯檔案,使其看起來如下:
using System;
using Foundation;

namespace tvTable
{
    public class AttractionInformation : NSObject
    {
        #region Computed Properties
        public CityInformation City { get; set;}
        public string Name { get; set;}
        public string Description { get; set;}
        public string ImageName { get; set;}
        public bool IsFavorite { get; set;}
        public bool AddDirections { get; set;}
        #endregion

        #region Constructors
        public AttractionInformation (string name, string description, string imageName)
        {
            // Initialize
            this.Name = name;
            this.Description = description;
            this.ImageName = imageName;
        }
        #endregion
    }
}
這個類別提供屬性來儲存指定 之景點的相關信息。
接下來,以滑鼠右鍵按兩下 Solution Pad 中的 [項目名稱],然後選取 [新增>檔案...]。針對 [名稱] 輸入 CityInformation ,然後按兩下 [新增] 按鈕:
CityInformation.cs編輯檔案,使其看起來如下:
using System;
using System.Collections.Generic;
using Foundation;

namespace tvTable
{
    public class CityInformation : NSObject
    {
        #region Computed Properties
        public string Name { get; set; }
        public List<AttractionInformation> Attractions { get; set;}
        public bool FlightBooked { get; set;}
        #endregion

        #region Constructors
        public CityInformation (string name)
        {
            // Initialize
            this.Name = name;
            this.Attractions = new List<AttractionInformation> ();
        }
        #endregion

        #region Public Methods
        public void AddAttraction (AttractionInformation attraction)
        {
            // Mark as belonging to this city
            attraction.City = this;

            // Add to collection
            Attractions.Add (attraction);
        }

        public void AddAttraction (string name, string description, string imageName)
        {
            // Create attraction
            var attraction = new AttractionInformation (name, description, imageName);

            // Mark as belonging to this city
            attraction.City = this;

            // Add to collection
            Attractions.Add (attraction);
        }
        #endregion
    }
}
這個類別會保存目的地 City 的所有資訊,這是該城市的景點集合,並提供兩個協助程式方法(AddAttraction),讓您更輕鬆地將景點新增至城市。
數據表檢視數據源
每個數據表檢視都需要數據來源 (UITableViewDataSource) 來提供數據表的數據,並視數據表檢視需要產生必要的數據列。
針對上述範例,以滑鼠右鍵按兩下 方案總管 中的 [項目名稱],選取 [新增>檔案...],然後呼叫它AttractionTableDatasource,然後按兩下 [新增] 按鈕來建立。 接下來,編輯 AttractionTableDatasource.cs 檔案,使其看起來如下:
using System;
using System.Collections.Generic;
using UIKit;

namespace tvTable
{
    public class AttractionTableDatasource : UITableViewDataSource
    {
        #region Constants
        const string CellID = "AttrCell";
        #endregion

        #region Computed Properties
        public AttractionTableViewController Controller { get; set;}
        public List<CityInformation> Cities { get; set;}
        #endregion

        #region Constructors
        public AttractionTableDatasource (AttractionTableViewController controller)
        {
            // Initialize
            this.Controller = controller;
            this.Cities = new List<CityInformation> ();
            PopulateCities ();
        }
        #endregion

        #region Public Methods
        public void PopulateCities ()
        {
            // Clear existing
            Cities.Clear ();

            // Define cities and attractions
            var Paris = new CityInformation ("Paris");
            Paris.AddAttraction ("Eiffel Tower", "Is a wrought iron lattice tower on the Champ de Mars in Paris, France.", "EiffelTower");
            Paris.AddAttraction ("Musée du Louvre", "is one of the world's largest museums and a historic monument in Paris, France.", "Louvre");
            Paris.AddAttraction ("Moulin Rouge", "French for 'Red Mill', is a cabaret in Paris, France.", "MoulinRouge");
            Paris.AddAttraction ("La Seine", "Is a 777-kilometre long river and an important commercial waterway within the Paris Basin.", "RiverSeine");
            Cities.Add (Paris);

            var SanFran = new CityInformation ("San Francisco");
            SanFran.AddAttraction ("Alcatraz Island", "Is located in the San Francisco Bay, 1.25 miles (2.01 km) offshore from San Francisco.", "Alcatraz");
            SanFran.AddAttraction ("Golden Gate Bridge", "Is a suspension bridge spanning the Golden Gate strait between San Francisco Bay and the Pacific Ocean", "GoldenGateBridge");
            SanFran.AddAttraction ("San Francisco", "Is the cultural, commercial, and financial center of Northern California.", "SanFrancisco");
            SanFran.AddAttraction ("Telegraph Hill", "Is primarily a residential area, much quieter than adjoining North Beach.", "TelegraphHill");
            Cities.Add (SanFran);

            var Houston = new CityInformation ("Houston");
            Houston.AddAttraction ("City Hall", "It was constructed in 1938-1939, and is located in Downtown Houston.", "CityHall");
            Houston.AddAttraction ("Houston", "Is the most populous city in Texas and the fourth most populous city in the US.", "Houston");
            Houston.AddAttraction ("Texas Longhorn", "Is a breed of cattle known for its characteristic horns, which can extend to over 6 ft.", "LonghornCattle");
            Houston.AddAttraction ("Saturn V Rocket", "was an American human-rated expendable rocket used by NASA between 1966 and 1973.", "Rocket");
            Cities.Add (Houston);
        }
        #endregion

        #region Override Methods
        public override UITableViewCell GetCell (UITableView tableView, Foundation.NSIndexPath indexPath)
        {
            // Get cell
            var cell = tableView.DequeueReusableCell (CellID) as AttractionTableCell;

            // Populate cell
            cell.Attraction = Cities [indexPath.Section].Attractions [indexPath.Row];

            // Return new cell
            return cell;
        }

        public override nint NumberOfSections (UITableView tableView)
        {
            // Return number of cities
            return Cities.Count;
        }

        public override nint RowsInSection (UITableView tableView, nint section)
        {
            // Return the number of attractions in the given city
            return Cities [(int)section].Attractions.Count;
        }

        public override string TitleForHeader (UITableView tableView, nint section)
        {
            // Get the name of the current city
            return Cities [(int)section].Name;
        }
        #endregion
    }
}
讓我們詳細查看類別的幾個區段。
首先,我們已定義常數來保存原型數據格的唯一標識碼(這與上述介面設計工具中指派的標識符相同),將快捷方式新增回數據表檢視控制器,併為數據建立記憶體:
const string CellID = "AttrCell";
public AttractionTableViewController Controller { get; set;}
public List<CityInformation> Cities { get; set;}
接下來,我們會儲存數據表檢視控制器,然後在建立 類別時建置並填入我們的數據源(使用上面定義的數據模型:
public AttractionTableDatasource (AttractionTableViewController controller)
{
    // Initialize
    this.Controller = controller;
    this.Cities = new List<CityInformation> ();
    PopulateCities ();
}
為了方便起見,方法只會在記憶體中建立數據模型對象, PopulateCities 不過,這些物件可以輕鬆地從實際應用程式中的資料庫或 Web 服務讀取:
public void PopulateCities ()
{
    // Clear existing
    Cities.Clear ();

    // Define cities and attractions
    var Paris = new CityInformation ("Paris");
    Paris.AddAttraction ("Eiffel Tower", "Is a wrought iron lattice tower on the Champ de Mars in Paris, France.", "EiffelTower");
    ...
}
方法會 NumberOfSections 傳回數據表中的 Sections 數目:
public override nint NumberOfSections (UITableView tableView)
{
    // Return number of cities
    return Cities.Count;
}
針對 純 樣式的數據表檢視,一律會傳回 1。
方法 RowsInSection 會傳回目前區段中的 Rows 數目:
public override nint RowsInSection (UITableView tableView, nint section)
{
    // Return the number of attractions in the given city
    return Cities [(int)section].Attractions.Count;
}
同樣地,針對 [一般 數據表檢視],傳回數據源中的項目總數。
方法會 TitleForHeader 傳回指定區段的 Title:
public override string TitleForHeader (UITableView tableView, nint section)
{
    // Get the name of the current city
    return Cities [(int)section].Name;
}
如果是純數據表檢視類型,請將標題保留空白 ("")。
最後,當數據表檢視要求時,請使用 GetCell 方法來建立並填入原型單元格:
public override UITableViewCell GetCell (UITableView tableView, Foundation.NSIndexPath indexPath)
{
    // Get cell
    var cell = tableView.DequeueReusableCell (CellID) as AttractionTableCell;

    // Populate cell
    cell.Attraction = Cities [indexPath.Section].Attractions [indexPath.Row];

    // Return new cell
    return cell;
}
如需使用 UITableViewDatasource的詳細資訊,請參閱 Apple 的 UITableViewDatasource 檔。
數據表檢視委派
每個數據表檢視都需要委派 (UITableViewDelegate) 來響應數據表上的用戶互動或其他系統事件。
針對上述範例,以滑鼠右鍵按兩下 方案總管 中的 [項目名稱],選取 [新增>檔案...],然後呼叫它AttractionTableDelegate,然後按兩下 [新增] 按鈕來建立。 接下來,編輯 AttractionTableDelegate.cs 檔案,使其看起來如下:
using System;
using System.Collections.Generic;
using UIKit;

namespace tvTable
{
    public class AttractionTableDelegate : UITableViewDelegate
    {
        #region Computed Properties
        public AttractionTableViewController Controller { get; set;}
        #endregion

        #region Constructors
        public AttractionTableDelegate (AttractionTableViewController controller)
        {
            // Initializw
            this.Controller = controller;
        }
        #endregion

        #region Override Methods
        public override void RowSelected (UITableView tableView, Foundation.NSIndexPath indexPath)
        {
            var attraction = Controller.Datasource.Cities [indexPath.Section].Attractions [indexPath.Row];
            attraction.IsFavorite = (!attraction.IsFavorite);

            // Update UI
            Controller.TableView.ReloadData ();
        }

        public override bool CanFocusRow (UITableView tableView, Foundation.NSIndexPath indexPath)
        {
            // Inform caller of highlight change
            RaiseAttractionHighlighted (Controller.Datasource.Cities [indexPath.Section].Attractions [indexPath.Row]);
            return true;
        }
        #endregion

        #region Events
        public delegate void AttractionHighlightedDelegate (AttractionInformation attraction);
        public event AttractionHighlightedDelegate AttractionHighlighted;

        internal void RaiseAttractionHighlighted (AttractionInformation attraction)
        {
            // Inform caller
            if (this.AttractionHighlighted != null) this.AttractionHighlighted (attraction);
        }
        #endregion
    }
}
讓我們在詳細數據中查看此類別的數個區段。
首先,建立 類別時,我們會建立數據表檢視控制器的快捷方式:
public AttractionTableViewController Controller { get; set;}
...

public AttractionTableDelegate (AttractionTableViewController controller)
{
    // Initialize
    this.Controller = controller;
}
然後,選取數據列時(用戶按兩下 Apple Remote 的 Touch Surface),我們想要將選取的 Row 所代表的 [吸引力] 標示為 [我的最愛]:
public override void RowSelected (UITableView tableView, Foundation.NSIndexPath indexPath)
{
    var attraction = Controller.Datasource.Cities [indexPath.Section].Attractions [indexPath.Row];
    attraction.IsFavorite = (!attraction.IsFavorite);

    // Update UI
    Controller.TableView.ReloadData ();
}
接下來,當使用者醒目提示數據列時(藉由使用Apple Remote Touch Surface 給予焦點),我們想要在分割檢視控制器的 [詳細數據] 區段中,顯示該數據列所代表的景點詳細數據:
public override bool CanFocusRow (UITableView tableView, Foundation.NSIndexPath indexPath)
{
    // Inform caller of highlight change
    RaiseAttractionHighlighted (Controller.Datasource.Cities [indexPath.Section].Attractions [indexPath.Row]);
    return true;
}
...

public delegate void AttractionHighlightedDelegate (AttractionInformation attraction);
public event AttractionHighlightedDelegate AttractionHighlighted;

internal void RaiseAttractionHighlighted (AttractionInformation attraction)
{
    // Inform caller
    if (this.AttractionHighlighted != null) this.AttractionHighlighted (attraction);
}
系統會 CanFocusRow 針對即將在數據表檢視中取得焦點的每個數據列呼叫 方法。 true如果 Row 可以取得焦點,則傳回 ,否則傳回 false。 在此範例中,我們已建立自定義 AttractionHighlighted 事件,該事件會在收到焦點時在每個 Row 上引發。
如需使用 UITableViewDelegate的詳細資訊,請參閱 Apple 的 UITableViewDelegate 檔。
數據表檢視儲存格
針對您在介面設計工具中新增至數據表檢視的每個原型儲存格,您也會建立資料表檢視單元格的自定義實例 () ,讓您在建立新儲存格時UITableViewCell填入新的儲存格 (Row)。
針對範例應用程式,按兩下 AttractionTableCell.cs 檔案以開啟檔案進行編輯,使其看起來如下所示:
using System;
using Foundation;
using UIKit;

namespace tvTable
{
    public partial class AttractionTableCell : UITableViewCell
    {
        #region Private Variables
        private AttractionInformation _attraction = null;
        #endregion

        #region Computed Properties
        public AttractionInformation Attraction {
            get { return _attraction; }
            set {
                _attraction = value;
                UpdateUI ();
            }
        }
        #endregion

        #region Constructors
        public AttractionTableCell (IntPtr handle) : base (handle)
        {
        }
        #endregion

        #region Private Methods
        private void UpdateUI ()
        {
            // Trap all errors
            try {
                Title.Text = Attraction.Name;
                Favorite.Hidden = (!Attraction.IsFavorite);
            } catch {
                // Since the UI might not be fully loaded, ignore
                // all errors at this point
            }
        }
        #endregion
    }
}
這個類別會為指定的數據列中顯示的景點數據模型物件提供儲存空間(AttractionInformation 如上所述:
private AttractionInformation _attraction = null;
...

public AttractionInformation Attraction {
    get { return _attraction; }
    set {
        _attraction = value;
        UpdateUI ();
    }
}
方法 UpdateUI 會視需要填入 UI Widget(已新增至介面設計工具中儲存格的原型):
private void UpdateUI ()
{
    // Trap all errors
    try {
        Title.Text = Attraction.Name;
        Favorite.Hidden = (!Attraction.IsFavorite);
    } catch {
        // Since the UI might not be fully loaded, ignore
        // all errors at this point
    }
}
如需使用 UITableViewCell的詳細資訊,請參閱 Apple 的 UITableViewCell 檔。
數據表檢視控制器
數據表檢視控制器 (UITableViewController) 會管理已透過介面設計工具新增至分鏡腳本的數據表檢視。
針對範例應用程式,按兩下 AttractionTableViewController.cs 檔案以開啟檔案進行編輯,使其看起來如下所示:
using System;
using Foundation;
using UIKit;

namespace tvTable
{
    public partial class AttractionTableViewController : UITableViewController
    {
        #region Computed Properties
        public AttractionTableDatasource Datasource {
            get { return TableView.DataSource as AttractionTableDatasource; }
        }

        public AttractionTableDelegate TableDelegate {
            get { return TableView.Delegate as AttractionTableDelegate; }
        }
        #endregion

        #region Constructors
        public AttractionTableViewController (IntPtr handle) : base (handle)
        {
        }
        #endregion

        #region Override Methods
        public override void ViewDidLoad ()
        {
            base.ViewDidLoad ();

            // Setup table
            TableView.DataSource = new AttractionTableDatasource (this);
            TableView.Delegate = new AttractionTableDelegate (this);
            TableView.ReloadData ();
        }
        #endregion
    }
}
讓我們進一步瞭解這個類別。 首先,我們已建立快捷方式,讓您更輕鬆地存取資料表檢視的 DataSource 和 TableDelegate。 我們稍後會使用這些檢視,在分割檢視左側的 [數據表檢視] 與右側的 [詳細數據檢視] 之間進行通訊。
最後,當數據表檢視載入記憶體時,我們會建立 和 AttractionTableDelegate 的AttractionTableDatasource實例(上述兩者都建立),並將其附加至數據表檢視。
如需使用 UITableViewController的詳細資訊,請參閱 Apple 的 UITableViewController 檔。
把它全部拉在一起
如本文件開頭所述,數據表檢視通常會以流覽方式顯示在分割檢視的一側,其中選取專案的詳細數據會顯示在相反邊。 例如:
由於這是tvOS的標準模式,讓我們看看最後的步驟,將所有專案整合在一起,並讓分割檢視的左右兩側彼此互動。
詳細數據檢視
針對上述旅遊應用程式的範例,針對分割檢視右側所呈現的標準檢視控制器定義自定義類別 (AttractionViewController) 作為詳細數據檢視:
using System;
using Foundation;
using UIKit;

namespace tvTable
{
    public partial class AttractionViewController : UIViewController
    {
        #region Private Variables
        private AttractionInformation _attraction = null;
        #endregion

        #region Computed Properties
        public AttractionInformation Attraction {
            get { return _attraction; }
            set {
                _attraction = value;
                UpdateUI ();
            }
        }

        public MasterSplitView SplitView { get; set;}
        #endregion

        #region Constructors
        public AttractionViewController (IntPtr handle) : base (handle)
        {
        }
        #endregion

        #region Public Methods
        public void UpdateUI ()
        {
            // Trap all errors
            try {
                City.Text = Attraction.City.Name;
                Title.Text = Attraction.Name;
                SubTitle.Text = Attraction.Description;

                IsFlighBooked.Hidden = (!Attraction.City.FlightBooked);
                IsFavorite.Hidden = (!Attraction.IsFavorite);
                IsDirections.Hidden = (!Attraction.AddDirections);
                BackgroundImage.Image = UIImage.FromBundle (Attraction.ImageName);
                AttractionImage.Image = BackgroundImage.Image;
            } catch {
                // Since the UI might not be fully loaded, ignore
                // all errors at this point
            }
        }
        #endregion

        #region Override Methods
        public override void ViewWillAppear (bool animated)
        {
            base.ViewWillAppear (animated);

            // Ensure the UI Updates
            UpdateUI ();
        }
        #endregion

        #region Actions
        partial void BookFlight (NSObject sender)
        {
            // Ask user to book flight
            AlertViewController.PresentOKCancelAlert ("Book Flight",
                                                      string.Format ("Would you like to book a flight to {0}?", Attraction.City.Name),
                                                      this,
                                                      (ok) => {
                Attraction.City.FlightBooked = ok;
                IsFlighBooked.Hidden = (!Attraction.City.FlightBooked);
            });
        }

        partial void GetDirections (NSObject sender)
        {
            // Ask user to add directions
            AlertViewController.PresentOKCancelAlert ("Add Directions",
                                                     string.Format ("Would you like to add directions to {0} to you itinerary?", Attraction.Name),
                                                     this,
                                                     (ok) => {
                                                         Attraction.AddDirections = ok;
                                                         IsDirections.Hidden = (!Attraction.AddDirections);
                                                     });
        }

        partial void MarkFavorite (NSObject sender)
        {
            // Flip favorite state
            Attraction.IsFavorite = (!Attraction.IsFavorite);
            IsFavorite.Hidden = (!Attraction.IsFavorite);

            // Reload table
            SplitView.Master.TableController.TableView.ReloadData ();
        }
        #endregion
    }
}
在這裡,我們已提供 要顯示為屬性的吸引力 (AttractionInformation),並建立 UpdateUI 方法,以填入在介面設計工具中新增至檢視的UI Widget。
我們也定義了一個快捷方式回到分割檢視控制器 (SplitView) ,我們將用來將變更傳回數據表檢視 (AcctractionTableView)。
最後,自定義動作(事件)已新增至介面設計工具中建立的三 UIButton 個實例,讓使用者將景點標示為 我的最愛、取得 景點的指示 ,以及 預訂飛往指定城市的航班 。
瀏覽檢視控制器
由於數據表檢視控制器巢狀於分割檢視左側的瀏覽檢視控制器中,所以導航檢視控制器已在介面設計工具中指派自定義類別 (MasterNavigationController),並定義如下:
using System;
using Foundation;
using UIKit;

namespace tvTable
{
    public partial class MasterNavigationController : UINavigationController
    {
        #region Computed Properties
        public MasterSplitView SplitView { get; set;}
        public AttractionTableViewController TableController {
            get { return TopViewController as AttractionTableViewController; }
        }
        #endregion

        #region Constructors
        public MasterNavigationController (IntPtr handle) : base (handle)
        {
        }
        #endregion
    }
}
同樣地,這個類別只會定義幾個快捷方式,讓您更輕鬆地在分割檢視控制器的兩端進行通訊:
SplitView- 這是瀏覽檢視控制器所屬之分割檢視控制器的連結MainSpiltViewController。TableController- 取得在瀏覽檢視控制器中顯示為上方檢視的數據表檢視控制器 (AttractionTableViewController)。
分割檢視控制器
因為分割檢視控制器是我們應用程式的基底,所以我們在介面設計工具中為它建立了自定義類別 (MasterSplitViewController),並定義如下:
using System;
using Foundation;
using UIKit;

namespace tvTable
{
    public partial class MasterSplitView : UISplitViewController
    {
        #region Computed Properties
        public AttractionViewController Details {
            get { return ViewControllers [1] as AttractionViewController; }
        }

        public MasterNavigationController Master {
            get { return ViewControllers [0] as MasterNavigationController; }
        }
        #endregion

        #region Constructors
        public MasterSplitView (IntPtr handle) : base (handle)
        {
        }
        #endregion

        #region Override Methods
        public override void ViewDidLoad ()
        {
            base.ViewDidLoad ();

            // Initialize
            Master.SplitView = this;
            Details.SplitView = this;

            // Wire-up events
            Master.TableController.TableDelegate.AttractionHighlighted += (attraction) => {
                // Display new attraction
                Details.Attraction = attraction;
            };
        }
        #endregion
    }
}
首先,我們會建立分割檢視 [詳細數據] 端和 AttractionViewController[主圖形] 端 (MasterNavigationController) 的快捷方式。 同樣地,這可讓雙方稍後更容易溝通。
接下來,當分割檢視載入記憶體時,我們會將分割檢視控制器附加至分割檢視的兩側,並藉由在分割檢視的詳細數據端顯示新的景點,以回應使用者醒目提示數據表檢視AttractionHighlighted中的景點。
數據表檢視詳細數據
由於tvOS是以iOS為基礎,因此數據表檢視和數據表檢視控制器的設計和行為也類似。 如需在 Xamarin 應用程式中使用資料表檢視的詳細資訊,請參閱 iOS 使用資料表和儲存格 檔。
摘要
本文涵蓋在 Xamarin.tvOS 應用程式內設計和使用資料表檢視。 並提供了在分割檢視內使用數據表檢視的範例,這是tvOS應用程式中數據表檢視的典型用法。


![選取[單一檢視應用程式]](table-views-images/table02.png)
![輸入應用程式的 [名稱]](table-views-images/table03.png)


![選取[單一檢視應用程式]](table-views-images/table02-vs.png)


![屬性總管的 [小工具] 索引標籤,您可以在其中指派類別名稱。](table-views-images/table09-vs.png)


![[樣式] 下拉式清單](table-views-images/table13-vs.png)


![選取 [類別],然後輸入 Name 的 AttractionInformation](table-views-images/data01-vs.png)

