使用 [執行 (設有參數)] 動作以建立參數化筆記本
Azure Data Studio 中的「參數化」是使用一組不同的參數來執行相同的筆記本。
本文說明如何使用 Python 核心在 Azure Data Studio 中建立並執行參數化筆記本。
注意
目前,您可以使用參數化搭配 Python、PySpark、PowerShell 和 .NET 互動式核心。
必要條件
執行 (設有參數) 動作
當您使用 [執行 (設有參數)] 筆記本動作時,使用者可以在 UI 中輸入新的參數,以快速設定筆記本的新參數。 然後,使用者可以使用新的參數來執行筆記本。
注意
請務必使用新行上的每個新參數來格式化參數儲存格。
參數化範例
您可以使用範例筆記本檔案來瀏覽本文中的步驟:
- 移至 GitHub 中的筆記本檔案。 選取 [Raw]。
- 選取 Ctrl+S 或按一下滑鼠右鍵,然後使用 .ipynb 副檔名儲存檔案。
- 在 Azure Data Studio 中開啟檔案。
設定筆記本以進行參數化
您可以從 Azure Data Studio 中開啟的範例筆記本開始,或完成下列步驟來建立筆記本。 然後,嘗試使用不同的參數。 所有步驟都會在 Azure Data Studio 筆記本內執行。
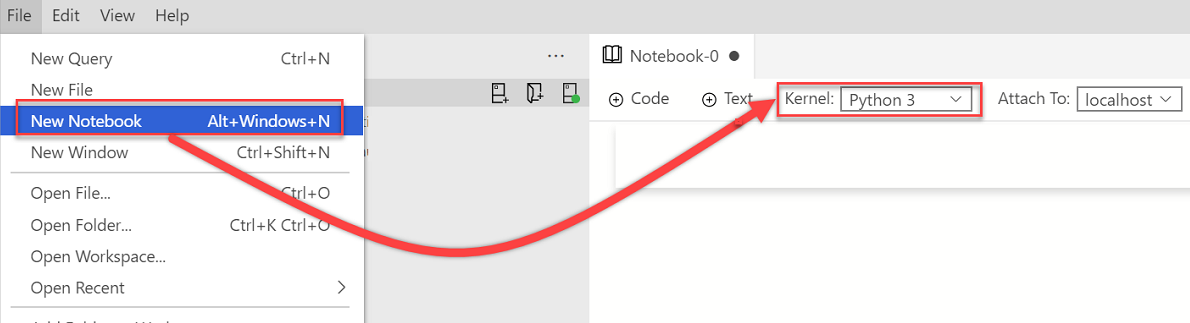
建立新的 Notebook。 將 [核心] 變更為 [Python 3]:
如果在您的套件需要更新時,系統提示您升級 Python 套件,則請選取 [是]:

驗證 [核心] 已設定為 [Python 3]:

製作新的程式碼儲存格。 選取 [參數] 以將儲存格標記為參數儲存格。
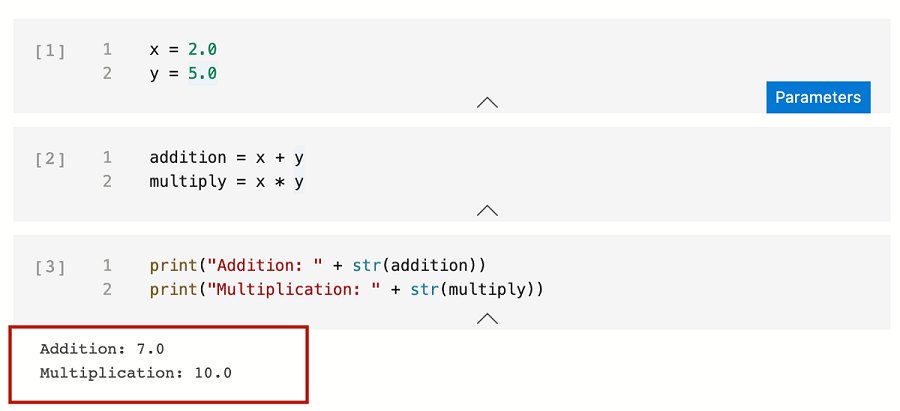
x = 2.0
y = 5.0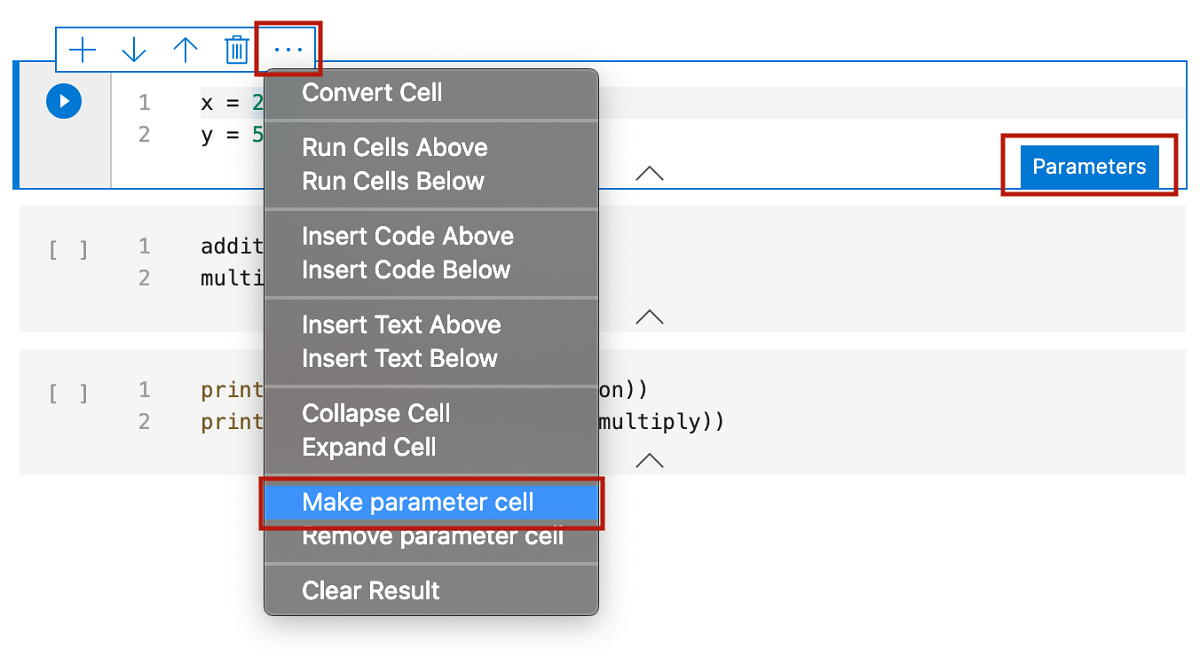
新增其他儲存格,以測試不同的參數:
addition = x + y
multiply = x * y
print("Addition: " + str(addition)) print("Multiplication: " + str(multiply))輸出會看似以下範例:
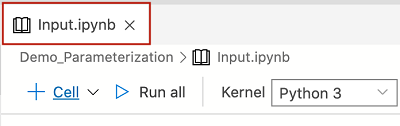
將筆記本儲存為 Input.ipynb:
使用參數執行筆記本
在筆記本工具列上,選取 [執行 (設有參數)] 圖示:

一系列的新對話方塊會提示您輸入 x 和 y 的新參數:


輸入新參數之後,請檢視新的參數化筆記本。 在工具列上,選取 [全部執行] 以執行所有儲存格,並查看新的輸出。 標示
# Injected-Parameters的新儲存格會包含傳入的新參數值:
下一步
深入了解筆記本和參數化:
意見反應
即將登場:在 2024 年,我們將逐步淘汰 GitHub 問題作為內容的意見反應機制,並將它取代為新的意見反應系統。 如需詳細資訊,請參閱:https://aka.ms/ContentUserFeedback。
提交並檢視相關的意見反應