Lab - Work with Microsoft Office integration
Read this first - before you start the lab!
Important
For this lab, you CANNOT sign in with your own credentials. Use the following steps to sign in to your lab environment with the correct credentials.
Ensure that you are signed in to Microsoft Learn.
Select Launch VM mode or Sign in to launch VM mode in this unit.
In the Resources tab on the lab side bar, select the T icon next to Password in the MININT box, to have the administrator password for the Virtual Machine entered for you.

Select Enter.
Microsoft Edge will open. Wait for it to navigate to the Sign in page for finance and operations.
On the Microsoft Sign in page in finance and operations, place your mouse cursor into the Username field.
On the Resources tab of the lab side bar, below the Azure portal heading, select the T icon next to Username, then press Enter.
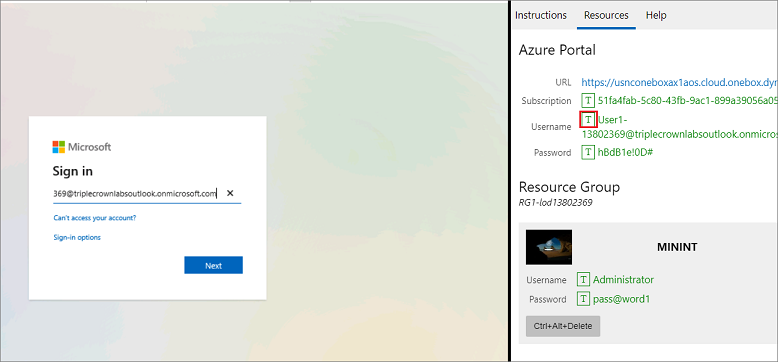
Your mouse cursor will now be in the Password page.
On the Resources tab of the lab side bar, below the Azure portal heading, select the T icon next to select Password, then press Enter.

Don't stay signed in or store the password on the virtual machine.
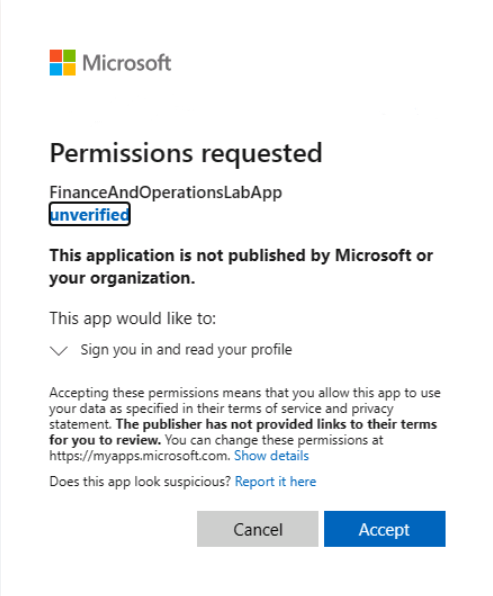
Select Accept in the Permissions requested page.
To see the lab instructions, select the Instructions tab on the lab side bar.
You can now begin your work on this lab.
Scenario - Use and build office integration in finance and operations
You want to use and build office integration in finance and operations.
Load the Fleet management data set
- In the company USMF, open Fleet Management > Setup > Fleet setup.
- Select Create.
- When the sample data is created, select Close. A message Sample data created appears.
- Close the message.
Static Export to Excel
- Go to Fleet Management > Customers > Customer.
- Select the Open in Microsoft Office icon in the top-right of the page, next to the Power Apps icon.
- Select Customers in the Export to Excel section.
- Download and open the workbook that is generated. Note that the columns in the workbook match the columns in the Customer grid.
- Close the Excel file.
- In finance and operations, select the first two rows by selecting in the left edge of the row, below the Select all check box in the Customer page.
- Right-click in the grid to open the shortcut menu. Note that both Export all rows and Export marked rows are available as commands.
- Select Export marked rows.
- Download and open the workbook that is generated. Note that the columns in the workbook match the columns in the grid, and that the rows that are exported match the rows that you selected.
- Close the Excel file.
Generated Open in Excel
- Go to Fleet Management > Customers > Customer, and select all customers.
- Select the Open in Microsoft Office icon.
- Select Fleet Management Customers (unfiltered) in the Open in Excel section.
- Download and open the workbook that is generated. This workbook contains the Excel Data Connector App, a binding to the Fleet Management Customer entity, and a pointer to the server that the workbook was generated from.
- Select Enable Editing in the excel file.
- Select Trust this add-in, that redirects to a Sign-in page.
- Use the credentials provided in the Azure Portal section of the Resources tab in the right pane of the online lab environment.
- In the Customer page in finance and operations, select Edit (or press F2) and change the email address of one of the customers.
- Select Save.
- In Excel, in the Data Connector app, select Refresh. Note that the new email address is shown in Excel.
- In Excel, change the email address of one of the customers.
- In the Data Connector app in Excel, select Publish.
- In finance and operations, select Refresh in the upper right of the page (or press Shift+F5). Note that the new email address is shown on the Customer page.
- In Excel, select the Open options dialog (gear) button in the upper-right corner of the Data Connector app. You can use the dialog box that appears to adjust the settings in the current workbook. Note that the Server URL value matches the start of the URL that is shown in an internet browser. Also note that the data refresh and data publish operations are listed in the Data Connector section.
- Select Cancel to close the Options dialog box.
- Select the Open message center (flag) button in the lower-right corner of the Excel app. The message center dialog box that appears provides information about what is occurring in the Excel app.
- Select Done. Do not close Excel.
Add and remove table columns from an existing table data source in the Excel app
- In the Data Connector app in Excel, select Design. A list of table and field data sources appears.
- Select the Edit (pencil) button next to the existing table data source. The data source details are shown.
- Remove fields. In the Selected fields list, double-click a field. Alternatively, select a field, and then select Remove. To select multiple fields, hold down the Ctrl key while you select the fields. To select all fields, press Ctrl+A.
- Add fields. In the Available fields list, double-click a field. Alternatively, select a field, and then select Add. To select multiple fields, hold down the Ctrl key while you select the fields. To select all fields, press Ctrl+A.
- Change the field order. In the Selected list, select a field, and then select Up or Down.
- Change a field label. In the Selected list, select a field, and then select the Column label field below the list. You can change the label to either a static string or a label identifier that will be translated to the active language (for example '@SYS129977').
- To apply the changes that you made to data source fields, select Update to return to the data source list.
- Select Yes to continue.
- Select Done.
- Select Refresh to make sure that any new fields are filled with data.
- Select Yes in the Confirm Refresh window that appears.
- Close the excel file.
Scenario - Use the Excel workbook designer
You need to use the Excel workbook designer page to create an Open in Excel experience for the company USMF.
- Go to Common > Common > Office integration > Excel workbook designer (it may take a few seconds to open).
- Select the FleetCustomer entity (you can use the Search field on the left to find it).
- Add all fields in the list of available fields to the list of selected fields, by using the Add all button.
- Select Create workbook.
- Select Download and then open the workbook that is generated.
- Enable editing in the workbook. This workbook contains the Excel Data Connector App, a binding to the Fleet Management Customer entity, and a pointer to the server that the workbook was generated from.
- In the Microsoft Edge security dialog box, select Allow.
- Select Enable Editing in the excel file.
- If a pop up shows, you must enable the Excel Data Connector App to load. Select Trust this add-in in NEW OFFICE ADD-IN window. If the pop-up does not appear, skip to step 12.
- You will then be redirected to a Sign-in page.
- Use the same credentials you used on the Microsoft Sign-in page to log in to finance and operations. You can find them in the Resources tab in the right pane.
- After successful sign-in, customer data is read from the OData service on the server and added to the table.
- Insert a blank row above the table and enter Fleet Customers as the title.
- Rename the worksheet FleetCustomers by saving it on the desktop with the new name.
Rearrange some of the fields in the table.
- Select Design in the Data Connecter to open the designer experience.
- Next to the Fleet Management Customers data source are buttons for editing and deleting the data source. Select Edit to view the field list. You might need to enlarge the Data Connector to see all sections.
- Select fields from the Selected fields section and us the Up and Down buttons. Set the sequence for the first three fields to FirstName, LastName, and DriverLicense.
- Select Update. Note that the field order in the Excel sheet is changed.
- Select Done.
- Select the **Open options dialog ** (gear) button in the Data Connector.
- Select Clear binding data in the Data Connector section, so that the workbook contains no bound data.
- Select OK.
- Save the workbook as FleetCustomersBasic.xlsx on the desktop.
- In finance and operations, go to Common > Common > Office integration > Document templates.
- Select New.
- Browse to the FleetCustomersBasic.xlsx file that you just saved.
- Select Open and then OK. The template is added as a line in the Document templates page.
- In the FleetCustomersBasic row, change the Template display name value to Fleet Customers Basic.
- Select Save.
- Close the Document templates page.
- Go to Fleet Management > Customers > Customer.
- Note that Fleet Customers Basic is now an option in the Open in Excel section, now select it.
- Select Download, and then Open.
- Select Allow in the Microsoft Edge security dialog box, to open the workbook that is generated, if it is prompted.
- Select Enable Editing in the excel file.
You can also try to use the designer experience in the Excel add-in to add another data source to another worksheet.
Close the lab environment
- Select Done in the Instructions pane in the lab side bar.
- In the Lab is complete window, select Continue, and then select Leave to return to the next unit in the module.