Windows 的偵錯工具 支援透過網路進行核心偵錯。 This article describes how to set up network debugging automatically by using the KDNET (kdnet.exe) setup tool.
The computer that runs the debugger is the host computer, and the computer being debugged is the target computer. The host computer must run Windows 7 or later, and the target computer must run Windows 8 or later.
判斷主計算機的IP位址
使用下列步驟來尋找主電腦的IP位址:
確認目標計算機和主機計算機已連線到網路中樞,或使用適當的網路纜線交換器。
On the host computer, open a command prompt and enter IPConfig to display the IP configuration.
在指令輸出中,找出電腦的乙太網路卡 IPv4 位址:
<Host-IP-Address>... Ethernet adapter Ethernet: ... IPv4 Address. . . . . . . . . . . : <Host-IP-Address> ...Alternatively, use Settings>Network & internet>Ethernet to gather the IPv4 address information.
記下您要用於偵錯之網路適配器的 IPv4 位址。
設定主機和目標計算機
使用 KDNET 公用程式,透過這些步驟在目標電腦上自動設定調試程式設定。
Note
此程式假設主機和目標計算都執行64位版本的Windows。 如果您的設定不同,最好的方法是在目標上執行的主機上執行相同的工具「位」。 例如,如果目標執行 32 位 Windows,請在主機上執行 32 位版本的調試程式。 如需詳細資訊,請參閱 選擇 32 位或 64 位偵錯工具。
確認主電腦上已安裝 Windows 偵錯工具。 如需下載和安裝工具的相關信息,請參閱 偵錯 Windows 工具。
Locate the kdnet.exe and VerifiedNICList.xml files on the host computer. 根據預設,檔案位於 C:\Program Files (x86)\Windows Kits\10\Debuggers\x64 資料夾中。
將主電腦上的兩個檔案複製到網路共用或拇指磁碟驅動器,使其可供目標計算機使用。
On the target computer, create a C:\KDNET folder, and copy the kdnet.exe and VerifiedNICList.xml files to the folder.
Important
Before you use kdnet.exe to change boot information, you might need to temporarily suspend Windows security features on the test PC, such as BitLocker and Secure Boot. 完成測試之後,請重新啟用安全性功能。 當安全性功能停用時,請務必適當地管理測試計算機。
在目標計算機上,以系統管理員身分開啟命令提示字元。 輸入下列命令以確認目標電腦具有支援的網路配接器:
C:\KDNET>kdnet.exe
Network debugging is supported on the following NICs:
busparams=1.0.0, Broadcom NetXtreme Gigabit Ethernet, Plugged in.
This Microsoft hypervisor supports using KDNET in guest VMs.
After the output from the KDNET (kdnet.exe) command shows the network adapter supported on the target, you can proceed.
輸入下列命令來設定主機系統的IP位址,併產生唯一的連線密鑰。
-
<Host-Computer-IP-Address>針對 值,請使用主機系統的IP位址或名稱。 -
<Debug-Port>針對值,針對您使用的每個目標/主機組輸入唯一的埠位址,在建議的 50000-50039 範圍內。
C:\KDNET>kdnet.exe <Host-Computer-IP-Address> Enabling network debugging on Intel(R) 82577LM Gigabit Network Connection. Key=2steg4fzbj2sz.23418vzkd4ko3.1g34ou07z4pev.1sp3yo9yz874p-
Save the key value returned by the KDNET command in a notepad .txt file.
將 WinDbg 連線至目標以進行核心偵錯
請遵循下列步驟,將 WinDbg 連線到目標電腦以進行核心偵錯:
On the host computer, open WinDbg, and select File>Kernel Debug.
In the Kernel Debugging dialog, select the Net tab.
Paste the port number and key from the notepad.txt file into the tab fields, and select OK.
You can also start the WinDbg session from the command line by using the windbg.exe command and the values you saved in the notepad.txt file.
windbg.exe -k -d net:port=<Debug-Port>,key=<KDNET-Key>
此值 <Debug-Port> 是您先前選取的埠。 值 <KDNET-Key> 是 KDNET 傳回的索引鍵。 選擇性 -d 參數會啟用早期中斷。 如需詳細資訊,請參閱 WinDbg 命令行選項。
當您啟動連線時,WinDbg 可能會提示您允許透過防火牆存取埠:
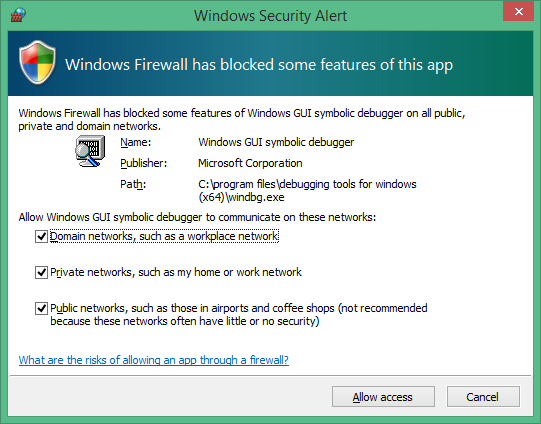
In the message dialog, select each checkbox to enable access for all three network types, and select Allow access.
此時,調試程式會等候目標重新連線,並在調試程式命令視窗中顯示進度:
Microsoft (R) Windows Debugger Version 1.0.1908.30002 AMD64
Copyright (c) Microsoft Corporation. All rights reserved.

Using NET for debugging
Opened WinSock 2.0
Waiting to reconnect...
重新啟動目標計算機
當調試程序顯示「正在等候重新連線...」時訊息,重新啟動目標計算機。
重新啟動電腦的其中一種方式是在系統管理員的命令提示字元中執行下列命令:
shutdown -r -t 0
目標電腦重新啟動之後,調試程式應該會自動連線。
Troubleshoot issues
如果您在建立埠連線或啟動偵錯會話時遇到問題,請檢閱下列疑難解答秘訣。
允許透過防火牆偵錯應用程式
在調試程序執行所在的主機端,必須啟用所有類型的網路功能,才能讓調試程式透過防火牆與目標通訊。
Use the Windows Control Panel to allow access through the firewall.
Open Control Panel>System and Security and select the appropriate Allow an app through Windows Firewall options:
WinDbg: In the list of applications, locate the WinDbg engine process (TCP) (all) option.
WinDbg (Classic): In the list of applications, locate the Windows GUI Symbolic Debugger and Windows Kernel Debugger options.
Select the checkboxes to allow all debugging applications through all three network types.
Select OK to save the firewall changes, and then restart the debugger.
![[控制面板] 防火牆組態的螢幕快照,其中顯示已啟用所有三種網路類型的 Windows GUI 符號調試程式和 Windows 核心調試程式應用程式。](images/firewall-control-pannel-windbg-gui-config.png)
使用 Ping 測試連線能力
如果調試程式逾時且未連線,請使用 ping 目標電腦上的 命令來驗證連線能力:
C:\>Ping <HostComputerIPAddress>
選擇網路偵錯的埠
如果調試程式逾時且未連線,可能是因為預設埠號碼 50000 已在使用中或遭到封鎖。
您可以選擇 49152 到 65535 之間的任何埠號碼,包括 。 建議的範圍是 50000 到 50039。 您選擇的埠會由在主電腦上執行的調試程式開啟供獨佔存取。
公司網路原則可能會限制網路偵錯可用的埠號碼範圍。 若要判斷公司的原則是否限制網路偵錯的埠範圍,請洽詢您的網路管理員。
尋找支援的網路適配器
如果您在執行 KDNET 時看到 此電腦訊息中的任何 NIC 不支援網路偵 錯,則不支援網路適配器。
主計算機可以使用任何網路適配器,但目標計算機必須使用 Windows 偵錯工具支援的網路適配器。 如需支援的網路適配器清單,請參閱下列文章:
啟用其他偵錯類型
Windows 10 2020 年 10 月更新版 (20H2) 和更新版本支援四種類型的偵錯:
| KDNET option | Debugging type | 對等的 set 命令 | More information |
|---|---|---|---|
b |
Bootmgr debugging | bcdedit /bootdebug {bootmgr} on |
BCDEdit /bootdebug |
w |
Winload debugging | bcdedit /bootdebug on |
BCDEdit /bootdebug |
k |
Kernel debugging | bcdedit /debug on |
開始使用 WinDbg(核心模式) |
h |
Hypervisor debugging | bcdedit /set hypervisordebug on |
BCDEdit /hypervisorsettings |
以下是使用偵錯類型的詳細資料:
- 您可以指定偵錯類型的任何組合。
- 如果您未指定偵錯類型,系統會啟用核心偵錯。
- 如果您同時啟用 Hypervisor 和核心偵錯,Hypervisor 埠會設定為
<Debug-Port>+ 1。
範例:啟用 bootmgr、kernel 和 winload 偵錯
下列範例會使用 - bkw 選項來啟用 bootmgr、kernel 和 winload 偵錯:
C:\>kdnet.exe <HostComputerIPAddress> <YourDebugPort> -bkw

Enabling network debugging on Intel(R) 82577LM Gigabit Network Connection.
Key=2steg4fzbj2sz.23418vzkd4ko3.1g34ou07z4pev.1sp3yo9yz874p
指定總線參數
如果 KDNET 無法自動判斷傳輸的總線參數,您可以使用 選項在命令行 /busparams 上指定參數:
kdnet.exe /busparams [b.d.f] [host] [port] [-[b][h][k][w]]
部分 b.d.f 會指定要設定之裝置的總線參數。
Use Device Manager on the target computer to determine the PCI bus number (b), the device number (d), and the function number (f) of the adapter you want to use for debugging. These values are available in the General tab under the Location setting.
For example:
C:\>kdnet.exe /busparams 0.29.7 <Host-Computer-IP-Address> <Debug-Port> -bkw