除了使用者標識碼和密碼組合之外,需要安全驗證的 Windows 應用程式可以使用憑證進行驗證。 驗證使用者時,憑證驗證可提供高度的信任。 在某些情況下,服務群組需要驗證多個應用程式的使用者。 本文說明如何使用同一憑證驗證多個 Windows 應用程式,以及如何提供使用者將access的憑證匯入安全網路服務的方法。
應用程式可以使用憑證向 Web 服務進行驗證,而多個應用程式可以使用憑證儲存的單一憑證來驗證相同的使用者。 如果商店中不存在憑證,您可以將程式代碼新增至您的應用程式,以從 PFX 檔案匯入憑證。 這個快速入門中的客戶端應用程式是 WinUI 3 應用程式,而網頁服務則是 ASP.NET Core 網頁 API。
提示
Microsoft Copilot 是一個很棒的資源,當你對於開始開發 Windows 應用程式或 ASP.NET Core 網頁 API 感到疑惑時。 Copilot 可協助您撰寫程式代碼、尋找範例,以及深入瞭解建立安全應用程式的最佳做法。
必要條件
- Visual Studio 安裝了 ASP.NET 以及網頁開發 和 WinUI 應用程式開發工作負載。
- 最新的 Windows 軟體開發套件(SDK) 用於使用 WinUI 應用程式中的 Windows Runtime(WinRT)API。
- 使用PowerShell來處理自我簽署憑證。
建立並發佈安全的 Web 服務
打開Microsoft Visual Studio,從開始畫面選擇建立一個新的project。
在「建立新專案」對話框中,在「選擇專案類型」下拉清單中選擇「API」,以篩選可用的專案範本。
選擇 ASP.NET Core Web API 範本,並選擇 Next。
將應用程式命名為 「FirstContosoBank」,然後選取 [ 下一步]。
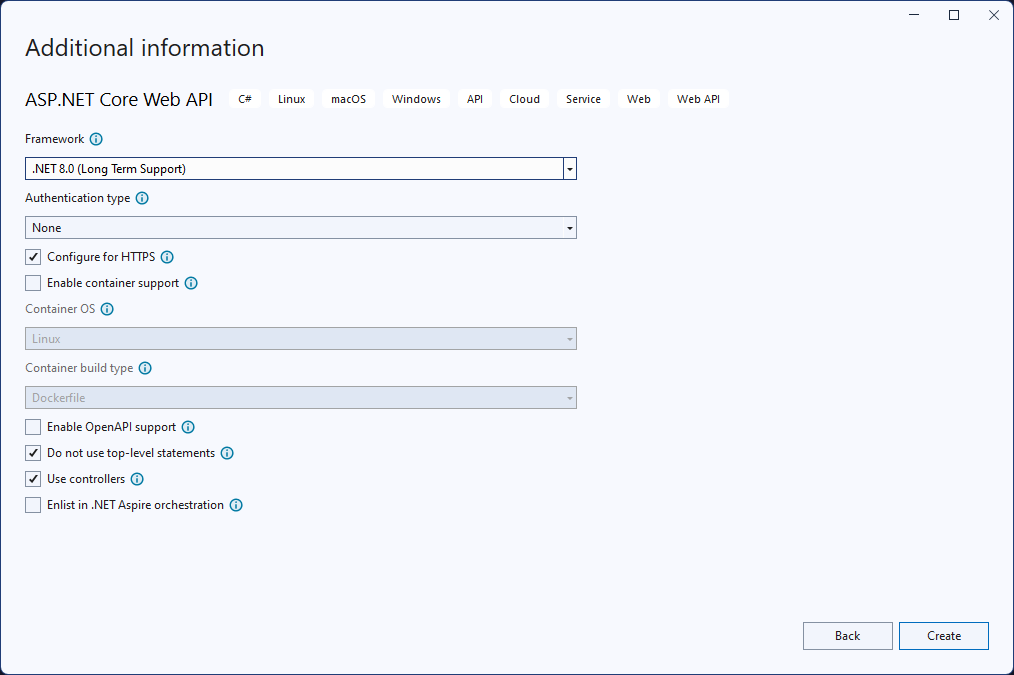
選擇 .NET 8.0 或更新版本,作為 Framework,將 Authentication Type 設為 None,確保勾選 Configure for HTTPS,取消勾選 Enable OpenAPI support, 請檢查 請勿使用頂層語句 以及 使用 controllers,並選擇 Create。
以滑鼠右鍵按兩下 Controllers 資料夾中WeatherForecastController.cs檔案,然後選取 [重新命名]。 將名稱改為 BankController.cs,並讓Visual Studio重新命名類別及所有對該類別的引用。
在 launchSettings.json 檔案中,將 “launchUrl” 的值從 “weatherforecast” 變更為 “bank”,並應用於所有使用該值的三個組態中。
在 BankController.cs 檔案中,新增下列 「Login」 方法。
[HttpGet]
[Route("login")]
public string Login()
{
    // Return any value you like here.
    // The client is just looking for a 200 OK response.
    return "true";
}
打開 NuGet 套件管理器,然後搜尋並安裝最新穩定版本的 Microsoft.AspNetCore.Authentication.Certificate 套件。 此套件提供 ASP.NET Core 憑證驗證的中介軟體。
在project中新增一個名為 SecureCertificateValidationService 的類別。 將下列程式代碼新增至 類別,以設定憑證驗證中間件。
using System.Security.Cryptography.X509Certificates;

public class SecureCertificateValidationService
{
    public bool ValidateCertificate(X509Certificate2 clientCertificate)
    {
        // Values are hard-coded for this example.
        // You should load your valid thumbprints from a secure location.
        string[] allowedThumbprints = { "YOUR_CERTIFICATE_THUMBPRINT_1", "YOUR_CERTIFICATE_THUMBPRINT_2" };
        if (allowedThumbprints.Contains(clientCertificate.Thumbprint))
        {
            return true;
        }

        return false;
    }
}
開啟 Program.cs ,並以下列程式代碼取代 Main 方法中的程式代碼:
public static void Main(string[] args)
{
    var builder = WebApplication.CreateBuilder(args);

    // Add our certificate validation service to the DI container.
    builder.Services.AddTransient<SecureCertificateValidationService>();

    builder.Services.Configure<KestrelServerOptions>(options =>
    {
        // Configure Kestrel to require a client certificate.
        options.ConfigureHttpsDefaults(options =>
        {
            options.ClientCertificateMode = ClientCertificateMode.RequireCertificate;
            options.AllowAnyClientCertificate();
        });
    });

    builder.Services.AddControllers();

    // Add certificate authentication middleware.
    builder.Services.AddAuthentication(
    CertificateAuthenticationDefaults.AuthenticationScheme)
       .AddCertificate(options =>
    {
        options.AllowedCertificateTypes = CertificateTypes.SelfSigned;
        options.Events = new CertificateAuthenticationEvents
        {
            // Validate the certificate with the validation service.
            OnCertificateValidated = context =>
            {
                var validationService = context.HttpContext.RequestServices.GetService<SecureCertificateValidationService>();

                if (validationService.ValidateCertificate(context.ClientCertificate))
                {
                    context.Success();
                }
                else
                {
                    context.Fail("Invalid certificate");
                }

                return Task.CompletedTask;
            },
            OnAuthenticationFailed = context =>
            {
                context.Fail("Invalid certificate");
                return Task.CompletedTask;
            }
        };
     });

     var app = builder.Build();

     // Add authentication/authorization middleware.
     app.UseHttpsRedirection();
     app.UseAuthentication();
     app.UseAuthorization();

     app.MapControllers();
     app.Run();
 }
上述程式代碼會將 Kestrel 伺服器設定為需要用戶端憑證,並將憑證驗證中間件新增至應用程式。 中間件會使用
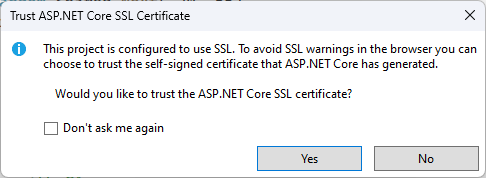
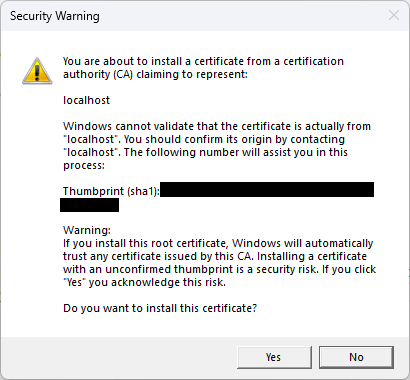
SecureCertificateValidationService類別來驗證客戶端憑證。 當憑證經過驗證時會呼叫OnCertificateValidated事件。 如果憑證有效,事件會呼叫Success方法。 如果憑證無效,事件會使用錯誤訊息呼叫Fail方法,而錯誤訊息將會傳回給用戶端。開始除錯專案以便啟動網路服務。 您可能會收到有關信任和安裝 SSL 憑證的訊息。 按Yes 以信任憑證並繼續偵錯專案。
Web 服務將可用於
https://localhost:7072/bank。 您可以開啟網頁瀏覽器並輸入網址來測試Web服務。 您會看到產生的天氣預報數據格式化為 JSON。 建立用戶端應用程式時,讓 Web 服務保持執行。
欲了解更多關於使用 ASP.NET Core控制器網頁 API 的資訊,請參見 Create a web API with ASP.NET Core。
建立使用憑證驗證的 WinUI 應用程式
現在您已經擁有一個或多個安全的 Web 服務,您的應用程式可以使用憑證對這些 Web 服務進行驗證。 當您使用來自 WinRT API 的 HttpClient 物件向已驗證的 Web 服務提出要求時,初始要求將不會包含客戶端憑證。 經過驗證的 Web 服務將回應用戶端驗證要求。 發生這種情況時,Windows 用戶端將自動查詢憑證儲存以取得可用的用戶端憑證。 您的使用者可以從這些憑證中進行選擇,以對 Web 服務進行驗證。 有些憑證受密碼保護,因此您需要為使用者提供輸入憑證密碼的方法。
注意
目前還沒有 Windows App SDK API 來管理憑證。 您必須使用 WinRT API 來管理應用程式中的憑證。 我們也會使用 WinRT storage API 從 PFX 檔案匯入憑證。 許多 WinRT API 可被任何具有套件身份的 Windows app 使用,包括 WinUI 應用程式。
我們將實作的 HTTP 用戶端程式碼使用 .NET 的 HttpClient。 WinRT API 中包含的 HttpClient 不支援客戶端憑證。
如果沒有可用的用戶端憑證,則使用者需要將憑證新增至憑證儲存。 您可以在應用程式中包含程式碼,使使用者能夠選擇包含用戶端憑證的 PFX 檔案,然後將該憑證匯入到用戶端憑證存放區中。
提示
您可以使用 PowerShell Cmdlet New-SelfSignedCertificate 和 Export-PfxCertificate 來建立自我簽署憑證,並將其導出至 PFX 檔案以搭配本快速入門使用。 如需詳細資訊,請參閱 New-SelfSignedCertificate 和 Export-PfxCertificate。
請注意,產生憑證時,您應該儲存憑證的指紋,以用於Web服務進行驗證。
打開 Visual Studio,從開始頁面建立一個新的 WinUI project。 將新的專案命名為「FirstContosoBankApp」。 點擊 Create 建立新的project。
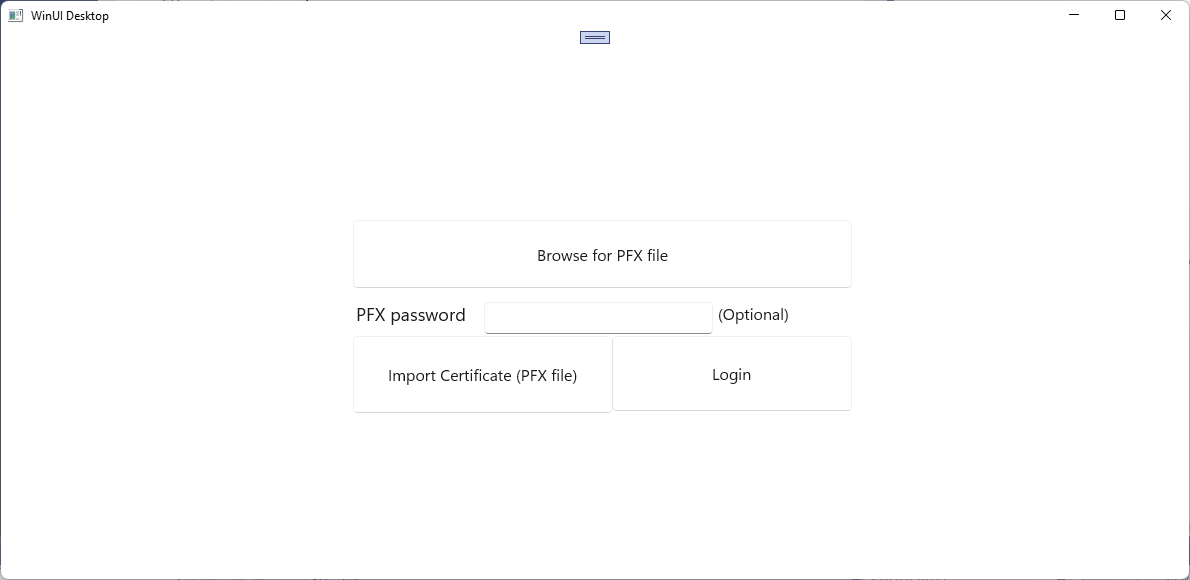
在 MainWindow.xaml 檔案中,將下列 XAML 新增至 Grid 元素,並取代現有的 StackPanel 元素及其內容。 此XAML 包括一個用於瀏覽要匯入的PFX 檔案的按鈕、一個用於為受密碼保護的PFX 檔案輸入密碼的文字方塊、一個用於匯入所選PFX 檔案的按鈕、一個用於登入安全 Web 服務的按鈕,以及顯示目前動作狀態的文字區塊。
<Button x:Name="Import" Content="Import Certificate (PFX file)" HorizontalAlignment="Left" Margin="352,305,0,0" VerticalAlignment="Top" Height="77" Width="260" Click="Import_Click" FontSize="16"/>
<Button x:Name="Login" Content="Login" HorizontalAlignment="Left" Margin="611,305,0,0" VerticalAlignment="Top" Height="75" Width="240" Click="Login_Click" FontSize="16"/>
<TextBlock x:Name="Result" HorizontalAlignment="Left" Margin="355,398,0,0" TextWrapping="Wrap" VerticalAlignment="Top" Height="153" Width="560"/>
<PasswordBox x:Name="PfxPassword" HorizontalAlignment="Left" Margin="483,271,0,0" VerticalAlignment="Top" Width="229"/>
<TextBlock HorizontalAlignment="Left" Margin="355,271,0,0" TextWrapping="Wrap" Text="PFX password" VerticalAlignment="Top" FontSize="18" Height="32" Width="123"/>
<Button x:Name="Browse" Content="Browse for PFX file" HorizontalAlignment="Left" Margin="352,189,0,0" VerticalAlignment="Top" Click="Browse_Click" Width="499" Height="68" FontSize="16"/>
<TextBlock HorizontalAlignment="Left" Margin="717,271,0,0" TextWrapping="Wrap" Text="(Optional)" VerticalAlignment="Top" Height="32" Width="83" FontSize="16"/>
儲存 MainWindow 變更。
開啟 MainWindow.xaml.cs 檔案,然後新增下列
using語句。using System; using System.Security.Cryptography.X509Certificates; using System.Diagnostics; using System.Net.Http; using System.Net; using System.Text; using Microsoft.UI.Xaml; using Windows.Security.Cryptography.Certificates; using Windows.Storage.Pickers; using Windows.Storage; using Windows.Storage.Streams;在 MainWindow.xaml.cs 檔案中,將下列變數新增至 MainWindow 類別。 他們會指定 「FirstContosoBank」Web 服務之安全 登入 服務端點的位址,以及保存要匯入證書存儲之 PFX 憑證的全域變數。 將
<server-name>更新為localhost:7072或你 API project launchSettings.json 檔案中「https」設定中指定的埠。private Uri requestUri = new Uri("https://<server-name>/bank/login"); private string pfxCert = null;在 MainWindow.xaml.cs 檔案中,新增以下點擊事件處理程序,並加入方法以存取安全的網路服務。
private void Login_Click(object sender, RoutedEventArgs e)
{
    MakeHttpsCall();
}

private async void MakeHttpsCall()
{
    var result = new StringBuilder("Login ");

    // Load the certificate
    var certificate = new X509Certificate2(Convert.FromBase64String(pfxCert),
                                           PfxPassword.Password);

    // Create HttpClientHandler and add the certificate
    var handler = new HttpClientHandler();
    handler.ClientCertificates.Add(certificate);
    handler.ClientCertificateOptions = ClientCertificateOption.Automatic;

    // Create HttpClient with the handler
    var client = new HttpClient(handler);

    try
    {
        // Make a request
        var response = await client.GetAsync(requestUri);

        if (response.StatusCode == HttpStatusCode.OK)
        {
            result.Append("successful");
        }
        else
        {
            result = result.Append("failed with ");
            result = result.Append(response.StatusCode);
        }
    }
    catch (Exception ex)
    {
        result = result.Append("failed with ");
        result = result.Append(ex.Message);
    }

    Result.Text = result.ToString();
}
接下來,為按鈕新增以下點擊處理程式,以瀏覽 PFX 檔案,以及將選擇的 PFX 檔案匯入到憑證存儲區。
private async void Import_Click(object sender, RoutedEventArgs e)
{
    try
    {
        Result.Text = "Importing selected certificate into user certificate store....";
        await CertificateEnrollmentManager.UserCertificateEnrollmentManager.ImportPfxDataAsync(
              pfxCert,
              PfxPassword.Password,
              ExportOption.Exportable,
              KeyProtectionLevel.NoConsent,
              InstallOptions.DeleteExpired,
              "Import Pfx");

        Result.Text = "Certificate import succeeded";
    }
    catch (Exception ex)
    {
        Result.Text = "Certificate import failed with " + ex.Message;
    }
}

private async void Browse_Click(object sender, RoutedEventArgs e)
{
    var result = new StringBuilder("Pfx file selection ");
    var pfxFilePicker = new FileOpenPicker();
    IntPtr hwnd = WinRT.Interop.WindowNative.GetWindowHandle(this);
    WinRT.Interop.InitializeWithWindow.Initialize(pfxFilePicker, hwnd);
    pfxFilePicker.FileTypeFilter.Add(".pfx");
    pfxFilePicker.CommitButtonText = "Open";
    try
    {
        StorageFile pfxFile = await pfxFilePicker.PickSingleFileAsync();
        if (pfxFile != null)
        {
            IBuffer buffer = await FileIO.ReadBufferAsync(pfxFile);
            using (DataReader dataReader = DataReader.FromBuffer(buffer))
            {
                byte[] bytes = new byte[buffer.Length];
                dataReader.ReadBytes(bytes);
                pfxCert = System.Convert.ToBase64String(bytes);
                PfxPassword.Password = string.Empty;
                result.Append("succeeded");
            }
        }
        else
        {
            result.Append("failed");
        }
    }
    catch (Exception ex)
    {
        result.Append("failed with ");
        result.Append(ex.Message); ;
    }

    Result.Text = result.ToString();
}
開啟 Package.appxmanifest 檔案,並將下列功能新增至 [功能] 索引標籤。
- 企業認證
- SharedUserCertificates
執行您的應用程式並登入您的安全 Web 服務,並將 PFX 檔案匯入本機憑證存放區。
你可以利用這些步驟建立多個應用程式,使用相同的使用者憑證來access相同或不同的安全網路服務。
