DirectX 和 XAML 互操作
注意
本主題適用於 通用 Windows 平台 (UWP) 遊戲和應用程式,以及 Windows.UI.Xaml.Xxx 命名空間中的類型(而非 Microsoft.UI.Xaml.Xxx)。
您可以在 通用 Windows 平台 (UWP) 遊戲或應用程式中,搭配 Microsoft DirectX 搭配使用 Extensible Application Markup Language (XAML)。 XAML 和 DirectX 的組合可讓您建置彈性的使用者介面架構,以與 DirectX 轉譯的內容互通;這對圖形密集型應用程式特別有用。 本主題說明使用 DirectX 的 UWP 應用程式結構,並識別建置 UWP 應用程式以使用 DirectX 時要使用的重要類型。
如果您的 app 主要著重於 2D 轉譯,則您可能想要使用 Win2D Windows 執行階段 連結庫。 該連結庫由Microsoft維護,並建置在核心 Direct2D 技術之上。 Win2D 可大幅簡化使用模式來實作 2D 圖形,並包含本檔中所述的一些技術有用的抽象概念。 如需詳細資訊,請參閱項目頁面。 本文件涵蓋選擇不使用 Win2D 之應用程式開發人員的指引。
注意
DirectX API 未定義為 Windows 執行階段 類型,但您可以使用 C++/WinRT 來開發與 DirectX 互通的 XAML UWP 應用程式。 如果您將呼叫 DirectX 的程式代碼納入它自己的C++/WinRT Windows 執行階段元件 (WRC),則可以在 UWP 應用程式中使用該 WRC,甚至 C# 應用程式,然後結合 XAML 和 DirectX。
XAML 和 DirectX
DirectX 分別提供兩個適用於 2D 和 3D 圖形的強大連結庫:Direct2D 和 Direct3D。 雖然 XAML 提供基本 2D 基本型別和效果的支援,但許多模型化和遊戲應用程式需要更複雜的圖形支援。 針對這些,您可以使用 Direct2D 和 Direct3D 來轉譯更複雜的圖形,並針對較傳統的使用者介面 (UI) 元素使用 XAML。
如果您要實作自定義 XAML 和 DirectX Interop,則需要知道這兩個概念。
- 共用介面是 XAML 所定義的顯示大小區域,您可以使用 DirectX,使用 Windows::UI::Xaml::Media::ImageSource 類型來間接繪製。 對於共用表面,您不會控制新內容在螢幕上出現時的精確時機。 相反地,共用介面的更新會同步至 XAML 架構的更新。
- 交換鏈結代表緩衝區集合,用來以最少延遲顯示圖形。 交換鏈結通常會以每秒 60 個畫面格與 UI 線程分開更新。 不過,交換鏈結會使用更多記憶體和 CPU 資源來支援快速更新,而且相對難以使用,因為您必須管理多個線程。
請考慮您使用 DirectX 的內容。 您是否會使用它來複合或建立符合顯示視窗維度的單一控件的動畫效果? 其是否包含需要即時轉譯和控制的輸出,就像在遊戲中一樣? 若是如此,您可能需要實作交換鏈結。 否則,您應該使用共用表面。
一旦您決定要使用 DirectX 的方式,您可以使用下列其中一種 Windows 執行階段 類型,將 DirectX 轉譯併入 UWP app。
- 如果您想要撰寫靜態影像,或以事件驅動間隔繪製複雜的影像,請使用 Windows::UI::Xaml::Media::Imaging::SurfaceImageSource 繪製至共用介面。 該類型會處理重設大小的 DirectX 繪圖介面。 一般而言,當您將影像或紋理撰寫為點陣圖以在檔或 UI 元素中顯示時,請使用此類型。 它不適用於即時互動,例如高效能遊戲。 這是因為 SurfaceImageSource 物件的更新會同步處理至 XAML 使用者介面更新,而且可能會對提供給使用者的視覺回饋造成延遲,例如波動的幀速率,或對即時輸入的感知不良回應。 不過,更新仍然足以用於動態控件或數據模擬。
- 如果影像大於提供的螢幕實際空間,而且可由使用者平移或縮放,請使用 Windows::UI::Xaml::Media::Imaging::VirtualSurfaceImageSource。 該類型會處理大於螢幕的大小 DirectX 繪圖介面。 如同 SurfaceImageSource,您會在動態撰寫複雜影像或控件時使用此專案。 此外,與 SurfaceImageSource 一樣,它不適用於高效能遊戲。 使用 VirtualSurfaceImageSource 的 XAML 元素範例包括地圖控件或大型的影像密集文件查看器。
- 如果您使用 DirectX 實時呈現更新的圖形,或更新必須採用一般低延遲間隔的情況,請使用 SwapChainPanel 類別,讓您可以重新整理圖形,而不需同步處理至 XAML 架構重新整理定時器。 使用 SwapChainPanel ,您可以直接存取圖形裝置的交換鏈結 (IDXGISwapChain1),並在轉譯目標上方分層 XAML。 SwapChainPanel 適用於需要 XAML 型使用者介面的遊戲和全螢幕 DirectX 應用程式。 您必須非常瞭解 DirectX 才能使用此方法,包括 Microsoft DirectX 圖形基礎結構 (DXGI)、Direct2D 和 Direct3D 技術。 如需詳細資訊,請參閱 Direct3D 11 的程序設計指南。
SurfaceImageSource
SurfaceImageSource 提供要繪製到的 DirectX 共用介面,然後將位撰寫到應用程式內容中。
提示
行距 (DirectWrite) 和可下載字型 (DirectWrite) 範例應用程式示範 SurfaceImageSource。
概括而言,以下是建立和更新 SurfaceImageSource 的程式。
- 建立 Direct 3D 裝置、Direct 2D 裝置和 Direct 2D 裝置內容。
- 建立 SurfaceImageSource,並在該裝置上設定 Direct 2D (或 Direct 3D) 裝置。
- 開始在 SurfaceImageSource 上繪製,以取得 DXGI 表面。
- 使用 Direct2D 繪製至 DXGI 介面(或 Direct3D)。
- 完成時, 會在 SurfaceImageSource 上結束繪圖。
- 在 XAML 影像或 ImageBrush 上設定 SurfaceImageSource,以便在 XAML UI 中顯示它。
以下是使用原始程式碼範例深入探討這些步驟。
您可以遵循下列程式代碼,方法是在 Visual Studio Microsoft中建立新的專案,以遵循以下所示的程式代碼。 建立 空白應用程式 (C++/WinRT) 專案。 以 Windows SDK 最新的正式推出版本 (即非預覽版本) 為目標。
開啟
pch.h,並將 下列內容新增 至已經存在的下方。// pch.h ... #include <d3d11_4.h> #include <d2d1_1.h> #include <windows.ui.xaml.media.dxinterop.h> #include <winrt/Windows.UI.Xaml.Media.Imaging.h>using將如下所示的 指示詞新增至 的頂端,位於該處的指示MainPage.cpp詞下方。 此外,在中MainPage.cpp,將MainPage::ClickHandler 的現有實作取代為如下所示的清單。 此程式代碼會建立 Direct 3D 裝置、Direct 2D 裝置和 Direct 2D 裝置內容。 若要這樣做,它會呼叫 D3D11CreateDevice、D2D1CreateDevice 和 ID2D1Device::CreateDeviceContext。// MainPage.cpp | paste this below the existing using directives using namespace Windows::UI::Xaml::Media::Imaging;// MainPage.cpp | paste this to replace the existing MainPage::ClickHandler void MainPage::ClickHandler(IInspectable const&, RoutedEventArgs const&) { myButton().Content(box_value(L"Clicked")); uint32_t creationFlags = D3D11_CREATE_DEVICE_BGRA_SUPPORT; D3D_FEATURE_LEVEL featureLevels[] = { D3D_FEATURE_LEVEL_11_1, D3D_FEATURE_LEVEL_11_0, D3D_FEATURE_LEVEL_10_1, D3D_FEATURE_LEVEL_10_0, D3D_FEATURE_LEVEL_9_3, D3D_FEATURE_LEVEL_9_2, D3D_FEATURE_LEVEL_9_1 }; // Create the Direct3D device. winrt::com_ptr<::ID3D11Device> d3dDevice; D3D_FEATURE_LEVEL supportedFeatureLevel; winrt::check_hresult(::D3D11CreateDevice( nullptr, D3D_DRIVER_TYPE_HARDWARE, 0, creationFlags, featureLevels, ARRAYSIZE(featureLevels), D3D11_SDK_VERSION, d3dDevice.put(), &supportedFeatureLevel, nullptr) ); // Get the DXGI device. winrt::com_ptr<::IDXGIDevice> dxgiDevice{ d3dDevice.as<::IDXGIDevice>() }; // Create the Direct2D device and a corresponding context. winrt::com_ptr<::ID2D1Device> d2dDevice; ::D2D1CreateDevice(dxgiDevice.get(), nullptr, d2dDevice.put()); winrt::com_ptr<::ID2D1DeviceContext> d2dDeviceContext; winrt::check_hresult( d2dDevice->CreateDeviceContext( D2D1_DEVICE_CONTEXT_OPTIONS_NONE, d2dDeviceContext.put() ) ); }接下來,新增程式代碼以建立 SurfaceImageSource,並藉由呼叫 ISurfaceImageSourceNativeWithD2D::SetDevice,在該裝置上設定 Direct 2D (或 Direct 3D) 裝置。
注意
如果您要從背景線程繪製 SurfaceImageSource,則您也必須確定 DXGI 裝置已啟用多線程存取權(如下列程式代碼所示)。 基於效能考慮,只有當您將從背景線程繪製時,才應該這麼做。
將高度和寬度傳遞至 SurfaceImageSource 建構函式,以定義共用表面的大小。 您也可以指出表面是否需要 Alpha (不透明度) 支援。
若要設定裝置並執行繪製作業,我們需要 ISurfaceImageSourceNativeWithD2D 的指標。 若要取得一個,請查詢 SurfaceImageSource 物件以取得其基礎 ISurfaceImageSourceNativeWithD2D 介面。
// MainPage.cpp | paste this at the end of MainPage::ClickHandler
SurfaceImageSource surfaceImageSource(500, 500);

winrt::com_ptr<::ISurfaceImageSourceNativeWithD2D> sisNativeWithD2D{
    surfaceImageSource.as<::ISurfaceImageSourceNativeWithD2D>() };

// Associate the Direct2D device with the SurfaceImageSource.
sisNativeWithD2D->SetDevice(d2dDevice.get());

// To enable multi-threaded access (optional)
winrt::com_ptr<::ID3D11Multithread> d3dMultiThread{
    d3dDevice.as<::ID3D11Multithread>() };
d3dMultiThread->SetMultithreadProtected(true);
呼叫 ISurfaceImageSourceNativeWithD2D::BeginDraw 來擷取 DXGI 介面(IDXGISurface 介面)。 如果您已啟用多線程存取,您可以從背景線程呼叫 ISurfaceImageSourceNativeWithD2D::BeginDraw (和稍後的繪圖命令)。 在此步驟中,您也會從 DXGI 介面建立位圖,並將它設定為 Direct 2D 裝置內容。
在 offset 參數中,ISurfaceImageSourceNativeWithD2D::BeginDraw 會傳回更新目標矩形的點位移(x,y 值)。 您可以使用該位移來判斷使用ID2D1DeviceContext 繪製更新內容的位置。
// MainPage.cpp | paste this at the end of MainPage::ClickHandler
winrt::com_ptr<::IDXGISurface> dxgiSurface;

RECT updateRect{ 0, 0, 500, 500 };
POINT offset{ 0, 0 };
HRESULT beginDrawHR = sisNativeWithD2D->BeginDraw(
    updateRect,
    __uuidof(::IDXGISurface),
    dxgiSurface.put_void(),
    &offset);

// Create render target.
winrt::com_ptr<::ID2D1Bitmap1> bitmap;
winrt::check_hresult(
    d2dDeviceContext->CreateBitmapFromDxgiSurface(
        dxgiSurface.get(),
        nullptr,
        bitmap.put()
    )
);

// Set context's render target.
d2dDeviceContext->SetTarget(bitmap.get());
使用 Direct 2D 裝置內容來繪製 SurfaceImageSource 的內容。 只會繪製 updateRect 參數中上一個步驟中為更新指定的區域。
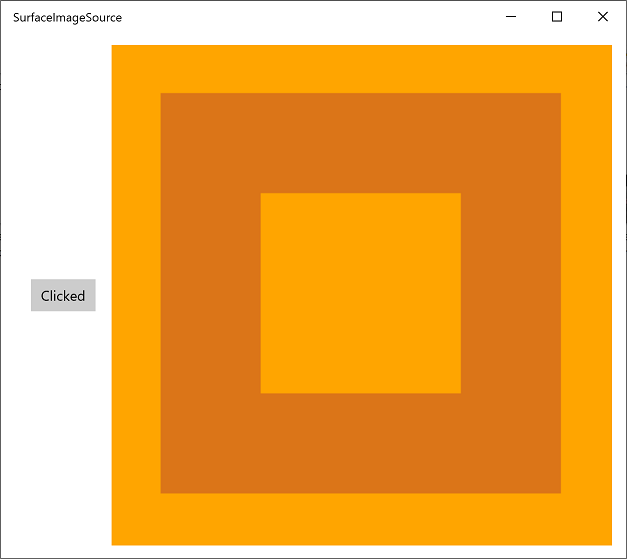
// MainPage.cpp | paste this at the end of MainPage::ClickHandler
if (beginDrawHR == DXGI_ERROR_DEVICE_REMOVED ||
    beginDrawHR == DXGI_ERROR_DEVICE_RESET ||
    beginDrawHR == D2DERR_RECREATE_TARGET)
{
    // The Direct3D and Direct2D devices were lost and need to be re-created.
    // Recovery steps are:
    // 1) Re-create the Direct3D and Direct2D devices
    // 2) Call ISurfaceImageSourceNativeWithD2D::SetDevice with the new Direct2D
    //    device
    // 3) Redraw the contents of the SurfaceImageSource
}
else if (beginDrawHR == E_SURFACE_CONTENTS_LOST)
{
    // The devices were not lost but the entire contents of the surface
    // were. Recovery steps are:
    // 1) Call ISurfaceImageSourceNativeWithD2D::SetDevice with the Direct2D
    //    device again
    // 2) Redraw the entire contents of the SurfaceImageSource
}
else
{
    // Draw using Direct2D context.
    d2dDeviceContext->BeginDraw();

    d2dDeviceContext->Clear(D2D1::ColorF(D2D1::ColorF::Orange));

    winrt::com_ptr<::ID2D1SolidColorBrush> brush;
    winrt::check_hresult(d2dDeviceContext->CreateSolidColorBrush(
        D2D1::ColorF(D2D1::ColorF::Chocolate),
        D2D1::BrushProperties(0.8f),
        brush.put()));

    D2D1_SIZE_F const size{ 500, 500 };
    D2D1_RECT_F const rect{ 100.0f, 100.0f, size.width - 100.0f, size.height - 100.0f };
    d2dDeviceContext->DrawRectangle(rect, brush.get(), 100.0f);

    d2dDeviceContext->EndDraw();
}
呼叫 ISurfaceImageSourceNativeWithD2D::EndDraw 來完成位圖(您只能從 UI 線程呼叫 ISurfaceImageSourceNativeWithD2D::EndDraw)。 然後在 XAML 映射上設定 SurfaceImageSource (或 ImageBrush),以便在 XAML UI 中顯示它。
// MainPage.cpp | paste this at the end of MainPage::ClickHandler
sisNativeWithD2D->EndDraw();

// The SurfaceImageSource object's underlying
// ISurfaceImageSourceNativeWithD2D object will contain the completed bitmap.

theImage().Source(surfaceImageSource);
注意
呼叫 SurfaceImageSource::SetSource (繼承自 IBitmapSource::SetSource)目前會擲回例外狀況。 請勿從 SurfaceImageSource 物件呼叫它。
注意
避免在窗口隱藏或非使用中時繪製至 SurfaceImageSource,否則 ISurfaceImageSourceNativeWithD2D API 將會失敗。 處理視窗可見度和應用程式暫停周圍的事件,以達成此目的。
最後,在中的
MainPage.xaml現有 XAML 標記內新增下列 Image 元素。<!-- MainPage.xaml --> ... <Image x:Name="theImage" Width="500" Height="500" /> ...您現在可以建置並執行應用程式。 按兩下按鈕以查看 Image 中顯示的 SurfaceImageSource 內容。
VirtualSurfaceImageSource
VirtualSurfaceImageSource 會 擴充 SurfaceImageSource,而且適用於內容可能太大而無法同時容納在螢幕上的案例(以及/或太大而無法以單一紋理容納視訊記憶體),因此內容必須虛擬化才能以最佳方式呈現。 例如,對應應用程式或大型文件畫布。
提示
複雜筆跡範例應用程式示範 VirtualSurfaceImageSource。
VirtualSurfaceImageSource 與 SurfaceImageSource 不同,因為它會使用回呼—IVirtualSurfaceImageSourceCallbacksNative::UpdatesNeeded--您在畫面上實作來更新介面的區域。 您不需要清除隱藏的區域,因為 XAML 架構會為您處理。
在處理 VirtualSurfaceImageSource 之前,請先熟悉 SurfaceImageSource(請參閱上面的 SurfaceImageSource 一節),這是個好主意。 但概括而言,以下是建立和更新 VirtualSurfaceImageSource 的程式。
- 實作 IVirtualSurfaceImageSourceCallbackNative 介面。
- 建立 Direct 3D 裝置、Direct 2D 裝置和 Direct 2D 裝置內容。
- 建立 VirtualSurfaceImageSource,並在該裝置上設定 Direct 2D (或 Direct 3D) 裝置。
- 在 VirtualSurfaceImageSource 上呼叫 RegisterForUpdatesNeeded。
- 在您的 UpdatesNeeded 回呼中,呼叫 GetUpdateRectCount 和 GetUpdateRects。
- 轉譯更新矩形(使用 BeginDraw EndDraw/ 就像 SurfaceImageSource 一樣)。
- 在 XAML 影像或 ImageBrush 上設定 SurfaceImageSource,以便在 XAML UI 中顯示它。
以下是使用原始程式碼範例深入探討這些步驟。
您可以遵循下列程式代碼,方法是在 Visual Studio Microsoft中建立新的專案,以遵循以下所示的程式代碼。 建立 空白應用程式 (C++/WinRT) 專案,並將它命名為 VSISDemo (如果您將在下列程式代碼清單中複製貼上,請務必為專案提供此名稱)。 以 Windows SDK 最新的正式推出版本 (即非預覽版本) 為目標。
開啟
pch.h,並將 下列內容新增 至已經存在的下方。// pch.h ... #include <d3d11_4.h> #include <d2d1_1.h> #include <windows.ui.xaml.media.dxinterop.h> #include <winrt/Windows.UI.Xaml.Media.Imaging.h>在此步驟中,您將提供 IVirtualSurfaceUpdatesCallbackNative 介面的實作。 將新的 頭檔 (.h) 專案新增至專案,並將它命名為 CallbackImplementation.h。 以下列清單取代該檔案的內容。 程式代碼會在清單之後說明。
#include "pch.h"

namespace winrt::VSISDemo::implementation
{
    struct CallbackImplementation : winrt::implements<CallbackImplementation, ::IVirtualSurfaceUpdatesCallbackNative>
    {
        CallbackImplementation(
            winrt::com_ptr<::ISurfaceImageSourceNativeWithD2D> sisNativeWithD2D,
            winrt::com_ptr<::IVirtualSurfaceImageSourceNative> const& vsisNative,
            winrt::com_ptr<::ID2D1DeviceContext> const& d2dDeviceContext) :
            m_sisNativeWithD2D(sisNativeWithD2D),
            m_vsisNative(vsisNative),
            m_d2dDeviceContext(d2dDeviceContext)
        {}

        IFACEMETHOD(UpdatesNeeded)()
        {
            HRESULT hr = S_OK;

            ULONG drawingBoundsCount = 0;
            m_vsisNative->GetUpdateRectCount(&drawingBoundsCount);

            std::unique_ptr<RECT[]> drawingBounds(
                new RECT[drawingBoundsCount]);

            m_vsisNative->GetUpdateRects(
                drawingBounds.get(),
                drawingBoundsCount);

            for (ULONG i = 0; i < drawingBoundsCount; ++i)
            {
                winrt::com_ptr<::IDXGISurface> dxgiSurface;

                POINT offset{ 0, 0 };
                HRESULT beginDrawHR = m_sisNativeWithD2D->BeginDraw(
                    drawingBounds[i],
                    __uuidof(::IDXGISurface),
                    dxgiSurface.put_void(),
                    &offset);

                // Create render target.
                winrt::com_ptr<::ID2D1Bitmap1> bitmap;
                winrt::check_hresult(
                    m_d2dDeviceContext->CreateBitmapFromDxgiSurface(
                        dxgiSurface.get(),
                        nullptr,
                        bitmap.put()
                    )
                );

                // Set context's render target.
                m_d2dDeviceContext->SetTarget(bitmap.get());

                if (beginDrawHR == DXGI_ERROR_DEVICE_REMOVED ||
                    beginDrawHR == DXGI_ERROR_DEVICE_RESET ||
                    beginDrawHR == D2DERR_RECREATE_TARGET)
                {
                    // The Direct3D and Direct2D devices were lost and need to be re-created.
                    // Recovery steps are:
                    // 1) Re-create the Direct3D and Direct2D devices
                    // 2) Call ISurfaceImageSourceNativeWithD2D::SetDevice with the new Direct2D
                    //    device
                    // 3) Redraw the contents of the SurfaceImageSource
                }
                else if (beginDrawHR == E_SURFACE_CONTENTS_LOST)
                {
                    // The devices were not lost but the entire contents of the surface
                    // were. Recovery steps are:
                    // 1) Call ISurfaceImageSourceNativeWithD2D::SetDevice with the Direct2D
                    //    device again
                    // 2) Redraw the entire contents of the SurfaceImageSource
                }
                else
                {
                    // Draw using Direct2D context.
                    m_d2dDeviceContext->BeginDraw();

                    m_d2dDeviceContext->Clear(D2D1::ColorF(D2D1::ColorF::Orange));

                    winrt::com_ptr<::ID2D1SolidColorBrush> brush;
                    winrt::check_hresult(m_d2dDeviceContext->CreateSolidColorBrush(
                        D2D1::ColorF(D2D1::ColorF::Chocolate),
                        D2D1::BrushProperties(0.8f),
                        brush.put()));

                    D2D1_SIZE_F const size{ drawingBounds[i].right - drawingBounds[i].left, drawingBounds[i].bottom - drawingBounds[i].top };
                    D2D1_RECT_F const rect{ 100.0f, 100.0f, size.width - 100.0f, size.height - 100.0f };
                    m_d2dDeviceContext->DrawRectangle(rect, brush.get(), 100.0f);

                    m_d2dDeviceContext->EndDraw();
                }

                m_sisNativeWithD2D->EndDraw();
            }

            return hr;
        }

    private:
        winrt::com_ptr<::ISurfaceImageSourceNativeWithD2D> m_sisNativeWithD2D{ nullptr };
        winrt::com_ptr<::IVirtualSurfaceImageSourceNative> m_vsisNative{ nullptr };
        winrt::com_ptr<::ID2D1DeviceContext> m_d2dDeviceContext{ nullptr };
    };
}
每當需要更新 VirtualSurfaceImageSource 的區域時,架構就會呼叫 IVirtualSurfaceUpdatesCallbackNative::UpdatesNeeded 的實作(如上所示)。
當架構判斷需要繪製區域時,就會發生這種情況(例如,當使用者平移或縮放表面的檢視時),或在您的應用程式呼叫 IVirtualSurfaceImageSourceNative::Invalidate 時發生。
在 IVirtualSurfaceImageSourceNative::UpdatesNeeded 的實作中,使用 IVirtualSurfaceImageSourceNative::GetUpdateRectCount 和 IVirtualSurfaceImageSourceNative::GetUpdateRects 方法來判斷必須繪製介面的區域。。
針對必須更新的每個區域,將特定內容繪製至該區域,但將您的繪圖限制為界限區域,以提升效能。 呼叫 ISurfaceImageSourceNativeWithD2D 方法的詳細數據與 SurfaceImageSource 相同(請參閱上面的 SurfaceImageSource 一節)。
注意
避免在窗口隱藏或非使用中時繪製至 VirtualSurfaceImageSource,否則 ISurfaceImageSourceNativeWithD2D API 將會失敗。 處理視窗可見度和應用程式暫停周圍的事件,以達成此目的。
在MainPage類別中,我們將新增 CallbackImplementation 類型的成員。 我們也會建立 Direct 3D 裝置、Direct 2D 裝置和 Direct 2D 裝置內容。 若要這樣做,我們將呼叫 D3D11CreateDevice、D2D1CreateDevice 和 ID2D1Device::CreateDeviceContext。
將、
MainPage.h和MainPage.cpp的內容MainPage.idl取代為下列清單的內容。// MainPage.idl namespace VSISDemo { [default_interface] runtimeclass MainPage : Windows.UI.Xaml.Controls.Page { MainPage(); } }// MainPage.h #pragma once #include "MainPage.g.h" #include "CallbackImplementation.h" namespace winrt::VSISDemo::implementation { struct MainPage : MainPageT<MainPage> { MainPage(); void ClickHandler(Windows::Foundation::IInspectable const& sender, Windows::UI::Xaml::RoutedEventArgs const& args); private: winrt::com_ptr<::IVirtualSurfaceUpdatesCallbackNative> m_cbi{ nullptr }; }; } namespace winrt::VSISDemo::factory_implementation { struct MainPage : MainPageT<MainPage, implementation::MainPage> { }; }// MainPage.cpp #include "pch.h" #include "MainPage.h" #include "MainPage.g.cpp" using namespace winrt; using namespace Windows::UI::Xaml; using namespace Windows::UI::Xaml::Media::Imaging; namespace winrt::VSISDemo::implementation { MainPage::MainPage() { InitializeComponent(); } void MainPage::ClickHandler(IInspectable const&, RoutedEventArgs const&) { myButton().Content(box_value(L"Clicked")); uint32_t creationFlags = D3D11_CREATE_DEVICE_BGRA_SUPPORT; D3D_FEATURE_LEVEL featureLevels[] = { D3D_FEATURE_LEVEL_11_1, D3D_FEATURE_LEVEL_11_0, D3D_FEATURE_LEVEL_10_1, D3D_FEATURE_LEVEL_10_0, D3D_FEATURE_LEVEL_9_3, D3D_FEATURE_LEVEL_9_2, D3D_FEATURE_LEVEL_9_1 }; // Create the Direct3D device. winrt::com_ptr<::ID3D11Device> d3dDevice; D3D_FEATURE_LEVEL supportedFeatureLevel; winrt::check_hresult(::D3D11CreateDevice( nullptr, D3D_DRIVER_TYPE_HARDWARE, 0, creationFlags, featureLevels, ARRAYSIZE(featureLevels), D3D11_SDK_VERSION, d3dDevice.put(), &supportedFeatureLevel, nullptr) ); // Get the Direct3D device. winrt::com_ptr<::IDXGIDevice> dxgiDevice{ d3dDevice.as<::IDXGIDevice>() }; // Create the Direct2D device and a corresponding context. winrt::com_ptr<::ID2D1Device> d2dDevice; ::D2D1CreateDevice(dxgiDevice.get(), nullptr, d2dDevice.put()); winrt::com_ptr<::ID2D1DeviceContext> d2dDeviceContext; winrt::check_hresult( d2dDevice->CreateDeviceContext( D2D1_DEVICE_CONTEXT_OPTIONS_NONE, d2dDeviceContext.put() ) ); } }接下來,新增程式代碼以建立具有所需大小的 VirtualSurfaceImageSource,並藉由呼叫 ISurfaceImageSourceNativeWithD2D::SetDevice,在該裝置上設定 Direct 2D (或 Direct 3D) 裝置。
注意
如果您要從背景線程繪製 VirtualSurfaceImageSource,則您也必須確定 DXGI 裝置已啟用多線程存取權(如下列程式代碼所示)。 基於效能考慮,只有當您將從背景線程繪製時,才應該這麼做。
若要設定裝置並執行繪製作業,我們需要 ISurfaceImageSourceNativeWithD2D 的指標。 若要取得其中一個,請查詢 VirtualSurfaceImageSource 物件是否有其基礎 ISurfaceImageSourceNativeWithD2D 介面。
同時查詢 IVirtualSurfaceImageSourceNative,並呼叫 IVirtualSurfaceImageSourceNative::RegisterForUpdatesNeeded,提供 IVirtualSurfaceUpdatesCallbackNative 的實作。
然後在 XAML 映射上設定 SurfaceImageSource (或 ImageBrush),以便在 XAML UI 中顯示它。
// MainPage.cpp | paste this at the end of MainPage::ClickHandler
VirtualSurfaceImageSource virtualSurfaceImageSource(2000, 2000);

winrt::com_ptr<::ISurfaceImageSourceNativeWithD2D> sisNativeWithD2D{
    virtualSurfaceImageSource.as<::ISurfaceImageSourceNativeWithD2D>() };

// Associate the Direct2D device with the SurfaceImageSource.
sisNativeWithD2D->SetDevice(d2dDevice.get());

// To enable multi-threaded access (optional)
winrt::com_ptr<::ID3D11Multithread> d3dMultiThread{
    d3dDevice.as<::ID3D11Multithread>() };
d3dMultiThread->SetMultithreadProtected(true);

winrt::com_ptr<::IVirtualSurfaceImageSourceNative> vsisNative{
    virtualSurfaceImageSource.as<::IVirtualSurfaceImageSourceNative>() };

m_cbi = winrt::make<CallbackImplementation>(sisNativeWithD2D, vsisNative, d2dDeviceContext);
vsisNative->RegisterForUpdatesNeeded(m_cbi.as<::IVirtualSurfaceUpdatesCallbackNative>().get());

// The SurfaceImageSource object's underlying
// ISurfaceImageSourceNativeWithD2D object will contain the completed bitmap.

theImage().Source(virtualSurfaceImageSource);
最後,在中的
MainPage.xaml現有 XAML 標記內新增下列 Image 元素。<!-- MainPage.xaml --> ... <Image x:Name="theImage" Width="500" Height="500" /> ...您現在可以建置並執行應用程式。 按兩下按鈕以查看 Image 中顯示的 VirtualSurfaceImageSource 內容。
SwapChainPanel 和遊戲
SwapChainPanel 是設計來支援高效能圖形和遊戲的 Windows 執行階段 類型,您可以在其中直接管理交換鏈結。 在此情況下,您會建立自己的 DirectX 交換鏈結,並管理轉譯內容的呈現方式。 SwapChainPanel 的另一個功能是,您可以在其前面重疊其他 XAML 元素。
提示
下列範例應用程式示範 SurfaceImageSource:Direct2D 進階色彩影像轉譯、Direct2D 相片調整、Direct2D SVG 影像轉譯、低延遲輸入、DirectX 和 XAML 遊戲,以及 XAML SwapChainPanel DirectX Interop (Windows 8.1) 。
為了確保效能良好,SwapChainPanel 類型有某些限制。
- 每個應用程式應該不超過 4 個 SwapChainPanel 實例。
- 您應該將 DirectX 交換鏈結的高度和寬度(以 DXGI_SWAP_CHAIN_DESC1 為單位)設定為交換鏈結專案的目前維度。 如果您未這麼做,則會調整顯示內容以符合 (使用 DXGI_SCALING_STRETCH)。
- 您必須將 DirectX 交換鏈結的縮放模式 (DXGI_SWAP_CHAIN_DESC1) 設定為 DXGI_SCALING_STRETCH。
- 您必須呼叫 IDXGIFactory2::CreateSwapChainForComposition 來建立 DirectX 交換鏈結。
您可以根據應用程式的需求來更新 SwapChainPanel ,而不會與 XAML 架構的更新同步處理。 如果您需要將 SwapChainPanel 的更新同步處理至 XAML 架構的更新,請註冊 Windows::UI::Xaml::Media::CompositionTarget::Rendering 事件。 否則,如果您嘗試從更新 SwapChainPanel 的不同線程更新 XAML 元素,就必須考慮任何跨線程問題。
如果您需要接收 SwapChainPanel 的低延遲指標輸入,請使用 SwapChainPanel::CreateCoreIndependentInputSource。 該方法會傳 回 CoreIndependentInputSource 對象,這個物件可用來在背景線程上以最少的延遲接收輸入事件。 請注意,一旦呼叫這個方法,一般 XAML 指標輸入事件將不會針對 SwapChainPanel 引發,因為所有輸入都會重新導向至背景線程。
以下是建立和更新 SwapChainPanel 物件的程式。
您可以遵循下列程式代碼,方法是在 Visual Studio Microsoft中建立新的專案,以遵循以下所示的程式代碼。 建立 空白應用程式 (C++/WinRT) 專案,並將它命名為 SCPDemo (如果您將在下面提供的程式代碼清單中複製貼上,請務必為專案提供此名稱)。 以 Windows SDK 最新的正式推出版本 (即非預覽版本) 為目標。
開啟
pch.h,並將 下列內容新增 至已經存在的下方。// pch.h ... #include <d3d11_4.h> #include <d2d1_1.h> #include <windows.ui.xaml.media.dxinterop.h>在 MainPage 類別中,我們會先建立 Direct 3D 裝置、Direct 2D 裝置和 Direct 2D 裝置內容。 若要這樣做,我們將呼叫 D3D11CreateDevice、D2D1CreateDevice 和 ID2D1Device::CreateDeviceContext。
將、
MainPage.h和MainPage.cpp的內容MainPage.idl取代為下列清單的內容。// MainPage.idl namespace SCPDemo { [default_interface] runtimeclass MainPage : Windows.UI.Xaml.Controls.Page { MainPage(); } }// MainPage.h #pragma once #include "MainPage.g.h" namespace winrt::SCPDemo::implementation { struct MainPage : MainPageT<MainPage> { MainPage(); void ClickHandler(Windows::Foundation::IInspectable const& sender, Windows::UI::Xaml::RoutedEventArgs const& args); }; } namespace winrt::SCPDemo::factory_implementation { struct MainPage : MainPageT<MainPage, implementation::MainPage> { }; }// MainPage.cpp #include "pch.h" #include "MainPage.h" #include "MainPage.g.cpp" using namespace winrt; using namespace Windows::UI::Xaml; namespace winrt::SCPDemo::implementation { MainPage::MainPage() { InitializeComponent(); } void MainPage::ClickHandler(IInspectable const&, RoutedEventArgs const&) { myButton().Content(box_value(L"Clicked")); uint32_t creationFlags = D3D11_CREATE_DEVICE_BGRA_SUPPORT; D3D_FEATURE_LEVEL featureLevels[] = { D3D_FEATURE_LEVEL_11_1, D3D_FEATURE_LEVEL_11_0, D3D_FEATURE_LEVEL_10_1, D3D_FEATURE_LEVEL_10_0, D3D_FEATURE_LEVEL_9_3, D3D_FEATURE_LEVEL_9_2, D3D_FEATURE_LEVEL_9_1 }; // Create the Direct3D device. winrt::com_ptr<::ID3D11Device> d3dDevice; D3D_FEATURE_LEVEL supportedFeatureLevel; winrt::check_hresult(::D3D11CreateDevice( nullptr, D3D_DRIVER_TYPE_HARDWARE, 0, creationFlags, featureLevels, ARRAYSIZE(featureLevels), D3D11_SDK_VERSION, d3dDevice.put(), &supportedFeatureLevel, nullptr) ); // Get the Direct3D device. winrt::com_ptr<::IDXGIDevice> dxgiDevice{ d3dDevice.as<::IDXGIDevice>() }; // Create the Direct2D device and a corresponding context. winrt::com_ptr<::ID2D1Device> d2dDevice; ::D2D1CreateDevice(dxgiDevice.get(), nullptr, d2dDevice.put()); winrt::com_ptr<::ID2D1DeviceContext> d2dDeviceContext; winrt::check_hresult( d2dDevice->CreateDeviceContext( D2D1_DEVICE_CONTEXT_OPTIONS_NONE, d2dDeviceContext.put() ) ); } }使用 將 XAML 標記包裝在 SwapChainPanel 元素
x:Name中。 包裝的 XAML 元素將會呈現在 SwapChainPanel 前面。<!-- MainPage.xaml --> <SwapChainPanel x:Name="swapChainPanel"> <StackPanel Orientation="Horizontal" HorizontalAlignment="Center" VerticalAlignment="Center"> <Button x:Name="myButton" Click="ClickHandler">Click Me</Button> </StackPanel> </SwapChainPanel>然後,您可以透過具有相同名稱的存取子函式來存取該 SwapChainPanel 物件,如我們所見。
接下來,呼叫 IDXGIFactory2::CreateSwapChainForComposition 來建立交換鏈結。
// MainPage.cpp | paste this at the end of MainPage::ClickHandler
// Get the DXGI adapter.
winrt::com_ptr< ::IDXGIAdapter > dxgiAdapter;
dxgiDevice->GetAdapter(dxgiAdapter.put());

// Get the DXGI factory.
winrt::com_ptr< ::IDXGIFactory2 > dxgiFactory;
dxgiFactory.capture(dxgiAdapter, &IDXGIAdapter::GetParent);

DXGI_SWAP_CHAIN_DESC1 swapChainDesc { 0 };
swapChainDesc.Width = 500;
swapChainDesc.Height = 500;
swapChainDesc.Format = DXGI_FORMAT_B8G8R8A8_UNORM; // This is the most common swapchain format.
swapChainDesc.Stereo = false;
swapChainDesc.SampleDesc.Count = 1; // Don't use multi-sampling.
swapChainDesc.SampleDesc.Quality = 0;
swapChainDesc.BufferUsage = DXGI_USAGE_RENDER_TARGET_OUTPUT;
swapChainDesc.BufferCount = 2;
swapChainDesc.Scaling = DXGI_SCALING_STRETCH;
swapChainDesc.SwapEffect = DXGI_SWAP_EFFECT_FLIP_SEQUENTIAL; // We recommend using this swap effect for all applications.
swapChainDesc.Flags = 0;

// Create a swap chain by calling IDXGIFactory2::CreateSwapChainForComposition.
winrt::com_ptr< ::IDXGISwapChain1 > swapChain;
dxgiFactory->CreateSwapChainForComposition(
    d3dDevice.get(),
    &swapChainDesc,
    nullptr,
    swapChain.put());
從您命名為 swapChainPanel 的 SwapChainPanel 取得 ISwapChainPanelNative。 呼叫 ISwapChainPanelNative::SetSwapChain 以在 SwapChainPanel 上設定交換鏈結。
// MainPage.cpp | paste this at the end of MainPage::ClickHandler
// Get native interface for SwapChainPanel
auto panelNative{ swapChainPanel().as<ISwapChainPanelNative>() };

winrt::check_hresult(
    panelNative->SetSwapChain(swapChain.get())
);
最後,繪製至 DirectX 交換鏈結,然後呈現它以顯示內容。
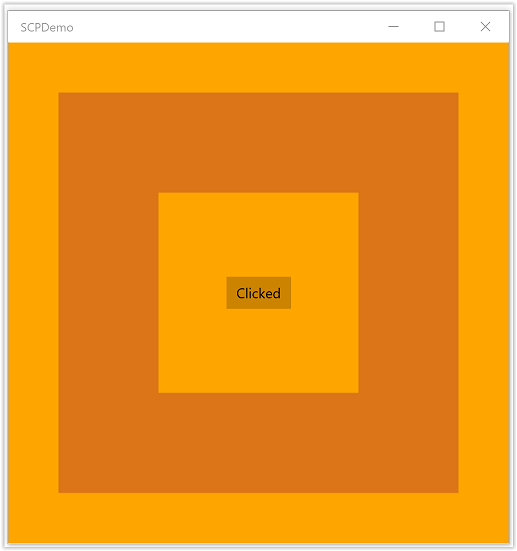
// Create a Direct2D target bitmap associated with the
// swap chain back buffer, and set it as the current target.
D2D1_BITMAP_PROPERTIES1 bitmapProperties =
    D2D1::BitmapProperties1(
        D2D1_BITMAP_OPTIONS_TARGET | D2D1_BITMAP_OPTIONS_CANNOT_DRAW,
        D2D1::PixelFormat(DXGI_FORMAT_B8G8R8A8_UNORM, D2D1_ALPHA_MODE_PREMULTIPLIED),
        96.f,
        96.f
    );

winrt::com_ptr<::IDXGISurface> dxgiBackBuffer;
swapChain->GetBuffer(0, __uuidof(dxgiBackBuffer), dxgiBackBuffer.put_void());

winrt::com_ptr< ::ID2D1Bitmap1 > targetBitmap;
winrt::check_hresult(
    d2dDeviceContext->CreateBitmapFromDxgiSurface(
        dxgiBackBuffer.get(),
        &bitmapProperties,
        targetBitmap.put()
    )
);

d2dDeviceContext->SetTarget(targetBitmap.get());

// Draw using Direct2D context.
d2dDeviceContext->BeginDraw();

d2dDeviceContext->Clear(D2D1::ColorF(D2D1::ColorF::Orange));

winrt::com_ptr<::ID2D1SolidColorBrush> brush;
winrt::check_hresult(d2dDeviceContext->CreateSolidColorBrush(
    D2D1::ColorF(D2D1::ColorF::Chocolate),
    D2D1::BrushProperties(0.8f),
    brush.put()));

D2D1_SIZE_F const size{ 500, 500 };
D2D1_RECT_F const rect{ 100.0f, 100.0f, size.width - 100.0f, size.height - 100.0f };
d2dDeviceContext->DrawRectangle(rect, brush.get(), 100.0f);

d2dDeviceContext->EndDraw();

swapChain->Present(1, 0);
當 Windows 執行階段 版面配置/轉譯邏輯發出更新訊號時,會重新整理 XAML 元素。
您現在可以建置並執行應用程式。 按兩下按鈕以查看顯示在其他 XAML 元素後方之 SwapChainPanel 的內容。
注意
一般而言,DirectX 應用程式應該以橫向方式建立交換鏈結,並等於顯示視窗大小(這通常是大多數Microsoft市集遊戲中的原生螢幕解析度)。 這可確保您的應用程式在沒有任何可見的 XAML 重疊時,會使用最佳的交換鏈結實作。 如果應用程式旋轉為直向模式,則您的應用程式應該在現有的交換鏈結上呼叫IDXGISwapChain1::SetRotation,視需要將轉換套用至內容,然後在相同的交換鏈結上再次呼叫 SetSwapChain。 同樣地,每當交換鏈結透過呼叫IDXGISwapChain::ResizeBuffers來調整交換鏈結大小時,您的應用程式應該會在相同的交換鏈結上再次呼叫 SetSwapChain。