Deploy and configure a Tomcat, JBoss, or Java SE app in Azure App Service
This article shows you the most common deployment and runtime configuration for Java apps in App Service. If you've never used Azure App Service, you should read through the Java quickstart first. General questions about using App Service that aren't specific to Java development are answered in the App Service FAQ.
Azure App Service runs Java web applications on a fully managed service in three variants:
- Java SE - Can run an app deployed as a JAR package that contains an embedded server (such as Spring Boot, Dropwizard, Quarkus, or one with an embedded Tomcat or Jetty server).
- Tomcat - The built-in Tomcat server can run an app deployed as a WAR package.
- JBoss EAP - Supported for Linux apps in the Premium v3 and Isolated v2 pricing tiers only. The built-in JBoss EAP server can run an app deployed as a WAR or EAR package.
Note
For Spring applications, we recommend using Azure Spring Apps. However, you can still use Azure App Service as a destination. See Java Workload Destination Guidance for advice.
Show Java version
To show the current Java version, run the following command in the Cloud Shell:
az webapp config show --name <app-name> --resource-group <resource-group-name> --query "[javaVersion, javaContainer, javaContainerVersion]"
To show all supported Java versions, run the following command in the Cloud Shell:
az webapp list-runtimes --os windows | grep java
For more information on version support, see App Service language runtime support policy.
Deploying your app
Build Tools
Maven
With the Maven Plugin for Azure Web Apps, you can prepare your Maven Java project for Azure Web App easily with one command in your project root:
mvn com.microsoft.azure:azure-webapp-maven-plugin:2.13.0:config
This command adds an azure-webapp-maven-plugin plugin and related configuration by prompting you to select an existing Azure Web App or create a new one. During configuration, it attempts to detect whether your application should be deployed to Java SE, Tomcat, or (Linux only) JBoss EAP. Then you can deploy your Java app to Azure using the following command:
mvn package azure-webapp:deploy
Here's a sample configuration in pom.xml:
<plugin>
  <groupId>com.microsoft.azure</groupId>
  <artifactId>azure-webapp-maven-plugin</artifactId>
  <version>2.11.0</version>
  <configuration>
    <subscriptionId>111111-11111-11111-1111111</subscriptionId>
    <resourceGroup>spring-boot-xxxxxxxxxx-rg</resourceGroup>
    <appName>spring-boot-xxxxxxxxxx</appName>
    <pricingTier>B2</pricingTier>
    <region>westus</region>
    <runtime>
      <os>Linux</os>
      <webContainer>Java SE</webContainer>
      <javaVersion>Java 17</javaVersion>
    </runtime>
    <deployment>
      <resources>
        <resource>
          <type>jar</type>
          <directory>${project.basedir}/target</directory>
          <includes>
            <include>*.jar</include>
          </includes>
        </resource>
      </resources>
    </deployment>
  </configuration>
</plugin>
Gradle
Set up the Gradle Plugin for Azure Web Apps by adding the plugin to your
build.gradle:plugins { id "com.microsoft.azure.azurewebapp" version "1.10.0" }Configure your web app details. The corresponding Azure resources are created if they don't exist. Here's a sample configuration, for details, refer to this document.
azurewebapp {
    subscription = '<your subscription id>'
    resourceGroup = '<your resource group>'
    appName = '<your app name>'
    pricingTier = '<price tier like 'P1v2'>'
    region = '<region like 'westus'>'
    runtime {
      os = 'Linux'
      webContainer = 'Tomcat 10.0' // or 'Java SE' if you want to run an executable jar
      javaVersion = 'Java 17'
    }
    appSettings {
        <key> = <value>
    }
    auth {
        type = 'azure_cli' // support azure_cli, oauth2, device_code and service_principal
    }
}
Deploy with one command.
gradle azureWebAppDeploy
IDEs
Azure provides seamless Java App Service development experience in popular Java IDEs, including:
- VS Code: Java Web Apps with Visual Studio Code
- IntelliJ IDEA:Create a Hello World web app for Azure App Service using IntelliJ
- Eclipse:Create a Hello World web app for Azure App Service using Eclipse
Kudu API
To deploy .jar files to Java SE, use the /api/publish endpoint of the Kudu site. For more information on this API, see this documentation.
Note
Your .jar application must be named app.jar for App Service to identify and run your application. The Maven plugin does this for you automatically during deployment. If you don't wish to rename your JAR to app.jar, you can upload a shell script with the command to run your .jar app. Paste the absolute path to this script in the Startup File textbox in the Configuration section of the portal. The startup script doesn't run from the directory into which it's placed. Therefore, always use absolute paths to reference files in your startup script (for example: java -jar /home/myapp/myapp.jar).
To deploy .war files to Tomcat, use the /api/wardeploy/ endpoint to POST your archive file. For more information on this API, see this documentation.
To deploy .war files to JBoss, use the /api/wardeploy/ endpoint to POST your archive file. For more information on this API, see this documentation.
To deploy .ear files, use FTP. Your .ear application is deployed to the context root defined in your application's configuration. For example, if the context root of your app is <context-root>myapp</context-root>, then you can browse the site at the /myapp path: http://my-app-name.azurewebsites.net/myapp. If you want your web app to be served in the root path, ensure that your app sets the context root to the root path: <context-root>/</context-root>. For more information, see Setting the context root of a web application.
Don't deploy your .war or .jar using FTP. The FTP tool is designed to upload startup scripts, dependencies, or other runtime files. It's not the optimal choice for deploying web apps.
Logging and debugging apps
Performance reports, traffic visualizations, and health checkups are available for each app through the Azure portal. For more information, see Azure App Service diagnostics overview.
Stream diagnostic logs
To access the console logs generated from inside your application code in App Service, turn on diagnostics logging by running the following command in the Cloud Shell:
az webapp log config --resource-group <resource-group-name> --name <app-name> --docker-container-logging filesystem --level Verbose
Possible values for --level are: Error, Warning, Info, and Verbose. Each subsequent level includes the previous level. For example: Error includes only error messages, and Verbose includes all messages.
Once diagnostic logging is turned on, run the following command to see the log stream:
az webapp log tail --resource-group <resource-group-name> --name <app-name>
If you don't see console logs immediately, check again in 30 seconds.
Note
You can also inspect the log files from the browser at https://<app-name>.scm.azurewebsites.net/api/logs/docker.
To stop log streaming at any time, type Ctrl+C.
For more information, see Stream logs in Cloud Shell.
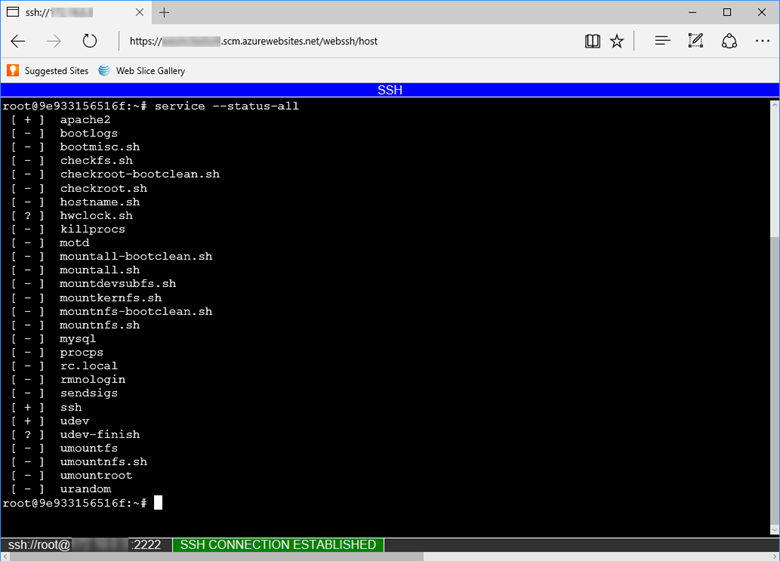
SSH console access in Linux
To make open a direct SSH session with your container, your app should be running.
Paste the following URL into your browser and replace <app-name> with your app name:
https://<app-name>.scm.azurewebsites.net/webssh/host
If you're not yet authenticated, you're required to authenticate with your Azure subscription to connect. Once authenticated, you see an in-browser shell, where you can run commands inside your container.
Note
Any changes you make outside the /home directory are stored in the container itself and don't persist beyond an app restart.
To open a remote SSH session from your local machine, see Open SSH session from remote shell.
Linux troubleshooting tools
The built-in Java images are based on the Alpine Linux operating system. Use the apk package manager to install any troubleshooting tools or commands.
Java Profiler
All Java runtimes on Azure App Service come with the JDK Flight Recorder for profiling Java workloads. You can use it to record JVM, system, and application events and troubleshoot problems in your applications.
To learn more about the Java Profiler, visit the Azure Application Insights documentation.
Flight Recorder
All Java runtimes on App Service come with the Java Flight Recorder. You can use it to record JVM, system, and application events and troubleshoot problems in your Java applications.
Timed Recording
To take a timed recording, you need the PID (Process ID) of the Java application. To find the PID, open a browser to your web app's SCM site at https://<your-site-name>.scm.azurewebsites.net/ProcessExplorer/. This page shows the running processes in your web app. Find the process named "java" in the table and copy the corresponding PID (Process ID).
Next, open the Debug Console in the top toolbar of the SCM site and run the following command. Replace <pid> with the process ID you copied earlier. This command starts a 30-second profiler recording of your Java application and generates a file named timed_recording_example.jfr in the C:\home directory.
jcmd <pid> JFR.start name=TimedRecording settings=profile duration=30s filename="C:\home\timed_recording_example.JFR"
Analyze .jfr files
Use FTPS to download your JFR file to your local machine. To analyze the JFR file, download and install Java Mission Control. For instructions on Java Mission Control, see the JMC documentation and the installation instructions.
App logging
Enable application logging through the Azure portal or Azure CLI to configure App Service to write your application's standard console output and standard console error streams to the local filesystem or Azure Blob Storage. Logging to the local App Service filesystem instance is disabled 12 hours after you enable it. If you need longer retention, configure the application to write output to a Blob storage container.
Your Java and Tomcat app logs can be found in the /home/LogFiles/Application/ directory.
If your application uses Logback or Log4j for tracing, you can forward these traces for review into Azure Application Insights using the logging framework configuration instructions in Explore Java trace logs in Application Insights.
Note
Due to known vulnerability CVE-2021-44228, be sure to use Log4j version 2.16 or later.
Customization and tuning
Azure App Service supports out of the box tuning and customization through the Azure portal and CLI. Review the following articles for non-Java-specific web app configuration:
- Configure app settings
- Set up a custom domain
- Configure TLS/SSL bindings
- Add a CDN
- Configure the Kudu site
Copy App Content Locally
Set the app setting JAVA_COPY_ALL to true to copy your app contents to the local worker from the shared file system. This setting helps address file-locking issues.
Set Java runtime options
To set allocated memory or other JVM runtime options, create an app setting named JAVA_OPTS with the options. App Service passes this setting as an environment variable to the Java runtime when it starts.
In the Azure portal, under Application Settings for the web app, create a new app setting named JAVA_OPTS that includes other settings, such as -Xms512m -Xmx1204m.
In the Azure portal, under Application Settings for the web app, create a new app setting named CATALINA_OPTS that includes other settings, such as -Xms512m -Xmx1204m.
To configure the app setting from the Maven plugin, add setting/value tags in the Azure plugin section. The following example sets a specific minimum and maximum Java heap size:
<appSettings>
    <property>
        <name>JAVA_OPTS</name>
        <value>-Xms1024m -Xmx1024m</value>
    </property>
</appSettings>
Note
You don't need to create a web.config file when using Tomcat on Windows App Service.
Developers running a single application with one deployment slot in their App Service plan can use the following options:
- B1 and S1 instances:
-Xms1024m -Xmx1024m - B2 and S2 instances:
-Xms3072m -Xmx3072m - B3 and S3 instances:
-Xms6144m -Xmx6144m - P1v2 instances:
-Xms3072m -Xmx3072m - P2v2 instances:
-Xms6144m -Xmx6144m - P3v2 instances:
-Xms12800m -Xmx12800m - P1v3 instances:
-Xms6656m -Xmx6656m - P2v3 instances:
-Xms14848m -Xmx14848m - P3v3 instances:
-Xms30720m -Xmx30720m - I1 instances:
-Xms3072m -Xmx3072m - I2 instances:
-Xms6144m -Xmx6144m - I3 instances:
-Xms12800m -Xmx12800m - I1v2 instances:
-Xms6656m -Xmx6656m - I2v2 instances:
-Xms14848m -Xmx14848m - I3v2 instances:
-Xms30720m -Xmx30720m
When tuning application heap settings, review your App Service plan details and take into account multiple applications and deployment slot needs to find the optimal allocation of memory.
Turn on web sockets
Turn on support for web sockets in the Azure portal in the Application settings for the application. You need to restart the application for the setting to take effect.
Turn on web socket support using the Azure CLI with the following command:
az webapp config set --name <app-name> --resource-group <resource-group-name> --web-sockets-enabled true
Then restart your application:
az webapp stop --name <app-name> --resource-group <resource-group-name>
az webapp start --name <app-name> --resource-group <resource-group-name>
Set default character encoding
In the Azure portal, under Application Settings for the web app, create a new app setting named JAVA_OPTS with value -Dfile.encoding=UTF-8.
Alternatively, you can configure the app setting using the App Service Maven plugin. Add the setting name and value tags in the plugin configuration:
<appSettings>
    <property>
        <name>JAVA_OPTS</name>
        <value>-Dfile.encoding=UTF-8</value>
    </property>
</appSettings>
Pre-Compile JSP files
To improve performance of Tomcat applications, you can compile your JSP files before deploying to App Service. You can use the Maven plugin provided by Apache Sling, or using this Ant build file.
Note
robots933456 in logs
You may see the following message in the container logs:
2019-04-08T14:07:56.641002476Z "-" - - [08/Apr/2019:14:07:56 +0000] "GET /robots933456.txt HTTP/1.1" 404 415 "-" "-"
You can safely ignore this message. /robots933456.txt is a dummy URL path that App Service uses to check if the container is capable of serving requests. A 404 response simply indicates that the path doesn't exist, but it lets App Service know that the container is healthy and ready to respond to requests.
Choosing a Java runtime version
App Service allows users to choose the major version of the JVM, such as Java 8 or Java 11, and the patch version, such as 1.8.0_232 or 11.0.5. You can also choose to have the patch version automatically updated as new minor versions become available. In most cases, production apps should use pinned patch JVM versions. This prevents unanticipated outages during a patch version autoupdate. All Java web apps use 64-bit JVMs, and it's not configurable.
If you're using Tomcat, you can choose to pin the patch version of Tomcat. On Windows, you can pin the patch versions of the JVM and Tomcat independently. On Linux, you can pin the patch version of Tomcat; the patch version of the JVM is also pinned but isn't separately configurable.
If you choose to pin the minor version, you need to periodically update the JVM minor version on the app. To ensure that your application runs on the newer minor version, create a staging slot and increment the minor version on the staging slot. Once you confirm the application runs correctly on the new minor version, you can swap the staging and production slots.
Clustering
App Service supports clustering for JBoss EAP versions 7.4.1 and greater. To enable clustering, your web app must be integrated with a virtual network. When the web app is integrated with a virtual network, it restarts, and the JBoss EAP installation automatically starts up with a clustered configuration. The JBoss EAP instances communicate over the subnet specified in the virtual network integration, using the ports shown in the WEBSITES_PRIVATE_PORTS environment variable at runtime. You can disable clustering by creating an app setting named WEBSITE_DISABLE_CLUSTERING with any value.
Note
If you're enabling your virtual network integration with an ARM template, you need to manually set the property vnetPrivatePorts to a value of 2. If you enable virtual network integration from the CLI or Portal, this property is set for you automatically.
When clustering is enabled, the JBoss EAP instances use the FILE_PING JGroups discovery protocol to discover new instances and persist the cluster information like the cluster members, their identifiers, and their IP addresses. On App Service, these files are under /home/clusterinfo/. The first EAP instance to start obtains read/write permissions on the cluster membership file. Other instances read the file, find the primary node, and coordinate with that node to be included in the cluster and added to the file.
Note
You can avoid JBOSS clustering timeouts by cleaning up obsolete discovery files during your app startup
The Premium V3 and Isolated V2 App Service Plan types can optionally be distributed across Availability Zones to improve resiliency and reliability for your business-critical workloads. This architecture is also known as zone redundancy. The JBoss EAP clustering feature is compatible with the zone redundancy feature.
Autoscale Rules
When configuring autoscale rules for horizontal scaling, it's important to remove instances incrementally (one at a time) to ensure each removed instance can transfer its activity (such as handling a database transaction) to another member of the cluster. When configuring your autoscale rules in the Portal to scale down, use the following options:
- Operation: "Decrease count by"
- Cool down: "5 minutes" or greater
- Instance count: 1
You don't need to incrementally add instances (scaling out), you can add multiple instances to the cluster at a time.
App Service plans
JBoss EAP is only available on the Premium v3 and Isolated v2 App Service Plan types. Customers that created a JBoss EAP site on a different tier during the public preview should scale up to Premium or Isolated hardware tier to avoid unexpected behavior.
Tomcat baseline configuration
Note
This section applies to Linux only.
Java developers can customize the server settings, troubleshoot issues, and deploy applications to Tomcat with confidence if they know about the server.xml file and configuration details of Tomcat. Possible customizations include:
- Customizing Tomcat configuration: By understanding the server.xml file and Tomcat's configuration details, you can fine-tune the server settings to match the needs of their applications.
- Debugging: When an application is deployed on a Tomcat server, developers need to know the server configuration to debug any issues that might arise. This includes checking the server logs, examining the configuration files, and identifying any errors that might be occurring.
- Troubleshooting Tomcat issues: Inevitably, Java developers encounter issues with their Tomcat server, such as performance problems or configuration errors. By understanding the server.xml file and Tomcat's configuration details, developers can quickly diagnose and troubleshoot these issues, which can save time and effort.
- Deploying applications to Tomcat: To deploy a Java web application to Tomcat, developers need to know how to configure the server.xml file and other Tomcat settings. Understanding these details is essential for deploying applications successfully and ensuring that they run smoothly on the server.
When you create an app with built-in Tomcat to host your Java workload (a WAR file or a JAR file), there are certain settings that you get out of the box for Tomcat configuration. You can refer to the Official Apache Tomcat Documentation for detailed information, including the default configuration for Tomcat Web Server.
Additionally, there are certain transformations that are further applied on top of the server.xml for Tomcat distribution upon start. These are transformations to the Connector, Host, and Valve settings.
The latest versions of Tomcat have server.xml (8.5.58 and 9.0.38 onward). Older versions of Tomcat don't use transforms and might have different behavior as a result.
Connector
<Connector port="${port.http}" address="127.0.0.1" maxHttpHeaderSize="16384" compression="on" URIEncoding="UTF-8" connectionTimeout="${site.connectionTimeout}" maxThreads="${catalina.maxThreads}" maxConnections="${catalina.maxConnections}" protocol="HTTP/1.1" redirectPort="8443"/>
maxHttpHeaderSizeis set to16384URIEncodingis set toUTF-8conectionTimeoutis set toWEBSITE_TOMCAT_CONNECTION_TIMEOUT, which defaults to240000maxThreadsis set toWEBSITE_CATALINA_MAXTHREADS, which defaults to200maxConnectionsis set toWEBSITE_CATALINA_MAXCONNECTIONS, which defaults to10000
Note
The connectionTimeout, maxThreads and maxConnections settings can be tuned with app settings
Following are example CLI commands that you might use to alter the values of conectionTimeout, maxThreads, or maxConnections:
az webapp config appsettings set --resource-group myResourceGroup --name myApp --settings WEBSITE_TOMCAT_CONNECTION_TIMEOUT=120000
az webapp config appsettings set --resource-group myResourceGroup --name myApp --settings WEBSITE_CATALINA_MAXTHREADS=100
az webapp config appsettings set --resource-group myResourceGroup --name myApp --settings WEBSITE_CATALINA_MAXCONNECTIONS=5000
- Connector uses the address of the container instead of 127.0.0.1
Host
<Host appBase="${site.appbase}" xmlBase="${site.xmlbase}" unpackWARs="${site.unpackwars}" workDir="${site.tempdir}" errorReportValveClass="com.microsoft.azure.appservice.AppServiceErrorReportValve" name="localhost" autoDeploy="true">
appBaseis set toAZURE_SITE_APP_BASE, which defaults to localWebappsLocalPathxmlBaseis set toAZURE_SITE_HOME, which defaults to/site/wwwrootunpackWARsis set toAZURE_UNPACK_WARS, which defaults totrueworkDiris set toJAVA_TMP_DIR, which defaultsTMPerrorReportValveClassuses our custom error report valve
Valve
<Valve prefix="site_access_log.${catalina.instance.name}" pattern="%h %l %u %t "%r" %s %b %D %{x-arr-log-id}i" directory="${site.logdir}/http/RawLogs" maxDays="${site.logRetentionDays}" className="org.apache.catalina.valves.AccessLogValve" suffix=".txt"/>
directoryis set toAZURE_LOGGING_DIR, which defaults tohome\logFilesmaxDaysis toWEBSITE_HTTPLOGGING_RETENTION_DAYS, which defaults to0[forever]
On Linux, it has all of the same customization, plus:
Adds some error and reporting pages to the valve:
<xsl:attribute name="appServiceErrorPage">
    <xsl:value-of select="'${appService.valves.appServiceErrorPage}'"/>
</xsl:attribute>

<xsl:attribute name="showReport">
    <xsl:value-of select="'${catalina.valves.showReport}'"/>
</xsl:attribute>

<xsl:attribute name="showServerInfo">
    <xsl:value-of select="'${catalina.valves.showServerInfo}'"/>
</xsl:attribute>
Next steps
Visit the Azure for Java Developers center to find Azure quickstarts, tutorials, and Java reference documentation.
Povratne informacije
Uskoro: tokom 2024. postepeno ćemo ukidati probleme s uslugom GitHub kao mehanizam povratnih informacija za sadržaj i zamijeniti ga novim sistemom povratnih informacija. Za više informacija, pogledajte https://aka.ms/ContentUserFeedback.
Pošalјite i prikažite povratne informacije za