Nasazení datových řešení pro zdravotnictví ve Microsoft Fabric
V tomto článku se dozvíte, jak nasadit datová řešení Microsoft Fabric pro zdravotnictví. Omezené nasazení zahrnuje následující kroky:
- Nasazení datových řešení pro zdravotnictví v Microsoft Fabric
- Nasazení základů dat pro zdravotnictví
- Nasazení ukázkových dat
- Nasadit funkce
Než začnete, ujistěte se, že splňujete licenční požadavky a proveďte požadované kroky uvedené v tématu Jak získat Řešení pro zdravotní data v Microsoft Fabric.
Nasazení datových řešení pro zdravotnictví
Pomocí Microsoft Fabric můžete procházet zjednodušeným procesem nasazení Řešení pro zdravotní data.
Přihlaste se do Microsoft Power BI s přihlašovacími údaji správce.
Na domovské stránce vyberte Pracovní prostory a vytvořte nový pracovní prostor prostředků infrastruktury pro nasazení datových řešení zdravotní péče. Poznamenejte si název pracovního prostoru pro další kroky.
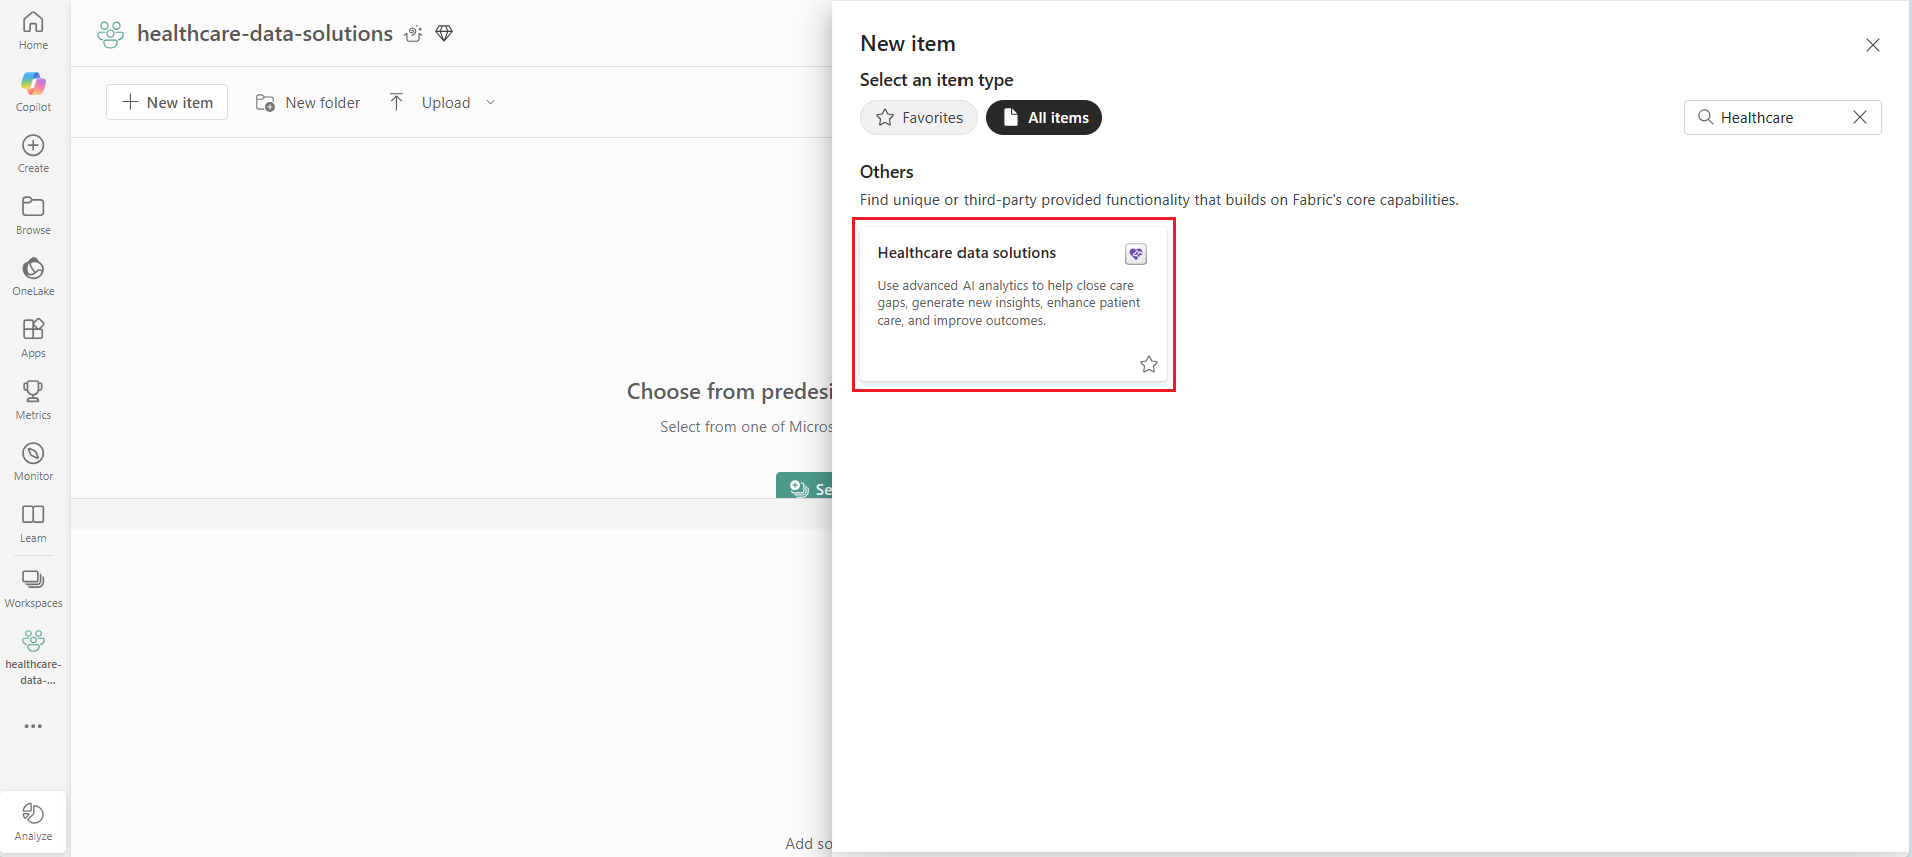
Přejděte do nově vytvořeného pracovního prostoru a vyberte + Nová položka.
V podokně Nová položka vyhledejte a vyberte Datová řešení pro zdravotnictví. Tato akce vytvoří nové prostředí datových řešení pro zdravotnictví v pracovním prostoru prostředky infrastruktury.
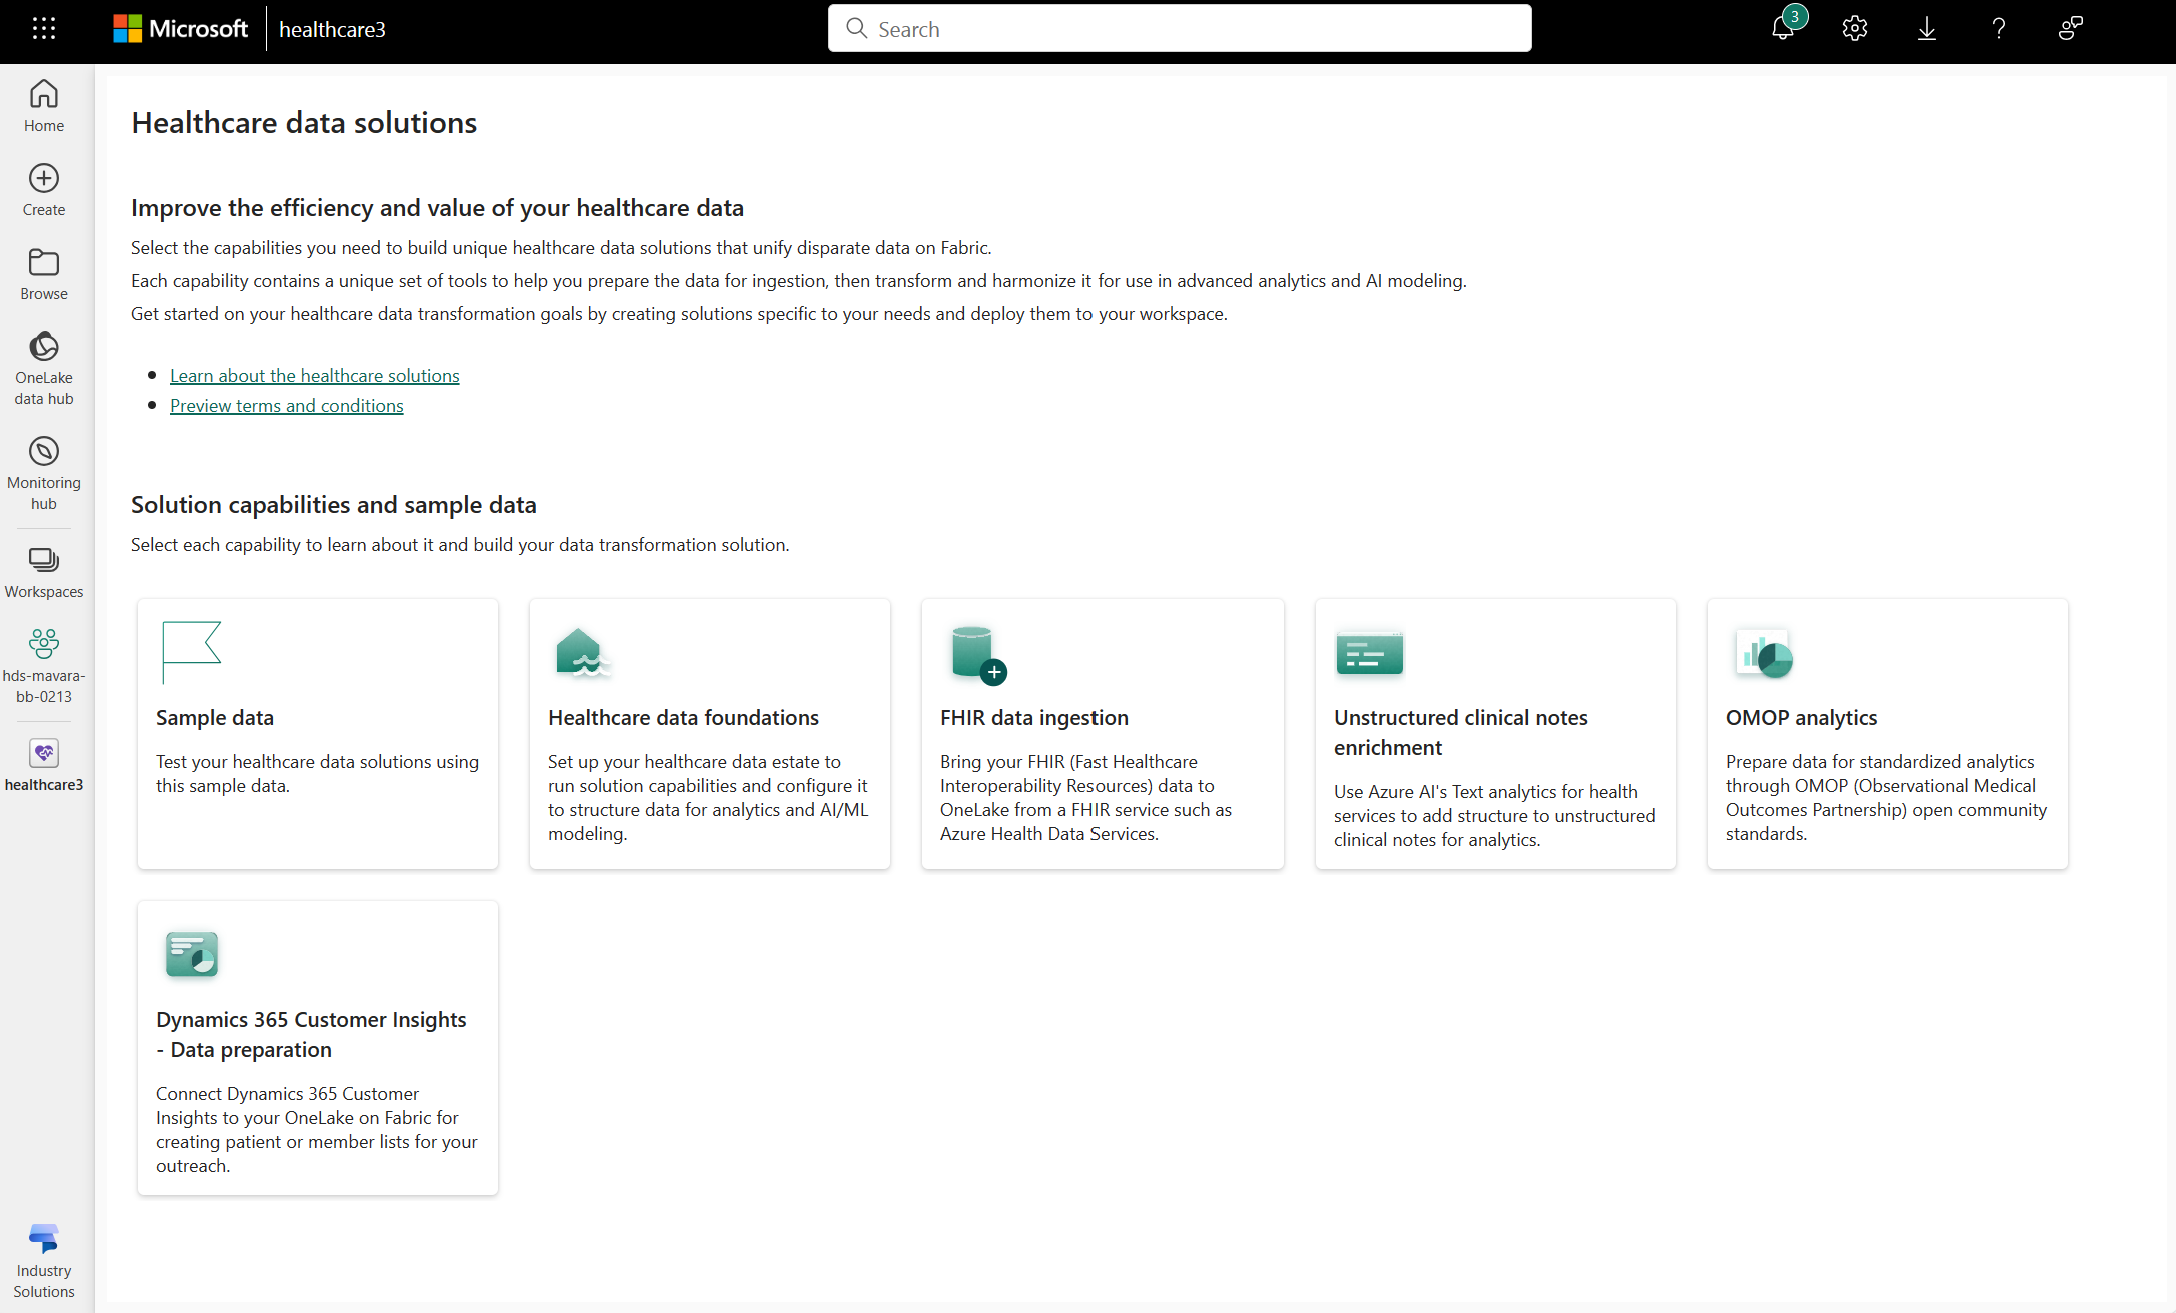
Po dokončení nasazení byste měli být přesměrováni na domovskou stránku Řešení pro zdravotní data. Zde si můžete prohlédnout různá řešení a funkce, které jsou aktuálně součástí Řešení pro zdravotní data v Microsoft Fabric.
Důležité
Prostředky infrastruktury jsou navrženy tak, aby ve vašem pracovním prostoru nasadily řešení pro zdravotní data více než jednou. Ve výchozím nastavení má první instalace název healthcare1 a položky nasazení se řídí formátem značení
healthcare1_item-name.U všech následných nasazení nad rámec první instalace se nasazení řídí formátem značení
healthcare#a artefakty/položky se řídí formátem značeníhealthcare#_item-name. Zde#začíná na1a popisek se zvyšuje pro1pro každé nové nasazení řešení ve vašem pracovním prostoru.


Nasazení základů dat pro zdravotnictví
Základy zdravotních dat nabízejí datové kanály připravené ke spuštění, které dokážou efektivně strukturovat data pro analýzy a modelování AI/strojového učení. Další informace najdete v tématu Přehled základů Řešení pro zdravotní data.
Měli byste nejdřív nasadit schopnost Základy zdravotních dat a teprve potom další schopnosti Řešení pro zdravotní data v Microsoft Fabric.
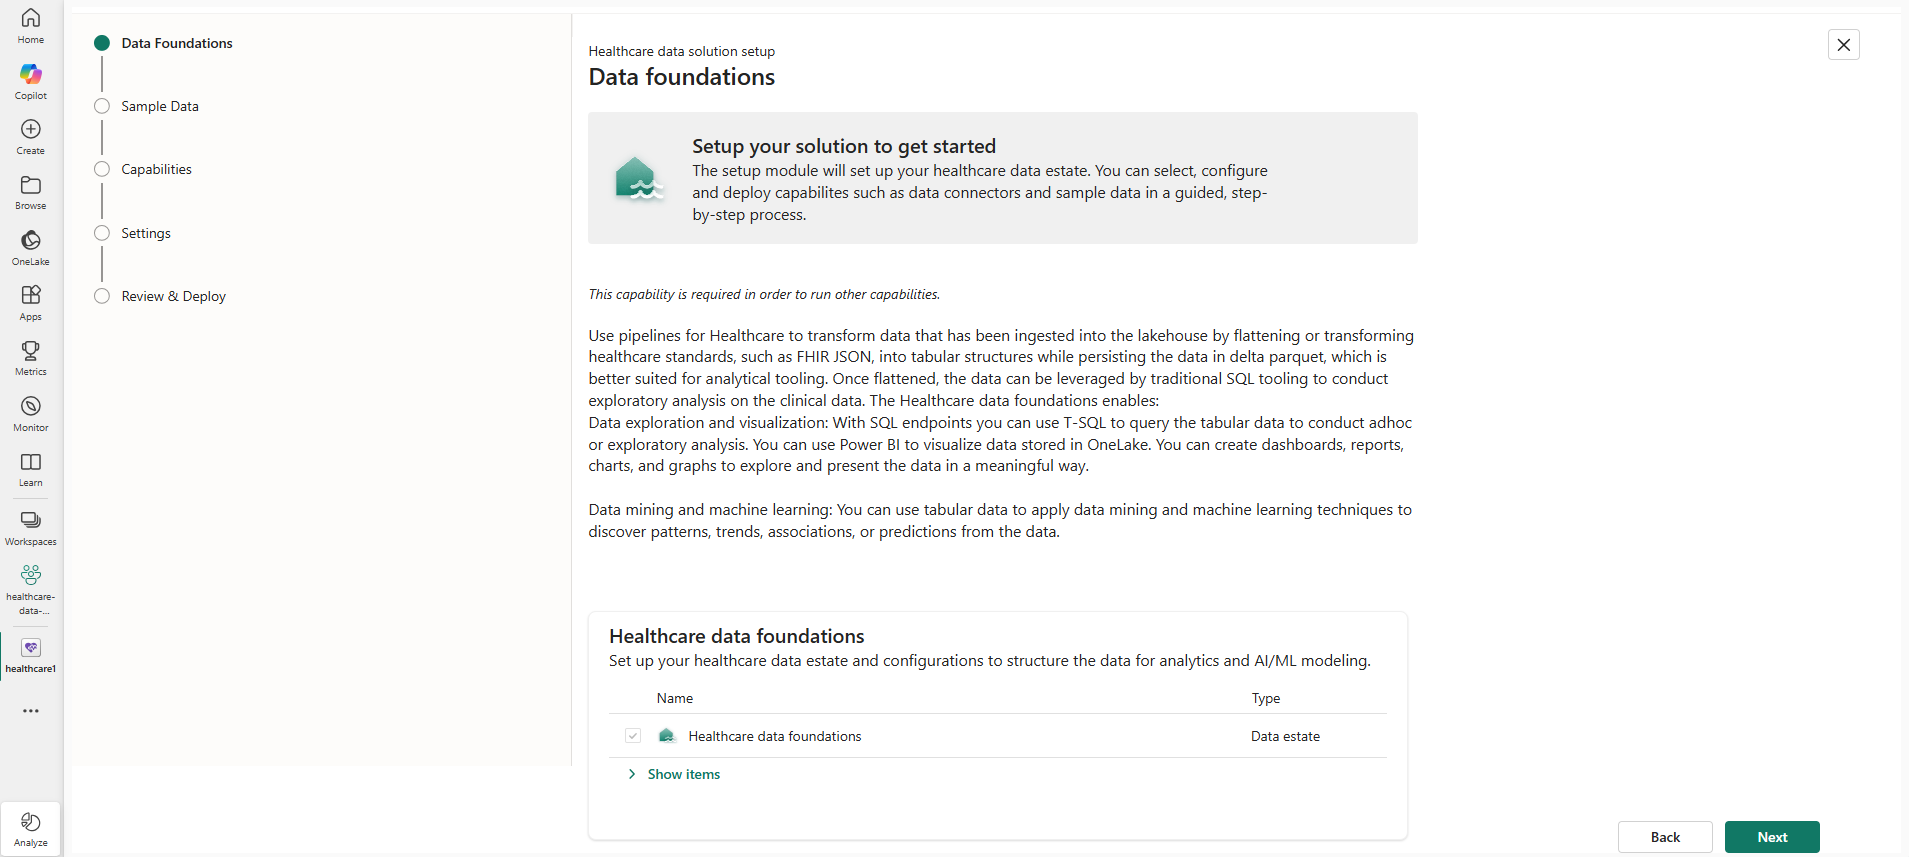
Na domovské stránce Řešení pro zdravotní data vyberte průvodce nastavením řešení. Tento instalační modul vás provede řadou kroků k dokončení nastavení prostředí Řešení pro zdravotní data.
Postupujte podle pokynů na obrazovce na stránce Data Foundations a nastavte schopnost Základy zdravotních dat. Můžete si také prohlédnout položky, které tento instalační modul vytváří.
Přejděte do části Ukázková data a nasaďte ukázková data. Tady můžete vybrat všechny ukázkové datové sady a později odstranit všechny, které nejsou potřeba. Případně můžete vybrat jenom ukázkové datové sady, které potřebujete.
Tento krok je volitelný – ukázková data můžete nasadit také později. Další informace naleznete v článku Nasazení ukázkových dat.
Přejděte do části Možnosti a nasaďte funkce datových řešení pro zdravotnictví.
Tento krok je volitelný – můžete se rozhodnout, že požadované funkce nasadíte hned, nebo je nasadíte později. Další informace najdete v průvodci nasazením jednotlivých funkcí v tématu Nasazení funkcí.
Přejděte na stránku Nastavení a zkontrolujte požadovaná nastavení (pokud existují).
Pokračujte do části Kontrola a nasazení. Zkontrolujte vybrané funkce, přijměte podmínky služby a pak vyberte Nasadit.
Dokončování nasazení může trvat několik minut. Během nasazování nezavírejte kartu ani prohlížeč. Mezitím můžete pracovat na jiné kartě.

Nasazení ukázkových dat
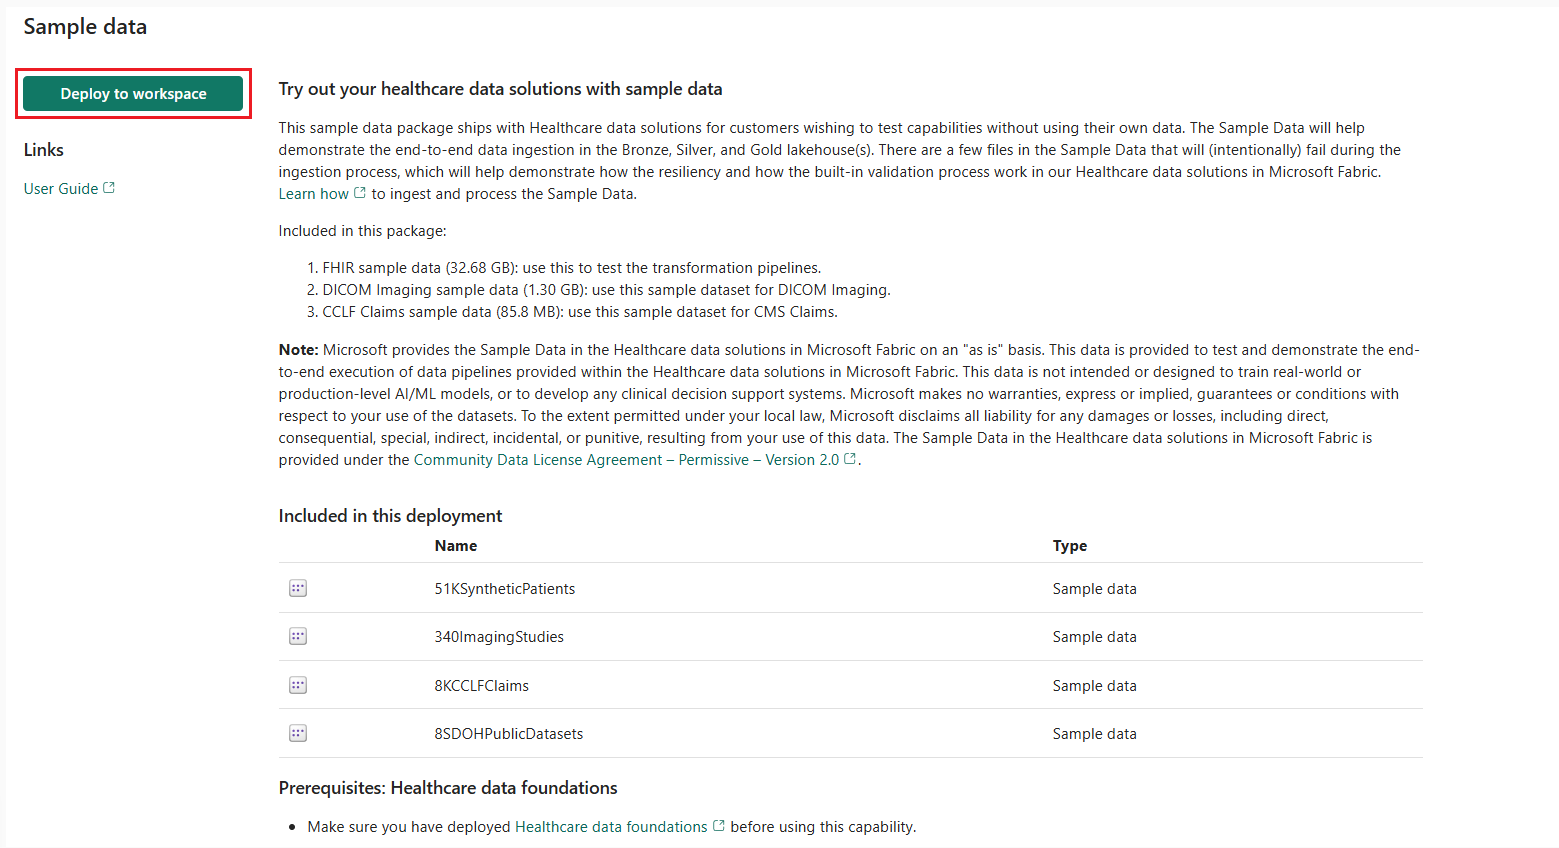
Řešení dat pro zdravotnictví zahrnují ukázkový datový balíček Microsoft Fabric, který můžete nasadit do svého pracovního prostoru. Tento balíček obsahuje různé datové prostředky pro zdravotnictví a přírodní vědy, které umožňují testovat možnosti datových řešení pro zdravotnictví bez použití vlastních dat. Po nasazení jsou soubory s ukázkovými daty uloženy ve vašem OneLake. Ukázková data pomáhají demonstrovat kompletní příjem dat prostřednictvím bronzových, stříbrných a zlatých transakčních jezer. Některé soubory jsou záměrně navržené tak, aby během procesu příjmu dat selhaly, aby bylo možné předvést odolnost a integrované funkce ověřování v řešeních pro zdravotnická data.
Balíček ukázkových dat obsahuje následující datové sady:
| Name | Size | Purpose |
|---|---|---|
| Ukázková data FHIR | 32.68 GB | Použijte tato data k testování transformačních kanálů |
| Ukázková data zobrazování DICOM | 1.3 GB | Použití této ukázkové datové sady pro vytváření obrazů DICOM |
| CCLF nárokuje ukázková data | 85.8 MB | Použití této ukázkové datové sady pro vytváření nároků CMS |
- FHIR: Fast Healthcare Interoperability Resources
- DICOM: Digitální zobrazování a komunikace v medicíně
- CMS: Centers for Medicare & Medicaid Services
- CCLF: Deklarace a řádkový kanál deklarace
Poznámka:
Toto nasazení ukázkových dat automaticky nenasazuje ukázková data pro všechny funkce Řešení pro zdravotní data. Některé funkce, jako jsou transformace OMOP a datové sady SDOH – transformace (Preview), nasadí přidružená ukázková data při nasazení konkrétní funkce. Další informace najdete v pokynech k nasazení jednotlivých funkcí.
Pokud chcete nasadit ukázková data do pracovního prostoru, postupujte takto. Tuto část můžete přeskočit, pokud jste už ukázková data nasadili pomocí průvodce nastavením řešení v tématu Nasazení základů zdravotních dat.
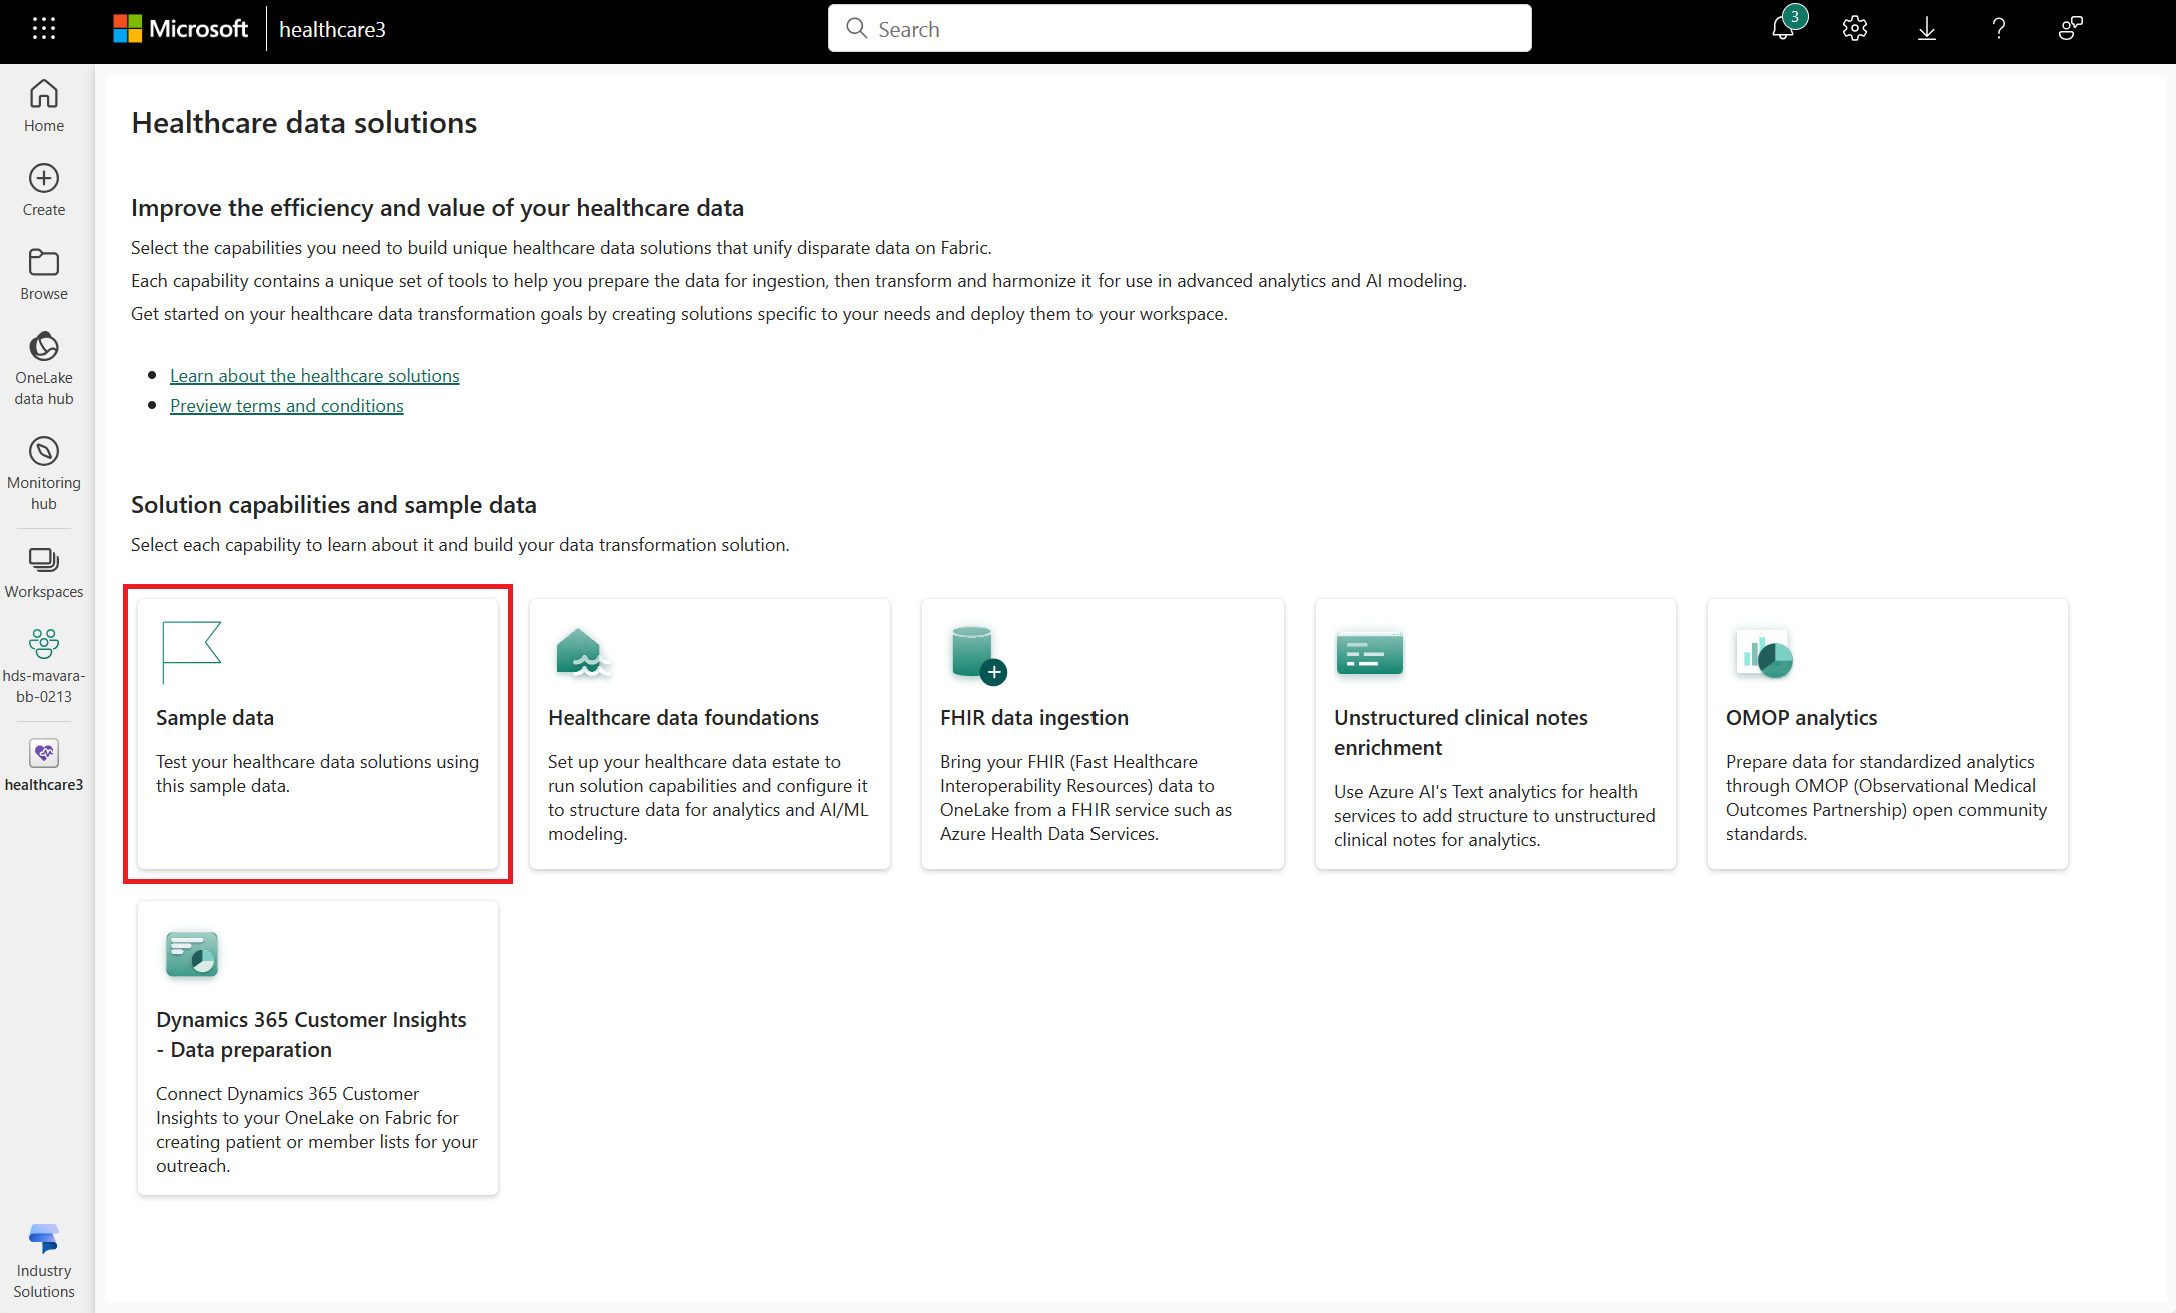
Vyberte dlaždici Ukázková data na domovské stránce Řešení pro zdravotní data.
Na stránce ukázkových dat vyberte možnost Nasadit v pracovním prostoru.
Po nasazení ukázkových dat do pracovního prostoru můžete pomocí Průzkumníka souborů OneLake zobrazit nasazené ukázkové datové soubory uložené v OneLake. Další informace najdete v tématu Použití Průzkumníka souborů OneLake pro přístup k datům prostředků infrastruktury.


Nasadit funkce
Po nastavení požadované funkce zdravotnických datových základů a poskytnutých ukázkových dat teď můžete nasadit a prozkoumat další možnosti řešení pro data ze zdravotnictví. Podrobné pokyny k nasazení jednotlivých funkcí viz:
- Nasazení a konfigurace zjišťování a sestavování kohort (Preview)
- Možnosti transformace:
- Nasazení a konfigurace Azure Health Data Services – Export dat, najdete tady:
- Nasazení a konfigurace transformací OMOP
- Nasazení a konfigurace transformace dat DICOM
- Nasazení a konfigurace transformace dat deklarací identity CMS (Preview)
- Nasazení a konfigurace datových sad SDOH – transformace (Preview)
- Nasazení a konfigurace schopnosti obohacení nestrukturovaných klinických poznámek (preview)
- Analytické možnosti: