Write an Azure Function that processes Microsoft Dataverse events
The previous exercise reviewed registering webhooks that publish Microsoft Dataverse data to an external Web API. In this exercise, you build an example Web API using Azure Functions to illustrate how to consume a published webhook event.
Azure Functions vs. plug-ins
Microsoft Azure Functions provides a great mechanism for doing small units of work, similar to what you would use plug-ins for in Dataverse. In many scenarios, it might make sense to offload this logic into a separate component, such to an Azure Function, to reduce load on the Dataverse's application host. You have the availability to run functions in a synchronous capacity because Dataverse webhooks provide the Remote Execution Context of the given request.
However, Azure Functions doesn't explicitly run within the Dataverse's event pipeline. So if you need to update data in the most high-performing manner, such as autoformatting a string value before it posts to Dataverse, we still recommend that you use a plug-in to perform this type of operation. Any data operations you perform from the Azure Function will also not roll back if, after it completes, the plug-in has an exception and rolls back.
Write an Azure Function that processes Dataverse events
To start writing an Azure Function that processes Dataverse events, you use Visual Studio 2022's Azure development template to create and publish your Function. Visual Studio provides several tools to help make Azure development simple. Therefore, you're required to have Azure Development Tools installed in your Visual Studio 2022 instance. If you don't have the feature installed, add it through the Visual Studio Installer.
Create your Azure Function project
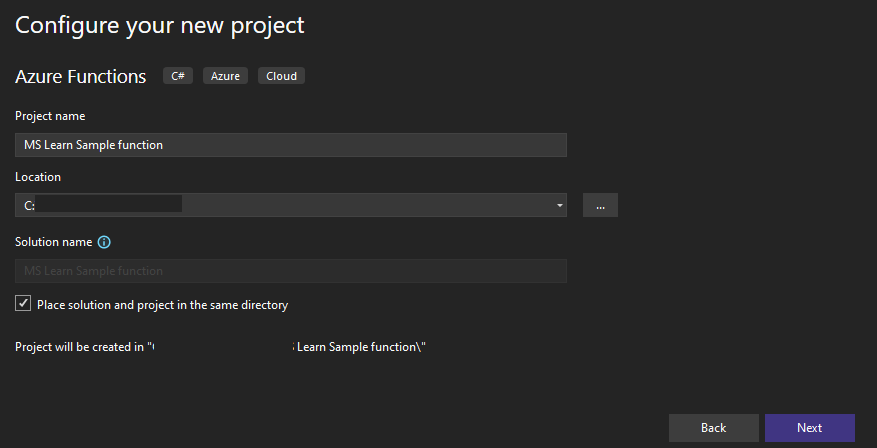
Create a new Azure Function project by using the Azure Functions template. You can find this template by creating a new project and then entering "function" in the search bar.

Give your Function project a descriptive name and then select Create.
Select the latest .NET Core LTS, select Http trigger, uncheck the Use Azurite checkbox, select Function for Authorization level, and select Create.

Your sample project should be created now, with the following template code found in the Function's .cs file:


 public static class Function1
 {
     [FunctionName("Function1")]
     public static async Task<IActionResult> Run(
         [HttpTrigger(AuthorizationLevel.Function, "get", "post", Route = null)] HttpRequest req,
         ILogger log)
     {
         log.LogInformation("C# HTTP trigger function processed a request.");

         string name = req.Query["name"];

         string requestBody = await new StreamReader(req.Body).ReadToEndAsync();
         dynamic data = JsonConvert.DeserializeObject(requestBody);
         name = name ?? data?.name;

         string responseMessage = string.IsNullOrEmpty(name)
             ? "This HTTP triggered function executed successfully. Pass a name in the query string or in the request body for a personalized response."
             : $"Hello, {name}. This HTTP triggered function executed successfully.";

         return new OkObjectResult(responseMessage);
     }
 }
You replace this code later, but first, publish your Function to ensure that everything works correctly.
Publish your Azure Function to Azure
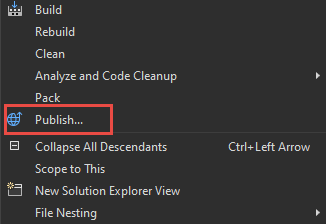
Right-click your project and select Publish... from the context menu to test the publishing of your Function to Azure App Service.
Select Azure and select Next.
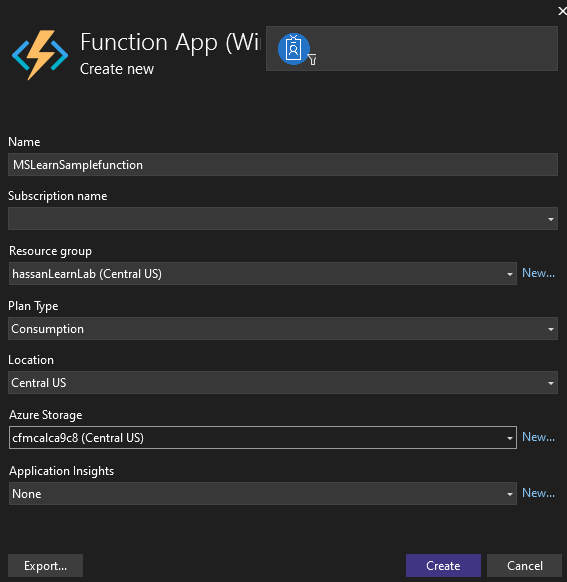
Select Azure Function App (Windows) and select Next.
Select your subscription and then select Create new.

Name your new App Service, select your resource group or create new on, provide the rest of the required information and then select Create.
After your Publish profile is created, select Finish.
Select Publish to deploy your Function to Azure. The Function is published by default in release mode. If you'd like to debug this function (more on this later), you want to publish the Function in Debug mode.


Another method to create Azure Functions
If you want to manually create your Azure Function without the help of Visual Studio 2019, you can do so from the Azure portal:
Sign in to your Azure environment and select + Create a new resource
Search for function app and select Function app.

Select Create.
To create an Azure Function App, specify its name and runtime stack, and then verify that the Subscription, Resource group, Region fields are correct, and then select Next.

Select Review + create.
Select Create.


Note
This lesson doesn't cover the details of building a new Azure Function assembly.
Update your function's logic to interact with Dataverse data
If needed, change your Function's FunctionName and corresponding class name to something more meaningful (that is, MSLearnFunction).
Add the following using statements to your function:
using Newtonsoft.Json.Linq;Replace the code inside the Run function with this code:
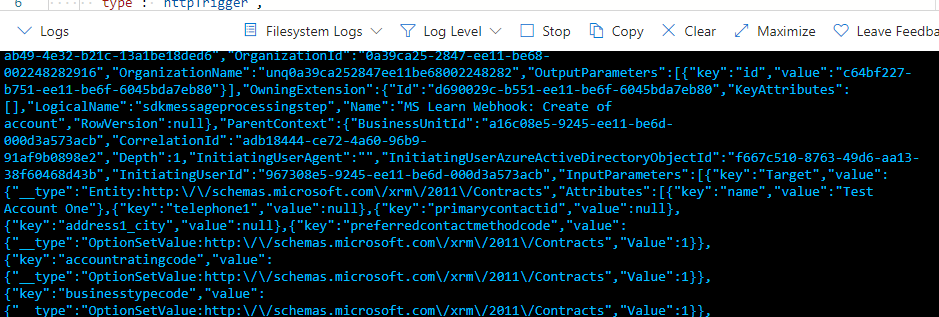
log.LogInformation("C# HTTP trigger function processed a request.");

 string queryParams = "";
 foreach (var q in req.Query)
 {
     queryParams += $"Key: {q.Key} Value: {q.Value}\n";
 }

 string requestBody = await new StreamReader(req.Body).ReadToEndAsync();
 dynamic data = JsonConvert.DeserializeObject(requestBody);
 string requestHeader = "";
 foreach (var h in req.Headers)
 {
   requestHeader += $"Key: {h.Key} Value: {h.Value}\n";
 }
 log.LogInformation("Query Parameters:\n" + queryParams);
 log.LogInformation("Request Header: \n" + requestHeader);
 log.LogInformation("Request Body:\n" + requestBody);
 string requestBodyFormatted = JValue.Parse(requestBody).ToString(Formatting.Indented);
 log.LogInformation("Request Body Formatted:\n" + requestBodyFormatted);

 try
 {
   dynamic target = data.InputParameters["Target"];

   foreach (dynamic field in target.Attributes)
   {
     log.LogInformation($"Name: {field.Key} Value: { field.Value}");
   }
 }
 catch (Exception ex)
 {
   log.LogInformation(ex.ToString());
 }

 return (ActionResult)new OkObjectResult(data.InitiatingUserId);
Build your function and publish it to Azure by right-clicking the project and then selecting Publish...
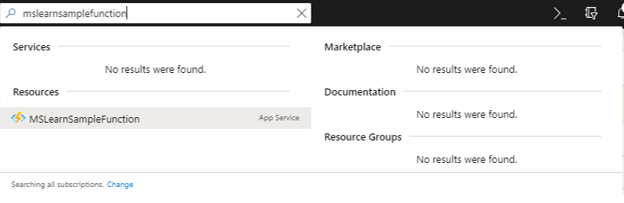
Verify that your function has been published by going to the Azure portal. You can manually select it from within the resource group that you specified when you created the function. Or you can search for it by name in the Azure portal, as shown in the following image.

Register a Dataverse webhook that calls your Azure Function
In this exercise, you use the Plug-in Registration Tool to register a webhook that calls your new Azure Function.
Open the Plug-in Registration Tool and sign in to your Dataverse environment.
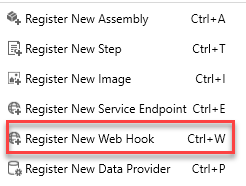
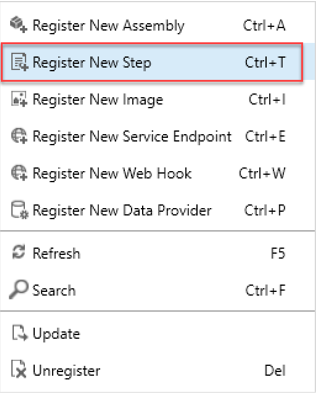
Register a new webhook by selecting Register New Web Hook under the Register menu option.
Get your Function's URL from the Azure portal by selecting Get function URL.

Copy the URL.
Paste the copied value into a text editor, which should look like the following string.
https://[AppServiceUrl].azurewebsites.net/api/MsLearnFunction?code=[WebhookKey]Cut and paste the code query string value from the copied URL and place into the Value section of the WebHook Registration string (make sure to remove the code= portion). Select Save.
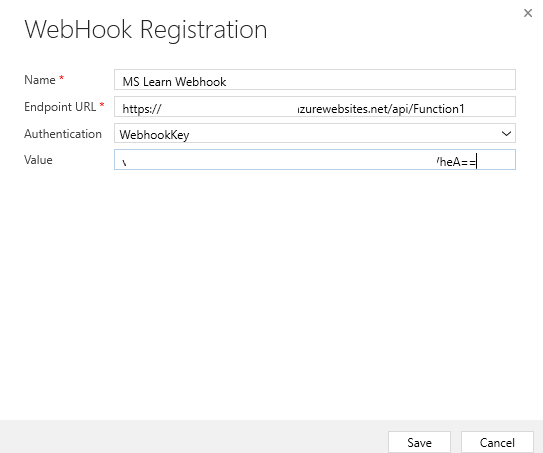
Register a new step that posts a message on creation of a new account. Register a new step by right-clicking your new webhook assembly and then selecting Register New Step.
Select Create for Message, select account for Primary Entity, select Synchronous for Execution Mode, and then select the Register New Step button. Because you're building this webhook to run synchronously, ensure that the flag is set when you're registering the new step.


Test your webhook integration
To test your webhook integration, go to your Dataverse environment and create an account row.
Go to your Function in the Azure portal and view the logs.