Configure and test Microsoft Entra SSO for Adobe Sign
In this section, you configure and test Microsoft Entra single sign-on with Adobe Sign based on a test user called Britta Simon.
For single sign-on to work, a link relationship between a Microsoft Entra user and the related user in Adobe Sign needs to be established.
To configure and test Microsoft Entra single sign-on with Adobe Sign, you need to perform the following steps:
Browse to Identity > Applications > Enterprise applications > Adobe Sign application integration page, select Single sign-on.
On the Select a Single sign-on method dialog, select SAML/WS-Fed mode to enable single sign-on.
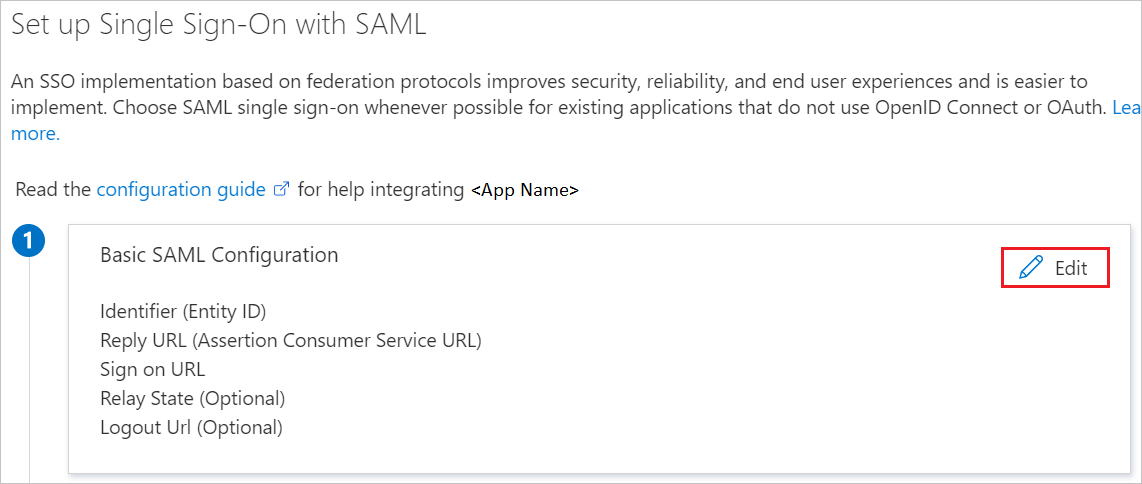
On the Set up Single Sign-On with SAML page, click pencil icon to open Basic SAML Configuration dialog.
On the Basic SAML Configuration section, perform the following steps:
a. In the Sign on URL text box, type a URL using the following pattern:
https://<companyname>.echosign.com/
b. In the Identifier (Entity ID) text box, type a URL using the following pattern:
https://<companyname>.echosign.com
Bemærk
These values are not real. Update these values with the actual Sign on URL and Identifier. Contact Adobe Sign Client support team to get these values. You can also refer to the patterns shown in the Basic SAML Configuration section.
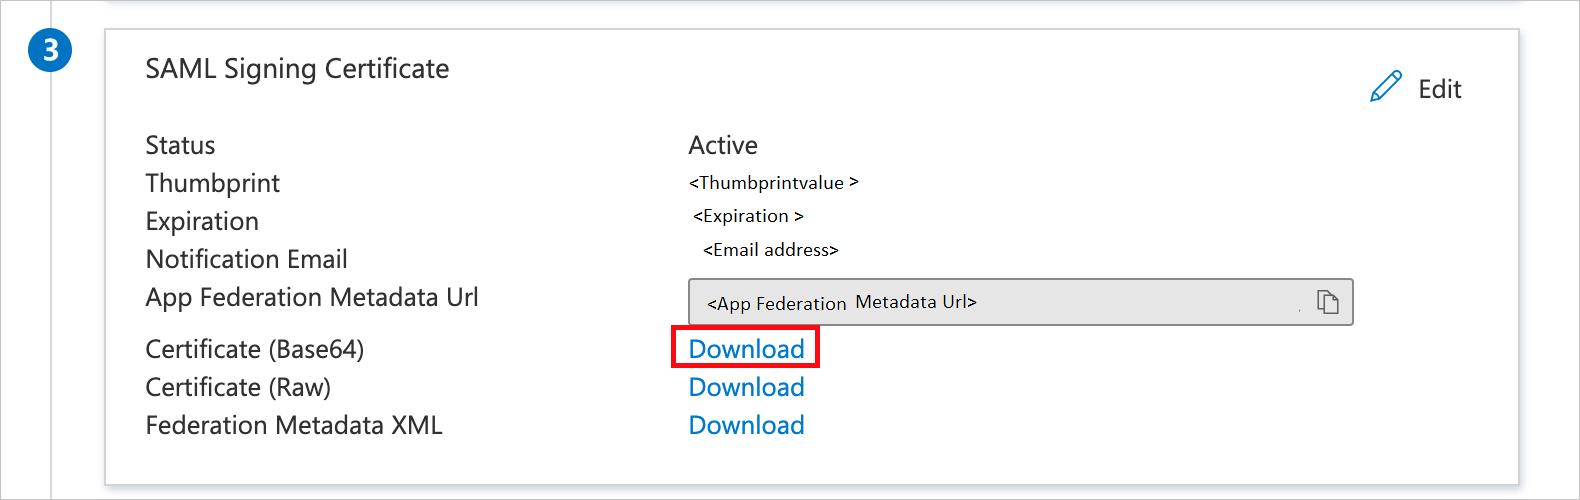
On the Set up Single Sign-On with SAML page, in the SAML Signing Certificate section, click Download to download the Certificate (Base64) from the given options as per your requirement and save it on your computer.
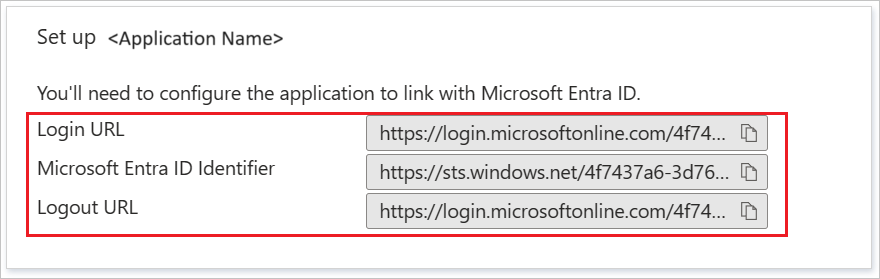
On the Set up Adobe Sign section, copy the appropriate URL(s) as per your requirement.
Create a Microsoft Entra test user
In this section, you'll create a test user called B.Simon.
In the app's overview page, select Users and groups.
Select Add user/group, then select Users and groups in the Add Assignment dialog.
In the Users and groups dialog, select B.Simon from the Users list, then click the Select button at the bottom of the screen.
If you are expecting a role to be assigned to the users, you can select it from the Select a role dropdown. If no role has been set up for this app, you see "Default Access" role selected.
In the Add Assignment dialog, click the Assign button.
Configure Adobe Sign SSO
Before configuration, contact the Adobe Sign Client support team to add your domain in the Adobe Sign allowlist. Here's how to add the domain:
a. The Adobe Sign Client support team sends you a randomly generated token. For your domain, the token will be like the following: adobe-sign-verification= xxxxxxxxxxxxxxxxxxxxxxxxxxxxxxx
This can take a few days, or longer. Note that DNS propagation delays mean that a value published in DNS might not be visible for an hour or more. Your IT administrator should be knowledgeable about how to publish this token in a DNS text record.
c. When you notify the Adobe Sign Client support team through the support ticket, after the token is published, they validate the domain and add it to your account.
d. Generally, here's how to publish the token on a DNS record:
Sign in to your domain account
Find the page for updating the DNS record. This page might be called DNS Management, Name Server Management, or Advanced Settings.
Find the TXT records for your domain.
Add a TXT record with the full token value supplied by Adobe.
Save your changes.
In a different web browser window, sign in to your Adobe Sign company site as an administrator.
In the SAML menu, select Account Settings > SAML Settings.
In the SAML Settings section, perform the following steps:
a. Under SAML Mode, select SAML Mandatory.
b. Select Allow Echosign Account Administrators to log in using their Echosign Credentials.
c. Under User Creation, select Automatically add users authenticated through SAML.
d. Paste Microsoft Entra Identifier into the Idp Entity ID text box.
e. Paste Login URL into the Idp Login URL text box.
f. Paste Logout URL into the Idp Logout URL text box.
g. Open your downloaded Certificate(Base64) file in Notepad. Copy the content of it into your clipboard, and then paste it to the IdP Certificate text box.
h. Select Save Changes.
Create Adobe Sign test user
To enable Microsoft Entra users to sign in to Adobe Sign, they must be provisioned into Adobe Sign. This is a manual task.
Bemærk
You can use any other Adobe Sign user account creation tools or APIs provided by Adobe Sign to provision Microsoft Entra user accounts.
Sign in to your Adobe Sign company site as an administrator.
In the menu on the top, select Account. Then, in the left pane, select Users & Groups > Create a new user.
In the Create New User section, perform the following steps:
a. Type the Email Address, First Name, and Last Name of a valid Microsoft Entra account you want to provision into the related text boxes.
b. Select Create User.
Bemærk
The Microsoft Entra account holder receives an email that includes a link to confirm the account, before it becomes active.
Test SSO
In this section, you test your Microsoft Entra single sign-on configuration with following options.
Click on Test this application, this will redirect to Adobe Sign Sign-on URL where you can initiate the login flow.
Go to Adobe Sign Sign-on URL directly and initiate the login flow from there.
You can use Microsoft My Apps. When you click the Adobe Sign tile in the My Apps, you should be automatically signed in to the Adobe Sign for which you set up the SSO. For more information about the My Apps, see Introduction to the My Apps.
Discover how Microsoft Entra External ID can provide secure, seamless sign-in experiences for your consumers and business customers. Explore tenant creation, app registration, flow customization, and account security.