Orchestrate healthcare data solutions (preview) notebook execution using Fabric pipelines
[This article is prerelease documentation and is subject to change.]
Fabric notebooks rely on the %pip library management magic command to get the wheel (WHL) files into a Spark session. This operation isn't currently supported in the Fabric pipeline. Hence, you can't add the notebooks as activities to a Fabric pipeline or automate notebook execution. To learn more about Fabric magic commands, see Magic commands in a notebook.
However, you can still utilize the Fabric pipelines to manually orchestrate notebook execution. This article shows you how to set up this configuration. It includes the following steps:
- Set up prerequisites
- Configure Fabric environment
- Update workspace settings
- Update notebooks
- Create orchestration pipeline
Set up prerequisites
To access your Fabric data locally, download, install, and set up OneLake file explorer. Alternatively, you can also use Azure Storage Explorer to access your Fabric data.
Configure Fabric environment
Let's use the guidance in Create, configure, and use an environment in Microsoft Fabric to upload the files to the workspace Spark pool.
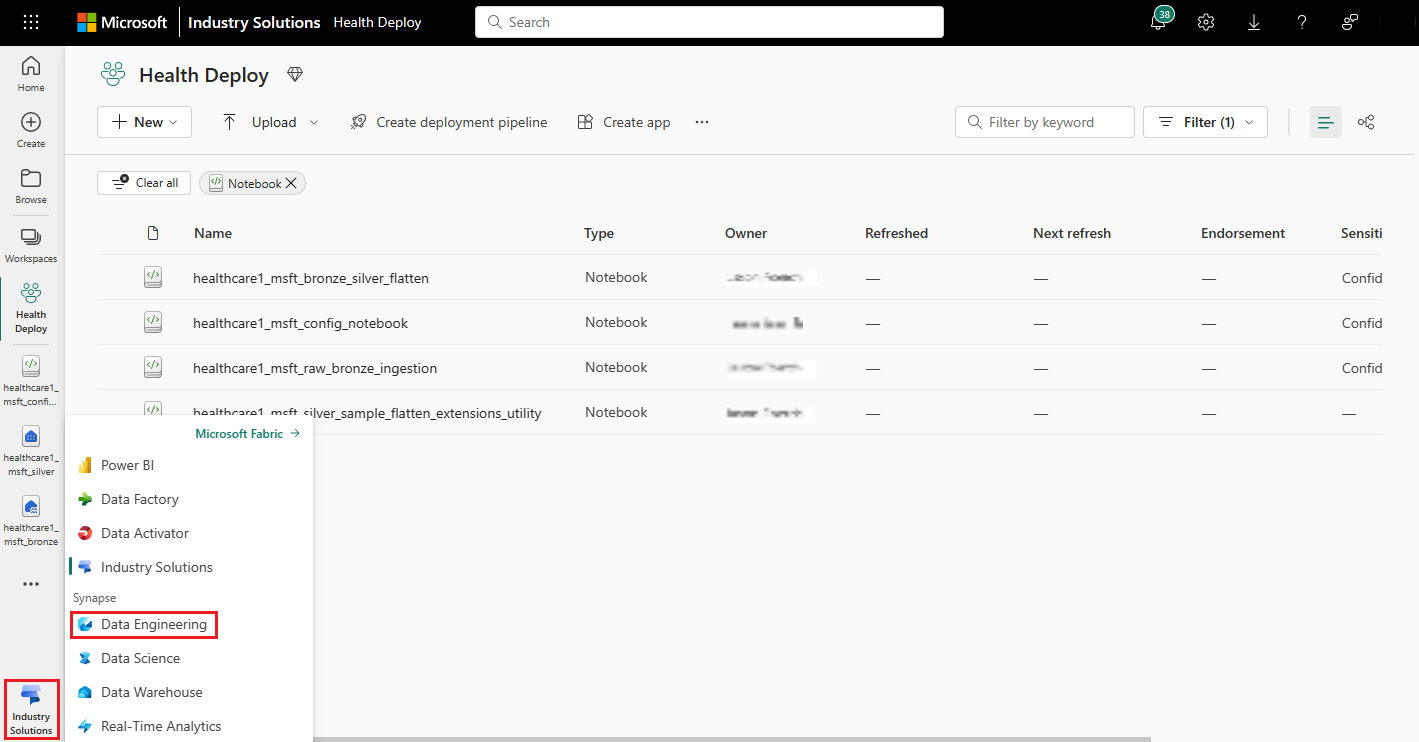
From the experience switcher in your Fabric environment, select Data Engineering.
On the Data Engineering home page, select the Environment tile to create a new environment.
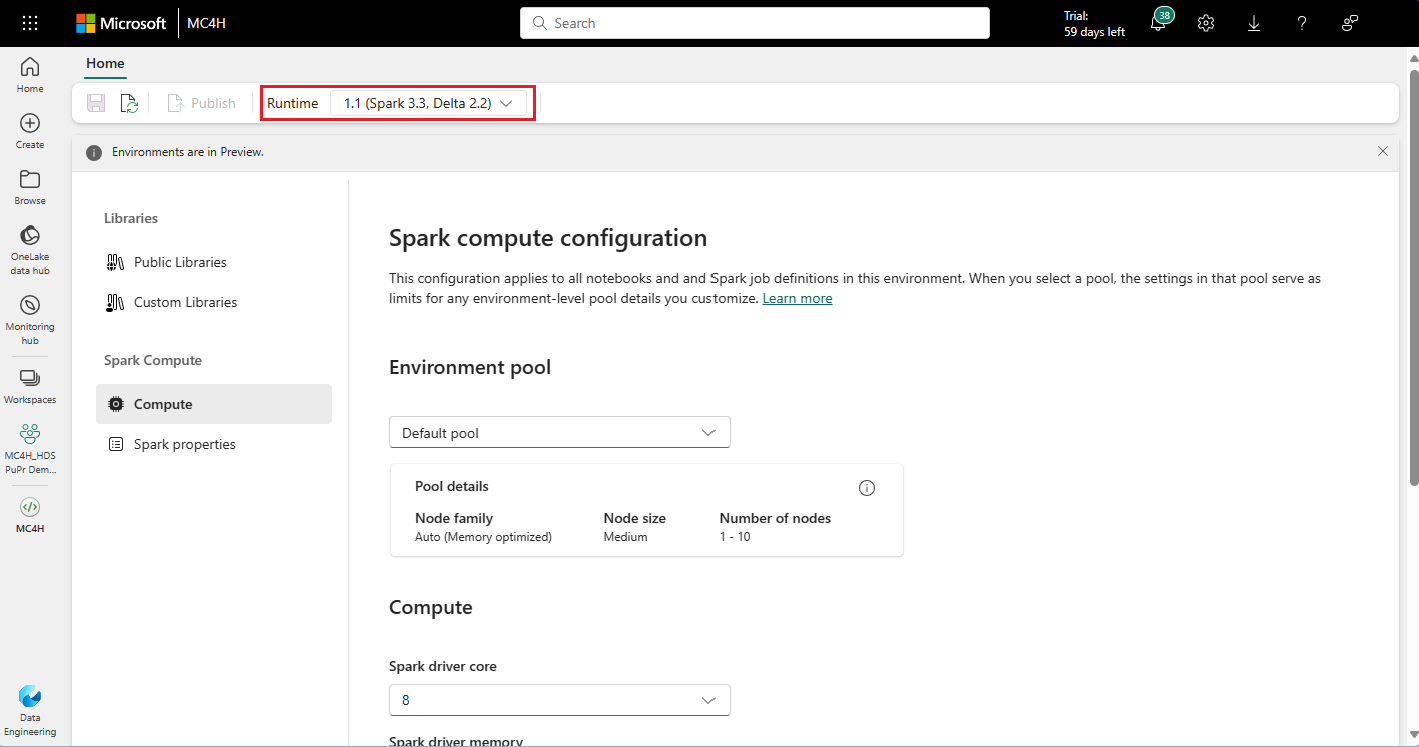
In the newly created environment, set the Runtime value to 1.1 (Spark 3.3, Delta 2.2).
In the navigation menu, select Custom Libraries, and then select Upload.
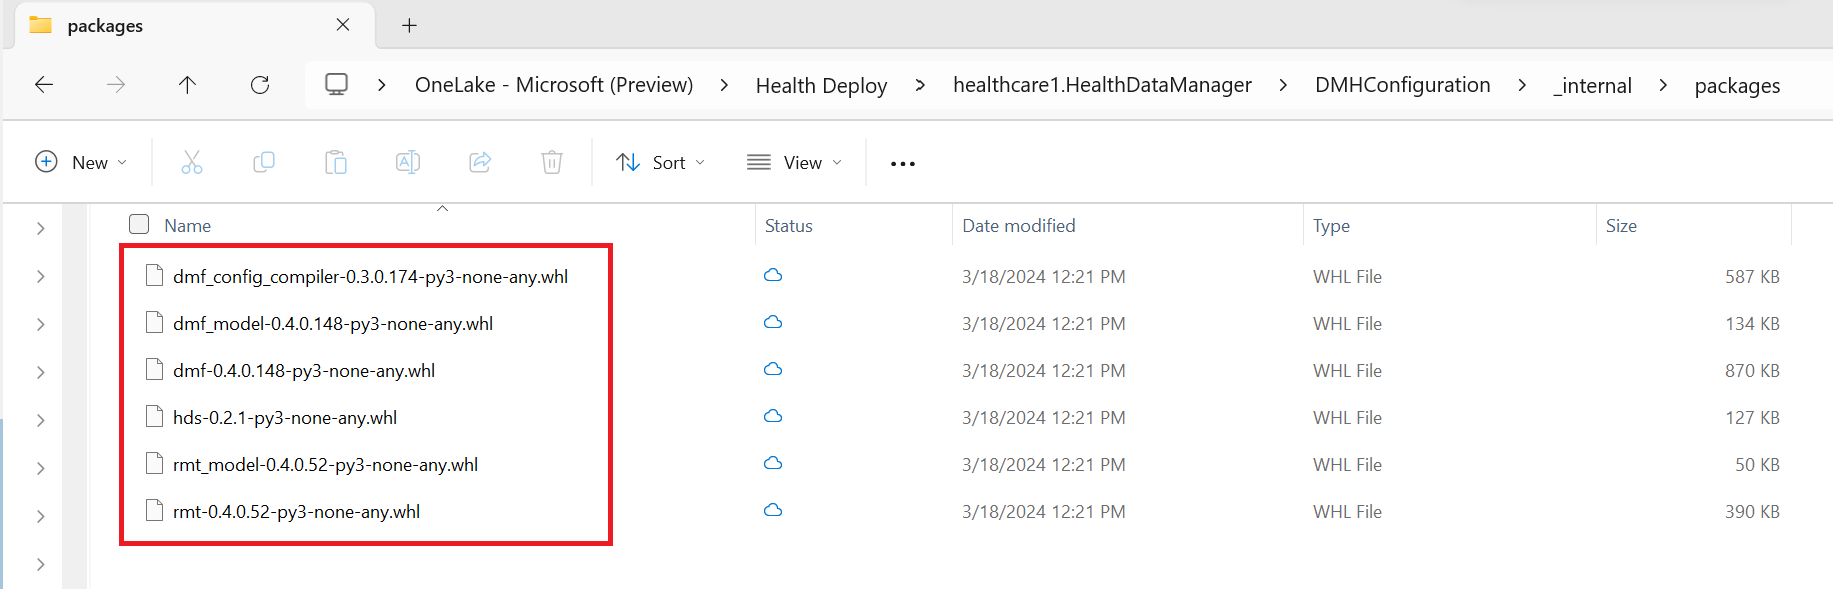
Use the OneLake file explorer or Azure Storage Explorer to go to the following folder path in your workspace:
<workspace-name>/healthcare#.HealthDataManager/DMHConfiguration/_internal/packagesUpload the following six wheel files:
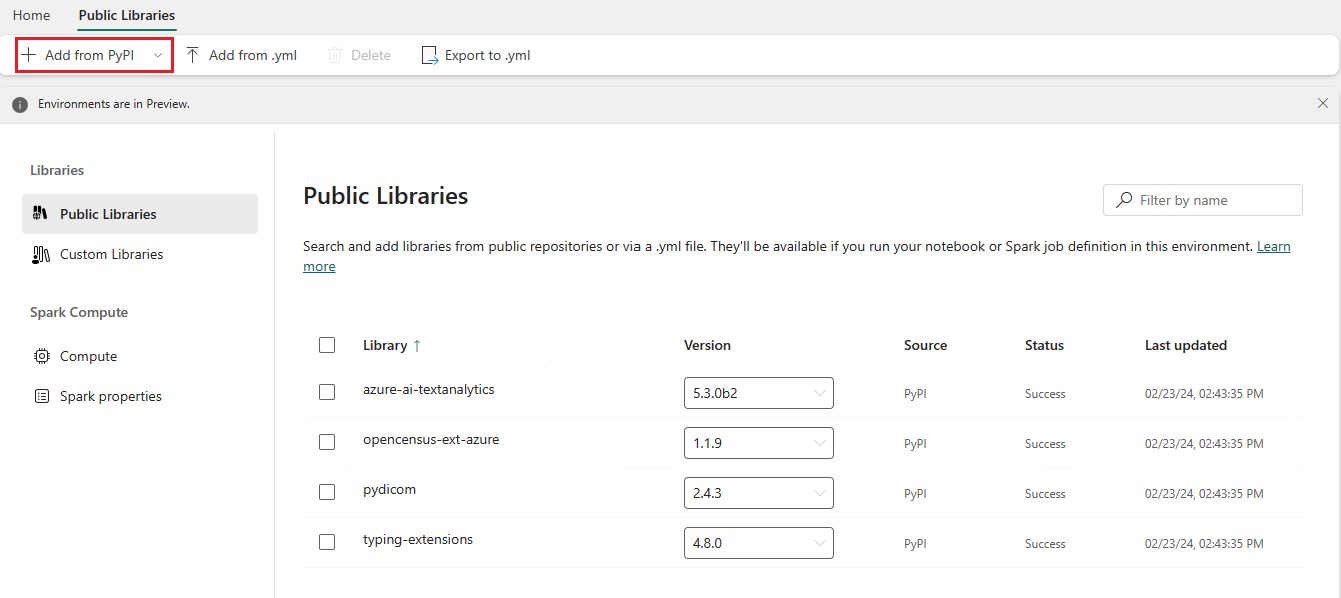
Go to Public Libraries and add the following packages from the PyPI public library source:
- azure-ai-textanalytics, version 5.3.0b2
- opencensus-ext-azure, version 1.1.9
- typing-extensions, version 4.8.0
Note
If you copy and paste the values, you might sometimes add hidden characters that prevent you from adding the feed libraries. To avoid this issue, start typing the names to get an autocomplete list.
Select Save, and then select Publish to apply the changes. Publishing can take a few minutes to complete.


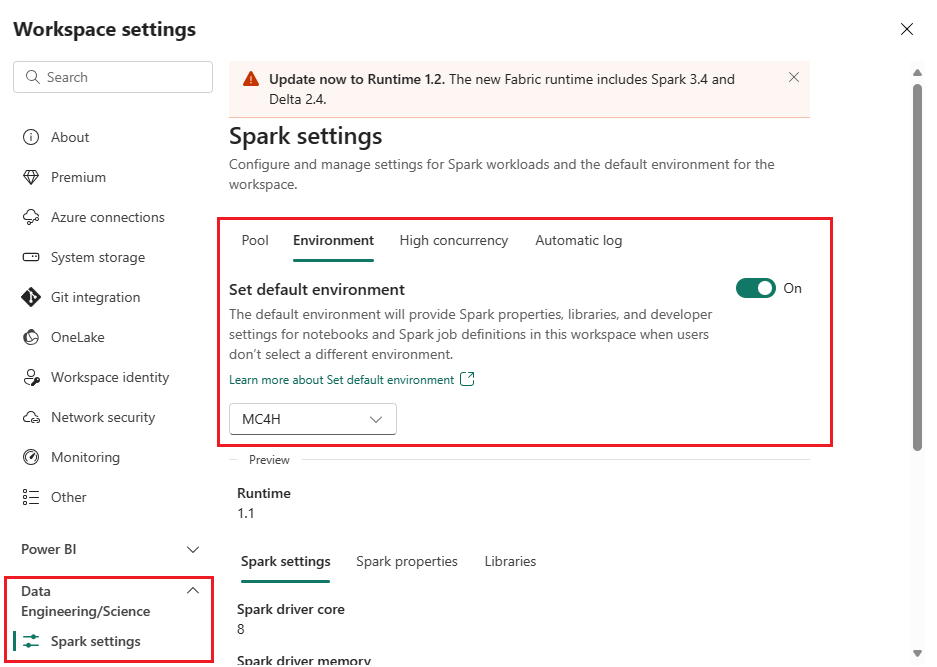
Update workspace settings
After publishing the library changes, follow these steps to update the workspace settings:
Go to your healthcare data solutions (preview) workspace and select Workspace settings.
On the workspace settings page, expand the Data Engineering/Science drop-down box, and select Spark settings.
On the Environment tab, slide the Set default environment toggle to On.
In the workspace drop-down box, select the environment you created earlier.
Select Save.

Update notebooks
After setting up the Fabric environment and uploading the wheel files, you can now update the notebook configuration. Comment out the first %run cell and the first %pip install cell in the following notebooks. You might see either all or only a subset of these notebooks, depending on the capabilities deployed in your environment:
- healthcare#_msft_fhir_export_service
- healthcare#_msft_raw_bronze_ingestion
- healthcare#_msft_bronze_silver_flatten
- healthcare#_msft_silver_ta4h
- healthcare#_msft_silver_omop
- healthcare#_msft_silver_ci_gold_flatten
Use the # character to comment out the cells. Here's an example:

Note
The healthcare#_msft_silver_omop notebook contains two additional %pip install cells that you need to comment out.
This execution pipeline doesn't currently include the DICOM data ingestion notebooks.
Create orchestration pipeline
After modifying the notebooks, you can now create a Fabric pipeline to orchestrate their execution.
From the Fabric experience switcher, select Data Engineering.
Select the Data pipeline tile to create a new pipeline. This action creates a blank data pipeline.
Add the healthcare data solutions (preview) notebooks as activities to this pipeline. For guidance, see Transform data by running a notebook.
When you add the notebooks as activities, they execute in the following sequence, depending on whether you opt to install the corresponding capability:
- healthcare#_msft_fhir_export_service (only required if you need to export FHIR data from your FHIR service)
- healthcare#_msft_raw_bronze_ingestion (required)
- healthcare#_msft_bronze_silver_flatten (required)
- healthcare#_msft_silver_ta4h (only required if you need to process unstructured data)
- healthcare#_msft_silver_omop (only required if you installed the OMOP analytics capability)
- healthcare#_msft_silver_ci_gold_flatten (only required if you installed the Dynamics 365 Customer Insights - Data preparation capability)