Patch and upgrade an AKS cluster
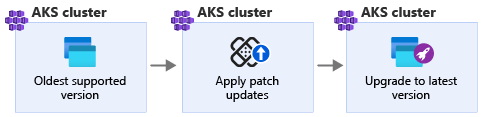
In the following exercise, you deploy an AKS cluster to represent the AKS cluster that the deployment team at Nod Publishers set up earlier. Then, you apply patch updates and upgrade the AKS cluster to the latest supported Kubernetes version.
Note
This exercise is optional. If you want to complete this exercise, you'll need to create an Azure subscription before you begin. If you don't have an Azure account or you don't want to create one at this time, you can read through the instructions so you understand the information that's being presented.
Create an AKS cluster
In Azure Cloud Shell, create a resource group using the
az group createcommand.az group create -l westus -n myResourceGroupCheck the current list of Kubernetes versions that AKS supports using the
az aks get-versionscommand.az aks get-versions -l westus -o tableYou should get a list similar to the one below:
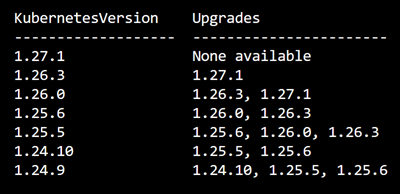
Find the oldest supported Kubernetes version from the list and store it inside a variable named KV.
KV=1.24.9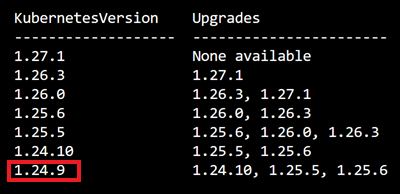
Get your resource group name and store in inside a variable named RG.
az group list -o table
RG=myResourceGroup
Create an AKS cluster using the
az aks createcommand.CLUSTERNAME=myAKSCluster az aks create -n $CLUSTERNAME -g $RG --kubernetes-version $KV --generate-ssh-keys
Upgrade the AKS cluster
Check for available cluster upgrades using the
az aks get-upgradescommand.az aks get-upgrades -n $CLUSTERNAME -g $RG -o tableYou'll see the versions available for upgrades are the next three supported Kubernetes versions from the current AKS cluster version.
For example:

Try to immediately upgrade to the latest supported Kubernetes version using the
az aks upgradecommand and replace[latest-version]with the latest Kubernetes version from the previous step.az aks upgrade -n $CLUSTERNAME -g $RG -k [latest-version]You should get an error message similar to the one below:
Operation failed with status: 'Bad Request'. Details: Upgrading Kubernetes version 1.18.17 to 1.21.1 is not allowed. Available upgrades: 1.18.19,1.19.9,1.19.11. Please see https://aka.ms/aks-supported-k8s-ver for version details.You can't skip minor versions when upgrading your AKS cluster. This means if you're running version 1.24.x, you can't immediately upgrade to version 1.26.x and above. However, you can skip patch version upgrades within a minor version.
Apply patches updates
Apply patch updates to AKS cluster using the
az aks upgradecommand and replace[next-patch-version]with the next patch version from the previous section.az aks upgrade -n $CLUSTERNAME -g $RG --no-wait -k [next-patch-version]Note
It's possible to apply upgrades only to the control plane in the AKS cluster or only to the nodes in the AKS cluster by including the optional parameters
--control-plane-onlyor--node-image-onlywhen running the upgrade command. If the optional parameters aren't included, both the control plane and nodes in the AKS cluster are upgraded.Confirm the patch upgrade using the
az aks showcommand.az aks show -n $CLUSTERNAME -g $RG -o table
Upgrade to the next minor version
Upgrade the AKS cluster to the next supported Kubernetes minor version using the
az aks upgradecommand and replace[next-minor-version]with the next minor version from the previous section.az aks upgrade -n $CLUSTERNAME -g $RG --no-wait -k [next-minor-version]Confirm the upgrade using the
az aks showcommand.az aks show -n $CLUSTERNAME -g $RG -o tableUpgrade the cluster to the latest stable Kubernetes version AKS supports using the
az aks upgradecommand and replace[latest-stable-version]with the latest stable version from the previous section.az aks upgrade -n $CLUSTERNAME -g $RG --no-wait -k [latest-stable-version]Confirm the upgrade using the
az aks showcommand.az aks show -n $CLUSTERNAME -g $RG -o table
Clean up your resources
In this module, you created resources using your Azure subscription. The following steps show you how to clean up these resources so you don't incur Azure costs after you complete this module.
- Navigate to the Azure portal.
- Select Resource groups > myResourceGroup.
- Select Delete resource group and enter the name of the resource group to confirm.
- Select Delete > Delete.