Exercise - Assign a policy to an Azure Kubernetes Services Cluster
You're now ready to configure Azure policies and initiatives for your Azure Kubernetes Service (AKS) cluster.
In this unit, you deploy a noncompliant pod and apply an Azure Policy that enforces the use of only trusted registries. Then, you deploy another noncompliant pod to see the effect of the Policy. You learn the steps to troubleshoot and see why the pods aren't being created. You also deploy the Kubernetes cluster pod security restricted standards for Linux-based workloads initiative.
Note
This exercise is optional. If you want to complete this exercise, you'll need to create an Azure subscription before you begin. If you don't have an Azure account or you don't want to create one at this time, you can read through the instructions so you understand the information that's being presented.
Deploy a noncompliant pod into the cluster
We begin by deploying an image directly from Docker Hub into the cluster. The first step is to sign into the cluster.
In Cloud Shell, sign into the AKS cluster.
az aks get-credentials -n videogamecluster -g videogamergRun the following code to create a simple-nginx pod from Docker Hub.
 cat <<EOF | kubectl apply -f -
 apiVersion: apps/v1
 kind: Deployment
 metadata:
   name: simple-nginx
   labels:
     app: nginx
 spec:
   selector:
     matchLabels:
       app: nginx
   template:
     metadata:
       labels:
         app: nginx
     spec:
       containers:
       - name: simple-nginx
         image: docker.io/library/nginx:stable
         resources:
           requests:
             cpu: 100m
             memory: 100Mi
           limits:
             cpu: 120m
             memory: 120Mi
         ports:
         - containerPort: 80
EOF
Run the following code to deploy the service to expose the deployment.
cat <<EOF | kubectl create -f -
 apiVersion: v1
 kind: Service
 metadata:
   name: simple-nginx
   labels:
     app: nginx
 spec:
   type: LoadBalancer
   ports:
   - port: 80
   selector:
     app: nginx
EOF
List all of the deployed services.
kubectl get servicesCopy the External-IP of the simple-nginx service and paste it in your browser to see if the service runs as expected.
If the external IP is listed as
<pending>, rerun the command. It takes time to allocate a public IP address for your workload.

Apply Azure Policy to the AKS cluster
You successfully deployed your workload on a cluster that doesn't have any policy enforcement on it. Now you can add a Policy to the cluster and see how that affects it.
Assign a policy
You want to ensure that only images from certain registries are allowed in the cluster. You need to create a new policy definition and then assign it to a scope. In this case, the scope is our videogamerg resource group. Policies can be created and assigned through the Azure portal, Azure PowerShell, or Azure CLI. This exercise takes you through creating a policy in the portal.
Find the built-in policy definitions for managing your cluster using the Azure portal with the following steps. In this case, you're applying the "only allowed images" policy.
Go to the Policy page in Azure portal.
In the left pane of the Azure Policy page, select Definitions.
From the Category dropdown list box, use Select all to clear the filter and then select Kubernetes.

Select the Kubernetes cluster containers should only use allowed images policy definition.
Select the Assign button.
Set the Scope to the resource group of the Kubernetes cluster you created, which in this case is the videogamerg resource group.
Enter the following into the Allowed container image regex field and select the Review + create button


.+\.azurecr\.io/.+$
- Select the Create button.
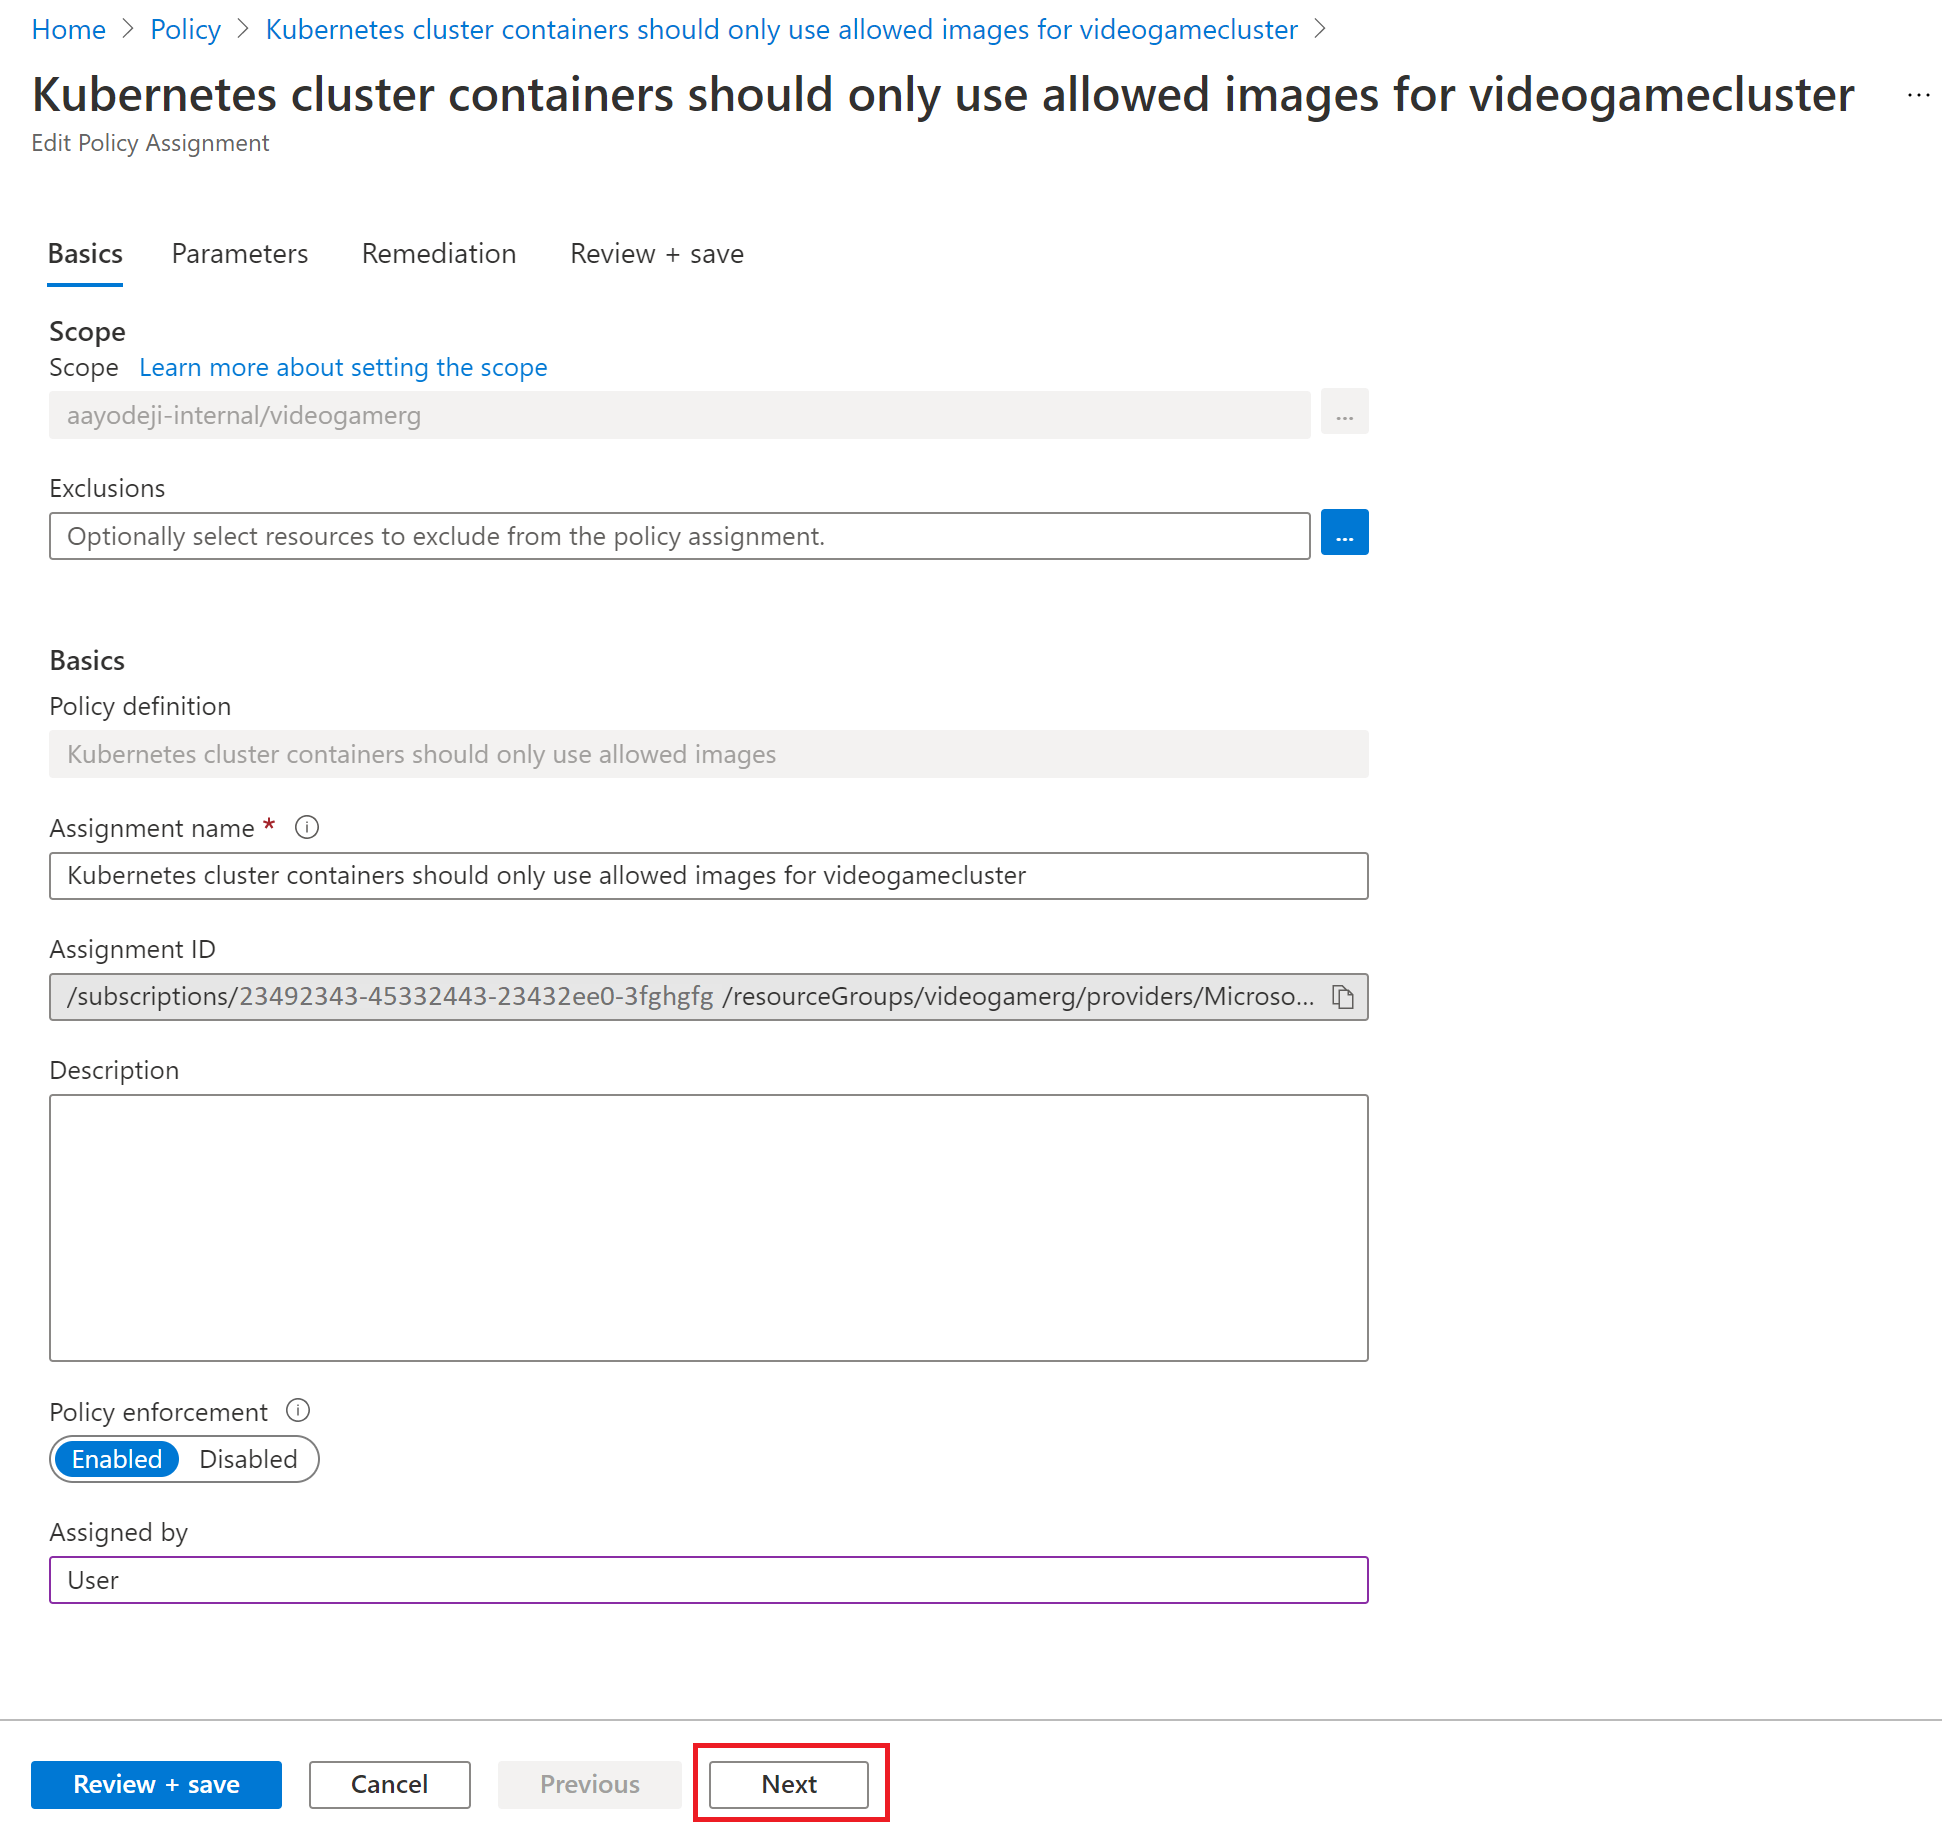
Now that the new policy is enabled, you can select Assignments to see the assigned Policy and select the Policy assignment you created.

Your policy assignment should look like the following image. The effect is set to deny by default. This means that only images hosted in Azure Container Registry can be deployed in the cluster.

Assign a policy initiative
Now that your policy is successfully assigned, you assign an initiative before you test the policies. An Azure Policy initiative is a collection of Azure Policy definitions, or rules, that are grouped together towards a specific goal or purpose. Azure initiatives simplify management of your policies by grouping a set of policies together, logically, as a single item.
Initiatives can be assigned the same way policies are assigned. Follow these steps to assign the "Kubernetes cluster pod security restricted standards for Linux-based workloads" initiative.
- Return to the Policy page in Azure portal.
- In the left pane of the Azure Policy page, select Definitions.
- From the Category dropdown list box, use Select all to clear the filter and then select Kubernetes.
- Select the Kubernetes cluster pod security restricted standards for Linux-based workloads initiative definition. Take some time to review the various policies that are a part of the initiative.
- Select the Assign button at the top-left corner of the screen.
- Set the Scope to the resource group of the Kubernetes cluster you created, which in this case is the videogamerg. Fill out the rest of the form as you did in the previous step and select Review + create.
- Select the Create button.
Here you can find the Policy assignment again by clicking on Policy and selecting Assignments. Clicking on the Policy assignment you created, shows that the effect is set to Audit in this case.
Test the Azure Policy
Now that the restricting Policy is assigned to the cluster, you can run a test to see if the Policy works. To demonstrate, let's create a new deployment and see if the deployment works. We begin by creating a new kubernetes manifest file and deploying it.
Important
Please note that the Policy assignments may take up to 30 minutes to take effect. Because of this delay, in the following steps the Policy validation may succeed and the deployment will not fail. If this happens, allow for additional time and retry your deployment.
You can check to see if the policy assignment is in effect by running the following command.
kubectl get ConstraintTemplates
You should see a result similar to the following output. If you see k8sazurecontainerallowedimages in the list, then you know your policy is in effect.
k8sazureallowedcapabilities              40m
k8sazureallowedseccomp                   20m
k8sazureallowedusersgroups               40m
k8sazureblockautomounttoken              40m
k8sazureblockdefault                     40m
k8sazureblockhostnamespace               40m
k8sazurecontainerallowedimages           40m
k8sazurecontainerallowedports            40m
k8sazurecontainerlimits                  40m
k8sazurecontainernoprivilege             40m
k8sazurecontainernoprivilegeescalation   40m
k8sazuredefenderblockvulnerableimages    40m
k8sazuredisallowedcapabilities           40m
k8sazureenforceapparmor                  40m
k8sazurehostfilesystem                   40m
k8sazurehostnetworkingports              40m
k8sazureingresshttpsonly                 40m
k8sazurereadonlyrootfilesystem           40m
k8sazureserviceallowedports              40m
k8sazurevolumetypes                      20m
Create another
nginxdeployment and service using the following code.cat <<EOF | kubectl create -f - apiVersion: apps/v1 kind: Deployment metadata: name: second-simple-nginx labels: app: second-nginx spec: selector: matchLabels: app: second-nginx template: metadata: labels: app: second-nginx spec: containers: - name: second-simple-nginx image: docker.io/library/nginx:stable resources: requests: cpu: 100m memory: 100Mi limits: cpu: 120m memory: 120Mi ports: - containerPort: 80 EOFCreate the service
cat <<EOF | kubectl create -f -
 apiVersion: v1
 kind: Service
 metadata:
   name: second-simple-nginx
   labels:
     app: second-nginx
 spec:
   type: LoadBalancer
   ports:
   - port: 80
   selector:
     app: second-nginx
EOF
Now we can check to see if the pod is created.
kubectl get pods
In the following output, even though it appears the deployment is created, the pod isn't created. The Policy you created blocked the deployment. However, the pod that was created before the Policy was assigned, wasn't stopped. The Policy also didn't prevent the service from getting created. If you try opening up the EXTERNAL-IP in a browser, you get no response, which further shows that the deployment wasn't successful.
NAME                            READY   STATUS    RESTARTS   AGE
simple-nginx-66d884c498-msbpc   1/1     Running   0          63m
Diagnose why the pod wasn't deployed
In the previous section, we noticed that the second pod wasn't deployed. In this section, we use the command line to diagnose why.
First, let's describe the deployment. We see that the ReplicaSet is created but the replicas failed to create.
kubectl get replicasetsYou should get an output similar to the following example:
NAME                             DESIRED   CURRENT   READY   AGE
second-simple-nginx-64969b4566   1         0         0       8m45s
simple-nginx-66d884c498          1         1         1       72m
Next, we describe the failed ReplicaSet. Copy the name of the ReplicaSet that starts with
second-simple-nginx, update the following command with that value and run the command.kubectl describe replicaset <ReplicaSet name>The output of the command shows that the replicas failed because of the Policy.
Warning FailedCreate 3m9s (x18 over 14m) replicaset-controller Error creating: admission webhook "validation.gatekeeper.sh" denied the request: [azurepolicy-container-allowed-images-bcfbd5e1e78f7c8b4104] Container image docker.io/library/nginx:stable for container second-simple-nginx has not been allowed.
Delete the deployment to prepare for the next step.
kubectl delete deployment second-simple-nginx
Redeploying the pods using an Azure Container Registry image
Now that you know that the Policy prevents images from Docker hub from being created in your cluster based on your Policy. Let's try redeploying the same workload using an image from the Azure Container Registry (ACR). In this section, you create an Azure Container Registry. Then you copy the nginx image from Docker hub to the new registry and attempt to redeploy the pod from your container registry. We use Azure CLI to create the container registry.
Head back to Cloud shell on Azure portal and enter the following commands to create a new container registry.
ACR_NAME=videogameacr$RANDOM
az acr create --name $ACR_NAME \
              --resource-group videogamerg \
              --sku Premium
Import the image from Docker Hub to your new container registry.
az acr import --name $ACR_NAME --source docker.io/library/nginx:stable --image nginx:v1Check to ensure the image was imported. You should see nginx in the list of results.
az acr repository list --name $ACR_NAMELink your AKS cluster with the container registry you created.
az aks update -n videogamecluster -g videogamerg --attach-acr $ACR_NAMENow create the deployment using your newly created container registry by running the following command.
 cat <<EOF | kubectl apply -f -
 apiVersion: apps/v1
 kind: Deployment
 metadata:
   name: second-simple-nginx
   labels:
     app: second-nginx
 spec:
   selector:
     matchLabels:
       app: second-nginx
   template:
     metadata:
       labels:
         app: second-nginx
     spec:
       containers:
       - name: second-simple-nginx
         image: ${ACR_NAME}.azurecr.io/nginx:v1
         resources:
           requests:
             cpu: 100m
             memory: 100Mi
           limits:
             cpu: 120m
             memory: 120Mi
         ports:
         - containerPort: 80
EOF
Get the EXTERNAL-IP so that you can test to see if the service is running in the cluster.
kubectl get pods
kubectl get services
Copy the external IP address and paste it in the browser. You see that the page now loads.


Use policies to enforce standards
In this unit, you saw how you to use policies to ensure that your cluster only allows Images from Azure Container Registry to be deployed. You also saw how to add one of the built-in initiatives that can help easily govern your cluster and make it more secure. However, you saw that the pod that was deployed before the Policy was assigned is still running. In the next unit, you see how we can check the compliance of pods running on the cluster.