Exercise - Create custom tables
In this unit, you learn how to:
- Create a Dataverse solution
- Create a custom table in Dataverse
Here, you create the table and columns needed to store the booking request information.
Create a solution
Follow these steps to create a new solution.
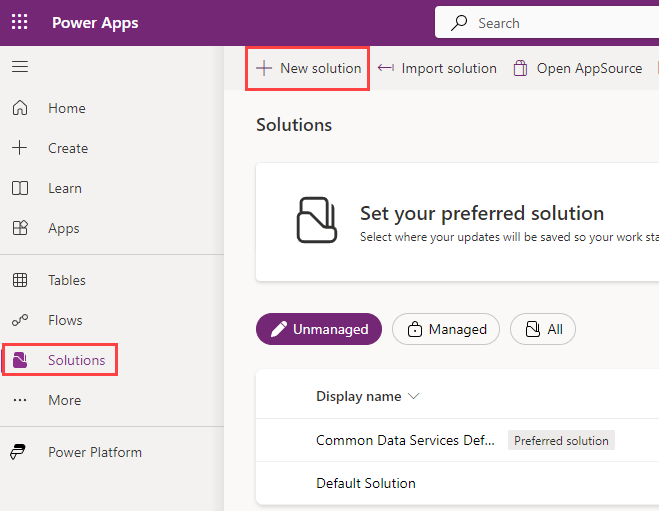
Navigate to the Power Apps maker portal.
Select your Environment.
In the left navigation pane, select Solutions, and select + New solution
Enter
Bookingsfor Display name.Select + New publisher.
Enter
Contosofor Display name.Enter
contosofor Name.Enter
contosofor Prefix.Select Save.
Select the Contoso (contoso) publisher.
Select Create.
Select Back to solutions in the top-left of the screen.

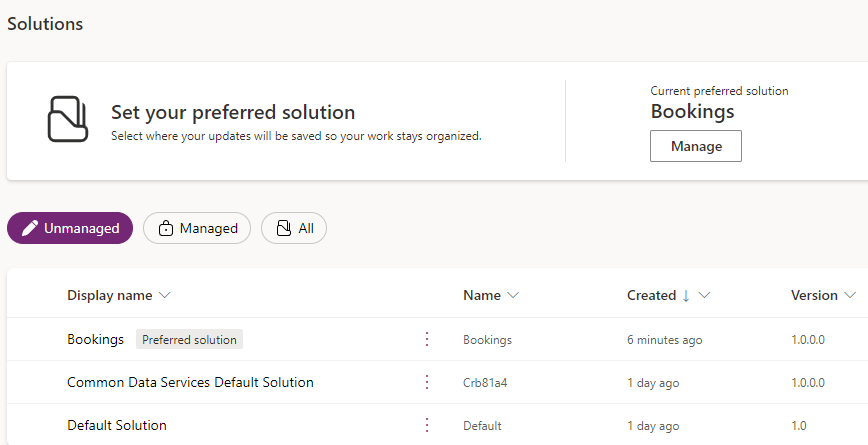
Set the preferred solution
All objects are automatically added to the preferred solution.
Under Solutions in the Maker portal, select Manage for Set your preferred solution.
Select Bookings (contoso) and select Apply.

Create the Real Estate Properties custom table
Follow these steps to create a new custom table in Dataverse for Real Estate Properties.
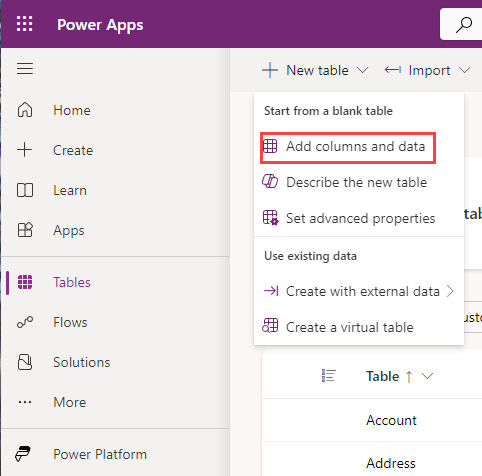
In the left navigation pane, select Tables, select New table, and then select Add columns and data.
Rename the table from New Table to
Real Estate Property.Change the name of the column called New Column to
Property Name.Select the + New column button to add a new column in the columns and data pane.
In the New column pane, enter the following values, and then select Save:
- Display name:
Asking Price - Data type: Currency
- Display name:
Let's add another column in the columns and data pane. Again, select the + New column button to add a new column.
In the New column pane, enter the following values, and then select Save:
- Display name:
Street - Data type: Single line of text (this value is the default)
- Display name:
Select the + New column button to add a new column in the columns and data pane.
In the New column pane, enter the following values, and then select Save:
- Display name:
City - Data type: Single line of text (this value is the default)
- Display name:
Select the + New column button to add a new column in the columns and data pane.
In the New column pane, enter the following values, and then select Save:
- Display name:
Bedrooms - Data type: Choice
- Display name:
Create the choice values:
- Under Choices you see two entry fields titled Label and Value. Enter 1 under the label. Power Apps assigns a value automatically but you can change the value to 1.
- Select + New choice and make 2 the new entry for Label and 2 for Value.
- Select + New choice and make 3 the new entry for Label and 3 for Value.
- Select + New choice and make 4 the new entry for Label and 4 for Value.
- Select + New choice and make 5 the new entry for Label and 5 for Value.
- Select Save.
Add another column by selecting the + button again in the columns and data pane.
Select the + New column button to add a new column in the columns and data pane.
In the New column pane, enter the following values, and then select Save:
- Display name:
Bathrooms - Data type: Choice
- Display name:
Create the choice values:
- Under Choices you see two entry fields titled Label and Value. Enter 1 under the label. Power Apps assigns a value automatically but you can change it to 1.
- Select + New choice and make 2 the new entry for Label and 2 for Value.
- Select + New choice and make 3 the new entry for Label and 3 for Value.
- Select + New choice and make 4 the new entry for Label and 4 for Value.
- Select + New choice and make 5 the new entry for Label and 5 for Value.
- Select Save.
Add another column by selecting the + button again in the columns and data pane.
In the New column pane, enter the following values, and then select Save:
- Display name:
Client - Data type: Lookup
- Related Table:
Contact
- Display name:
At the bottom of the pane, select Create.
Under Real Estate Property columns and data, enter the following test data:
- Property Name:
1100 High Villas - Asking Price:
250,000 - Bathrooms:
3 - Bedrooms:
2 - City:
Redmond - Street:
Main Avenue - Client: Select any contact
- Property Name:

Create the Bookings table
Follow these steps to create a new custom table in Dataverse for Real Estate Property Bookings.
In the left navigation pane, select Tables, select New table, and then select Add columns and data.
Rename the table
Booking Request.Change the name of the column called New Column to
Booking Name.Select the + New column button to add a new column in the columns and data pane.
In the New column pane, enter the following values, and then select Save:
- Display name:
Property - Data type: Lookup
- Related Table:
Real Estate Property
- Display name:
Add another column by selecting the + button again in the columns and data pane.
In the New column pane, enter the following values, and then select Save:
- Display name:
Viewer Name - Data type: Single line of text
- Display name:
Add another column by selecting the + button again in the columns and data pane.
In the New column pane, enter the following values, and then select Save:
- Display name:
Viewer Email - Data type: Single line of text
- Format: Email
- Display name:
Add another column by selecting the + button again in the columns and data pane.
In the New column pane, enter the following values, and then select Save:
- Display name:
Booking Date - Data type: Date and time
- Display name:
Add another column by selecting the + button again in the columns and data pane.
In the New column pane, enter the following values, and then select Save:
- Display name:
Notes - Data type: Multiple lines of text
- Display name:
Select the + New column button to add a new column in the columns and data pane.
In the New column pane, enter the following values:
- Display name:
Decision - Data type: Choice
- Display name:
Create the choice values:
- Under Choices you see two entry fields titled Label and Value. Enter
Undecidedunder the label. Power Apps assigns a value automatically, but you can change it to 1. - Select + New choice and make
Acceptedthe new entry for Label and 2 for Value. - Select + New choice and make
Declinedthe new entry for Label and 3 for Value. - Designate Undecided as the Default choice.
- Select Save.
- Under Choices you see two entry fields titled Label and Value. Enter
At the bottom of the pane, select Create.