Exercise - Prepare development environment
In this exercise, you'll sign up for a Power Apps Developer Plan and learn how to create Power Platform environments and configure their settings.
Task 1: Sign up for the developer plan
Navigate to Power Apps Developer Plan and select Add a dev environment.
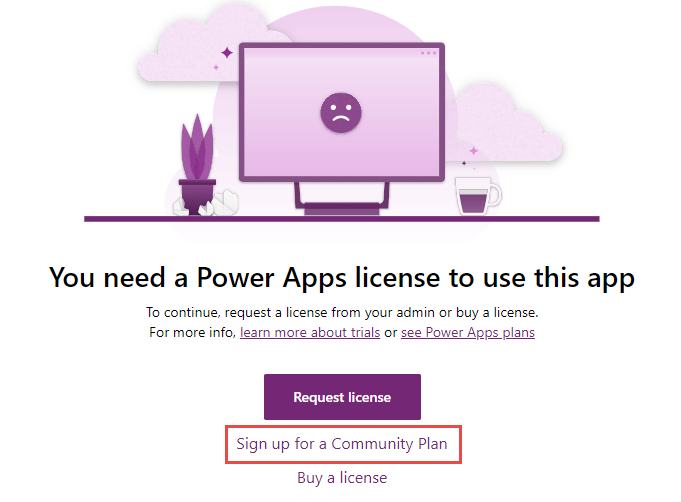
Select Sign up for a Community Plan.
Select your region and then Accept.
Navigate to Power Platform admin center and select Environments.
You should see the newly created environment.
You'll now create a new developer environment. Select + New environment button.
Enter Dev for Name, select your region, select Developer for Type, and then select Next.
Select a language, select a currency, select Yes for Deploy sample apps and data, and then select the here button under the URL.
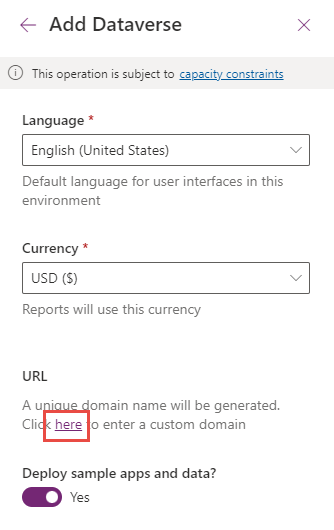
You may provide your own unique URL here. Providing your own URL will make it easier to remember. Select Save

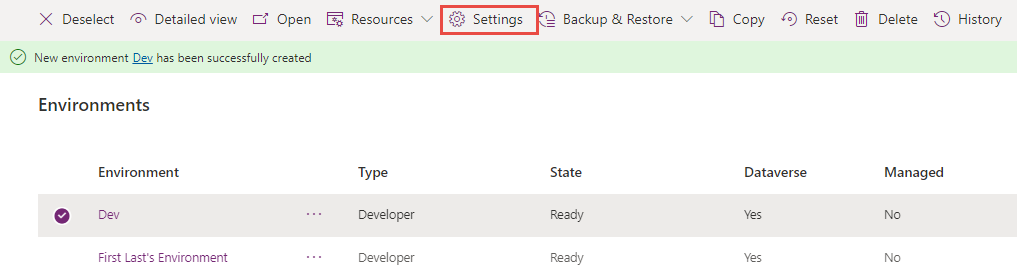
You should now see your new environment listed with the list of environments.
Don't navigate away from this page.


Task 2: Review and configure environment settings
Wait until the environment state changes to Ready. You should see a notification when your new environment is ready.
Select the Dev environment you created and then select the environment Settings button.
Take a minute or two to review all the different environment settings available to you.
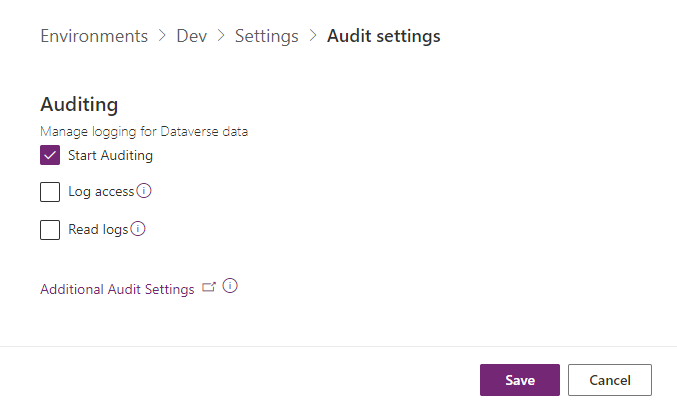
Expand the Audit and logs section and select Audit settings.
Check the Start auditing checkbox and select Save.
Go back to the environment settings.
Expand the Product section and select Features.
Scroll down to the Power Apps component framework for canvas apps section.
Turn On Allow publishing of canvas apps with code components.
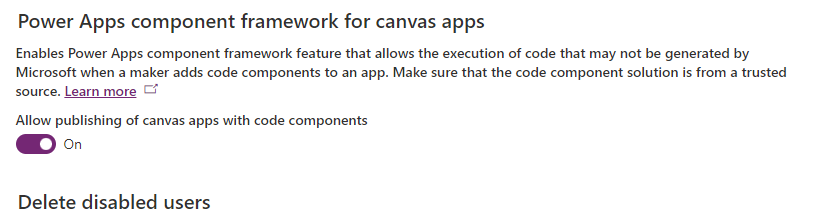
Scroll down and select Save.


Task 3: Run sample Power Apps from maker portal
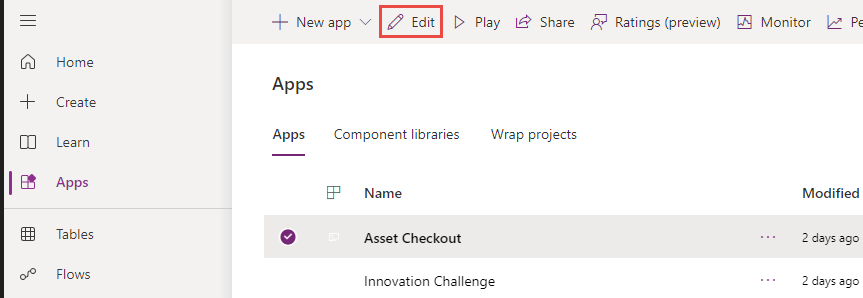
Navigate to Power Apps maker portal and select the Dev environment you created.
Select Apps, select the Asset Checkout model-driven application, and then select Edit.
Take a few minutes to review the different areas of the model-driven app designer.
After you're done, select the <- Back button.
You should now be back on the list of apps. Select the Asset Checkout application and then select Play to launch the application.
Take some time to familiarize yourself with the user experience of the model-driven application if you're new to model-driven applications.
Close the model-driven application.

Task 4: Import and review the Creator Kit
Download the Creator Kit Core solution from here and save it to your machine.
Download the Creator Kit Reference (MDA) from here and save it to your machine.
Navigate to Power Apps maker portal and select the Dev environment you created.
Select Solutions and then select the Import solution button.
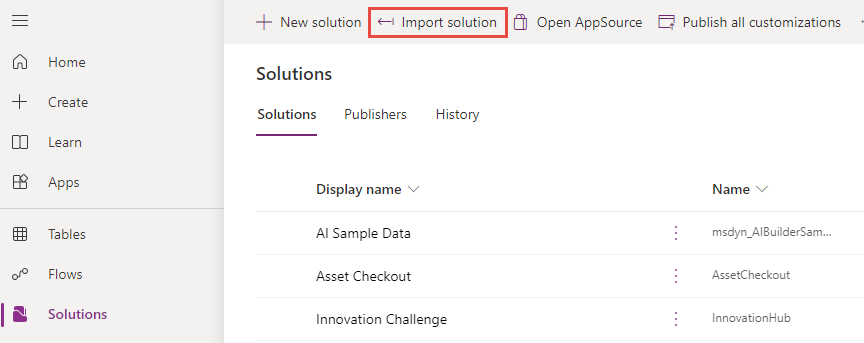
Select the Browse button.
Select the CreatorKitCore solution you downloaded and then select Open.
Select Next.
Select Import and wait for the solution import to complete. You should see a notification when the import is completed.
After the solution import completes, select Solutions and then select the Import solution button again.
Select the Browse button.
Select the CreatorKitReferencesMDA solution you downloaded and then select Open.
Select Next.
Select Import and wait for the solution import to complete. You should see a notification when the import is completed.
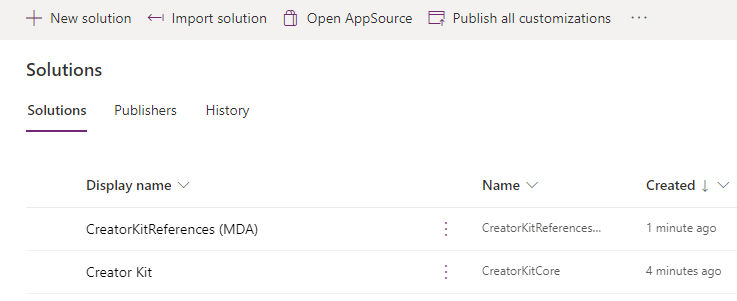
You should now have both solutions you imported in listed in the solutions view.
Select Apps and launch the Creator Kit Reference App.
Select Allow if prompted for permission.
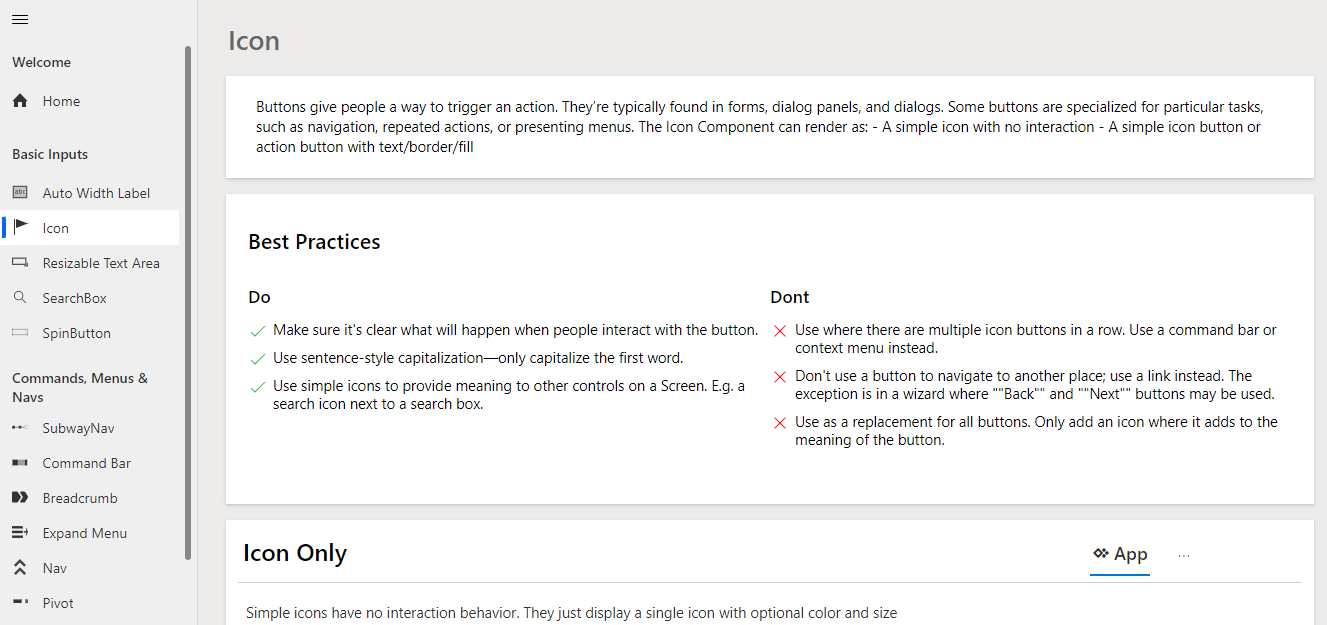
The application showcases several PCF components. Go to the Basic category and select Icon.
Read the description and best practices.
See the different use cases for the icon components.
Take a few minutes to review some of the other components.
You can review the code for different components on GitHub.

