Exercise - Deploy MSIX app attach
As a senior administrator working for Contoso, you've been asked to adopt the application delivery method and to use MSIX app attach in your Azure Virtual Desktop environment.
In this exercise, you'll add and test MSIX app attach.
Note
To complete this exercise, you need to have an active Azure subscription and run an Azure Virtual Desktop environment. You can identify all the prerequisites for this exercise in the previous unit of this module, "Manage MSIX app attach."
Add MSIX app attach in Azure Virtual Desktop
Open the Azure portal. In Search resources, services and docs (G+I), enter and then select Azure Virtual Desktop.
On the Azure Virtual Desktop page, select Host pools from the left menu.
On the Azure Virtual Desktop | Host pools page, select the desired host pool.
On the your host pool page, on the left menu, select MSIX packages under the Manage section.
On the your host pool | MSIX packages page from the toolbar, select + Add.
In the Add MSIX package window, in the MSIX image path field, add the UNC path of your MSIX image.
Note
If you're storing an MSIX image in Azure Files, refer to the previous unit in this module, "Manage MSIX app attach," to retrieve the UNC path from the URL location of the MSIX image.
After you add the UNC path of your MSIX image, provide the following information:
Field Value MSIX image path The UNC path of the MSIX image. MSIX package Select the MSIX package loaded from the MSIX image. Package applications The names of the MSIX applications loaded from the MSIX package are already selected. Display name Enter a descriptive name. Version The version number retrieved from the MSIX package is already selected. Registration type Select On-demand. State Select Active. 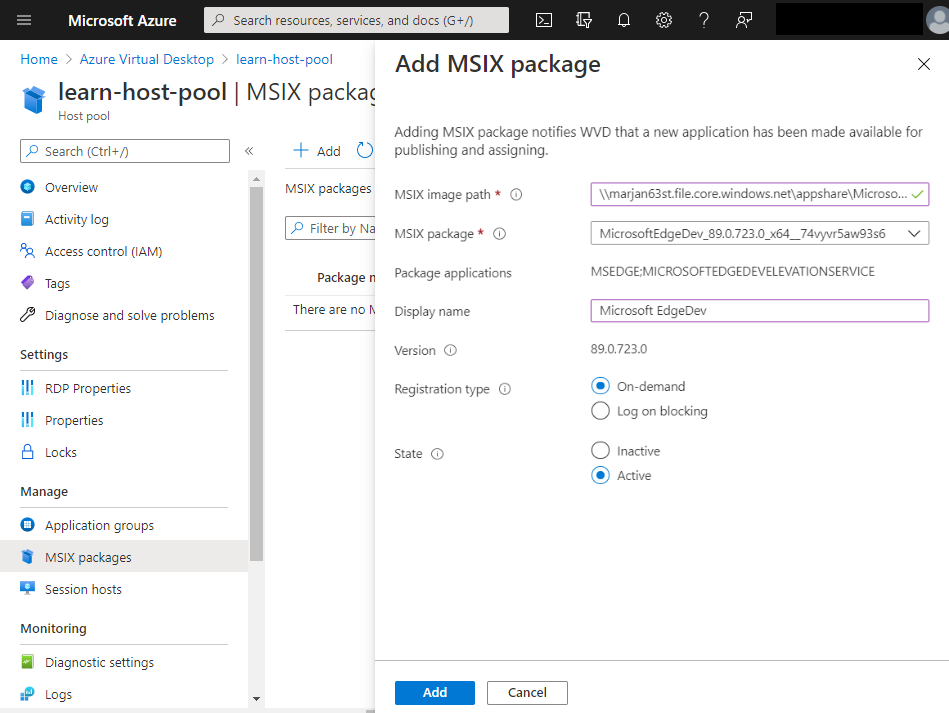
Select Add to add the MSIX image to the host pool.
Publish MSIX app attach to a desktop application group
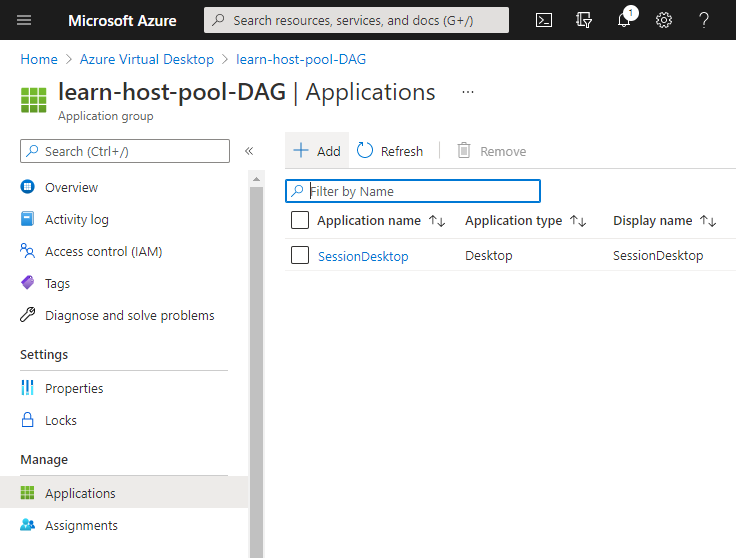
On the Azure Virtual Desktop page, on the left menu, select Application groups.
On the Azure Virtual Desktop | Application groups page, select the desired application group.
On the application group page, on the left menu, select Applications under the Manage section.
On the your application group | Applications page from the toolbar, select + Add.
In the Add application window, provide the following information:
Field Value Application source Select MSIX package. MSIX package Select one of the MSIX packages. Application name Enter a descriptive name. Display name Enter a descriptive name. Description Provide a description of the MSIX package. 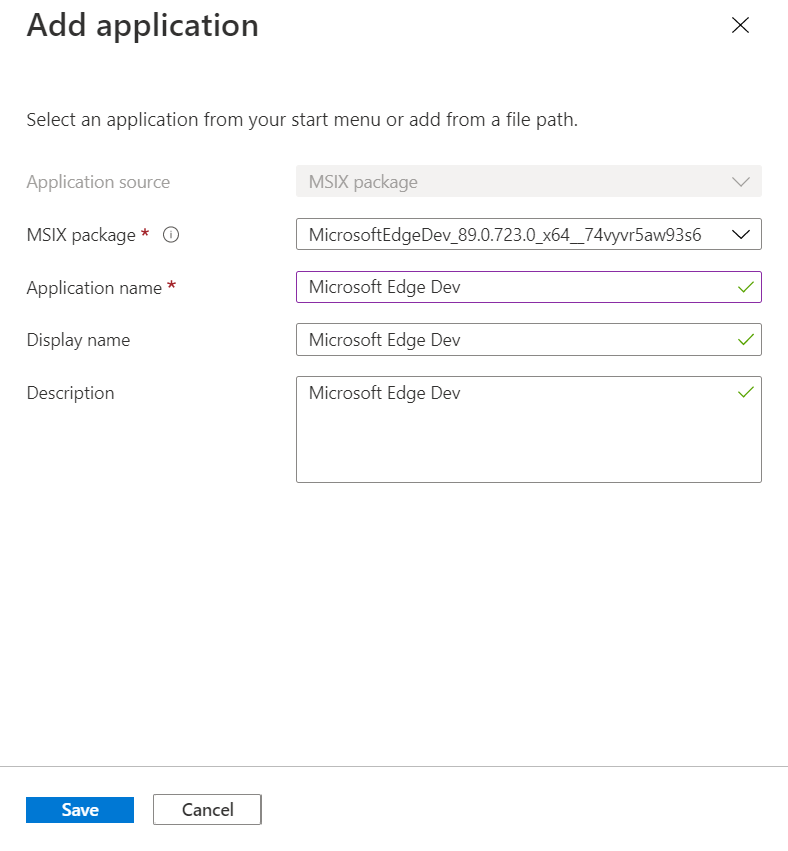
Select Save to add the MSIX image to the application group.
Assign users to an application group
- On the Azure Virtual Desktop page, on left menu, select Application groups.
- On the Azure Virtual Desktop | Application groups page, select the desired application group.
- On the application group page, on the left menu, select Assignments under the Manage section.
- On the your application group | Assignments page, from the toolbar, select + Add.
- On the Select Microsoft Entra users or user groups page, select your users or groups, and then choose Select.
Publish MSIX app attach to a RemoteApp group
On the Azure Virtual Desktop page, on the left menu, select Application groups.
On the Azure Virtual Desktop | Application groups page, from the toolbar, select + Add.
In Create an application group, in Basics, provide the following information:
Field Value Subscription Select your Azure subscription. Resource Group Select your existing resource group that contains your host pool. Location The region is automatically selected from the location of the host pool. Application group type Enter RemoteApp. Application group name Provide a descriptive name, such as ContosoApps. Select Next: Applications >.
On the Applications tab, select + Add applications. Then provide the following information in the Add application grid:
Field Value Application source Select MSIX package. MSIX package Select one of the packages that you added to your host pool. MSIX application Select one of the MSIX applications. Application name Provide a descriptive name. Display name Provide a descriptive name. Description Provide a description of the application. Icon path You can add a path to your custom icon. Icon index Add an index of the icon. Show in web feed Select Yes. Select Save to add the application, and then select Next: Assignments >.
On the Assignment tab, select + Add Microsoft Entra users or user groups. Select one or multiple users or groups from Microsoft Entra ID, and then choose Select.
Select Next: Workspace >.
On the Workspace tab, select Yes for Register application group. Then, from the Register application group drop-down menu, select one of the RemoteApp groups.
Select Next: Tags >.
On the Tags tab, provide Name and Value information for the tags. Then select Next: Review + create >.
After the validation is complete, select Create to finish creating the RemoteApp group.
Wait for the deployment to finish.
Test MSIX app attach
From any computer, open a browser and then open the Remote Desktop web client.
Sign in with the credentials of the user who has been assigned access to the application group that contains MSIX app attach.
Select the SessionDesktop icon and sign in with the credentials of the user.
Note
You might be prompted with a security warning to "allow local resources." Select which local resources you want to allow the remote computer to access, and then select Allow.
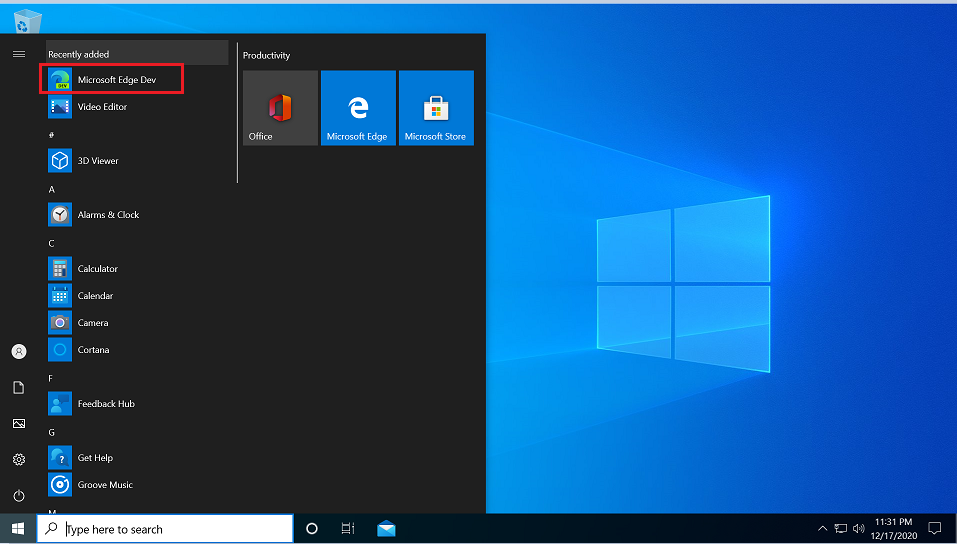
After you remotely access the virtual machine, open the Start menu and notice the shortcut of the published app.
Close the Remote Desktop session.