Run a C# program in Visual Studio
How to run a program depends on what you start from, the type of program, and whether you want to run under the debugger. In the simplest case, to build and run an open project in Visual Studio:
- Press F5, choose Debug > Start with debugging from the Visual Studio menu, or select the green Start arrow and project name on the Visual Studio toolbar.
- Or, to run without debugging, press Ctrl+F5 or choose Debug > Start without debugging from the Visual Studio menu.


Start from a project
You can run a C# project (.csproj file) if it's a runnable program. If the project contains a C# file with a Main method, and its output is an executable or .exe file, it will probably run if it builds successfully. Newer versions of C# don't require a Main method; instead, program executions starts with top-level statements. See Programs without Main methods. If a project has no Main method and no top-level statements, then it might be a class library. If so, it's not runnable on its own, but it can be referenced by other projects.
If your program code is already in a Visual Studio project, open the project. To do so, you can double-click or tap on the .csproj file in Windows File Explorer, or choose Open a project in Visual Studio, browse to find the .csproj file, and select the file.
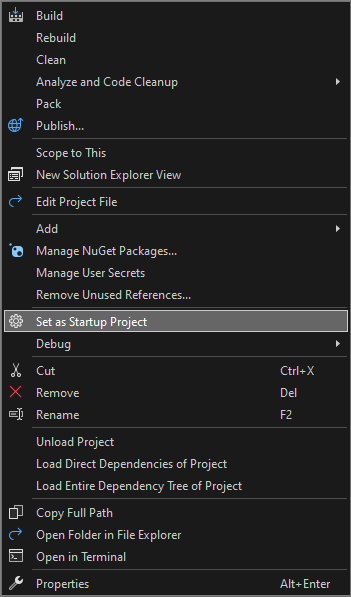
After the project loads in Visual Studio, if your Visual Studio solution has more than one project, make sure to set the project with the
Mainmethod as the startup project. To set the startup project, right-click on the project name or node in Solution Explorer and choose Set as Startup Project from the context menu.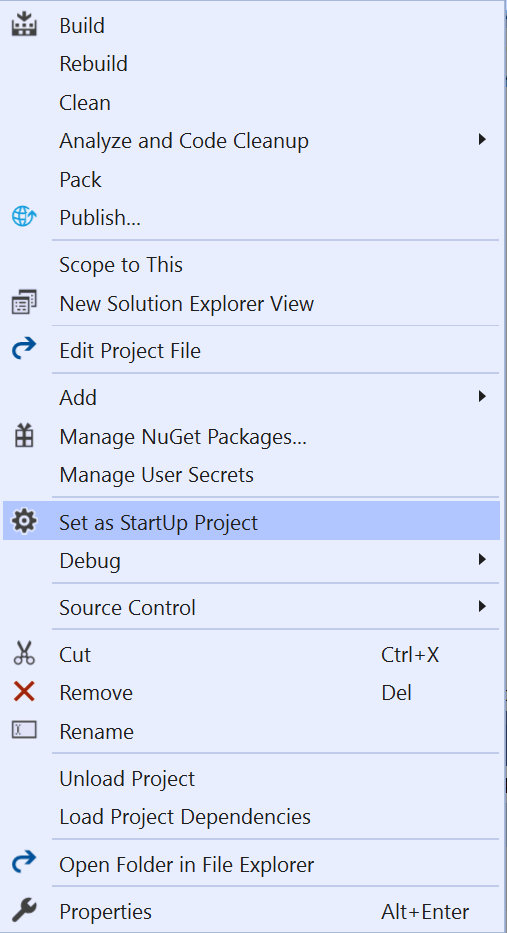
To run the program, press Ctrl+F5, select Debug > Start without debugging from the top menu, or select the green Start button.
Visual Studio tries to build and run your project. At the bottom of the Visual Studio screen, the build output appears in the Output window, and any build errors appear in the Error List window.
If the build succeeds, the app runs as appropriate for the type of project. Console apps run in a terminal window, Windows desktop apps start in a new desktop window, and web apps run in a browser hosted by IIS Express.
Start from code
If you start from a code listing, code file, or small number of files, first make sure the code is a runnable program from a trusted source. Any app with a Main method is probably a runnable program, but with the current version of C#, programs without Main methods with top-level statements can also run. You can use the Console Application template to create a project to work with the app in Visual Studio.
Code listing for a single file
- Start Visual Studio, choose Create a new project, and choose the C# Console App project.
- Replace all the code in the project .cs file with the contents of your code listing or file. If the code you want to use is on the web, or in a single file, it might be easiest to select the code, copy it to the clipboard, and paste it into a code file in the Visual Studio project.
- Rename the project .cs file to match your code file name.
Several code listings or files on disk
- Start Visual Studio, and create a new project of the appropriate type. Use the C# Console App if you're not sure.
- In the new project, replace all the code in the project code file with the contents of your first code listing or file.
- Rename the project code file to match your code file name.
- For each remaining code file:
- Right-click the project node in Solution Explorer and choose Add > Existing Item, or select the project and press Shift+Alt+A.
- Browse to and select the code file to import it into the project.
Several files in a folder
If you have a folder with many files, first check for a project or solution file. Programs that Visual Studio creates have project and solution files. In Windows File Explorer, look for files with the .csproj or .sln extension. Double-click the .csproj file to open it in Visual Studio. See Start from a Visual Studio solution or project.
If the code is from another development environment, there's no project file. Open the folder by choosing Open > Folder in Visual Studio. See Develop code without projects or solutions.
Start from a GitHub or Azure DevOps repo
If the code you want to run is in a GitHub or Azure DevOps repo, you can use Visual Studio to open the project directly from the repo. See Open a project from a repo.
Run the program
To start building the program, press the green Start button on the Visual Studio toolbar, or press F5 or Ctrl+F5. Using the Start button or F5 runs the program under the debugger.
Visual Studio attempts to build and run the code in your project. If a build doesn't succeed, see the following sections for some ideas on how to get the project to build successfully.
Troubleshooting
Your code might have errors. Or the code might be correct, but maybe it depends on missing assemblies or NuGet packages, or targets a different version of .NET. In those cases, you might be able to easily fix the build.
Add references
To build properly, the code must be correct and have the right references to libraries or other dependencies. Red squiggly underlines in code or entries in the Error List show errors even before you compile and run the program. If the errors relate to unresolved names, you probably need to add a reference or a using directive, or both. If the code references any missing assemblies or NuGet packages, you need to add those references to the project.
Visual Studio tries to help you identify missing references. When a name is unresolved, a light bulb icon appears in the editor. Select the light bulb to see suggestions on how to fix the issue. Fixes might be to:
- Add a using directive.
- Add a reference to an assembly.
- Install a NuGet package.
Add a using directive
Here's an example of a missing using directive. You can add using System; to the start of the code file to resolve the unresolved name Console:
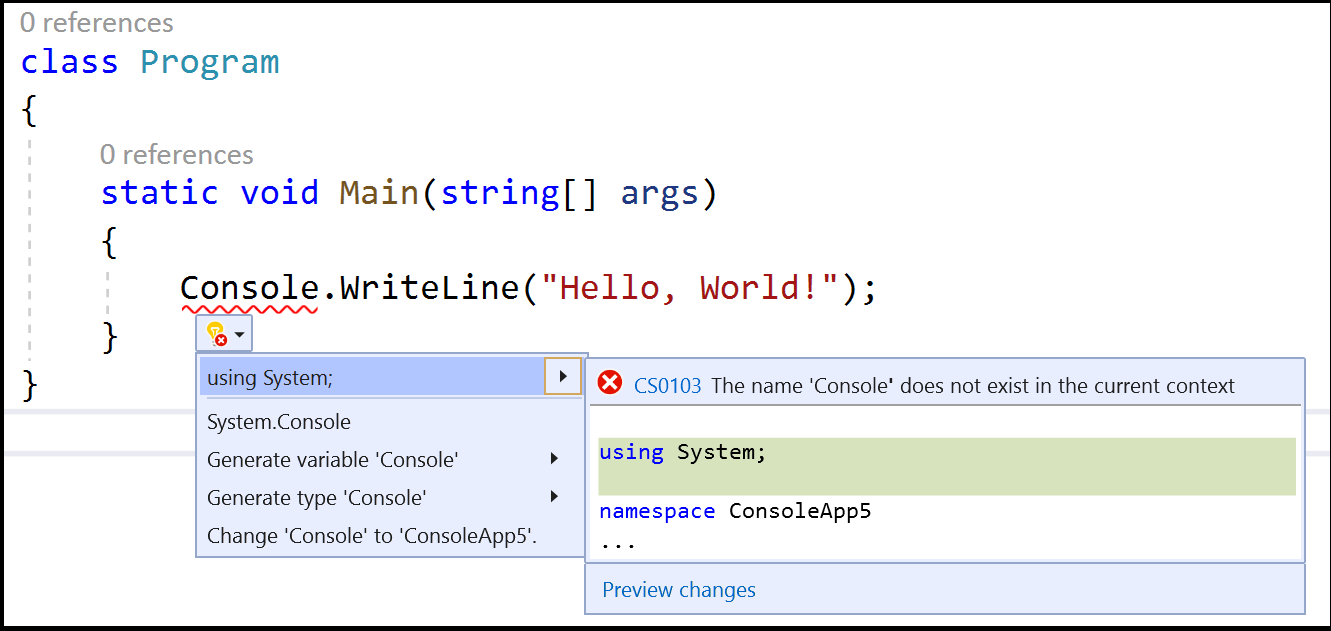

More recent of C# support implicit using directives for some commonly used namespaces, so if you chose that option when creating a project, you don't need them.
Add an assembly reference
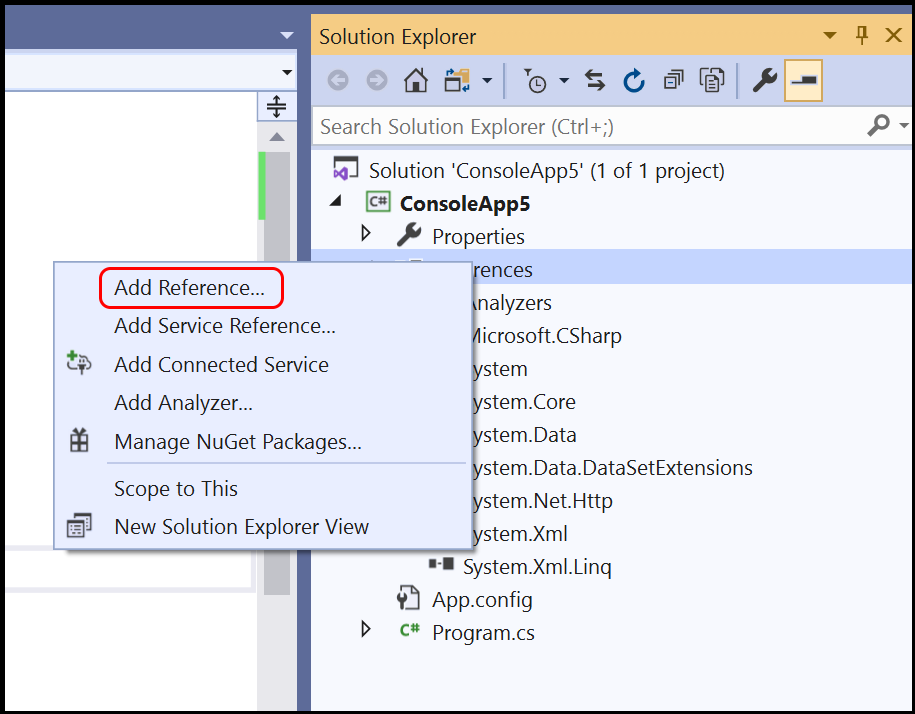
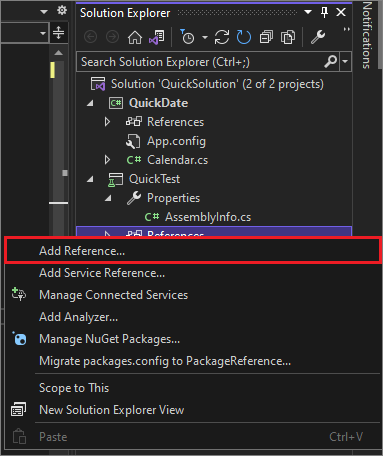
.NET references can be assemblies or NuGet packages. In source code, the publisher or author usually explains what assemblies the code requires and what packages it depends on. To add a reference to a project manually, right-click the References node in Solution Explorer and choose Add Reference. In the Reference Manager, locate and add the required assembly.
You can find assemblies and add references by following the instructions in Add or remove references by using the Reference Manager.
Add a NuGet package
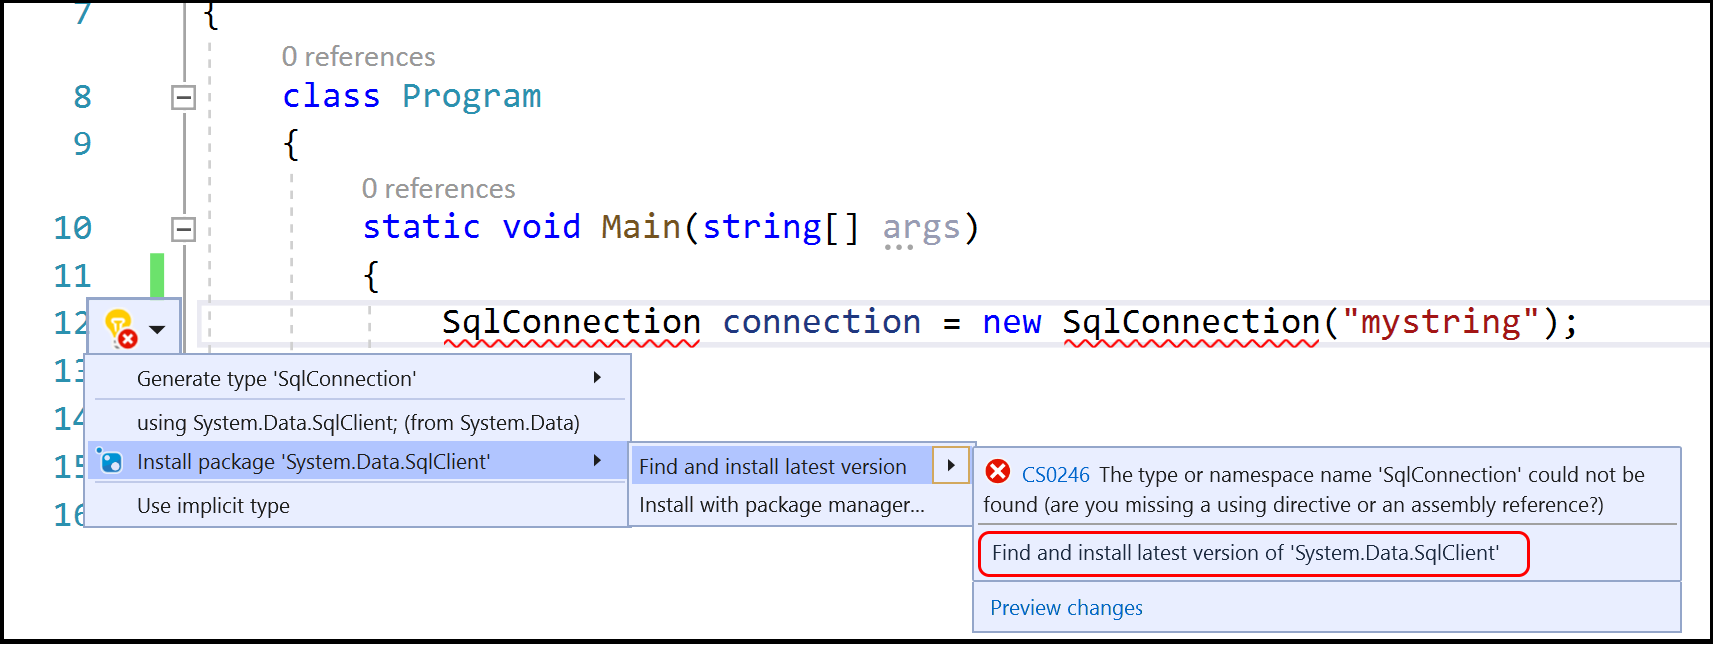
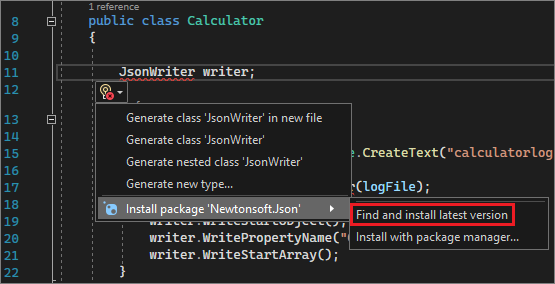
If Visual Studio detects a missing NuGet package, a light bulb appears and gives you the option to install the package:
If that doesn't solve the issue or Visual Studio can't locate the package, try searching for the package online. See Install and use a NuGet package in Visual Studio.
Use the right version of .NET
Because different versions of the .NET Framework have some backward compatibility, a newer framework might run code written for an older framework without any changes. But sometimes you need to target a specific .NET Framework version. You might need to install a specific version of the .NET Framework or .NET Core. See Modify Visual Studio.
To change the target .NET Framework version, see Change the target framework. For more information, see Troubleshooting .NET Framework targeting errors.
Next steps
- Explore the Visual Studio development environment by reading Welcome to the Visual Studio IDE.
- Create your first C# app.
Feedback
Coming soon: Throughout 2024 we will be phasing out GitHub Issues as the feedback mechanism for content and replacing it with a new feedback system. For more information see: https://aka.ms/ContentUserFeedback.
Submit and view feedback for