Note
Access to this page requires authorization. You can try signing in or changing directories.
Access to this page requires authorization. You can try changing directories.
This article describes how to configure operational backup for Azure Elastic SAN volume by using the Azure portal.
Prerequisites
Before you configure operational backup for an Azure Elastic SAN volume by using the Azure portal, ensure that you meet the following prerequisites:
- Use an existing Elastic SAN volume, or create a new one.
- Check if the Elastic SAN volume is present in a supported region.
- Verify if the Elastic SAN volume size is 16 TB or less.
- Use an existing Backup vault in the subscription that's the same as the Elastic SAN volume, or create a new one.
- Use an Elastic SAN backup policy. To create one, see Quickstart: Create an operational backup policy for Azure Elastic SAN volume.
For more information about the supported scenarios, limitations, and availability of Azure Elastic SAN volume operational backup, see the support matrix.
Configure operational backup for Azure Elastic SAN volume by using the Azure portal
To configure operational backup for an Azure Elastic SAN volume, follow these steps:
In the Azure portal, go to Resiliency, and select + Configure protection.
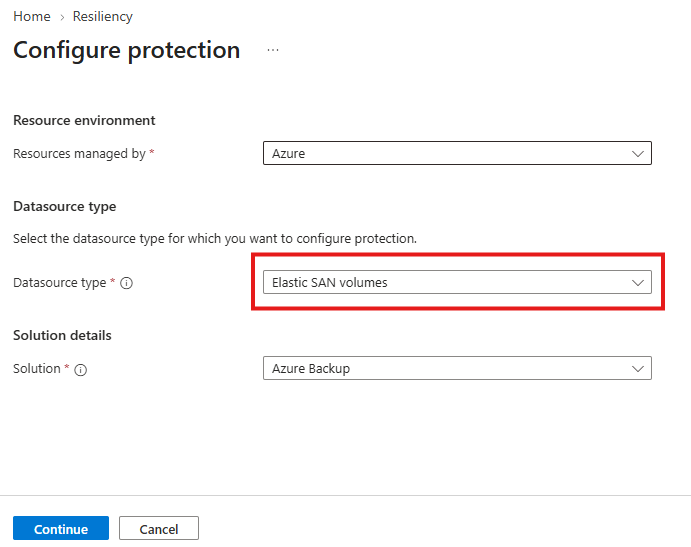
On the Configure protection pane, select Resource managed by as Azure, Datasource type as Elastic SAN volumes, Solution as Azure Backup, and select Continue.
On the Configure Backup pane, on the Basics tab, ensure that the Datasource type is selected as Elastic SAN volumes.
Under Vault, select Select vault to choose the Backup vault.
Note
A Backup vault uses a system-assigned managed identity to create and manage snapshots.
On the Backup policy tab, under Backup policy, select the policy to use for data retention, and select Next.
If you want to create a new backup policy, select Create new. To learn more, see Quickstart: Create an operational backup policy for Azure Elastic SAN volume.
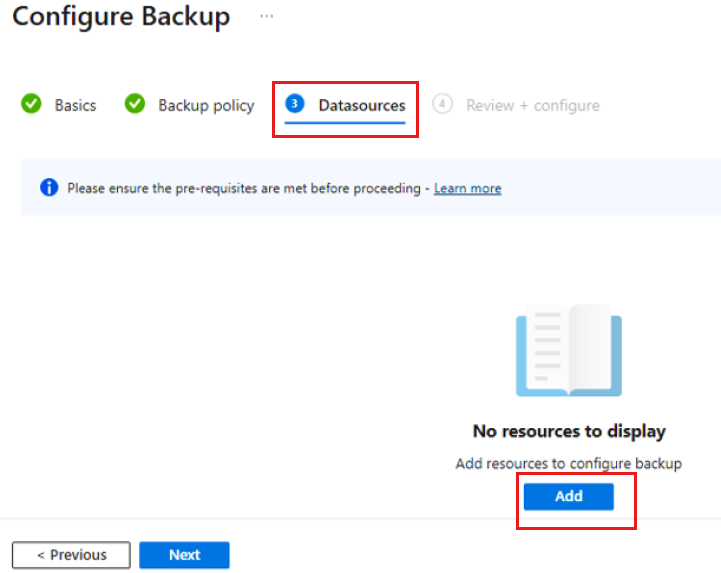
On the Datasources tab, select Add to choose the Elastic SAN instance for backup.
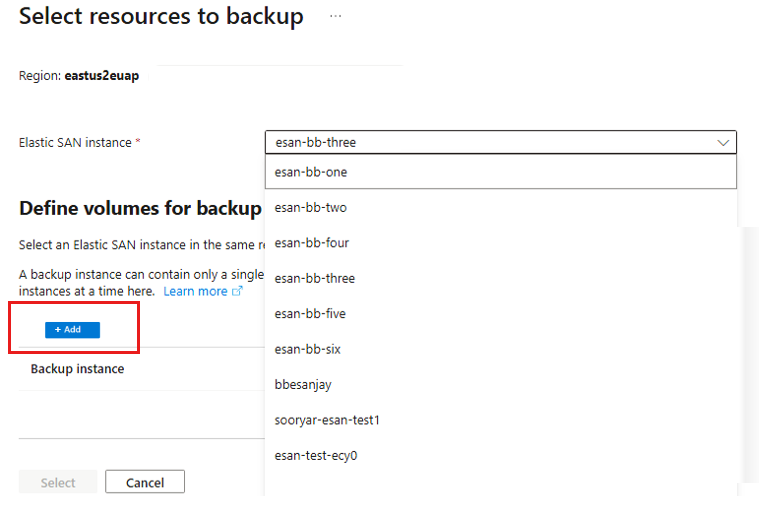
On the Select resources to backup pane, select an Elastic SAN instance from the dropdown list, and select Add.
The list shows only instances that belong to the same subscription and region as the vault.
On the Add backup instance pane, filter by Volume group, select a volume from the list, and select Add.
Note
- You can select multiple volumes in a single backup request. Azure Backup creates a separate backup instance for each selected Elastic SAN volume and associated backup policy. A backup instance represents the pairing of an Elastic SAN volume and a backup policy. You can use the autogenerated backup instance name or provide a custom name.
- By default, Azure Backup stores restore point snapshots in the same resource group as the Elastic SAN volume. You can select a different resource group to store the snapshots.
After you add the backup instances, backup readiness validation starts on the Configure Backup pane, under the Datasources tab.
Validation errors appear if the selected Backup vault's managed identity doesn't have the Elastic SAN Snapshot Exporter and Disk Snapshot Contributor roles assigned.
To assign the required roles, on the Configure Backup pane, on the Datasources tab, select Assign missing roles.
Note
If you don't have Role-Based Access Control Administrator permissions, the Assign missing roles option is disabled.
On the Grant missing permissions pane, select the scope at which you need to grant the access permissions, and select Next.
When the role assignment is complete, on the Configure Backup pane, on the Datasources tab, select Revalidate.
On the Review + configure tab, review the configuration details, and then select Configure Backup to finish the backup configuration.
You can track the progress of the backup configuration under Backup instances.
Next steps
This article describes how to configure operational backup for Azure Elastic SAN volume by using Azure CLI.
Prerequisites
Before you configure operational backup for an Azure Elastic SAN volume by using Azure CLI, ensure that you meet the following prerequisites:
- Use an existing Elastic SAN volume, or create a new one.
- Check if the Elastic SAN volume is present in a supported region.
- Verify if the Elastic SAN volume size is 16 TB or less.
- Use an existing vault in the subscription that's the same as the Elastic SAN volume, or create a new one.
- Use an Elastic SAN backup policy. To install the Azure CLI extension and create a new backup policy, see Quickstart: Create an operational backup policy for Azure Elastic SAN volume by using Azure CLI.
- Verify that you use the Azure CLI and the dataprotection extension 1.12.0 or later.
Configure operational backup for Azure Elastic SAN volume by using Azure CLI
To configure operational backup for an Azure Elastic SAN volume by using Azure CLI, run the following commands:
Create a backup configuration for the Elastic SAN volume.
az dataprotection backup-instance initialize-backupconfig \
    --datasource-type AzureElasticSAN \
    --resource-selectors $volume \
    > esan_backup_config.json
Initialize the backup instance.
az dataprotection backup-instance initialize \
    --datasource-type AzureElasticSAN \
    --datasource-location $location \
    --datasource-id $vgId \
    --policy-id $policyId \
    --friendly-name esan-bi \
    --backup-configuration @esan_backup_config.json \
    > esan_backup_instance.json
Grant the Backup vault managed identity the required permissions.
az dataprotection backup-instance update-msi-permissions \
    --datasource-type AzureElasticSAN \
    --operation Backup \
    --permissions-scope Resource \
    --resource-group $rg \
    --vault-name $vault \
    --backup-instance @esan_backup_instance.json \
    --yes
Validate backup readiness.
az dataprotection backup-instance validate-for-backup \
    --resource-group $rg \
    --vault-name $vault \
    --backup-instance @esan_backup_instance.json
Enable backup.
az dataprotection backup-instance create \
    --resource-group $rg \
    --vault-name $vault \
    --backup-instance @esan_backup_instance.json