Ask Learn
Preview
Ask Learn is an AI assistant that can answer questions, clarify concepts, and define terms using trusted Microsoft documentation.
Please sign in to use Ask Learn.
Sign inThis browser is no longer supported.
Upgrade to Microsoft Edge to take advantage of the latest features, security updates, and technical support.
Note
Access to this page requires authorization. You can try signing in or changing directories.
Access to this page requires authorization. You can try changing directories.
Add real-time chat to your app using the Communication Services Chat SDK. This article describes how to use the Chat SDK to create chat threads that enable users to have conversations with one another. To learn more about Chat concepts, see chat conceptual documentation.
An Azure account with an active subscription. Create an account for free.
An active Communication Services resource and connection string. Create a Communication Services resource.
Install Azure CLI.
Note your Communication Services resource endpoint. You can get the endpoint from the Azure portal. Alternatively, you can find the endpoint url in the connection string. It's the url that comes after endpoint= and starts with https://.
A User Access Token. Be sure to set the scope to chat, and note the token string as well as the user_id string. You can also use the Azure CLI and run the following command with your connection string to create a user and an access token.
az communication identity token issue --scope chat --connection-string "yourConnectionString"
For details, see Use Azure CLI to Create and Manage Access Tokens.
Add the Azure Communication Services extension for Azure CLI by using the az extension command.
az extension add --name communication
You need to sign in to Azure CLI. You can sign in by running the az login command from the terminal and providing your credentials.
You can configure the AZURE_COMMUNICATION_ENDPOINT environment variable to use Azure CLI chat operations without having to use --endpoint to pass in the endpoint. To configure an environment variable, open a console window and select your operating system from the following tabs. Replace <yourEndpoint> with your actual endpoint.
Edit your .bash_profile, and add the environment variable:
export AZURE_COMMUNICATION_ENDPOINT="<yourEndpoint>"
After you add the environment variable, run source ~/.bash_profile from your console window to make the changes effective. If you created the environment variable with your IDE open, you may need to close and reopen the editor, IDE, or shell in order to access the variable.
You can configure the AZURE_COMMUNICATION_ACCESS_TOKEN environment variable to use Azure CLI chat operations without having to use --access-token to pass in the access token. To configure an environment variable, open a console window and select your operating system from the following tabs. Replace <yourAccessToken> with your actual access token.
Edit your .bash_profile, and add the environment variable:
export AZURE_COMMUNICATION_ACCESS_TOKEN="<yourAccessToken>"
After you add the environment variable, run source ~/.bash_profile from your console window to make the changes effective. If you created the environment variable with your IDE open, you may need to close and reopen the editor, IDE, or shell in order to access the variable.
Use the thread create command to create a chat thread.
az communication chat thread create --topic "<chatTopic>" --endpoint "<endpoint>" --access-token "<token>"
If you stored the endpoint and the access token in environment variables as previously stated, you don't need to pass them to the command.
az communication chat thread create --topic "<chatTopic>"
<chatTopic> to give the thread a topic. You can update the topic after the chat thread is created by using the thread update-topic command.<endpoint> with your Azure Communication Services endpoint.<token> with your access token obtained earlier with running identity token issue command.az communication chat thread update-topic --thread "<chatThreadId>" --topic "<chatTopic>" --endpoint "<endpoint>" --access-token "<token>"
<chatThreadId> with your chat thread ID.<chatTopic> with the new chat topic you want to set.<endpoint> with your Azure Communication Services endpoint.<token> with your access token obtained earlier with running identity token issue command.The thread list command returns the list of chat threads of a user.
az communication chat thread list --start-time "<startTime>" --endpoint "<endpoint>" --access-token "<token>"
<startTime> to specify the earliest point in time to get chat messages.<endpoint> with your Azure Communication Services endpoint.<token> with your access token obtained earlier with running identity token issue command.Use the message send command to send a message to a chat thread you created, identified by threadId.
az communication chat message send --thread "<chatThreadId>" --display-name "<displayName>" --content "<content>" --message-type "<messageType>" --endpoint "<endpoint>" --access-token "<token>"
<chatThreadId> with your chat thread ID.<content> to provide the chat message content.<messageType> to specify the message content type. Possible values are text and html. If you don't specify a value, the default is text.<displayName> optionally to specify the display name of the sender.<endpoint> with your Azure Communication Services endpoint.<token> with your access token obtained earlier with running identity token issue command.The message list command returns the list of chat messages in a chat thread.
az communication chat message list --thread "<chatThreadId>" --start-time "<startTime>" --endpoint "<endpoint>" --access-token "<token>"
<chatThreadId> with your chat thread ID.<startTime> optionally to specify the earliest point in time to get chat messages.<endpoint> with your Azure Communication Services endpoint.<token> with your access token obtained earlier with running identity token issue command.You can retrieve chat messages by using the message list command.
az communication chat message get --thread "<chatThreadId>" --message-id "<messageId>" --endpoint "<endpoint>" --access-token "<token>"
<chatThreadId> with your chat thread ID.<messageId> with the ID of the message you want to retrieve.<endpoint> with your Azure Communication Services endpoint.<token> with your access token obtained earlier with running identity token issue command.You use the message receipt send command to post a read receipt event to a thread, on behalf of a user.
az communication chat message receipt send --thread "<chatThreadId>" --message-id "<messageId>" --endpoint "<endpoint>" --access-token "<token>"
<chatThreadId> with your chat thread ID.<messageId> to specify the ID of the latest message read by current user.<endpoint> with your Azure Communication Services endpoint.<token> with your access token obtained earlier with running identity token issue command.When you create a chat thread, you can then add and remove users from it. By adding users, you give them access to be able to send messages to the chat thread, and add or remove other participants. Before calling the participant add command, ensure that you acquired a new access token and identity for that user.
az communication chat participant add --thread "<chatThreadId>" --user "<userId>" --display-name "<displayName>" --start-time "<startTime>" --endpoint "<endpoint>" --access-token "<token>"
<chatThreadId> with your chat thread ID.<userId> with your userId.<displayName> optionally to specify the display name of the sender.<startTime> optionally to specify the earliest point in time to get chat messages.<endpoint> with your Azure Communication Services endpoint.<token> with your access token obtained earlier with running identity token issue command.Similar to adding a participant, you can also list participants from a thread.
Use participant list command to retrieve the participants of the thread.
az communication chat participant list --thread "<chatThreadId>" --skip "<skip>" --endpoint "<endpoint>" --access-token "<token>"
<chatThreadId> with your chat thread ID.<skip> optionally to skip participants up to a specified position in the response.<endpoint> with your Azure Communication Services endpoint.<token> with your access token obtained earlier with running identity token issue command.You can remove a chat participant from a chat thread by using the 'participant remove' command.
az communication chat participant remove --thread "<chatThreadId>" --user "<userId>" --endpoint "<endpoint>" --access-token "<token>"
<chatThreadId> with your chat thread ID.<userId> with the userId you want to remove from the chat thread.<endpoint> with your Azure Communication Services endpoint.<token> with your access token obtained earlier with running identity token issue command.Create an Azure account with an active subscription. For details, see Create an account for free.
Install Node.js Active LTS and Maintenance LTS versions.
Create an Azure Communication Services resource. For details, see Create an Azure Communication Services resource. You need to record your resource endpoint and connection string for this article.
Create three Azure Communication Services Users and issue them a User Access Token. Be sure to set the scope to chat, and note the token string as well as the user_id string. The full demo creates a thread with two initial participants and then adds a third participant to the thread. You can also use the Azure CLI and run the following command with your connection string to create a user and an access token.
az communication identity token issue --scope chat --connection-string "yourConnectionString"
For details, see Use Azure CLI to Create and Manage Access Tokens.
First, open your terminal or command window create a new directory for your app, and navigate to it.
mkdir chat-quickstart && cd chat-quickstart
Run npm init -y to create a package.json file with default settings.
npm init -y
Use the npm install command to install the following Communication Services SDKs for JavaScript.
npm install @azure/communication-common --save

npm install @azure/communication-identity --save

npm install @azure/communication-signaling --save

npm install @azure/communication-chat --save
The --save option lists the library as a dependency in your package.json file.
This article uses webpack to bundle the application assets. Run the following command to install it and list it as a development dependency in your package.json:
npm install webpack webpack-cli webpack-dev-server --save-dev
Create a webpack.config.js in the root directory of your project.
module.exports = {
    entry: "./client.js",
    output: {
        filename: "bundle.js"
    },
    devtool: "inline-source-map",
    mode: "development"
}
Create an index.html file in the root directory of your project. Use this file as a template to add chat capability using the Azure Communication Chat SDK for JavaScript.
<!DOCTYPE html>
<html>
  <head>
    <title>Communication Client - Chat Sample</title>
  </head>
  <body>
    <h4>Azure Communication Services</h4>
    <h1>Chat Quickstart</h1>
    <script src="./bundle.js"></script>
  </body>
</html>
Create a file in the root directory of your project called client.js to contain the application logic for this article.
To create a chat client in your web app, use the Communications Service endpoint and the access token that was generated as part of prerequisite steps.
User access tokens enable you to build client applications that directly authenticate to Azure Communication Services. This article doesn't cover creating a service tier to manage tokens for your chat application. For more information about chat architecture, see chat concepts. For more information about access tokens, see user access tokens.
Inside client.js use the endpoint and access token in the following code to add chat capability using the Azure Communication Chat SDK for JavaScript.
import { ChatClient } from '@azure/communication-chat';
import { AzureCommunicationTokenCredential } from '@azure/communication-common';

// Your unique Azure Communication service endpoint
let endpointUrl = '<replace with your resource endpoint>';
// The user access token generated as part of the pre-requisites
let userAccessToken = '<USER_ACCESS_TOKEN>';

let chatClient = new ChatClient(endpointUrl, new AzureCommunicationTokenCredential(userAccessToken));
console.log('Azure Communication Chat client created!');
Update the scripts section in the package.json to include "start"
"start": "webpack serve --config ./webpack.config.js"
Run the following command to run your application:
npm install
npm run start
Open your browser and navigate to http://localhost:8080/. In the developer tools console within your browser, you should see:
Azure Communication Chat client created!
The following classes and interfaces handle some of the major features of the Azure Communication Services Chat SDK for JavaScript.
| Name | Description |
|---|---|
| ChatClient | This class is needed for the Chat functionality. You instantiate it with your subscription information, and use it to create, get, delete threads, and subscribe to chat events. |
| ChatThreadClient | This class is needed for the Chat Thread functionality. You obtain an instance via the ChatClient, and use it to send/receive/update/delete messages, add/remove/get users, send typing notifications and read receipts. |
Use the createThread method to create a chat thread.
createThreadRequest is used to describe the thread request:
topic to give a topic to this chat. Topics can be updated after the chat thread is created using the UpdateThread function.participants to list the participants to be added to the chat thread.When resolved, createChatThread method returns a CreateChatThreadResult. This model contains a chatThread property where you can access the id of the newly created thread. You can then use the id to get an instance of a ChatThreadClient. The ChatThreadClient can then be used to perform operation within the thread such as sending messages or listing participants.
async function createChatThread() {
  const createChatThreadRequest = {
    topic: "Hello, World!"
  };
  const createChatThreadOptions = {
    participants: [
      {
        id: { communicationUserId: '<USER_ID>' },
        displayName: '<USER_DISPLAY_NAME>'
      }
    ]
  };
  const createChatThreadResult = await chatClient.createChatThread(
    createChatThreadRequest,
    createChatThreadOptions
  );
  const threadId = createChatThreadResult.chatThread.id;
  return threadId;
}

createChatThread().then(async threadId => {
  console.log(`Thread created:${threadId}`);
  // PLACEHOLDERS
  // <CREATE CHAT THREAD CLIENT>
  // <RECEIVE A CHAT MESSAGE FROM A CHAT THREAD>
  // <SEND MESSAGE TO A CHAT THREAD>
  // <LIST MESSAGES IN A CHAT THREAD>
  // <ADD NEW PARTICIPANT TO THREAD>
  // <LIST PARTICIPANTS IN A THREAD>
  // <REMOVE PARTICIPANT FROM THREAD>
  });
When you refresh your browser tab, you should see the following message in the console:
Thread created: <thread_id>
The getChatThreadClient method returns a chatThreadClient for a thread that already exists. It can be used for performing operations on the created thread: add participants, send message, etc. threadId is the unique ID of the existing chat thread.
let chatThreadClient = chatClient.getChatThreadClient(threadId);
console.log(`Chat Thread client for threadId:${threadId}`);
Add this code in place of the <CREATE CHAT THREAD CLIENT> comment in client.js, refresh your browser tab and check the console, you should see:
Chat Thread client for threadId: <threadId>
The listChatThreads method returns a PagedAsyncIterableIterator of type ChatThreadItem. It can be used for listing all chat threads.
An iterator of [ChatThreadItem] is the response returned from listing threads
const threads = chatClient.listChatThreads();
for await (const thread of threads) {
   // your code here
}
Use sendMessage method to send a message to a thread identified by threadId.
sendMessageRequest is used to describe the message request:
content to provide the chat message content;sendMessageOptions is used to describe the operation optional params:
senderDisplayName to specify the display name of the sender;type to specify the message type, such as 'text' or 'html';metadata optionally to include any other data you want to send along with the message. This field provides a mechanism for developers to extend chat message functionality and add custom information for your use case. For example, when sharing a file link in the message, you might want to add 'hasAttachment: true' in metadata so that recipient's application can parse that and display accordingly.SendChatMessageResult is the response returned from sending a message. It contains the unique ID of the message.
const sendMessageRequest =
{
  content: 'Please take a look at the attachment'
};
let sendMessageOptions =
{
  senderDisplayName : 'Jack',
  type: 'text',
  metadata: {
    'hasAttachment': 'true',
    'attachmentUrl': 'https://contoso.com/files/attachment.docx'
  }
};
const sendChatMessageResult = await chatThreadClient.sendMessage(sendMessageRequest, sendMessageOptions);
const messageId = sendChatMessageResult.id;
console.log(`Message sent!, message id:${messageId}`);
Add this code in place of the <SEND MESSAGE TO A CHAT THREAD> comment in client.js, refresh your browser tab and check the console.
Message sent!, message id:<number>
With real-time signaling, you can subscribe to listen for new incoming messages and update the current messages in memory accordingly. Azure Communication Services supports a list of events that you can subscribe to.
// open notifications channel
await chatClient.startRealtimeNotifications();
// subscribe to new notification
chatClient.on("chatMessageReceived", (e) => {
  console.log("Notification chatMessageReceived!");
  // your code here
});
Add this code in place of <RECEIVE A CHAT MESSAGE FROM A CHAT THREAD> comment in client.js.
Refresh your browser tab, you should see in the console a message Notification chatMessageReceived;
Alternatively you can retrieve chat messages by polling the listMessages method at specified intervals.
const messages = chatThreadClient.listMessages();
for await (const message of messages) {
   // your code here
}
Add this code in place of the <LIST MESSAGES IN A CHAT THREAD> comment in client.js.
Refresh your tab, in the console you should find the list of messages sent in this chat thread.
listMessages returns different types of messages that you can be identify by the chatMessage.type.
For more information, see Message Types.
Once a chat thread is created, you can then add and remove users from it. By adding users, you give them access to send messages to the chat thread, and add/remove other participants.
Before calling the addParticipants method, ensure that you acquired a new access token and identity for that user. The user needs that access token in order to initialize their chat client.
addParticipantsRequest describes the request object wherein participants lists the participants to be added to the chat thread;
id, required, is the communication identifier to be added to the chat thread.displayName, optional, is the display name for the thread participant.shareHistoryTime, optional, is the time from which the chat history is shared with the participant. To share history since the inception of the chat thread, set this property to any date equal to, or less than the thread creation time. To share no history previous to when the participant was added, set it to the current date. To share partial history, set it to the date of your choice.
const addParticipantsRequest =
{
  participants: [
    {
      id: { communicationUserId: '<NEW_PARTICIPANT_USER_ID>' },
      displayName: 'Jane'
    }
  ]
};

await chatThreadClient.addParticipants(addParticipantsRequest);
Replace NEW_PARTICIPANT_USER_ID with a new user ID
Add this code in place of the <ADD NEW PARTICIPANT TO THREAD> comment in client.js
const participants = chatThreadClient.listParticipants();
for await (const participant of participants) {
   // your code here
}
Add this code in place of the <LIST PARTICIPANTS IN A THREAD> comment in client.js, refresh your browser tab and check the console. You should see information about users in a thread.
Similar to adding a participant, you can remove participants from a chat thread. In order to remove, you need to track the IDs of the participants you added.
Use removeParticipant method where participant is the communication user to be removed from the thread.
await chatThreadClient.removeParticipant({ communicationUserId: <PARTICIPANT_ID> });
await listParticipants();
Replace PARTICIPANT_ID with a User ID used in the previous step (<NEW_PARTICIPANT_USER_ID>).
Add this code in place of the <REMOVE PARTICIPANT FROM THREAD> comment in client.js.
Subscription to events realTimeNotificationConnected and realTimeNotificationDisconnected enables you to know when the connection to the call server is active.
// subscribe to realTimeNotificationConnected event
chatClient.on('realTimeNotificationConnected', () => {
  console.log("Real time notification is now connected!");
  // your code here
});
// subscribe to realTimeNotificationDisconnected event
chatClient.on('realTimeNotificationDisconnected', () => {
  console.log("Real time notification is now disconnected!");
  // your code here
});
Find the finalized code for this article in the GitHub sample Add Chat to your application.
Create an Azure account with an active subscription. For details, see Create an account for free.
Install Python 3.7+.
Create an Azure Communication Services resource. For details, see Quickstart: Create and manage Communication Services resources. You need to record your resource endpoint and connection string for this article.
A User Access Token. Be sure to set the scope to chat, and note the token string as well as the user_id string. You can also use the Azure CLI and run the following command with your connection string to create a user and an access token.
az communication identity token issue --scope chat --connection-string "yourConnectionString"
For details, see Use Azure CLI to Create and Manage Access Tokens.
Open your terminal or command window, create a new directory for your app, and go to it.
mkdir chat-quickstart && cd chat-quickstart
Use a text editor to create a file called start-chat.py in the project root directory. Add the structure for the program, including basic exception handling. In the following sections, add all the source code for this article to this file.
import os
# Add required SDK components from quickstart here

try:
    print('Azure Communication Services - Chat Quickstart')
    # Quickstart code goes here
except Exception as ex:
    print('Exception:')
    print(ex)
Use the following command to install the SDK:
pip install azure-communication-chat
The following classes and interfaces handle some of the major features of the Azure Communication Services Chat SDK for Python.
| Name | Description |
|---|---|
ChatClient |
This class is needed for the chat functionality. You instantiate it with your subscription information, and use it to create, get, and delete threads. |
ChatThreadClient |
This class is needed for the chat thread functionality. You obtain an instance via ChatClient, and use it to send, receive, update, and delete messages. You can also use it to add, remove, and get users, and send typing notifications and read receipts. |
To create a chat client, use the Communication Services endpoint and the access token you generated as part of prerequisite steps.
pip install azure-communication-identity
from azure.communication.chat import ChatClient, CommunicationTokenCredential

endpoint = "<replace with your resource endpoint>"
chat_client = ChatClient(endpoint, CommunicationTokenCredential("<Access Token>"))
This article doesn't cover creating a service tier to manage tokens for your chat application, but it's recommended. For more information, see the "Chat architecture" section of Chat concepts > Chat architecture.
Use the create_chat_thread method to create a chat thread.
topic to give the thread a topic. You can update the topic after the chat thread is created by using the update_thread function.thread_participants to list the ChatParticipant to be added to the chat thread. The ChatParticipant takes the CommunicationUserIdentifier type as user.CreateChatThreadResult is the result returned from creating a thread. You can use it to fetch the id of the chat thread that got created. This id can then be used to fetch a ChatThreadClient object by using the get_chat_thread_client method. You can use ChatThreadClient to perform other chat operations to this chat thread.
topic="test topic"

create_chat_thread_result = chat_client.create_chat_thread(topic)
chat_thread_client = chat_client.get_chat_thread_client(create_chat_thread_result.chat_thread.id)
The get_chat_thread_client method returns a thread client for a thread that already exists. You can use it to perform operations on the created thread. For example, you can add participants and send messages. thread_id is the unique ID of the existing chat thread.
You can use ChatThreadClient to perform other chat operations to this chat thread.
thread_id = create_chat_thread_result.chat_thread.id
chat_thread_client = chat_client.get_chat_thread_client(thread_id)
The list_chat_threads method returns an iterator of type ChatThreadItem.
start_time to specify the earliest point in time to get chat threads.results_per_page to specify the maximum number of chat threads returned per page.An iterator of [ChatThreadItem] is the response returned from listing threads.
from datetime import datetime, timedelta

start_time = datetime.utcnow() - timedelta(days=2)

chat_threads = chat_client.list_chat_threads(results_per_page=5, start_time=start_time)
for chat_thread_item_page in chat_threads.by_page():
    for chat_thread_item in chat_thread_item_page:
        print(chat_thread_item)
        print('Chat Thread Id: ', chat_thread_item.id)
Use the send_message method to send a message to a chat thread you created, identified by thread_id.
content to provide the chat message content.chat_message_type to specify the message content type. Possible values are text and html. If you don't specify a value, the default is text.sender_display_name to specify the display name of the sender.metadata optionally to include any other data you want to send along with the message. This field provides a mechanism for developers to extend chat message functionality and add custom information for your use case. For example, when sharing a file link in the message, you might want to add 'hasAttachment:true' in metadata so that recipient's application can parse that and display accordingly.SendChatMessageResult is the response returned from sending a message. It contains an ID, which is the unique ID of the message.
from azure.communication.chat import ChatMessageType

topic = "test topic"
create_chat_thread_result = chat_client.create_chat_thread(topic)
thread_id = create_chat_thread_result.chat_thread.id
chat_thread_client = chat_client.get_chat_thread_client(create_chat_thread_result.chat_thread.id)


content='Please take a look at the attachment'
sender_display_name='sender name'
metadata={
    'hasAttachment': 'true',
    'attachmentUrl': 'https://contoso.com/files/attachment.docx'
}

# specify chat message type with pre-built enumerations
send_message_result_w_enum = chat_thread_client.send_message(content=content, sender_display_name=sender_display_name, chat_message_type=ChatMessageType.TEXT, metadata=metadata)
print("Message sent: id: ", send_message_result_w_enum.id)
You can retrieve chat messages by polling the list_messages method at specified intervals.
results_per_page to specify the maximum number of messages to be returned per page.start_time to specify the earliest point in time to get messages.An iterator of [ChatMessage] is the response returned from listing messages.
from datetime import datetime, timedelta

start_time = datetime.utcnow() - timedelta(days=1)

chat_messages = chat_thread_client.list_messages(results_per_page=1, start_time=start_time)
for chat_message_page in chat_messages.by_page():
    for chat_message in chat_message_page:
        print("ChatMessage: Id=", chat_message.id, "; Content=", chat_message.content.message)
list_messages returns the latest version of the message, including any edits or deletes that happened to the message by using update_message and delete_message. For deleted messages, ChatMessage.deleted_on returns a datetime value indicating when that message was deleted. For edited messages, ChatMessage.edited_on returns a datetime value indicating when the message was edited. You can access the original time of message creation by using ChatMessage.created_on, which can be used for ordering the messages.
list_messages returns different types of messages, which you identify from the ChatMessage.type.
For more information, see Message types.
You use the send_read_receipt method to post a read receipt event to a thread, on behalf of a user.
message_id to specify the ID of the latest message read by current user.content='hello world'
send_message_result = chat_thread_client.send_message(content)
chat_thread_client.send_read_receipt(message_id=send_message_result.id)
When you create a chat thread, you can then add and remove users from it. By adding users, you give them access to be able to send messages to the chat thread, and add or remove other participants. Before calling the add_participants method, ensure that you acquired a new access token and identity for that user. The user needs that access token to initialize the chat client.
You can add one or more users to the chat thread by using the add_participants method, if a new access token and identity is available for all users.
A list(tuple(ChatParticipant, CommunicationError)) is returned. When the participant is successfully added, an empty list is expected. If you encounter an error while adding a participant, the list is populated with the failed participants and the error that was encountered.
from azure.communication.identity import CommunicationIdentityClient
from azure.communication.chat import ChatParticipant
from datetime import datetime

# create 2 users
identity_client = CommunicationIdentityClient.from_connection_string('<connection_string>')
new_users = [identity_client.create_user() for i in range(2)]

# # conversely, you can also add an existing user to a chat thread; provided the user_id is known
# from azure.communication.identity import CommunicationUserIdentifier
#
# user_id = 'some user id'
# user_display_name = "Wilma Flinstone"
# new_user = CommunicationUserIdentifier(user_id)
# participant = ChatParticipant(
#     identifier=new_user,
#     display_name=user_display_name,
#     share_history_time=datetime.utcnow())

participants = []
for _user in new_users:
  chat_thread_participant = ChatParticipant(
    identifier=_user,
    display_name='Fred Flinstone',
    share_history_time=datetime.utcnow()
  )
  participants.append(chat_thread_participant)

response = chat_thread_client.add_participants(participants)

def decide_to_retry(error, **kwargs):
    """
    Insert some custom logic to decide if retry is applicable based on error
    """
    return True

# verify if all users has been successfully added or not
# in case of partial failures, you can retry to add all the failed participants
retry = [p for p, e in response if decide_to_retry(e)]
if retry:
    chat_thread_client.add_participants(retry)
Similar to adding a participant, you can also list participants from a thread.
Use list_participants to retrieve the participants of the thread. Both of the following commands are optional:
results_per_page to specify the maximum number of participants to be returned per page.skip to skip participants up to a specified position in the response.An iterator of [ChatParticipant] is the response returned from listing participants.
chat_thread_participants = chat_thread_client.list_participants()
for chat_thread_participant_page in chat_thread_participants.by_page():
    for chat_thread_participant in chat_thread_participant_page:
        print("ChatParticipant: ", chat_thread_participant)
Run the application from your application directory with the python command.
python start-chat.py
Find the finalized code for this article in the GitHub sample Add Chat to your application.
An Azure account with an active subscription. Create an account for free.
Java Development Kit (JDK) version 8 or above.
Create an Azure Communication Services resource. For details, see Create an Azure Communication Services resource. You need to record your resource endpoint and connection string for this article.
A User Access Token. Be sure to set the scope to chat, and note the token string as well as the user_id string. You can also use the Azure CLI and run the following command with your connection string to create a user and an access token.
az communication identity token issue --scope chat --connection-string "yourConnectionString"
For details, see Use Azure CLI to Create and Manage Access Tokens.
Open your terminal or command window and navigate to the directory where you would like to create your Java application. Run the following command to generate the Java project from the maven-archetype-quickstart template.
mvn archetype:generate -DgroupId=com.communication.quickstart -DartifactId=communication-quickstart -DarchetypeArtifactId=maven-archetype-quickstart -DarchetypeVersion=1.4 -DinteractiveMode=false
The generate goal is created a directory with the same name as the artifactId. Under this directory, the src/main/java directory contains the project source code, the src/test/java directory contains the test source, and the pom.xml file is the project's Project Object Model, or POM.
Update your application's POM file to use Java 8 or higher:
<properties>
    <project.build.sourceEncoding>UTF-8</project.build.sourceEncoding>
    <maven.compiler.source>1.8</maven.compiler.source>
    <maven.compiler.target>1.8</maven.compiler.target>
</properties>
In your POM file, reference the azure-communication-chat package with the Chat APIs:
<dependency>
    <groupId>com.azure</groupId>
    <artifactId>azure-communication-chat</artifactId>
    <version><!-- Please refer to https://search.maven.org/artifact/com.azure/azure-communication-chat for the latest version --></version>
</dependency>
For authentication, your client needs to reference the azure-communication-common package:
<dependency>
    <groupId>com.azure</groupId>
    <artifactId>azure-communication-common</artifactId>
    <version><!-- Please refer to https://search.maven.org/artifact/com.azure/azure-communication-common for the latest version --></version>
</dependency>
The following classes and interfaces handle some of the major features of the Azure Communication Services Chat SDK for Java.
| Name | Description |
|---|---|
| ChatClient | This class is needed for the Chat functionality. You instantiate it with your subscription information, and use it to create, get, and delete threads. |
| ChatAsyncClient | This class is needed for the asynchronous Chat functionality. You instantiate it with your subscription information, and use it to create, get, and delete threads. |
| ChatThreadClient | This class is needed for the Chat Thread functionality. You obtain an instance via the ChatClient, and use it to send/receive/update/delete messages, add/remove/get users, send typing notifications and read receipts. |
| ChatThreadAsyncClient | This class is needed for the asynchronous Chat Thread functionality. You obtain an instance via the ChatAsyncClient, and use it to send/receive/update/delete messages, add/remove/get users, send typing notifications and read receipts. |
To create a chat client, use the Communications Service endpoint and the access token that was generated as part of prerequisite steps. User access tokens enable you to build client applications that directly authenticate to Azure Communication Services. Once you generate these tokens on your server, pass them back to a client device. You need to use the CommunicationTokenCredential class from the Common SDK to pass the token to your chat client.
Learn more about Chat Architecture
When adding the import statements, be sure to only add imports from the com.azure.communication.chat and com.azure.communication.chat.models namespaces, and not from the com.azure.communication.chat.implementation namespace. In the App.java file that was generated via Maven, you can use the following code to begin with:
package com.communication.quickstart;

import com.azure.communication.chat.*;
import com.azure.communication.chat.models.*;
import com.azure.communication.common.*;
import com.azure.core.http.rest.PagedIterable;

import java.io.*;
import java.util.*;

public class App
{
    public static void main( String[] args ) throws IOException
    {
        System.out.println("Azure Communication Services - Chat Quickstart");

        // Your unique Azure Communication service endpoint
        String endpoint = "<replace with your resource endpoint>";

        // User access token fetched from your trusted service
        String userAccessToken = "<USER_ACCESS_TOKEN>";

        // Create a CommunicationTokenCredential with the given access token, which is only valid until the token is valid
        CommunicationTokenCredential userCredential = new CommunicationTokenCredential(userAccessToken);

        // Initialize the chat client
        final ChatClientBuilder builder = new ChatClientBuilder();
        builder.endpoint(endpoint)
            .credential(userCredential);
        ChatClient chatClient = builder.buildClient();
    }
}
Use the createChatThread method to create a chat thread.
createChatThreadOptions is used to describe the thread request.
topic parameter of the constructor to give a topic to this chat; Topic can be updated after the chat thread is created using the UpdateThread function.participants to list the thread participants to be added to the thread. ChatParticipant takes the user you created in User Access Token.CreateChatThreadResult is the response returned from creating a chat thread.
It contains a getChatThread() method, which returns the ChatThread object that can be used to get the thread client from which you can get the ChatThreadClient for performing operations on the created thread: add participants, send message, etc.
The ChatThread object also contains the getId() method, which retrieves the unique ID of the thread.
CommunicationUserIdentifier identity1 = new CommunicationUserIdentifier("<USER_1_ID>");
CommunicationUserIdentifier identity2 = new CommunicationUserIdentifier("<USER_2_ID>");

ChatParticipant firstThreadParticipant = new ChatParticipant()
    .setCommunicationIdentifier(identity1)
    .setDisplayName("Participant Display Name 1");

ChatParticipant secondThreadParticipant = new ChatParticipant()
    .setCommunicationIdentifier(identity2)
    .setDisplayName("Participant Display Name 2");

CreateChatThreadOptions createChatThreadOptions = new CreateChatThreadOptions("Topic")
    .addParticipant(firstThreadParticipant)
    .addParticipant(secondThreadParticipant);

CreateChatThreadResult result = chatClient.createChatThread(createChatThreadOptions);
String chatThreadId = result.getChatThread().getId();
Use the listChatThreads method to retrieve a list of existing chat threads.
PagedIterable<ChatThreadItem> chatThreads = chatClient.listChatThreads();

chatThreads.forEach(chatThread -> {
    System.out.printf("ChatThread id is %s.\n", chatThread.getId());
});
The getChatThreadClient method returns a thread client for a thread that already exists. It can be used for performing operations on the created thread: add participants, send message, etc.
chatThreadId is the unique ID of the existing chat thread.
ChatThreadClient chatThreadClient = chatClient.getChatThreadClient(chatThreadId);
Use the sendMessage method to send a message to the thread you created, identified by chatThreadId.
sendChatMessageOptions is used to describe the chat message request.
content to provide the chat message content.type to specify the chat message content type, TEXT or HTML.senderDisplayName to specify the display name of the sender.metadata optionally to include any other data you want to send along with the message. This field provides a mechanism for developers to extend chat message functionality and add custom information for your use case. For example, when sharing a file link in the message, you might want to add hasAttachment:true in metadata so that recipient's application can parse that and display accordingly.The response sendChatMessageResult contains an id, which is the unique ID of the message.
Map<String, String> metadata = new HashMap<String, String>();
metadata.put("hasAttachment", "true");
metadata.put("attachmentUrl", "https://contoso.com/files/attachment.docx");

SendChatMessageOptions sendChatMessageOptions = new SendChatMessageOptions()
    .setContent("Please take a look at the attachment")
    .setType(ChatMessageType.TEXT)
    .setSenderDisplayName("Sender Display Name")
    .setMetadata(metadata);

SendChatMessageResult sendChatMessageResult = chatThreadClient.sendMessage(sendChatMessageOptions);
String chatMessageId = sendChatMessageResult.getId();
You can retrieve chat messages by polling the listMessages method on the chat thread client at specified intervals.
chatThreadClient.listMessages().forEach(message -> {
    System.out.printf("Message id is %s.\n", message.getId());
});
listMessages returns the latest version of the message, including any edits or deletes that happened to the message using .editMessage() and .deleteMessage(). For deleted messages, chatMessage.getDeletedOn() returns a datetime value indicating when that message was deleted. For edited messages, chatMessage.getEditedOn() returns a datetime indicating when the message was edited. The original time of message creation can be accessed using chatMessage.getCreatedOn(), and it can be used for ordering the messages.
Read more about message types here: Message Types.
Use the sendReadReceipt method to post a read receipt event to a chat thread, on behalf of a user.
chatMessageId is the unique ID of the chat message that was read.
String chatMessageId = message.getId();
chatThreadClient.sendReadReceipt(chatMessageId);
Use listParticipants to retrieve a paged collection containing the participants of the chat thread identified by chatThreadId.
PagedIterable<ChatParticipant> chatParticipantsResponse = chatThreadClient.listParticipants();
chatParticipantsResponse.forEach(chatParticipant -> {
    System.out.printf("Participant id is %s.\n", ((CommunicationUserIdentifier) chatParticipant.getCommunicationIdentifier()).getId());
});
Once a chat thread is created, you can then add and remove users from it. By adding users, you give them access to send messages to the chat thread, and add/remove other participants. You need to start by getting a new access token and identity for that user. Before calling addParticipants method, ensure that you acquired a new access token and identity for that user. The user needs that access token to initialize their chat client.
Use the addParticipants method to add participants to the thread.
communicationIdentifier, required, is the CommunicationIdentifier you created by the CommunicationIdentityClient in User Access Token.displayName, optional, is the display name for the thread participant.shareHistoryTime, optional, is the time from which the chat history is shared with the participant. To share history since the inception of the chat thread, set this property to any date equal to, or less than the thread creation time. To share no history previous to when the participant was added, set it to the current date. To share partial history, set it to the required date.List<ChatParticipant> participants = new ArrayList<ChatParticipant>();
CommunicationUserIdentifier identity3 = new CommunicationUserIdentifier("<USER_3_ID>");
CommunicationUserIdentifier identity4 = new CommunicationUserIdentifier("<USER_4_ID>");
ChatParticipant thirdThreadParticipant = new ChatParticipant()
.setCommunicationIdentifier(identity3)
.setDisplayName("Display Name 3");
ChatParticipant fourthThreadParticipant = new ChatParticipant()
.setCommunicationIdentifier(identity4)
.setDisplayName("Display Name 4");
participants.add(thirdThreadParticipant);
participants.add(fourthThreadParticipant);
chatThreadClient.addParticipants(participants);
Navigate to the directory containing the pom.xml file and compile the project by using the following mvn command.
mvn compile
Then, build the package.
mvn package
Run the following mvn command to execute the app.
mvn exec:java -Dexec.mainClass="com.communication.quickstart.App" -Dexec.cleanupDaemonThreads=false
Find the finalized code for this article in the GitHub sample Add Chat to your application.
Create an Azure account with an active subscription. For details, see Create an account for free.
Install Android Studio, we use Android Studio to create an Android application and to install dependencies.
Create an Azure Communication Services resource. For details, see Create an Azure Communication Services resource. You need to record your resource endpoint and connection string for this article.
Create two Communication Services Users and issue them a User Access Token. Be sure to set the scope to chat, and note the token string and the user_id string. In this article, we create a thread with an initial participant and then add a second participant to the thread. You can also use the Azure CLI and run the following command with your connection string to create a user and an access token.
az communication identity token issue --scope chat --connection-string "yourConnectionString"
For details, see Use Azure CLI to Create and Manage Access Tokens.
Create a new project.Empty Views Activity as the project template.ChatQuickstart as the project name.We use Gradle to install the necessary Communication Services dependencies. From the command line, navigate inside the root directory of the ChatQuickstart project. Open the app's build.gradle file and add the following dependencies to the ChatQuickstart target:
implementation libs.azure.communication.common
implementation libs.azure.communication.chat
implementation libs.slf4j.log4j12
For the latest version numbers, see https://search.maven.org/artifact/com.azure.android/azure-communication-common and https://search.maven.org/artifact/com.azure.android/azure-communication-chat.
android {
   ...
    packagingOptions {
        exclude 'META-INF/DEPENDENCIES'
        exclude 'META-INF/LICENSE'
        exclude 'META-INF/license'
        exclude 'META-INF/NOTICE'
        exclude 'META-INF/notice'
        exclude 'META-INF/ASL2.0'
        exclude("META-INF/*.md")
        exclude("META-INF/*.txt")
        exclude("META-INF/*.kotlin_module")
    }
}
To import the library into your project using the Maven build system, add it to the dependencies section of your app's pom.xml file, specifying its artifact ID and the version you wish to use:
<dependency>
  <groupId>com.azure.android</groupId>
  <artifactId>azure-communication-chat</artifactId>
  <version><!-- Please refer to https://search.maven.org/artifact/com.azure.android/azure-communication-chat for the latest version --></version>
</dependency>
For details, see Azure Function integration. We recommend integrating with Azure Function to avoid hard-coding application parameters.
Create a class ApplicationConstants which stores all application constants:
public class ApplicationConstants {
    public static final String SDK_VERSION = "<your_version>";
    public final static String SDK_NAME = "azure-communication-com.azure.android.communication.chat";
    public final static String APPLICATION_ID = "Chat_Test_App";
    public final static String TAG = "[Chat Test App]";
    public static CommunicationTokenCredential COMMUNICATION_TOKEN_CREDENTIAL;
}
Open and edit the file MainActivity.java. In this article, we add our code to MainActivity, and view the output in the console. This article doesn't address building a UI. At the top of the file, import the Azure Communication Common, Azure Communication Chat, and other system libraries:
import com.azure.android.communication.chat.*;
import com.azure.android.communication.chat.models.*;
import com.azure.android.communication.common.*;

import android.os.Bundle;
import android.util.Log;
import android.widget.Toast;

import com.jakewharton.threetenabp.AndroidThreeTen;

import java.util.ArrayList;
import java.util.List;
Copy the following code into class MainActivity in file MainActivity.java:
    private ChatAsyncClient chatAsyncClient;

    private void log(String msg) {
        Toast.makeText(this, msg, Toast.LENGTH_LONG).show();
    }

   @Override
    protected void onStart() {
        super.onStart();
        try {
            AndroidThreeTen.init(this);

            // Initialize application parameters if one of the conditions in '### Initialize Application Parameters' are met.

            // <CREATE A CHAT CLIENT>

            // <CREATE A CHAT THREAD>

            // <CREATE A CHAT THREAD CLIENT>

            // <SEND A MESSAGE>

            // <RECEIVE CHAT MESSAGES>

            // <ADD A USER>

            // <LIST USERS>

            // <REMOVE A USER>

            // <<SEND A TYPING NOTIFICATION>>

            // <<SEND A READ RECEIPT>>

            // <<LIST READ RECEIPTS>>
        } catch (Exception e){
            System.out.println("Quickstart failed: " + e.getMessage());
        }
    }
Note
Initializing ApplicationConstants needs to be added to MainActivity.java if EITHER of the following conditions are met: 1. The push notification feature is NOT enabled. 2. The version for the Azure Communication Chat library for Android is < 2.0.0. Otherwise, refer to step 11 in Android push notifications. Refer to the sample APP of the SDK version that you're consuming for reference.
ACS_ENDPOINT, FIRST_USER_ID, and FIRST_USER_ACCESS_TOKEN are returned from calling Azure Function. For more information, see Azure Function integration. We use the response from calling Azure Function to initialize the list of parameters:
ACS_ENDPOINT: the endpoint of your Communication Services resource.FIRST_USER_ID and SECOND_USER_ID: valid Communication Services user IDs generated by your Communication Services resource.FIRST_USER_ACCESS_TOKEN: the Communication Services access token for <FIRST_USER_ID>.Code block to initialize application parameters by calling Azure Function:
try {
        UserTokenClient userTokenClient = new UserTokenClient(AZURE_FUNCTION_URL);
        //First user context
        userTokenClient.getNewUserContext();
        ACS_ENDPOINT = userTokenClient.getACSEndpoint();
        FIRST_USER_ID = userTokenClient.getUserId();
        FIRST_USER_ACCESS_TOKEN = userTokenClient.getUserToken();
        COMMUNICATION_TOKEN_CREDENTIAL = new CommunicationTokenCredential(FIRST_USER_ACCESS_TOKEN);
        //Second user context
        userTokenClient.getNewUserContext();
        SECOND_USER_ID = userTokenClient.getUserId();
    } catch (Throwable throwable) {
        //Your handling code
        logger.logThrowableAsError(throwable);
    }
Replace the comment <CREATE A CHAT CLIENT> with the following code (put the import statements at top of the file):
import com.azure.android.core.http.policy.UserAgentPolicy;

chatAsyncClient = new ChatClientBuilder()
    .endpoint(endpoint)
    .credential(new CommunicationTokenCredential(firstUserAccessToken))
    .addPolicy(new UserAgentPolicy(APPLICATION_ID, SDK_NAME, sdkVersion))
    .buildAsyncClient();
The following classes and interfaces handle some of the major features of the Azure Communication Services Chat SDK for JavaScript.
| Name | Description |
|---|---|
| ChatClient/ChatAsyncClient | This class is needed for the Chat functionality. You instantiate it with your subscription information, and use it to create, get, delete threads, and subscribe to chat events. |
| ChatThreadClient/ChatThreadAsyncClient | This class is needed for the Chat Thread functionality. You obtain an instance via the ChatClient, and use it to send/receive/update/delete messages, add/remove/get users, send typing notifications and read receipts. |
Use our ChatAsyncClient to create a new thread with an initial user.
Replace the comment <CREATE A CHAT THREAD> with the following code:
// A list of ChatParticipant to start the thread with.
List<ChatParticipant> participants = new ArrayList<>();
// The display name for the thread participant.
String displayName = "initial participant";
participants.add(new ChatParticipant()
    .setCommunicationIdentifier(new CommunicationUserIdentifier(firstUserId))
    .setDisplayName(displayName));

// The topic for the thread.
final String topic = "General";
// Optional, set a repeat request ID.
final String repeatabilityRequestID = "";
// Options to pass to the create method.
CreateChatThreadOptions createChatThreadOptions = new CreateChatThreadOptions()
    .setTopic(topic)
    .setParticipants(participants)
    .setIdempotencyToken(repeatabilityRequestID);

CreateChatThreadResult createChatThreadResult =
    chatAsyncClient.createChatThread(createChatThreadOptions).get();
ChatThreadProperties chatThreadProperties = createChatThreadResult.getChatThreadProperties();
threadId = chatThreadProperties.getId();
Now that we created a Chat thread, we need to obtain a ChatThreadAsyncClient to perform operations within the thread. Replace the comment <CREATE A CHAT THREAD CLIENT> with the following code:
ChatThreadAsyncClient chatThreadAsyncClient = new ChatThreadClientBuilder()
    .endpoint(endpoint)
    .credential(new CommunicationTokenCredential(firstUserAccessToken))
    .addPolicy(new UserAgentPolicy(APPLICATION_ID, SDK_NAME, sdkVersion))
    .chatThreadId(threadId)
    .buildAsyncClient();
Send message to the chat thread now.
Replace the comment <SEND A MESSAGE> with the following code:
// The chat message content, required.
final String content = "Please take a look at the attachment";

// The display name of the sender, if null (i.e. not specified), an empty name will be set.
final String senderDisplayName = "An important person";

// Use metadata optionally to include any additional data you want to send along with the message.
// This field provides a mechanism for developers to extend chat message functionality and add
// custom information for your use case. For example, when sharing a file link in the message, you
// might want to add 'hasAttachment:true' in metadata so that recipient's application can parse
// that and display accordingly.
final Map<String, String> metadata = new HashMap<String, String>();
metadata.put("hasAttachment", "true");
metadata.put("attachmentUrl", "https://contoso.com/files/attachment.docx");

SendChatMessageOptions chatMessageOptions = new SendChatMessageOptions()
    .setType(ChatMessageType.TEXT)
    .setContent(content)
    .setSenderDisplayName(senderDisplayName)
    .setMetadata(metadata);

// A string is the response returned from sending a message, it is an id, which is the unique ID
// of the message.
chatMessageId = chatThreadAsyncClient.sendMessage(chatMessageOptions).get().getId();
With real-time signaling, you can subscribe to new incoming messages and update the current messages in memory accordingly. Azure Communication Services supports a list of events that you can subscribe to.
Replace the comment <RECEIVE CHAT MESSAGES> with the following code (put the import statements at top of the file):
// Start real time notification
chatAsyncClient.startRealtimeNotifications(firstUserAccessToken, getApplicationContext());

// Register a listener for chatMessageReceived event
chatAsyncClient.addEventHandler(ChatEventType.CHAT_MESSAGE_RECEIVED, (ChatEvent payload) -> {
    ChatMessageReceivedEvent chatMessageReceivedEvent = (ChatMessageReceivedEvent) payload;
    // You code to handle chatMessageReceived event

});
Important
Known issue: When you use Android Chat and Calling SDK together in the same application, the Chat SDK real-time notifications feature doesn't work. You might get a dependency resolving issue.
You can turn off real-time notifications feature by adding the following dependency information in app's build.gradle file and instead poll the GetMessages API to display incoming messages to users.
implementation ("com.azure.android:azure-communication-chat:1.0.0") {
    exclude group: 'com.microsoft', module: 'trouter-client-android'
}
implementation 'com.azure.android:azure-communication-calling:1.0.0'
Note with this update, if the application tries to contact the notification API using chatAsyncClient.startRealtimeNotifications() or chatAsyncClient.addEventHandler(), it generates a runtime error.
For more information, see Android push notifications.
Replace the comment <ADD A USER> with the following code:
// The display name for the thread participant.
String secondUserDisplayName = "a new participant";
ChatParticipant participant = new ChatParticipant()
    .setCommunicationIdentifier(new CommunicationUserIdentifier(secondUserId))
    .setDisplayName(secondUserDisplayName);

chatThreadAsyncClient.addParticipant(participant);
Replace the <LIST USERS> comment with the following code (put the import statements at top of the file):
import com.azure.android.core.rest.util.paging.PagedAsyncStream;
import com.azure.android.core.util.RequestContext;

// The maximum number of participants to be returned per page, optional.
int maxPageSize = 10;

// Skips participants up to a specified position in response.
int skip = 0;

// Options to pass to the list method.
ListParticipantsOptions listParticipantsOptions = new ListParticipantsOptions()
    .setMaxPageSize(maxPageSize)
    .setSkip(skip);

PagedAsyncStream<ChatParticipant> participantsPagedAsyncStream =
      chatThreadAsyncClient.listParticipants(listParticipantsOptions, RequestContext.NONE);

participantsPagedAsyncStream.forEach(chatParticipant -> {
    // You code to handle participant
});
Remove the second user from the thread.
Replace the <REMOVE A USER> comment with the following code:
// Using the unique ID of the participant.
chatThreadAsyncClient.removeParticipant(new CommunicationUserIdentifier(secondUserId)).get();
Replace the <SEND A TYPING NOTIFICATION> comment with the following code:
chatThreadAsyncClient.sendTypingNotification().get();
We send read receipt for the previously sent message.
Replace the <SEND A READ RECEIPT> comment with the following code:
chatThreadAsyncClient.sendReadReceipt(chatMessageId).get();
Replace the <READ RECEIPTS> comment with the following code:
// The maximum number of participants to be returned per page, optional.
maxPageSize = 10;
// Skips participants up to a specified position in response.
skip = 0;
// Options to pass to the list method.
ListReadReceiptOptions listReadReceiptOptions = new ListReadReceiptOptions()
    .setMaxPageSize(maxPageSize)
    .setSkip(skip);

PagedAsyncStream<ChatMessageReadReceipt> readReceiptsPagedAsyncStream =
      chatThreadAsyncClient.listReadReceipts(listReadReceiptOptions, RequestContext.NONE);

readReceiptsPagedAsyncStream.forEach(readReceipt -> {
    // You code to handle readReceipt
});
In Android Studio, hit the Run button to build and run the project. In the console, you can view the output from the code and the logger output from the ChatClient.
Find the finalized code for this article in the GitHub sample Add Chat to your application.
Create an Azure account with an active subscription. For details, see Create an account for free.
Install Visual Studio
Create an Azure Communication Services resource. For details, see Create an Azure Communication Services resource. You need to record your resource endpoint and connection string for this article.
A User Access Token. Be sure to set the scope to chat, and note the token string as well as the user_id string. You can also use the Azure CLI and run the following command with your connection string to create a user and an access token.
az communication identity token issue --scope chat --connection-string "yourConnectionString"
For details, see Use Azure CLI to Create and Manage Access Tokens.
In a console window (such as cmd, PowerShell, or Bash), use the dotnet new command to create a new console app with the name ChatQuickstart. This command creates a simple "Hello World" C# project with a single source file: Program.cs.
dotnet new console -o ChatQuickstart
Change your directory to the newly created app folder and use the dotnet build command to compile your application.
cd ChatQuickstart
dotnet build
Install the Azure Communication Chat SDK for .NET
dotnet add package Azure.Communication.Chat
The following classes handle some of the major features of the Azure Communication Services Chat SDK for C#.
| Name | Description |
|---|---|
| ChatClient | This class is needed for the Chat functionality. You instantiate it with your subscription information, and use it to create, get, and delete threads. |
| ChatThreadClient | This class is needed for the Chat Thread functionality. You obtain an instance via the ChatClient, and use it to send/receive/update/delete messages, add/remove/get participants, send typing notifications and read receipts. |
To create a chat client, use your Communication Services endpoint and the access token that was generated as part of the prerequisite steps. You need to use the CommunicationIdentityClient class from the Identity SDK to create a user and issue a token to pass to your chat client.
Learn more about User Access Tokens.
This article doesn't cover creating a service tier to manage tokens for your chat application, although we recommend it. For more information, see Chat Architecture.
Copy the following code snippets and paste into the Program.cs source file.
using Azure;
using Azure.Communication;
using Azure.Communication.Chat;
using System;

namespace ChatQuickstart
{
    class Program
    {
        static async System.Threading.Tasks.Task Main(string[] args)
        {
            // Your unique Azure Communication service endpoint
            Uri endpoint = new Uri("<replace with your resource endpoint>");

            CommunicationTokenCredential communicationTokenCredential = new CommunicationTokenCredential(<Access_Token>);
            ChatClient chatClient = new ChatClient(endpoint, communicationTokenCredential);
        }
    }
}
Use the createChatThread method on the chatClient to create a chat thread
topic to give a topic to this chat. You can update the topic after creating the chat thread using the UpdateTopic function.participants property to pass a list of ChatParticipant objects to be added to the chat thread. The ChatParticipant object is initialized with a CommunicationIdentifier object. CommunicationIdentifier could be of type CommunicationUserIdentifier, MicrosoftTeamsUserIdentifier, or PhoneNumberIdentifier. For example, to get a CommunicationIdentifier object, you need to pass an Access ID which you created by following instruction to Create a userThe response object from the createChatThread method contains the chatThread details. To interact with the chat thread operations such as adding participants, sending a message, deleting a message, and so on, a chatThreadClient client instance needs to instantiated using the GetChatThreadClient method on the ChatClient client.
var chatParticipant = new ChatParticipant(identifier: new CommunicationUserIdentifier(id: "<Access_ID>"))
{
    DisplayName = "UserDisplayName"
};
CreateChatThreadResult createChatThreadResult = await chatClient.CreateChatThreadAsync(topic: "Hello world!", participants: new[] { chatParticipant });
ChatThreadClient chatThreadClient = chatClient.GetChatThreadClient(threadId: createChatThreadResult.ChatThread.Id);
string threadId = chatThreadClient.Id;
The GetChatThreadClient method returns a thread client for a thread that already exists. You can use it to perform operations on the created thread: add members, send message, and so on. threadId is the unique ID of the existing chat thread.
string threadId = "<THREAD_ID>";
ChatThreadClient chatThreadClient = chatClient.GetChatThreadClient(threadId: threadId);
Use GetChatThreads to retrieve all the chat threads that the user is part of.
AsyncPageable<ChatThreadItem> chatThreadItems = chatClient.GetChatThreadsAsync();
await foreach (ChatThreadItem chatThreadItem in chatThreadItems)
{
    Console.WriteLine($"{ chatThreadItem.Id}");
}
Use SendMessage to send a message to a thread.
content to provide the content for the message. Required.type for the content type of the message such as 'Text' or 'Html'. If not specified, 'Text' is set.senderDisplayName to specify the display name of the sender. If not specified, empty string is set.metadata to include other data you want to send along with the message. This field provides a mechanism for developers to extend chat message functionality and add custom information for your use case. For example, when sharing a file link in the message, you might want to add 'hasAttachment:true' in metadata so that recipient's application can parse that and display accordingly.SendChatMessageOptions sendChatMessageOptions = new SendChatMessageOptions()
{
Content = "Please take a look at the attachment",
MessageType = ChatMessageType.Text
};
sendChatMessageOptions.Metadata["hasAttachment"] = "true";
sendChatMessageOptions.Metadata["attachmentUrl"] = "https://contoso.com/files/attachment.docx";
SendChatMessageResult sendChatMessageResult = await chatThreadClient.SendMessageAsync(sendChatMessageOptions);
string messageId = sendChatMessageResult.Id;
You can retrieve chat messages by polling the GetMessages method on the chat thread client at specified intervals.
AsyncPageable<ChatMessage> allMessages = chatThreadClient.GetMessagesAsync();
await foreach (ChatMessage message in allMessages)
{
    Console.WriteLine($"{message.Id}:{message.Content.Message}");
}
GetMessages takes an optional DateTimeOffset parameter. If that offset is specified, you receive messages that were received, updated, or deleted after it. Messages received before the offset time but edited or removed afterward are also returned.
GetMessages returns the latest version of the message, including any edits or deletes that happened to the message using UpdateMessage and DeleteMessage. For deleted messages, chatMessage.DeletedOn returns a datetime value indicating when that message was deleted. For edited messages, chatMessage.EditedOn returns a datetime indicating when the message was edited. The original time of message creation can be accessed using chatMessage.CreatedOn, and it can be used for ordering the messages.
GetMessages returns different types of messages. You can identify the type from the chatMessage.Type. The types are:
Text: Regular chat message sent by a thread member.
Html: A formatted text message. Communication Services users currently can't send RichText messages. This message type is supported for messages sent from Teams users to Communication Services users in Teams Interop scenarios.
TopicUpdated: System message that indicates the topic is updated. (readonly)
ParticipantAdded: System message that indicates one or more participants are added to the chat thread (readonly).
ParticipantRemoved: System message that indicates a participant is removed from the chat thread.
For more information, see Message Types.
Once a thread is created, you can then add and remove users from it. By adding users, you give them access to be able to send messages to the thread, and add/remove other participant. Before calling AddParticipants, ensure that you acquire a new access token and identity for that user. The user needs that access token in order to initialize their chat client.
Use AddParticipants to add one or more participants to the chat thread. The following are the supported attributes for each thread participant:
communicationUser, required, is the identity of the thread participant.displayName, optional, is the display name for the thread participant.shareHistoryTime, optional, time from which the chat history is shared with the participant.var josh = new CommunicationUserIdentifier(id: "<Access_ID_For_Josh>");
var gloria = new CommunicationUserIdentifier(id: "<Access_ID_For_Gloria>");
var amy = new CommunicationUserIdentifier(id: "<Access_ID_For_Amy>");
var participants = new[]
{
new ChatParticipant(josh) { DisplayName = "Josh" },
new ChatParticipant(gloria) { DisplayName = "Gloria" },
new ChatParticipant(amy) { DisplayName = "Amy" }
};
await chatThreadClient.AddParticipantsAsync(participants: participants);
Use GetParticipants to retrieve the participants of the chat thread.
AsyncPageable<ChatParticipant> allParticipants = chatThreadClient.GetParticipantsAsync();
await foreach (ChatParticipant participant in allParticipants)
{
    Console.WriteLine($"{((CommunicationUserIdentifier)participant.User).Id}:{participant.DisplayName}:{participant.ShareHistoryTime}");
}
Use SendReadReceipt to notify other participants that the user read the message.
await chatThreadClient.SendReadReceiptAsync(messageId: messageId);
Run the application from your application directory with the dotnet run command.
dotnet run
Find the finalized code for this article in the GitHub sample Add Chat to your application.
Create an Azure account with an active subscription. For details, see Create an account for free.
Install Xcode and CocoaPods. You use Xcode to create an iOS application for this article, and CocoaPods to install dependencies.
Create an Azure Communication Services resource. For details, see Quickstart: Create and manage Communication Services resources. You need to record your resource endpoint and connection string for this article.
Create two users in Azure Communication Services, and issue them a User Access Token. Be sure to set the scope to chat, and note the token string as well as the user_id string. In this article, you create a thread with an initial participant, and then add a second participant to the thread. You can also use the Azure CLI and run the following command with your connection string to create a user and an access token.
az communication identity token issue --scope chat --connection-string "yourConnectionString"
For details, see Use Azure CLI to Create and Manage Access Tokens.
Open Xcode and select Create a new Xcode project. Then select iOS as the platform and App for the template.
For the project name, enter ChatQuickstart. Then select Storyboard as the interface, and Swift as the language.
Select Next, and choose the directory where you want the project to be created.
Use CocoaPods to install the necessary Communication Services dependencies.
From the command line, go inside the root directory of the ChatQuickstart iOS project. Create a Podfile with the following command: pod init.
Open the Podfile, and add the following dependencies to the ChatQuickstart target:
pod 'AzureCommunicationChat', '~> 1.3.6'
Install the dependencies with the following command: pod install. This also creates an Xcode workspace.
After running pod install, reopen the project in Xcode by selecting the newly created .xcworkspace.
Open the workspace ChatQuickstart.xcworkspace in Xcode, and then open ViewController.swift.
In this article, you add your code to viewController, and view the output in the Xcode console. This article doesn't address building a user interface in iOS.
At the top of viewController.swift, import the AzureCommunication and AzureCommunicationChat libraries:
import AzureCommunicationCommon
import AzureCommunicationChat
Copy the following code into the viewDidLoad() method of ViewController:
override func viewDidLoad() {
        super.viewDidLoad()
        // Do any additional setup after loading the view.

        let semaphore = DispatchSemaphore(value: 0)
        DispatchQueue.global(qos: .background).async {
            do {
                // <CREATE A CHAT CLIENT>

                // <CREATE A CHAT THREAD>

                // <LIST ALL CHAT THREADS>

                // <GET A CHAT THREAD CLIENT>

                // <SEND A MESSAGE>

                // <SEND A READ RECEIPT >

                // <RECEIVE MESSAGES>

                // <ADD A USER>

                // <LIST USERS>
            } catch {
                print("Quickstart failed: \(error.localizedDescription)")
            }
        }
    }
For demonstration purposes, we use a semaphore to synchronize your code. In following steps, you replace the placeholders with sample code by using the Azure Communication Services Chat library.
To create a chat client, use your Communication Services endpoint and the access token that was generated as part of the prerequisite steps.
Learn more about User Access Tokens.
This article doesn't cover creating a service tier to manage tokens for your chat application, but we recommended it. Learn more about Chat Architecture
Replace the comment <CREATE A CHAT CLIENT> with the following code snippet:
let endpoint = "<ACS_RESOURCE_ENDPOINT>"
let credential =
try CommunicationTokenCredential(
    token: "<ACCESS_TOKEN>"
)
let options = AzureCommunicationChatClientOptions()

let chatClient = try ChatClient(
    endpoint: endpoint,
    credential: credential,
    withOptions: options
)
Replace <ACS_RESOURCE_ENDPOINT> with the endpoint of your Azure Communication Services resource. Replace <ACCESS_TOKEN> with a valid Communication Services access token.
The following classes and interfaces handle some of the major features of the Azure Communication Services Chat SDK for iOS.
| Name | Description |
|---|---|
ChatClient |
This class is needed for the chat functionality. You instantiate it with your subscription information, and use it to create, get, delete threads, and subscribe to chat events. |
ChatThreadClient |
This class is needed for the chat thread functionality. You obtain an instance via ChatClient, and use it to send, receive, update, and delete messages. You can also use it to add, remove, and get users, send typing notifications and read receipts. |
CreateChatThreadResult is the response returned from creating a chat thread.
It contains a chatThread property which is the ChatThreadProperties object. This object contains the threadId which can be used to get a ChatThreadClient for performing operations on the created thread: add participants, send message, etc.
Replace the comment <CREATE A CHAT THREAD> with the following code snippet:
let request = CreateChatThreadRequest(
    topic: "Quickstart",
    participants: [
        ChatParticipant(
            id: CommunicationUserIdentifier("<USER_ID>"),
            displayName: "Jack"
        )
    ]
)

var threadId: String?
chatClient.create(thread: request) { result, _ in
    switch result {
    case let .success(result):
        threadId = result.chatThread?.id

    case .failure:
        fatalError("Failed to create thread.")
    }
    semaphore.signal()
}
semaphore.wait()
Replace <USER_ID> with a valid Communication Services user ID.
You're using a semaphore here to wait for the completion handler before continuing. In later steps, use the threadId from the response returned to the completion handler.
After creating a chat thread, we can list all chat threads by calling the listChatThreads method on ChatClient. Replace the comment <LIST ALL CHAT THREADS> with the following code:
chatClient.listThreads { result, _ in
    switch result {
    case let .success(threads):
        guard let chatThreadItems = threads.pageItems else {
            print("No threads returned.")
            return
        }

        for chatThreadItem in chatThreadItems {
            print("Thread id: \(chatThreadItem.id)")
        }
    case .failure:
        print("Failed to list threads")
    }
    semaphore.signal()
}
semaphore.wait()
The createClient method returns a ChatThreadClient for a thread that already exists. It can be used for performing operations on the created thread: add participants, send message, etc. threadId is the unique ID of the existing chat thread.
Replace the comment <GET A CHAT THREAD CLIENT> with the following code:
let chatThreadClient = try chatClient.createClient(forThread: threadId!)
Use the send method to send a message to a thread identified by threadId.
SendChatMessageRequest is used to describe the message request:
content to provide the chat message contentsenderDisplayName to specify the display name of the sendertype to specify the message type, such as 'text' or 'html'metadata optionally to include any other data you want to send along with the message. This field provides a mechanism for developers to extend chat message functionality and add custom information for your use case. For example, when sharing a file link in the message, you might want to add 'hasAttachment:true' in metadata so that recipient's application can parse that and display accordingly.SendChatMessageResult is the response returned from sending a message. It contains an ID, which is the unique ID of the message.
Replace the comment <SEND A MESSAGE> with the following code snippet:
let message = SendChatMessageRequest(
                        content: "Hello!",
                        senderDisplayName: "Jack",
                        type: .text,
                        metadata: [
                            "hasAttachment": "true",
                            "attachmentUrl": "https://contoso.com/files/attachment.docx"
                        ]
                    )

var messageId: String?

chatThreadClient.send(message: message) { result, _ in
    switch result {
    case let .success(result):
        print("Message sent, message id: \(result.id)")
        messageId = result.id
    case .failure:
        print("Failed to send message")
    }
    semaphore.signal()
}
semaphore.wait()
Use the sendReadReceipt method to post a read receipt event to a chat thread, on behalf of a user.
messageId is the unique ID of the chat message that was read.
Replace the comment <SEND A READ RECEIPT> with the following code:
if let id = messageId {
    chatThreadClient.sendReadReceipt(forMessage: id) { result, _ in
        switch result {
        case .success:
            print("Read receipt sent")
        case .failure:
            print("Failed to send read receipt")
        }
        semaphore.signal()
    }
    semaphore.wait()
} else {
    print("Cannot send read receipt without a message id")
}
With real-time signaling, you can subscribe to listen for new incoming messages and update the current messages in memory accordingly. Azure Communication Services supports a list of events that you can subscribe to.
Replace the comment <RECEIVE MESSAGES> with the following code. After enabling notifications, try sending new messages to see the ChatMessageReceivedEvents.
chatClient.startRealTimeNotifications { result in
    switch result {
    case .success:
        print("Real-time notifications started.")
    case .failure:
        print("Failed to start real-time notifications.")
    }
    semaphore.signal()
}
semaphore.wait()

chatClient.register(event: .chatMessageReceived, handler: { response in
    switch response {
    case let .chatMessageReceivedEvent(event):
        print("Received a message: \(event.message)")
    default:
        return
    }
})
Alternatively you can retrieve chat messages by polling the listMessages method at specified intervals. See the following code snippet for listMessages
chatThreadClient.listMessages { result, _ in
    switch result {
    case let .success(messagesResult):
        guard let messages = messagesResult.pageItems else {
            print("No messages returned.")
            return
        }

        for message in messages {
            print("Received message with id: \(message.id)")
        }

    case .failure:
        print("Failed to receive messages")
    }
    semaphore.signal()
}
semaphore.wait()
Once a thread is created, you can then add and remove users from it. By adding users, you give them access to be able to send messages to the thread, and add/remove other participant. Before calling add, ensure that you acquired a new access token and identity for that user. The user needs the access token in order to initialize their chat client.
Use the add method of ChatThreadClient to add one or more participants to the chat thread. The following are the supported attributes for each thread participant:
id, required, is the identity of the thread participant.displayName, optional, is the display name for the thread participant.shareHistoryTime, optional, time from which the chat history is shared with the participant.Replace the comment <ADD A USER> with the following code:
let user = ChatParticipant(
    id: CommunicationUserIdentifier("<USER_ID>"),
    displayName: "Jane"
)

chatThreadClient.add(participants: [user]) { result, _ in
    switch result {
    case let .success(result):
        if let errors = result.invalidParticipants, !errors.isEmpty {
            print("Error adding participant")
        } else {
            print("Added participant")
        }
    case .failure:
        print("Failed to add the participant")
    }
    semaphore.signal()
}
semaphore.wait()
Replace <USER_ID> with the Communication Services user ID of the user to be added.
Use the listParticipants method to get all participants for a particular chat thread.
Replace the <LIST USERS> comment with the following code:
chatThreadClient.listParticipants { result, _ in
    switch result {
    case let .success(participantsResult):
        guard let participants = participantsResult.pageItems else {
            print("No participants returned.")
            return
        }

        for participant in participants {
            let user = participant.id as! CommunicationUserIdentifier
            print("User with id: \(user.identifier)")
        }
    case .failure:
        print("Failed to list participants")
    }
    semaphore.signal()
}
semaphore.wait()
Push notifications notify clients of incoming messages in a chat thread in situations where the mobile app isn't running in the foreground.
Currently, sending chat push notifications with Notification Hub is supported for IOS SDK in version 1.3.0.
For more information, see Enable Push Notification in your chat app.
Some of the scripts within the linked libraries write files during the build process. To enable file writing, disable the User Script Sandboxing in Xcode.
In the Xcode project, under Build Settings, set the User Script Sandboxing option to No. To find the setting, change the filter from Basic to All or use the search bar.
In Xcode hit the Run button to build and run the project. In the console, you can view the output from the code and the logger output from the ChatClient.
Find the finalized code for this article in the GitHub sample Add Chat to your application.
An Azure account with an active subscription, or create an Azure account for free.
An active Azure Communication Services resource, or create a Communication Services resource.
An active Azure Logic Apps resource, or create a blank logic app with the trigger that you want to use. Currently, the Communication Services Chat connector provides only actions, so your logic app requires a trigger, at minimum.
Complete these steps in Power Automate with your Power Automate flow open in edit mode.
To add a new step in your workflow by using the Communication Services Identity connector:
In the designer, under the step where you want to add the new action, select New step. Alternatively, to add the new action between steps, move your pointer over the arrow between those steps, select the plus sign (+), and then select Add an action.
In the Choose an operation search box, enter Communication Services Identity. In the list of actions list, select Create a user.
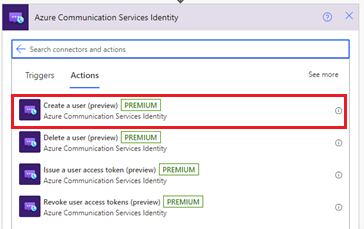
Enter the connection string. To get the connection string URL in the Azure portal, go to the Azure Communication Services resource. In the resource menu, select Keys, and then select Connection string. Select the copy icon to copy the connection string.

Enter a name for the connection.
Select Show advanced options, and then select the token scope. The action generates an access token and its expiration time with the specified scope. This action also generates a user ID that's a Communication Services user identity.

In Token Scopes Item, select chat.
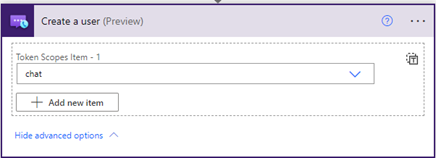
Select Create. The user ID and an access token are shown.
Add a new action.
In the Choose an operation search box, enter Communication Services Chat. In the list of actions, select Create chat thread.
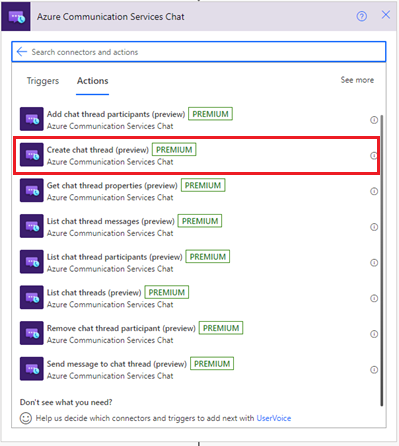
Enter the Communication Services endpoint URL. To get the endpoint URL in the Azure portal, go to the Azure Communication Services resource. In the resource menu, select Keys, and then select Endpoint.
Enter a name for the connection.
Select the access token that was generated in the preceding section, and then add a chat thread topic description. Add the created user and enter a name for the participant.
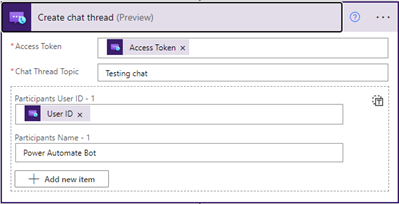
Add a new action.
In the Choose an operation search box, enter Communication Services Chat. In the list of actions, select Send message to chat thread.
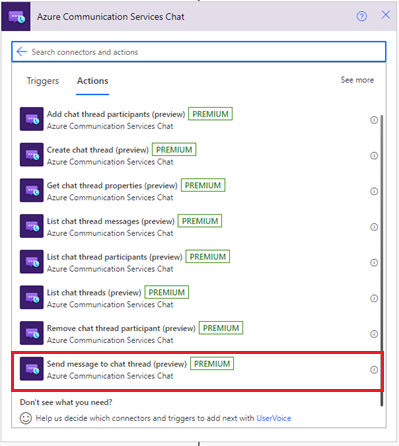
Enter the access token, thread ID, content, and name.
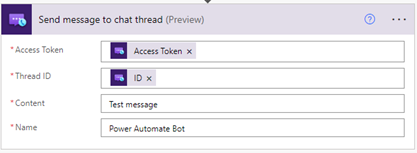
To verify that you sent a message correctly:
Add a new action.
In the Choose an operation search box, enter Communication Services Chat. In the list of actions, select List chat thread messages.
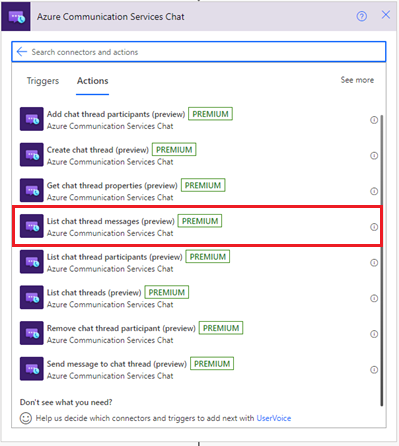
Enter the access token and thread ID.
To manually start your workflow, on the designer toolbar, select Run. The workflow creates a user, issues an access token for that user, and then removes the token and deletes the user. For more information, see How to run your workflow.
Now, select List chat thread messages. In the action outputs, check for the message that was sent.
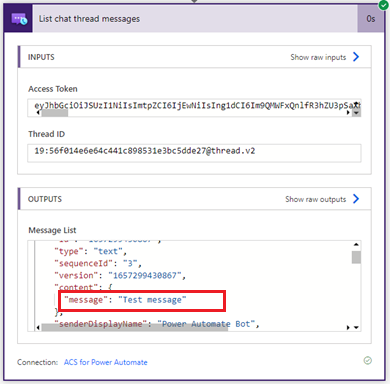
To clean up your logic app workflow and related resources, see how to clean up Logic Apps resources.
To clean up and remove a Communication Services subscription, you can delete the resource or resource group. Deleting the resource group also deletes any other resources associated with it. For more information, see cleaning up resources.
This article described how to:
Ask Learn is an AI assistant that can answer questions, clarify concepts, and define terms using trusted Microsoft documentation.
Please sign in to use Ask Learn.
Sign in