Tutorial: Device Update for Azure IoT Hub using the Raspberry Pi 3 B+ reference image
Device Update for Azure IoT Hub supports image-based, package-based, and script-based updates.
Image updates provide a higher level of confidence in the end state of the device. It's typically easier to replicate the results of an image update between a preproduction environment and a production environment because it doesn't pose the same challenges as packages and their dependencies. Because of their atomic nature, you can also adopt an A/B failover model easily.
This tutorial walks you through the steps to complete an end-to-end image-based update by using Device Update for IoT Hub on a Raspberry Pi 3 B+ board.
In this tutorial, you'll learn how to:
- Download an image.
- Add a tag to your IoT device.
- Import an update.
- Create a device group.
- Deploy an image update.
- Monitor the update deployment.
Note
Image updates in this tutorial were validated on the Raspberry Pi B3 board.
Prerequisites
If you haven't already done so, create a Device Update account and instance and configure an IoT hub.
Download the image
We provide sample images in Assets on the Device Update GitHub releases page. The .gz file is the base image that you can flash on to a Raspberry Pi 3 B+ board. The swUpdate file is the update you would import through Device Update for IoT Hub.
Flash an SD card with the image
Use your favorite OS flashing tool to install the Device Update base image (adu-base-image) on the SD card that will be used in the Raspberry Pi 3 B+ device.
Use bmaptool to flash the SD card
Install the
bmaptoolutility, if you haven't done so already.sudo apt-get install bmap-toolsLocate the path for the SD card in
/dev. The path should look something like/dev/sd*or/dev/mmcblk*. You can use thedmesgutility to help locate the correct path.Unmount all mounted partitions before flashing.
sudo umount /dev/<device>Make sure you have write permissions to the device.
sudo chmod a+rw /dev/<device>Optional: For faster flashing, download the bimap file and the image file and put them in the same directory.
Flash the SD card.
sudo bmaptool copy <path to image> /dev/<device>
Device Update for Azure IoT Hub software is subject to the following license terms:
Read the license terms prior to using the agent. Your installation and use constitutes your acceptance of these terms. If you don't agree with the license terms, don't use the Device Update for IoT Hub agent.
Create a device or module in IoT Hub and get a connection string
Now, add the device to IoT Hub. From within IoT Hub, a connection string is generated for the device.
From the Azure portal, start IoT Hub.
Create a new device.
On the left pane, select Devices. Then select New.
Under Device ID, enter a name for the device. Ensure that the Autogenerate keys checkbox is selected.
Select Save. On the Devices page, the device you created should be in the list.
Get the device connection string by using one of two options:
- Option 1: Use the Device Update agent with a module identity: On the same Devices page, select Add Module Identity at the top. Create a new Device Update module with the name IoTHubDeviceUpdate. Choose other options as they apply to your use case and then select Save. Select the newly created module. In the module view, select the Copy icon next to Primary Connection String.
- Option 2: Use the Device Update agent with the device identity: In the device view, select the Copy icon next to Primary Connection String.
Paste the copied characters somewhere for later use in the following steps:
This copied string is your device connection string.
Prepare on-device configurations for Device Update for IoT Hub
Two configuration files must be on the device so that Device Update for IoT Hub configures properly. The first file is the du-config.json file, which must exist at /adu/du-config.json. The second file is the du-diagnostics-config.json file, which must exist at /adu/du-diagnostics-config.json.
Here are two examples for the du-config.json and the du-diagnostics-config.json files:
Example du-config.json
   {
      "schemaVersion": "1.0",
      "aduShellTrustedUsers": [
         "adu",
         "do"
      ],
      "manufacturer": "fabrikam",
      "model": "vacuum",
      "agents": [
         {
         "name": "main",
         "runas": "adu",
         "connectionSource": {
            "connectionType": "string",
            "connectionData": "HostName=example-connection-string.azure-devices.net;DeviceId=example-device;SharedAccessKey=M5oK/rOP12aB5678YMWv5vFWHFGJFwE8YU6u0uTnrmU="
         },
         "manufacturer": "fabrikam",
         "model": "vacuum"
         }
      ]
   }
Example du-diagnostics-config.json
   {
      "logComponents":[
         {
               "componentName":"adu",
               "logPath":"/adu/logs/"
         },
         {
               "componentName":"do",
               "logPath":"/var/log/deliveryoptimization-agent/"
         }
      ],
      "maxKilobytesToUploadPerLogPath":50
   }
Configure the Device Update agent on Raspberry Pi
Make sure that Raspberry Pi 3 is connected to the network.
Follow these instructions to add the configuration details:
First, SSH in to the machine by using the following command in the PowerShell window:
ssh raspberrypi3 -l rootCreate or open the
du-config.jsonfile for editing by using:nano /adu/du-config.jsonAfter you run the command, you should see an open editor with the file. If you've never created the file, it will be empty. Now copy the preceding example du-config.json contents, and substitute the configurations required for your device. Then replace the example connection string with the one for the device you created in the preceding steps.
After you finish your changes, select Ctrl+X to exit the editor. Then enter y to save the changes.
Now you need to create the
du-diagnostics-config.jsonfile by using similar commands. Start by creating or opening thedu-diagnostics-config.jsonfile for editing by using:nano /adu/du-diagnostics-config.jsonCopy the preceding example du-diagnostics-config.json contents, and substitute any configurations that differ from the default build. The example du-diagnostics-config.json file represents the default log locations for Device Update for IoT Hub. You only need to change these if your implementation differs.
After you finish your changes, select Ctrl+X to exit the editor. Then enter y to save the changes.
Use the following command to show the files located in the
/adu/directory. You should see both of your configuration files.du-diagnostics-config.json files for editing by using:ls -la /adu/
Restart the Device Update system daemon to make sure that the configurations were applied. Use the following command within the terminal logged in to the
raspberrypi:systemctl start adu-agentCheck that the agent is live by using the following command:
systemctl status adu-agentYou should see the status come back as alive and green.
Connect the device in Device Update for IoT Hub
On the left pane, select Devices.
Select the link with your device name.
At the top of the page, select Device Twin if you're connecting directly to Device Update by using the IoT device identity. Otherwise, select the module you created and select its module twin.
Under the reported section of the Device Twin properties, look for the Linux kernel version. For a new device, which hasn't received an update from Device Update, the DeviceManagement:DeviceInformation:1.swVersion value represents the firmware version running on the device. After an update has been applied to a device, Device Update uses the AzureDeviceUpdateCore:ClientMetadata:4.installedUpdateId property value to represent the firmware version running on the device.
The base and update image files have a version number in the file name.
adu-<image type>-image-<machine>-<version number>.<extension>
Use that version number in the later "Import the update" section.
Add a tag to your device
Sign in to the Azure portal and go to the IoT hub.
On the left pane, under Devices, find your IoT device and go to the device twin or module twin.
In the module twin of the Device Update agent module, delete any existing Device Update tag values by setting them to null. If you're using the device identity with the Device Update agent, make these changes on the device twin.
Add a new Device Update tag value, as shown:
    "tags": {
            "ADUGroup": "<CustomTagValue>"
            }
Import the update
Download the sample tutorial manifest (Tutorial Import Manifest_Pi.json) and sample update (adu-update-image-raspberrypi3-0.6.5073.1.swu) from Release Assets for the latest agent.
Sign in to the Azure portal and go to your IoT hub with Device Update. On the left pane, under Automatic Device Management, select Updates.
Select the Updates tab.
Select + Import New Update.
Select + Select from storage container. Select an existing account or create a new account by using + Storage account. Then select an existing container or create a new container by using + Container. This container will be used to stage your update files for importing.
Note
We recommend that you use a new container each time you import an update to avoid accidentally importing files from previous updates. If you don't use a new container, be sure to delete any files from the existing container before you finish this step.

In your container, select Upload and go to the files you downloaded in step 1. After you've selected all your update files, select Upload. Then select the Select button to return to the Import update page.
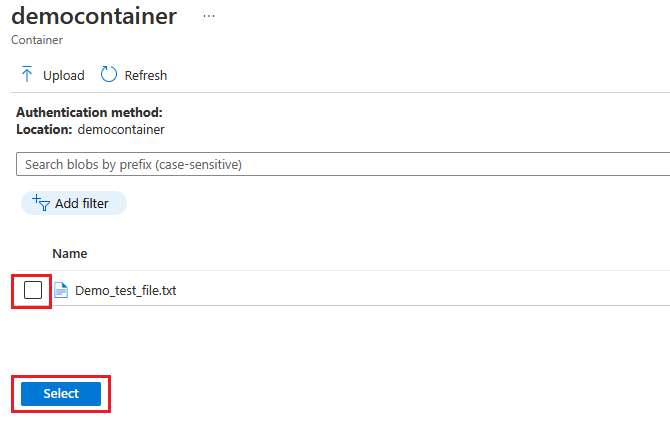
This screenshot shows the import step. File names might not match the ones used in the example.
On the Import update page, review the files to be imported. Then select Import update to start the import process.

The import process begins, and the screen switches to the Import history section. When the Status column indicates the import has succeeded, select the Available updates header. You should see your imported update in the list now.


Learn more about how to import updates.
Create an update group
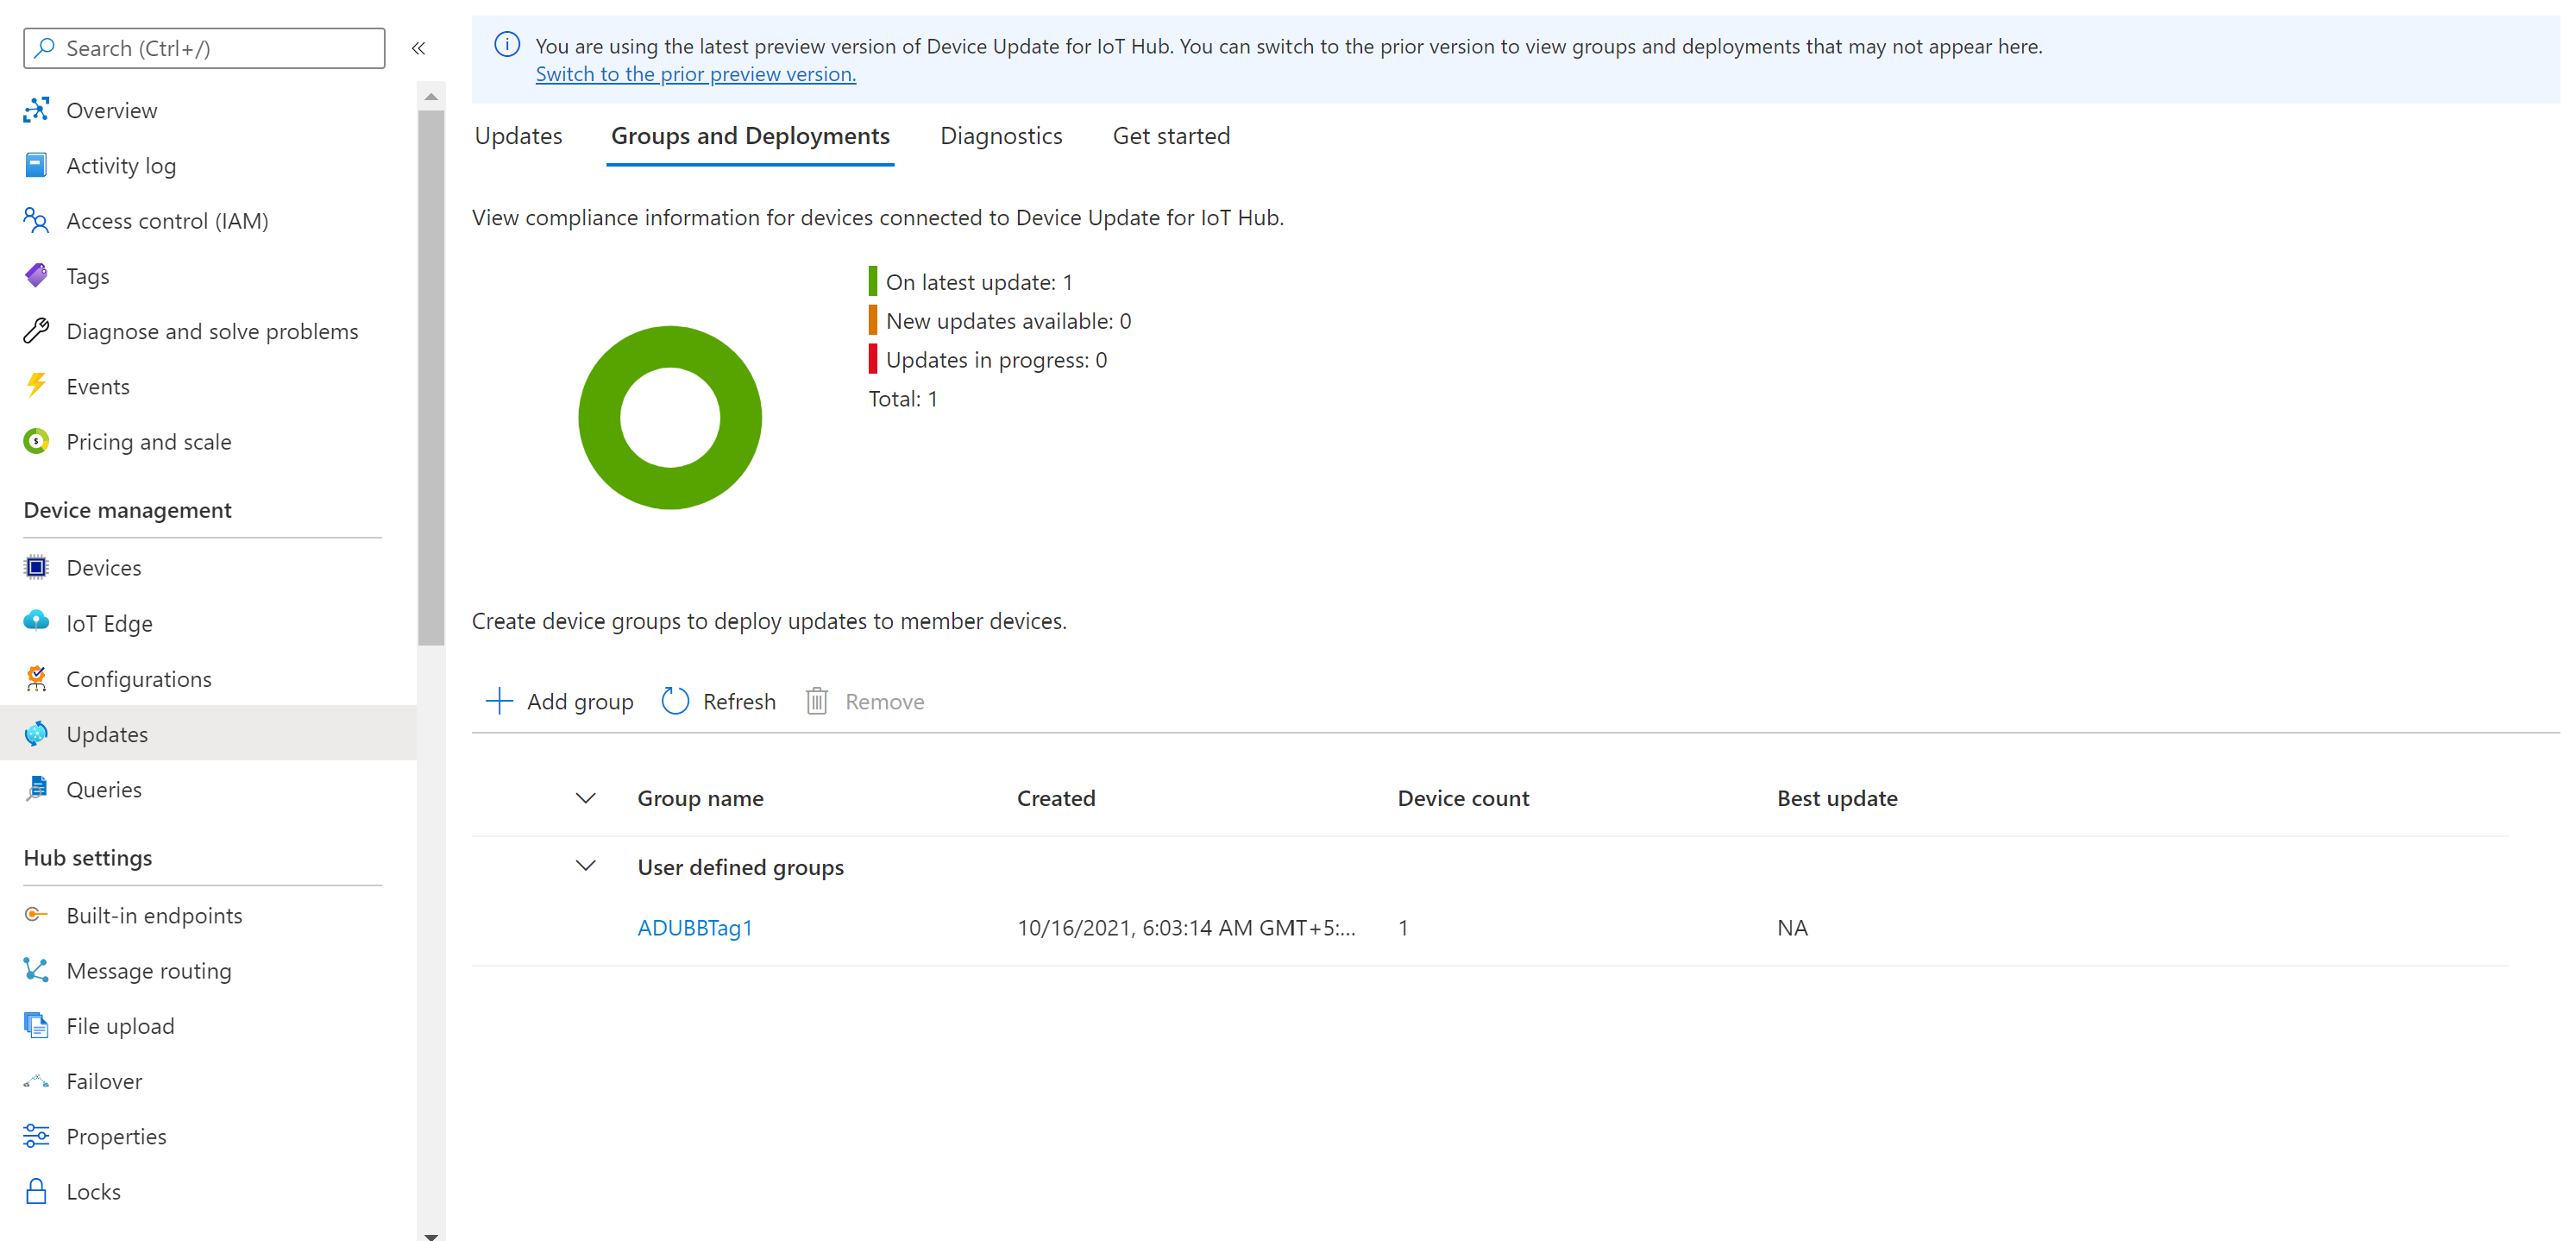
Go to the Groups and Deployments tab at the top of the page.

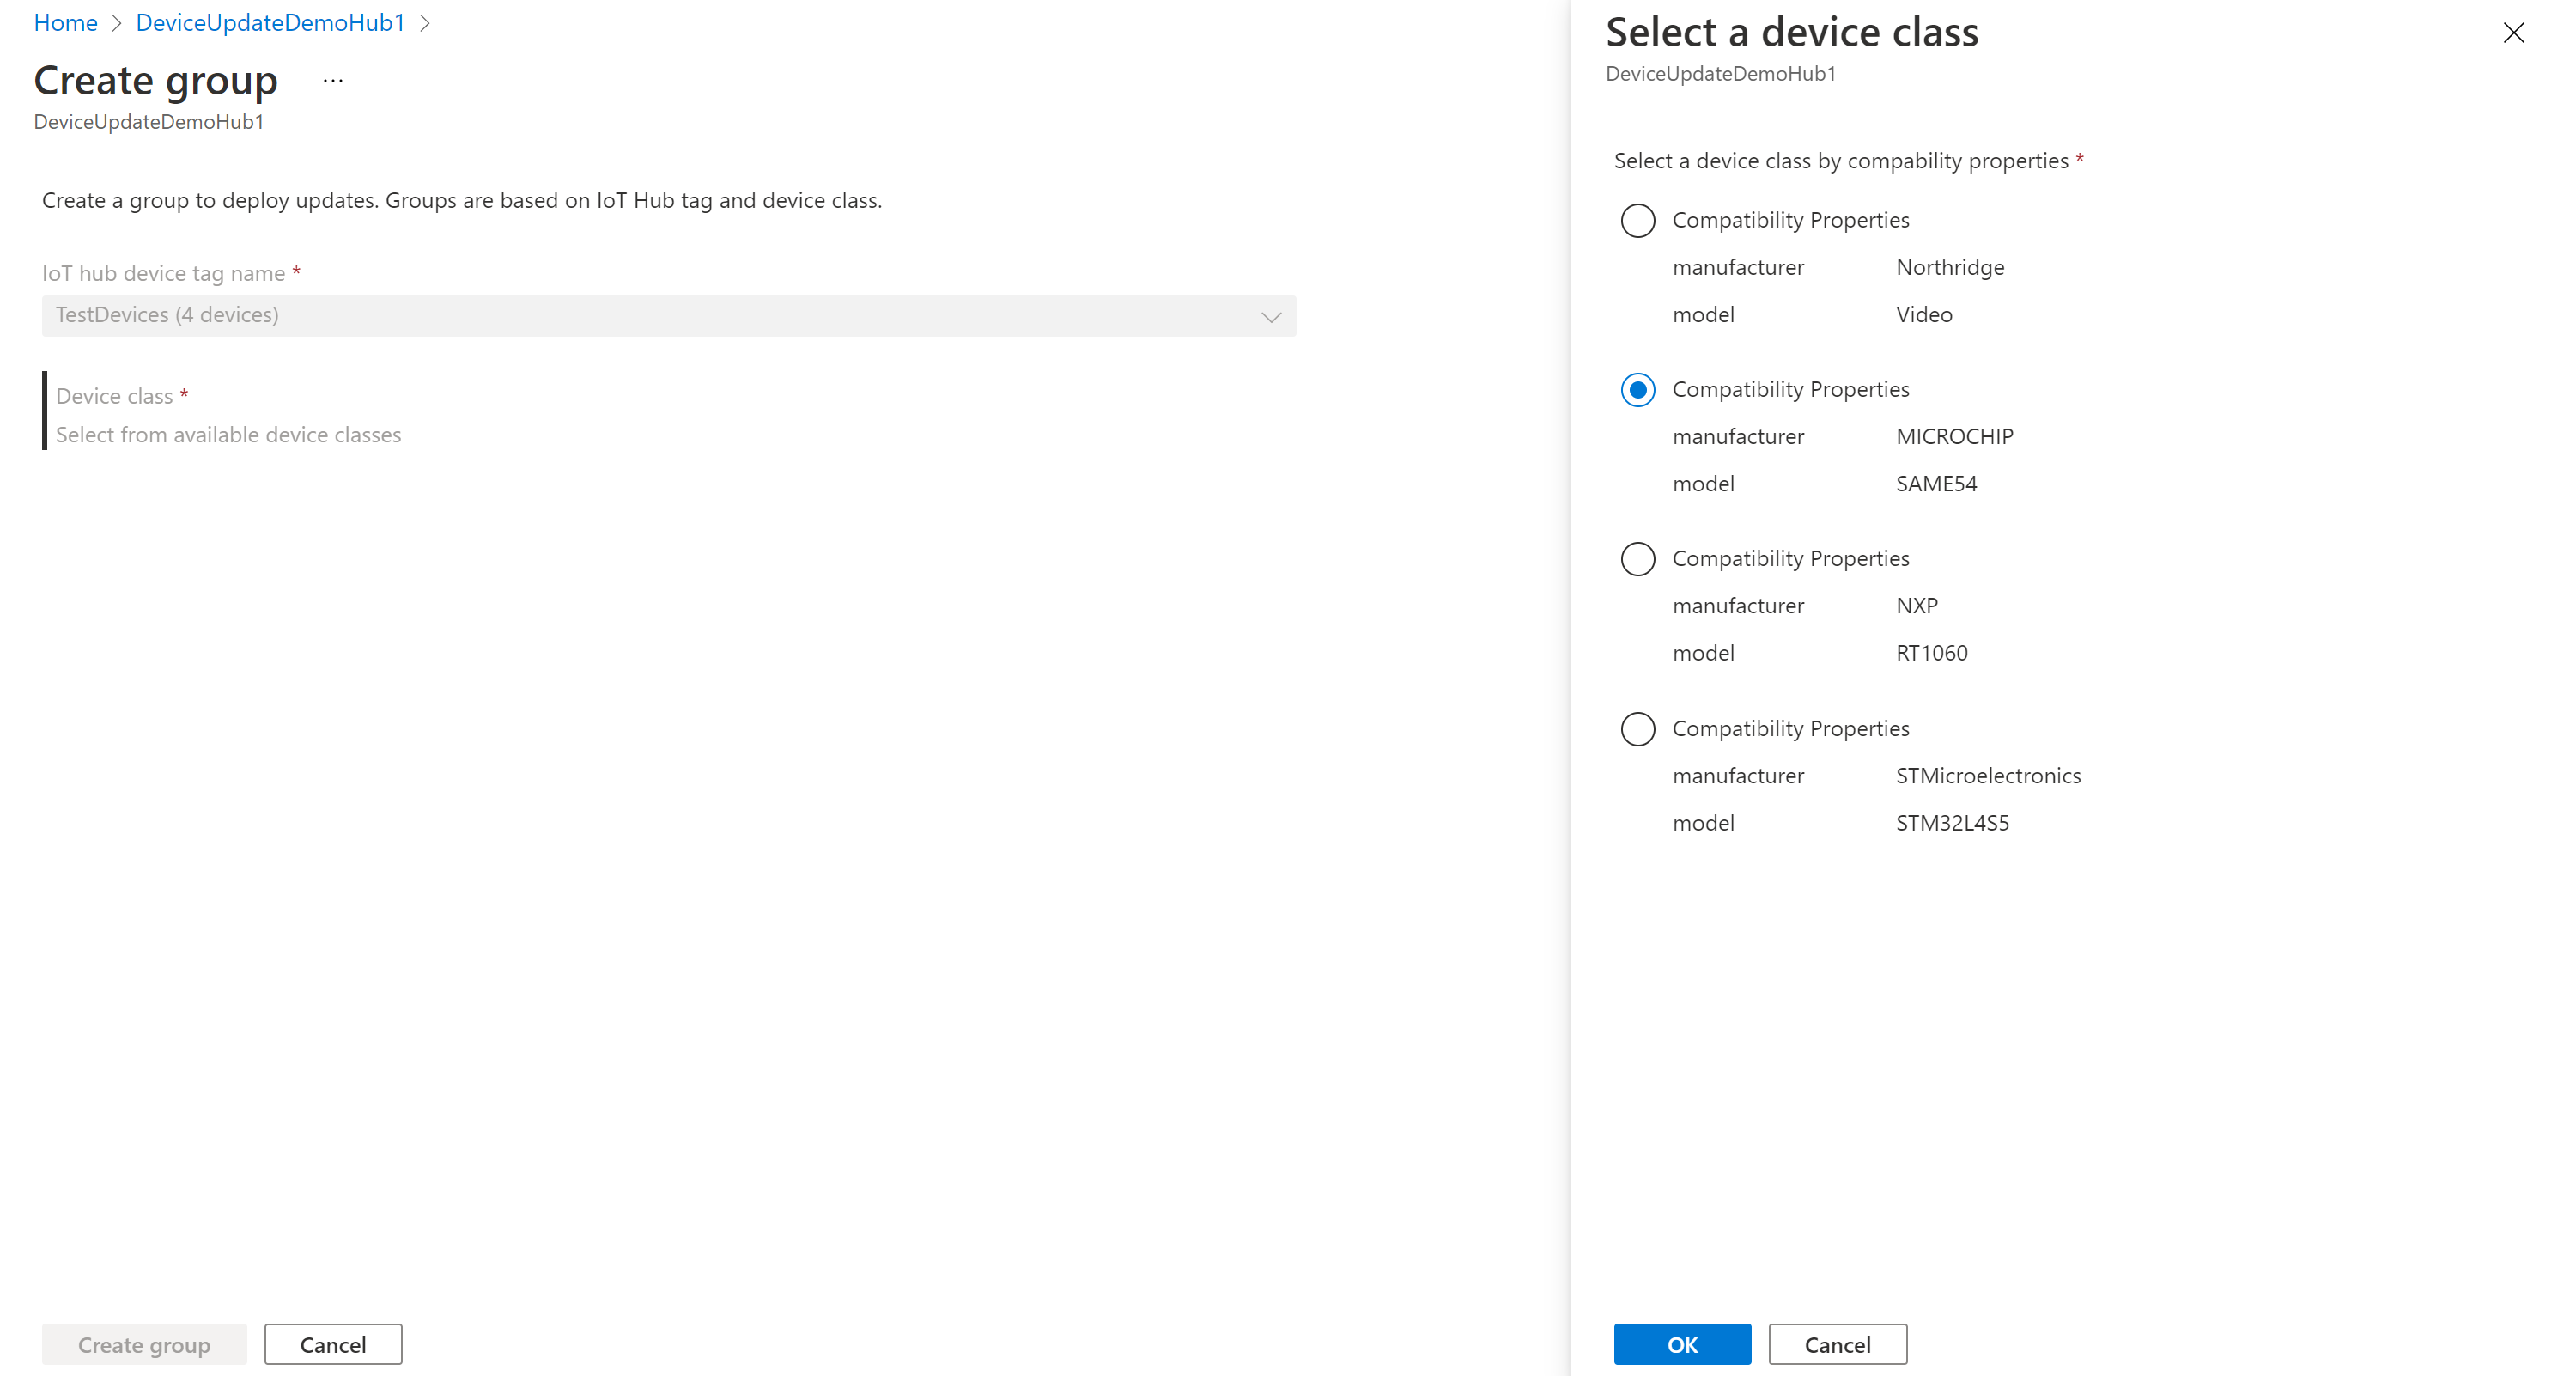
Select Add group to create a new group.

Select an IoT Hub tag and Device class from the list. Then select Create group.
After the group is created, the update compliance chart and groups list are updated. The update compliance chart shows the count of devices in various states of compliance: On latest update, New updates available, and Updates in progress. Learn about update compliance.
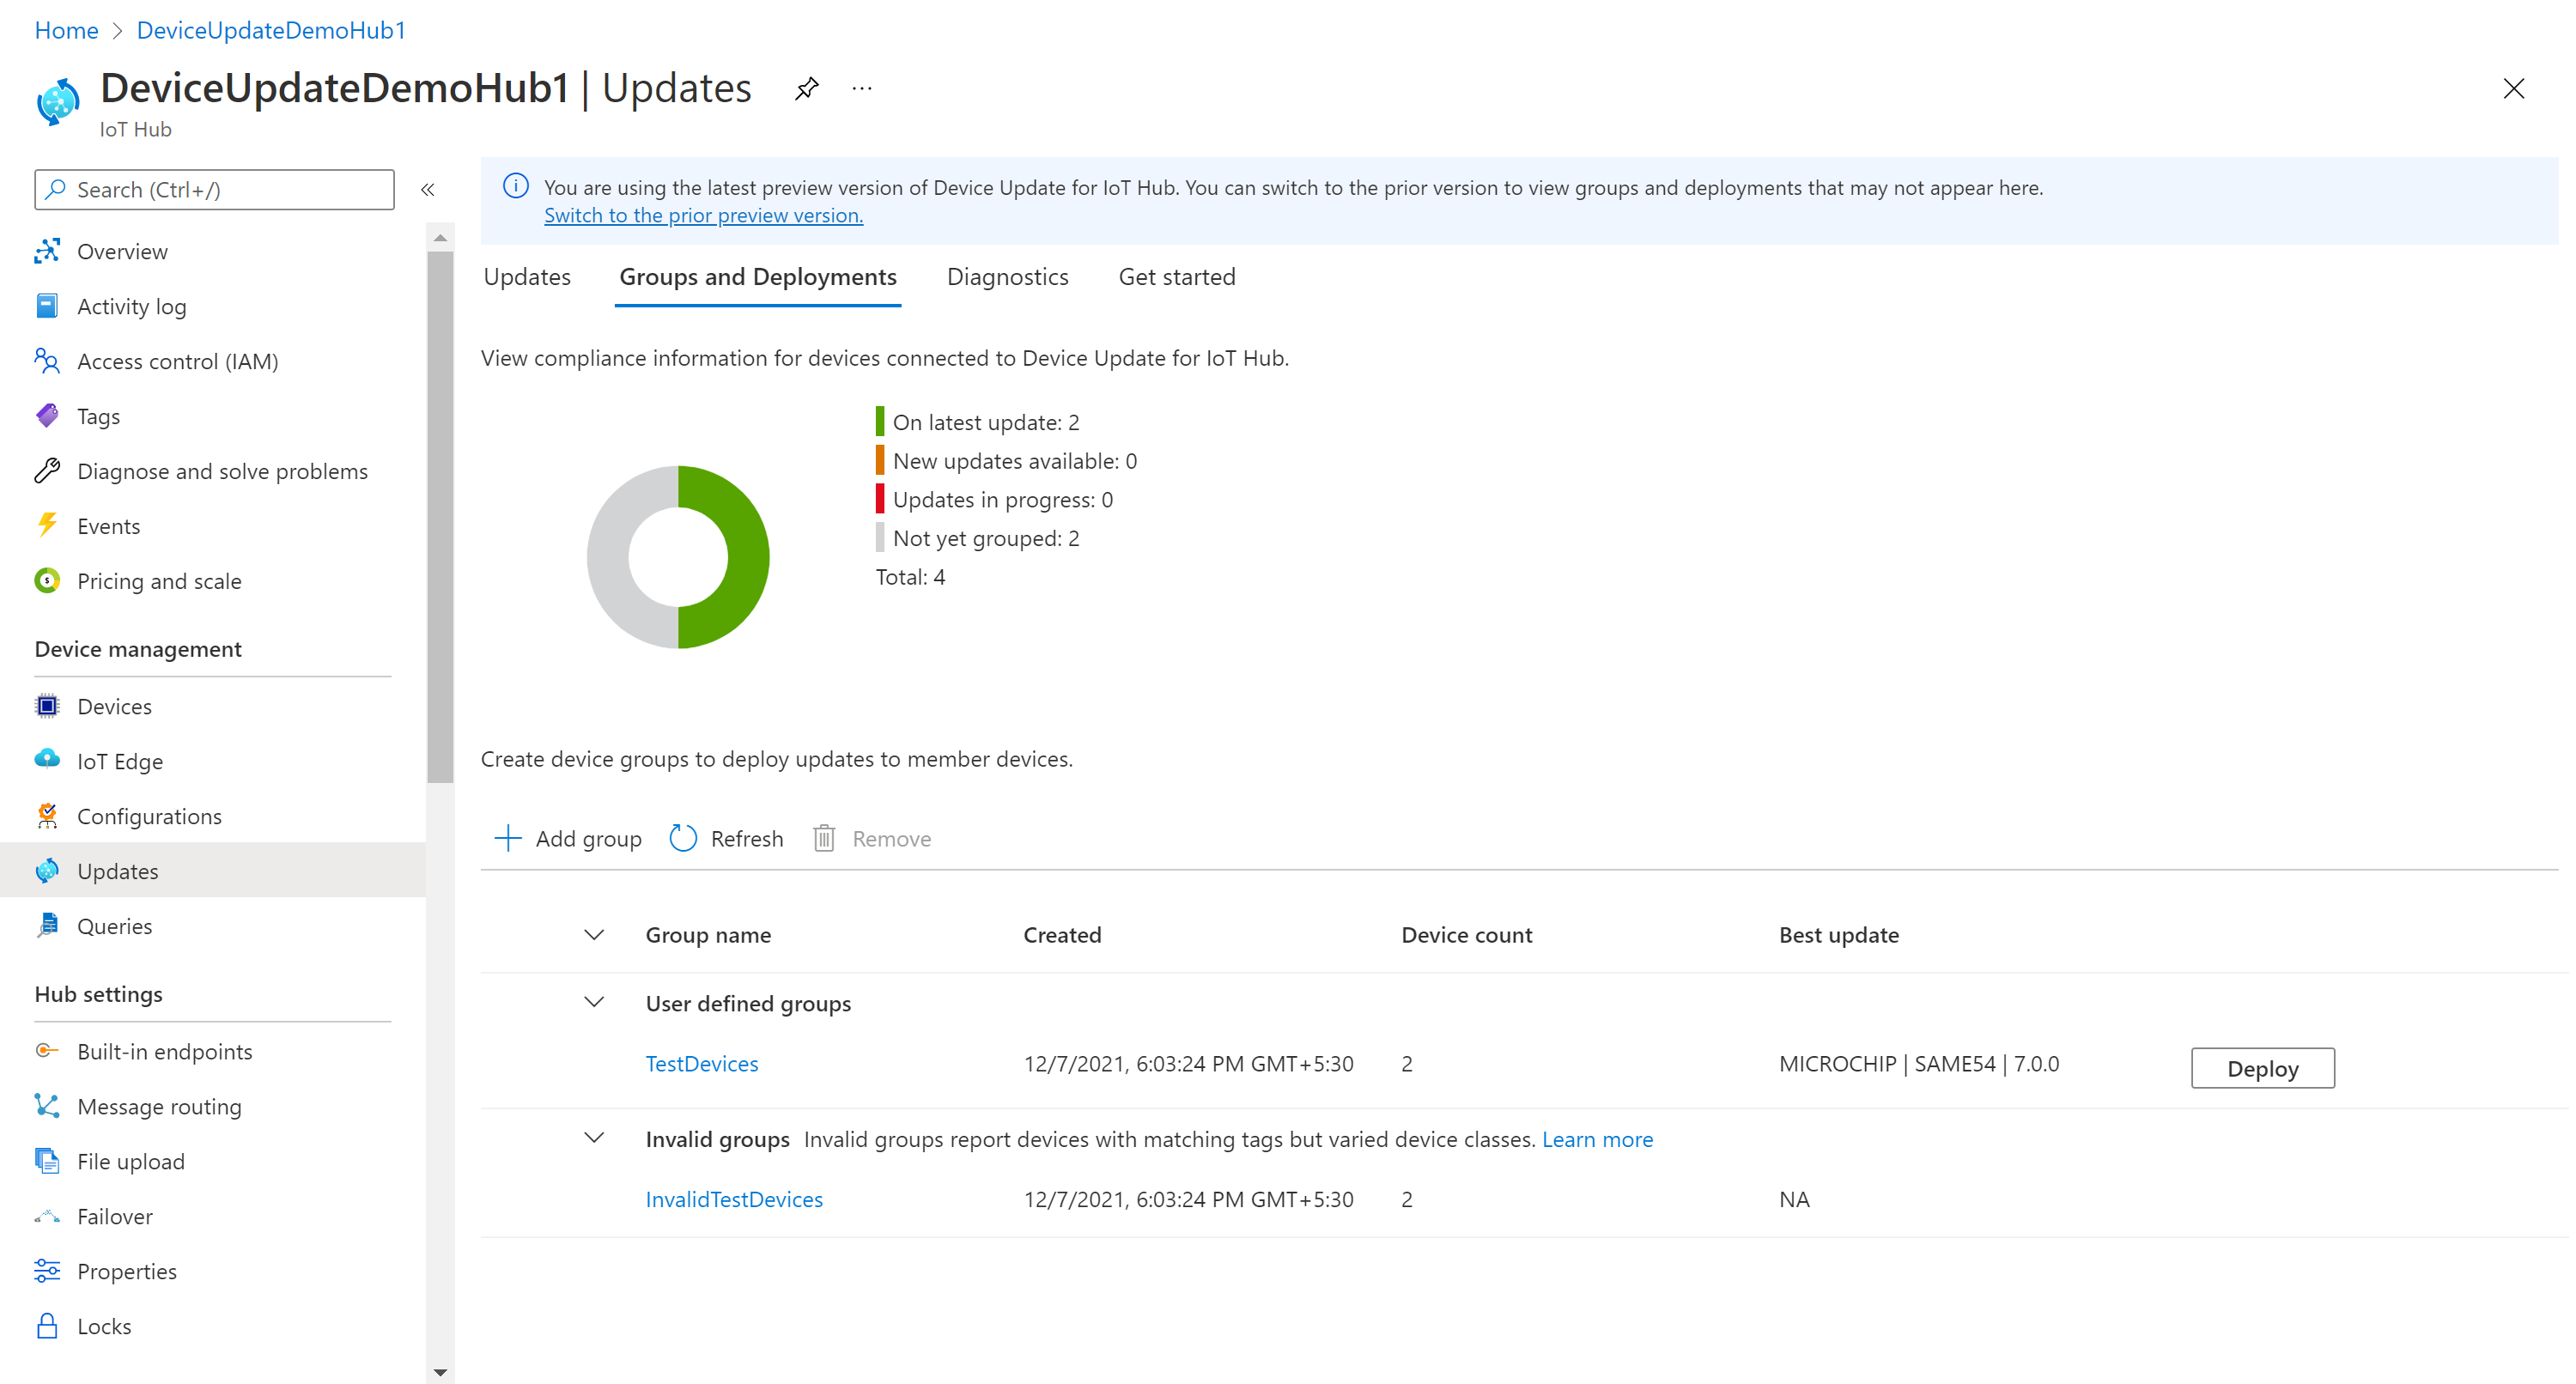
You should see your newly created group and any available updates for the devices in the new group. If there are devices that don't meet the device class requirements of the group, they show up in a corresponding invalid group. To deploy the best available update to the new user-defined group from this view, select Deploy next to the group.


Learn more about how to add tags and create update groups.
Deploy the update
After the group is created, you should see a new update available for your device group. A link to the update should be under Best update. You might need to refresh once. Learn more about update compliance.
Select the target group by selecting the group name. You're directed to the group details under Group basics.

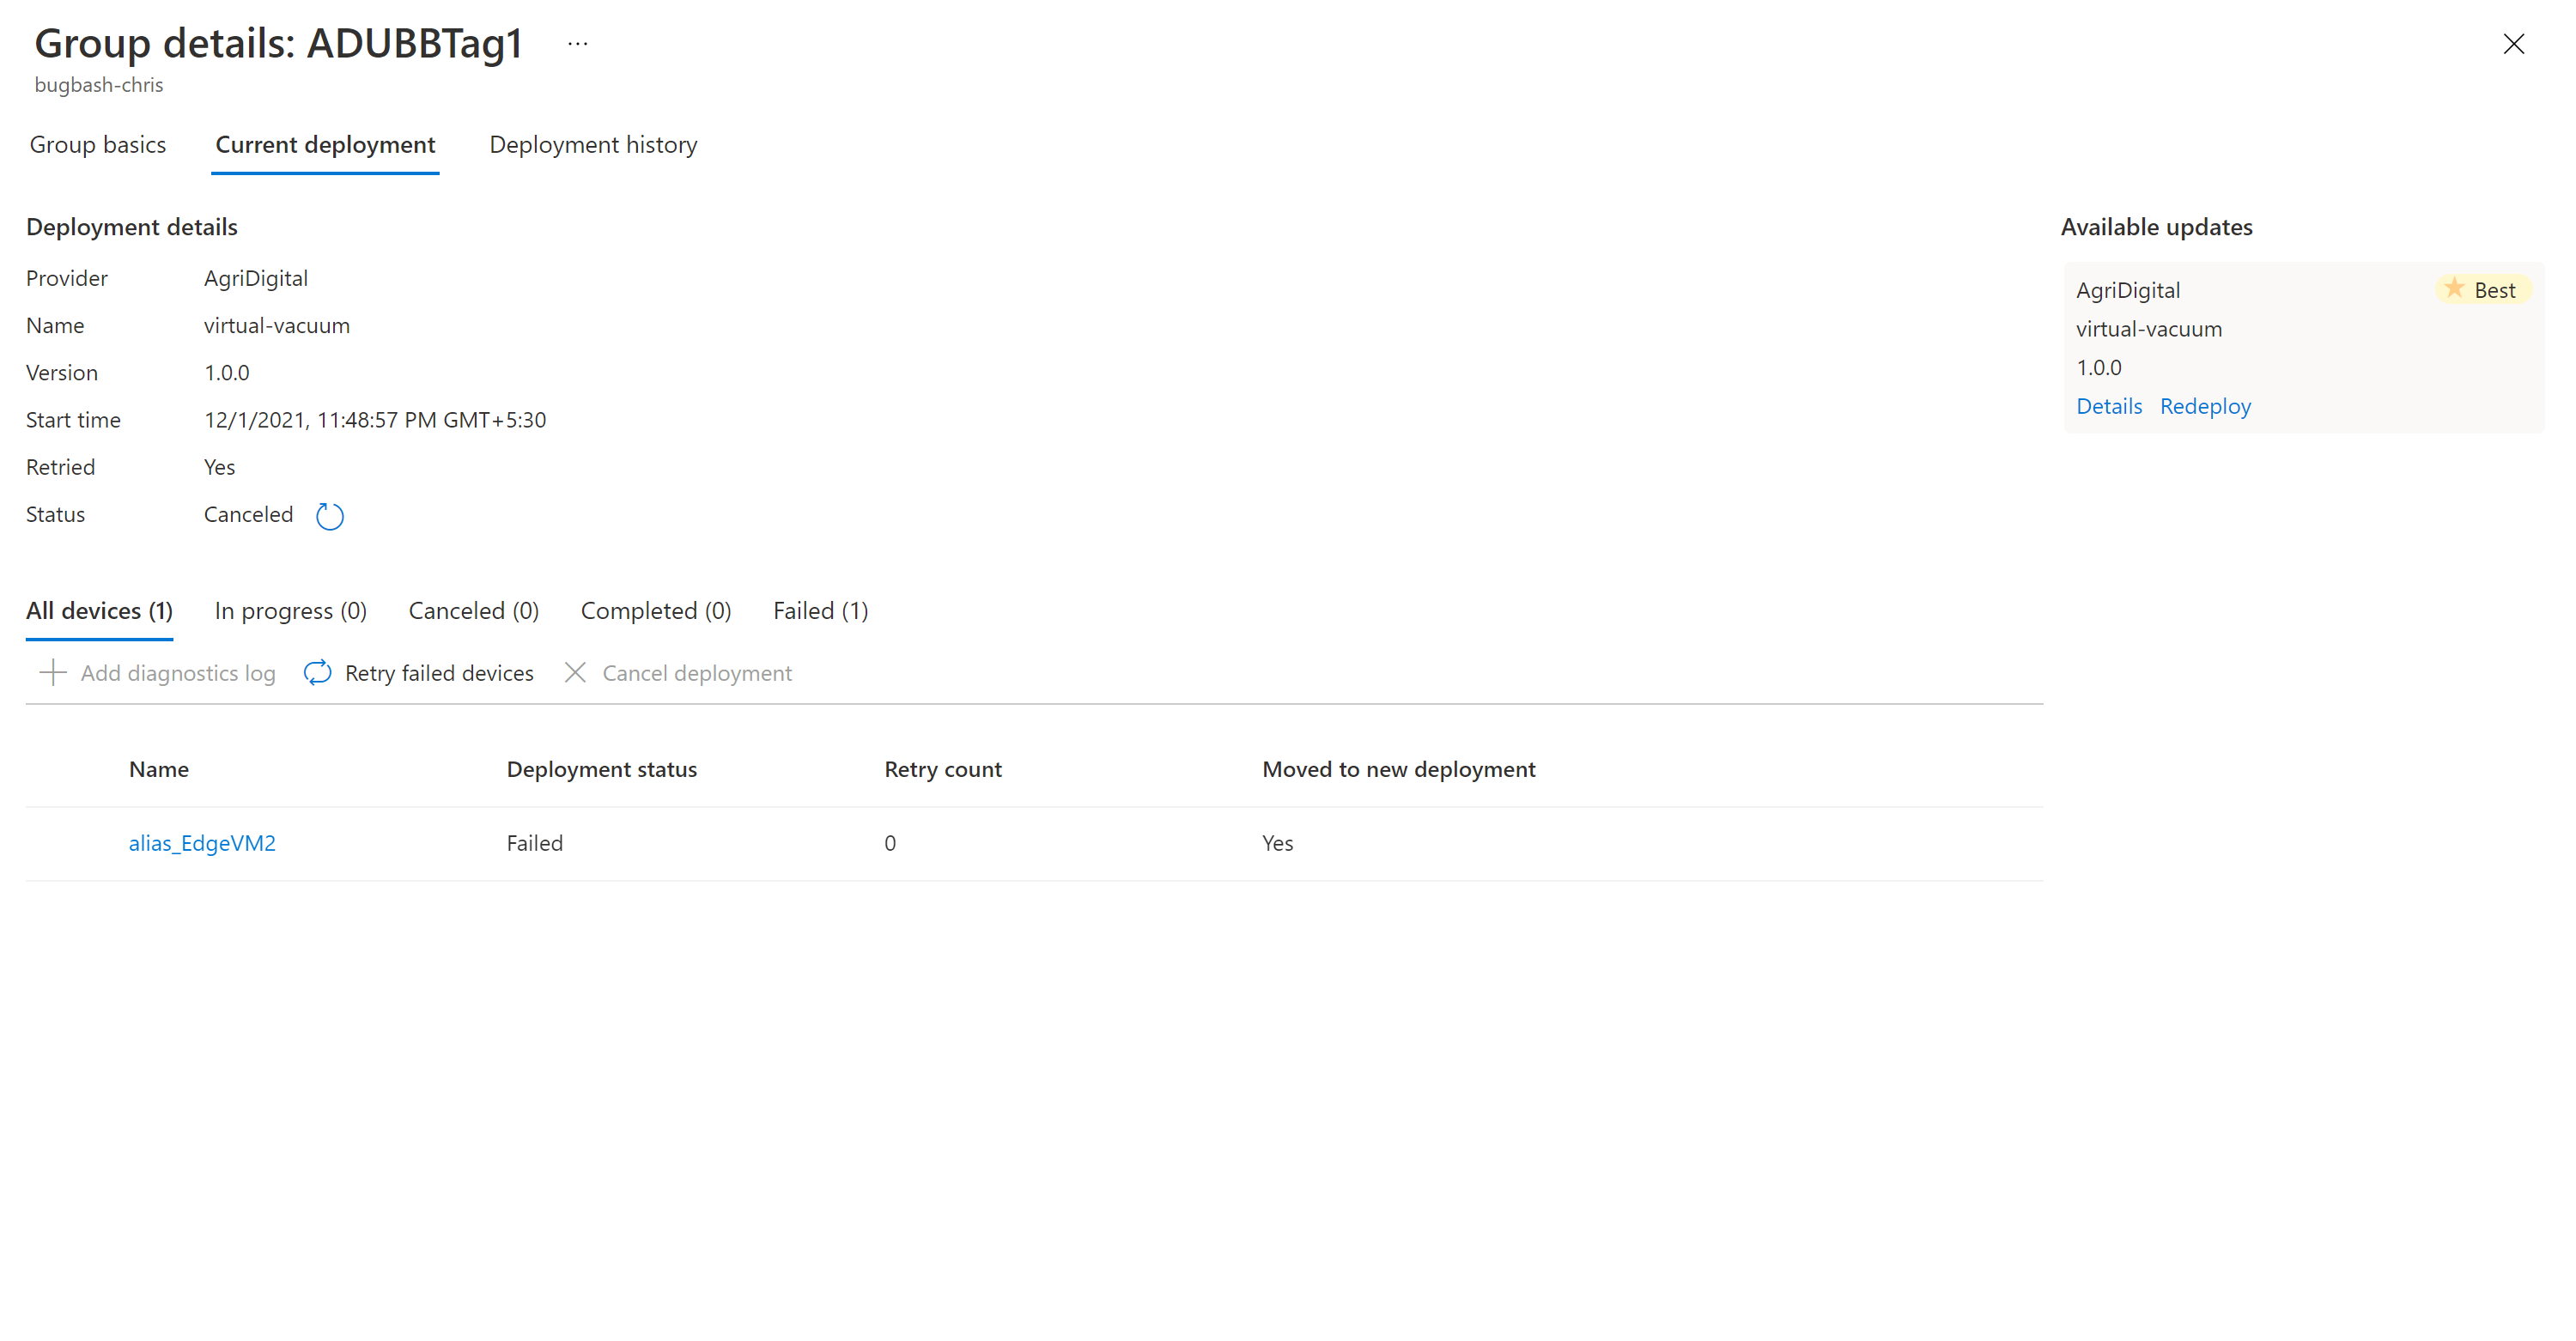
To start the deployment, go to the Current deployment tab. Select the deploy link next to the desired update from the Available updates section. The best available update for a given group is denoted with a Best highlight.
Schedule your deployment to start immediately or in the future. Then select Create.
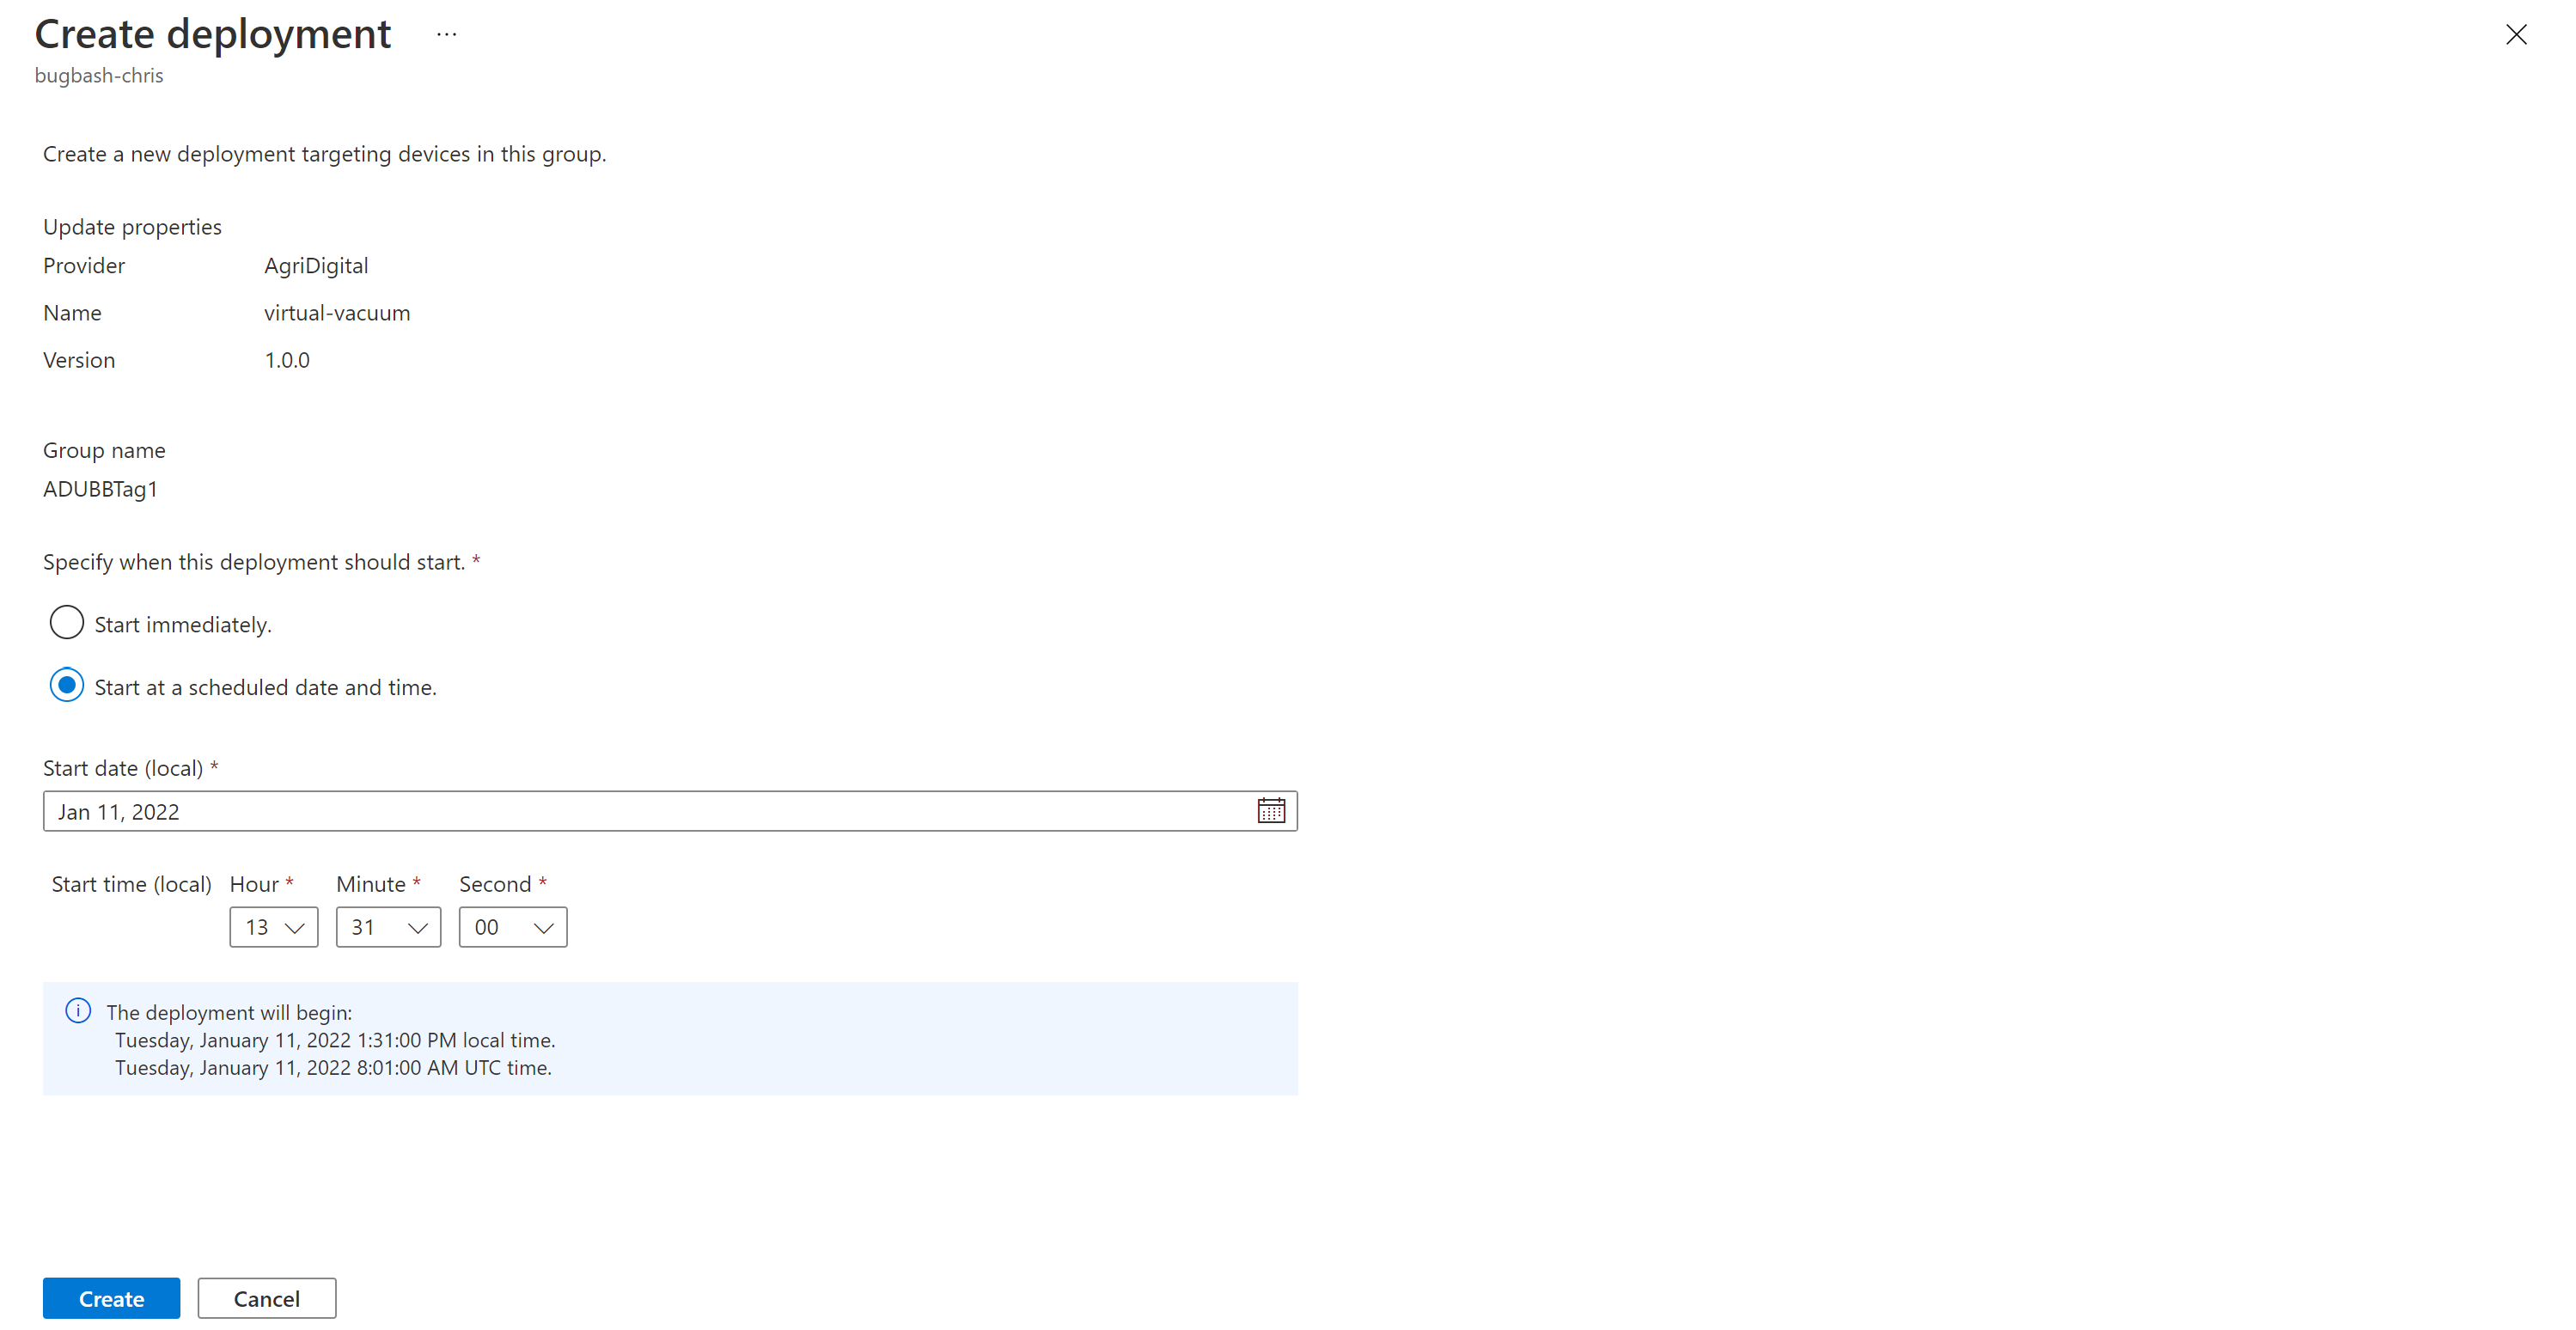
Under Deployment details, Status turns to Active. The deployed update is marked with (deploying).

View the compliance chart to see that the update is now in progress.
After your device is successfully updated, you see that your compliance chart and deployment details updated to reflect the same.


Monitor the update deployment
Select the Deployment history tab at the top of the page.

Select Details next to the deployment you created.

Select Refresh to view the latest status details.


You've now completed a successful end-to-end image update by using Device Update for IoT Hub on a Raspberry Pi 3 B+ device.
Clean up resources
When no longer needed, clean up your Device Update account, instance, IoT hub, and IoT device.