Note
Access to this page requires authorization. You can try signing in or changing directories.
Access to this page requires authorization. You can try changing directories.
With Power Automate, you can manage the approval of documents or processes across several services, including SharePoint, Dynamics 365, Salesforce, OneDrive for work or school, Zendesk, or WordPress.
To create an approval workflow, add the Approvals - Start and wait for an approval action to any flow. After you add this action, your flow can manage the approval of documents or processes. For example, you can create document approval flows that approve invoices, work orders, or sales quotations. You can also create process approval flows that approve vacation requests, overtime work, or travel plans.
Approvers can respond to requests from their email inbox, the approvals center in Power Automate, or the Power Automate app.
Create an approval flow
Here's an overview of the flow you create and test. In this example, you use SharePoint Online as the trigger, but you can use any other trigger to start your approval flow.
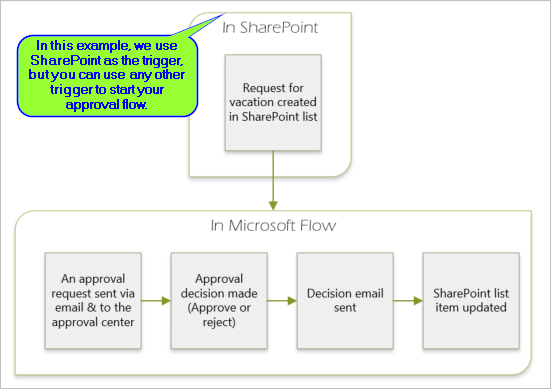
The flow performs the following steps:
Starts when someone creates a vacation request in a SharePoint Online list.
Adds the vacation request to the approval center, and then emails it to the approver.
Sends an email with the approver's decision to the person who requested vacation.
Updates the SharePoint Online list with the approver's decision comments.
Learn more about using SharePoint with Power Automate in the SharePoint documentation.
Important
Always follow the best practices for SharePoint security and your organization's best practices to ensure your environment is secure. Security is outside the scope of this article.
Prerequisites
To complete this tutorial, you must have access to:
- Power Automate.
- A SharePoint Online list.
- Office 365 Outlook and Office 365 Users account.
Note
While we use SharePoint Online and Office 365 Outlook in this tutorial, you can use other services such as Zendesk, Salesforce, or Gmail. If you're using SharePoint 2010, learn more in SharePoint 2010 workflow retirement
Before you create the flow, create a SharePoint Online list. Later, you use this list to request approval for vacations.
Create these columns in your SharePoint Online list:
| Column | Type |
|---|---|
| Title | Single line of text |
| Start Date | Date and Time |
| End Date | Date and Time |
| Comments | Single line of text |
| Approved | Yes/No |
| Manager Comments | Single line of text |
Make a note of the name and URL of the SharePoint Online list. You need these items later when you configure the SharePoint - When an item is created trigger.
Create an automated cloud flow
Follow these steps to create an automated cloud flow.
- Sign in to Power Automate.
- On the navigation pane to the left, select My flows.
- On the command bar, select New flow > Automated cloud flow.
- Give your flow a name.
- Under Choose your flow's trigger, select When an item is created - SharePoint, and then select Create.
- Go to Configure the flow trigger.
Configure the flow trigger
When you create a flow, the first step is to configure the trigger. The trigger starts your flow when a specific event occurs. Power Automate allows you to use either the new designer or the classic designer to configure your cloud flow. The steps are similar in both designers. Learn more (with examples) in Identify differences between the new designer and the classic designer.
Make sure you created an automated cloud flow.
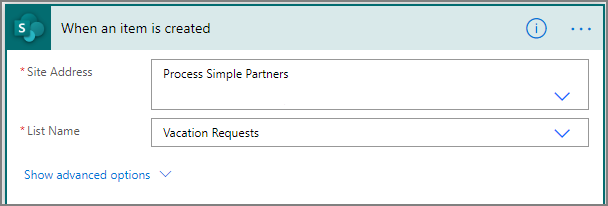
New designer: Open the configuration pane on the left by selecting the When an item is created card.
Classic designer: Expand the When an item is created card by selecting the When an item is created card.
Select the Site Address and the List Name for the SharePoint list that you created earlier.
The Site Address and the List Name are the items you created in the SharePoint online list in the Prerequisites section.
New designer Classic designer 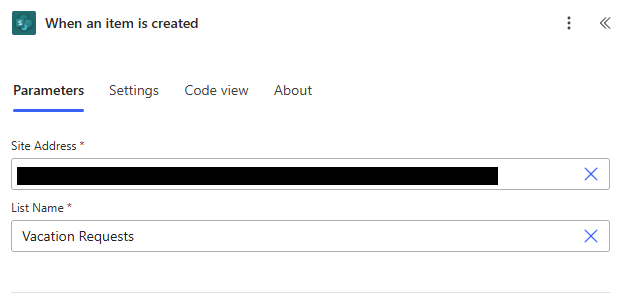
Close the configuration pane by selecting (<<) in the upper-right corner of the pane.
Go to Add a profile action.
Add a profile action
Follow these steps to add a profile action to your flow. This action retrieves the user's profile information, which you can use in the approval request.
Make sure you created an automated cloud flow and configured the flow trigger.
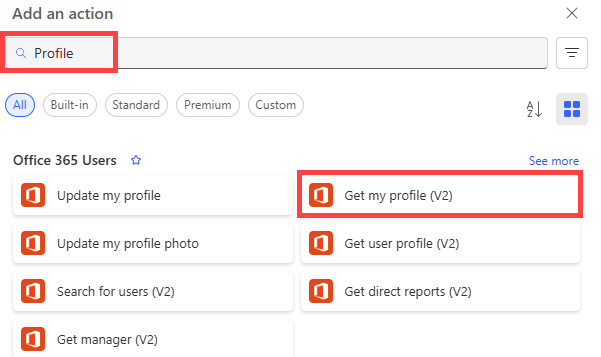
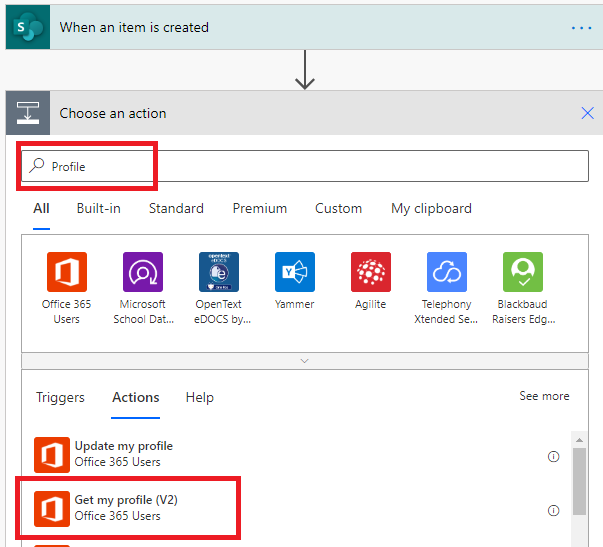
Select +, and then type Profile in the Add an action search field.
Under Office 365 Users, select Get my profile (V2).
In the Advanced parameters dropdown menu, place a check in the Select fields checkbox, and then select a blank area of the pane.
Select the Select fields field, and then select the lightning bolt icon.
Select a field from your profile to include in your flow.
If your field doesn't display what you're looking for, select See more to view additional fields.
To add more fields from your profile, repeat the previous two steps.
Close the configuration pane by selecting (<<) in the upper-right corner of the pane.
Go to Add an approval action.
Add an approval action
Follow these steps to add an approval action to your flow.
Make sure you performed these procedures in this order:
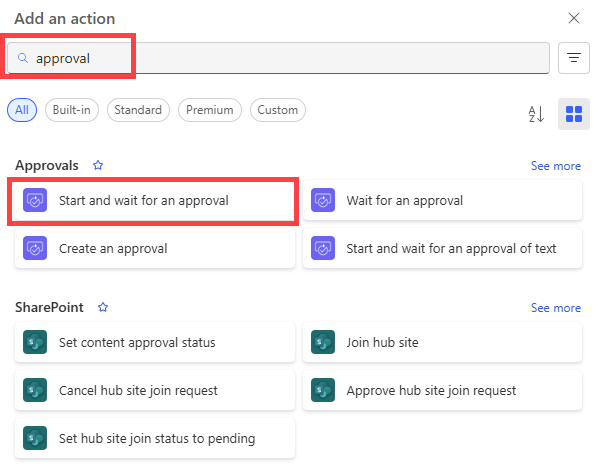
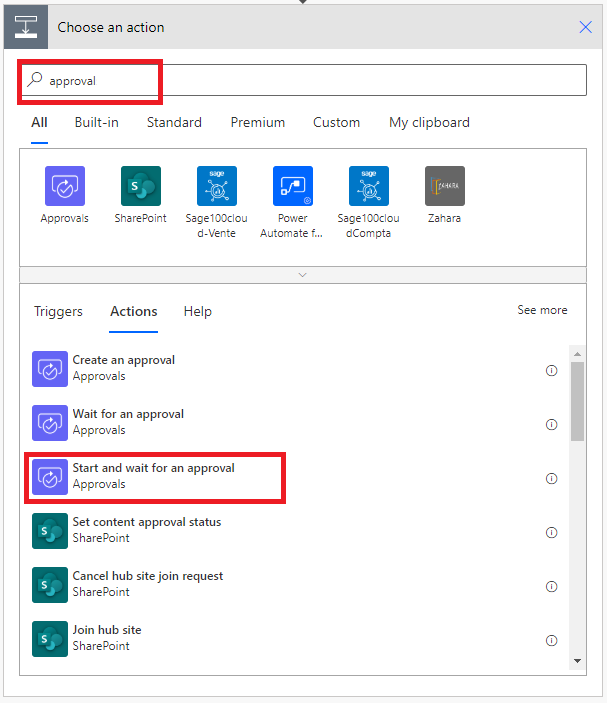
In the designer below the Get my profile (V2) card, select +.
In the Add an action search field, type approval.
Under Standard approvals, select the Start and wait for an approval action.
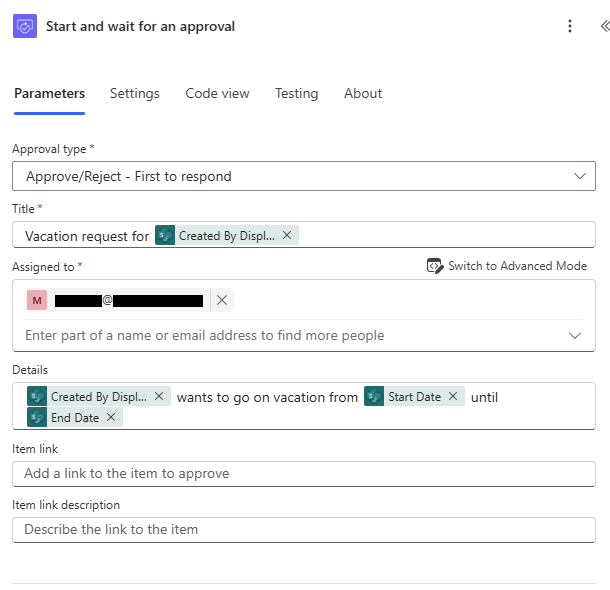
In the Approval type dropdown menu, select a value.
You can also create your own by selecting Enter custom value.
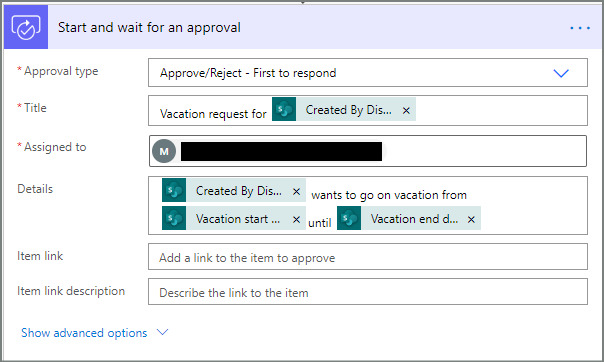
In the Title field, enter a title for the approval request.
In the Assigned to field, enter the email address of the person who will approve the request.
This action sends the approval request to the email address in the Assigned to field.
In the Details field, describe the vacation request. You can include information such as the start date and end date from the person who requested vacation.
In this example, do the following steps:
Select the Details field, and then select the lightning bolt icon.
Select the value for the person who requested the vacation. This inserts the value in the Details field.
In the Details field next to the value you just inserted, enter wants to go on vacation from.
Select the lightning bolt icon, and then select the value for the start date of the vacation request.
In the Details field next to the value you just inserted, enter until.
Select the lightning bolt icon, and then select the value for the end date of the vacation request.
The Details field should look similar to this example:
<requestor>wants to go on vacation from<start date>until<end date>.(Optional) You can use Markdown to format the Details field.
Close the configuration pane by selecting (<<) in the upper-right corner of the pane.
Add an email action for approvals
Follow these steps to send an email if the vacation request is approved.
Make sure you performed these procedures in this order:
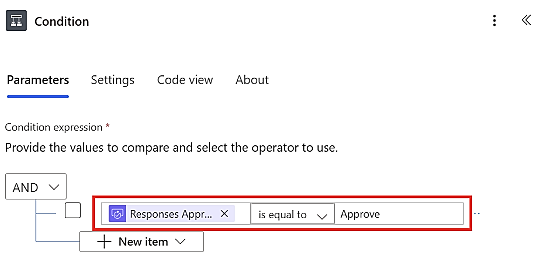
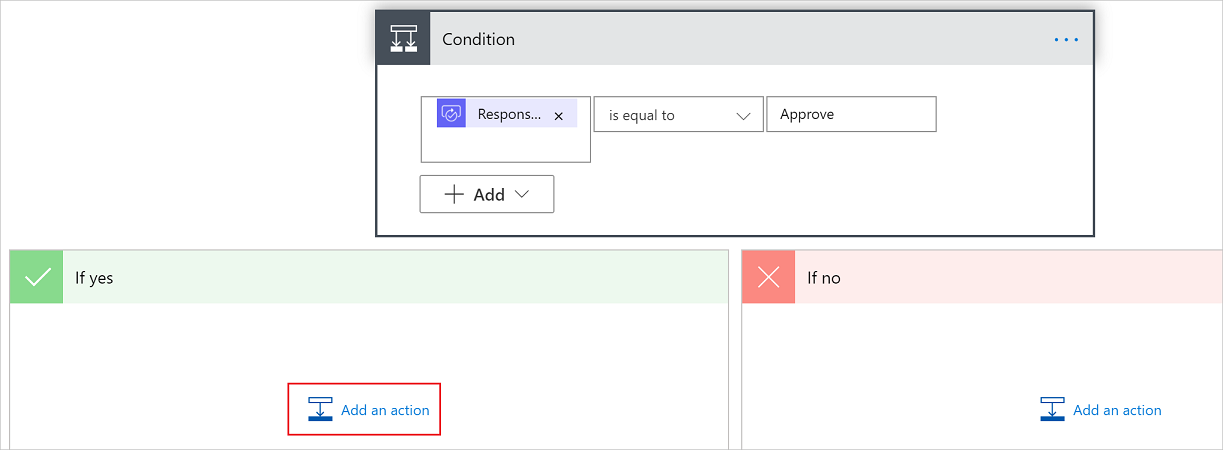
Under the Start and wait for an approval card, select the plus sign (+) to add the Condition action.
In the Add an action search field, type condition.
Under Control, select Condition.
In the Parameters tab, select the first Choose a value field, and then select the lightning bolt icon.
Select the Responses Approver response value.
If the expected response doesn't appear, select See more in the title bar of the dropdown menu to display additional values.
In the next field, select is equal to from the dropdown menu.
In the other Choose a value field, type Approve.
Close the configuration pane by selecting (<<) in the upper-right corner of the pane.
In the designer, select the plus sign in the True branch.
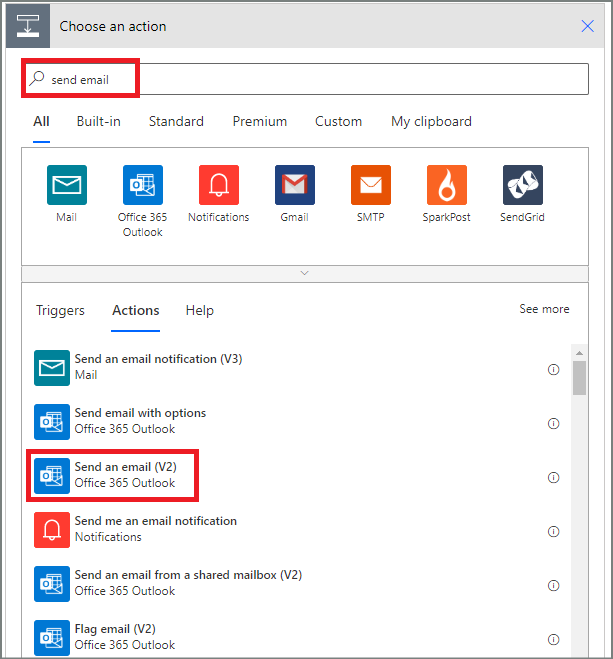
In the Add an action search field, type send email.
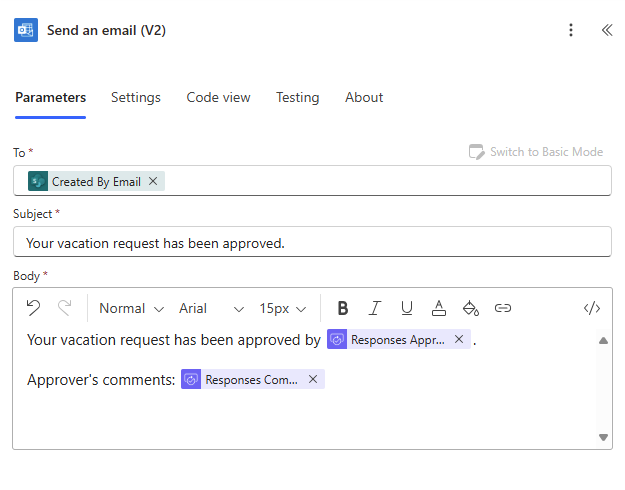
Under Office 365 Outlook, select Send an email (V2).
The Parameters tab displays. This is the template for the email sent when the status of the vacation request changes.
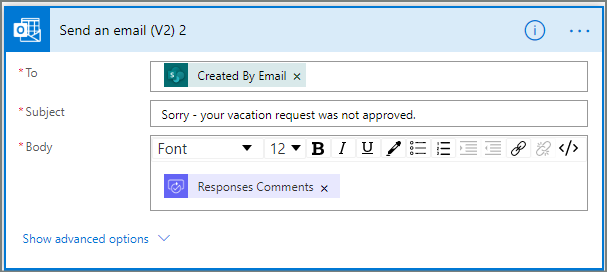
In the To field, enter the email address of the person who submitted the vacation request.
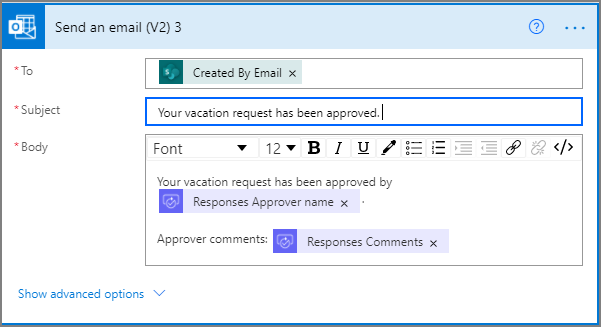
In the Subject field, type a subject for the email. This example uses Your vacation request has been approved as the subject.
In the Body field, type a message for the email:
Type the standard text you want to appear in the email, such as Your vacation request has been approved by.
To insert the name of the person who approved the vacation request:
- Place your cursor in the Body field at the location where you want the name to appear, and then select the lightning bolt icon.
- From the dropdown menu, select a dynamic value. The following example uses the Responses Approver name dynamic value.
(Optional) To insert the comments from the approver:
- Type Approver's comments.
- Place your cursor in the Body field at the location where you want the comments to appear, and then select the lightning bolt icon.
- Select a dynamic value from the dropdown menu. The following example uses the Responses comments dynamic value.
Close the configuration pane by selecting (<<) in the upper-right corner of the pane.
Add an update action for approved requests
Follow these steps to update actions for approved requests.
Make sure you performed these procedures:
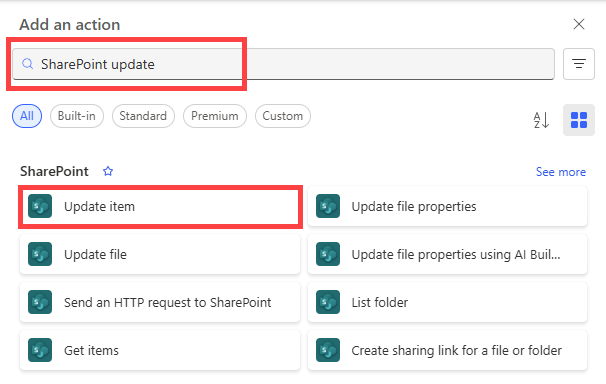
In the True branch under the Send an email (V2) card, select +.
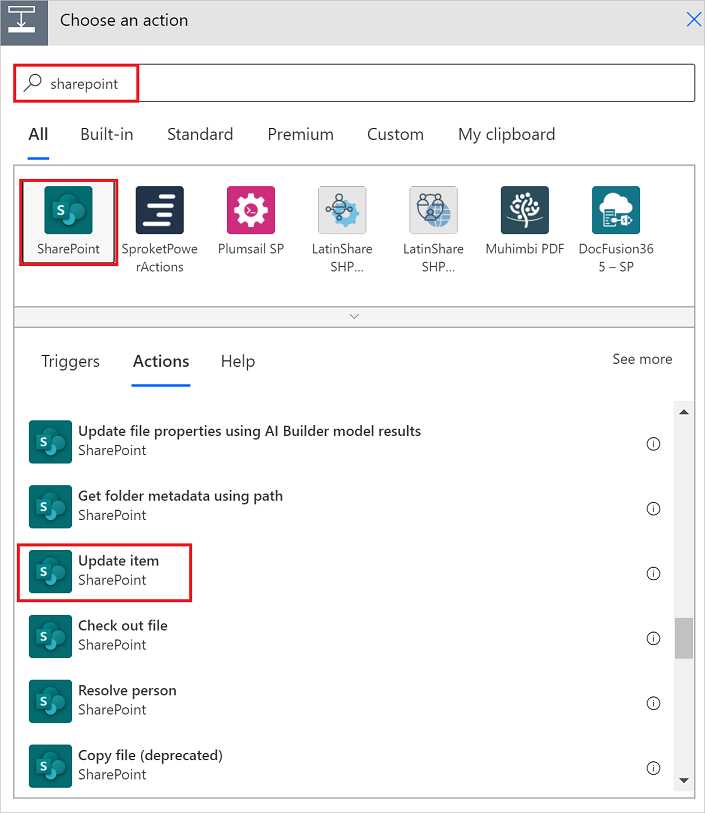
In the Add an action search field, enter SharePoint update.
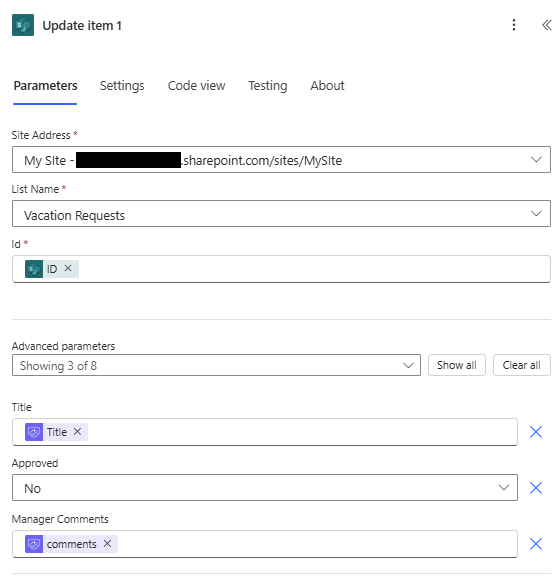
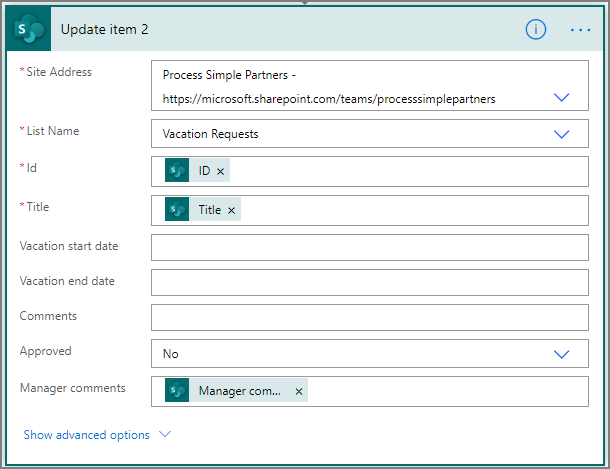
Under SharePoint, select Update item.
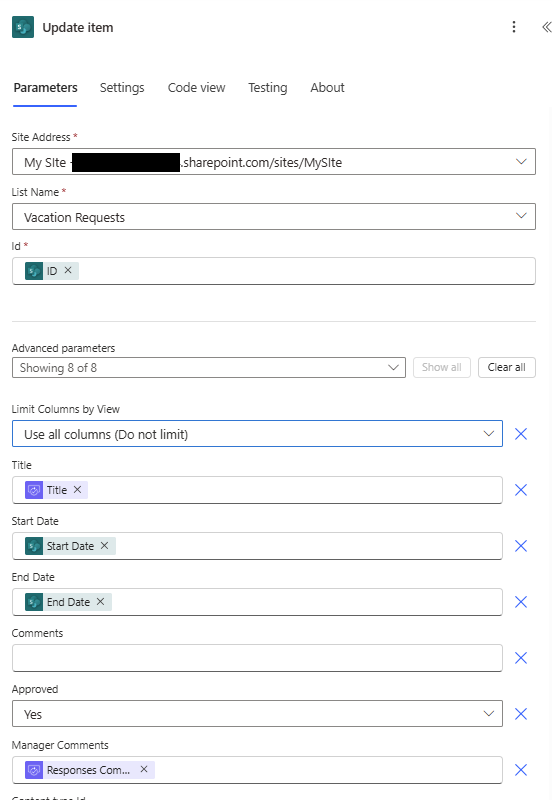
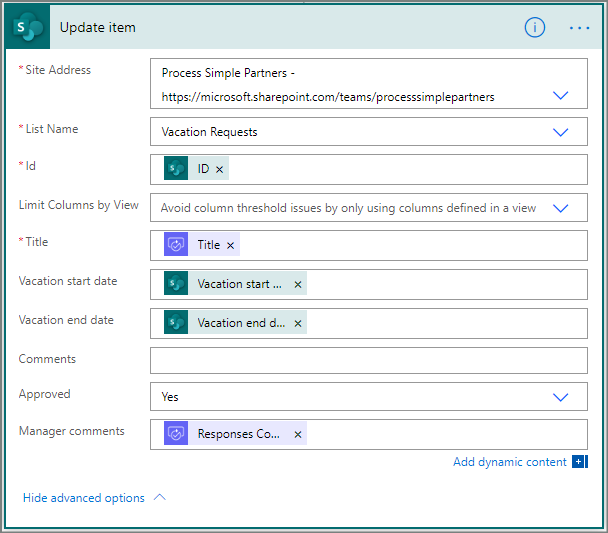
Configure the Update item card to suit your needs.
The Site Address, List Name, Id, and Title fields are required.
Close the configuration pane by selecting (>>) in the upper-right corner of the pane.
Add an email action for rejections
Follow these steps to send an email if the vacation request is rejected.
- Make sure you performed these procedures in this order:
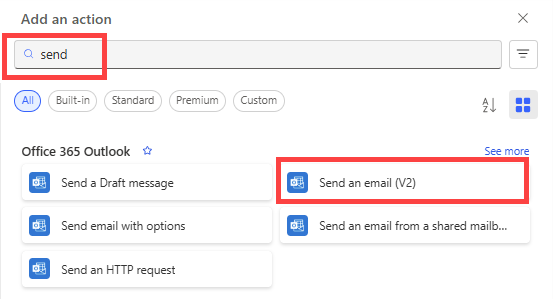
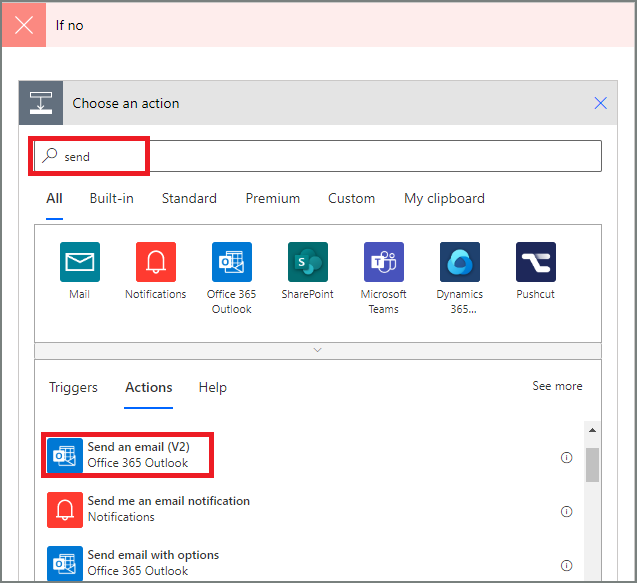
Select + on the False branch.
Enter send into the search box of the Add an action card.
Select the Send an email (V2) action in Office 365 Outlook to filter the actions.
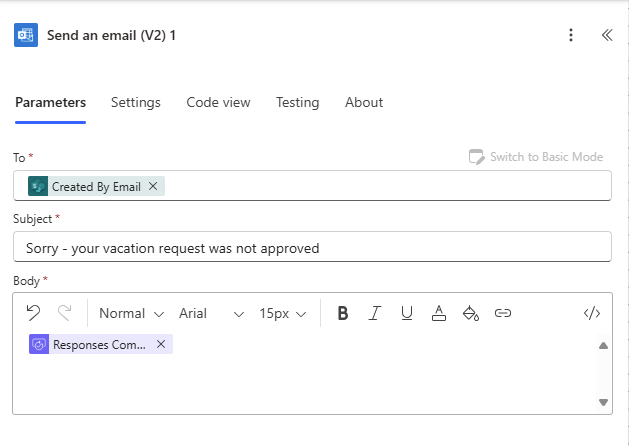
Configure the email card to suit your needs.
This card represents the template for the email that's sent when the status of a vacation request changes.
Add update action for rejected requests
Follow these steps to update actions for rejected requests.
- Make sure you performed these procedures in this order:
In the False branch under the Send an email (v2) card, select +.
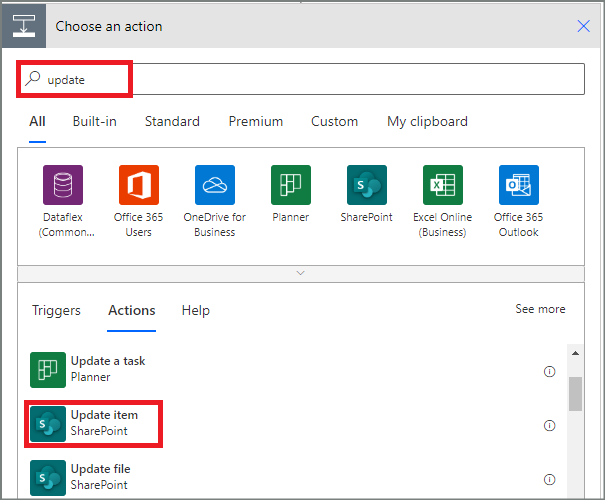
Enter update item into the search box on the Choose an action card, and then select the Update item action in SharePoint.

Configure the card to suit your needs.
The Site Address, List Name, Id, and Title fields are required.
Select Save to save your work.
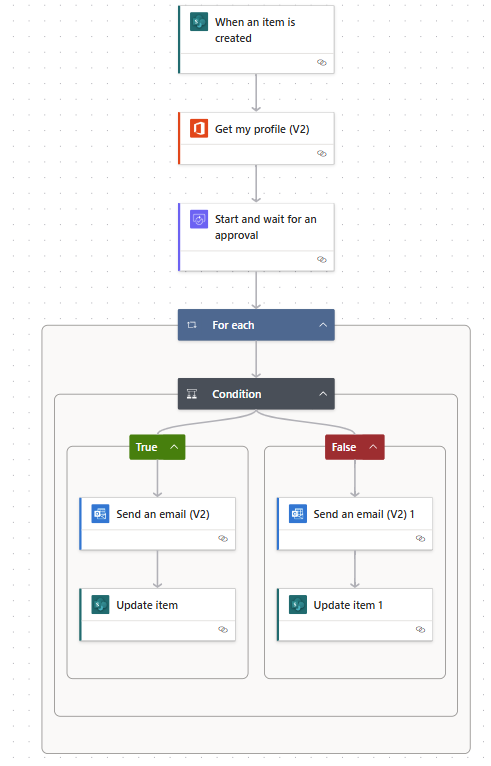
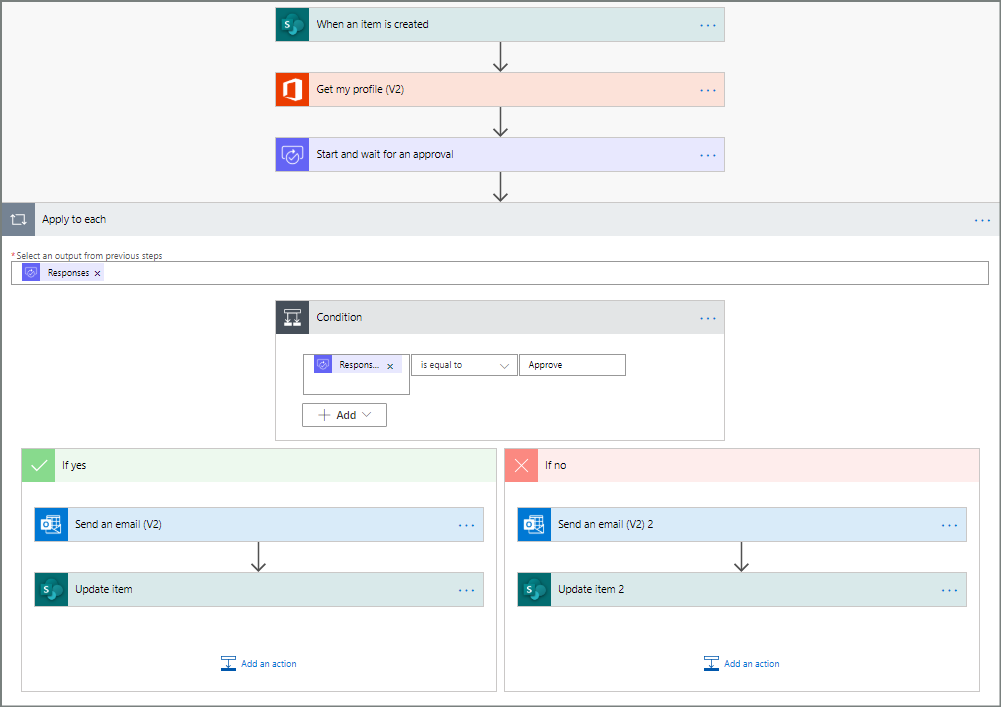
If you followed along, your flow should resemble this screenshot:
Now that you created the flow, it's time to test it. Go to Test your flow that requests an approval.
Test your flow that requests an approval
After you complete the sections in this tutorial, you created a flow that requests an approval for a vacation request. Now you can test your flow to make sure it works as expected.
Create a vacation request in the SharePoint Online list you created earlier.
After you save this request, the flow triggers, and then:
- Creates a request in the approvals center.
- Sends an approval request email to the approvers.
Congratulations! You created a flow that requests an approval for a vacation request and tested it. You can now use this flow to manage vacation requests in your organization.
Create long-running approvals
If your flow might run for more than 30 days, store your approvals in Microsoft Dataverse. This lets you create flows that act on responses to approval requests, even after the original flow run times out.
To do this, use two flows, one to send an approval request, and the other to run business logic on the responses to the approval request, based on the Create an approval (v2) action.
Tip
If you use modern email clients, you don't need to wonder if a request is still required because Power Automate automatically updates the email to indicate that the approval request is completed.
Cancel an approval request
Sometimes you might want to cancel an approval request that you sent. Possibly you made a mistake in the request, or it's no longer relevant. The person who sent the request can cancel it by following these steps.
The cancel feature is supported on the Create an approval (v2) action.
On the navigation pane to the left, select Approvals.
In the Sent tab, find and select your approval request.
At the top of the page, select Cancel.
You might be prompted to confirm that you want to cancel the request.
Tip
You can select the History tab to view the approval requests that you canceled.
Request approvals from guest users
You can send approvals requests to persons outside your organization. To do this, use Microsoft Entra guest users by inviting users from other tenants as guests.
When you assign a role to a guest, this gives the guest the permission required to participate in the approval process.
Now that you created and tested your flow, be sure to let others know how to use it.