Migrating apps and flows from the default environment
This white paper explains how organizations and administrators can plan migration of their apps and flows from the default environment.
Authors: Ravi Chada (Microsoft), Rui Santos (Microsoft)
Note
You can save or print this white paper by selecting Print from your browser, and then selecting Save as PDF.
Default environment
One default environment is created per tenant and is accessible for all users in that tenant. The default environment is created in the region closest to the default region of the Microsoft Entra tenant and is named as follows: [Microsoft Entra tenant name] (default). Whenever a new user signs up for Power Apps or Power Automate, they're automatically added to the Maker role of the default environment. No users are automatically added to the Environment Admin role of the default environment.
You can't delete the default environment and you can't manually back up the default environment. System backups are done continuously. The default environment is limited to 1 TB of storage capacity. The default environment has the following capabilities:
- 3 GB Dataverse database capacity
- 3 GB Dataverse file capacity
- 1 GB Dataverse log capacity
The capacity check conducted prior to creating new environments, excludes the default environment's included storage capacity when calculating whether you have sufficient capacity to create a new environment. To store more data, you can create a production environment.
In the default environment, employees of an organization with a Microsoft 365 license can create apps and cloud flows. The default environment becomes the first playground studio for these employees to start building their apps and flows. Because it isn't possible to remove the environment maker role from the default environment, makers start to build personal productivity apps and flows and share them within their teams for others to benefit. Most organizations often rename the default environment to Personal Productivity.
Administrators reactively discover that many apps and flows are created in the default environment. It may not be appropriate for an app or flow to be in the default environment in scenarios, such as:
- An app is shared with many users in production-like behavior.
- An app uses Excel workbooks with sensitive data.
- An app, based on SharePoint lists, is getting many data interactions such as inserts or updates.
- An app or flow is using connectors that aren't allowed in new data loss prevention (DLP) policies.
- Custom connectors are enabled and used in the default environment, instead of being secured in a dedicated environment.
The above scenarios are worth consideration and provide an indication that you should start moving these apps and flows from the default environment into their own, developer environment or another shared environment. Other factors that come into play are the limitations associated with the default environment.
Center of Excellence (CoE) teams that monitor Power Platform are forced to react once the limits are reached, which negatively affects the apps that are running in the default environment. This limitation may be something an administrator or the CoE team need to perform regularly, as well. There are three broad stages:
- Identification of the Power Platform objects
- Move the Power Platform objects
- Clean up the Power Platform objects
There are different ways of exporting your apps and flows to move them to a new environment. Solutions are a single file that can include nearly anything your makers build in Power Platform and move them together. Canvas apps and cloud flows can be exported directly.
Over time, Power Platform objects have evolved to be solution aware. Now apps and flows can be solution aware by default, though this requires manual activation. Makers could still create apps and flows from make.powerapps.com and make.powerautomate.com, which can be classified as non-solution aware, and these can be exported individually, or add them to a solution. By adding a solution, the maker can take advantage of environment variables and connection references to configure and deploy endpoints across environments.
The goal is to have all Power Platform components added to a single solution, which allows multiple components to be easily moved as a single unit between environments.
Identification of the Power Platform objects
The first step is to identify apps and flows and assets that need to be moved over or cleaned-up. The CoE Starter Kit provides an inventory of all the apps and flows, and the Power BI reports help determine usage. This step helps you evaluate the app usage and should help to label them. As you go through the exercise, be sure to tag apps and flows that should be migrated to another environment. A tag could be based on the connectors used, user location, user department, and so on. This article also outlines a method for recognizing items that should be cleaned or relocated based on data loss prevention (DLP) practices.
Move the Power Platform objects
If the component is tagged to move to a different environment, there are options available to move the app. A move is an interactive process and needs some level of maker interaction. The level of complexity to move an app or flow increases with the mix of components used to build the app or flow.
For example, an app with six screens has 10 buttons through multiple screens. Let’s assume that these 10 buttons each call an individual flow. There are also a couple of flows that get triggered daily to fix data or integrate data with another system. Let’s also assume that there's an AI Builder image processing model that's used as part of the automation. To move such an app, all components must be added to a solution and connection references must be adjusted correctly and tested out before confirming the completion.
In another case, assume that there's a canvas app that uses an Office 365 connection. In this case, the maker just needs to add only the canvas app to the solution.
Clean up the Power Platform objects
If a component is tagged for clean-up, then there are two, main options. The first option is to delete it directly and the second option is to delete it after taking a backup. In the latter case of backup, there may be some overlap of steps coinciding with moving objects.
As an example, CoE Team administrators find that most makers create test apps and flows for learning purposes. The makers then abandon the apps and flows, which can be confirmed by looking at the usage metrics. Another way is to quarantine an app. If no one approaches you about the app, the app can be deleted, as well.
Maintaining a communication strategy plays a key role. Admins should plan to communicate:
- Establishing connections that makers need to permit as they launch the app in the new environment.
- The new URL of the app from the target environment.
- Navigating to the right environment.
Some of these solutions for relocating objects are ready-made and may require a standalone Power Apps and Power Automate license that provide users the ability to create and run apps across data sources that extend beyond Microsoft 365.
Strategies
The entire process of identifying and moving apps and flows from the default environment is more likely to be successful when it's based on a strategy. There are multiple strategies that you should consider.
DLP strategy
Data loss prevention (DLP) policies function as guardrails to help prevent users from unintentionally exposing organizational data and to protect information security in the tenant. DLP policies enforce rules for which connectors are enabled for each environment, and which connectors can be used together. Connectors are classified as either business data only, no business data allowed, or blocked. A connector in the business data only group can only be used with other connectors from that group in the same app or flow. We recommended that you have, at least, one policy.
Identification of objects using DLP
DLP policy-based identification is helpful to define target environments for your apps and flows. There might be apps or flows that are using a connector that is blocked by the DLP or a mix of business and non-business connectors, which, upon DLP activation, stop working.
To prevent downtime of potential critical objects, due to DLP, part of CoE Starter Kit, you can find DLP editor (impact analysis) tool. The goal of the DLP editor is to allow admins to see the impact of existing policies or the potential impact of policy changes. It provides admins with a view of impacted apps and flows, and resources that would be disabled if new or updated policies were to be enforced. The app can be used to review existing policies, change existing policies, and mitigate risk by contacting makers and informing them about the best course of action for their app or flow.
Update existing DLP policies to review impact. Follow the Establishing tenant hygiene with the CoE Starter Kit article to find more information about the DLP editor.
Before turning on the DLP feature, you can identify which apps and flows are affected and alert the makers. The DLP editor can send a list of all the apps and flows that are affected to an email address, which generates a .csv file for each type of object.
Using the DLP editor version 2.0, in the Impact Analysis area, choose Export impacted apps and flows to CSV.

Each generated csv file (flow.csv and apps.csv) has information regarding:
- Name of the apps and flows.
- Owner of the apps and flows.
- OwnerEmail of the apps and flows.
- All connections used by the apps and flows.
- ID of the apps and flows to identify the object.
- Environment ID where the apps and flows are located.
Notice that the Connections give you the list of all connections used by the app or flow. If you need to identify exactly which connector is impacted by the DLP in question, an automation is needed at this time. We're evaluating changing this situation in the tool.
Example of implementation to identify the connection:
Create a Power Automate flow.
Use the Get Tenant DLP Policy connector specifying the DLP in question.
The result is two arrays, business data and non-business data. As an example, the Twitter connector shows this code:
[
  {
    "id": "/providers/Microsoft.PowerApps/apis/shared_twitter",
    "name": "Twitter",
    "type": "Microsoft.PowerApps/apis"
  }
……
]
From this list, you have access to the name of the connector that matches with the name list of the csv app or flow Connection column.
By converting the csv to Excel format and placing it in your OneDrive, you can read all the impacted apps and flows from Power Automate. Check which connection is affected based on logic that compares connections with connector names.
After you have a match on which connection is causing the impact, generate a new list with the app or flow ID and the connector affected by the DLP.
Use the earlier information to notify the maker about the future impact. You can use Power Cards to collect the feedback from the maker if the app or flow can be deleted or needs to be migrated to another environment.
Based on your analysis, if you determine that the affected flows aren't being used, you can put them in quarantine and send an email to the maker with instructions on how to move them to a different environment. This encourages a do-it-yourself (DIY) culture and removes the shadow IT. In some situations, you might want to exempt some objects from the DLP. For instance, you may want to apply a specific DLP only for new resources that have been created and exempt the current resources. For more information about DLP resource exemption, see DLP resource exemption.
Effectively, your environment strategy is defined through DLP and that provides a destination for the apps and flows developed in the default environment.
Environment strategy
Developing an environment strategy requires configuring environments and other layers of data security in a way that supports productive development in your organization, while securing and organizing resources. A strategy to manage environment provisioning, access management, and controlling resources within them, is important to:
- Secure data and access.
- Govern the default environment in a compliant way.
- Manage the correct number of environments to avoid sprawl and conserve capacity.
- Facilitate and implement a healthy application lifecycle management (ALM).
- Organize resources in logical partitions.
- Support operations (and helpdesk) in identifying apps that are in production by having them in dedicated environments.
- Ensure data is being stored and transmitted in acceptable geographic regions (for performance and compliance reasons).
- Ensure isolation of applications being developed.
- Enablement of internal invoicing services to business end-users or business units consuming the services.
You should have well-established departments that can self-sustain and have existing ALM processes in place. In such cases, environments provide isolation and organize resources based on the department. A strategy based on that can be achieved by creating separate environments for each department. These environments then become the destination for the apps and flows in the default environment.
Communication strategy
Effective communication is crucial during a migration process. Communication happens over all phases of the migration process. Clear communication fosters understanding and collaboration among stakeholders. It enables the smooth flow of information, ensuring that everyone involved is well-informed about the migration plans, progress, and any potential challenges.
As part of the migration and clean-up effort, make sure the process is smooth to the makers, stakeholders, and leadership. Develop a strategy on how best to communicate and at what points you need to communicate, that provides consistency in your objectives and helps with communication for all involved. Some options to consider include:
- Use the CoE Starter Kit as an asset tracker.
- Add custom cloud flows to send notifications at various stages.
- Create template emails that get sent out to communicate with makers.
Things to keep in mind include:
- Change in URL of the app. Users of the app need to update any bookmarks to an app in the default environment.
- If there's an URL-based HTTP trigger flow, that must be updated in dependent flows to ensure it still acts as a webhook.
- Provide detailed steps to establish connections once the move is complete for both makers and app users. Users shouldn't be worried about creating a connection when they launch the app for the first time from the new environment.
A good start for setting up communications requires a self-serve model to scale and be more real-time for users than just leaving it for a single user’s email or a distribution list. If you plan to establish a SharePoint site, there's a template available that you can use to create an internal, Microsoft Power Platform hub. The hub becomes the common place to learn about strategy and guidance so makers get to make right decisions for what they intend to build and where they should go for it.
There are some existing solution components like set up inactivity notifications components and set up Developer Compliance components in the CoE Starter Kit that you could take advantage of. These components come with email templates and they can be duplicated to fit your purpose and need for migrating them from the default environment. A good addition is to capture some success stories on the communication site, as well.
Audiences
In the migration process, there are typically different audiences involved in communication. Here are the most typical key stakeholders and their roles:
- App owners: App owners are individuals or teams responsible for the development, maintenance, and management of specific applications. They have in-depth knowledge of the functionality, workflow, and configuration of their applications. Communication with app owners is crucial to understanding their app-specific requirements, gathering feedback, addressing concerns, and ensuring a smooth migration of their apps to the new environment.
- App users: App users are the individuals who utilize the applications regularly to perform their tasks or workflows. They may have varying levels of technical expertise and familiarity with the applications. Communication with app users is important to inform them about the migration, provide updates on any changes or disruptions that may occur, offer training or support to ensure a seamless transition, and minimize any impact on their day-to-day operations.
- Department heads or managers: Department heads or managers play a significant role in the migration process as they oversee the operations and strategic objectives of their respective departments. They need to be informed about the migration timeline, potential impacts, and benefits. Communication with department heads allows them to provide necessary guidance, align the migration with departmental goals, and ensure smooth coordination within their teams.
- IT or technical teams: IT or technical teams are responsible for the infrastructure, systems, and overall technical aspects of the migration. They're involved in the planning, execution, and support of the migration process. Communication with IT teams is essential to discuss technical requirements, dependencies, security considerations, and any necessary infrastructure or configuration changes that need to be implemented for the successful migration.
- Security and compliance teams: Security and compliance teams play a critical role in ensuring data security, privacy, and regulatory compliance during the migration. They provide guidance and ensure that appropriate measures are in place to protect sensitive information. Communication with security and compliance teams involves discussing security requirements, encryption protocols, access controls, and any compliance-related considerations throughout the migration process.
- Executive management: Executive management, including C-level executives or senior leadership, should be kept informed about the migration process. They may not require detailed, technical information, but should be aware of the project's objectives, progress, and potential impacts on the organization. Communication with executive management helps ensure their support, alignment with strategic goals, and resource allocation for the migration.
It's important to tailor communication strategies and messages for each audience, considering their specific needs, concerns and level of technical understanding. Clear and timely communication with all stakeholders fosters collaboration, ensures smooth coordination, and mitigates any potential challenges during the migration process.
Cadence
The cadence or frequency of communication with stakeholders during a migration process varies based on the specific needs and dynamics of the project. It's important to establish regular and consistent communication to keep stakeholders informed, address concerns, and maintain alignment throughout the migration. Here are some considerations for determining the cadence of communication with different stakeholders:
- App owners: Maintaining frequent communication with app owners throughout the migration process is important. This includes regular updates on the progress of the migration, addressing any concerns, and involving app owners in decision making, when necessary. The frequency of communication can vary depending on the complexity and criticality of the app, but it's recommended to have regular check-ins and timely responses to inquiries.
- App users: Engage app users through regular communication channels to keep them informed about the migration. This should include announcements, emails, newsletters, or even dedicated training sessions or workshops. The frequency of communication with app users may vary, but it's crucial to provide updates at key milestones, inform them about any changes or disruptions that may affect them, and offer support and guidance throughout the process.
- Department heads and managers: Communication with department heads and managers can occur at regular intervals or as needed, based on the significance of the migration to their departments. Provide periodic updates on the overall progress, timelines, and impact on their teams.
- IT or technical teams: Engage in regular communication with IT and technical teams involved in the migration. This includes ongoing collaboration, sharing updates on technical questions or issues, and coordinating any necessary configurations or changes. Communication frequency is typically higher in the planning and analysis phase. During the implementation phase, have regular touchpoints or meetings to ensure smooth coordination.
Resourcing
Managing resources effectively is crucial for a successful migration. Here are some key aspects to consider when it comes to resourcing management during a migration:
- Resource identification: Identify the resources required for the migration project, including individuals or teams responsible for tasks such as premigration preparations, data migration, testing, deployment, configuration, and post-migration support. Determine the specific skills, expertise, and availability needed for each role.
- Resources allocation: Assign resources to roles and tasks based on the resource's skills, availability, and workload capacity. Ensure that resources are appropriately allocated to balance the workload and meet project deadlines. Consider any dependencies or constraints that may impact resource allocation, such as shared resources across multiple projects.
- Skills development and training: Assess the skills and knowledge gaps within the team and provide necessary training or upskilling opportunities to ensure that resources are adequately equipped for their assigned tasks. This may involve providing training sessions, workshops, or access to relevant resources and documentation.
- Communication and collaboration: Foster effective communication and collaboration among resources involved in the migration. Encourage regular status updates, coordination meetings, and knowledge sharing to ensure that all team members are aligned, informed, and working together towards common goals.
- Contingency planning: Anticipate potential resource constraints or risks and develop contingency plans. Have backup resources identified or cross-trained in critical roles to mitigate any unforeseen challenges, such as unexpected absences or resource limitations.
- Stakeholder engagement: Keep stakeholders, such as app owners, department heads, and management, informed about resource allocation and any potential impact on timelines or deliverables. Regularly communicate resource updates, progress reports, and any adjustments to resourcing plans to manage expectations and maintain transparency.
Individual migration of objects
The distinction between app and solution is an important one. Exporting and importing an app only affects that object. A solution is a container that can have multiple apps, flows, and other objects.
Export and import a canvas app (legacy way)
The detailed steps are documented in Exporting a canvas app package and Importing a canvas app package.
This method of exporting apps is a legacy way. While it’s supported, we recommend that you use solutions. Solutions enable you to migrate multiple components instead of just one resource.
Export and import flow (legacy way)
The following steps describe how to export a flow.
- Select "…" menu, select Export then select Package (.zip).
- Enter a name and a description for your package. You can then configure default settings and add comments that are accessible during the import phase.
- Select the Export button in the bottom-right corner to download the package. If your download doesn't start automatically, you can select the Download button.
The following steps describe how to import a flow.
- Select the Import button.
- Upload the package file and wait for the screen to show the package details.
- When configuring the flow settings, you can choose to either create a new flow or update an existing one with the flow definition from the package.
- Select the connections that are required to set up the flow. You should see the Import button become available after you have successfully configured all the required settings.
After you have imported the flow, it must be activated. If the flow has any connection references, the user activating it must have access to those connections. If not, the connection owner can grant access to the activation user.
This method of exporting cloud flows is a legacy way. While it’s supported, we recommended that you use solutions, which enable you to migrate multiple components instead of just one resource.
Export and import a model-driven app
A model-driven app is always part of a solution. The packaged app, included in the solution file (.zip), can be shared with users based on their security roles after it has been successfully exported from the source environment and imported into the target environment.
The detailed step-by-step processes are covered in Export a solution and Import a solution.
Export and import a Microsoft Copilot Studio bot
You can export and import bots using solutions. A detailed list of steps is covered in Export and import bots using solutions.
Export and import Power Pages site
Migration pages involve exporting the existing configuration from the source Microsoft Dataverse environment, and then importing it into the target Dataverse environment. There are some prerequisite steps that must be performed in the target environment. Once the preparation work is complete, the portal configuration data can be exported using the configuration migration tool.
SharePoint Form app – special case for default environment
SharePoint form apps can be associated with only one environment, and if not configured otherwise, are in the default environment. A migration of all apps requires setting the destination to be a different environment instead of the default environment. Existing custom forms don't automatically migrate to the newly designated environment. Only production environments may be designated for SharePoint custom forms. The manual process follows, like moving a canvas app.
Backing up Microsoft Power Platform objects
Most Microsoft Power Platform objects are exported as zip files. If not, they have at least one file format. These files in their original format, as a zip file or whatever extension they come with, can be added to any file storage location or a repository of your choice. A few options to mention are Azure DevOps, GitHub, SharePoint, One Drive, or any other solution that supports all file formats.
Mass migration options
The migration of an app or flow is successful if it functions the same way as it did before. However, there are certain elements that can't be transferred:
- Flow run data about the past runs of the flow - The data about flow runs is only stored for 28 days. If you need the data, then it can be exported and stored by either using the CoE Starter Kit or if you have set up export to data lake. The latest version of the CoE Starter Kit has the flow run data if used with Data Export.
- Versions of the canvas app - As makers iterate through the development process, there may be multiple versions created. The prior versions can't be migrated. Only the latest version can be migrated.
- Data accessed by the app or flow or by using connectors - Only app metadata is included as part of export.
Any collaboration comments made in the app or flow are also not included.
This article outlines some possibilities. It's important to carefully consider the implications and advantages of each possibility before deciding.
Migrate all – database backup and restore option
Similar to most environment types, the default environment is backed up, as well. These system backups are performed automatically. There's no on-demand option for the default environment, so it requires a support request. The backup can be restored into a new environment keeping all the data within Dataverse. This option is only to show the reader about its existence and educate the reader on when to consider. It shouldn't be pursued as the primary choice, as it would only yield partial migration.
- Supported: Dataverse, Dynamics apps
- Not fully supported: Canvas app, component library, custom pages, Power Automate, Microsoft Copilot Studio
Not fully supported indicates that there may be potential data loss during migration and more steps required.
Migrate metadata and then data
A recommended approach is to use solutions to move the metadata and then either dataflows, Azure Data Factory, or another tool of preference could be employed to transfer data. Complete automation from start to finish may not be achievable in all cases, due to the diverse connectors, but close approximation is possible.
At a high level, the steps are:
- Add app to a solution.
- Add flow to solution.
- Add existing bots.
- Adjust connection references in apps and flows.
- Check for solution dependencies and add objects.
- Export the solution.
- Import the solution.
- Transfer data.
Checking for solution dependencies
The success of a solution import in the target environment can only be ensured when you have all related components added to the solution or they're available in the target environment. If there are missing components, then the import of the solution is likely to fail. To ensure that all required components are present, there are options best if used in combination:
Manually add selected components to the solution. In this case, it's assumed that you know that all dependent components are already available on the target environment.
Use the show dependencies button from within the solution to let the system identify dependencies for you. You can add all dependencies or selectively add only the dependencies that don't exist in the target environment.

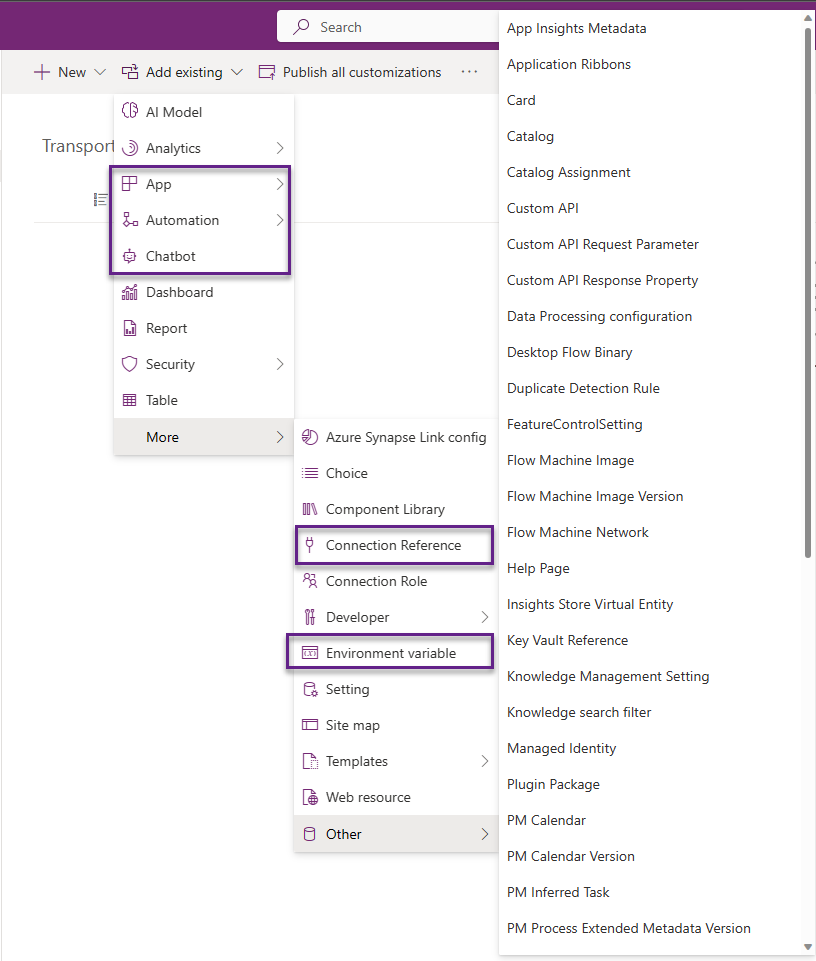
Adding a component to a solution (manual)
Assuming that a solution is created, a maker needs to use the add existing component menu option to add an existing app, flow, or bot.
Adjust connection references
Canvas apps and flows handle connections differently. Flows use connection references for all connectors, while canvas apps only use them for implicitly shared (non-OAuth) connections, such as SQL Server authentication.
Updating an app to use connection references instead of connections
Canvas apps that aren't solution-aware when added to a solution won't automatically be upgraded to use connection references. Connection references get associated with canvas apps only at the time a data source is added to the app. To upgrade apps, you must:
- Add an app that is non-solution aware to a solution.
- Remove the connection from the app.
- Create a new connection reference in the solution.
- Add a connection containing an associated connection reference.
Updating a flow to use connection references instead of connections
When a flow isn't in a solution, it uses connections. If that flow is then added into a solution, it continues to use connections initially. Flows can be updated to use connections references, instead of connections, in one of two ways:
If the flow is exported in an unmanaged solution and imported, the connections are removed with connection references.
When a solution flow is opened, the flow checker on the flow details page shows a warning to use connection references. The warning message has an action you can select to Remove connections so connection references can be added. Selecting that action removes connections from the trigger and actions in the flow and allows connection references to be selected and created.
Adding an object to a solution (automation)
You can use PowerShell commands to move apps in bulk to a solution. Adding pre-existing canvas apps and cloud flows to solutions can also be done via the command line. Install the latest PowerShell modules to try this option. The two main commands are Set-PowerAppAsSolutionAware and Set-FlowAsSolutionAware.
Once the modules are installed, insert your own environment ID, app ID, flow ID, and solution ID.
For a canvas app:
Set-PowerAppAsSolutionAware -EnvironmentName {Environment ID} -AppName {App ID} -SolutionId {Solution ID}
For a flow:
Set-FlowAsSolutionAware -EnvironmentName {Environment ID} -FlowName {Flow ID} - SolutionId {Solution ID}
Connection references are data entries into the connection reference table. To use the connection reference as part of the app or flow requires a modification of the core app or flow definition. You need to replace the connectionReferences node with the connection reference.
Solution export and import
Assuming the solutions are ready, the next stage of automation can be done in multiple ways:
Manually export and import the solutions into the target environment.
Use packages to move multiple solutions in a single pass.
Use Power Platform build tools tasks to perform multiple operations like pack solution, unpack solution, export solution, and import solution. DevOps provides the ability to automate application lifecycle management (ALM) and these tasks are all built to support ALM for Microsoft Power Platform.
The Power Platform Command Line Interface (CLI) also provides options to export and import solutions. All solution-related commands can be used to build, export, and import solutions. You can also use CLI to transfer data in and out.
A maker-friendly option is to use pipelines that are intended to democratize ALM for Power Platform. Bringing ALM automation and continuous integration/continuous deployment (CI/CD) capabilities into a single feature service is more approachable for all makers, admins, and developers.
Creating connections (manual)
In the target environment before the import operation is set, create the missing connections that are required by the app or flow. For more information about how to create connections, see Manage connections in Power Automate.
Data migration
There are multiple options available for data migration, ranging from manual to full automation.
- Manually export and import the data using Excel workbooks.
- A Power Automate cloud flow can be developed to extract data from source tables and write directly to the destination. However, this requires the maker to use the Dynamics 365 Connector or the Dataverse (legacy) connector. Currently, the Dataverse connector doesn’t support connecting across environments. This feature is planned for the future, and once released it may be used to move data from one to the other.
- Configuration Migration tool (CMT) is a tool that is used for portal migration, but can also be used for regular data migration. CMT can also be used with PowerShell. The PAC CLI tool gives the ability to call CMT.
- Dataflows can be used to create mappings between the environments and used to move data. HTTP Web connector may be used as an alternative to Dataverse.
- Azure Data Factory can be used with the Dataverse connector to pull data from the source and insert it into the destination.
Given that the default environment is limited in size, one of the above options should suffice to move data out of the default environment.
Clean up considerations
A clean-up is a good idea for apps and flows that haven't been used and updated in a long time. There are different paths for an administrator to consider as far as clean-up is concerned.
- Decide the order of importing the data. The least dependent tables go first and most dependent come at the end.
- Not all fields need be mapped. Fields like Version, Modified date, Created on date, and some other system fields don't need to be mapped.
- If you would like to preserve the original Created on date, then use map the source Created On date field to OverRiddenCreatedOn field on the destination table.
- Audit data can't be migrated.
- Don't enable any workflows or flows that get triggered based on data insertion, unless intended. This increases the time for data migration.
Tagging options
CoE Starter Kit doesn’t have a tagging option today. However, it could be a customization that you could add to the Starter Kit.
Create a table called Tags and set up a many-to-many (N:N) relationship with the app, flows, and other inventory tables. You can then create a tag and associate these records with the appropriate inventory items. For a better user experience, you can embed a grid on the Main form of apps, flows, and other inventory tables. This option is recommended as it has referential consistency.
Create a text field on each inventory table and use that to capture the text (tag) that you can later use.
If you want a more fixed list, create a global option set and add that to all the inventory tables and their forms, as well.
Quarantine option
If you're uncertain about the necessity of certain applications, you can try isolating them for a while and put them in quarantine during this state. The app can only be used by the owner. After a suitable amount of time has elapsed and if no response from the owner has been received, you can remove them from the environment.
Flows don’t support the quarantine state, but a similar approach can be used by stopping the flow and checking if it gets activated again by the owner.
In both cases, having proper communication with the owner is important.
Only Delete option
If there's really no loss of productivity and reuse of the objects, this option is the best. Most test flows and apps fall into this category.
In this case, once the list of objects is identified, a PowerShell batch could be developed, and a csv list passed to it, which would then delete all those assets.
As you loop through the IDs of apps and flows, the following command can be used to remove them from the default environment.
- Remove-AdminFlow -EnvironmentName Default-[Guid] -FlowName [Guid]
- Remove-AdminPowerApp -AppName [Guid] -EnvironmentName [Guid]
Objects backup and Delete option
As an example, assume that a Power Automate flow is created to address a specific seasonal need, but that it hasn't been used for a long time. In this case, it’s good to take a backup of the component before deleting the component.
To make a backup of the component, either options of individual migration or mass migration could be used to generate an exported solution. This can then be added to either a file repository of your choice or to a OneDrive location.
After the backup is secured, then you can apply the Delete option to complete the clean-up process.
In many cases, these are test flows and apps created by makers as part of their personal productivity learning and experimenting.
Conclusion
Power Platform is a tool for citizen developers and professional developers alike. The default environment usage should primarily focus on personal productivity using Microsoft 365 products. All other apps and flow development should be happening in designated shared, individual, or developer environments. A strong recommendation is to develop an independent environment strategy based on DLP, which can help makers to develop their apps and flows in the right environment. There's also a great benefit to establishing a communication strategy and providing users with self-service models of learning about the strategy, implementation of solutions, and best practices to develop apps and flows. A good addition is to capture some success stories on the communication site. Success stories published internally help makers to connect with ideas and makes them open to possibilities that could be achieved using Power Platform.
A strong governance strategy is essential when migrating or moving specific objects. There are various strategies available for migrating objects, including individual and mass migration. The best fit option depends on our organization policies. Solutions are the most recommended way to organize the components of your application and make migrations more straightforward.
Feedback
Coming soon: Throughout 2024 we will be phasing out GitHub Issues as the feedback mechanism for content and replacing it with a new feedback system. For more information see: https://aka.ms/ContentUserFeedback.
Submit and view feedback for