Note
Access to this page requires authorization. You can try signing in or changing directories.
Access to this page requires authorization. You can try changing directories.
Note
This feature is available in all Microsoft Advertising markets.
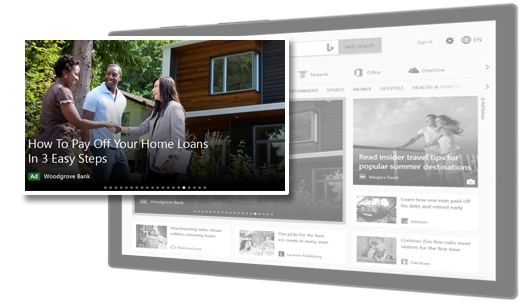
With Native ads, you can use creative assets such as images, logos, and videos to grab people's attention and drive clicks and conversions.
For more information about best practices for adding images to your Native ads, see Best practices for Audience ad images. Here's an example of what Native ads with images could look like:
Create a Native ad in an existing campaign
To create Native ads in an existing Audience campaign, follow the instructions below. To create a new Audience campaign with Native ads, see How do I create an Audience campaign?
From the navigation menu on the left, hover over Campaigns and select Ads & extensions > Ads.
Select Create, and then select an ad group.
For your ad type, select Native.
Enter your Final URL. This is your landing page URL—in other words, the URL of the page that displays after a customer selects your ad.
Below Images, add the images you want to appear in your ad.
Choose whether to use an image from your Website images, pick one of our available Stock images, or upload an image.
Note
You cannot upload more than 5,000 images to a Microsoft Advertising account.
When you've found the right image, select it.
You'll see how we have cropped the image for the possible aspect ratios for native ads. If you want to change the imagery for any specific aspect ratio, select its pencil icon and select either Re-crop or Replace.
(Optional) Below Videos, you can add up to five videos that you want to appear in your ad. You may also choose to add our Recommended videos.
If you choose to add Recommended videos:
As you add videos, the Ad preview area on the right side of the page will update to give you an idea of what your video ads could look like. Select the arrows on either side of the Ad preview area to scroll through the different possible placements.
Select the pencil icon to edit your videos. When editing your videos, you can adjust the scene's Business name, Logo, Text, and Image. If you've been enabled to use video templates in Ads Studio, then you have the option to edit these video elements:
- For Assets, you can edit the Logo, Image, and Text.
- For Style, you can edit the Background color, Font color, Font, and Font weight.
- For Audio, you can choose the Music that you'd like to play in your video.
Note
Not everyone has video templates in Ads Studio yet. If you don't, don't worry—it's coming soon!
Select Apply when you're finished editing your videos.
Note
See Technical requirements for videos for information about the technical requirements for videos.
(Optional) Select Add logos. Adding logos to your ads allows you to better showcase your brand and reach potential customers.
Logo dimensionsNote
You can add up to 5 logos. Your logos can use both 4:1 and 1:1 aspect ratios. You can choose which aspect ratios you want when adding your logos. We will crop your logos in your chosen aspect ratios. Your selected logos will appear in the thumbnail list below Logos.
To re-crop your logos, select the pencil icon below your logo in the thumbnail list.
Your logos must meet the minimum dimensions in pixels for the following aspect ratios:
Aspect ratio Minimum dimensions (pixels) 1 : 1 128 x 128 4 : 1 512 x 128 Enter your Short headlines (up to 15), Long headlines (up to five), and Descriptions (up to five). You need a minimum of one Short headline, one Long headline, and one Description per ad. These are required for display flexibility. Short headlines must be 40 characters or fewer; long headlines and descriptions must be 90 characters or fewer. Depending on your native ad's placement, the Description will appear below or adjacent to your ad's long or short headline.
Enter your Business name. Depending on your native ad's placement, your business name may appear in your native ad.
(Optional) Under advanced settings, enter your Mobile URL. This is the webpage where people go to after selecting your ad on a mobile device.
(Optional) Choose a Call to action from the predefined list. This will provide potential customers with a brief, compelling reason for them to select your ad right now.
Note
“Automated” is the default option for your Call to action. If you don't choose a Call to action from the predefined list, then it will be automated by default during ad delivery. This means that we'll automatically choose your Call to action and the language it serves in.
(Optional) Select Advanced URL options to include tracking templates or URL parameters in your final URL.
(Optional) Set up your Impression tracking URLs.
(Optional) Enter your Tag URL under Third-party measurement and select Save.
Select Save.
Note
- After you select Save, your ads will begin appearing on the Microsoft Advertising Network shortly, unless there is an error with your account.
- To further optimize your Audience campaign, use the audience network planner to experiment with different audiences and combinations of audiences.
Technical requirements for videos
Videos for Native ads have the same technical requirements as Online Video ads. For a complete list of technical requirements, see About Online Video ads.