Monitor model activity (preview)
[This topic is prerelease documentation and is subject to change.]
As you use your AI models, you might have to access data to monitor their activity or consumption.
Important
- This is a preview feature.
- Preview features aren’t meant for production use and may have restricted functionality. These features are available before an official release so that customers can get early access and provide feedback.
- This feature might not yet be available in your region.
The AI Builder activity section of the Power Automate portal provides tables and charts that you can use to monitor AI models and the data that they process, and to track AI credit consumption.
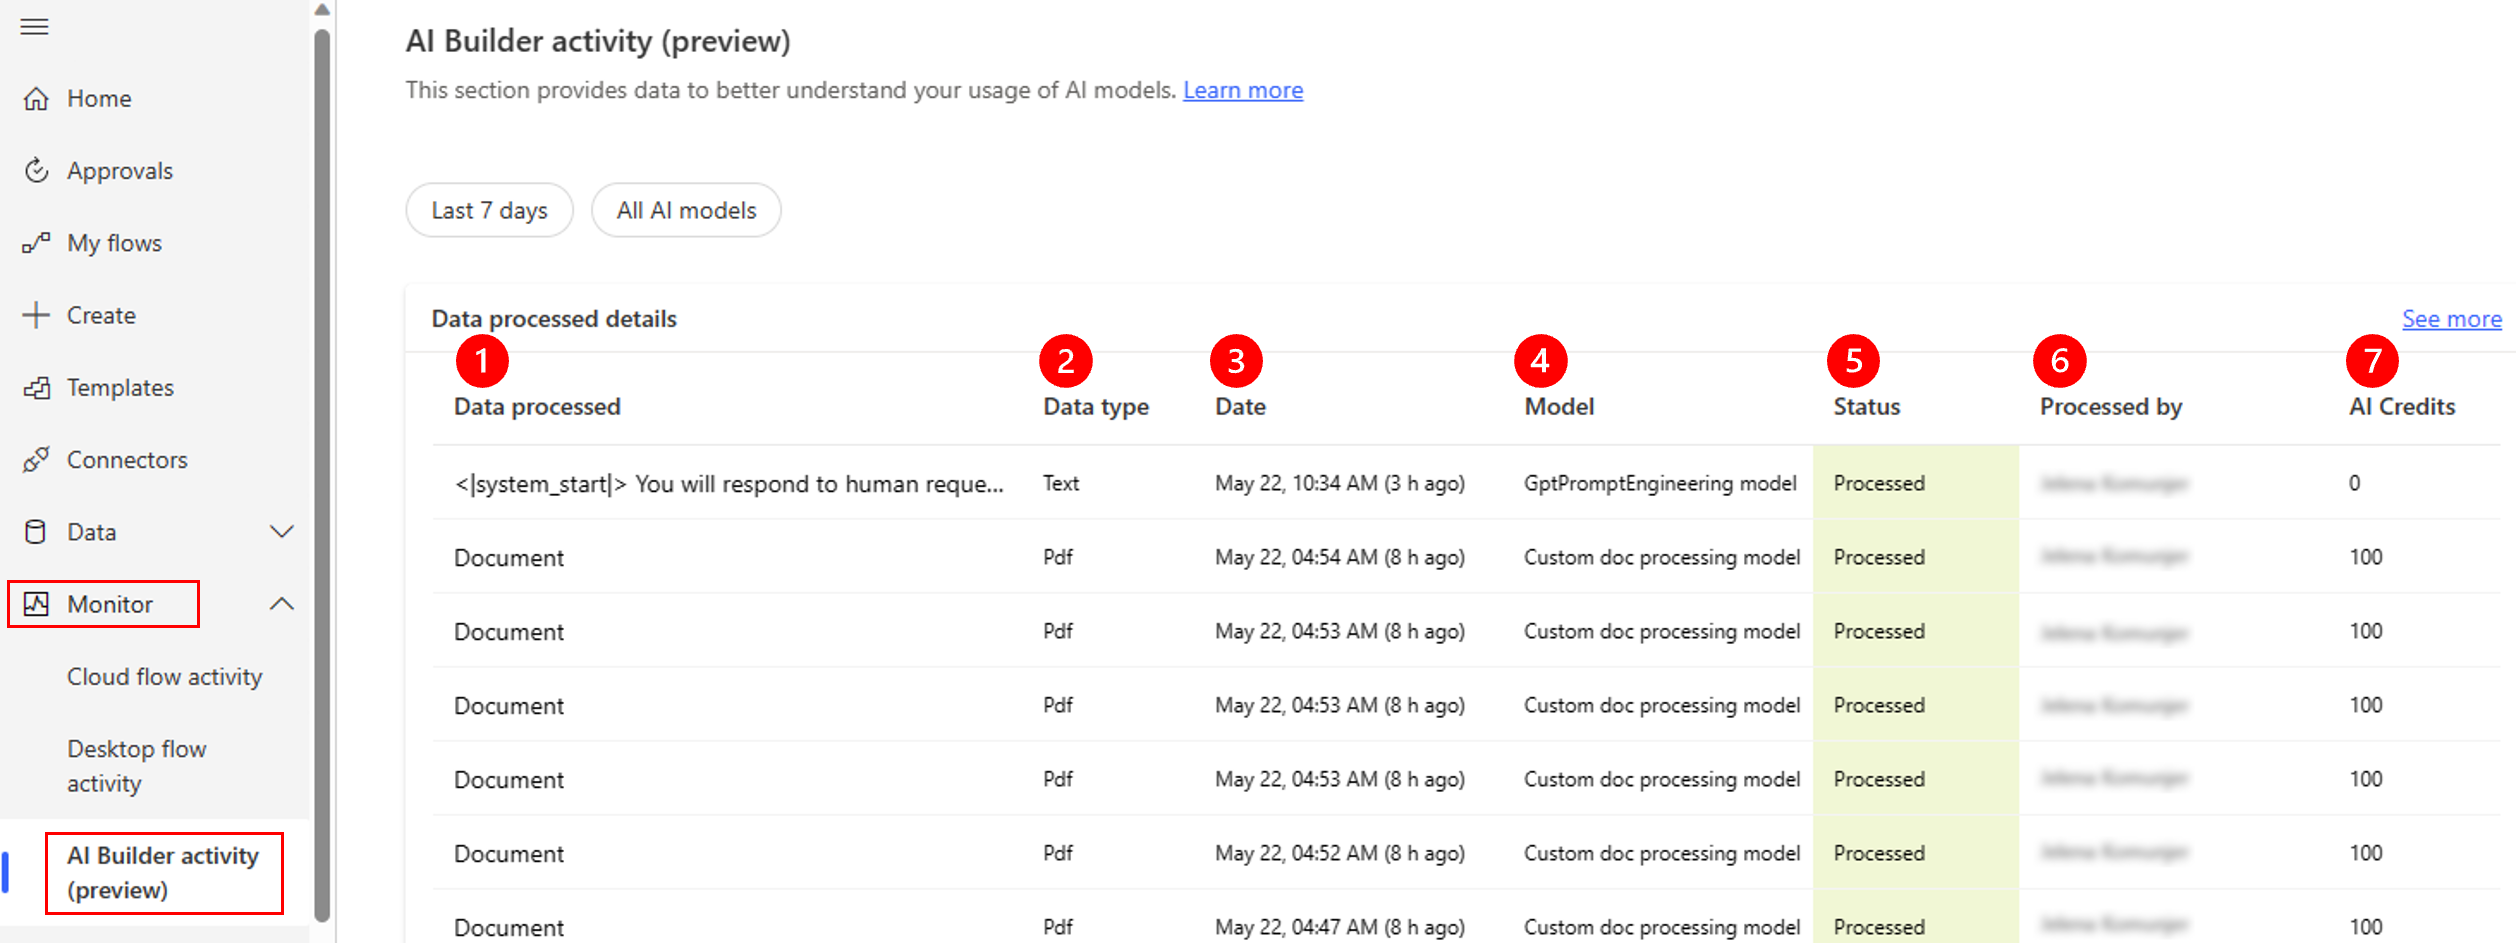
Legend:
- Data processed: The text input of the AI model predict action for text processing models, or the value Image or Document for other models.
- Data type: The data type that the AI model processed: Text, Jpeg, Png, Bmp, Pdf, or Unknown.
- Date: The processing date.
- Model: The name of the AI model that was used. If the model has been deleted, Deleted is shown.
- Status: The processing status: Processing, Processed, or Failed.
- Processed by: The name of the person who did the predict action. This person is typically the owner of the Power Automate flow or the person who ran the app that was created in Power Apps.
- AI Credits: The number of credits that were consumed for the predict action.
View AI Builder activity
The AI Builder activity page shows AI model activity, including activity that is generated in Power Apps.
Sign in to Power Automate.
On the left navigation pane, select ...More > Discover all.
Under Monitor, select AI Builder activity (preview).
(Optional) Customize the data that shows by applying a filter for the timeframe or model. To apply a filter, select the relevant table heading.
By default, data shows for all AI models for the last seven days.
(Optional) To display more data, select See more.
Monitoring data for makers and admins
The AI Builder activity section is helpful for makers who want to monitor the use of their AI models. It's also helpful for environment admins who want to monitor all activity in an environment.
Note
- The monitoring data is stored in the AI Event table in your Dataverse instance. It persists in the table even if the model, flow, and app are deleted.
- Write access to this table is required to record AI model/prompt activity.
- The AI Event Dataverse table contains input of the AI model predict actions for text scenarios only.
The data that you can display depends on your role.
| Role | What you can display |
|---|---|
| System Administrator | All activity for all AI models. |
| System Customizer | All activity for all AI models. |
| Basic User | Only your own activity for the AI models that you have access to. |
| Environment Maker | Only your own activity for the AI models that you have access to. |
Manage AI Builder activity monitoring data
Through effective management of the historical data that your Power Automate flows, Power Apps, or other Microsoft Power Platform products generate, you ensure that your Dataverse environments remain efficient and cost-effective. By implementing data retention policies and using features such as bulk record deletion in Dataverse and Power Platform admin center, you can proactively manage the accumulation of historical data.
This section of the article explains how to identify the historical AI Builder activity monitoring data that can be purged from your environment. It then explains how to use Dataverse's built-in bulk-delete feature to purge it. With the bulk-delete feature, you can quickly and easily remove large amounts of data from your environment in a way that complies with your specific data retention policies. This approach ensures efficient data storage and performance management.
In addition to on-demand bulk-delete jobs, you can schedule recurrent bulk-delete jobs that find and delete records in a table that are, for example, older than a specified number of days (OlderThanXDays query function).
To create bulk-delete jobs in Dataverse, you must have the Bulk Delete privilege in at least one of the roles that have been assigned to you.
Caution
When you delete Dataverse data, it's permanently deleted from your environment. There is no way to recover individual records after they have been deleted.
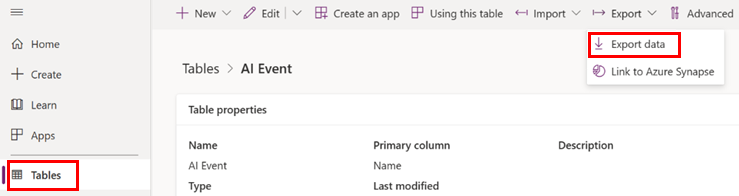
Export a Dataverse table
The following table shows an AI Builder activity monitoring Dataverse table that might have large data volumes.
| Display name | System name | Details |
|---|---|---|
| AI Event | Msdyn_aievent | The AI Event table stores activity data about AI model activity (predicts). This data includes the processed data type, processed data information for text scenarios, processing date, processing status, and credits consumed. |
As the data is stored in your AI Event Dataverse table, you can export it in comma-separated values (CSV) format. Learn how to export data.
Delete AI Builder activity monitoring data
To delete AI Builder activity monitoring data, you must create a bulk-delete job. To bulk-delete data in Dataverse, follow these steps.
Caution
Before you perform bulk-delete operations, thoroughly test and review your filter results. Bulk-delete operations are irreversible.
Sign in to Power Platform admin center.
On the left navigation pane, select Environments, select your environment, and then select Settings on the top menu bar.
Select Data management > Bulk deletion.
Select New on the command bar above the All Bulk Deletion System Jobs grid. The Bulk Deletion Wizard appears, where you define a query for the records that you want to delete.
Select Next.
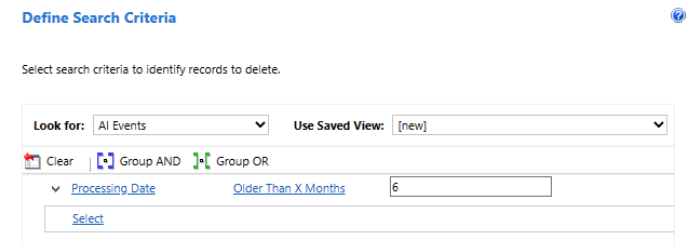
In the Look for list, select the AI Events table.
In the search criteria area, add the filter that should return the records that you want to delete. For example, the filter in the following screenshot finds all AI Builder model activity that is older than six months.
Select Next.
In the Name field, enter a name for the bulk-delete job (for example, Bulk-delete of AI models monitoring data older than 6 months).
In the At scheduled time section, select a start date and time for the job. Select a time when users aren't typically online.
Select the Run this job after every checkbox.
In the days list, select the frequency that you want the job to run at.
If you want to receive a notification email, select the Send an email to me (<your email address>) when this job is finished checkbox.
Select Next.
On the Review and Submit Bulk Deletion Details page, review the bulk-delete job, and then select Submit to create the recurring job.