Hi @Kris Masoner
To change what's shown on the contact card in Microsoft Teams, you need to make some settings in the Microsoft 365 admin center. Here are the steps:
- Sign in to the Microsoft 365 admin center: Sign in to the Microsoft 365 admin center with an administrator account.
- Navigate to user management: In the left navigation bar, select Users > Active users.
- Select a user: Find and select the user whose information you want to change.
- Edit user information: On the user's details page, select Manage contact information. You can edit the user's name, title, department, phone number, and more.
- Save changes: When you're done editing, click Save to apply the changes.
After the changes are made, sign out of Teams and sign back in. Please note that it may take some time for the changes to take effect in all users' Teams clients.
If you don't see the option to change your personal information in the Teams admin center, sign in to the Microsoft Entra admin center and follow the steps below to modify your information.
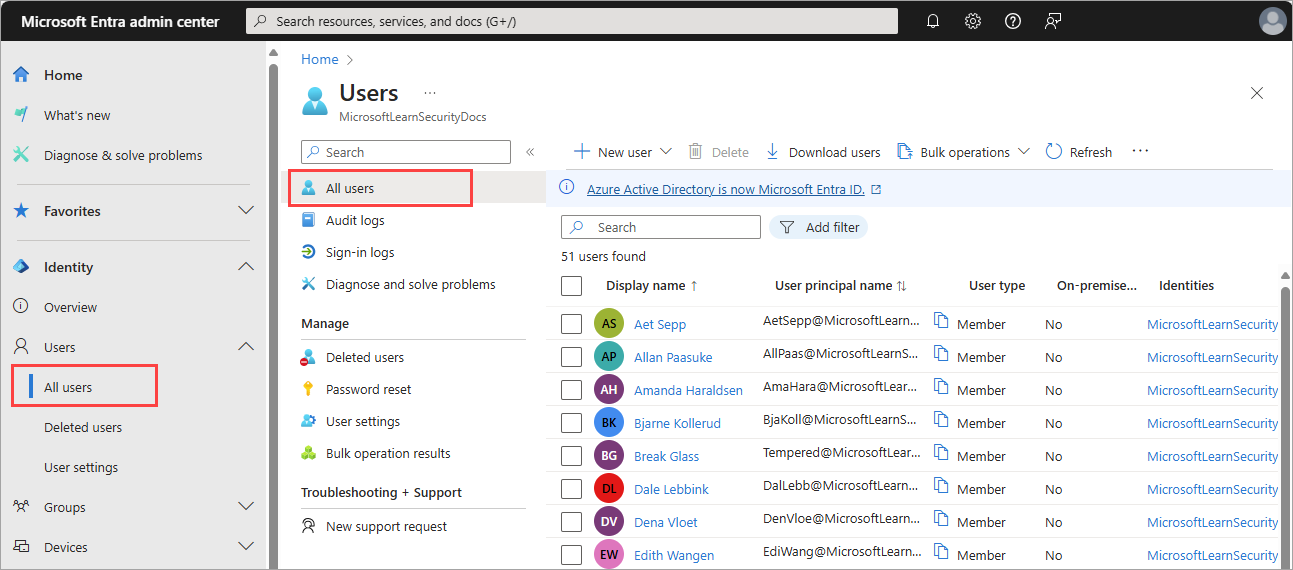
- Sign in to the Microsoft Entra admin center as at least a User Administrator.
- Browse to Identity > Users > All users.

- Select a user.
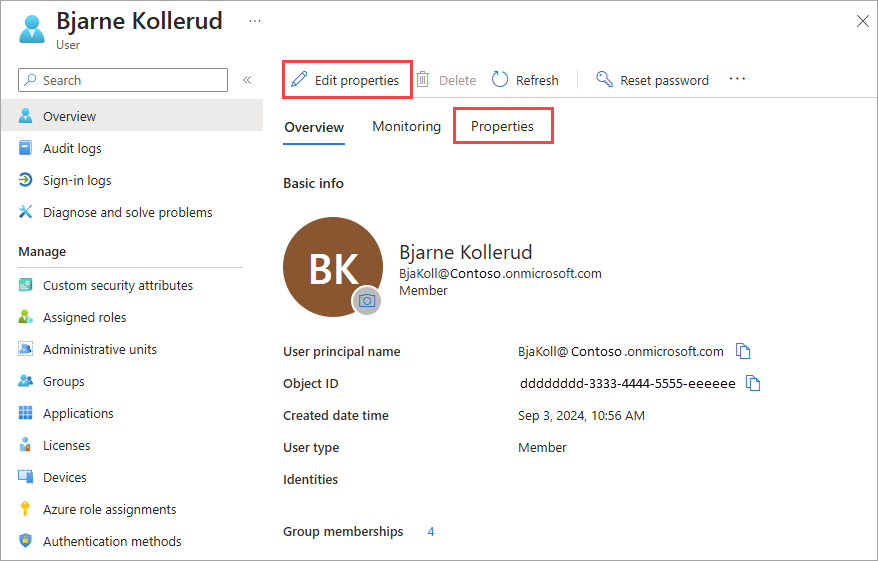
- There are two ways to edit user profile details. Either select Edit properties from the top of the page or select Properties.

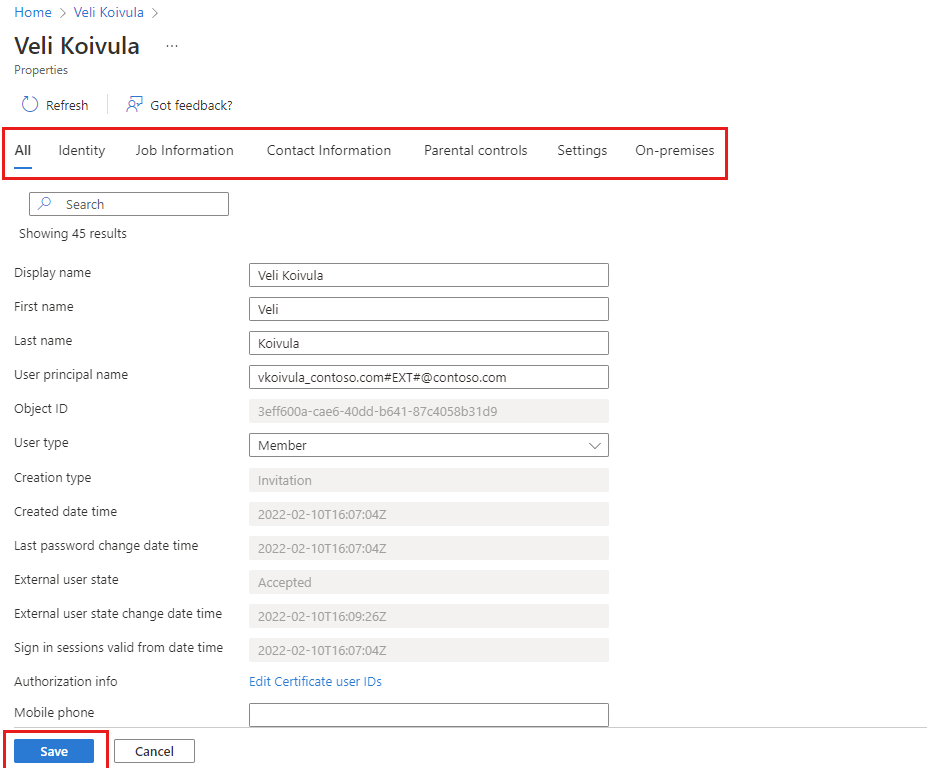
- After making any changes, select the Save button. If you selected the Edit properties option:
- The full list of properties appears in edit mode on the All category.
- To edit properties based on the category, select a category from the top of the page.
- Select the Save button at the bottom of the page to save any changes.
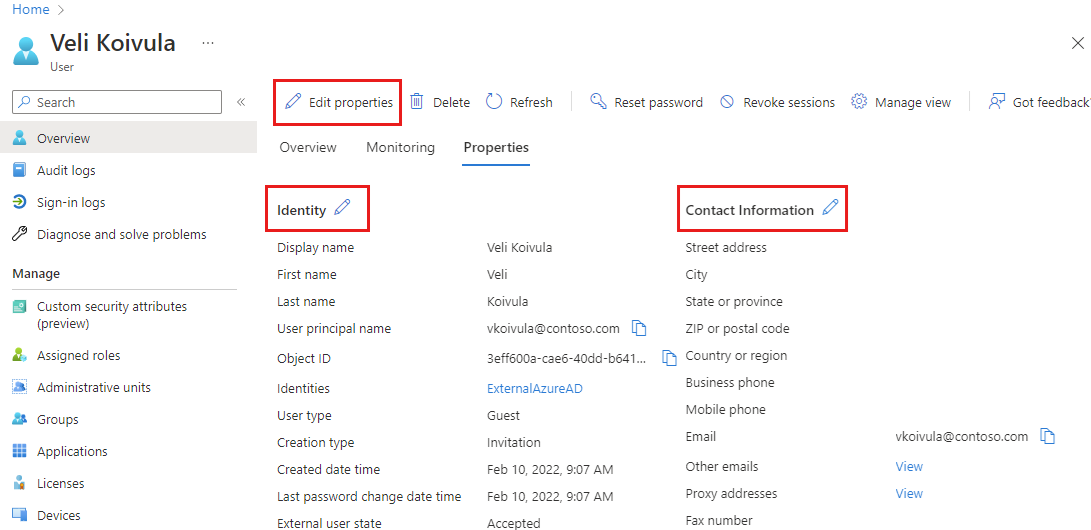
 If you selected the Properties tab option:
- The full list of properties appears for you to review.
- To edit a property, select the pencil icon next to the category heading.
- Select the Save button at the bottom of the page to save any changes.

If you encounter problems or have other questions, feel free to let me know. Thanks for your understanding and support.
If the answer is helpful, please click "Accept Answer" and kindly upvote it. If you have extra questions about this answer, please click "Comment".
Note: Please follow the steps in our documentation to enable e-mail notifications if you want to receive the related email notification for this thread.