Azure Virtual Network
An Azure networking service that is used to provision private networks and optionally to connect to on-premises datacenters.
This browser is no longer supported.
Upgrade to Microsoft Edge to take advantage of the latest features, security updates, and technical support.

Provide Enable and Disable option on Azure Route Table For Static Route Entries (UDR).
Also the same request for Enable/Disable of Route options for static route in vWAN-vHUB under Route Table.
Advantage: This will help in administrative effort rather than deleting a specfic route inoder to influence it as per case requirement, we just have to disable it. It should take into effect and if the user would like to reintroduce the route back into the system, they should be able to just click on Enable.
Reason: This will give an added advantage on change on demand.
' cx='32' cy='32' r='32' /%3E%3Ctext x='50%25' y='55%25' dominant-baseline='middle' text-anchor='middle' fill='%23FFF' %3EA%3C/text%3E%3C/svg%3E)
Just checking in to see if the below answer provided by @Marcin Policht helped.
If this answers your query, do click 'Accept Answer'. And, if you have any further query do let us know in the comments below so that we can address them.
I'm glad that you were able to resolve your issue and thank you for posting your solution so that others experiencing the same thing can easily reference this! Since the Microsoft Q&A community has a policy that "The question author cannot accept their own answer. They can only accept answers by others ", I'll repost your solution in case you'd like to "Accept " the answer.
Issue: Provide Enable and Disable option on Azure Route Table For Static Route Entries (UDR).
Also, the same request for Enable/Disable of Route options for static route in vWAN-vHUB under Route Table.
Solution: Op has shared the feedback directly on Azure platform.
If you have any other questions or are still running into more issues, please let me know. Thank you again for your time and patience throughout this issue.
' cx='32' cy='32' r='32' /%3E%3Ctext x='50%25' y='55%25' dominant-baseline='middle' text-anchor='middle' fill='%23FFF' %3EMP%3C/text%3E%3C/svg%3E)
For the first one, refer to https://learn.microsoft.com/en-us/azure/virtual-network/manage-route-table
Create a route table
On the Azure portal menu or from the Home page, select Create a resource.
In the search box, enter Route table. When Route table appears in the search results, select it.
In the Route table page, select Create.
In the Create route table dialog box:
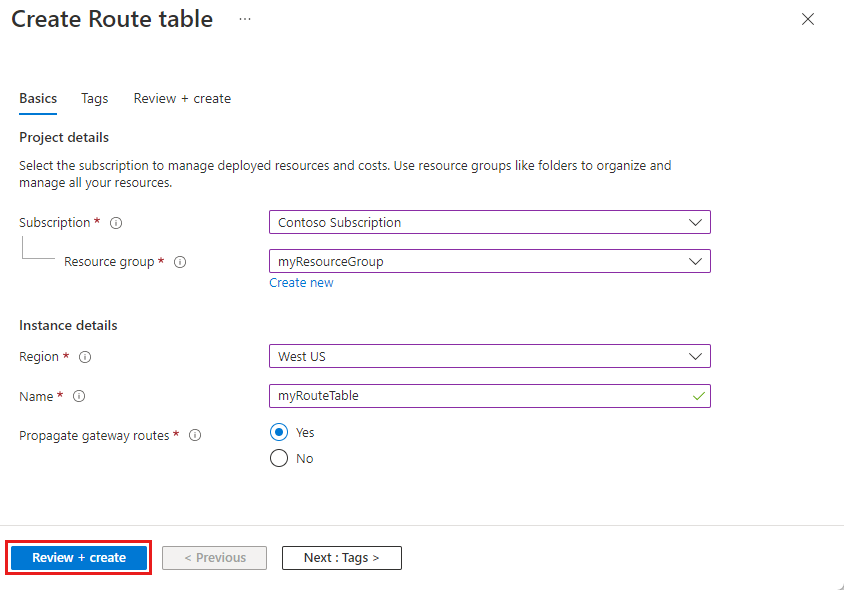
Create a route
Go to the Azure portal to manage your route tables. Search for and select Route tables.
In the route table list, choose the route table you want to add a route to.
From the route table menu bar, choose Routes and then select + Add.
Enter a unique Route name for the route within the route table. 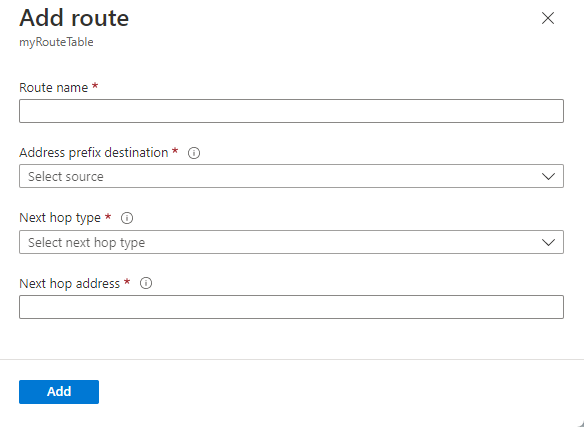
Enter the Address prefix, in Classless Inter-Domain Routing (CIDR) notation, that you want to route traffic to. The prefix can't be duplicated in more than one route within the route table, though the prefix can be within another prefix. For example, if you defined 10.0.0.0/16 as a prefix in one route, you can still define another route with the 10.0.0.0/22 address prefix. Azure selects a route for traffic based on longest prefix match. To learn more, see How Azure selects a route.
Choose a Next hop type. To learn more about next hop types, see Virtual network traffic routing.
If you chose a Next hop type of Virtual appliance, enter an IP address for Next hop address.
Select OK.
For the second one, refer to https://learn.microsoft.com/en-us/azure/virtual-wan/how-to-virtual-hub-routing
Create a route table
The following steps help you create a route table and a route.
In the Azure portal, go to the virtual hub.
On the Virtual HUB page, in the left pane, select Route Tables to open the Route Tables page. Notice the route tables that are propagated to this virtual hub.
Select + Create route table to open the Create Route Table page.
On the Basics tab, complete the following fields, then click Labels to move to the Labels page.

On the Labels page, configure label names. Labels provide a mechanism to logically group route tables. Configure any required labels, then move to the Associations page.
On the Associations page, associate connections to the route table. You'll see Branches, Virtual Networks, and the Current settings of the connections. After configuring settings, move to the Propagations page.

On the Propagations page, select the settings to propagate routes from connections to the route table.

Select Create to create the route table.
If the above response helps answer your question, remember to "Accept Answer" so that others in the community facing similar issues can easily find the solution. Your contribution is highly appreciated.
hth
Marcin
Hi Team,
Please ignore the above post, I have shared the feedback directly on Azure platform. I am aware of the steps mentioned by Marcin.
If there is a way we can disolve this post, that should be fine.
Thank you for taking the time and responding on this post.