Note
Access to this page requires authorization. You can try signing in or changing directories.
Access to this page requires authorization. You can try changing directories.
Applies to: Azure Stack HCI, version 22H2
Important
Azure Stack HCI is now part of Azure Local. However, older versions of Azure Stack HCI, for example 22H2 will continue to reference Azure Stack HCI and won't reflect the name change. Learn more.
Warning
The deployment instructions provided in this article apply to an older version, Azure Stack HCI, version 22H2. For new deployments, we recommend that you use the latest generally available version of Azure Local, see About Azure Local deployment.
Now that you've deployed the Azure Stack HCI operating system, you'll learn how to use Windows Admin Center to create an Azure Stack HCI cluster that uses Storage Spaces Direct, and, optionally, Software Defined Networking. The Create Cluster wizard in Windows Admin Center will do most of the heavy lifting for you. If you'd rather do it yourself with PowerShell, see Create an Azure Stack HCI cluster using PowerShell. The PowerShell article is also a good source of information for what is going on under the hood of the wizard and for troubleshooting purposes.
Note
If you are doing a single server installation of Azure Stack HCI 21H2, use PowerShell to create the cluster.
Cluster creation workflow
Here's the workflow for creating a cluster in Windows Admin Center:
- Complete the prerequisites.
- Start the Create Cluster wizard.
- Complete the following steps in the Create Cluster wizard:
- Step 1: Get Started. Ensures that each server meets the prerequisites and features needed for cluster join.
- Step 2: Networking. Assigns and configures network adapters and creates the virtual switches for each server.
- Step 3: Clustering. Validates the cluster is set up correctly. For stretched clusters, also sets up the two sites.
- Step 4: Storage. Configures Storage Spaces Direct.
- Step 5: SDN. (Optional) Sets up a Network Controller for SDN deployment.
After you're done creating a cluster in the Create Cluster wizard, complete these post-cluster creation steps:
- Set up a cluster witness. This is highly recommended for all clusters with at least two nodes.
- Register with Azure. Your cluster is not fully supported until your registration is active.
- Validate an Azure Stack HCI cluster. Your cluster is ready to work in a production environment after completing this step.
Prerequisites
Before you run the Create Cluster wizard in Windows Admin Center, you must complete the following prerequisites.
Warning
Running the wizard before completing the prerequisites can result in a failure to create the cluster.
Review the hardware and related requirements in System requirements.
Consult with your networking team to identify and understand Physical network requirements, Host network requirements, and Firewall requirements. Especially review the Network Reference patterns, which provide example network designs. Also, determine how you'd like to configure host networking, using Network ATC or manually.
Install the Azure Stack HCI operating system on each server in the cluster. See Deploy the Azure Stack HCI operating system.
Obtain an account that's a member of the local Administrators group on each server.
Have at least two servers to cluster; four if creating a stretched cluster (two in each site). To instead deploy Azure Stack HCI on a single server, see Deploy Azure Stack HCI on a single server.
Ensure all servers are in the same time zone as your local domain controller.
Install the latest version of Windows Admin Center on a PC or server for management. See Install Windows Admin Center.
Ensure that Windows Admin Center and your domain controller are not installed on the same system. Also, ensure that the domain controller is not hosted on the Azure Stack HCI cluster or one of the machines in the cluster.
If you're running Windows Admin Center on a server (instead of a local PC), use an account that's a member of the Gateway Administrators group, or the local Administrators group on the Windows Admin Center server.
Verify that your Windows Admin Center management computer is joined to the same Active Directory domain in which you'll create the cluster, or joined to a fully trusted domain. The servers that you'll cluster don't need to belong to the domain yet; they can be added to the domain during cluster creation.
If you're using an integrated system from a Microsoft hardware partner, install the latest version of vendor extensions on Windows Admin Center to help keep the integrated hardware and firmware up to date. To install them, open Windows Admin Center and click Settings (gear icon) at the upper right. Select any applicable hardware vendor extensions, and click Install.
For stretched clusters, set up your two sites beforehand in Active Directory. Alternatively, the wizard can set them up for you too. For more information about stretched clusters, see the Stretched clusters overview.
Start the Create Cluster wizard
To start the Create Cluster wizard in Windows Admin Center:
Log in to Windows Admin Center.
Under All connections, click Add.
In the Add or create resources panel, under Server clusters, select Create new.
Under Choose the cluster type, select Azure Stack HCI.
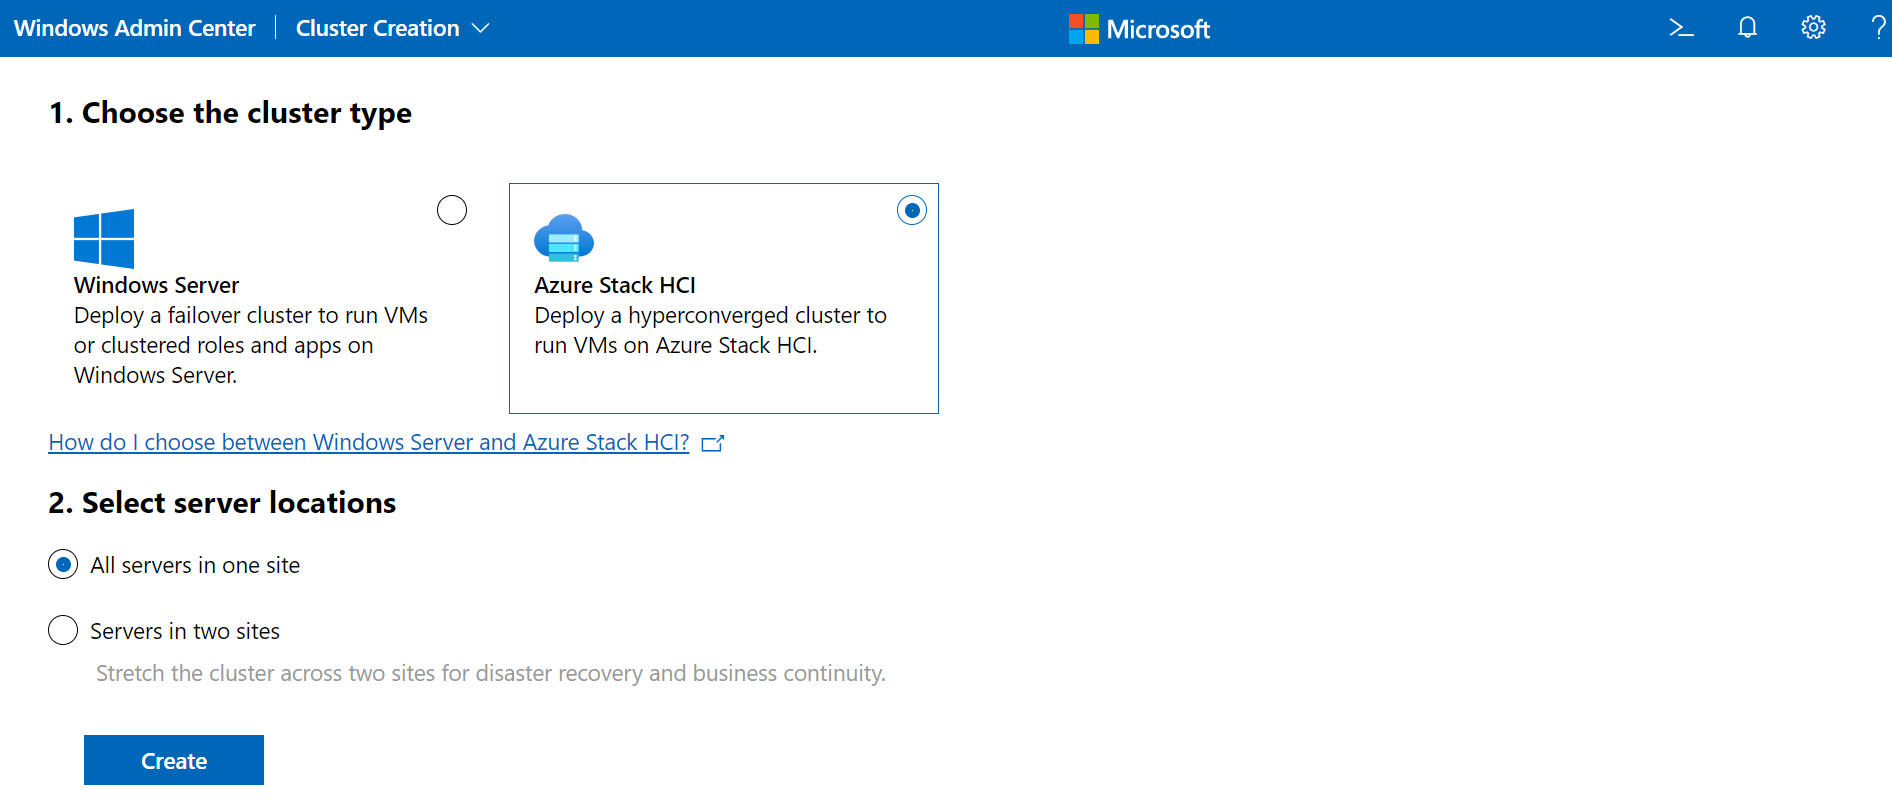
Under Select server locations, select one the following:
- All servers in one site
- Servers in two sites (for stretched cluster)
When finished, click Create. You'll see the Create Cluster wizard, as shown below.

Proceed to the next step in the cluster creation workflow, Step 1: Get started.


Step 1: Get started
Step 1 of the wizard walks you through making sure all prerequisites are met, adding the server nodes, installing needed features, and then restarting each server if needed.
Review 1.1 Check the prerequisites listed in the wizard to ensure each server node is cluster-ready. When finished, click Next.
On 1.2 Add servers, enter your account username using the format domain\username. Enter your password, then click Next. This account must be a member of the local Administrators group on each server.
Enter the name of the first server you want to add, then click Add. When you add servers, make sure to use a fully qualified domain name.
Repeat Step 3 for each server that will be part of the cluster. When you're finished, select Next.
If needed, on 1.3 Join a domain, specify the domain to join the servers to and the account to use. You can optionally rename the servers if you want. Then click Next.
On 1.4 Install features, review and add features as needed. When finished, click Next.
The wizard lists and installs required features for you, including the following options:
- Data Deduplication
- Hyper-V
- BitLocker Drive Encryption
- Data Center Bridging (for RoCEv2 network adapters)
- Failover Clustering
- Network ATC
- Active Directory module for Windows PowerShell
- Hyper-V module for Windows PowerShell
On 1.5 Install updates, click Install updates as needed to install any operating system updates. When complete, click Next.
On 1.6 Install hardware updates, click Get updates as needed to get available vendor hardware updates. If you don't install the updates now, we recommend manually installing the latest networking drivers before continuing. Updated drivers are required if you want to use Network ATC to configure host networking.
Note
Some extensions require extra configuration on the servers or your network, such as configuring the baseboard management controller (BMC). Consult your vendor's documentation for details.
Follow the vendor-specific steps to install the updates on your hardware. These steps include performing symmetry and compliance checks on your hardware to ensure a successful update. You may need to re-run some steps.
On 1.7 Restart servers, click Restart servers if required. Verify that each server has successfully started.
On 1.8 Choose host networking, select one of the following:
- Use Network ATC to deploy and manage networking (Recommended). We recommend using this option for configuring host networking. Network ATC provides an intent-based approach to host network deployment and helps simplify the deployment and network configuration management for Azure Stack HCI clusters. For more information about using Network ATC, see Network ATC.
- Manually configure host networking. Select this option to manually configure host networking. For more information about configuring RDMA and Hyper-V host networking for Azure Stack HCI, see Host network requirements.
Select Next: Networking to proceed to Step 2: Networking.
Step 2: Networking
Step 2 of the wizard walks you through configuring the host networking elements for your cluster. RDMA (both iWARP and RoCE) network adapters are supported.
Depending on the option you selected in 1.8 Choose host networking of Step 1: Get started above, refer to one of the following tabs to configure host networking for your cluster:
This is the recommended option for configuring host networking. For more information about Network ATC, see Network ATC overview.
On 2.1 Verify network adapters, review the list displayed, and exclude or add any adapters you want to cluster. Wait for a couple of minutes for the adapters to show up. Only adapters with matching names, interface descriptions, and link speed on each server are displayed. All other adapters are hidden.
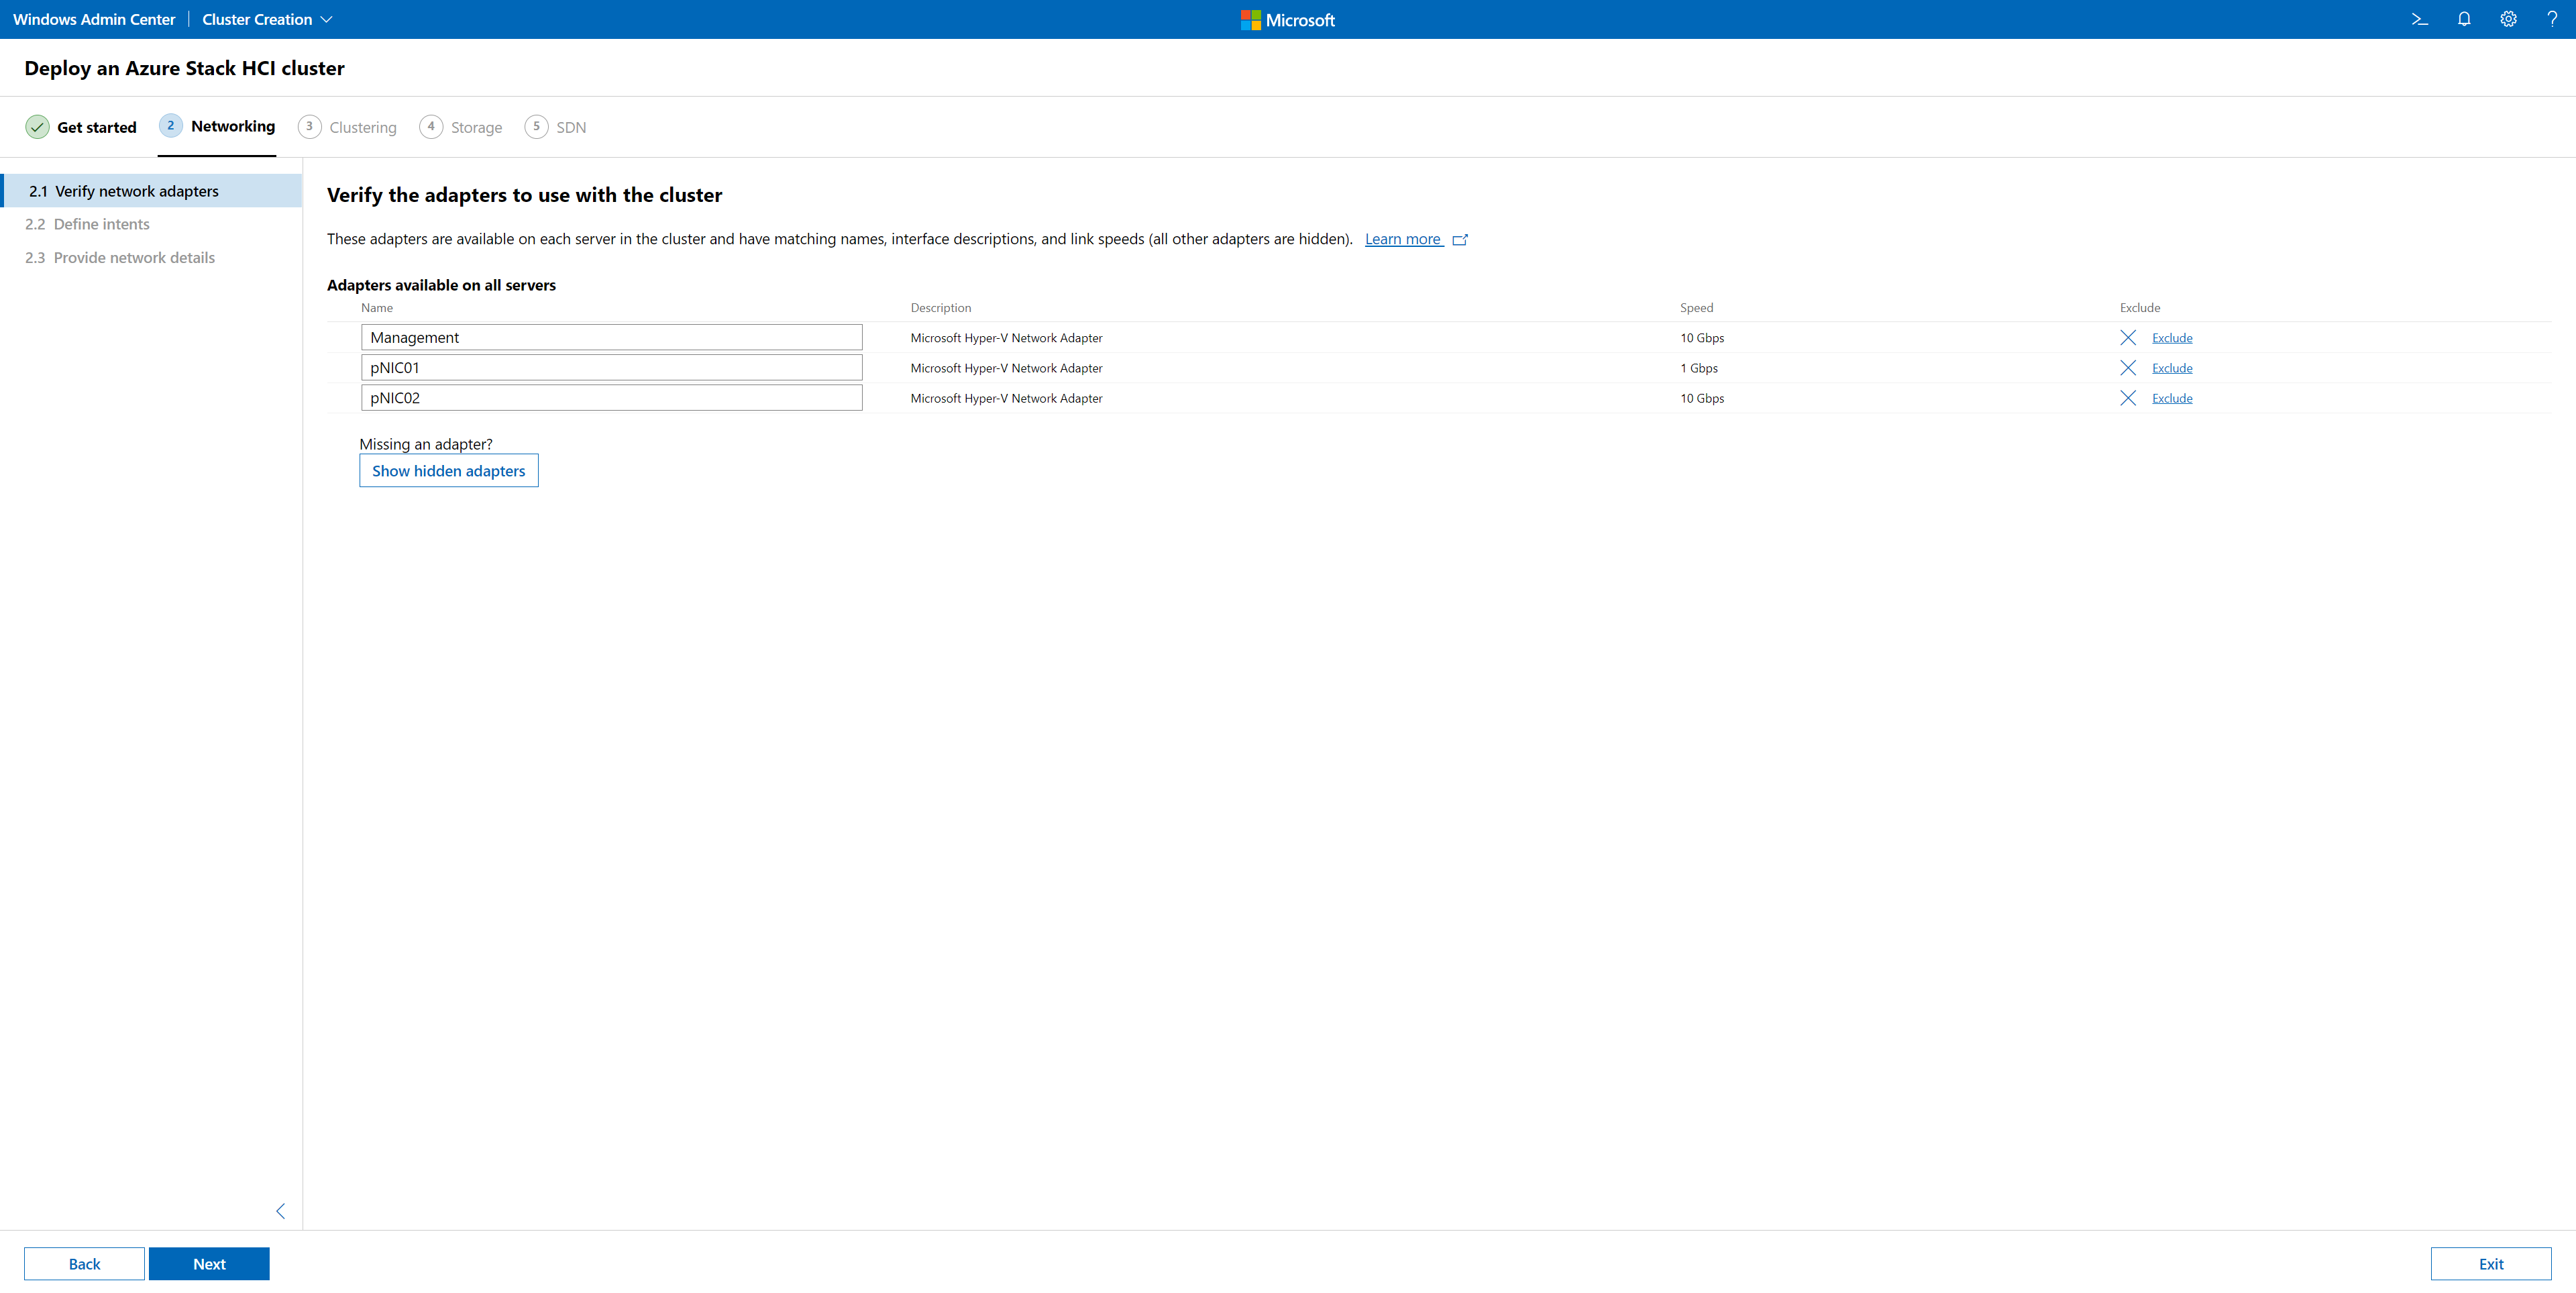
If you don't see your adapters in the list, click Show hidden adapters to see all the available adapters and then select the missing adapters.
On the Select the cluster network adapters page, select the checkbox for any adapters listed that you want to cluster. The adapters must have matching names, interface descriptions, and link speeds on each server. You can rename the adapters to match, or just select the matching adapters. When finished, click Close.
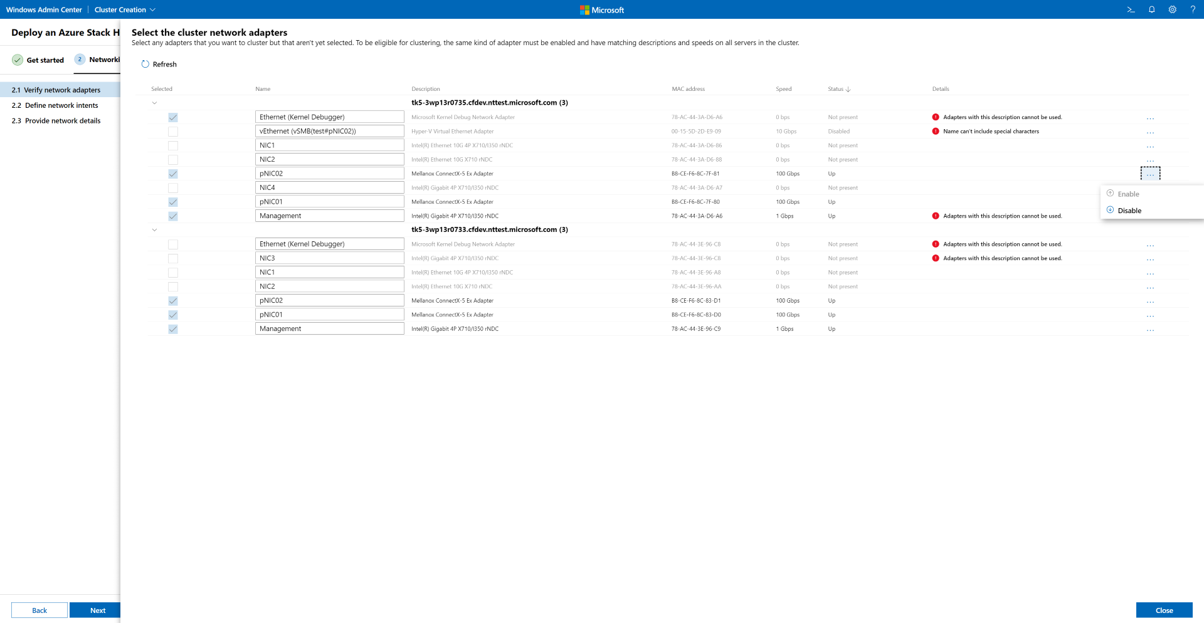
The selected adapters will now display under Adapters available on all servers. When finished selecting and verifying adapters, click Next.
On 2.2 Define intents, under Intent 1, do the following:
- For Traffic types, select a traffic type from the dropdown list. You can add the Management and Storage intent types to exactly one intent while the Compute intent type can be added to one or more intents. For more information, see Network ATC traffic types.
- For Intent name, enter a friendly name for the intent.
- For Network adapters, select an adapter from the dropdown list.
- (Optional) Click Select another adapter for this traffic if needed.
For recommended intent configurations, see the network reference pattern that matches your deployment:
(Optional) After an intent is added, select Customize network settings to modify its network settings. When finished, select Save.
(Optional) To add another intent, select Add an intent, and repeat step 5 and optionally step 6.
When finished defining network intents, select Next.
On 2.3: Provide network details, for each storage traffic adapter listed, enter the following or use the default values (recommended):
- Subnet mask/CIDR
- VLAN ID
- IP address (this is usually on a private subnet such as 10.71.1.x and 10.71.2.x)
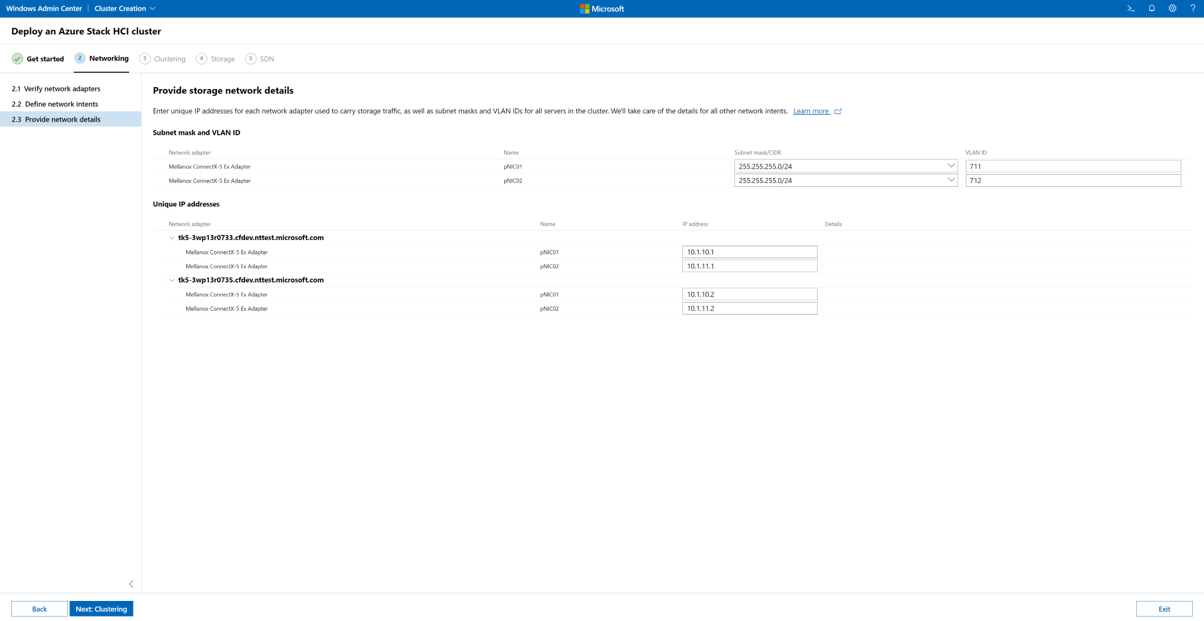
Select Next: Clustering to proceed to Step 3: Clustering.


Step 3: Clustering
Step 3 of the wizard makes sure everything thus far is set up correctly, automatically sets up two sites in the case of stretched cluster deployments, and then actually creates the cluster. You can also set up your sites beforehand in Active Directory.
On 3.1 Create the cluster, specify a unique name for the cluster.
Under IP address, do one of the following:
- Specify one or more static addresses. The IP address must be entered in the following format: IP address/current subnet length. For example: 10.0.0.200/24.
- Assign address dynamically with DHCP.
When finished, select Create cluster. This can take a while to complete.
If you get the error "Failed to reach cluster through DNS," select the Retry connectivity checks button. You might have to wait several hours before it succeeds on larger networks due to DNS propagation delays.
Important
If you failed to create a cluster, do not click the Back button instead of the Retry connectivity checks button. If you select Back, the Cluster Creation wizard exits prematurely, and can potentially reset the entire process.
If you encounter issues with deployment after the cluster is created and you want to restart the Cluster Creation wizard, first remove (destroy) the cluster. To do so, see Remove a cluster.
The next step appears only if you selected Use Network ATC to deploy and manage networking (Recommended) for step 1.8 Choose host networking.
In Deploy host networking settings, select Deploy to apply the Network ATC intents you defined earlier. If you chose to manually deploy host networking in step 1.8 of the Cluster Creation wizard, you won't see this page.
On 3.2 Deploy host networking settings, select Deploy to apply the Network ATC intents you defined earlier. This can take a few minutes to complete. When finished, select Next.
On 3.3 Validate cluster, select Validate. Validation can take several minutes. Note that the in-wizard validation is not the same as the post-cluster creation validation step, which performs additional checks to catch any hardware or configuration problems before the cluster goes into production. If you experience issues with cluster validation, see Troubleshoot cluster validation reporting.
If the Credential Security Service Provider (CredSSP) pop-up appears, select Yes to temporarily enable CredSSP for the wizard to continue. Once your cluster is created and the wizard has completed, you'll disable CredSSP to increase security. If you experience issues with CredSSP, see Troubleshoot CredSSP.
Review all validation statuses, download the report to get detailed information on any failures, make changes, then click Validate again as needed. You can Download report as well. Repeat again as necessary until all validation checks pass. When all is OK, click Next.
Select Advanced. You have a couple of options here:
- Register the cluster with DNS and Active Directory
- Add eligible storage to the cluster (recommended)
Under Networks, select whether to Use all networks (recommended) or Specify one or more networks not to use.
When finished, click Create cluster.
For stretched clusters, on 3.3 Assign servers to sites, name the two sites that will be used.
Next assign each server to a site. You'll set up replication across sites later. When finished, click Apply changes.
Select Next: Storage to proceed to Step 4: Storage.
Step 4: Storage
Complete these steps after finishing the Create Cluster wizard. Step 4 walks you through setting up Storage Spaces Direct for your cluster.
On 4.1 Clean drives, you can optionally select Erase drives if it makes sense for your deployment.
On 4.2 Check drives, click the > icon next to each server to verify that the disks are working and connected. If all is OK, click Next.
On 4.3 Validate storage, click Next.
Download and review the validation report. If all is good, click Next. If not, run Validate again.
On 4.4 Enable Storage Spaces Direct, click Enable.
Download and review the report. When all is good, click Finish.
Select Go to connections list.
After a few minutes, you should see your cluster in the list. Select it to view the cluster overview page.
It can take some time for the cluster name to be replicated across your domain, especially if workgroup servers have been newly added to Active Directory. Although the cluster might be displayed in Windows Admin Center, it might not be available to connect to yet.
If resolving the cluster isn't successful after some time, in most cases you can substitute a server name instead of the cluster name.
(Optional) Select Next: SDN to proceed to Step 5: SDN.
Step 5: SDN (optional)
This optional step walks you through setting up the Network Controller component of Software Defined Networking (SDN). Once the Network Controller is set up, you can configure other SDN components such as Software Load Balancer (SLB) and RAS Gateway as per your requirements. See the Phased deployment section of the planning article to understand what other SDN components you might need.
You can also deploy Network Controller using SDN Express scripts. See Deploy an SDN infrastructure using SDN Express.
Note
The Create Cluster wizard does not currently support configuring SLB And RAS gateway. You can use SDN Express scripts to configure these components. Also, SDN is not supported or available for stretched clusters.

- Under Host, enter a name for the Network Controller. This is the DNS name used by management clients (such as Windows Admin Center) to communicate with Network Controller. You can also use the default populated name.
- Download the Azure Stack HCI VHDX file. For more information, see Download the VHDX file.
- Specify the path where you downloaded the VHDX file. Use Browse to find it quicker.
- Specify the number of VMs to be dedicated for Network Controller. Three VMs are strongly recommended for production deployments.
- Under Network, enter the VLAN ID of the management network. Network Controller needs connectivity to same management network as the Hyper-V hosts so that it can communicate and configure the hosts.
- For VM network addressing, select either DHCP or Static.
- If you selected DHCP, enter the name for the Network Controller VMs. You can also use the default populated names.
- If you selected Static, do the following:
- Specify an IP address.
- Specify a subnet prefix.
- Specify the default gateway.
- Specify one or more DNS servers. Click Add to add additional DNS servers.
- Under Credentials, enter the username and password used to join the Network Controller VMs to the cluster domain.
- Enter the local administrative password for these VMs.
- Under Advanced, enter the path to the VMs. You can also use the default populated path.
- Enter values for MAC address pool start and MAC address pool end. You can also use the default populated values.
- When finished, click Next.
- Wait until the wizard completes its job. Stay on this page until all progress tasks are complete. Then click Finish.
Note
After Network Controller VM(s) are created, you must configure dynamic DNS updates for the Network Controller cluster name on the DNS server.
If Network Controller deployment fails, do the following before you try this again:
Stop and delete any Network Controller VMs that the wizard created.
Clean up any VHD mount points that the wizard created.
Ensure you have at least 50-100GB of free space on your Hyper-V hosts.
Step 6: Remove a Cluster (optional)
There are situations in which you may need to actually remove the cluster which you created in Step 3. If so, choose the Remove the Cluster option in the Cluster Creation wizard.
For more information about removing a cluster, see Remove a cluster.
Next steps
To perform the next management task related to this article, see: