Validate OEM packages
You can test a new original equipment manufacturer (OEM) package when there has been a change to the firmware or drivers for a completed solution validation. When your package has passed the test, it's signed by Microsoft. Your test must contain the updated OEM extension package with the drivers and firmware that have passed Windows Server logo and PCS tests.
The solution is considered validated when all tests are completed with a result of Succeeded. If any test completes with a result of Failed, file a bug in Microsoft Collaborate and notify Microsoft by sending an email to vaashelp@microsoft.com.
Important
Before uploading or submitting packages, review Create an OEM package for the expected package format and contents.
Managing packages for validation
When using the Package Validation workflow to validate a package, you need to provide a URL to an Azure Storage blob. This blob is the test signed OEM package installed as part of the update process. Create the blob using the Azure Storage account you created during setup (see Set up your validation as a service [VaaS] resources).
Prerequisite: Provision a storage container
Create a container in your storage account for package blobs. This container can be used for all your Package Validation runs.
In the Azure portal, go to the storage account created in Set up your VaaS resources.
On the left blade under Blob Service, select Containers.
Select + Container from the menu bar.
- Provide a name for the container. For example,
vaaspackages. - Select the desired access level for unauthenticated clients such as VaaS. For details on how to grant VaaS access to packages in each scenario, see Handling container access level.
- Provide a name for the container. For example,
Upload package to storage account
Prepare the package you want to validate. This is a
.zipfile whose contents must match the structure described in Create an OEM package.Note
Please ensure that the
.zipcontents are placed at the root of the.zipfile. There should be no sub-folders in the package.In the Azure portal, select the package container and upload the package by selecting Upload in the menu bar.
Select the package
.zipfile to upload. Keep defaults for Blob type (that is, Block Blob) and Block size.
Generate package blob URL for VaaS
When creating a Package Validation workflow in the VaaS portal, you need to provide a URL to the Azure Storage blob containing your package. Some interactive tests, including Monthly Azure Stack Hub Update Verification and OEM Extension Package Verification, also require a URL to package blobs.
Handling container access level
The minimum access level required by VaaS depends on whether you're creating a Package Validation workflow or scheduling an interactive test.
In the case of Private and Blob access levels, you must temporarily grant access to the package blob by giving VaaS a shared access signature (SAS). The Container access level doesn't require you to generate SAS URLs but allows unauthenticated access to the container and its blobs.
| Access level | Workflow requirement | Test requirement |
|---|---|---|
| Private | Generate a SAS URL per package blob (Option 1). | Generate a SAS URL at the account level and manually add the package blob name (Option 2). |
| Blob | Provide the blob URL property (Option 3). | Generate a SAS URL at the account level and manually add the package blob name (Option 2). |
| Container | Provide the blob URL property (Option 3). | Provide the blob URL property (Option 3). |
The options for granting access to your packages are ordered from least access to greatest access.
Option 1: Generate a blob SAS URL
Use this option if the access level of your storage container is set to Private, where the container doesn't enable public read access to the container or its blobs.
Note
This method won't work for interactive tests. See Option 2: Construct a container SAS URL.
In the Azure portal, go to your storage account and navigate to the
.zipcontaining your package.Select Generate SAS from the context menu.
Select Read from Permissions.
Set Start time to the current time, and End time to at least 48 hours from Start time. If you'll be creating other workflows with the same package, consider increasing End time for the length of your testing.
Select Generate blob SAS token and URL.
Use the Blob SAS URL when providing package blob URLs to the portal.
Option 2: Construct a container SAS URL
Use this option if the access level of your storage container is set to Private and you need to supply a package blob URL to an interactive test. This URL can also be used at the workflow level.
-
In the Azure portal, navigate to your storage account. Under Settings, select Shared access signature.
Select Blob from Allowed Services options. Deselect any remaining options.
Select Container and Object from Allowed resource types.
Select Read and List from Allowed permissions. Deselect any remaining options.
Select Start time as current time and End time to at least 14 days from Start time. If you'll be running other tests with the same package, consider increasing End time for the length of your testing. Any tests scheduled through VaaS after End time will fail and a new SAS will need to be generated.
-
Select Generate SAS and connection string and copy the Blob service SAS URL string.
The format should look like this:
https://storageaccountname.blob.core.windows.net/?sv=2016-05-31&ss=b&srt=co&sp=rl&se=2017-05-11T21:41:05Z&st=2017-05-11T13:41:05Z&spr=https Modify the generated SAS URL to include the package container,
{containername}, and the name of your package blob,{mypackage.zip}. Like this:https://storageaccountname.blob.core.windows.net/{containername}/{mypackage.zip}?sv=2016-05-31&ss=b&srt=co&sp=rl&se=2017-05-11T21:41:05Z&st=2017-05-11T13:41:05Z&spr=httpsUse this value when providing package blob URLs to the portal.
Option 3: Grant public read access
Use this option if it's acceptable to allow unauthenticated clients access to individual blobs or, in the case of interactive tests, the container.
Caution
This option opens up your blob(s) for anonymous read-only access.
Set the access level of the package container to Blob or Container. For more information, see Grant anonymous users permissions to containers and blobs.
Note
If you're providing a package URL to an interactive test, you must grant full public read access to the container to proceed with testing.
In the package container, select the package blob to open the properties pane.
Copy the URL. Use this value when providing package blob URLs to the portal.
Create a Package Validation workflow
Sign in to the VaaS portal.
-
On the solutions dashboard, create or select an existing solution. For instructions, see Create a solution in the VaaS portal.
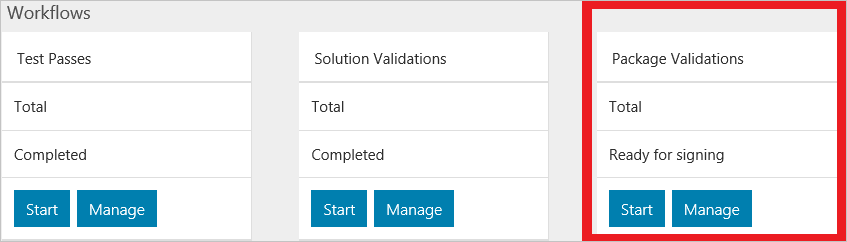
Select Start on the Package Validation tile.
-
Enter a name for the workflow. The name must be unique within the solution. For naming suggestions, see Naming convention for VaaS workflows.
Enter the Azure Storage blob URL to the test signed OEM package requiring a signature from Microsoft. For instructions, see Generate package blob URL for VaaS.
Copy the Azure Stack Hub update package folder to a local directory on the DVM. Enter the path to the folder that contains the package zip file and metadata file for 'AzureStack update package folder path'.
Copy the OEM package folder created above to a local directory on the DVM. Enter the path to the folder that contains the package zip file and metadata file for 'OEM update package folder path'.
Note
Copy the Azure Stack Hub update and OEM update to 2 separate directories.
RequireDigitalSignature- provide the value true if you need the package to be Microsoft signed (Running OEM Validation workflow). If you're validating a Microsoft signed package on the latest Azure Stack Hub update, make this value false (running monthly Azure Stack Hub update verification).-
Enter the test parameters. For additional details and instructions, see Test parameters.
Note
Environment parameters can't be modified after creating a workflow.
-
(Optional) Label the workflow with tags of your choice. You may filter workflows on this text when managing workflows for the solution.
-
Select Submit to create the workflow.
You'll be redirected to the tests summary page.
Required tests
The following tests are required to be run for OEM package validation:
- OEM Validation Workflow
Run Package Validation tests
In the Package Validation tests summary page, you'll run a subset of the listed tests appropriate to your scenario.
In the validation workflows, scheduling a test uses the workflow-level common parameters that you specified during workflow creation (see Workflow common parameters for Azure Stack Hub validation as a service). If any of test parameter values become invalid, you must resupply them as instructed in Modify workflow parameters.
Note
Scheduling a validation test over an existing instance will create a new instance in place of the old instance in the portal. Logs for the old instance will be retained but aren't accessible from the portal.
Once a test has completed successfully, the Schedule action becomes disabled.Select the agent that will run the test. For information about adding local test execution agents, see Deploy the local agent.
To schedule the test run, select Schedule from the context menu to open a prompt for scheduling the test instance.
Review the test parameters and then select Submit to schedule the test.
Review the results for the required tests.
To submit a package signing request, send an email to vaashelp@microsoft.com with the Solution name and Package Validation name associated with this run.
Next steps
Feedback
Coming soon: Throughout 2024 we will be phasing out GitHub Issues as the feedback mechanism for content and replacing it with a new feedback system. For more information see: https://aka.ms/ContentUserFeedback.
Submit and view feedback for