Validate a solution in Azure Stack Hub
Learn how to use the solution validation workflow to validate new Azure Stack Hub solutions.
An Azure Stack Hub solution is a hardware bill of materials (BoM) that has been jointly agreed upon between Microsoft and the partner after meeting the Windows Server logo certification requirements. A solution must be recertified when there has been a change to the hardware BoM. For further questions about when to revalidate solutions, contact the team at vaashelp@microsoft.com.
To validate your solution, run the solution validation workflow twice. Run it once for the minimally supported configuration. Run it a second time for the maximally supported configuration. Microsoft validates the solution if both configurations pass all tests.
The solution is considered validated when all tests are completed with a result of Succeeded. If any test completes with a result of Failed, file a bug in Microsoft Collaborate and notify Microsoft by sending an email to vaashelp@microsoft.com.
Create a Solution Validation workflow
-
On the solutions dashboard, create or select an existing solution. For instructions, see Create a solution in the VaaS portal.
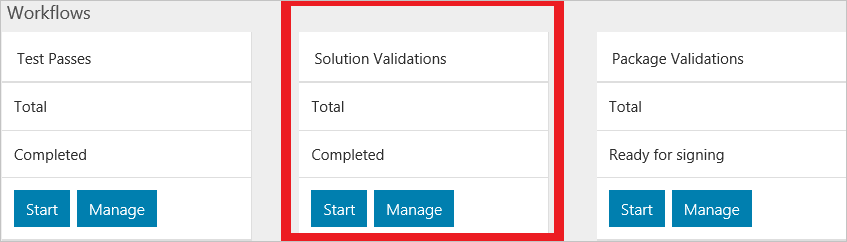
Select Start on the Solution Validations tile.
-
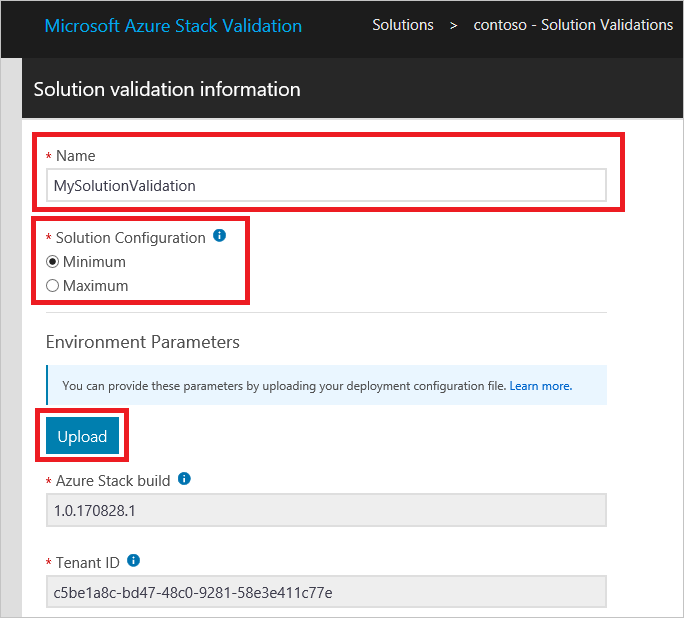
Enter a name for the workflow. The name must be unique within the solution. For naming suggestions, see Naming convention for VaaS workflows.
Select the solution configuration.
- Minimum: the solution is configured with the minimum supported number of nodes.
- Maximum: the solution is configured with the maximum supported number of nodes.
-
Select Upload and select your Azure Stack Hub stamp information file. For instructions, see Generate the stamp information file.
-
Enter the test parameters. For additional details and instructions, see Test parameters.
Note
Environment parameters can't be modified after creating a workflow.
-
(Optional) Label the workflow with tags of your choice. You may filter workflows on this text when managing workflows for the solution.
-
Select Submit to create the workflow.
You 'll be redirected to the tests summary page.
Run Solution Validation tests
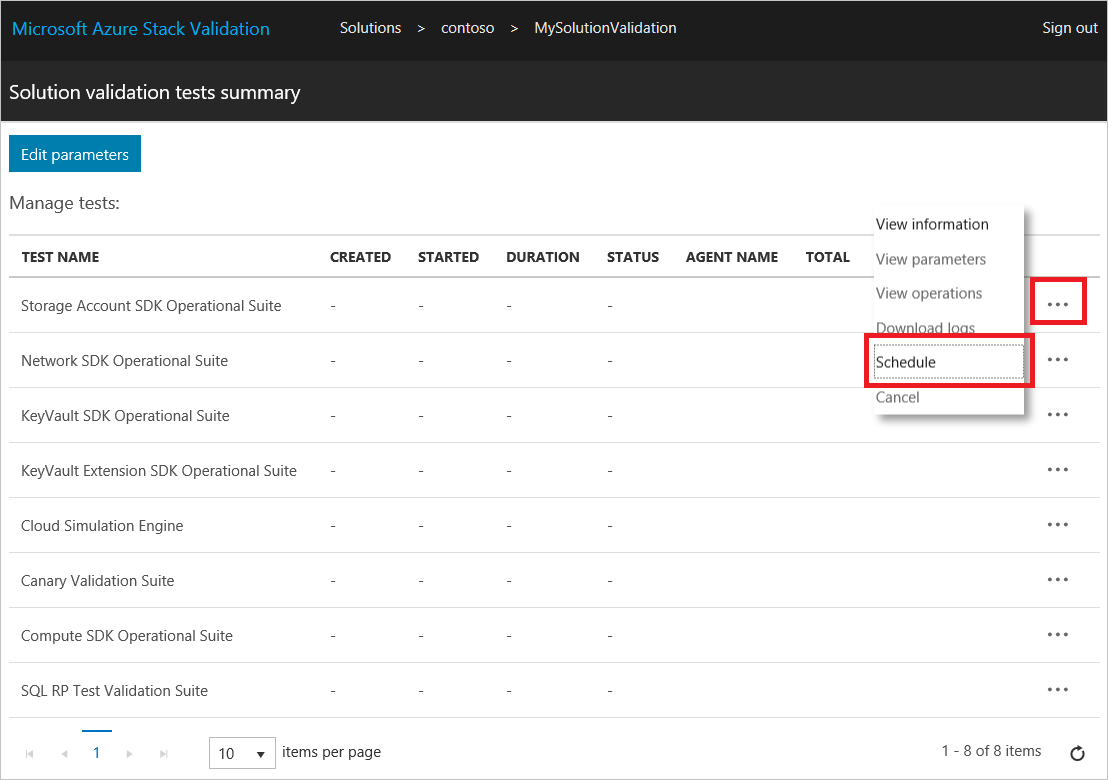
In the Solution Validation tests summary page, you'll see a list of the tests required for completing validation.
In the validation workflows, scheduling a test uses the workflow-level common parameters that you specified during workflow creation (see Workflow common parameters for Azure Stack Hub validation as a service). If any of the test parameter values become invalid, you must resupply them as instructed in Modify workflow parameters.
Note
Scheduling a validation test over an existing instance will create a new instance in place of the old instance in the portal. Logs for the old instance will be retained but aren't accessible from the portal.
Once a test has completed successfully, the Schedule action becomes disabled.
-
Select the agent that will run the test. For information about adding local test execution agents, see Deploy the local agent.
Select the following tests:
- Cloud Simulation Engine
- Disk Identification Test
Select Schedule from the context menu to open a prompt for scheduling the test instance.
Review the test parameters and then select Submit to schedule the test for execution.
Next steps
Feedback
Coming soon: Throughout 2024 we will be phasing out GitHub Issues as the feedback mechanism for content and replacing it with a new feedback system. For more information see: https://aka.ms/ContentUserFeedback.
Submit and view feedback for