Note
Access to this page requires authorization. You can try signing in or changing directories.
Access to this page requires authorization. You can try changing directories.
You can perform all of your administrative tasks using the Microsoft Entra admin center, including creating a new tenant for your organization.
In this quickstart article, you learn how to create a basic tenant for your organization.
Note
Only paid customers can create a new Workforce tenant in Microsoft Entra ID. Customers using a free tenant, or a trial subscription won't be able to create additional tenants from the Microsoft Entra admin center. Customers facing this scenario who need a new tenant can sign up for a free account.
Create a new tenant for your organization
After you sign in to the Azure portal, you can create a new tenant for your organization. Your new tenant represents your organization and helps you to manage a specific instance of Microsoft Cloud services for your internal and external users.
Note
- If you're unable to create a Microsoft Entra ID or Azure AD B2C tenant, review your user settings page to ensure that tenant creation isn't switched off. If it is not enabled you must be assigned at least the Tenant Creator role.
- This article doesn't cover creating an external tenant configuration for consumer-facing apps; learn more about using Microsoft Entra External ID for your customer identity and access management (CIAM) scenarios.
Important
Effective May 1, 2025, Azure AD B2C will no longer be available to purchase for new customers. To learn more, please see Is Azure AD B2C still available to purchase? in our FAQ.
To create a new tenant
Sign in to the Azure portal.
From the Azure portal menu, select Microsoft Entra ID.
Navigate to Entra ID > Overview > Manage tenants.
Select Create.

On the Basics tab, select the type of tenant you want to create, either Microsoft Entra ID or Microsoft Entra ID (B2C).
Select Next: Configuration to move to the Configuration tab.
On the Configuration tab, enter the following information:

- Type your desired Organization name (for example Contoso Organization) into the Organization name box.
- Type your desired Initial domain name (for example Contosoorg) into the Initial domain name box.
- Select your desired Country/Region or leave the United States option in the Country or region box.
Select Next: Review + Create. Review the information you entered and if the information is correct, select Create in the lower left corner.
Your new tenant is created with the domain contoso.onmicrosoft.com.
Your user account in the new tenant
By default, the user who creates a Microsoft Entra tenant is automatically assigned the Global Administrator role.
By default, you're also listed as the technical contact for the tenant. Technical contact information is something you can change in Properties.
Microsoft recommends that organizations have two cloud-only emergency access accounts permanently assigned the Global Administrator role. These accounts are highly privileged and aren't assigned to specific individuals. The accounts are limited to emergency or "break glass" scenarios where normal accounts can't be used or all other administrators are accidentally locked out. These accounts should be created following the emergency access account recommendations.
Clean up resources
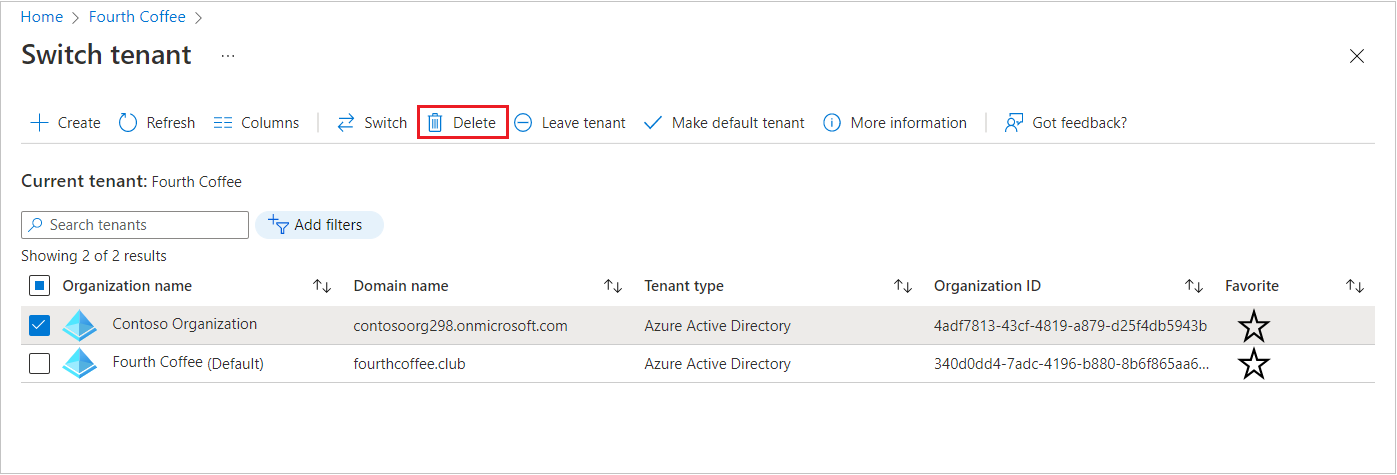
If you're not going to continue to use this application, you can delete the tenant using the following steps:
Ensure that you're signed in to the directory that you want to delete through the Directory + subscription filter in the Azure portal. Switch to the target directory if needed.
Select Microsoft Entra ID, and then on the Contoso - Overview page, select Delete directory.
The tenant and its associated information are deleted.
Next steps
Change or add other domain names, see How to add a custom domain name to Microsoft Entra ID.
Add users, see Add or delete a new user
Add groups and members, see Create a basic group and add members.
Learn about Azure role-based access control (RBAC) and Conditional Access to help manage your organization's application and resource access.
Learn about Microsoft Entra ID, including basic licensing information, terminology, and associated features.