Note
Access to this page requires authorization. You can try signing in or changing directories.
Access to this page requires authorization. You can try changing directories.
Employees with accounts in your Microsoft Entra ID environment can have Verifiable Credentials of the type VerifiedEmployee, created with claims sourced from their user profiles. In this tutorial, we create a credential with claims sourced from a user's profile in Microsoft Entra ID.
You can create VerifiedEmployee credentials using the Quick setup or the advanced setup. If you use the quick setup, the VerifiedEmployee credential is automatically created for you in a workforce tenant. If you use the advanced setup, you need to manually create the VerifiedEmployee credential as explained in this guide.
Issuing a VerifiedEmployee credential is now supported in MyAccount. Instructions to enable it in Verified ID are available here. Configuring a sample to issue VerifiedEmployee credentials is only necessary if you would like to handle issuance in your own app.
In this article, you learn how to:
- Create a user in the directory
- Setup the user for Microsoft Authenticator
- Create a Verified employee credential
- Configure the samples to issue and verify your VerifiedEmployee credential
Prerequisites
- Set up a tenant for Microsoft Entra Verified ID Credentials.
- Complete the tutorial for issuance and verification of verifiable credentials.
- A mobile phone with Microsoft Authenticator that can be used as the test user account.
Configure your test user account
Create a new user to use in our testing.
Sign in with your new user. The user name would be something like meganb@yourtenant.onmicrosoft.com. You must change your password.
Set up your test user for Microsoft Authenticator
Your test user needs to have Microsoft Authenticator setup for the account. To enable Authenticator on the test user account, follow these steps:
- On your mobile test device, open Microsoft Authenticator, go to the Authenticator tab at the bottom and tap + sign to Add account. Select Work or school account
- At the prompt, select Sign in. Don't select "Scan QR code"
- Sign in with the test user’s credentials in the Microsoft Entra tenant
- Authenticator launches https://aka.ms/mfasetup in the browser on your mobile device. need to sign in again with your test users credentials.
- In the Set up your account in the app, select Pair your account to the app by clicking this link. The Microsoft Authenticator app and opens and you see your test user as an added account
If https://aka.ms/mfasetup launches without prompting you to sign in, that means Microsoft Authenticator is already set up for another user on this device. When already configured with a user, Authenticator signs you in automatically. Sign out the browser and then setup authenticator again. If you zoom in on the page, you find the Sign out button at the top right corner.
Create a Verified employee credential
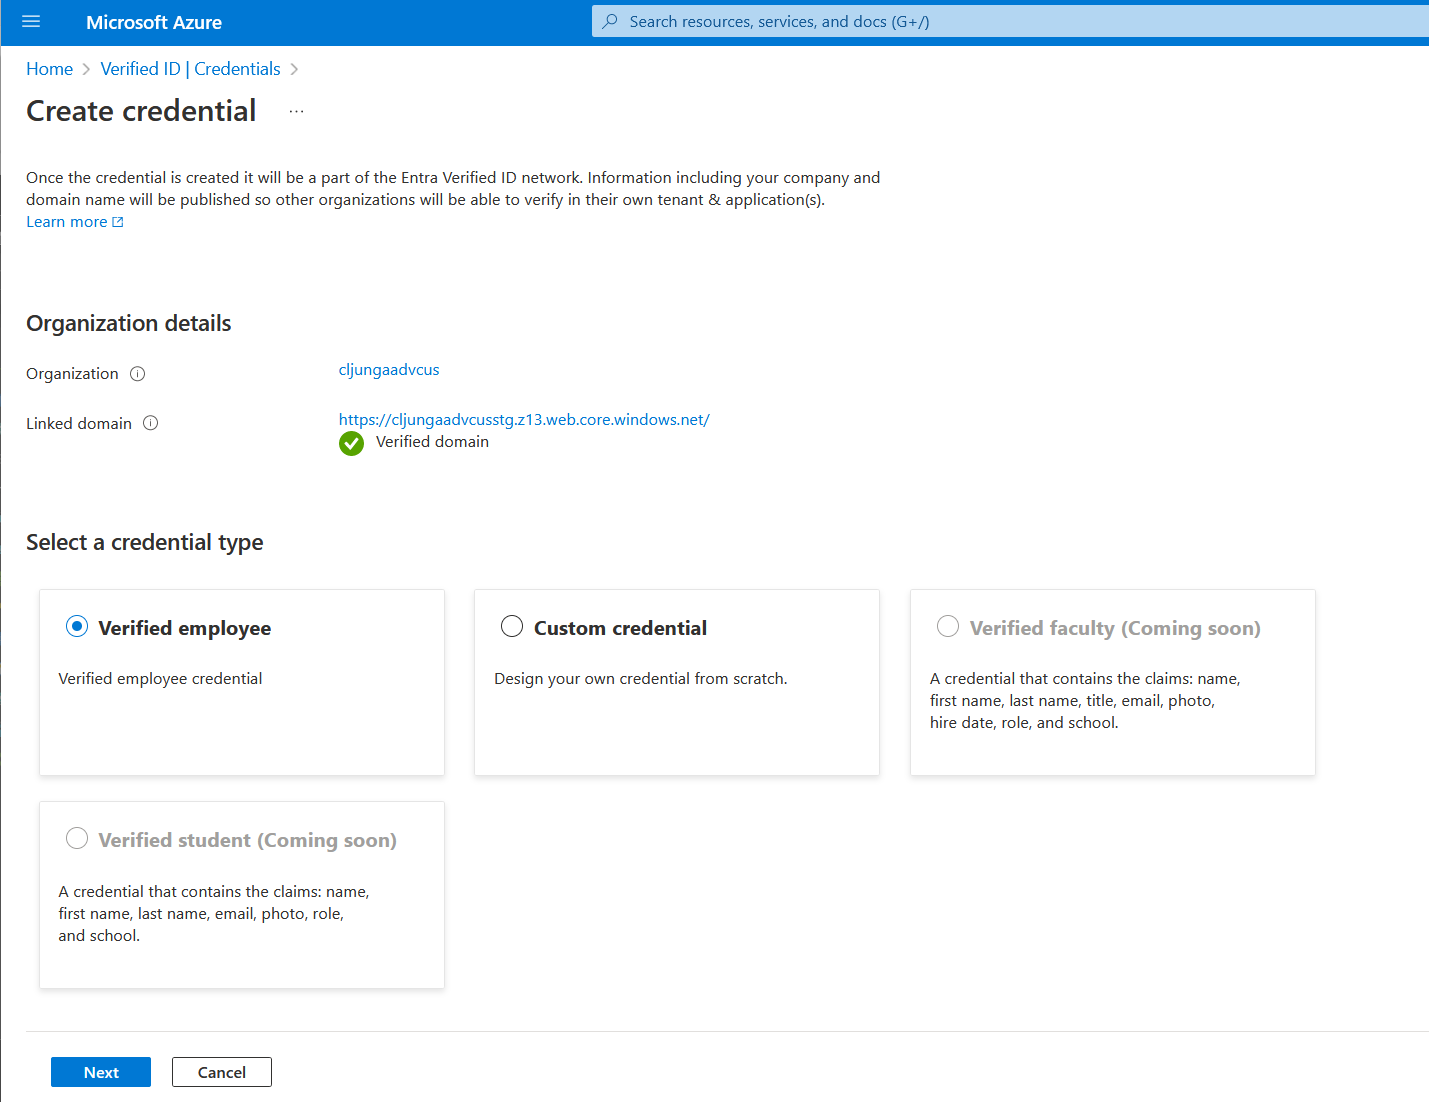
When you select + Add credential in the portal, you get the option to launch two Quickstarts. Select Verified employee and select Next.
In the next screen, you enter some of the Display definitions, like logo url, text and background color. Since the credential is a managed credential with directory based claims, rules definitions are predefined and can't be changed. You don't need to enter rule definition details. The credential type is VerifiedEmployee and the claims from the user’s profile are preset. Select Create to create the credential.
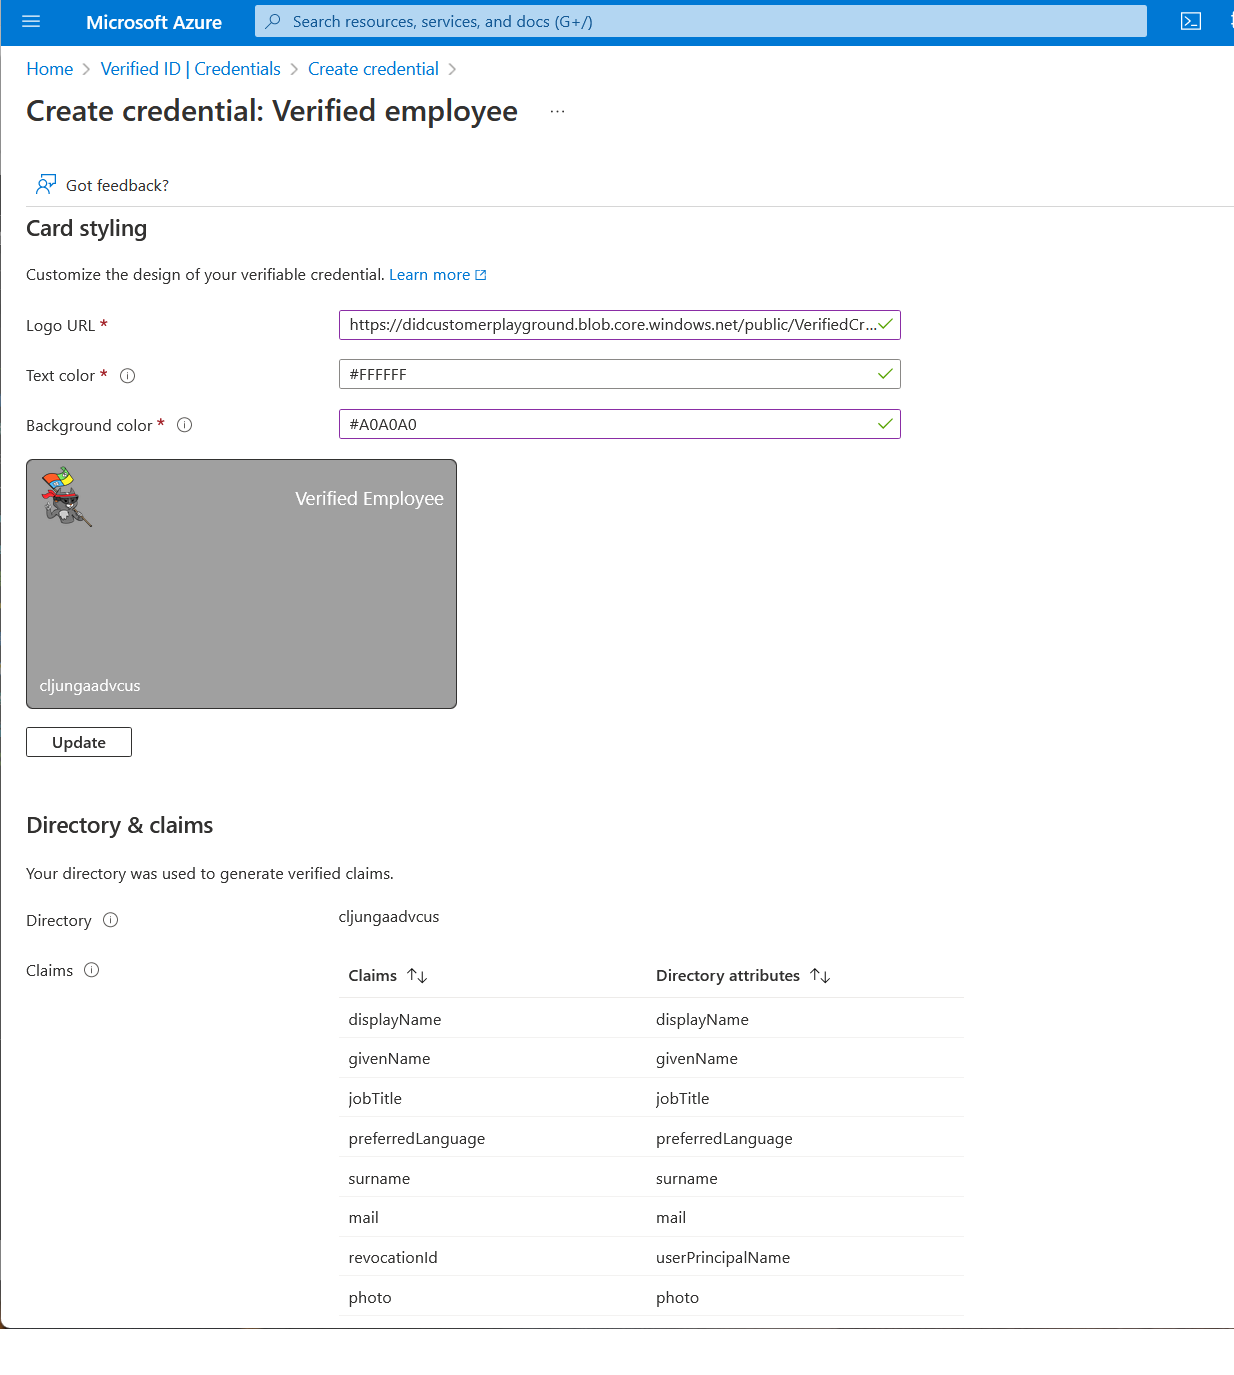
Claims schema for Verified employee credential
All of the claims in the Verified employee credential come from attributes in the user's profile in Microsoft Entra ID for the issuing tenant. You can't modify the set of claims. All claims, except photo, come from the Microsoft Graph Query https://graph.microsoft.com/v1.0/me. The photo claim comes from the value returned from the Microsoft Graph Query https://graph.microsoft.com/v1.0/me/photo/$value.
| Claim | Directory attribute | Value |
|---|---|---|
revocationId |
userPrincipalName |
The UPN of the user is added as a claim named revocationId and gets indexed. |
displayName |
displayName |
The displayName of the user |
givenName |
givenName |
First name of the user |
surname |
surname |
Last name of the user |
jobTitle |
jobTitle |
The user's job title. This attribute doesn't have a value by default in the user's profile. If the user's profile has no value specified, there's no jobTitle claim in the issued VC. |
preferredLanguage |
preferredLanguage |
Should follow ISO 639-1 and contain a value like en-us. There's no default value specified. If there's no value, no claim is included in the issued VC. |
mail |
mail |
The user's email address. The mail value isn't the same as the UPN. It's also an attribute that doesn't have a value by default. |
photo |
photo |
The uploaded photo for the user. The image type should be JPEG and the maximum size is 2 MB. When presenting the photo claim to a verifier, the photo claim is in the UrlEncode(Base64Encode(photo)) format. To use the photo, the verifier application has to Base64Decode(UrlDecode(photo)). |
See full Microsoft Entra user profile properties reference.
Important
If attribute values change in the user's Microsoft Entra profile, the VC isn't automatically reissued. You must reissue it manually. Issuance would be the same as the issuance process when working with the samples.
Configure the samples to issue and verify your VerifiedEmployee credential
Verifiable Credentials for directory based claims can be issued and verified just like any other credentials you create. All you need is your issuer DID for your tenant, the credential type, and the manifest url to your credential. The easiest way to find these values for a Managed Credential is to view the credential in the portal, select Issue credential and you get a header named Custom issue. These steps bring up a textbox with a skeleton JSON payload for the Request Service API.
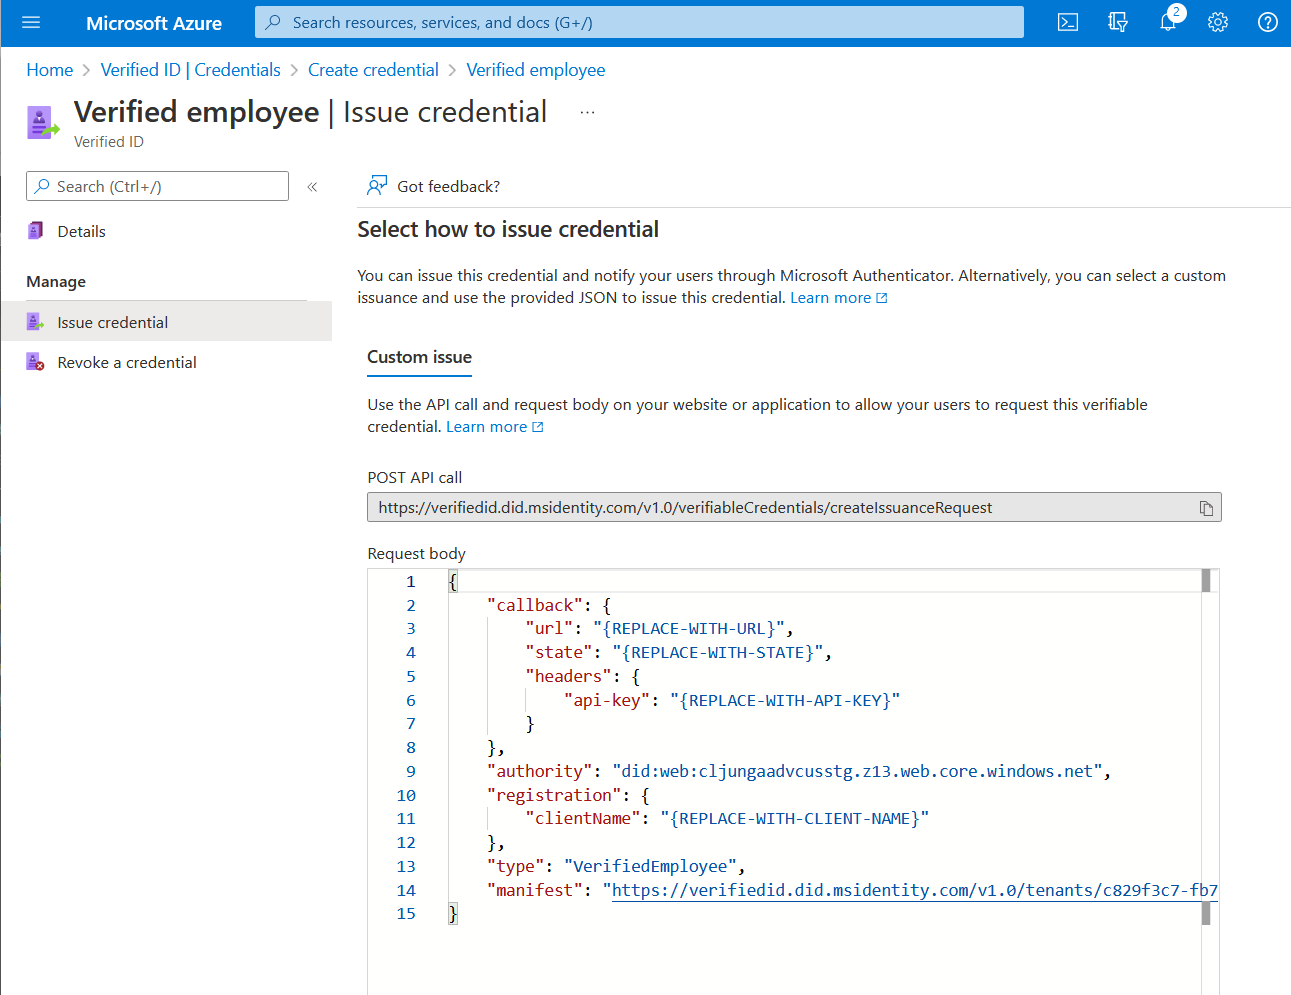
In this screen, you have values that you can copy and paste to your sample deployment’s configuration files. Issuer’s DID is the authority value.
- authority - Issuer's DID
- type - the credential type is always
VerifiedEmployeewhen looking at a verified employee credential - manifest - the credential manifest URL
The configuration file depends on the sample in-use.
- Dotnet - appsettings.json
- node - config.json
- python - config.json
- Java - values are set as environment variables in run.cmd and run.sh or docker-run.cmd/docker-run.sh when using docker.
Remarks
Note
This schema is fixed and it isn't supported to add or remove claims in the schema. The attestation flow for directory based claims is also fixed and it's unsupported to try to change it to become a custom credential with ID token hint attestation flow, for example.