Note
Access to this page requires authorization. You can try signing in or changing directories.
Access to this page requires authorization. You can try changing directories.
In this article, you learn how to deploy Azure Adaptive Virtual Patching by using the Azure portal. You create an Adaptive Shield, add eligible resources, and verify the automatically installed Neuron extension so that your resources can report findings and receive mitigations.
Prerequisites
- An Azure account with an active subscription. Create an account for free.
- Your subscription has the
Microsoft.NetworkSecurityresource provider and theMicrosoft.NetworkSecurity/AdaptiveVirtualPatchingPreviewpreview feature registered. Register the resource provider first, and then register the preview feature. For steps, see Register resource provider and Set up preview features in an Azure subscription. - The resource you want to protect is running, has outbound network connectivity, and has a system-assigned managed identity with the required permissions.
- An Automatic upgrade policy for any virtual machine scale set you want to protect. Without that policy, Adaptive Shield protection doesn't work.
- An Adaptive Shield and every resource you want to protect with it must be deployed in the same region. For the region list, see Supported regions.
For other preview limitations, see Preview limitations.
Sign in to Azure
Sign in to the Azure portal.
Create an Adaptive Shield
Create an Adaptive Shield to configure mitigation settings and select the resources to protect.
In the Azure portal, search for Adaptive Virtual Patching, and then select Deploy Adaptive Shield.
On the Basics tab, enter or select the following information:
Setting Value Subscription Select your Azure subscription. Resource group Select your resource group. Name Enter a name for your Adaptive Shield. Region Select a supported region that matches the resources you want to protect. Severity threshold Select the minimum finding severity eligible for mitigation. Response strategy Select automatic response to prioritize security through faster mitigation, or manual approval to prioritize continuity by reducing operational impact. 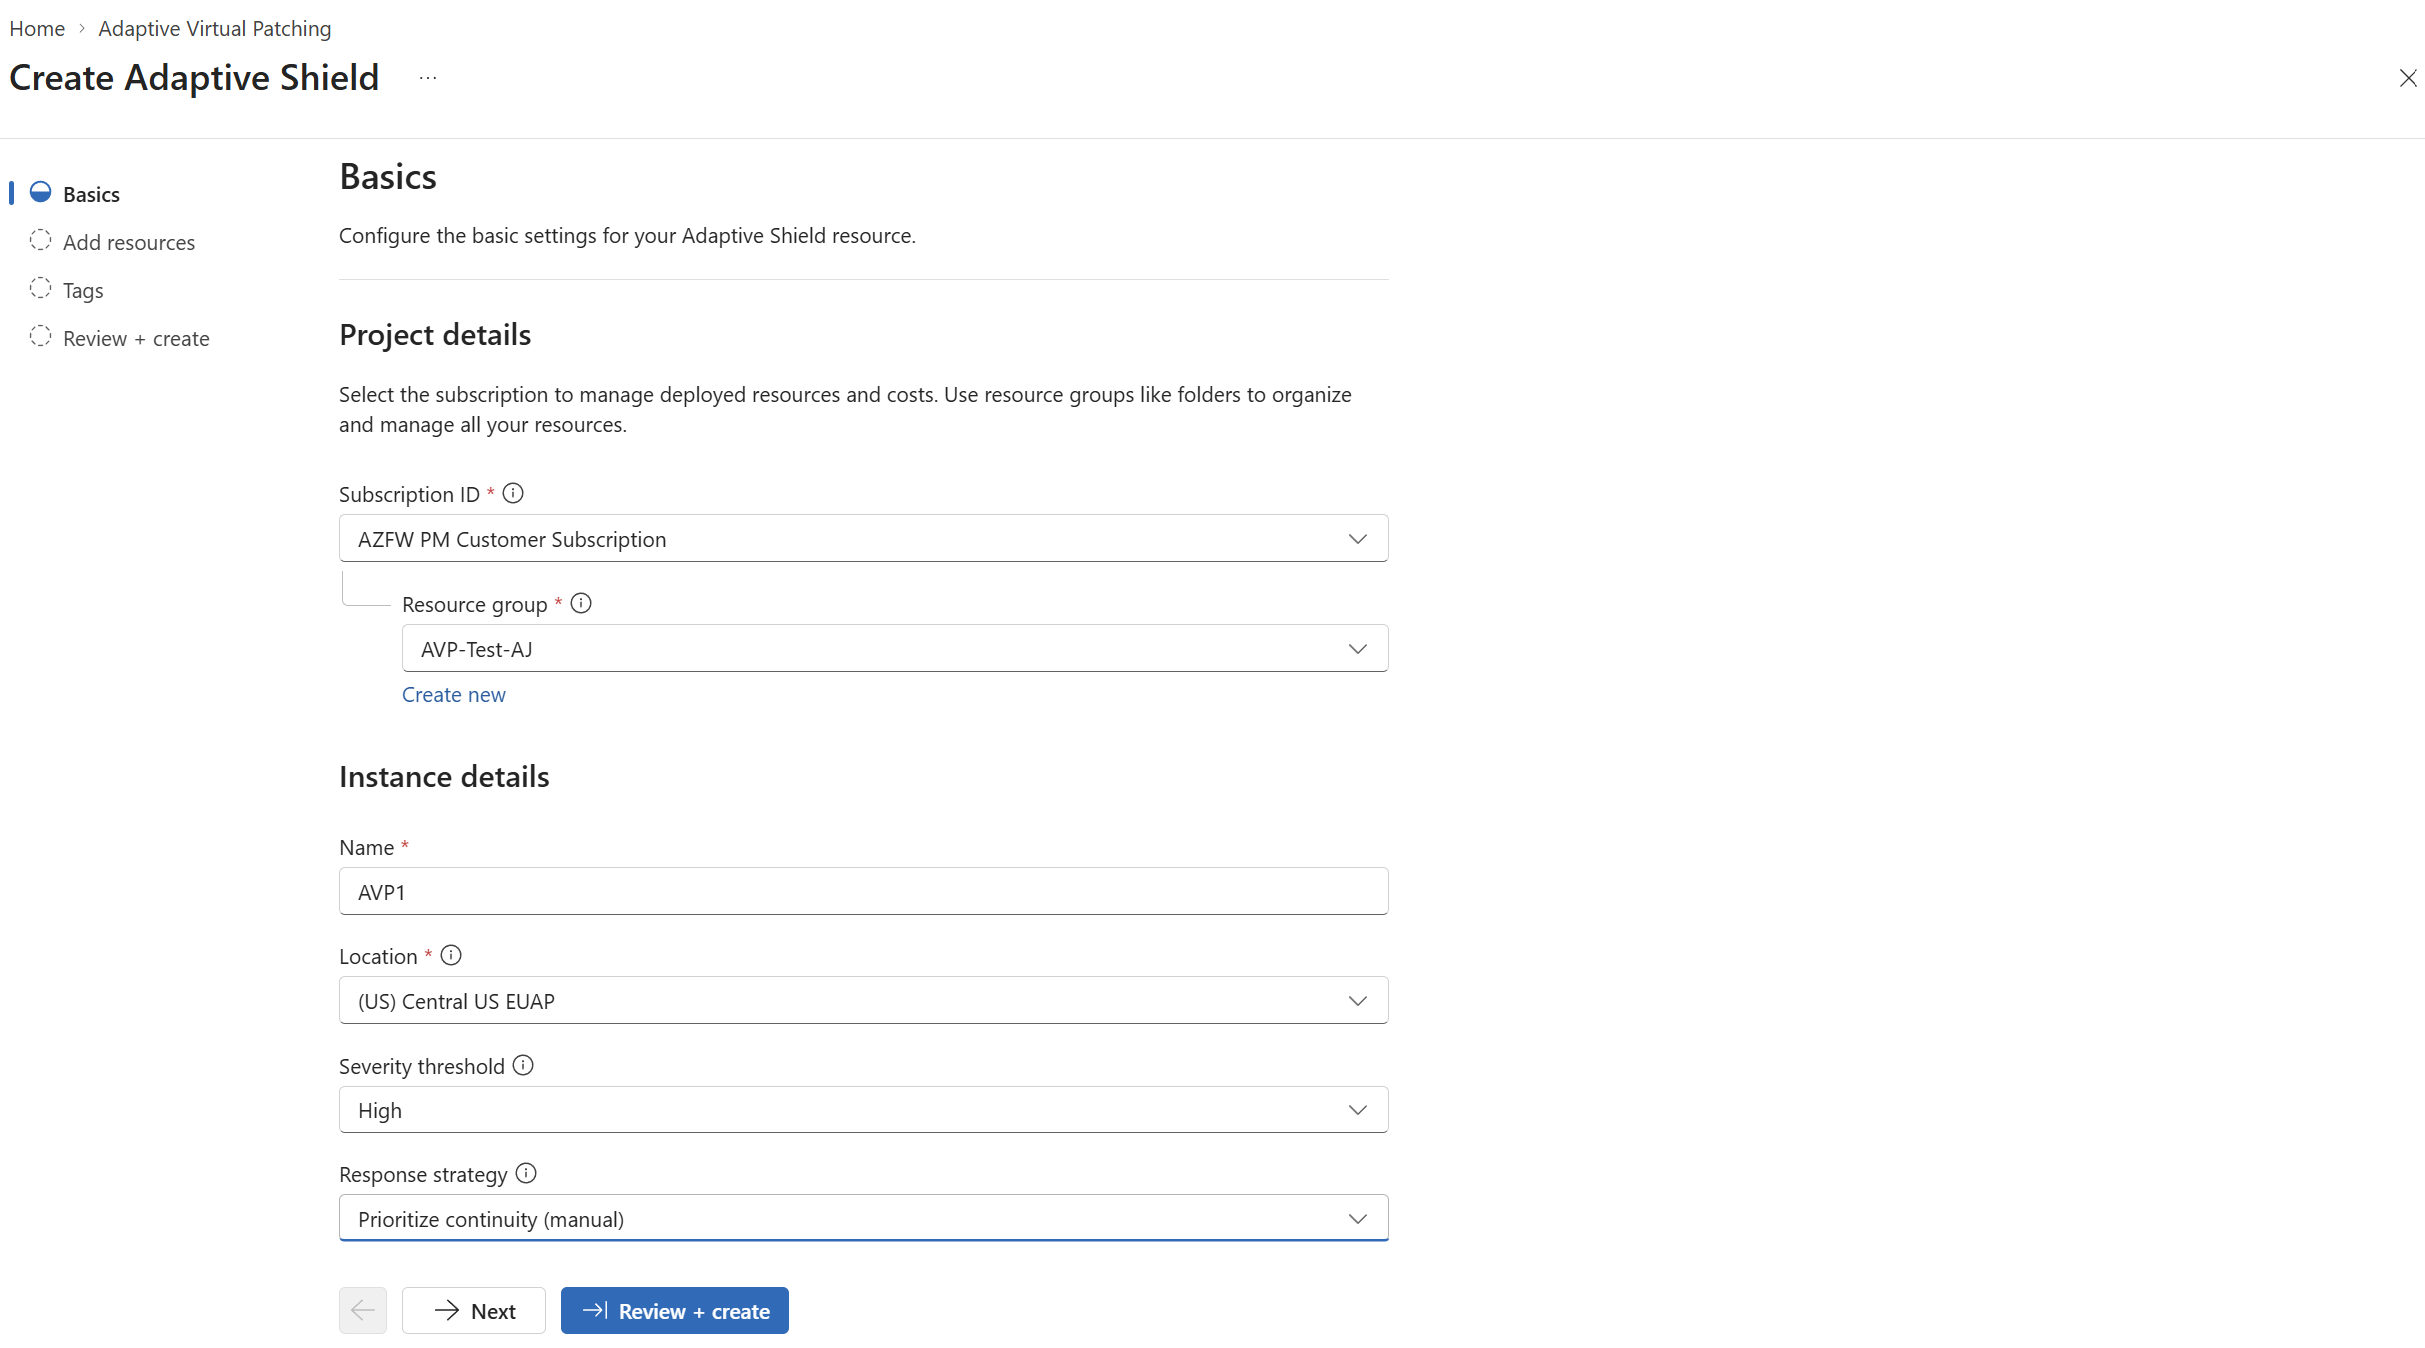
On the Add resources tab, select the resources to protect. Select Next to run the resource eligibility checks. After the checks pass, go to the next page and select Add.
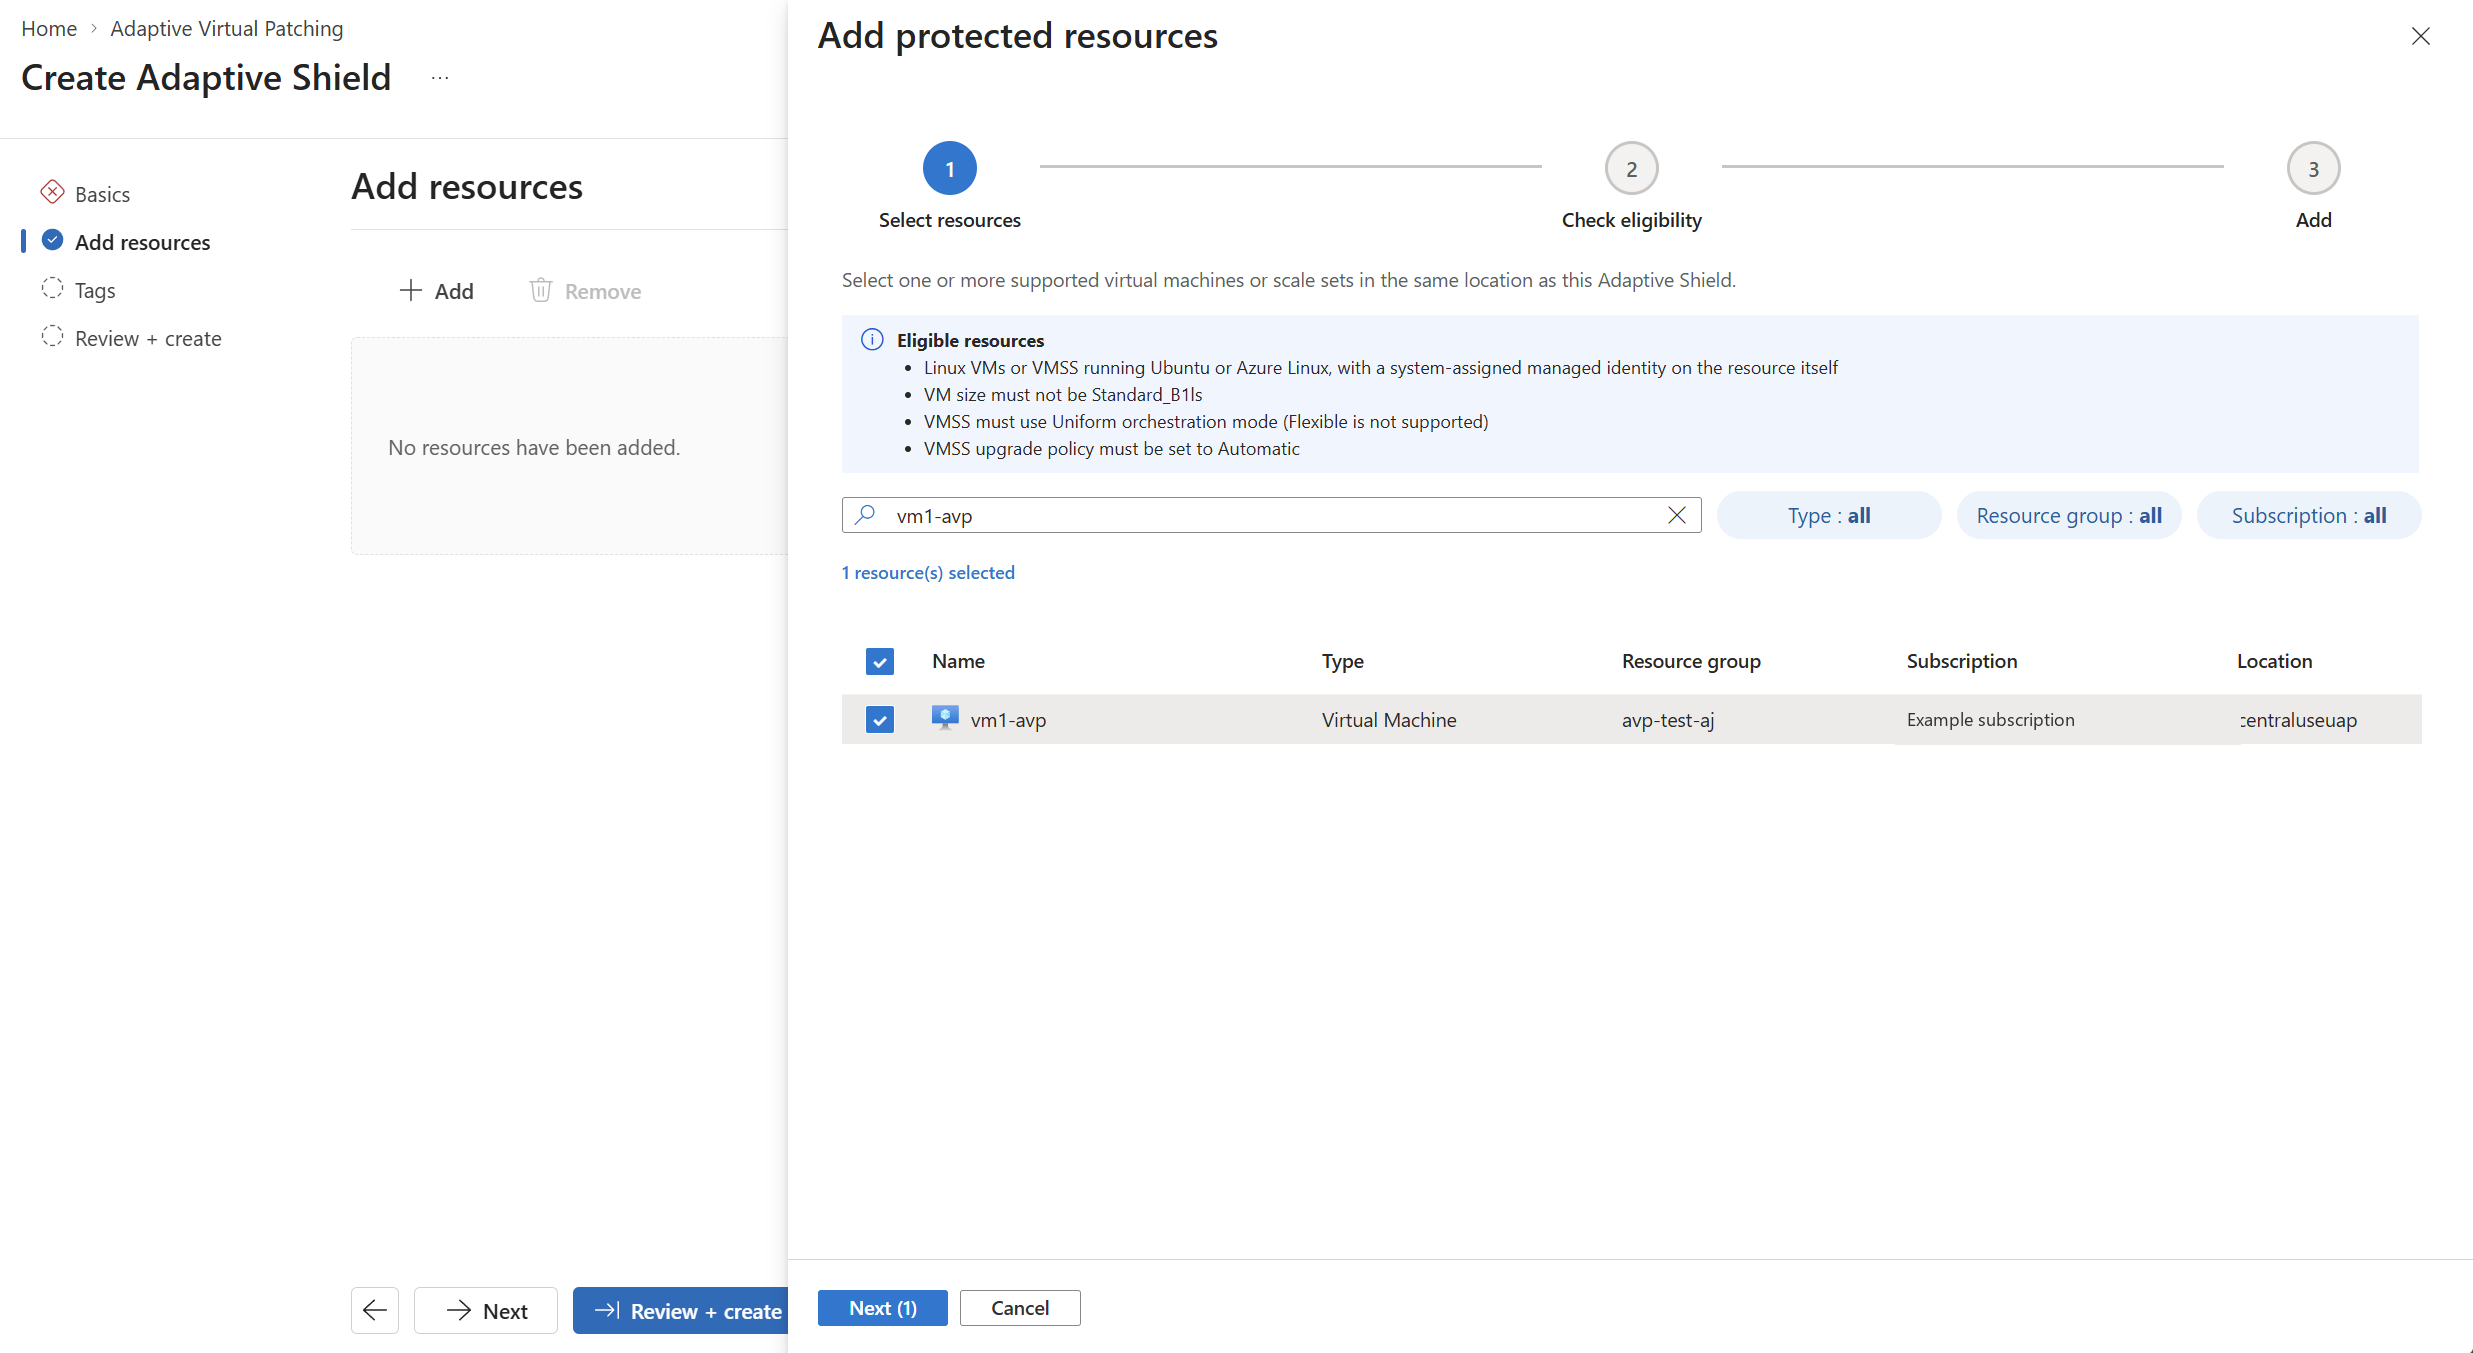
Optionally, add tags on the Tags tab.
Select Review + create, and then select Create.
The portal shows Creating Adaptive Shield while the shield is created.
Resource eligibility
When you add resources, the portal runs four checks:
| Check | What it verifies |
|---|---|
| OS Prerequisites | Azure Linux or Ubuntu with kernel version 4.19 or later. |
| Status | The virtual machine is running. |
| Route and outbound configuration | The resource can reach the required service endpoints. |
| NSG and network policy | Network security group rules and network policies don't block the Neuron extension. |
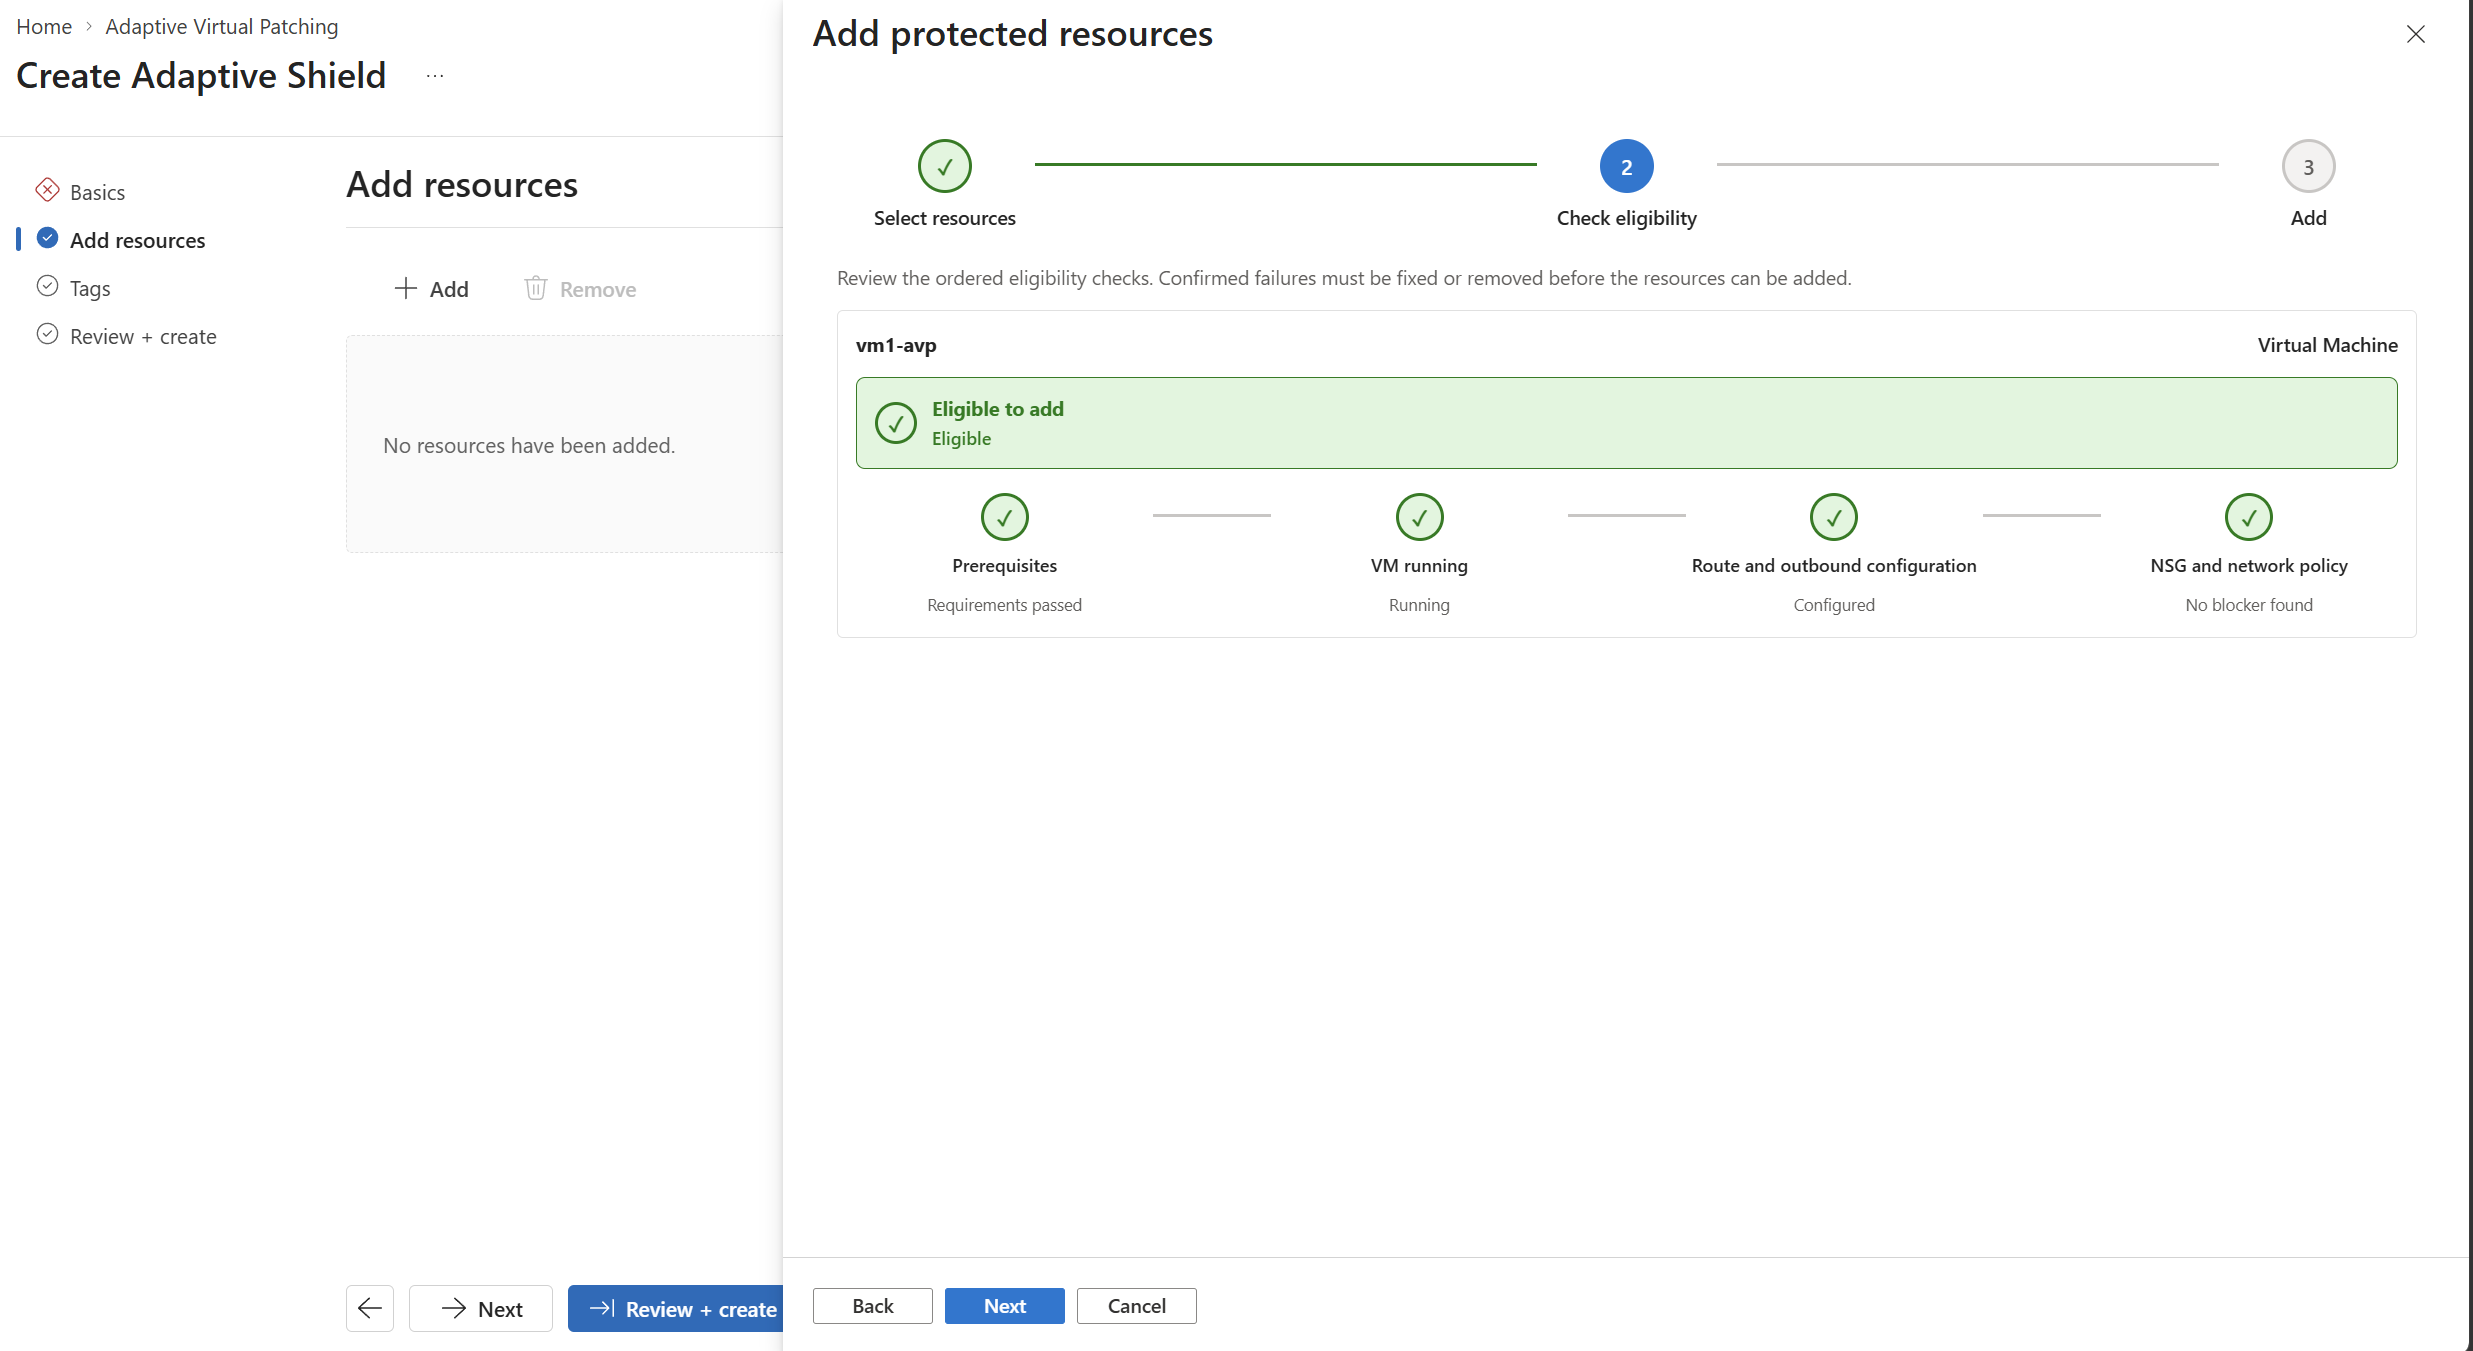
A resource that passes all four checks shows Eligible to add. If a check fails, the portal shows the reason next to the resource. If a check shows Unable to verify, the portal couldn't complete the check.
Verify the Neuron extension
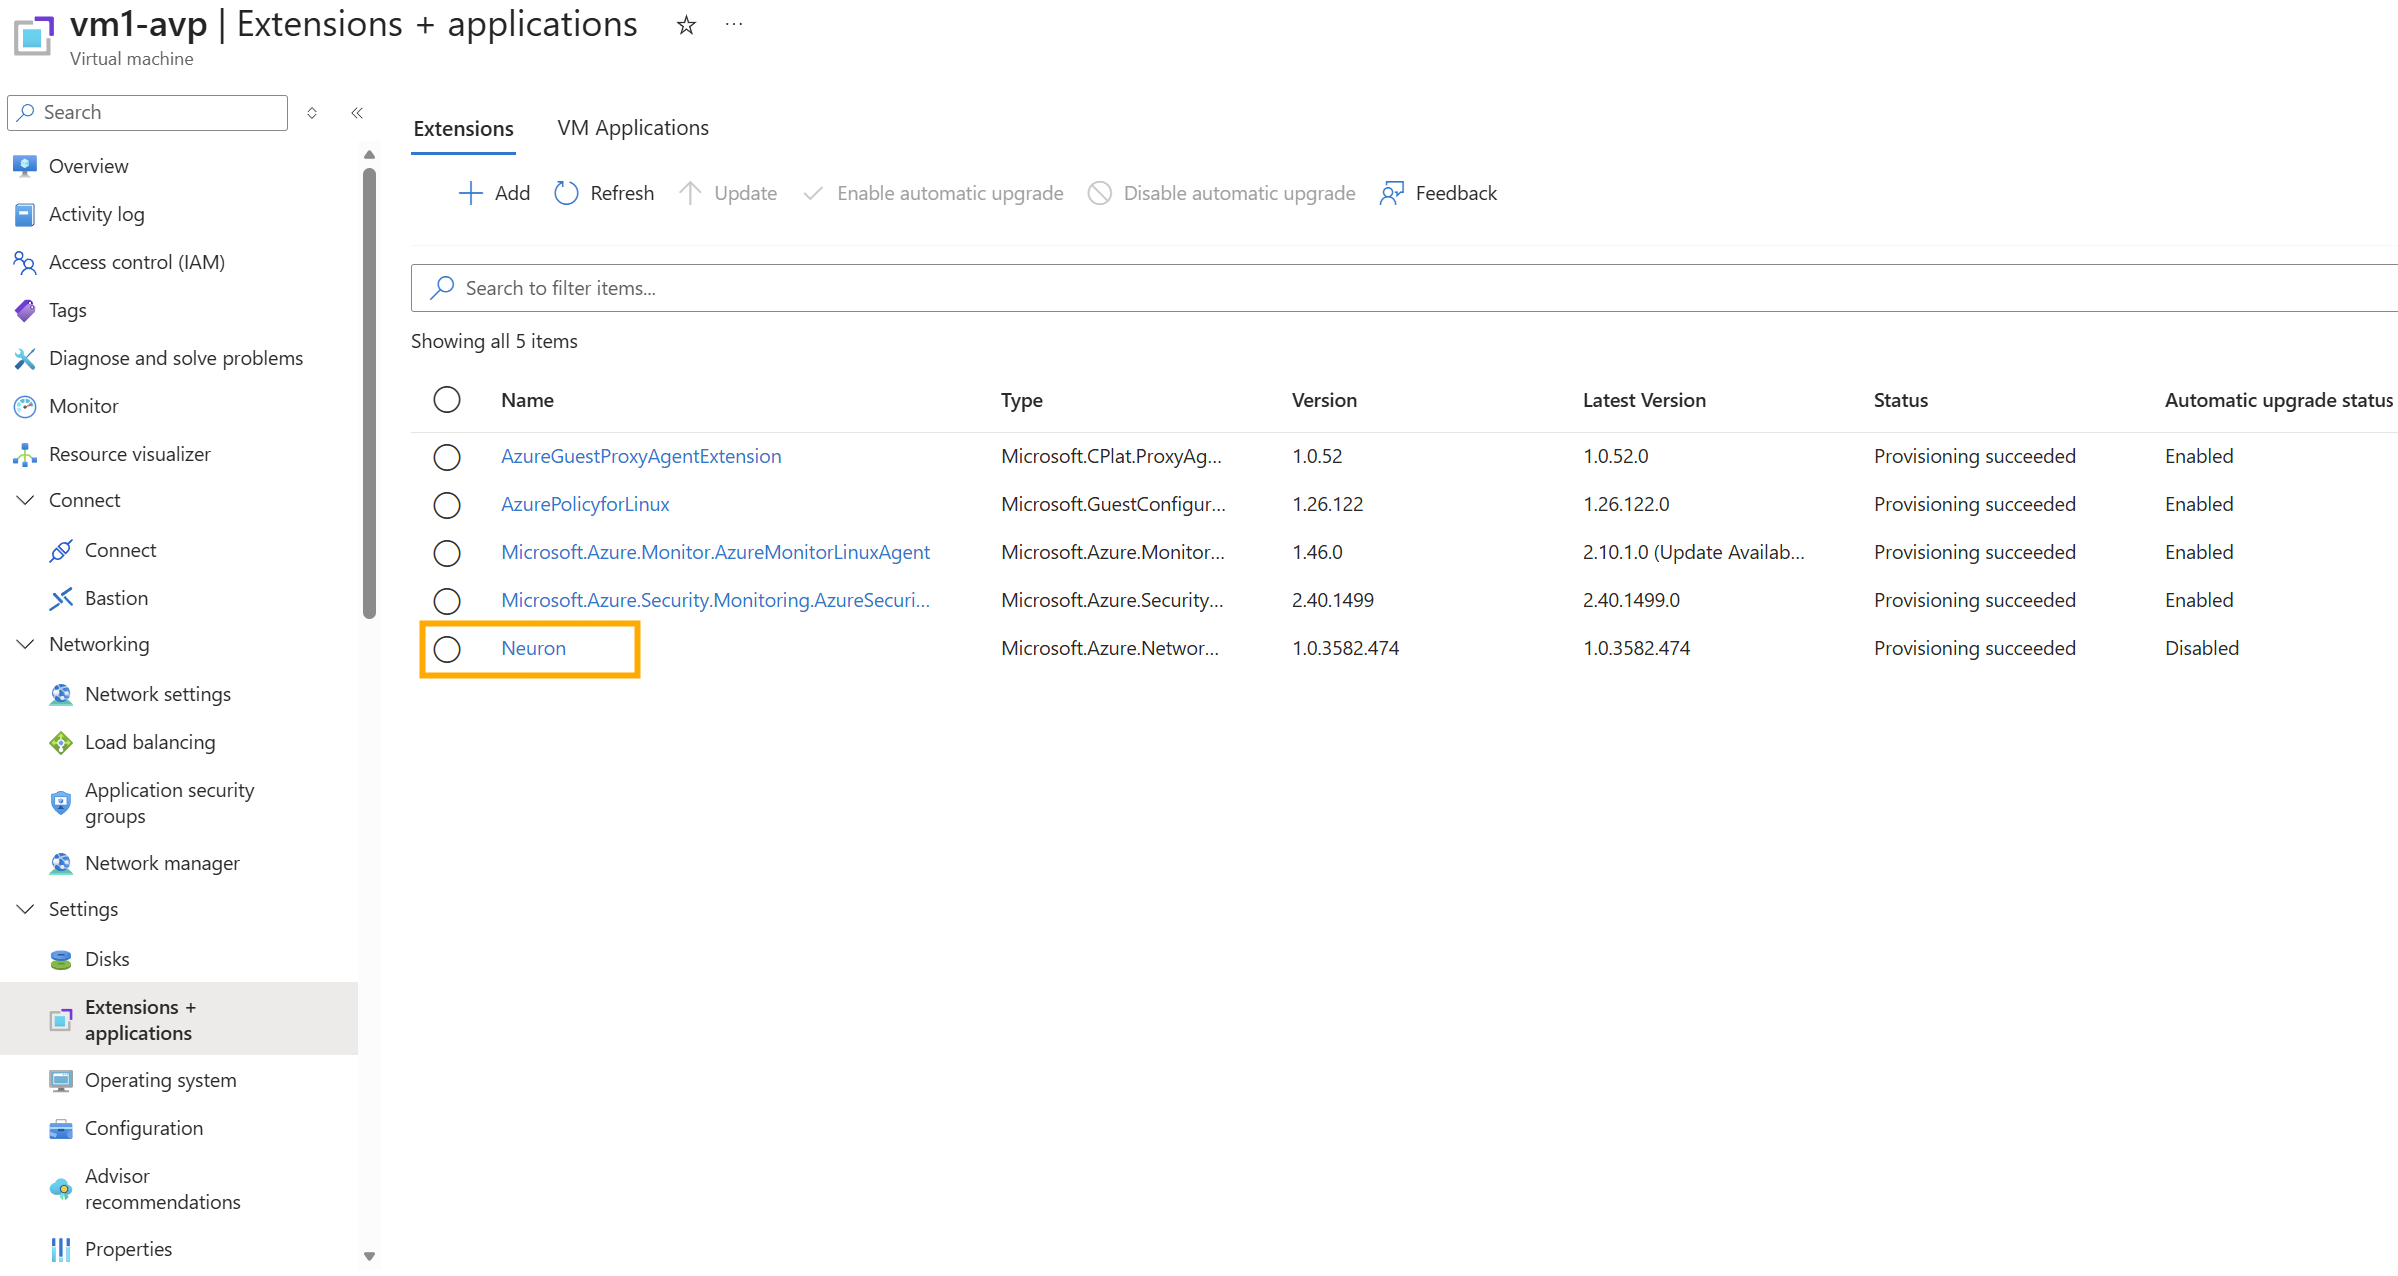
After you create the Adaptive Shield, the Azure portal automatically installs the Neuron extension on each protected resource. Installation can take up to five minutes. Verify the extension's provisioning status before you check resource reporting.
Open a protected virtual machine in the Azure portal.
Select Extensions + applications.
Confirm that the Neuron extension shows Provisioning succeeded.
Verify protected resource reporting
Check that the protected resource sends its first inventory report to the Adaptive Shield.
- Open the Adaptive Shield in the Azure portal.
- Select Protected resources.
- Check the resource's status. A new resource shows Awaiting first report until the Neuron extension finishes installing and sends its first inventory report. After the first report, the resource shows Reachable, with the number of open findings.
- If the resource doesn't leave Awaiting first report, select Check reachability at the top of the page. For further help, see Frequently asked questions and troubleshooting.
Related content
After you deploy an Adaptive Shield, learn how to manage protection or resolve problems: