Note
Access to this page requires authorization. You can try signing in or changing directories.
Access to this page requires authorization. You can try changing directories.
Use Azure Adaptive Virtual Patching in the Azure portal to track your fleet's security posture, review findings and proposed mitigations, apply or roll back mitigations, and change how the service responds. This article covers the operations you do after you deploy an Adaptive Shield. For setup, see Deploy Azure Adaptive Virtual Patching.
Prerequisites
- Deploy an Adaptive Shield and add at least one protected resource. See Deploy Azure Adaptive Virtual Patching.
View fleet posture
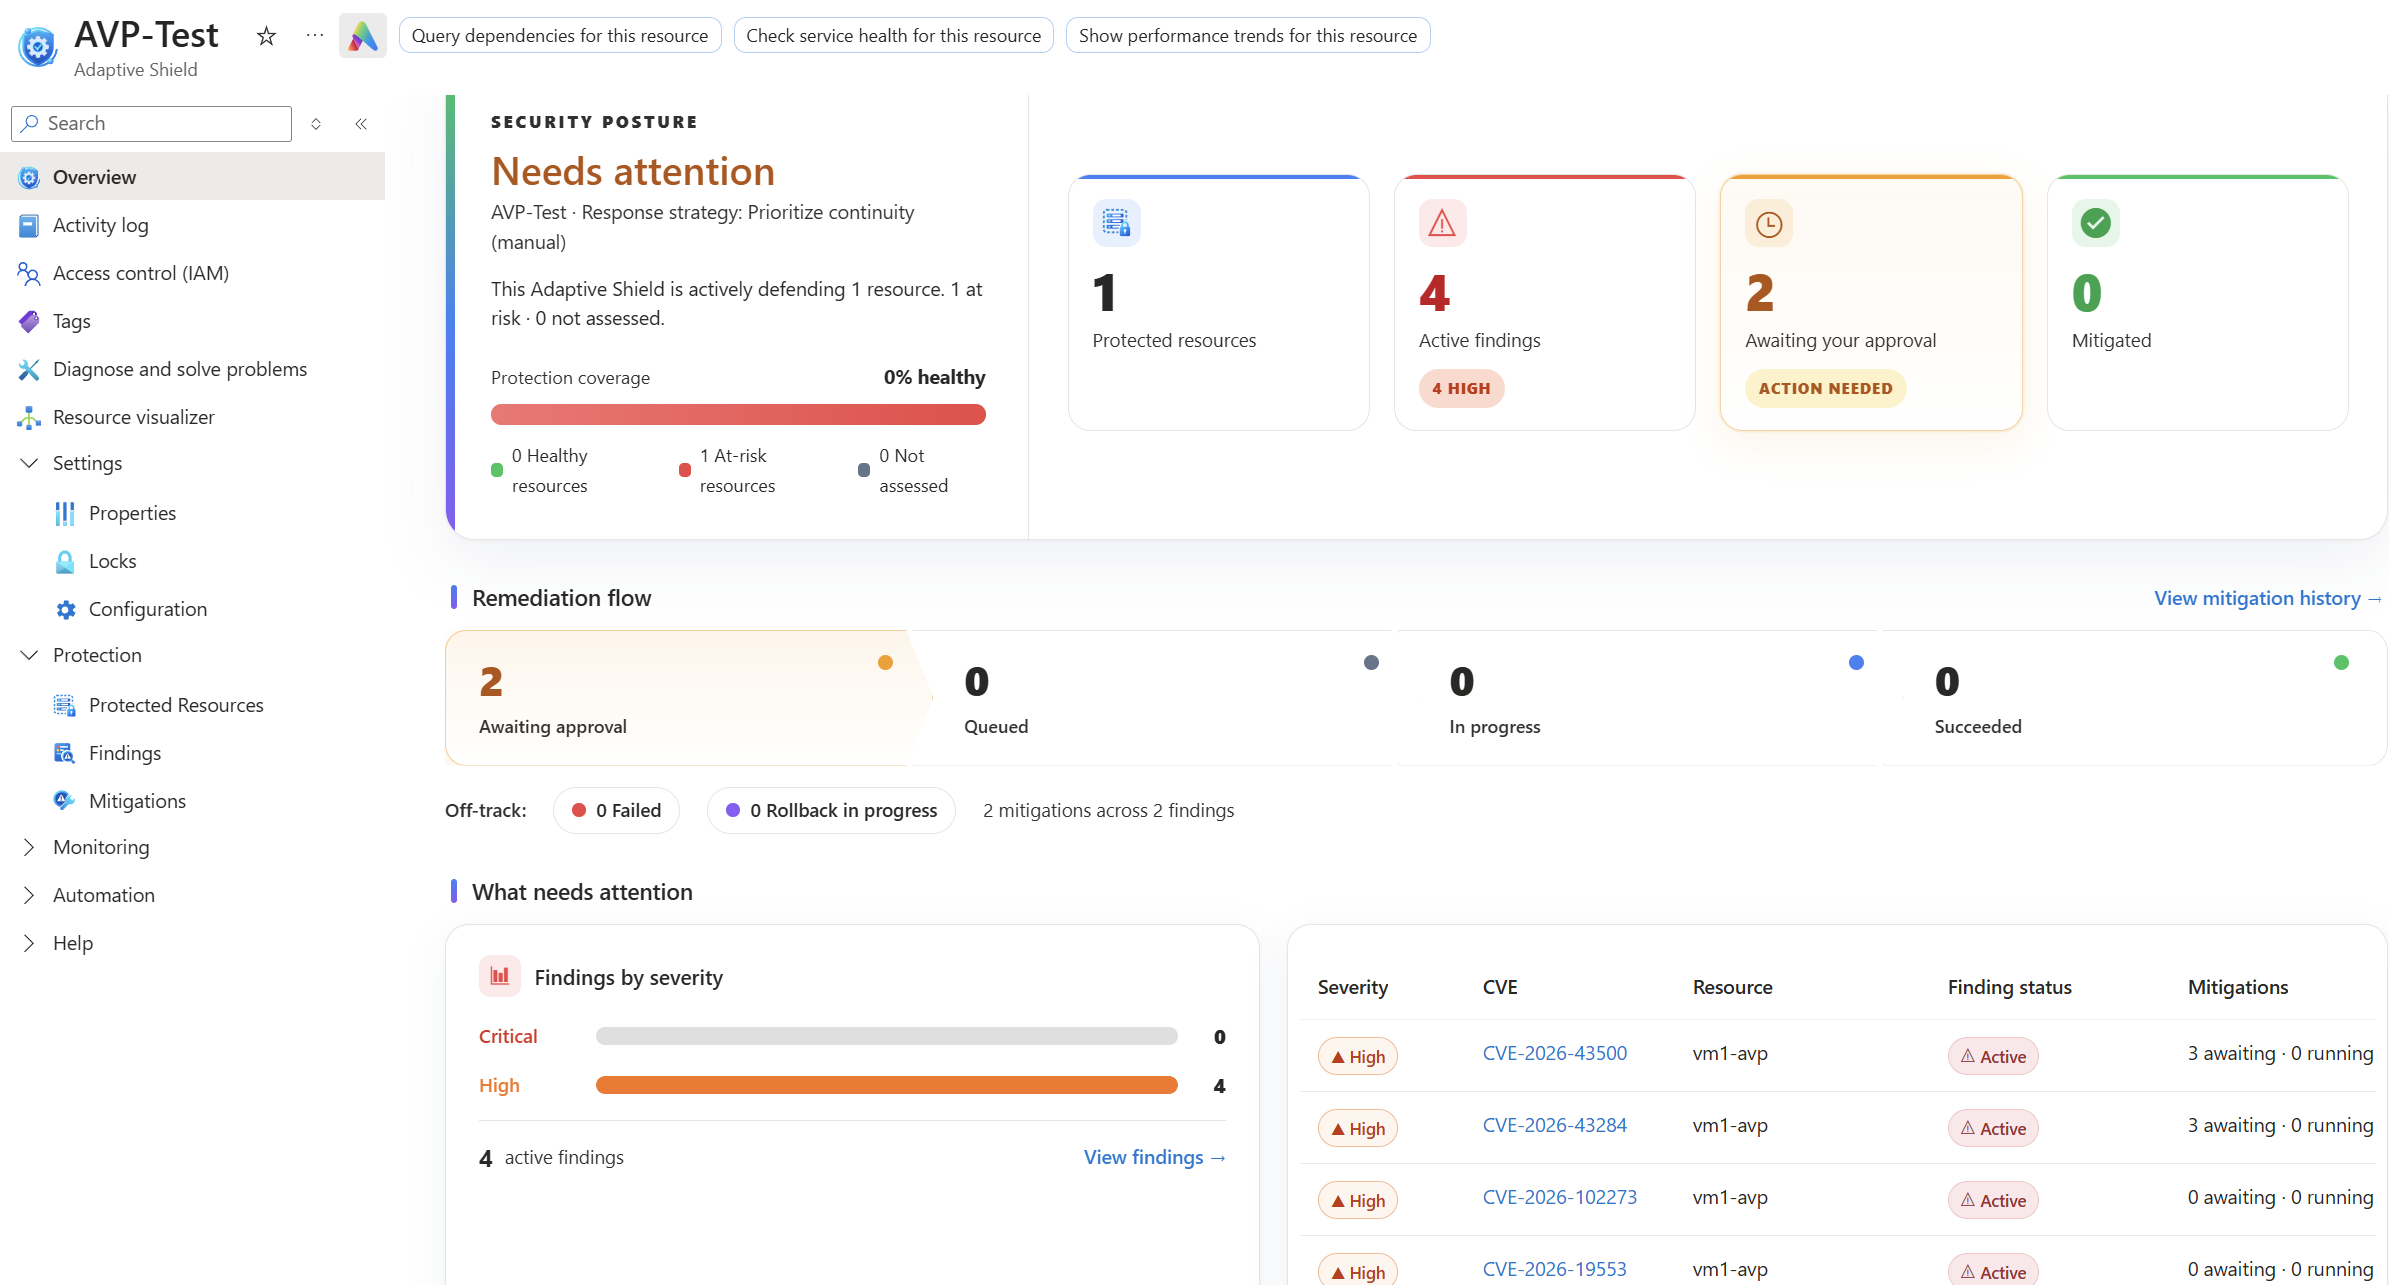
The Adaptive Shield overview page shows whether your fleet is protected and what needs attention.
The security posture can be Healthy or Needs attention. You can see a summary of protected resources and active findings, including findings that need your review and those already mitigated. The remediation flow shows mitigations that are awaiting approval, queued, in progress, and succeeded. Select View mitigation history for the full list. The Off-track section summarizes failed and rolled-back mitigations. The What needs attention section highlights open findings by severity, with each finding's CVE, resource, status, and mitigation counts.
View protected resources
The Protected Resources page under Protection lists every resource the Adaptive Shield protects, along with its findings and their severity. Select the open findings link to see details of the detected CVEs.
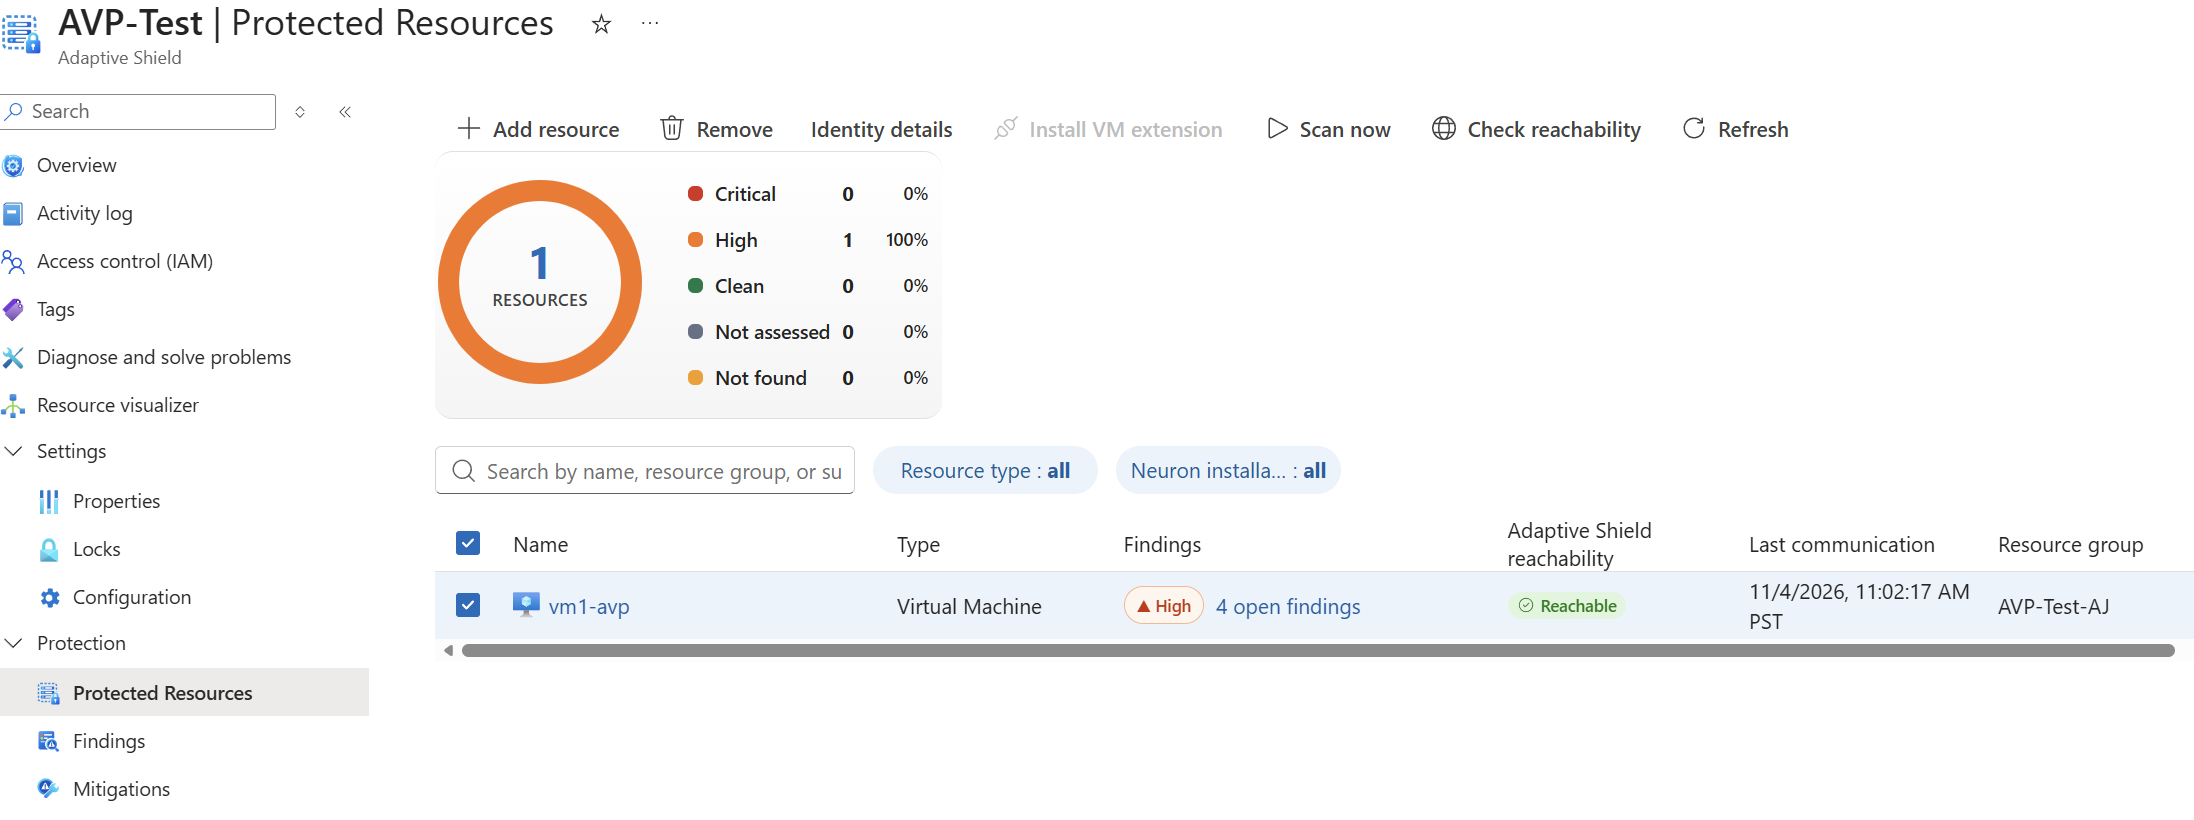
To add more VMs to a deployed Adaptive Shield, select Add resource. The eligibility checks run first. See Deploy Azure Adaptive Virtual Patching.
To remove a resource from protection, select the resource, and then select Remove on the Protected Resources page. Removing a resource automatically uninstalls the Neuron extension from it.
View findings
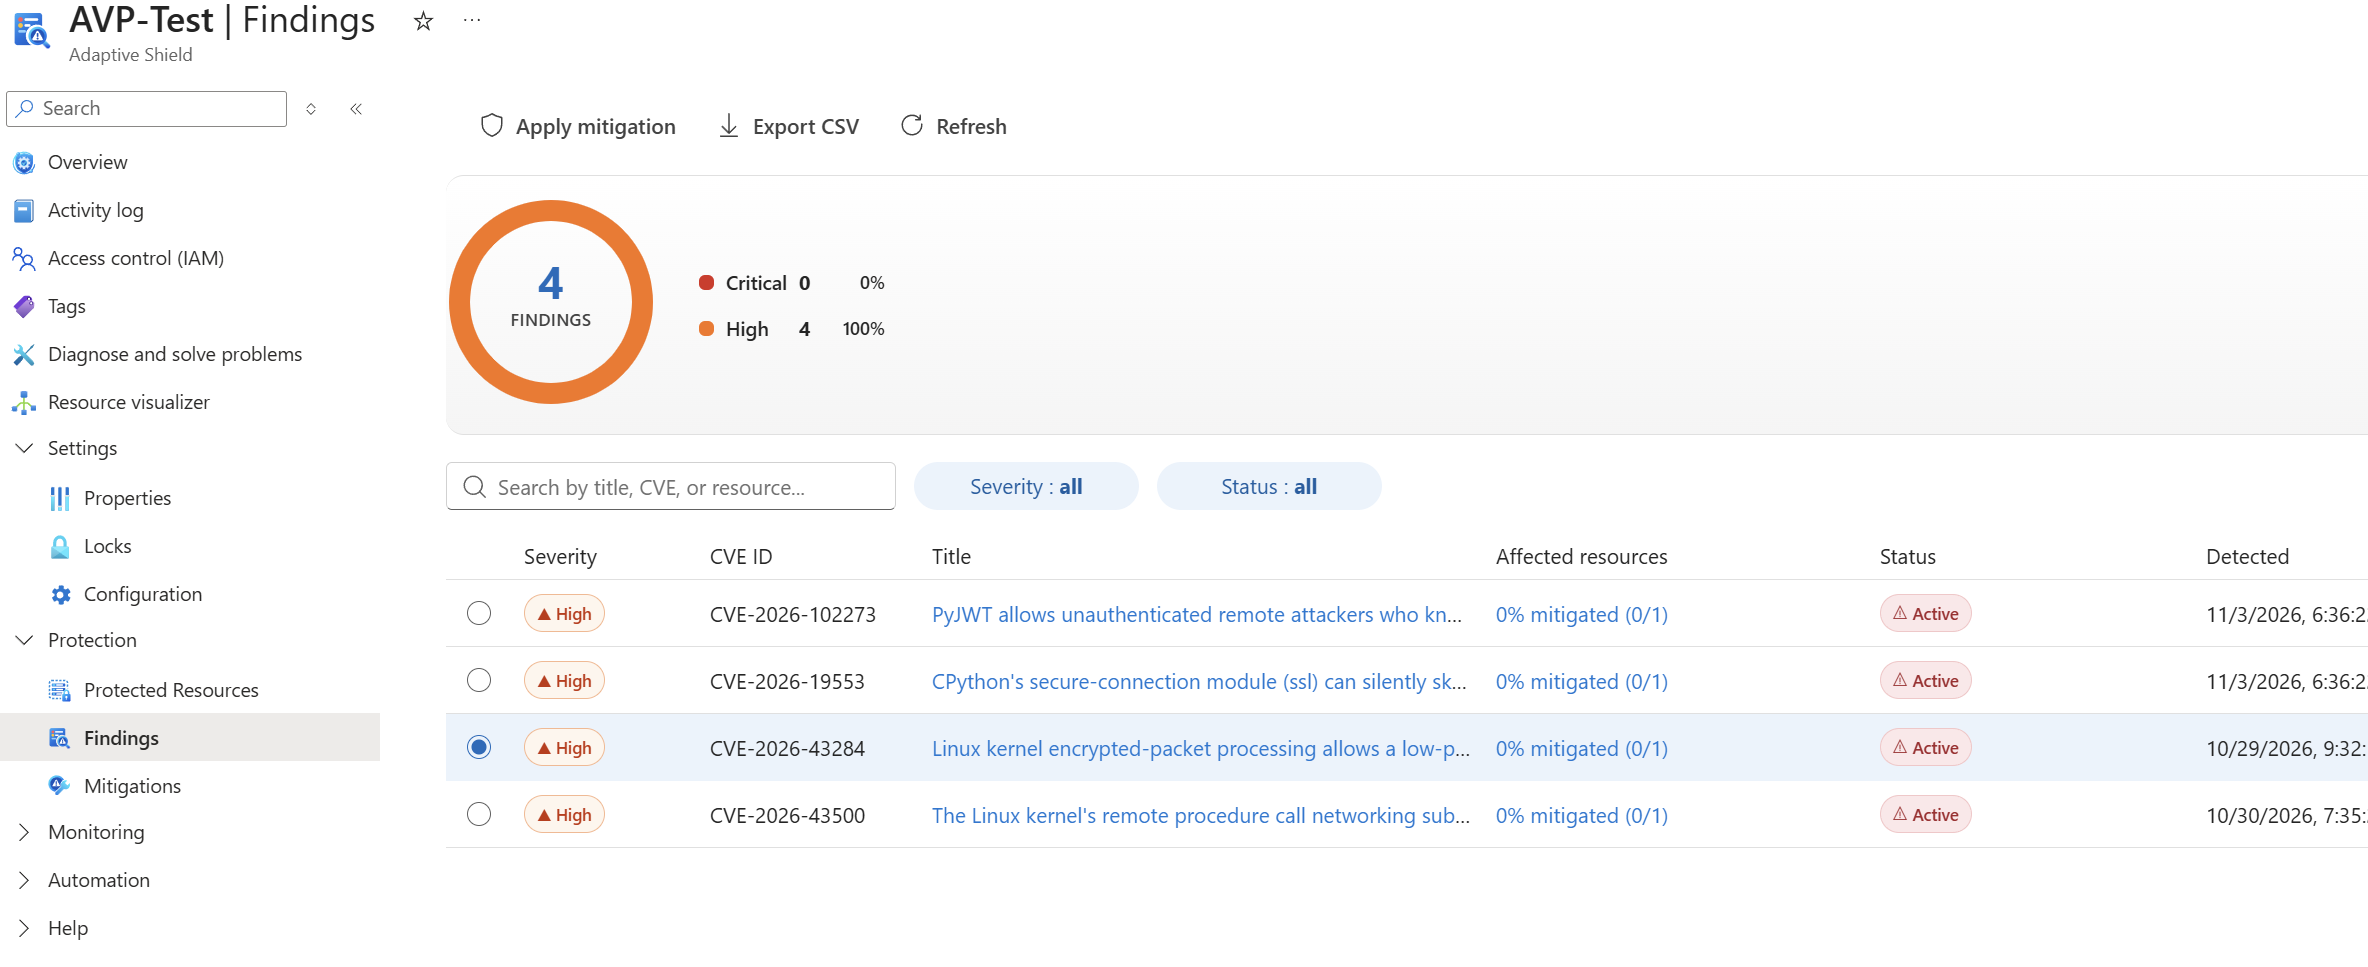
The Findings blade lists findings across all protected resources, grouped by CVE. The Affected resources column shows how many of each finding's resources are mitigated. Use the Severity and Status filters to narrow the list. To apply a mitigation, select a finding, and then select Apply mitigation to open the Apply mitigation wizard.
Finding statuses
| Status | Description |
|---|---|
| Active | CVE detected, no mitigation applied, or all applied mitigations rolled back. |
| Mitigation In Progress | At least one mitigation is InProgress or RollbackInProgress. |
| Mitigated | At least one mitigation Succeeded. Rollback can return the finding to Active. |
| Skipped | Every mitigation was skipped because the CVE wasn't present. Nothing was applied. |
| Mitigations Exhausted | Every mitigation has the Failed status. A future detection cycle might generate new ones. |
| Unreachable | Agent communication failed. The system retries on the next poll. |
View mitigations
The Mitigations blade lists the proposed mitigations for every finding, grouped by protected resource and then by CVE. Each mitigation shows its status, its rank, and whether it can be rolled back. The Rank column shows recommendation priority: higher values indicate higher priority. The top-ranked mitigation has a Recommended tag in the Apply mitigation wizard. A mitigation that shows Not available in the Rollback column can't be rolled back. Use the Status and Rollback filters to find mitigations awaiting approval or ready to roll back.
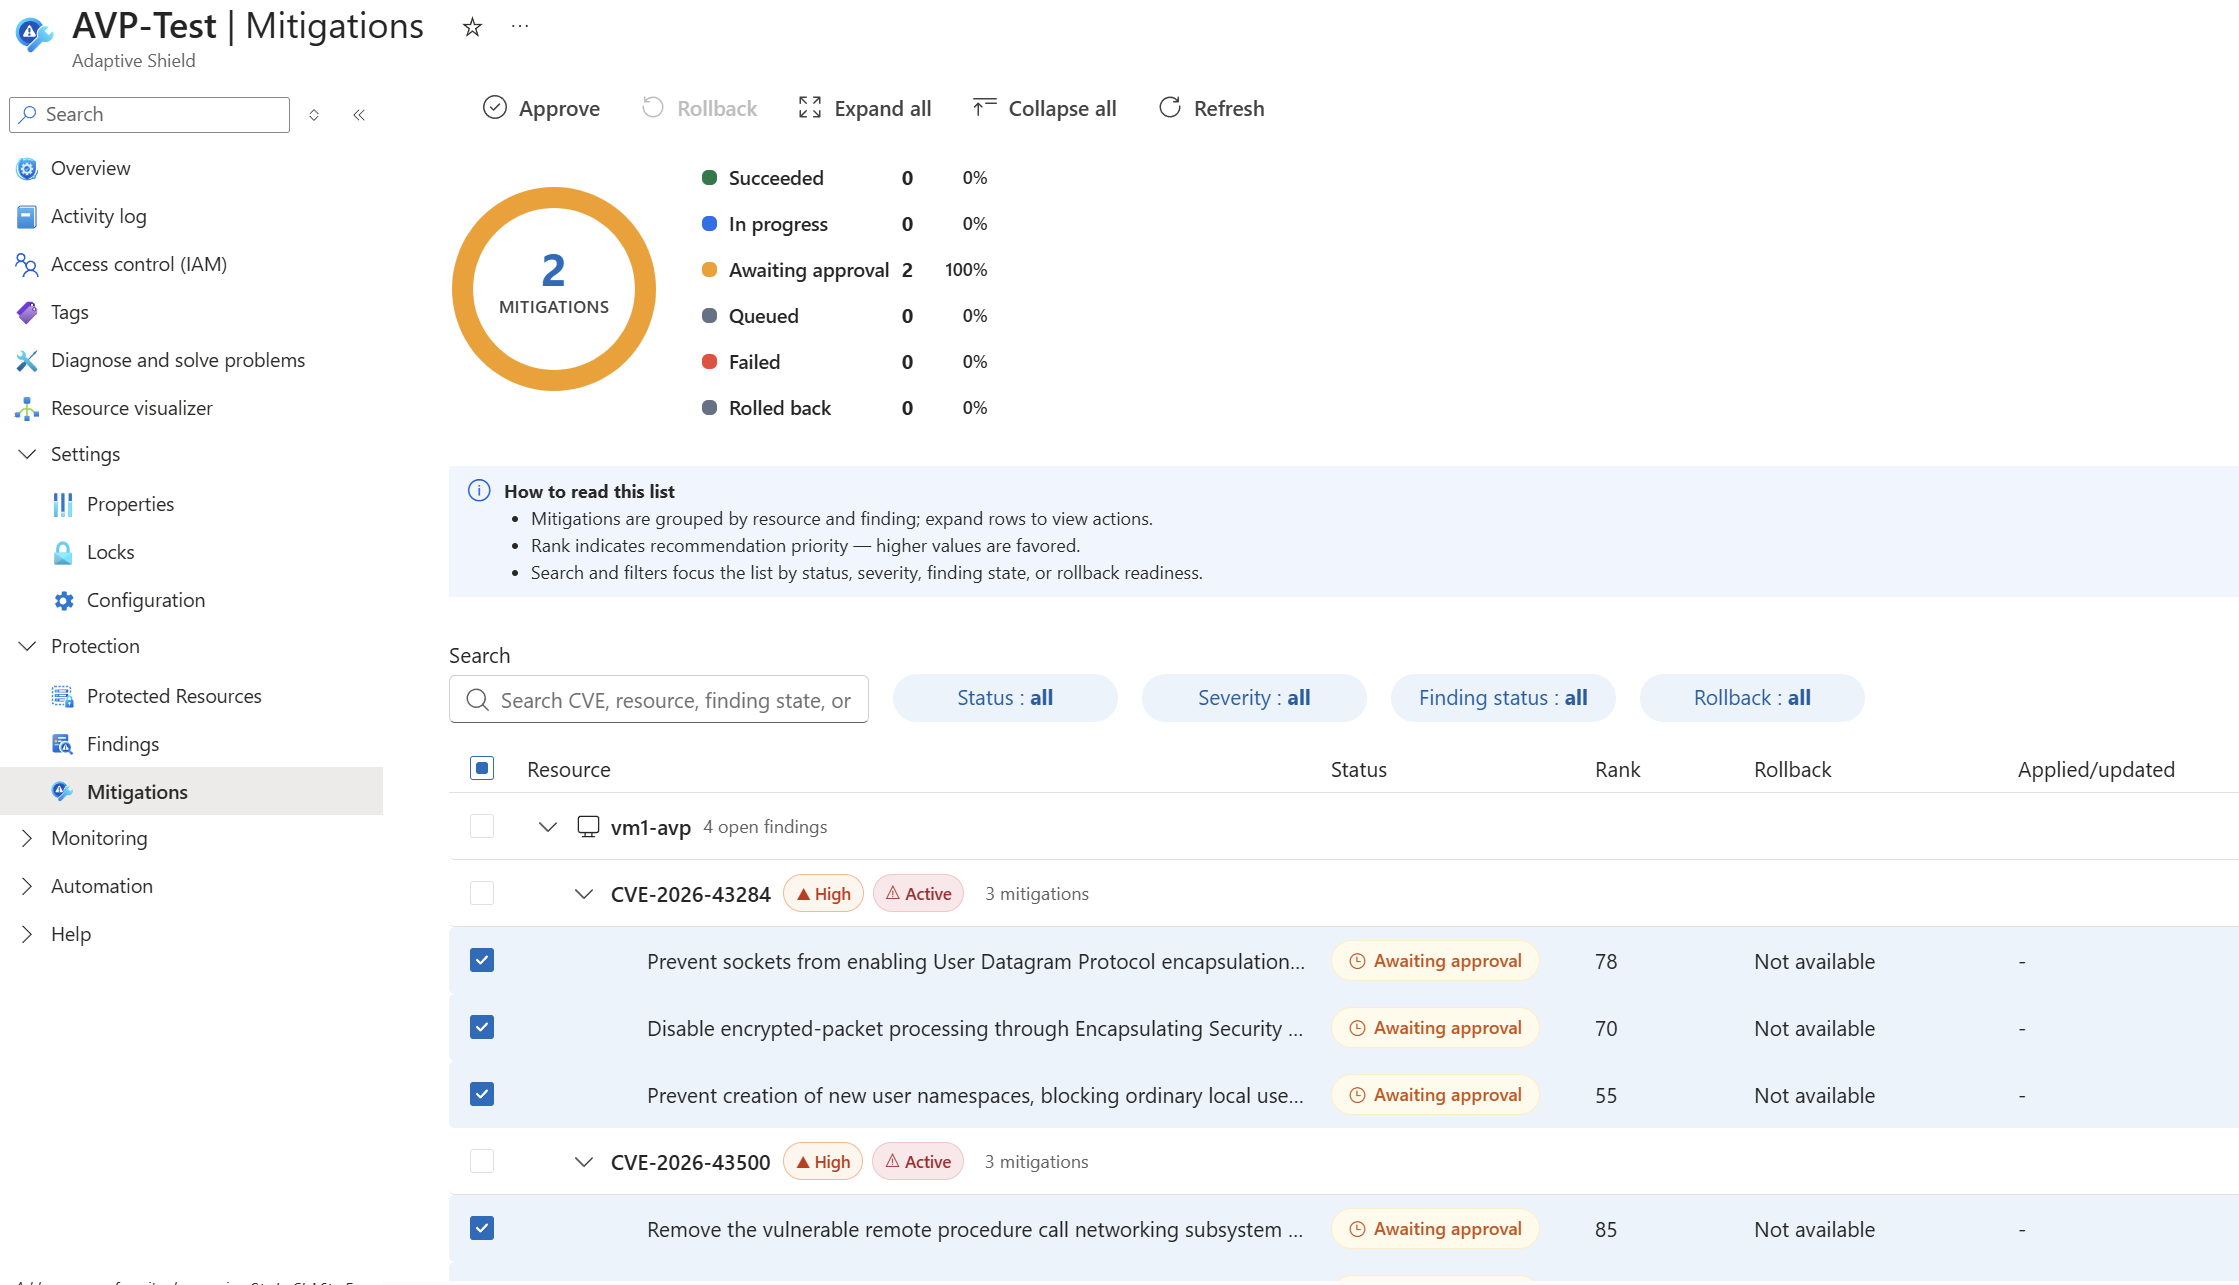
On a virtual machine scale set, each VM instance has its own finding for each CVE, so mitigation status is shown per instance.
Mitigation statuses
| Status | Description |
|---|---|
| Awaiting Approval | Waits for customer approval (Manual mode only). |
| Queued | Served to the agent on the next poll cycle, about 15 minutes. |
| In Progress | Running on the VM. Wait for completion. |
| Succeeded | Post-validation confirmed the CVE is resolved on that instance. Rollback is available if the mitigation is rollbackable. |
| Skipped | The CVE was not present on that instance. Nothing ran. |
| Failed | The mitigation failed and might have left partial changes that require rollback. The next Queued mitigation is tried. |
Apply mitigations
You apply mitigations in Manual mode with customer approval. In Auto mode, eligible mitigations apply automatically. The system tries mitigations in recommendation order, starting with the highest rank. If one fails, the system tries the next queued mitigation in that order.
Manual mode
In manual response mode, you can approve proposed mitigations from any of the following three places:
- Mitigations page: select one or more mitigations with the Awaiting approval status, then select Approve.
- Findings page: select a CVE, then select Apply mitigation.
- Protected resource page: open a finding's flyout, then select Apply mitigation.
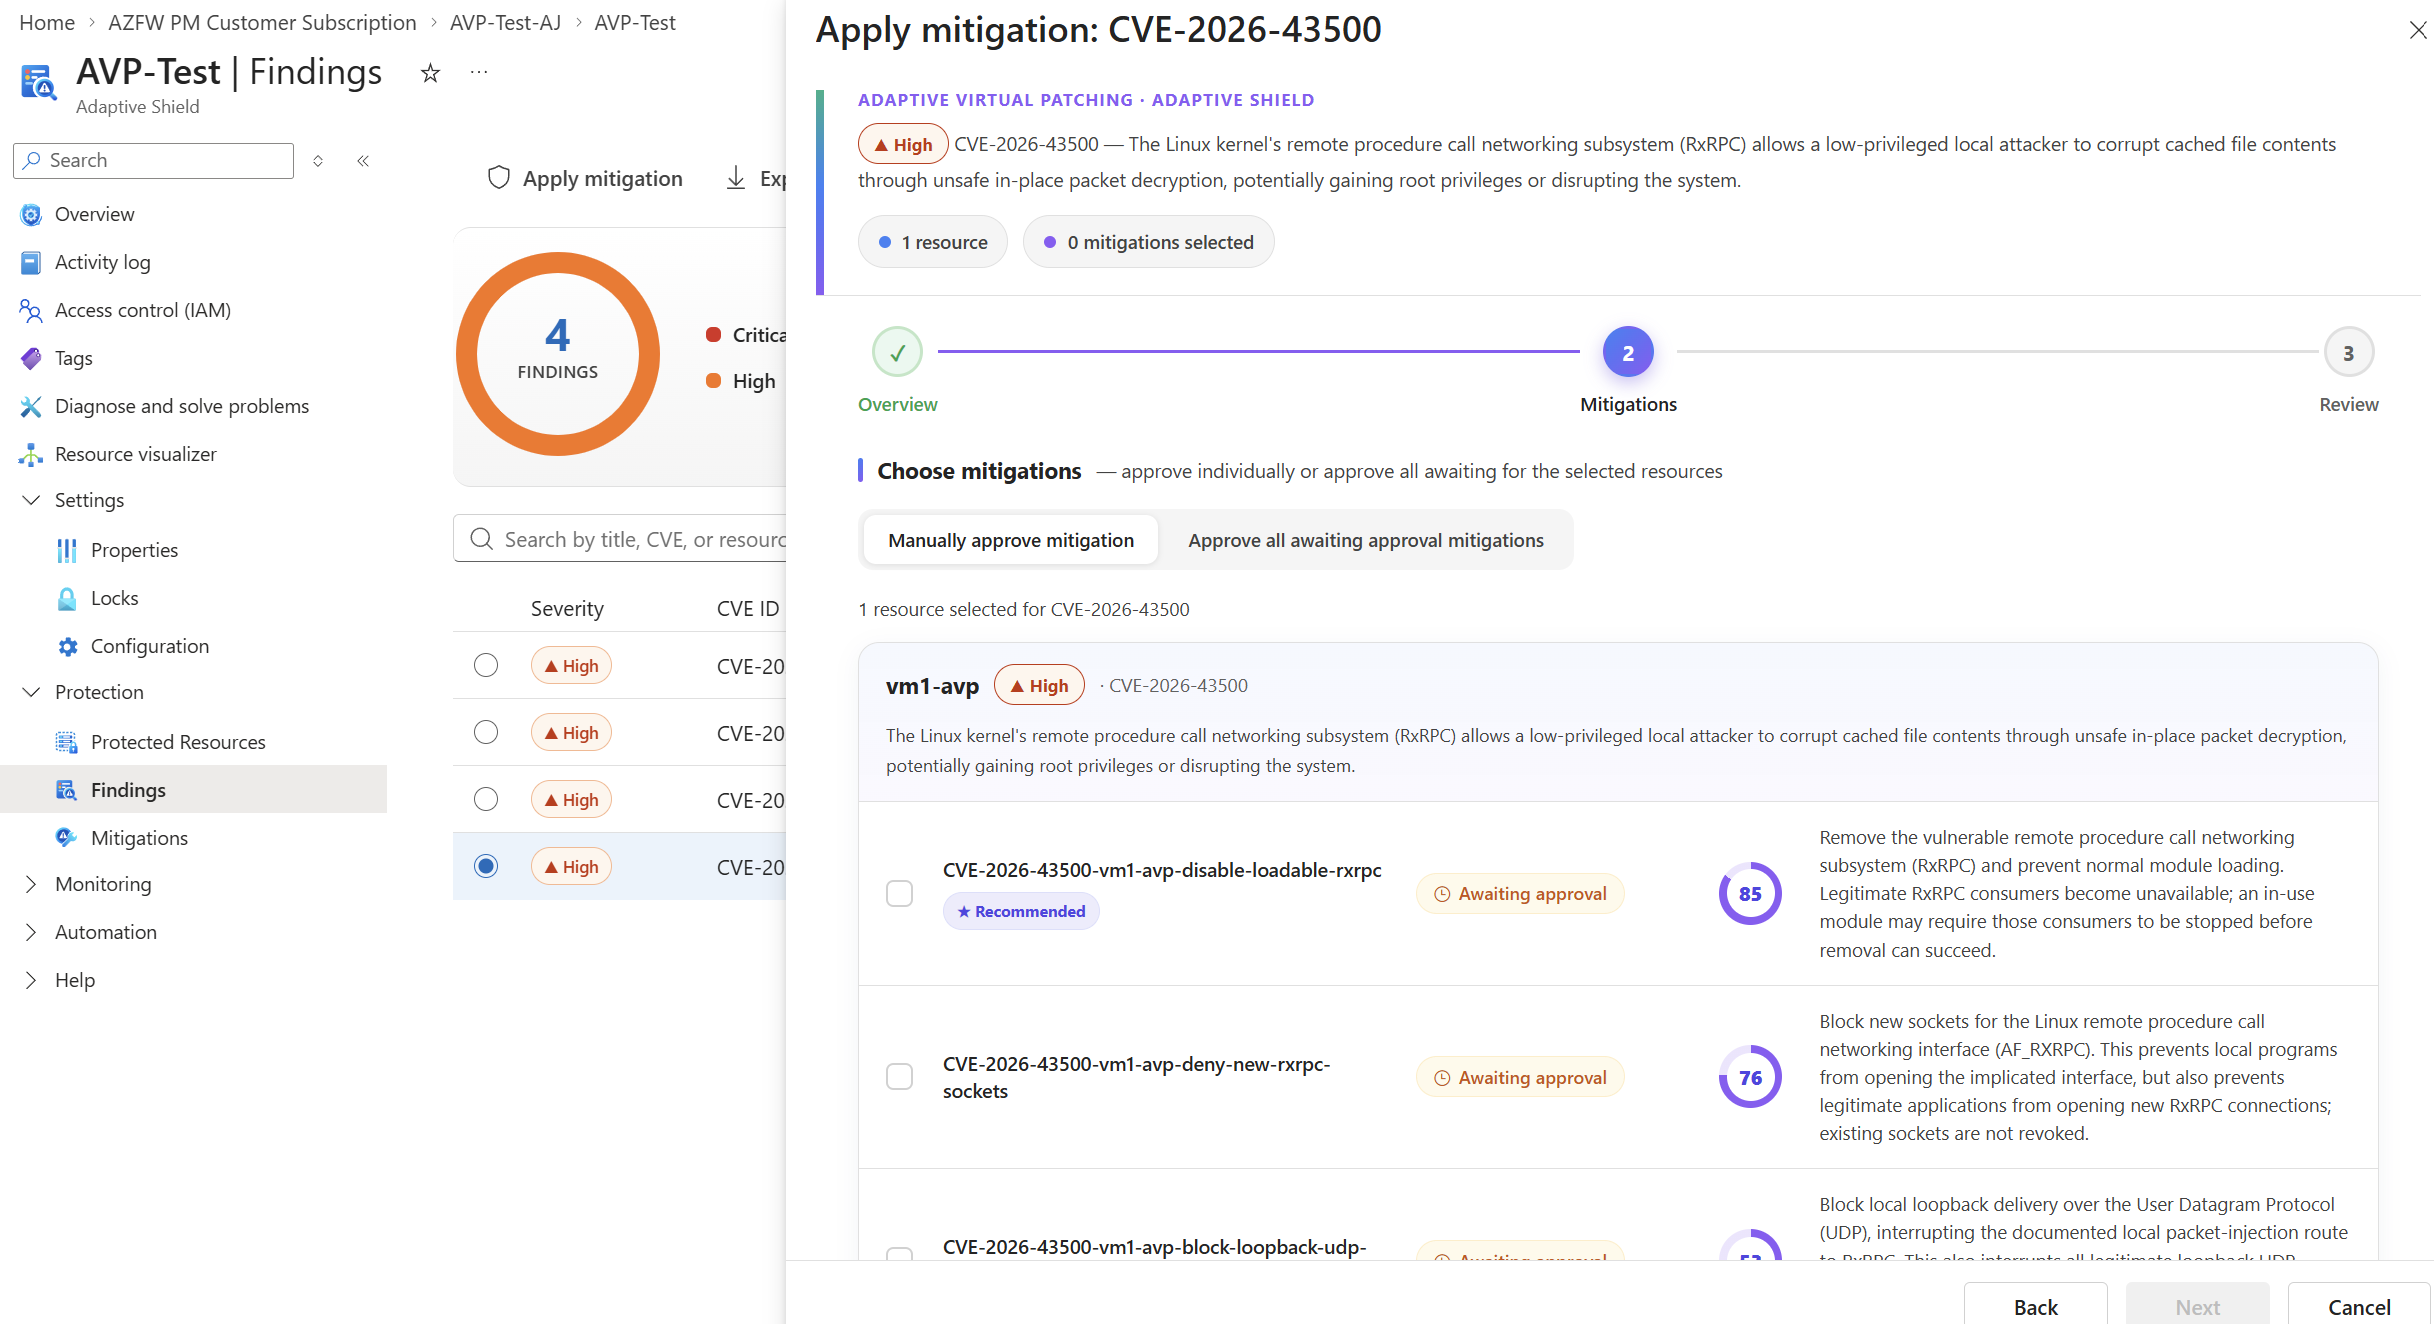
The Apply mitigation wizard has three steps: Overview, Mitigations, and Review. In step 2, choose Manually approve mitigation or Approve all awaiting approval mitigations. The top-ranked mitigation shows a Recommended tag.
Approved mitigations move to Queued. The Approve action is available only for mitigations with the Awaiting approval status.
Auto mode
Auto mode applies eligible mitigations automatically, without per-action approval.
Roll back mitigations
Rollback is always user-initiated. The Mitigations page shows whether a proposed mitigation can be rolled back. You can roll back a Succeeded mitigation, or a Failed one that left partial changes, as long as it's rollbackable. You can roll back a single mitigation, or all Succeeded mitigations for a CVE on a resource at once.
If the rollback fails, the system retries three times and then asks for manual action. A mitigation that failed to roll back still counts as applied. When every Succeeded mitigation for a finding is rolled back, the finding returns to Active state.
A rolled-back mitigation can't be reapplied. The response strategy doesn't change how rollback works, so you can roll back in either Auto or Manual mode.
Change response strategy and severity threshold
- Response strategy: Auto (Prioritize security) or Manual (Prioritize continuity). To change it, go to Adaptive Shield > Settings > Configurations.
- Switching from Auto to Manual moves queued mitigations to awaiting approval. Switching from Manual to Auto moves awaiting approval mitigations to queued.
- Severity threshold: Set in the Basics step when you create the Adaptive Shield. To change it, go to Adaptive Shield > Settings > Configurations.